|
|
Page
7 The
Great Scenery Splurge
of 2025 Scenery is mostly not what I do best. I much prefer working on
rolling stock. Scenery is very tedious and time consuming. When working full
time my truly precious limited weekend hours are usually devoted to making
something with flanged wheels. And my “modern” modeling binge of over 3 years
rolls on. Since 2020 I have threatened myself to do more ballasting “during
the winter” but that has not happened yet until now. I have had a hernia for a few years that never actually hurt.
My Doctor was not very concerned about it so I left it alone, until 1 day in
February 2025 it just felt different.
Not an emergency on that day but it was time to finally get it fixed. Hearing
that I would get 6 weeks off from work just sealed the deal even more. I got
my hernia fixed on 4-29-25. Knowing this time off was coming actually got me motivated a
bit early. I have been doing some new ballasting
already. My plan is to at least have the ballasting
completely done before returning to work. |
|


So
let “The Great Scenery Splurge of 2025” begin……
Added
5-15-25
Photos
taken 4-28 to 5-11-25
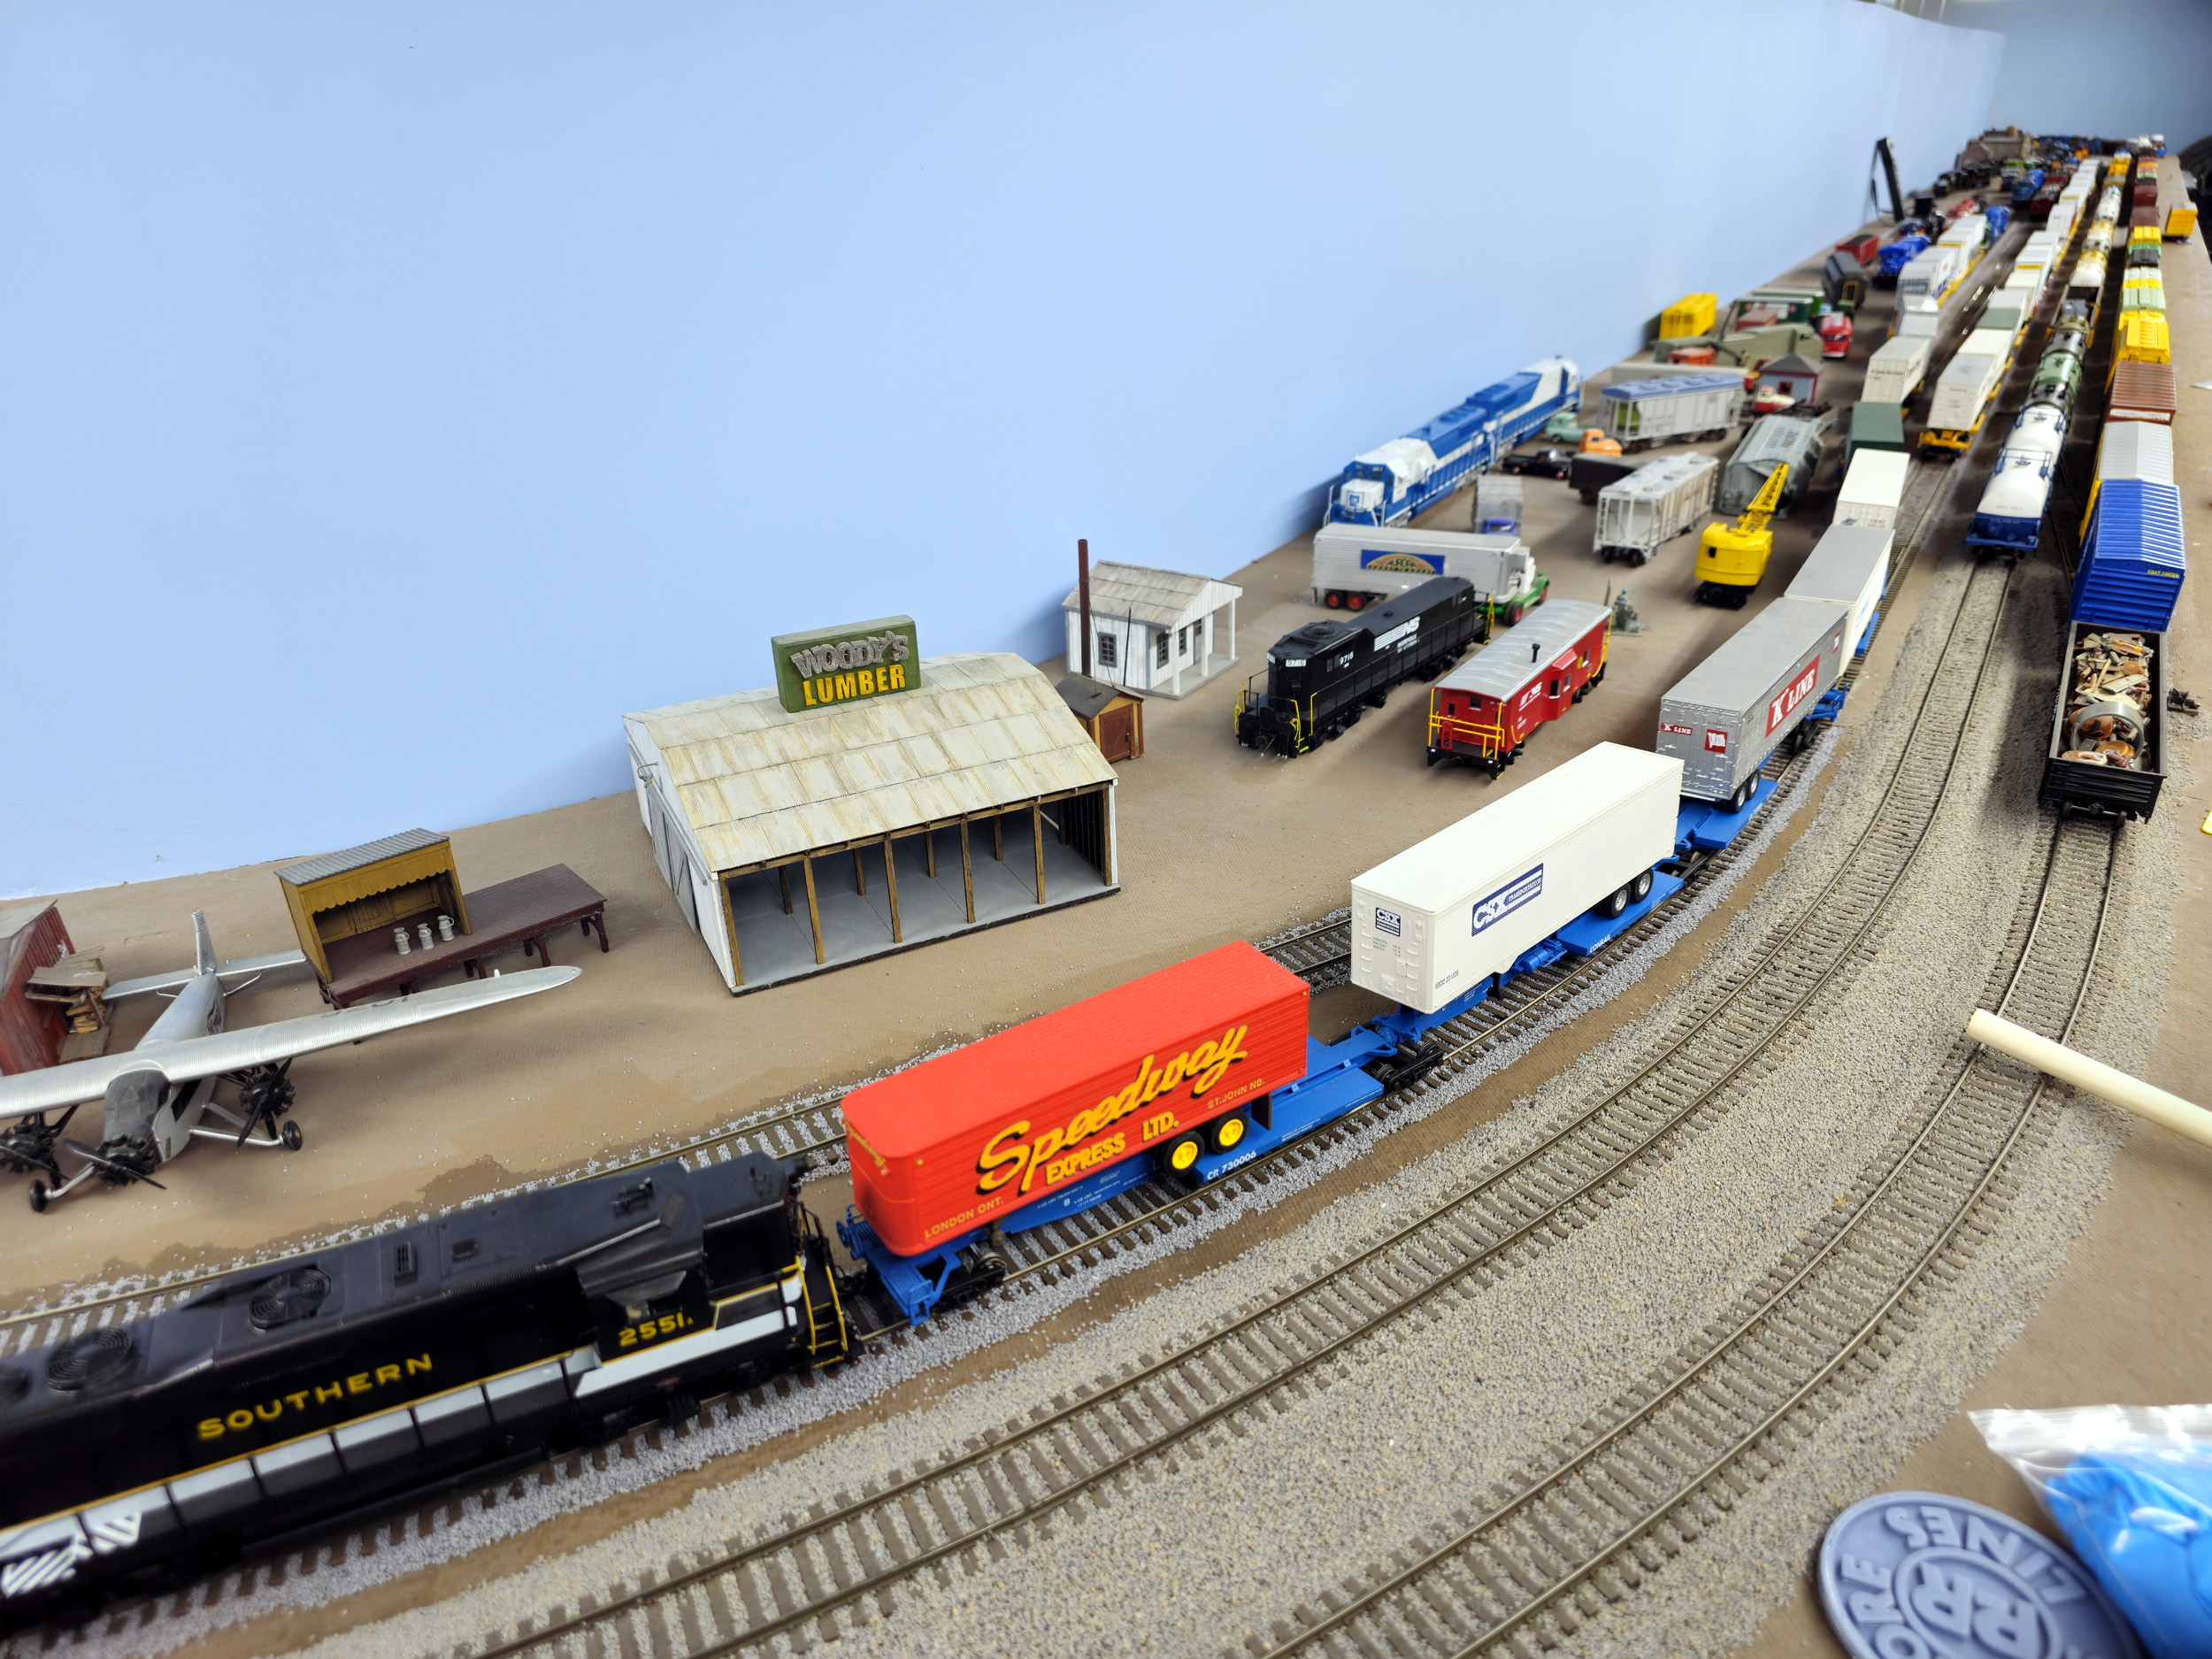
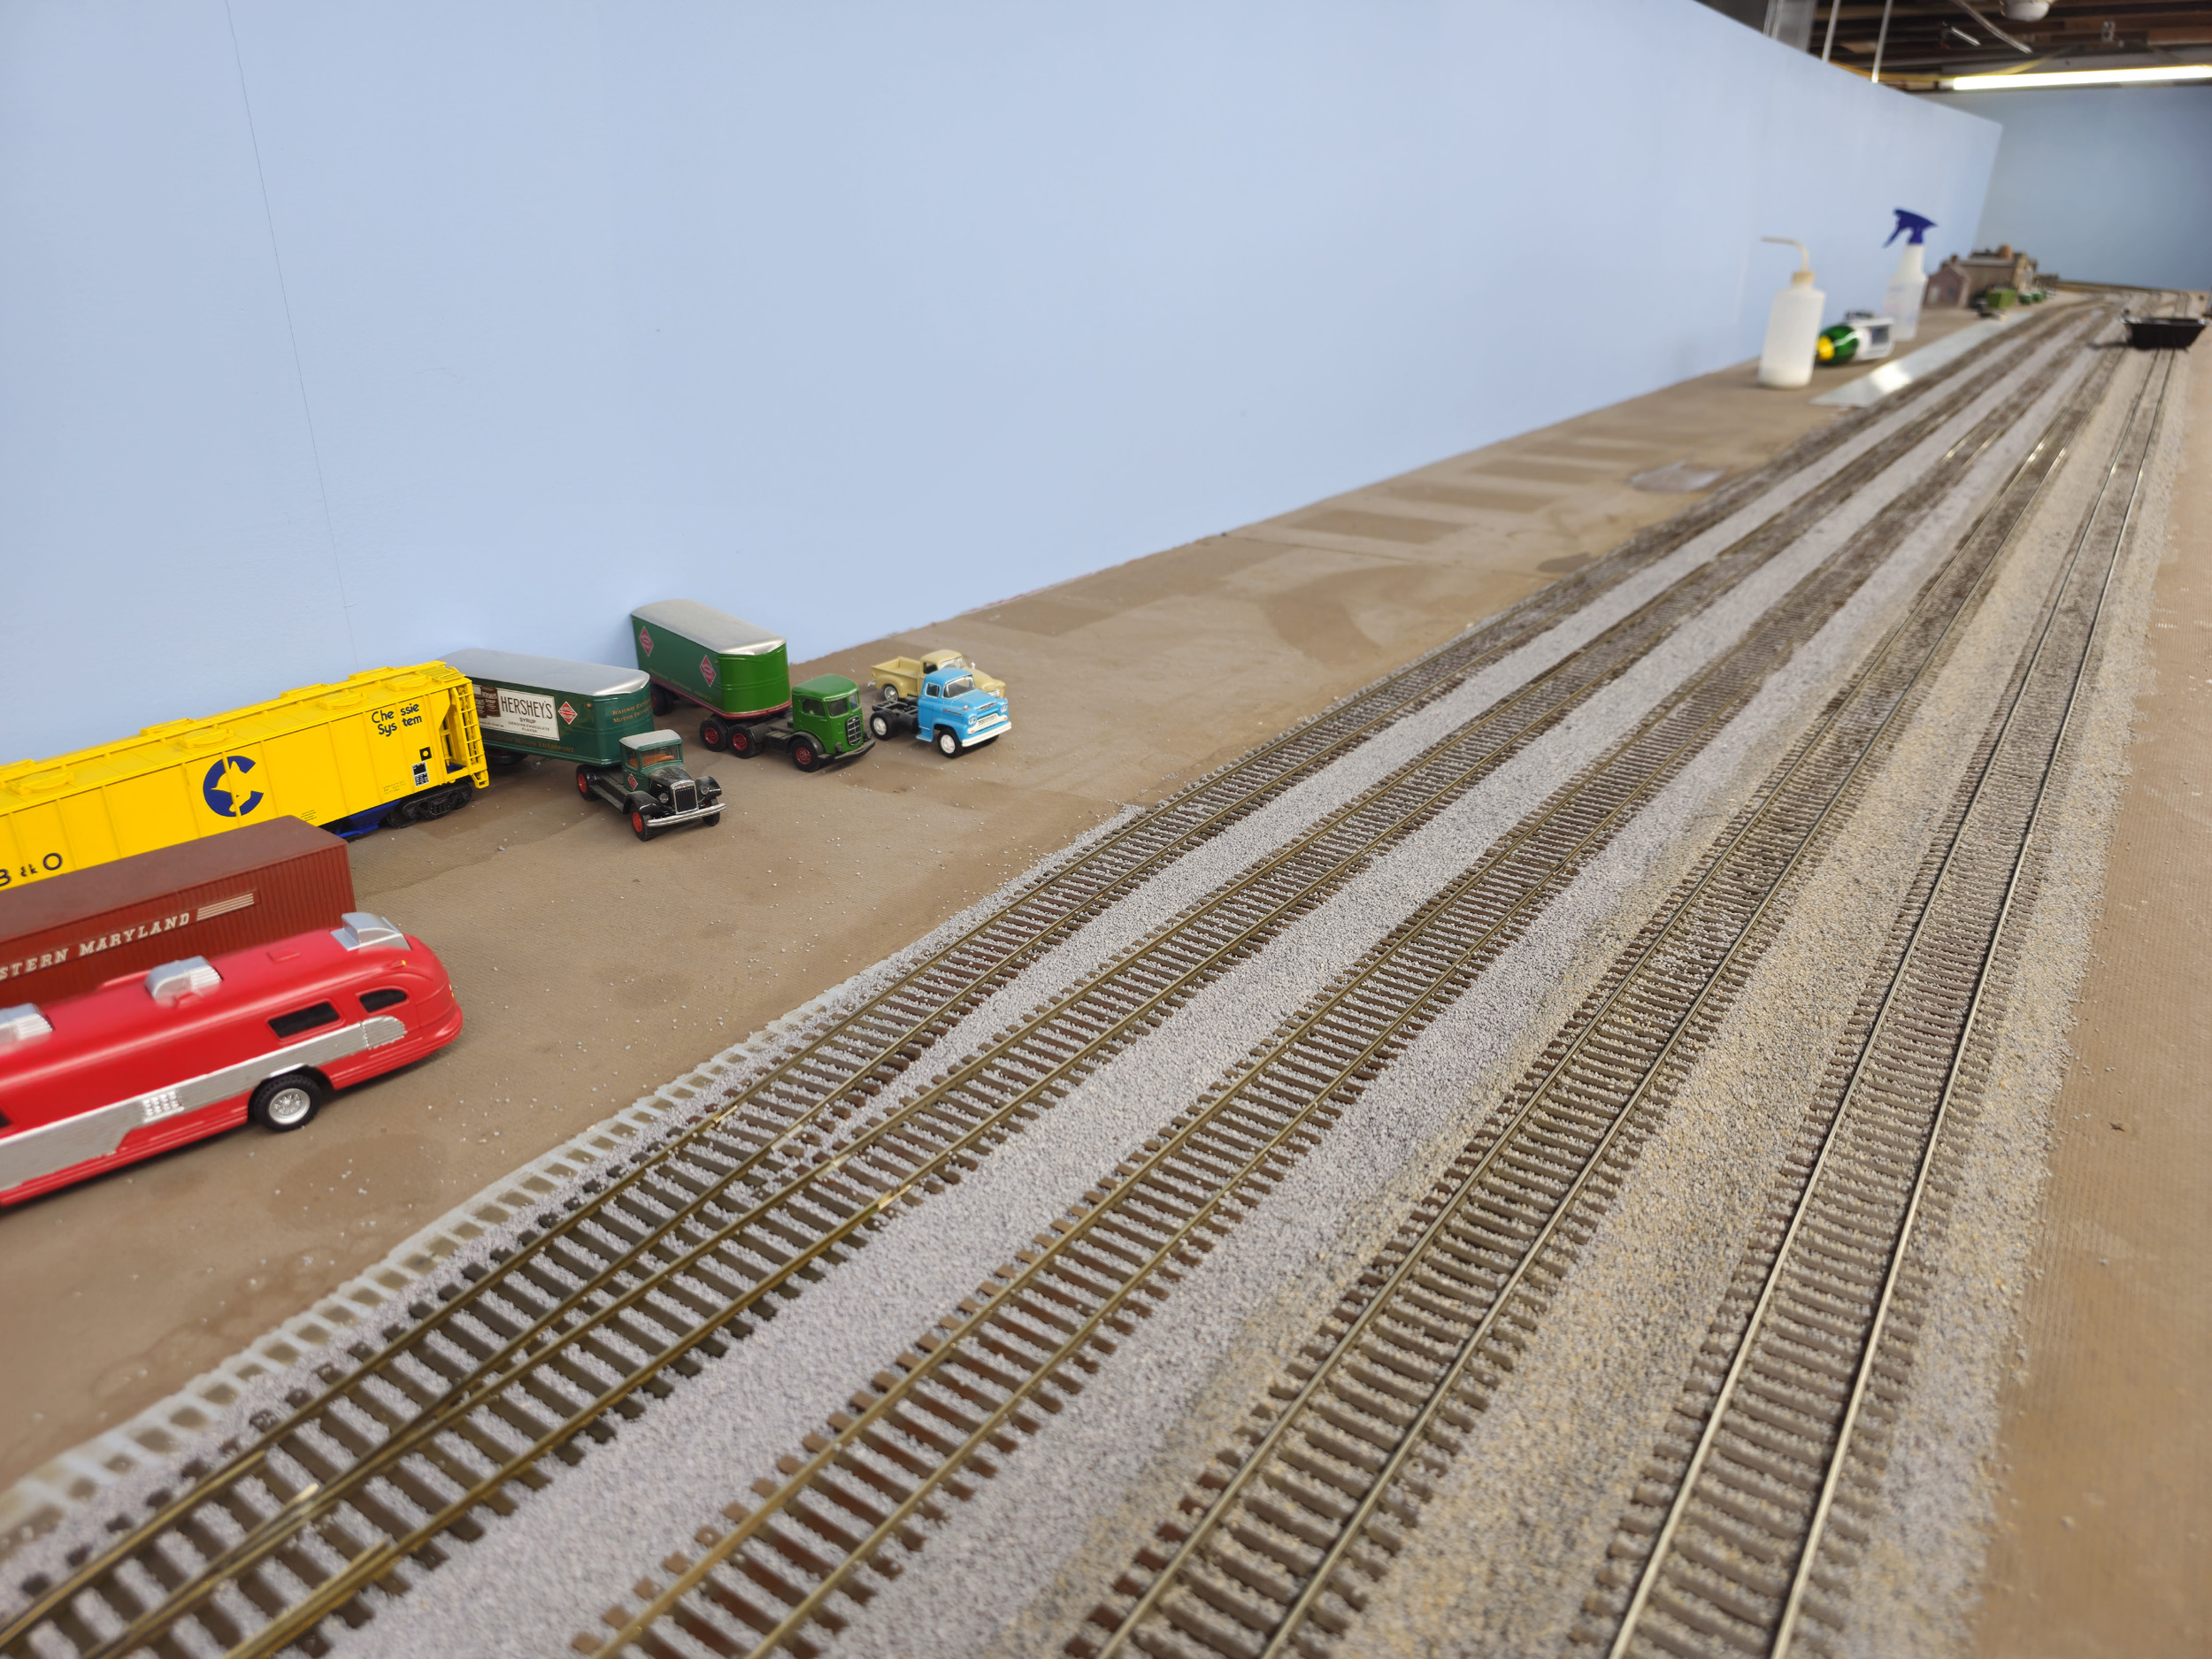
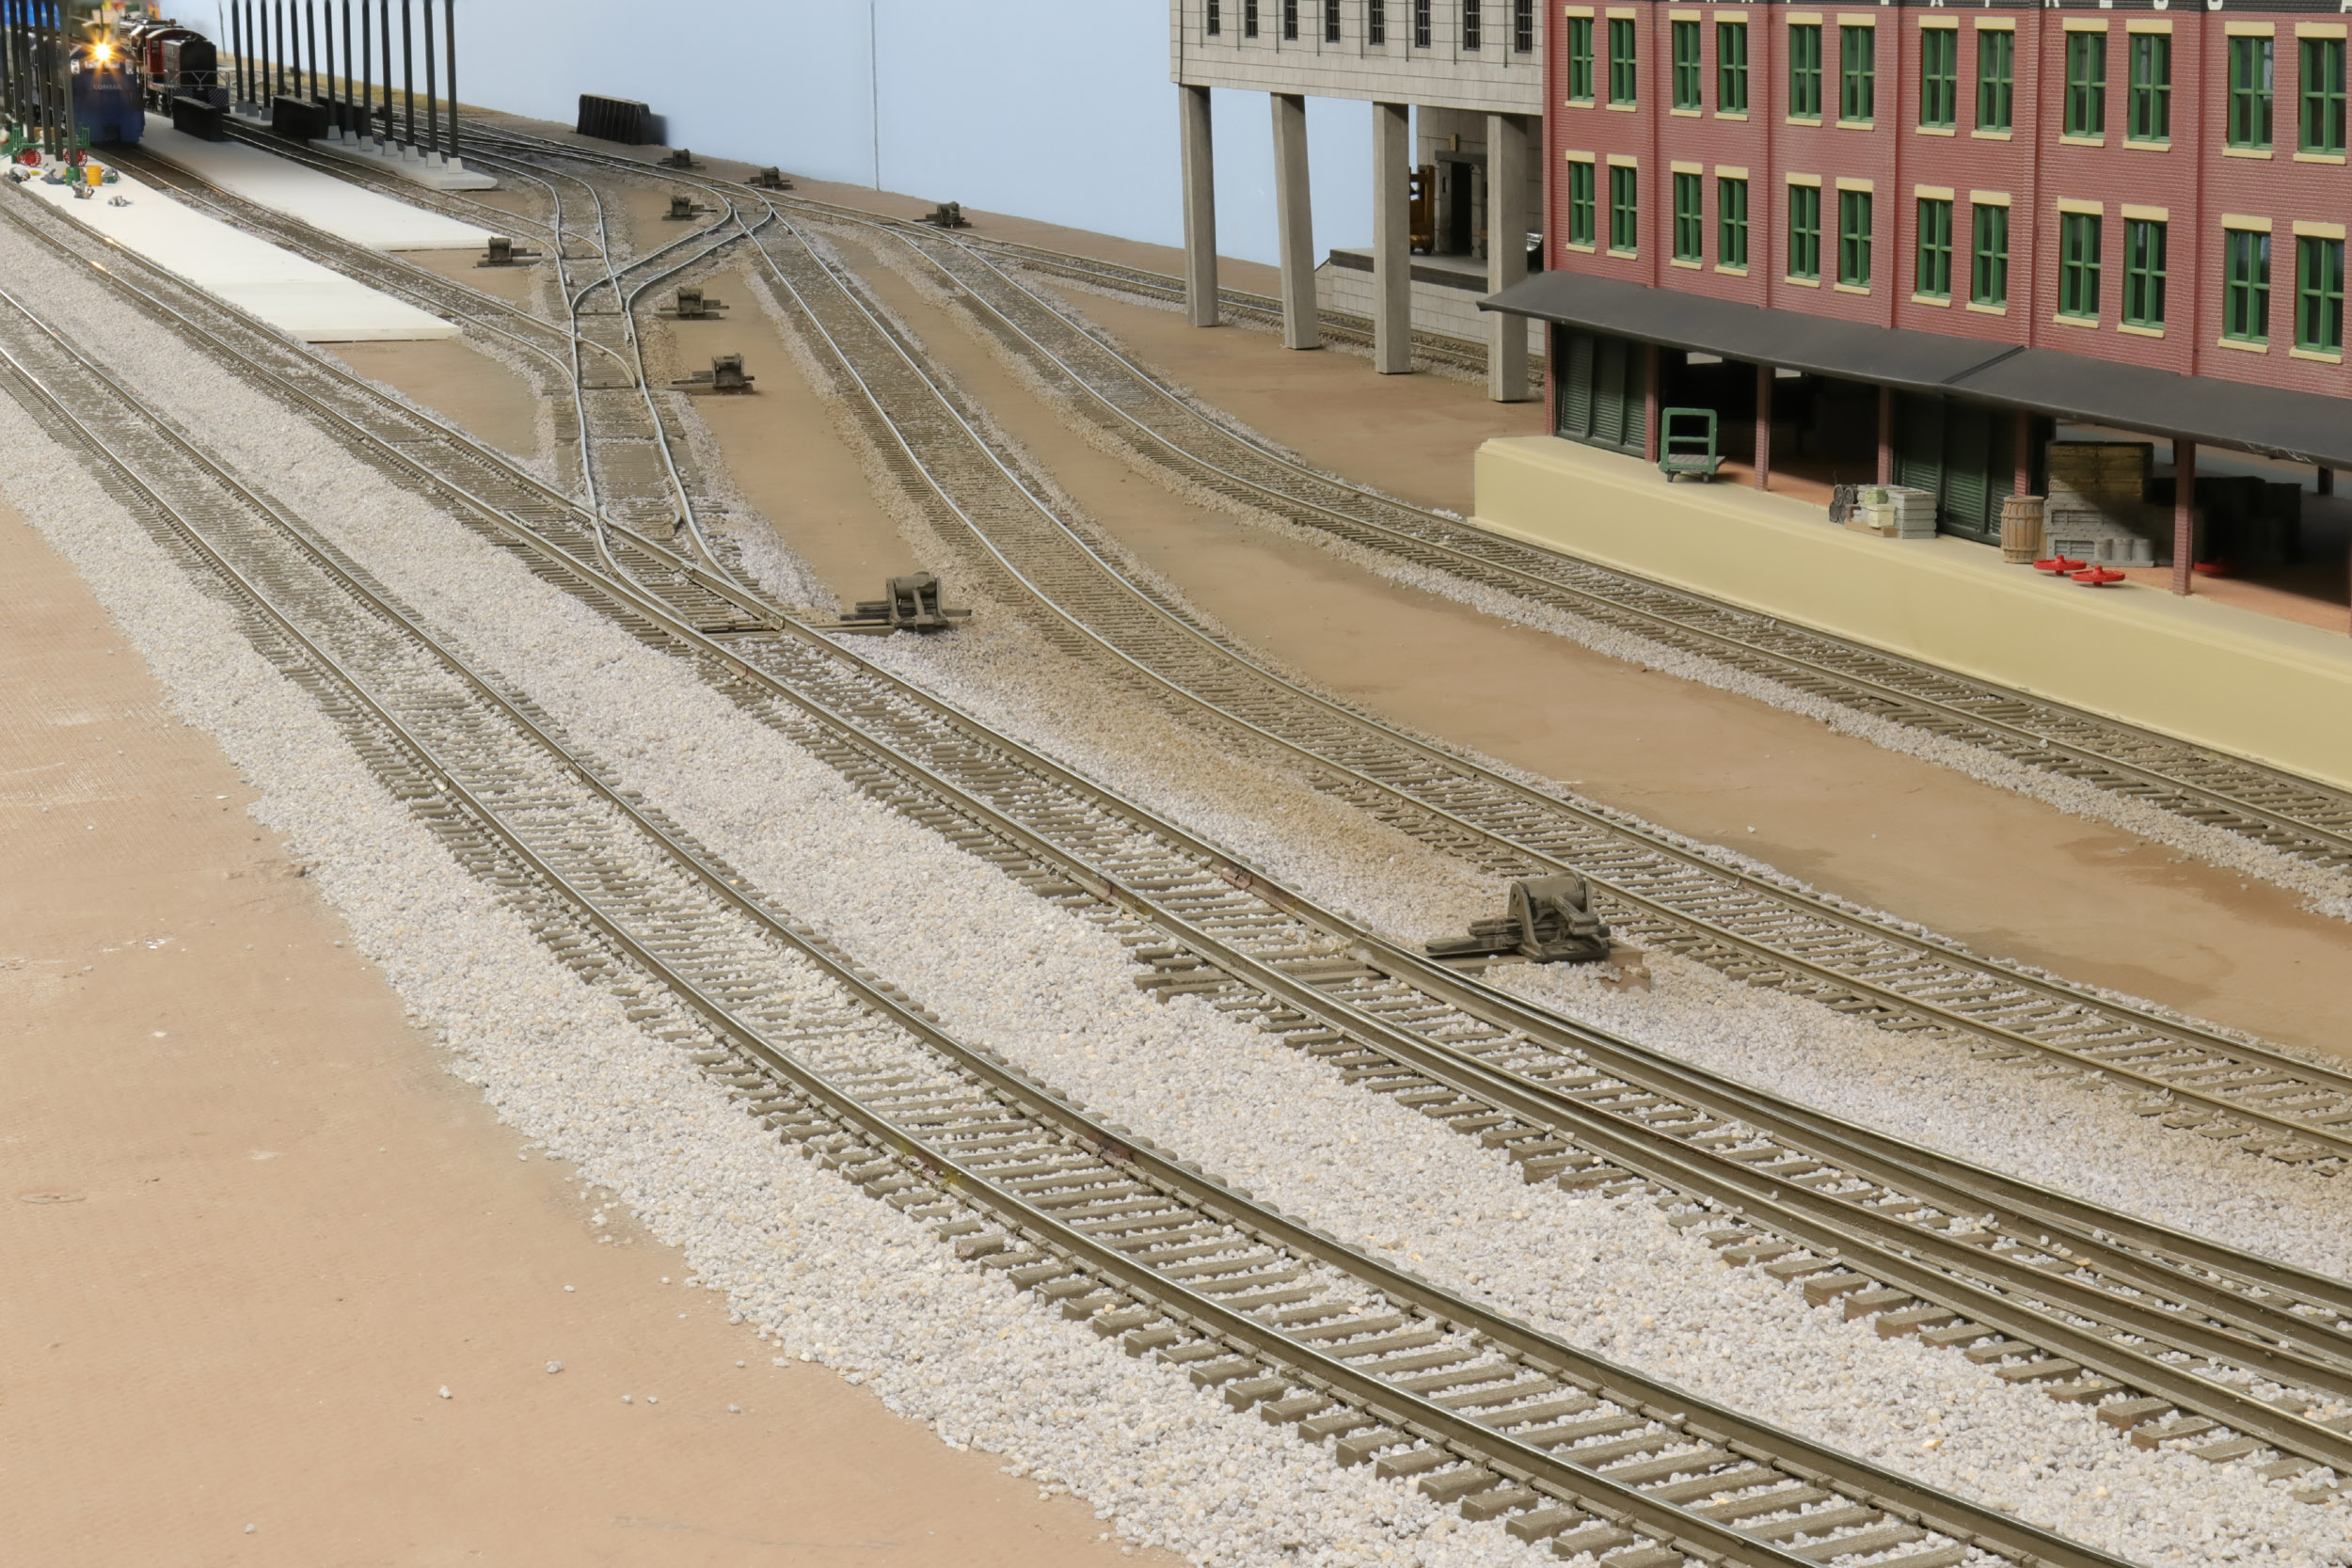
My hoarding and buying ways paid off here. I already had truly
everything I needed to finish the ballasting. The 100 pounds of ballast was
bought years ago. The 2 main lines were almost completely ballasted previously.
Only a few turnouts and the 3 “down ramps” were left to complete.
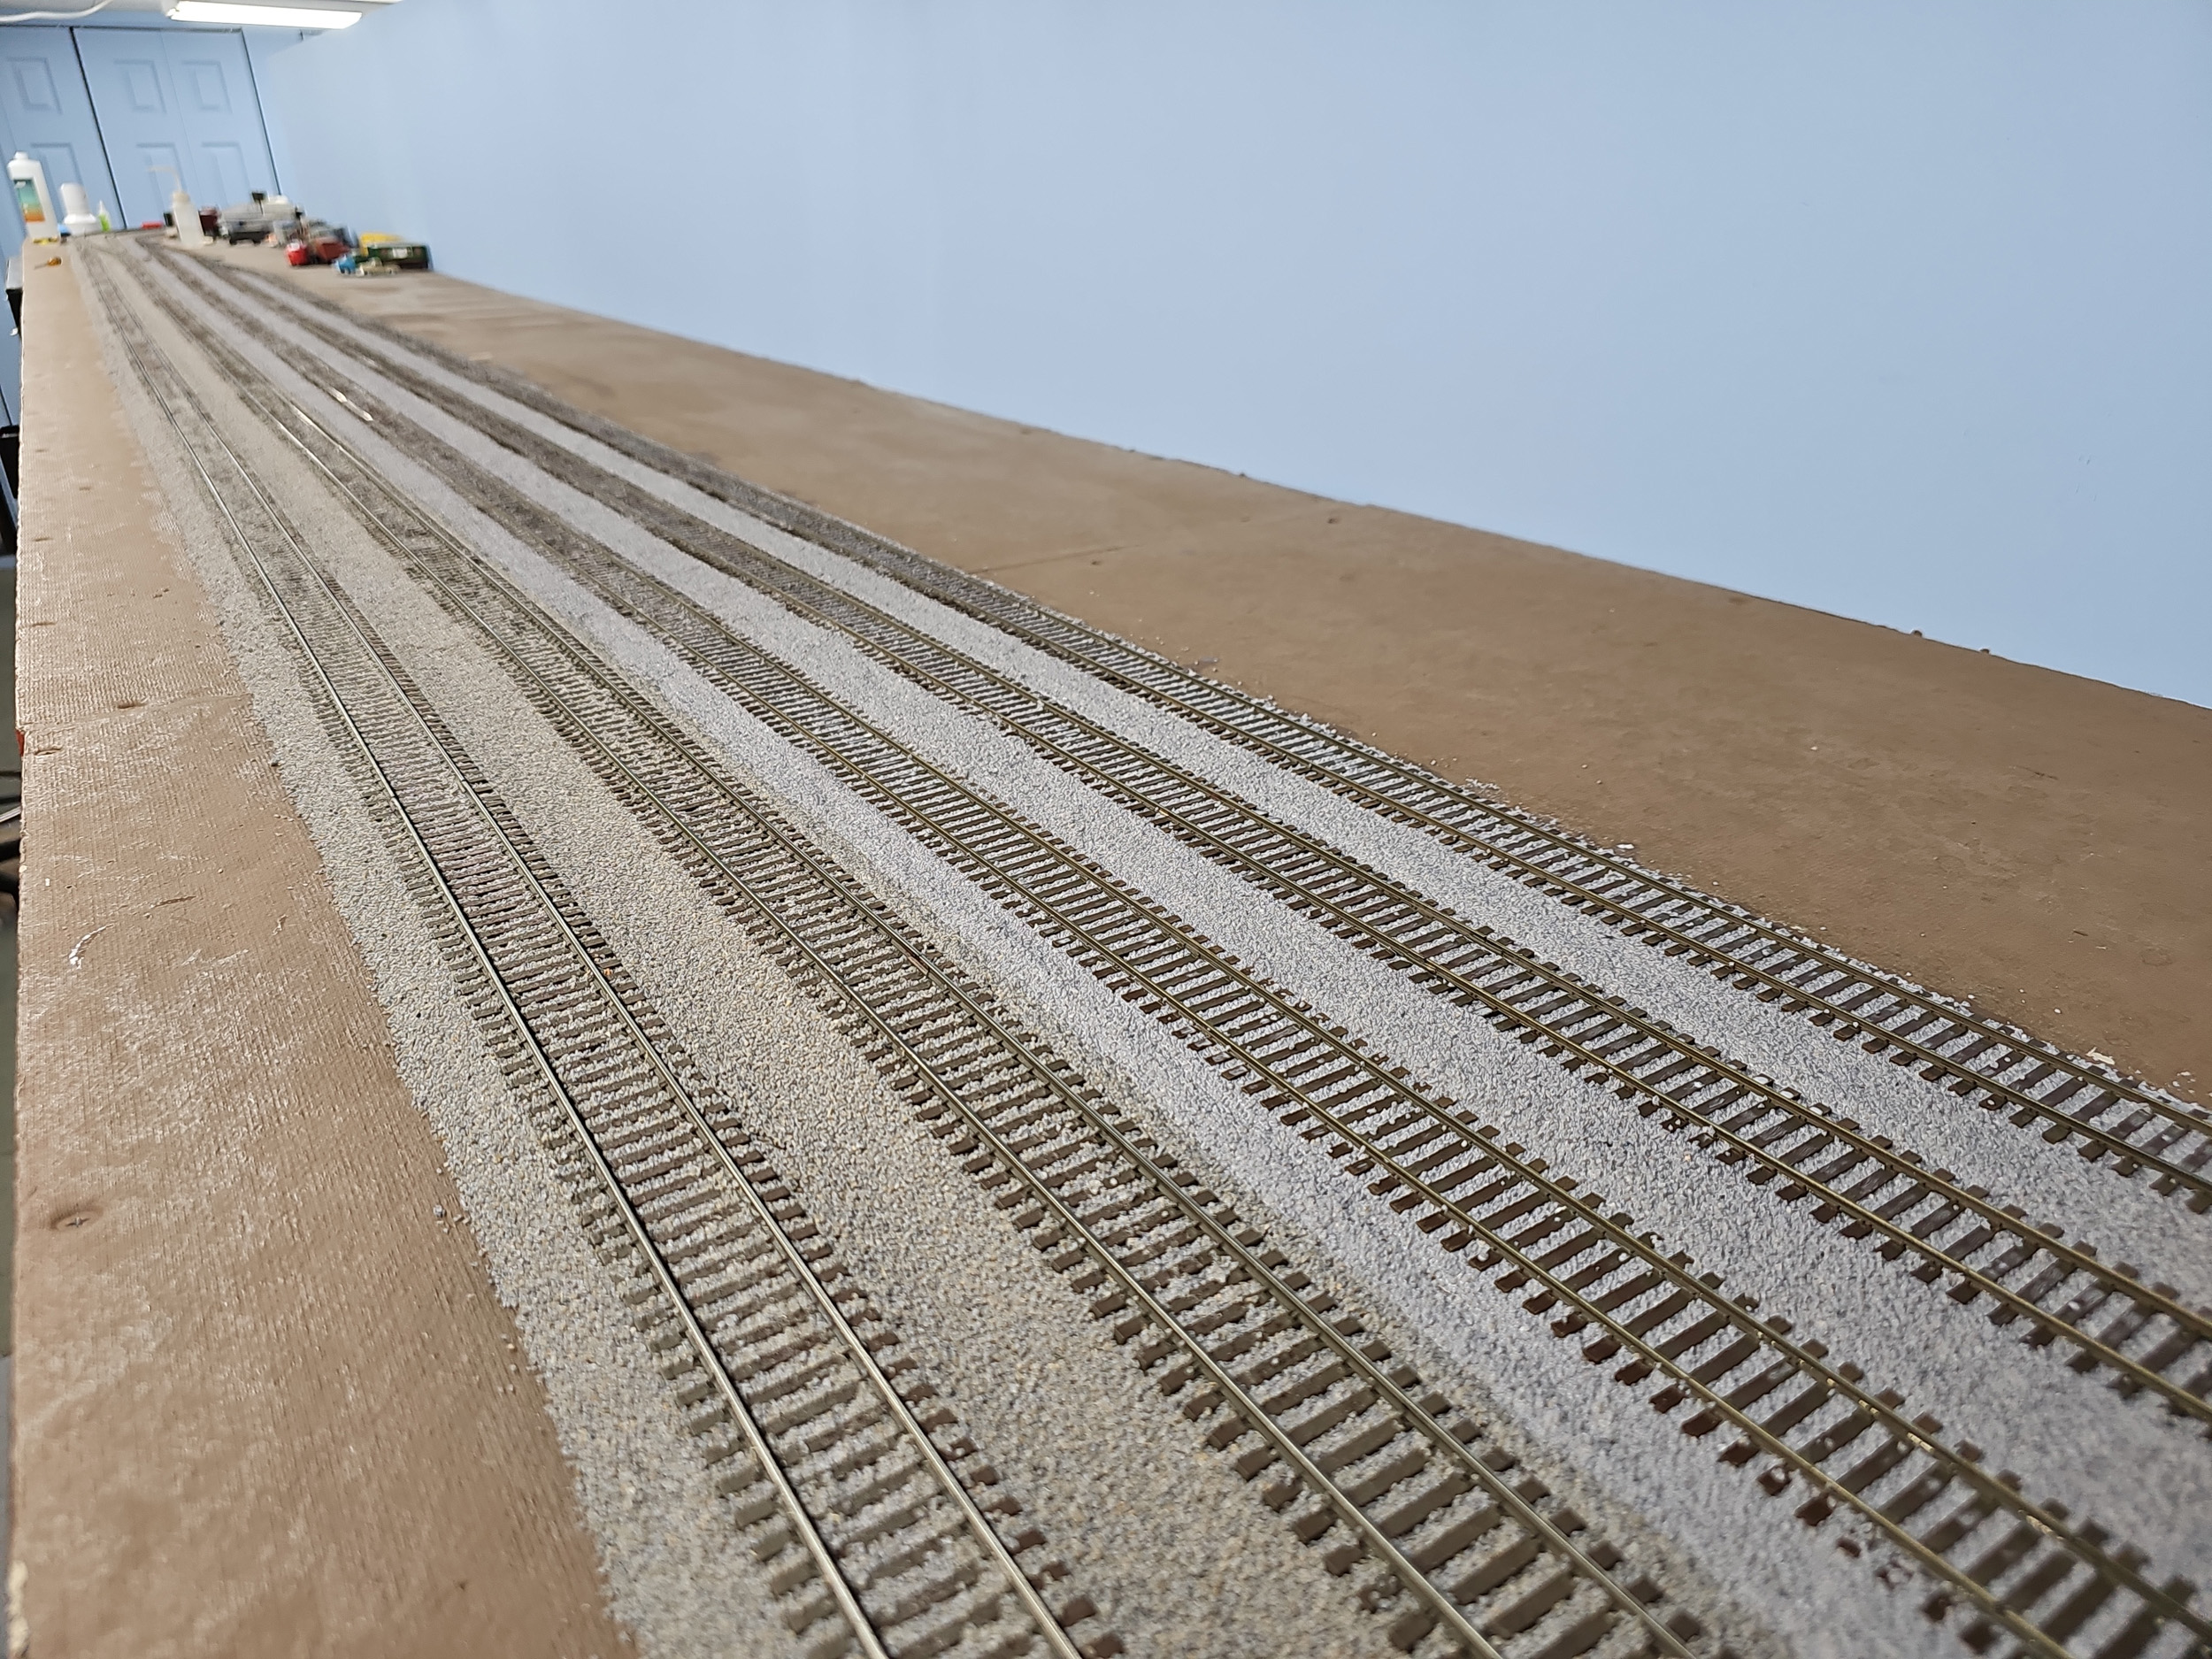
I was surprised to see the ballast color shift from the ballast
on the layout for a few years to the new ballast. It was all from the same
bucket. I guess dust and exposure changed the color.
I found ballasting the mainlines with
the code 137 track and raised Homabed was a lot easier than the code 100 track
without the roadbed. The Homabed quickly helps define the ballast boundaries
and makes for sharper edge lines. I just brushed everything up into the
roadbed. With the code 100 track there
is no roadbed. I had to make the edge lines myself.
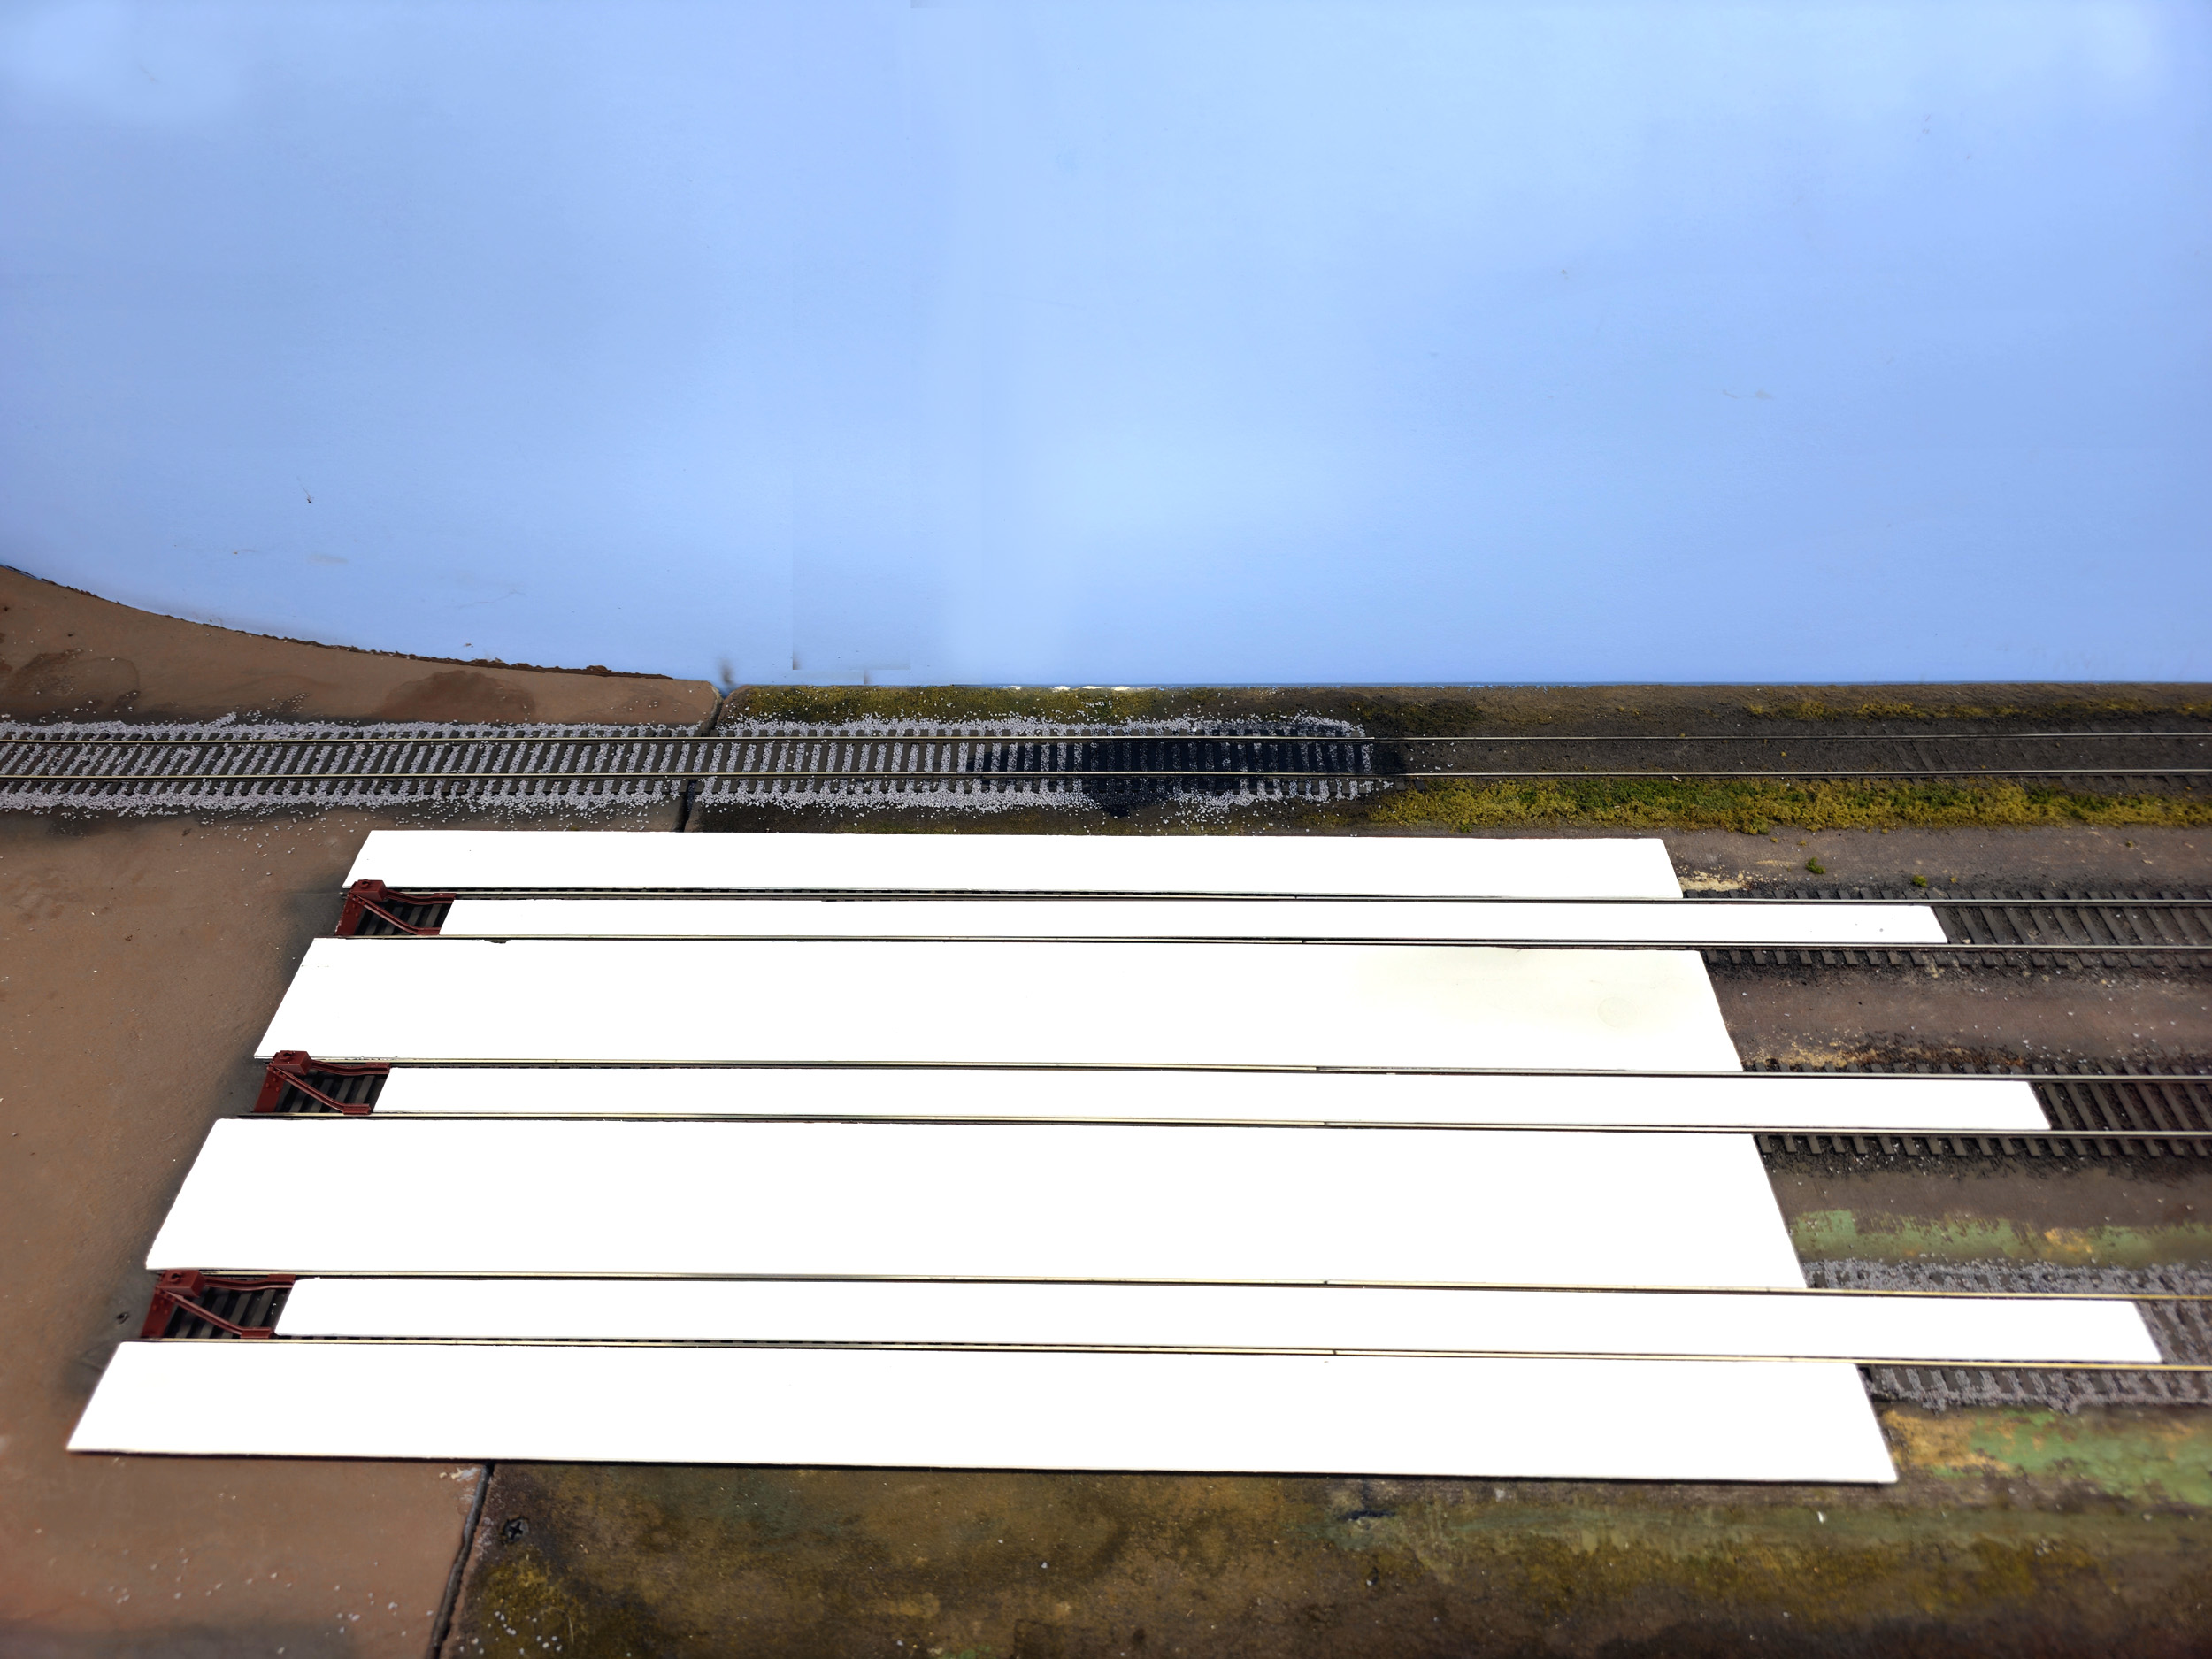
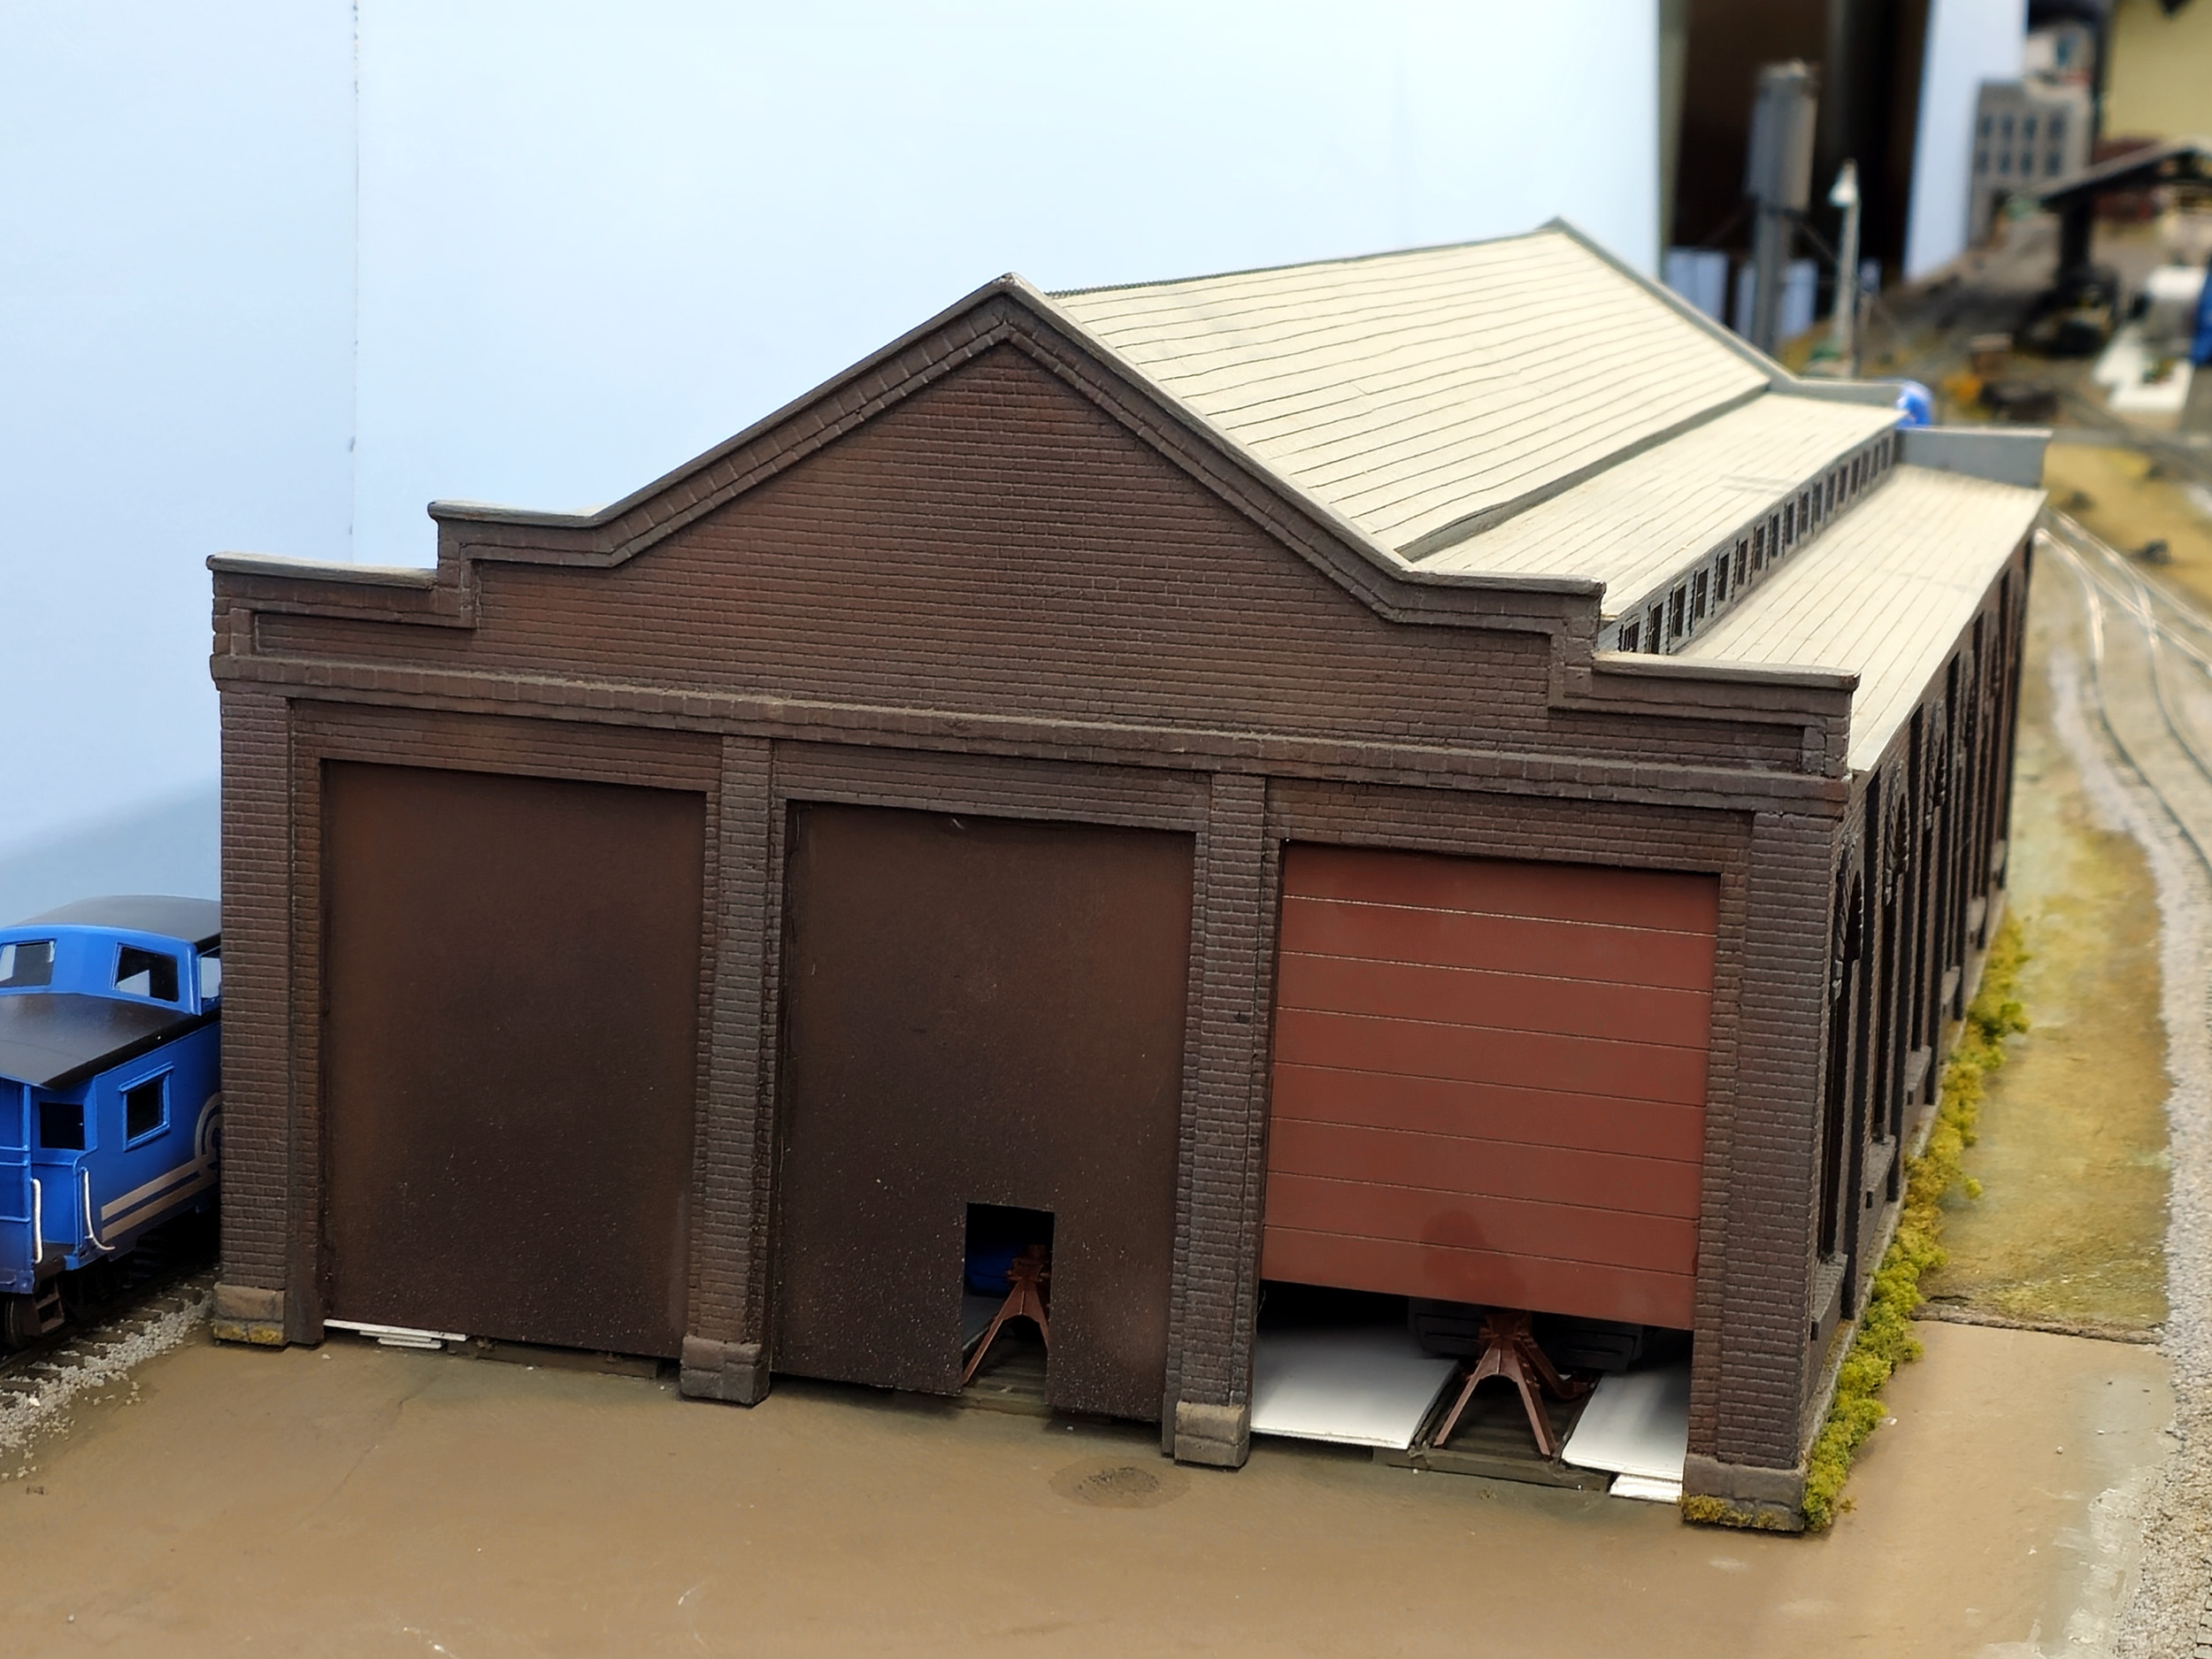
Engine
House Concrete Floor
This first little side project was an idea that popped into my
head at first as a way to not have to ballast inside the engine house! I did it
as soon as I could get the plastic I needed. Since the rail is code 100 I
thought that .062 plastic should be good. I got some 12 x 24 pieces from eBay
that turned out to be FRP sheets which you have seen on the bathroom walls of
cheap restaurants or dive bars. No matter it worked for what I needed. The
pieces are mostly free floating with small pieces of double faced tape holding
them in place. The engine house is pretty close to the outer perimeter of all
the pieces so nothing is going to move much. I made it all more formal by
adding S Helper Service track bumpers instead of drywall screws. I painted the
pieces with Tru Color CP157 Soo Line Off White which is what my other concrete areas as painted
as well.
In 2018 I made 2 ballast
dispensers. They were a good idea that could have been further refined but
I did not do it. The ballast was filled to the top of the rails which is way
too much. A lot of time was wasted moving ballast between the rails forward. It
is much easier to dump in the correct amount and groom it in place. I used
various foam rubber paint brushes to move the ballast around. Regular diluted
Elmer’s glue worked just fine.
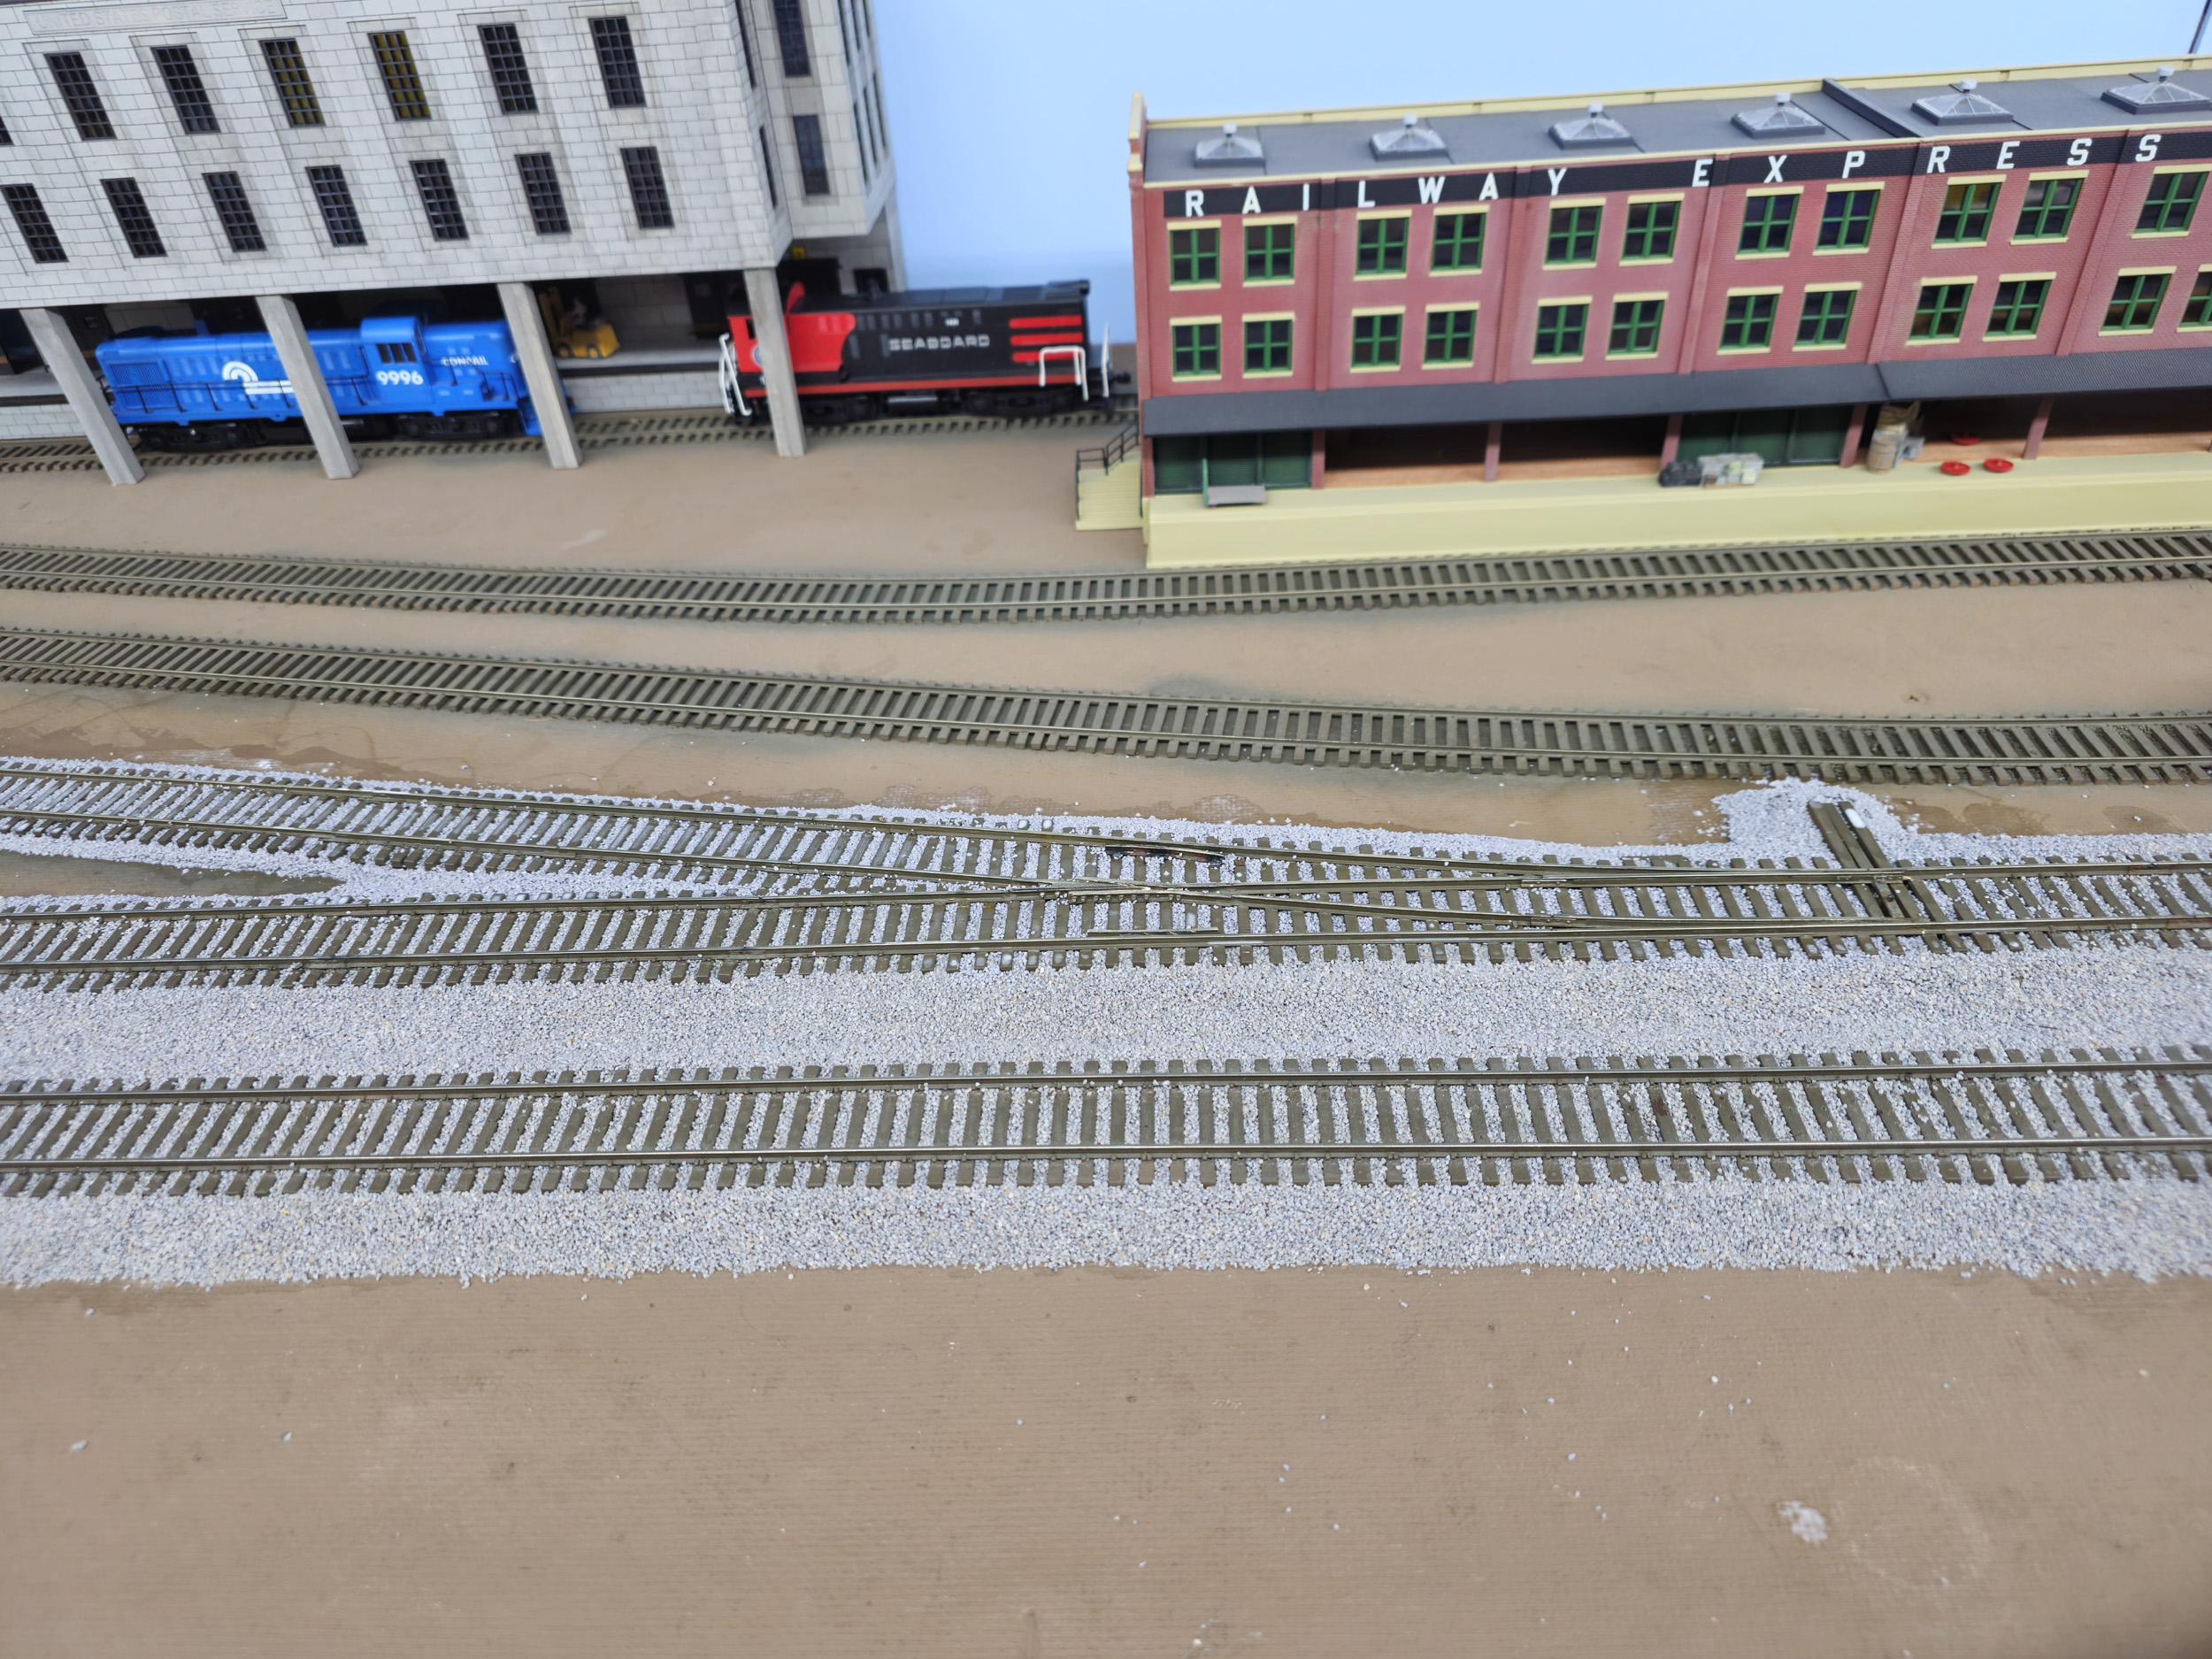
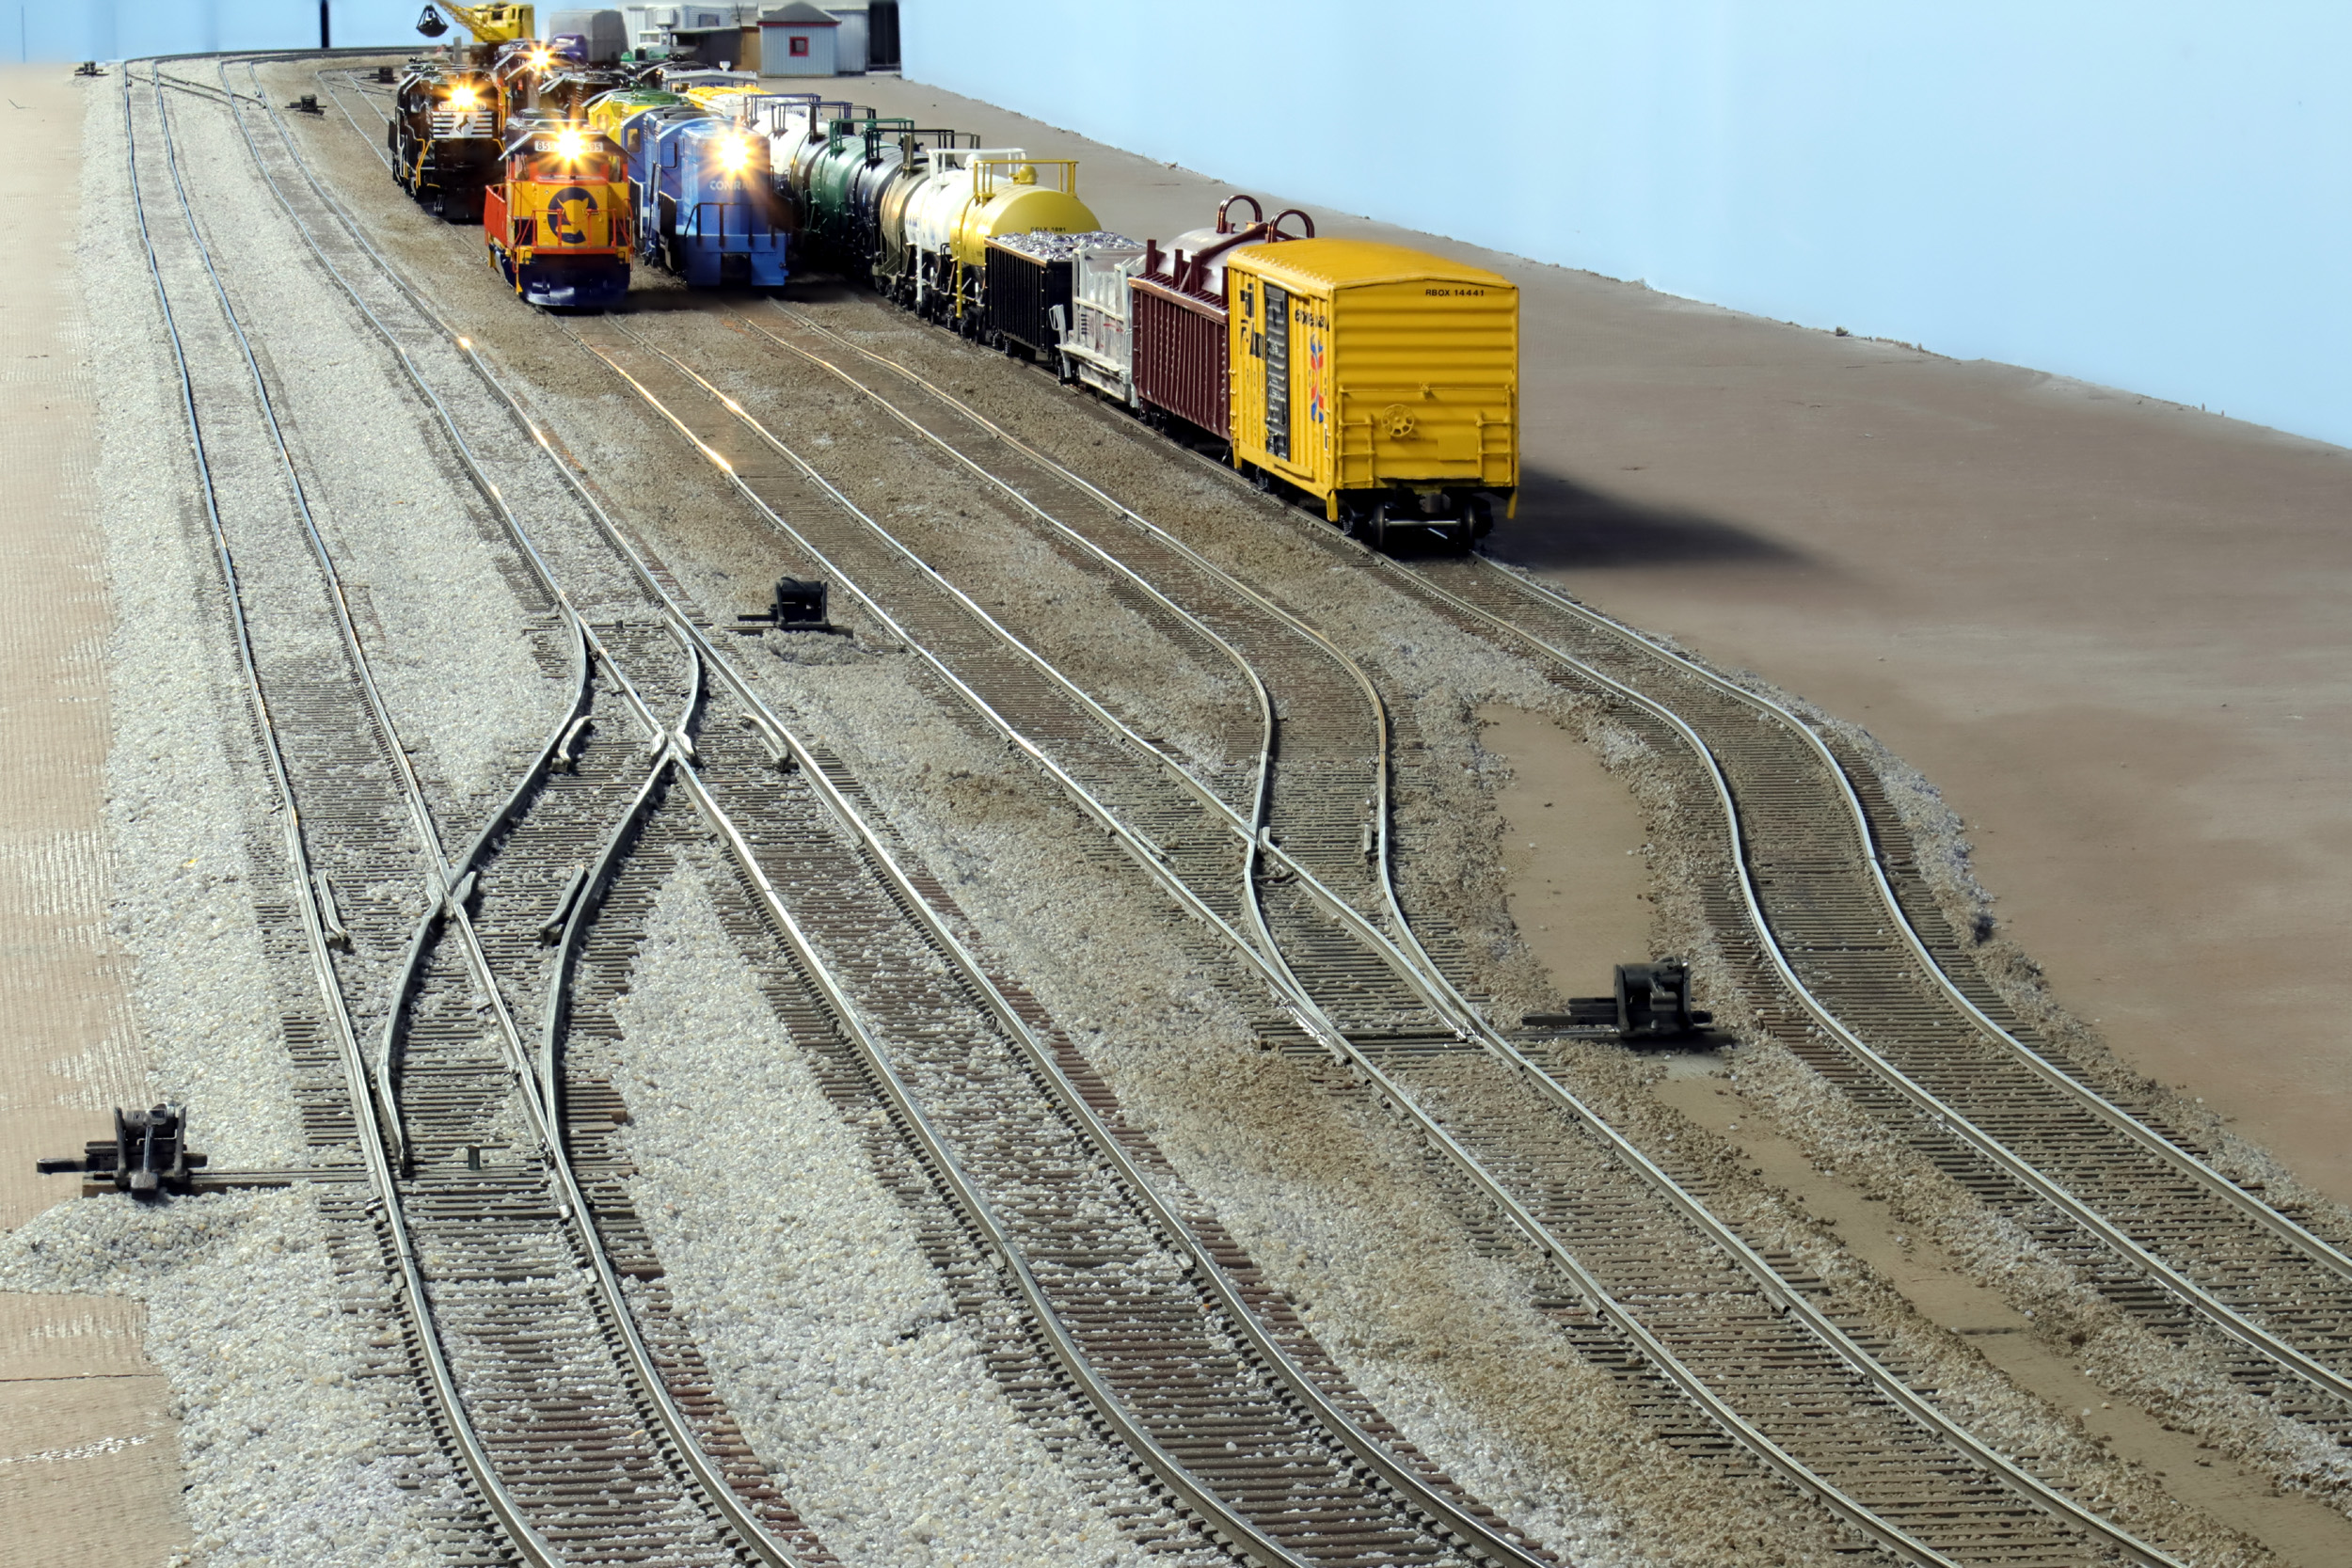
Not wanting to box up over 150 cars and 40 locos, it was some
effort continually jockeying everything to be out of the way in other parts of
the layout while working. Every inch of track was used. I also removed most of
the buildings on one side. Luckily nothing got bruised. Some of the backdrops have been temporarily
clamped for many years. I removed 2 sections for easier access to ballast and
do maintenance. The backdrops will be permanently installed with the seams
filled and a new paint job.
I ran out of safe storage room for the buildings. The bathroom
got used! J

Trains
Everywhere!

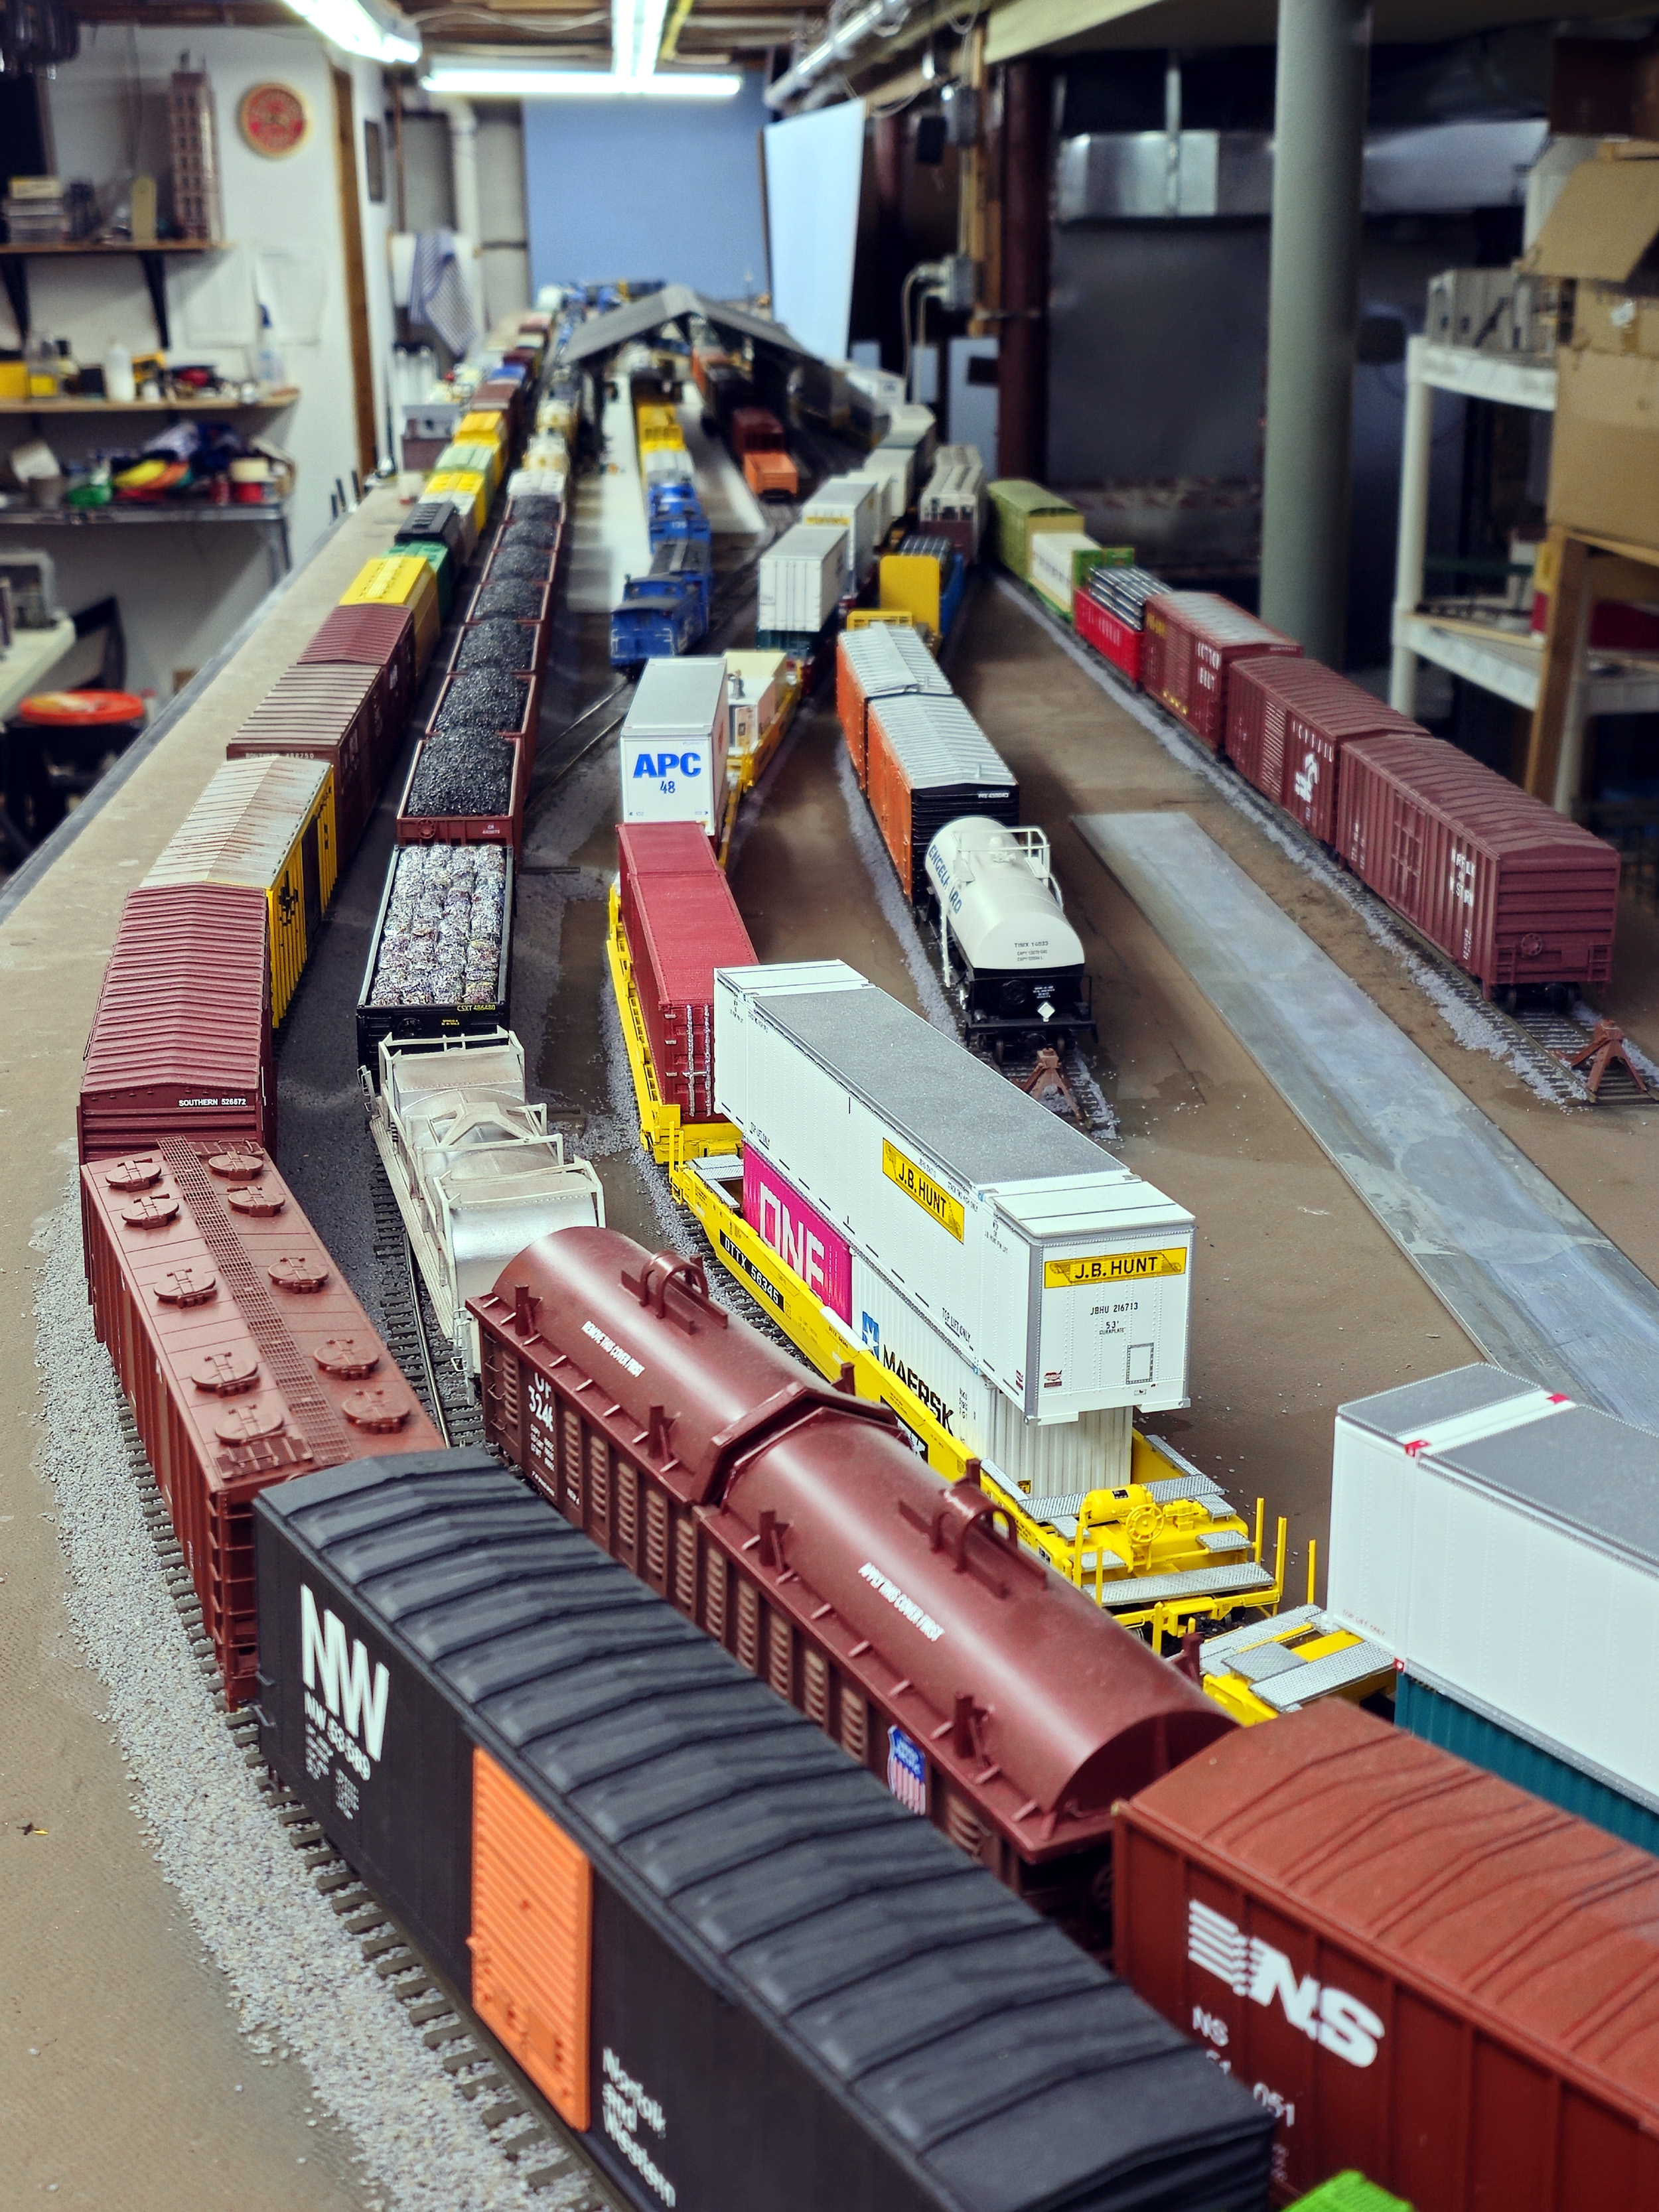
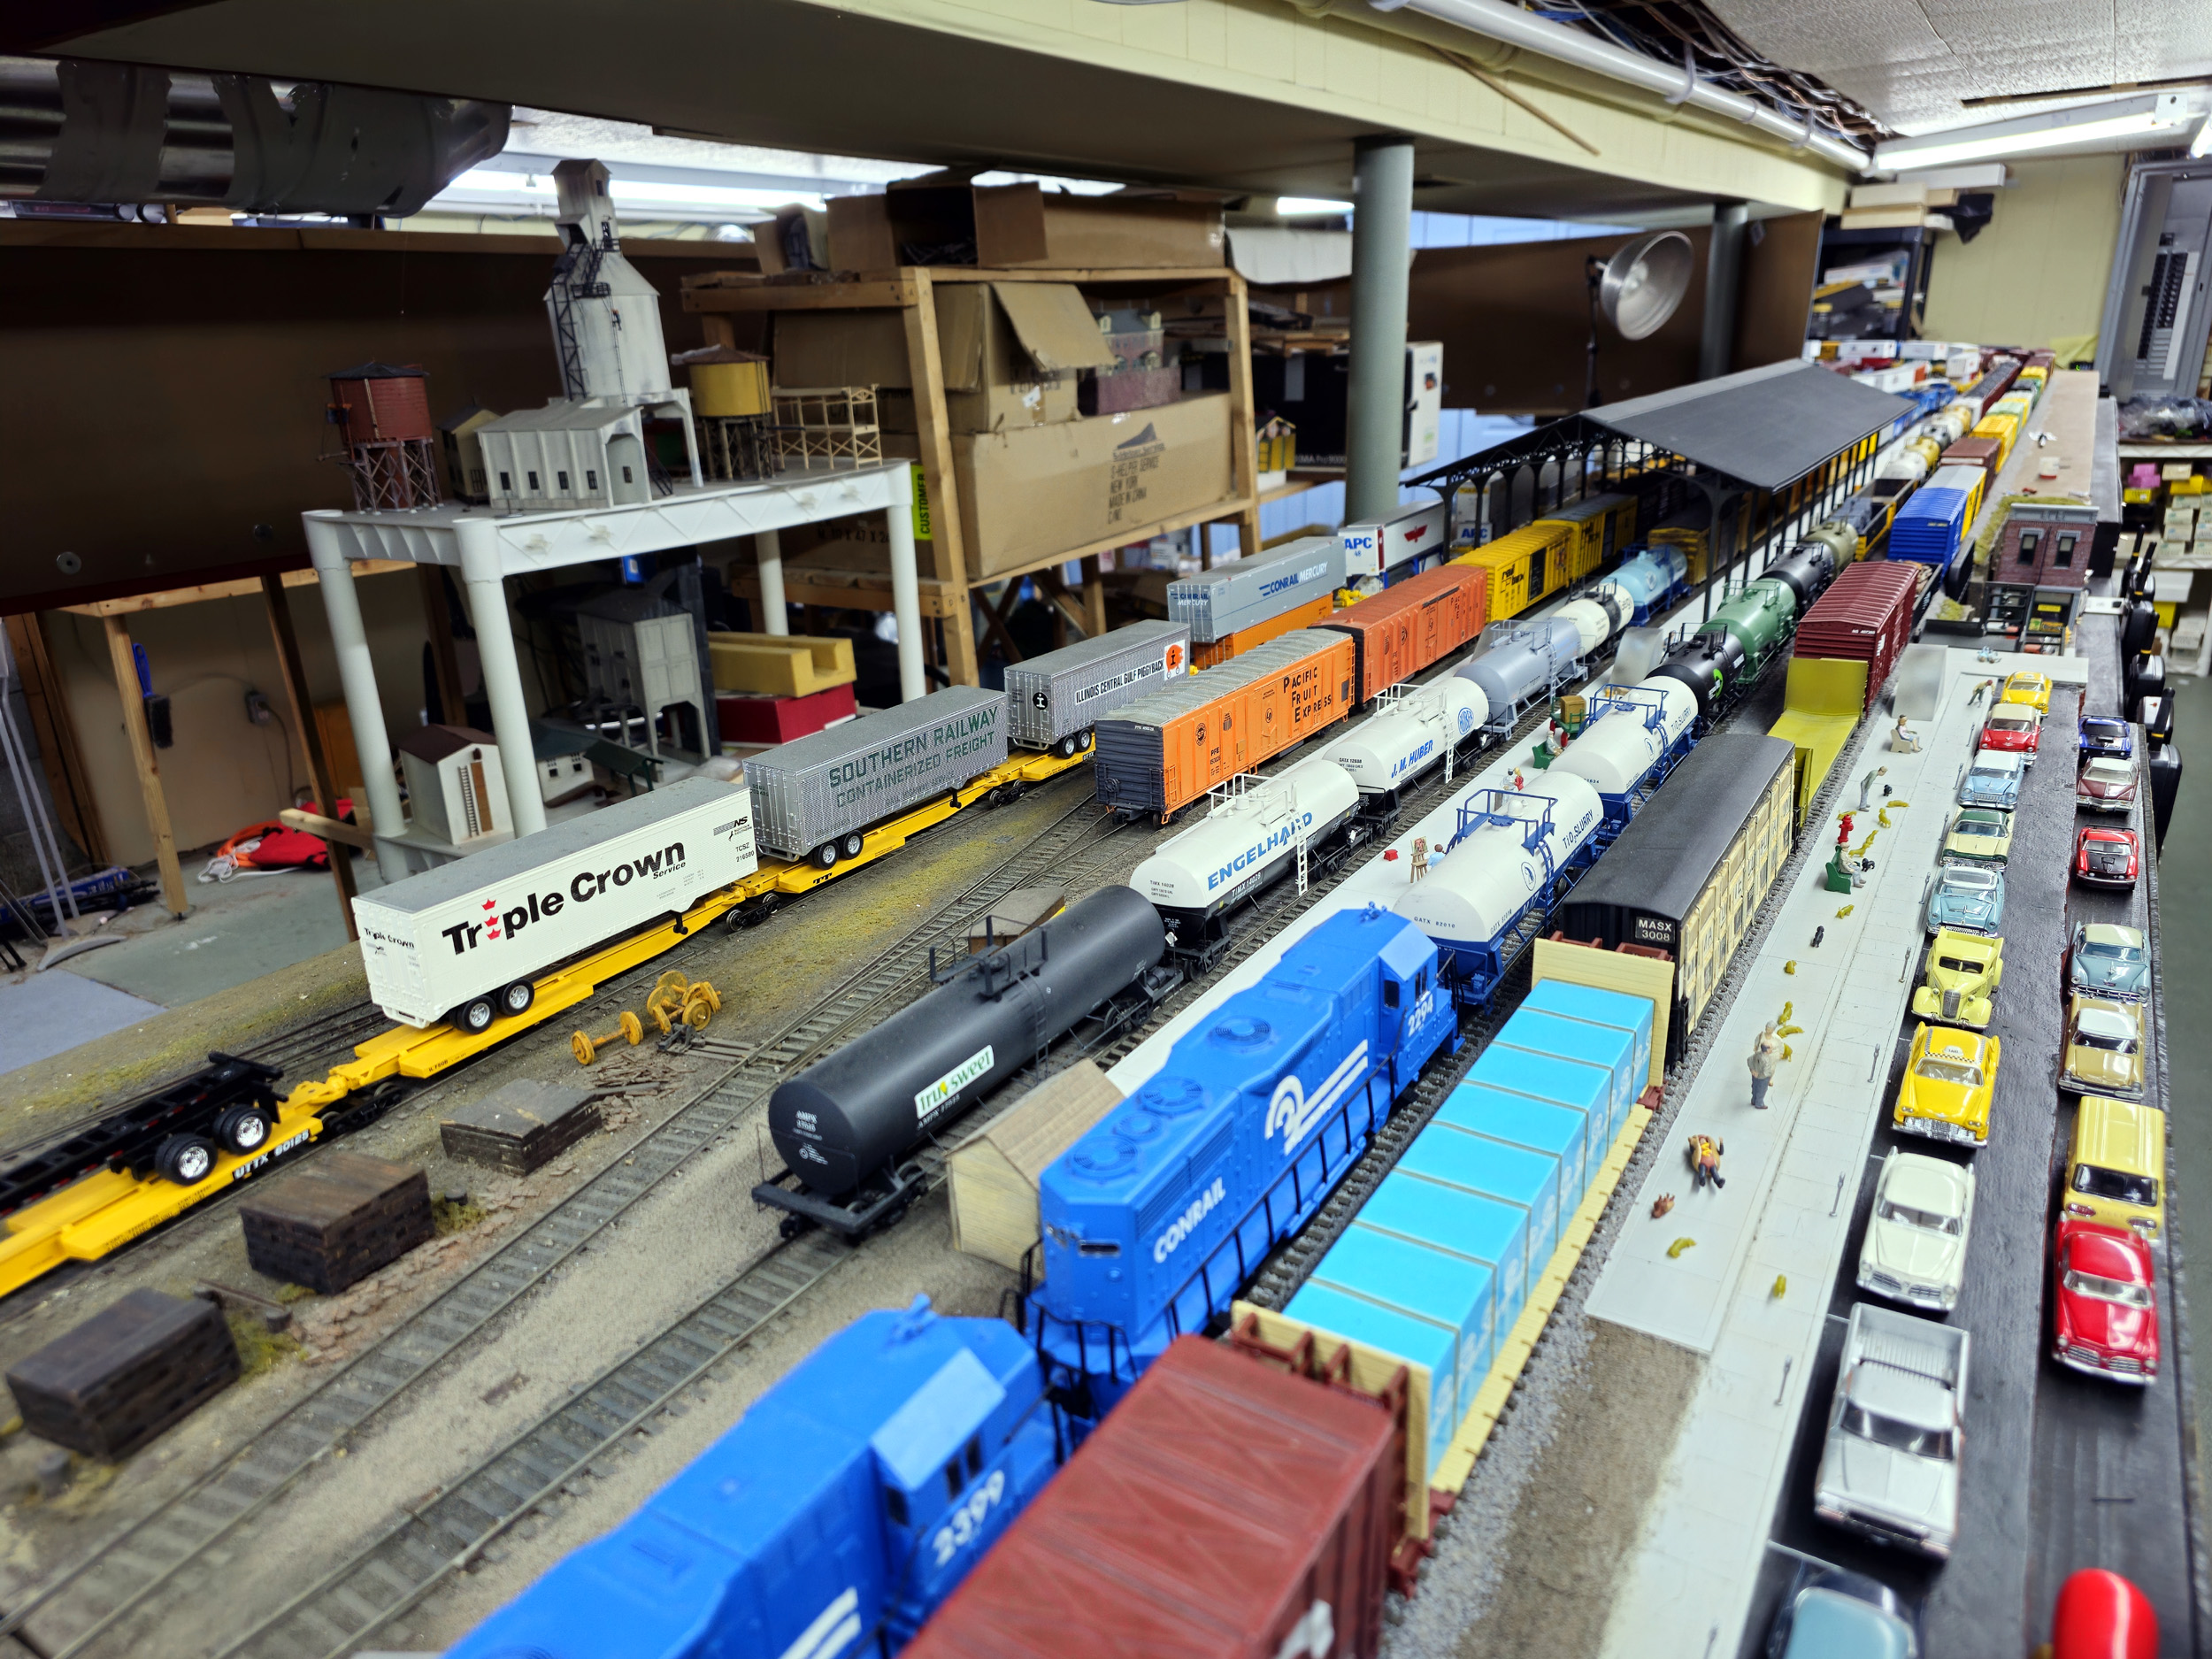
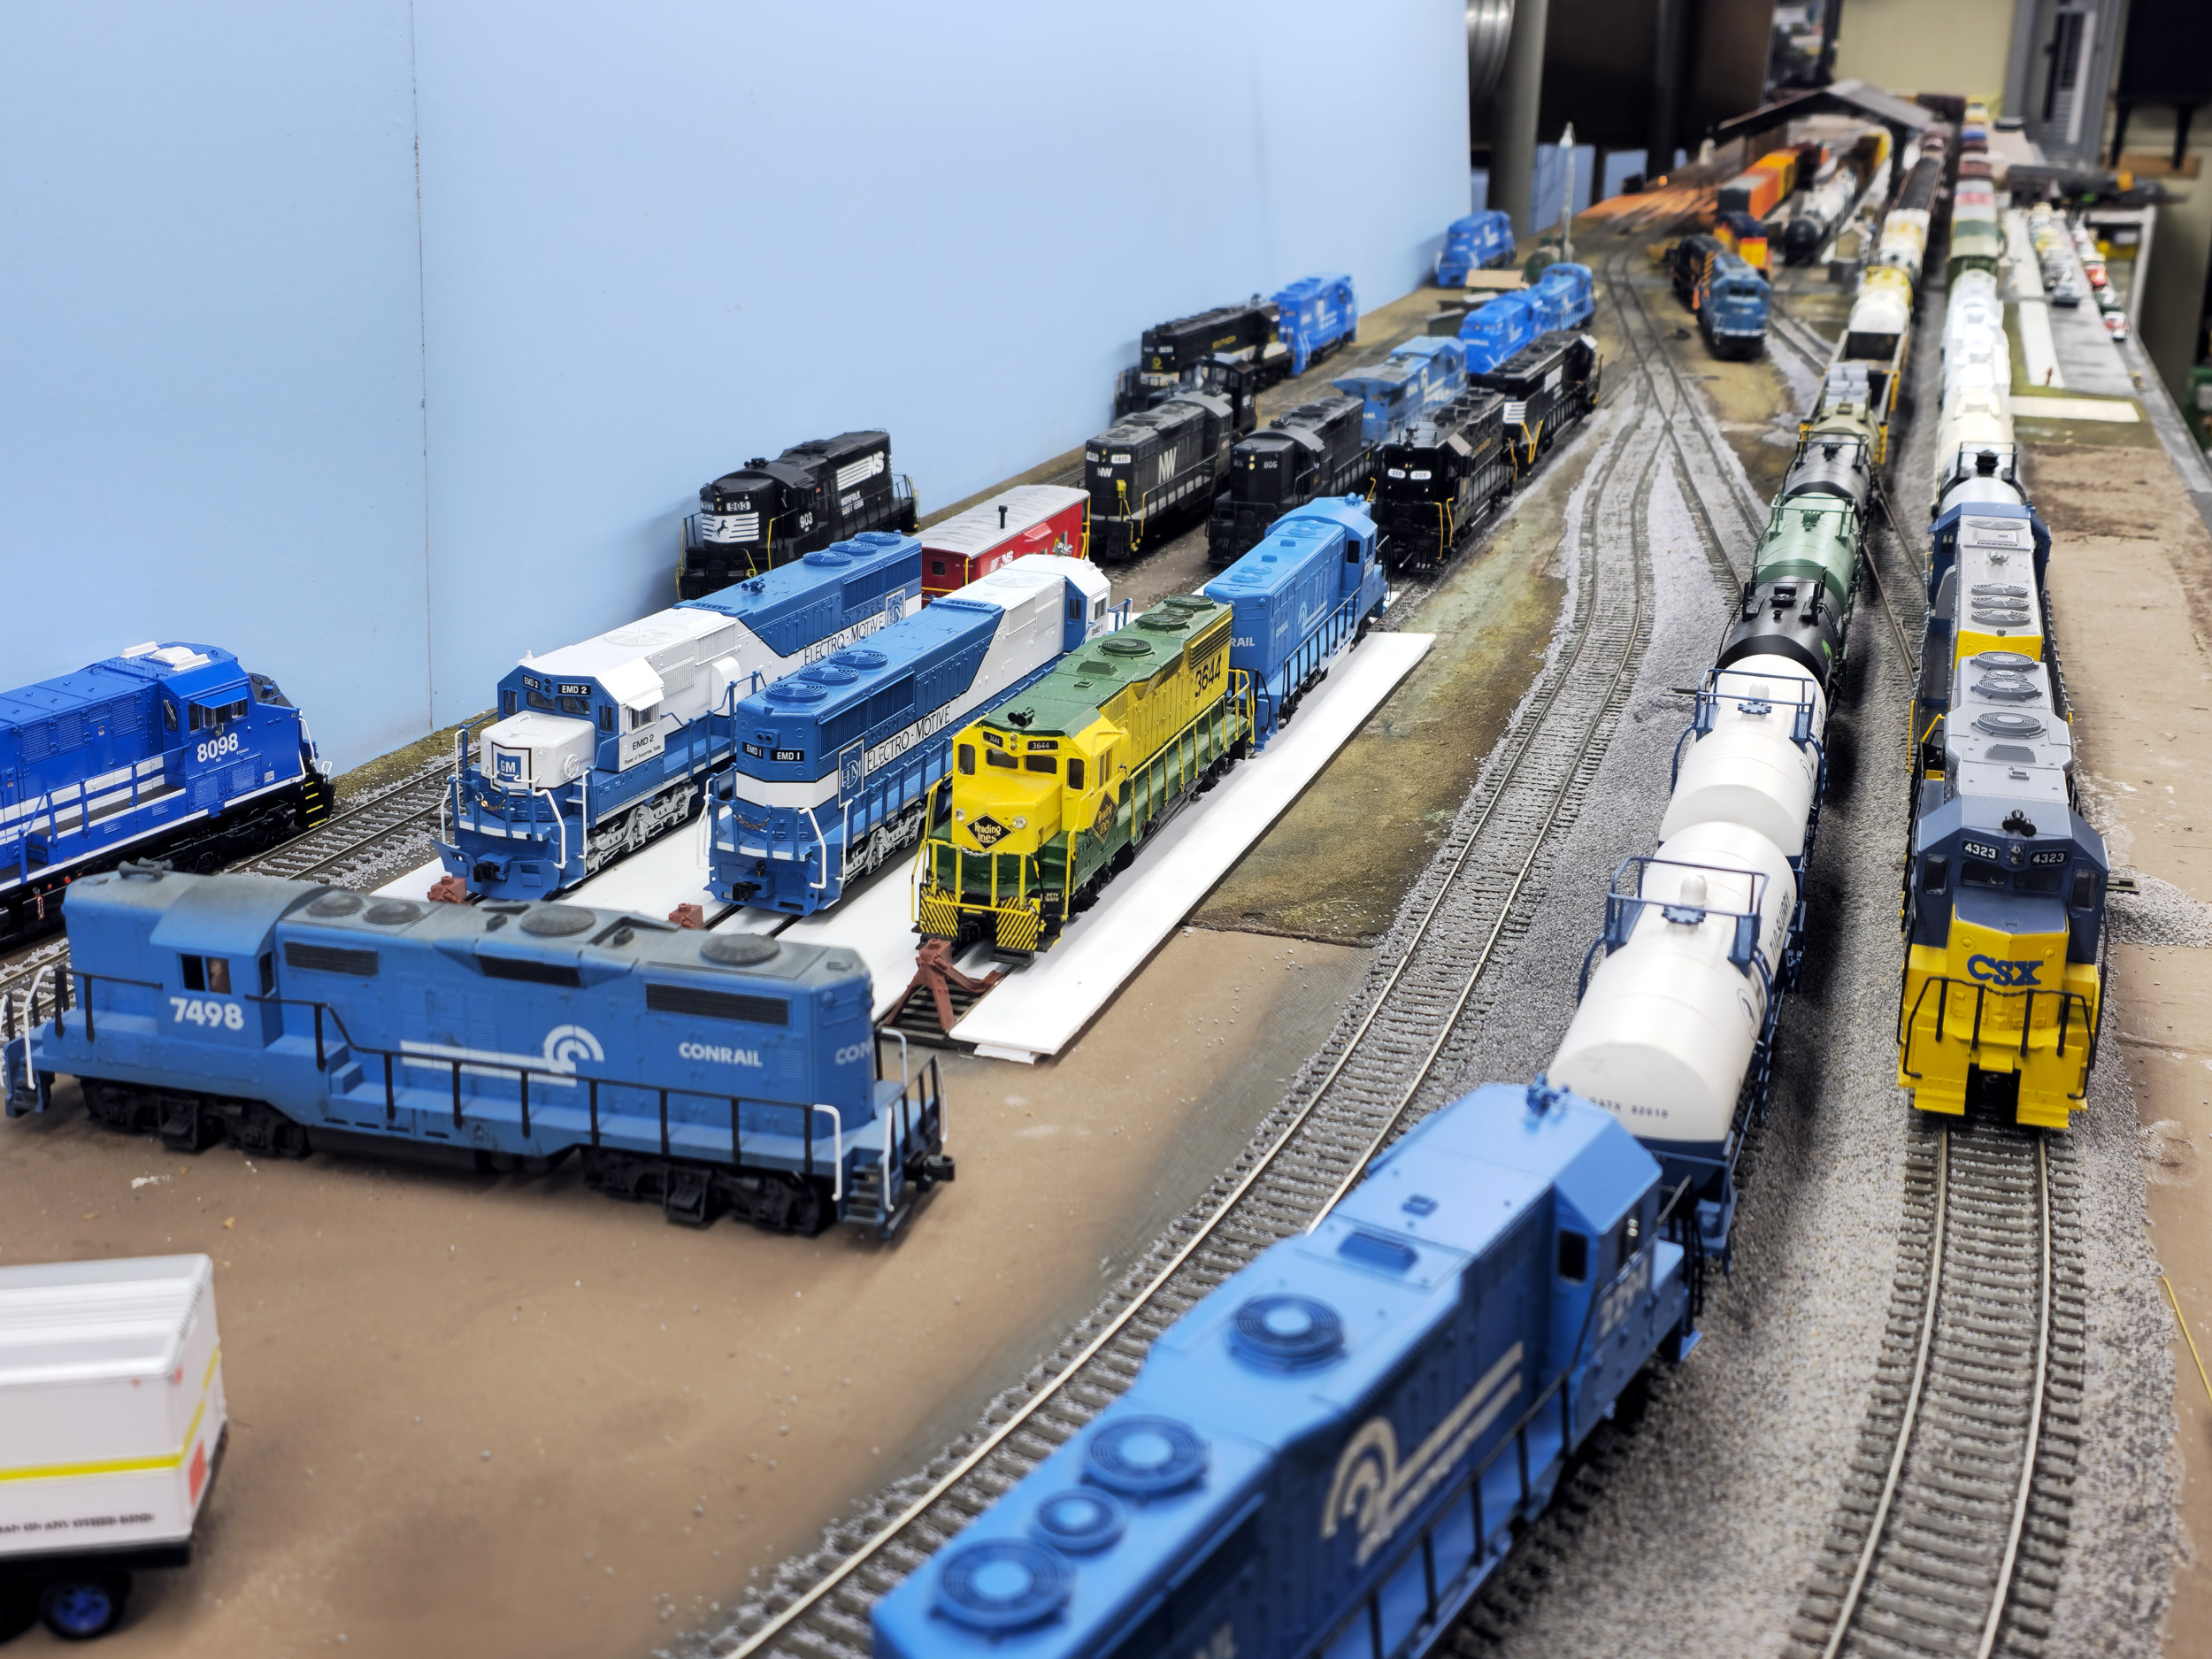
Ballasting
After talking to a friend that is a real railroader I decided
that the yard and some other small areas between adjacent tracks would be
better if they were completely covered in ballast. That also is less area that
has to be covered with other scenery materials!
The photos are showing the ballast progress as I went along.
There are a few small areas I want to refine but I called ballasting completed
on 5-11-25. That is a monumental goal. It was at least 80 hours to get it done.
My friends Mike and Hugh came over to get this started which was
>>greatly appreciated<< but I got it finished.
For some reason – I don’t know why I started the new ballast at
a down ramp.
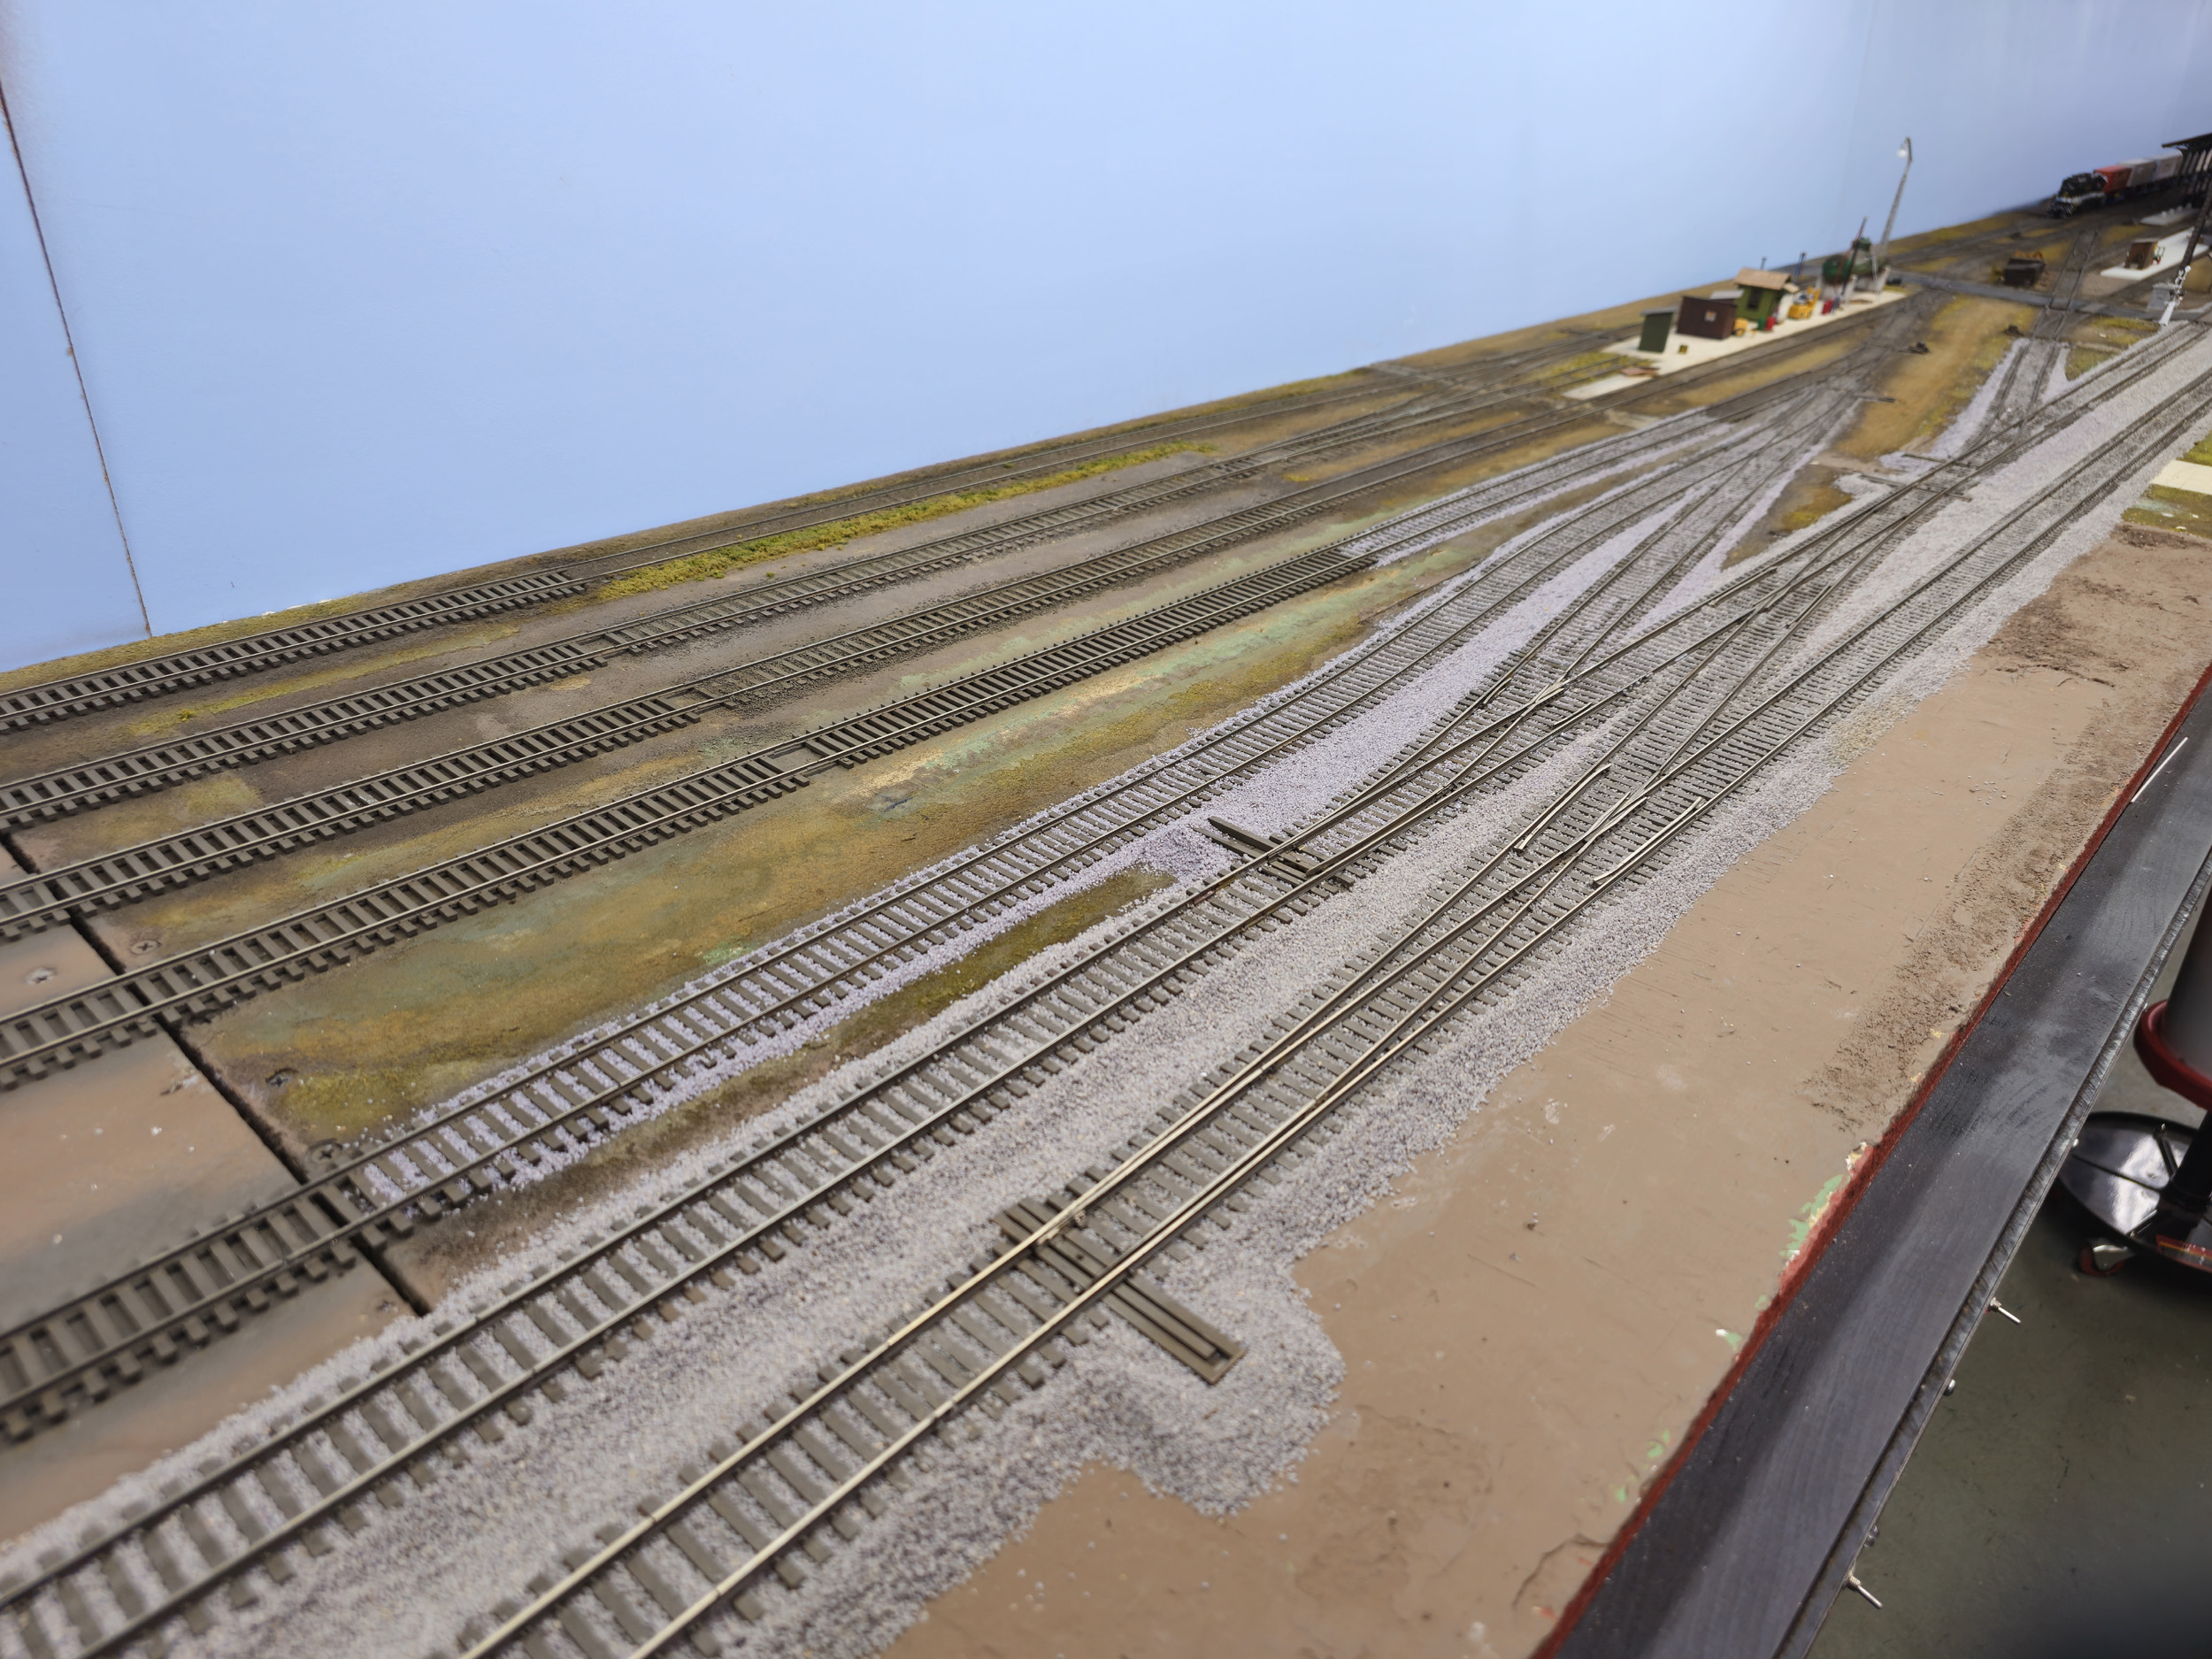

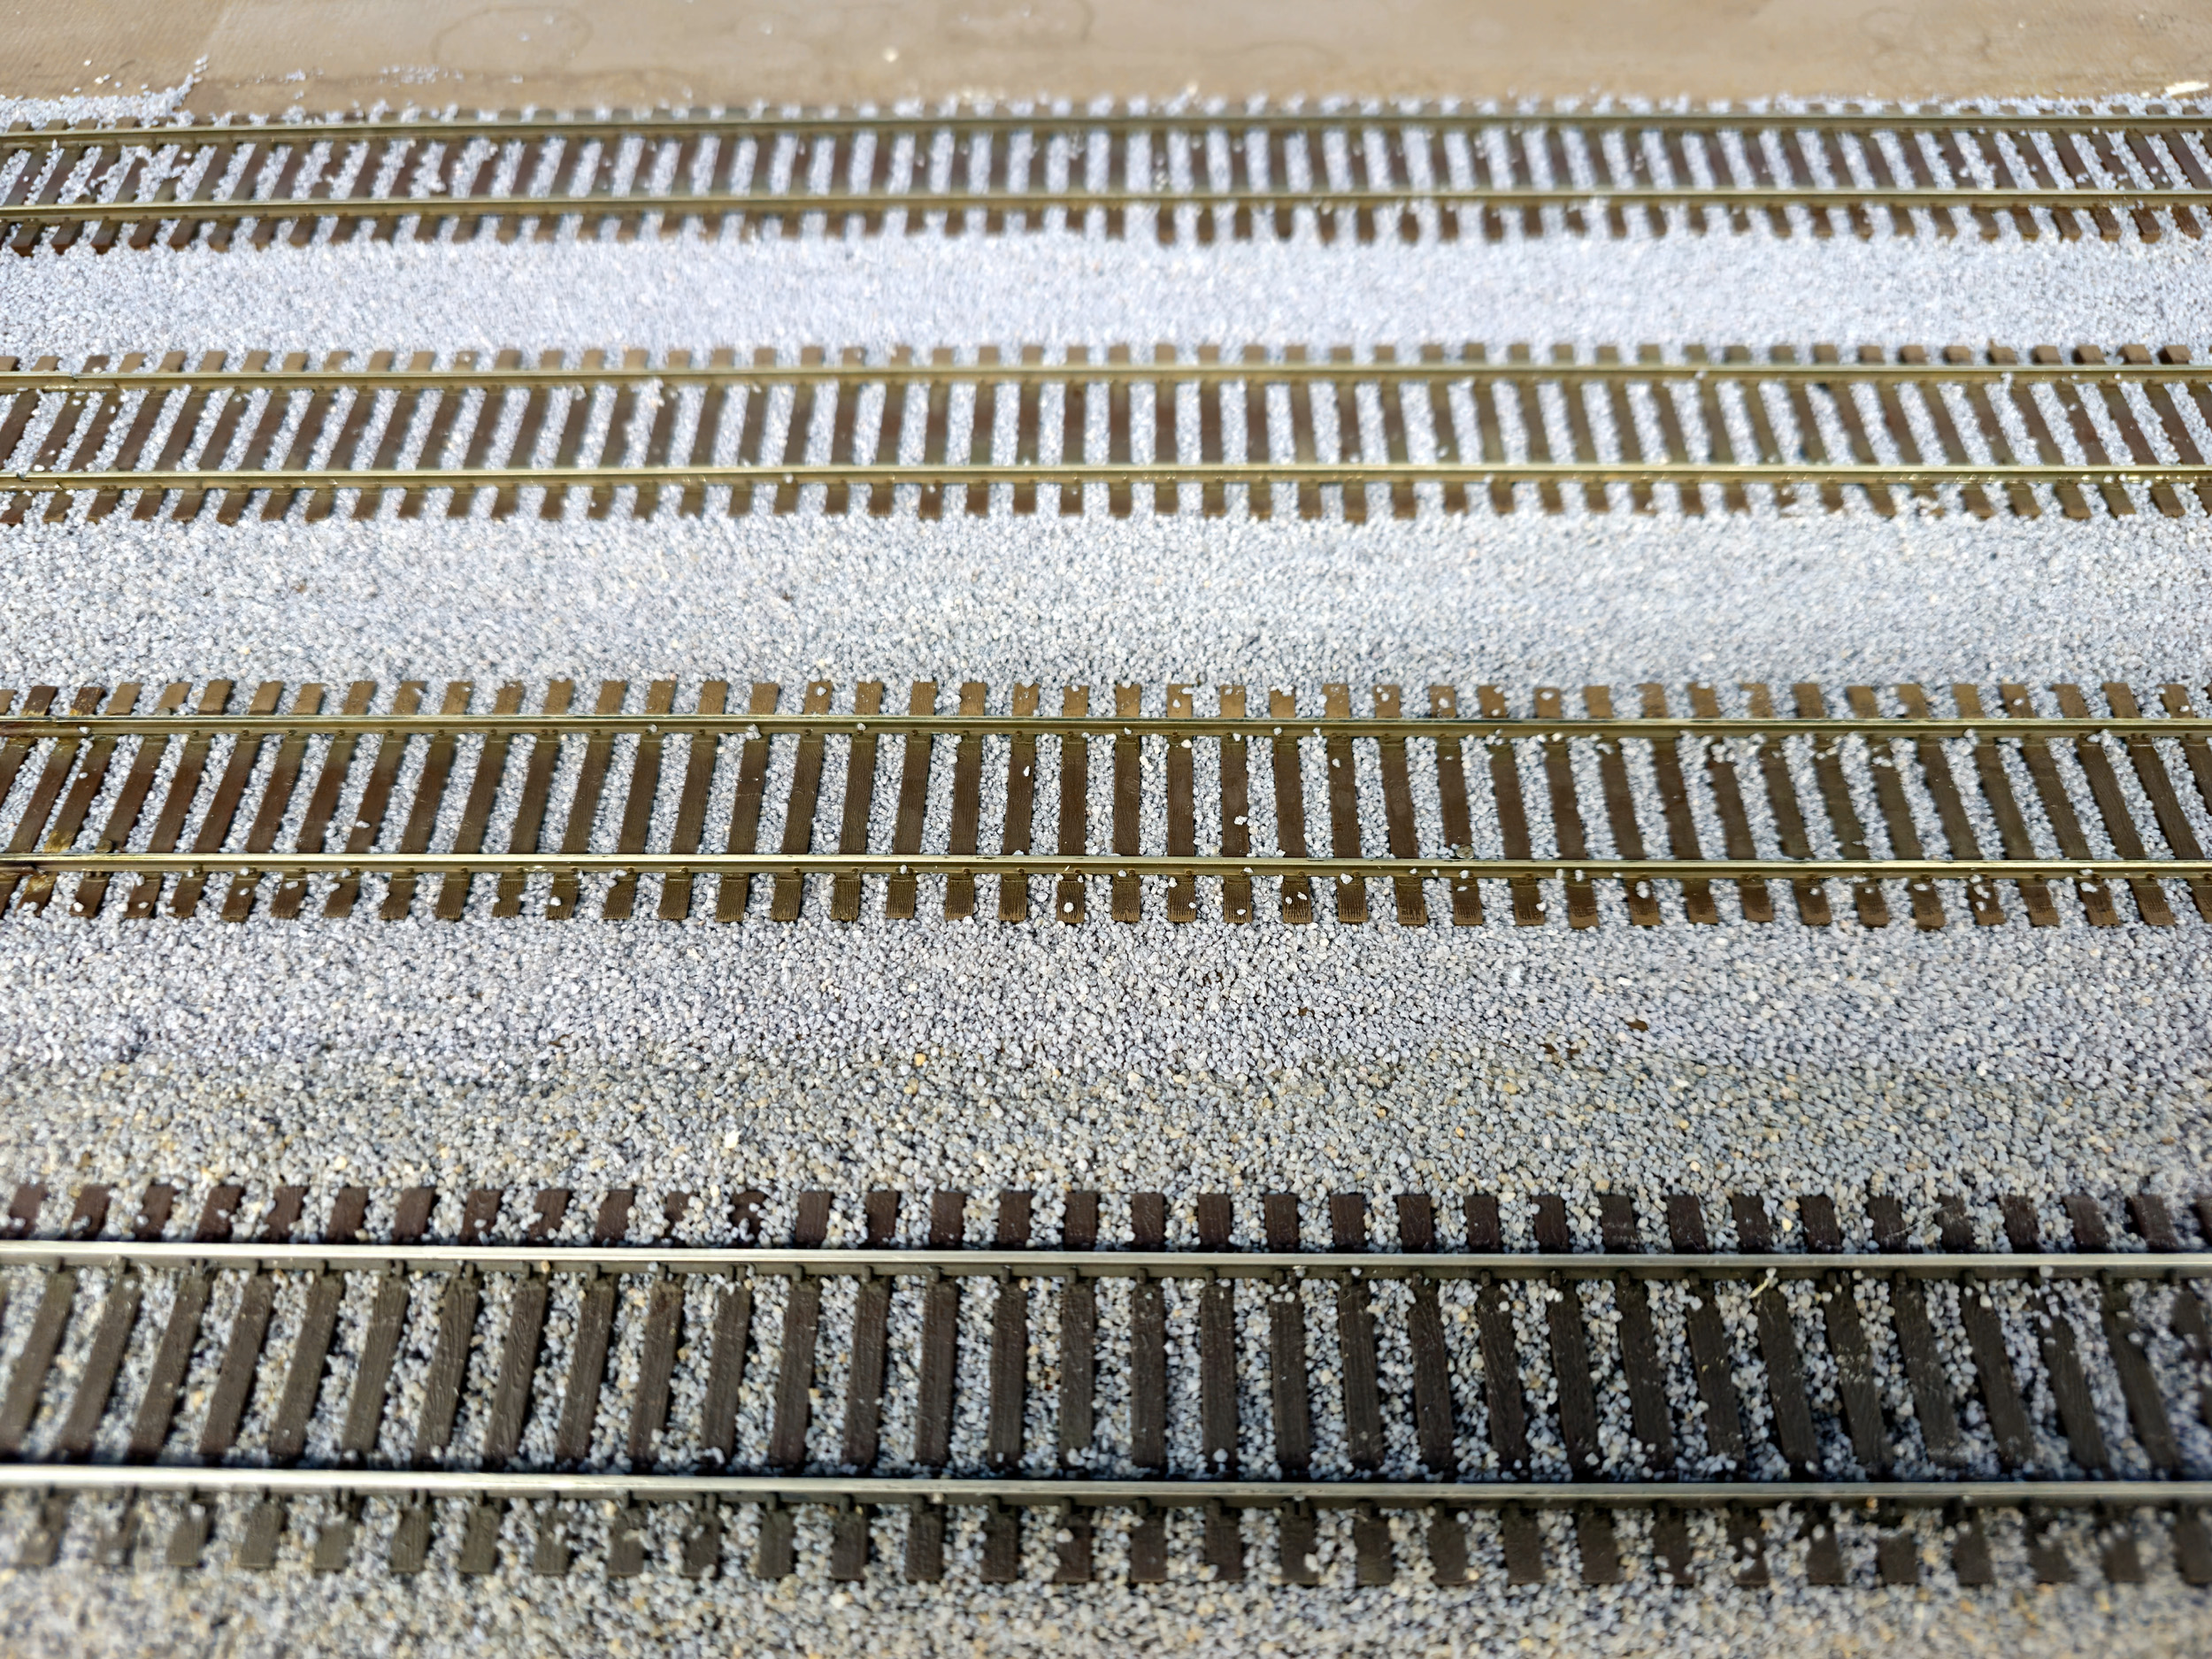
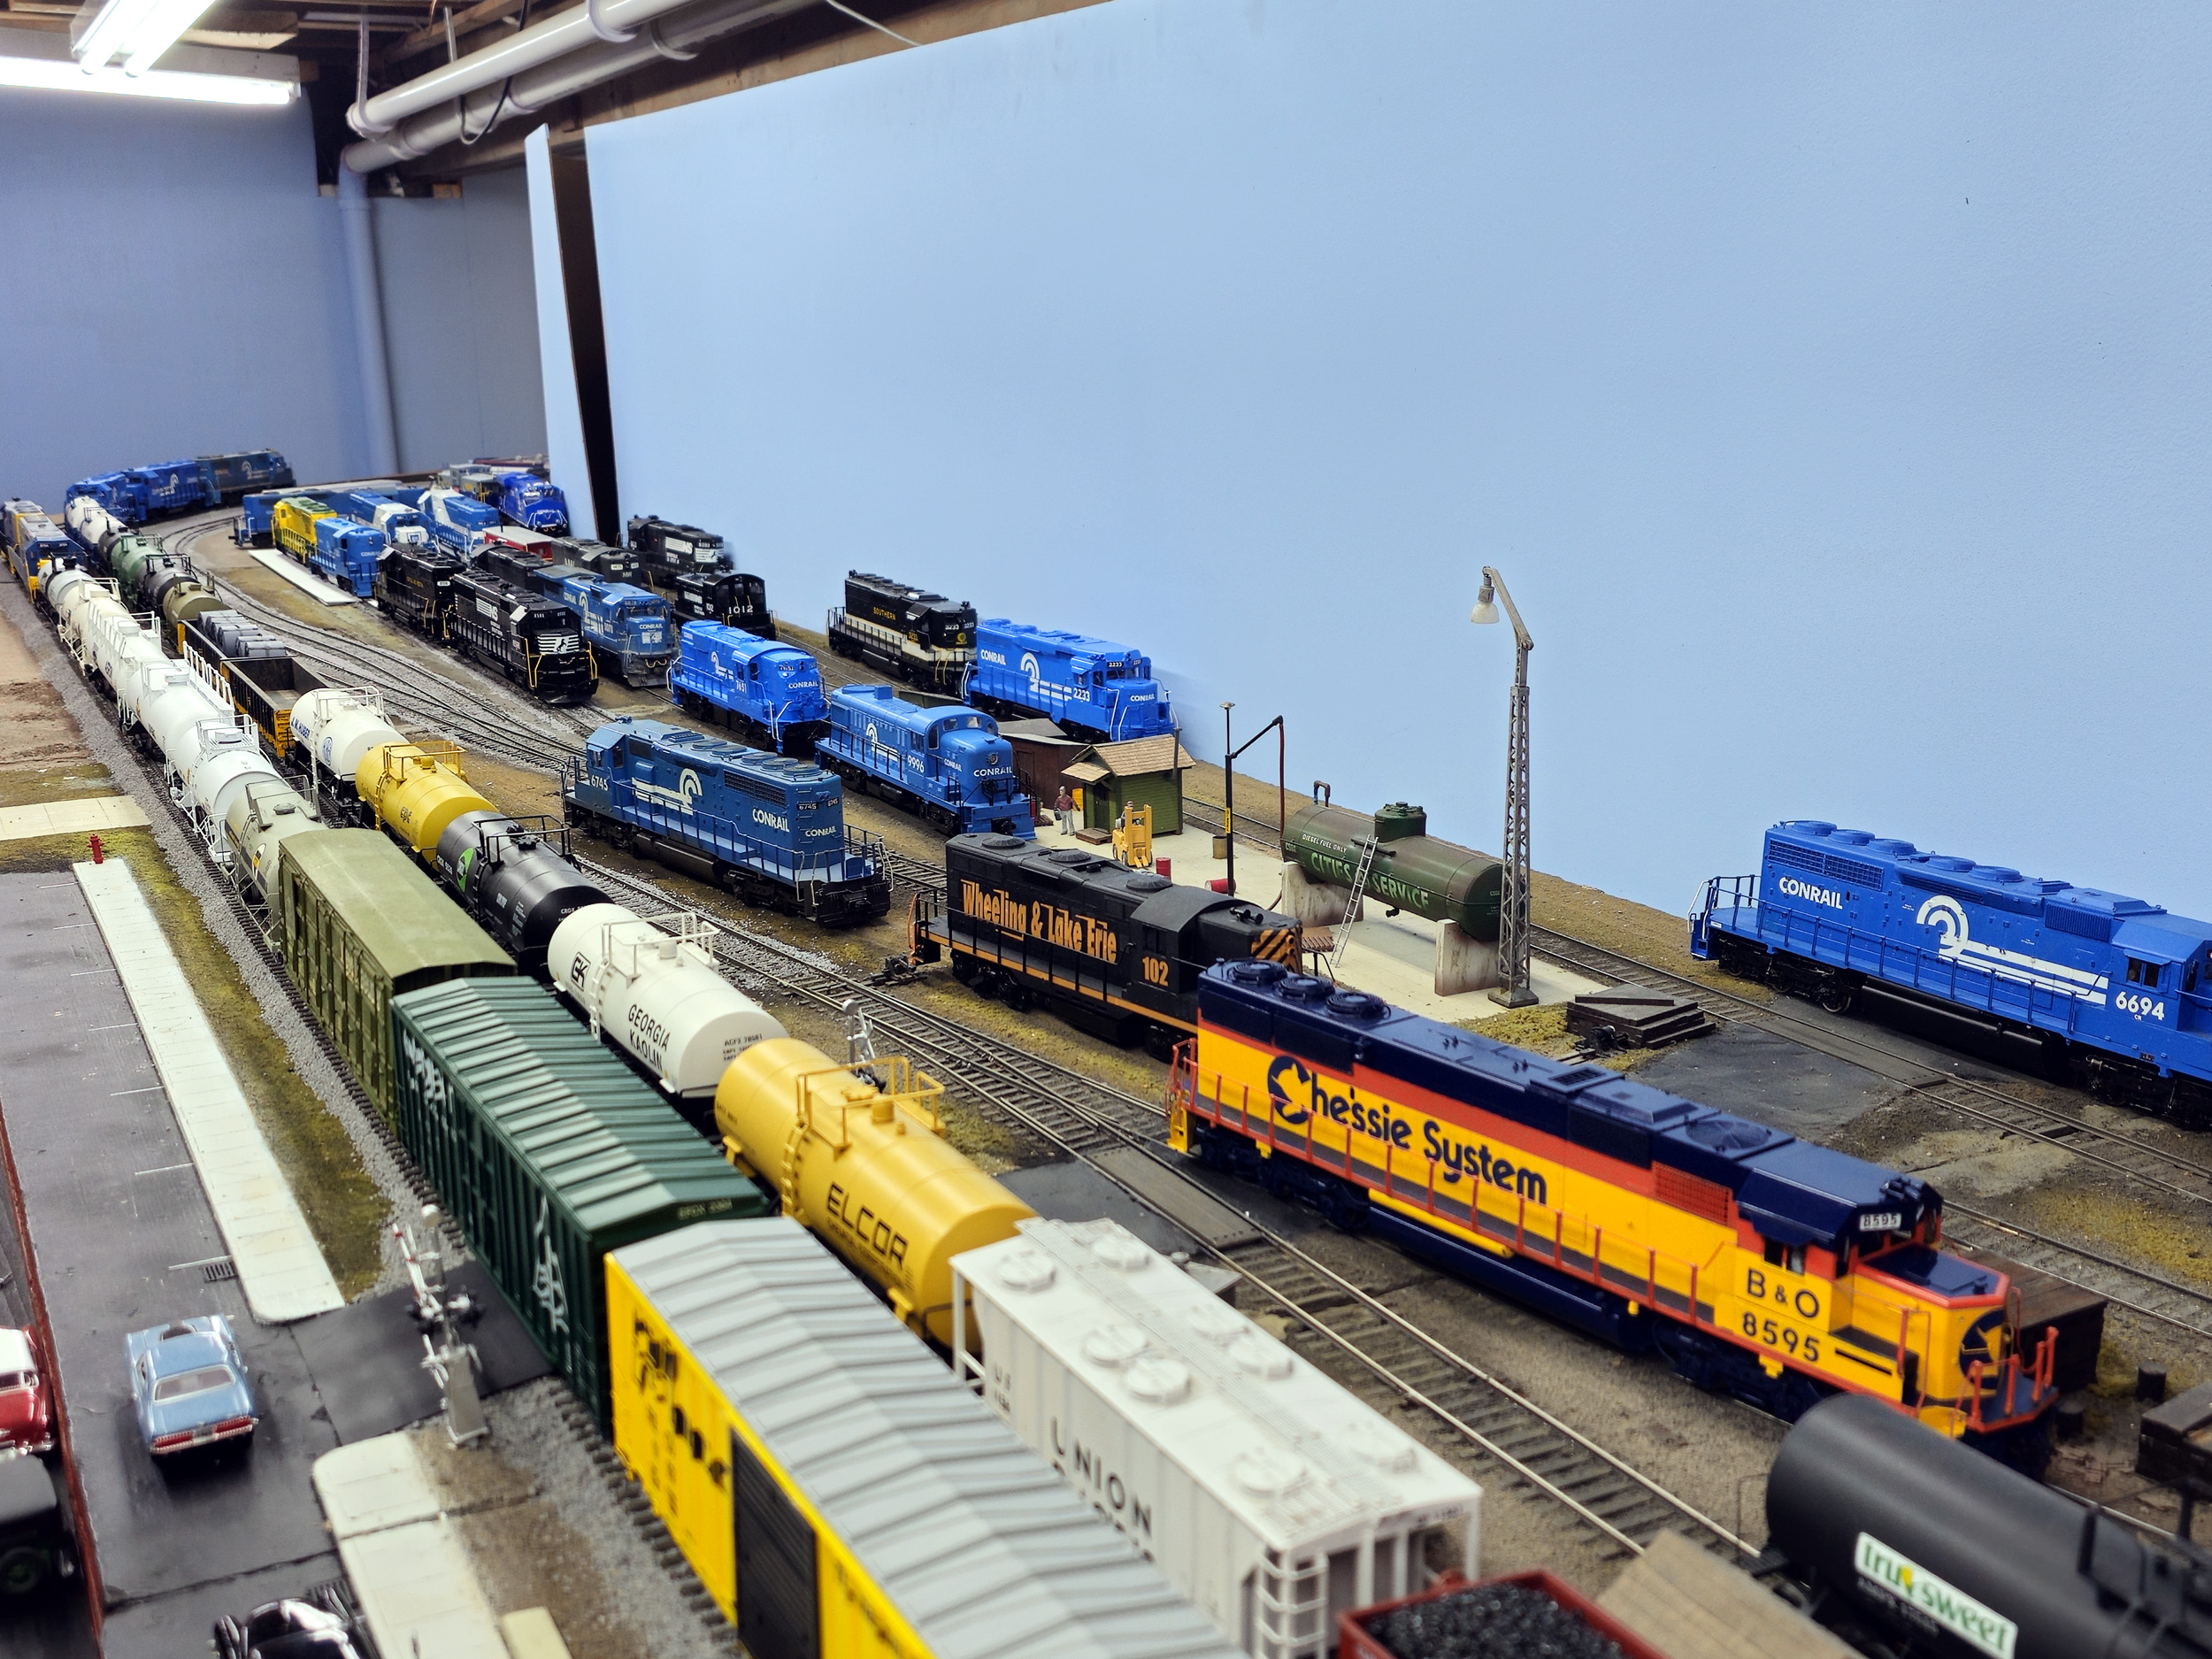
In these photos below you can see some color difference between the older ballast and newer ballast. That really surprised me. It is real natural “weathering” from being in my basement. They both came from the same ballast supply I have.
Track/Ballast
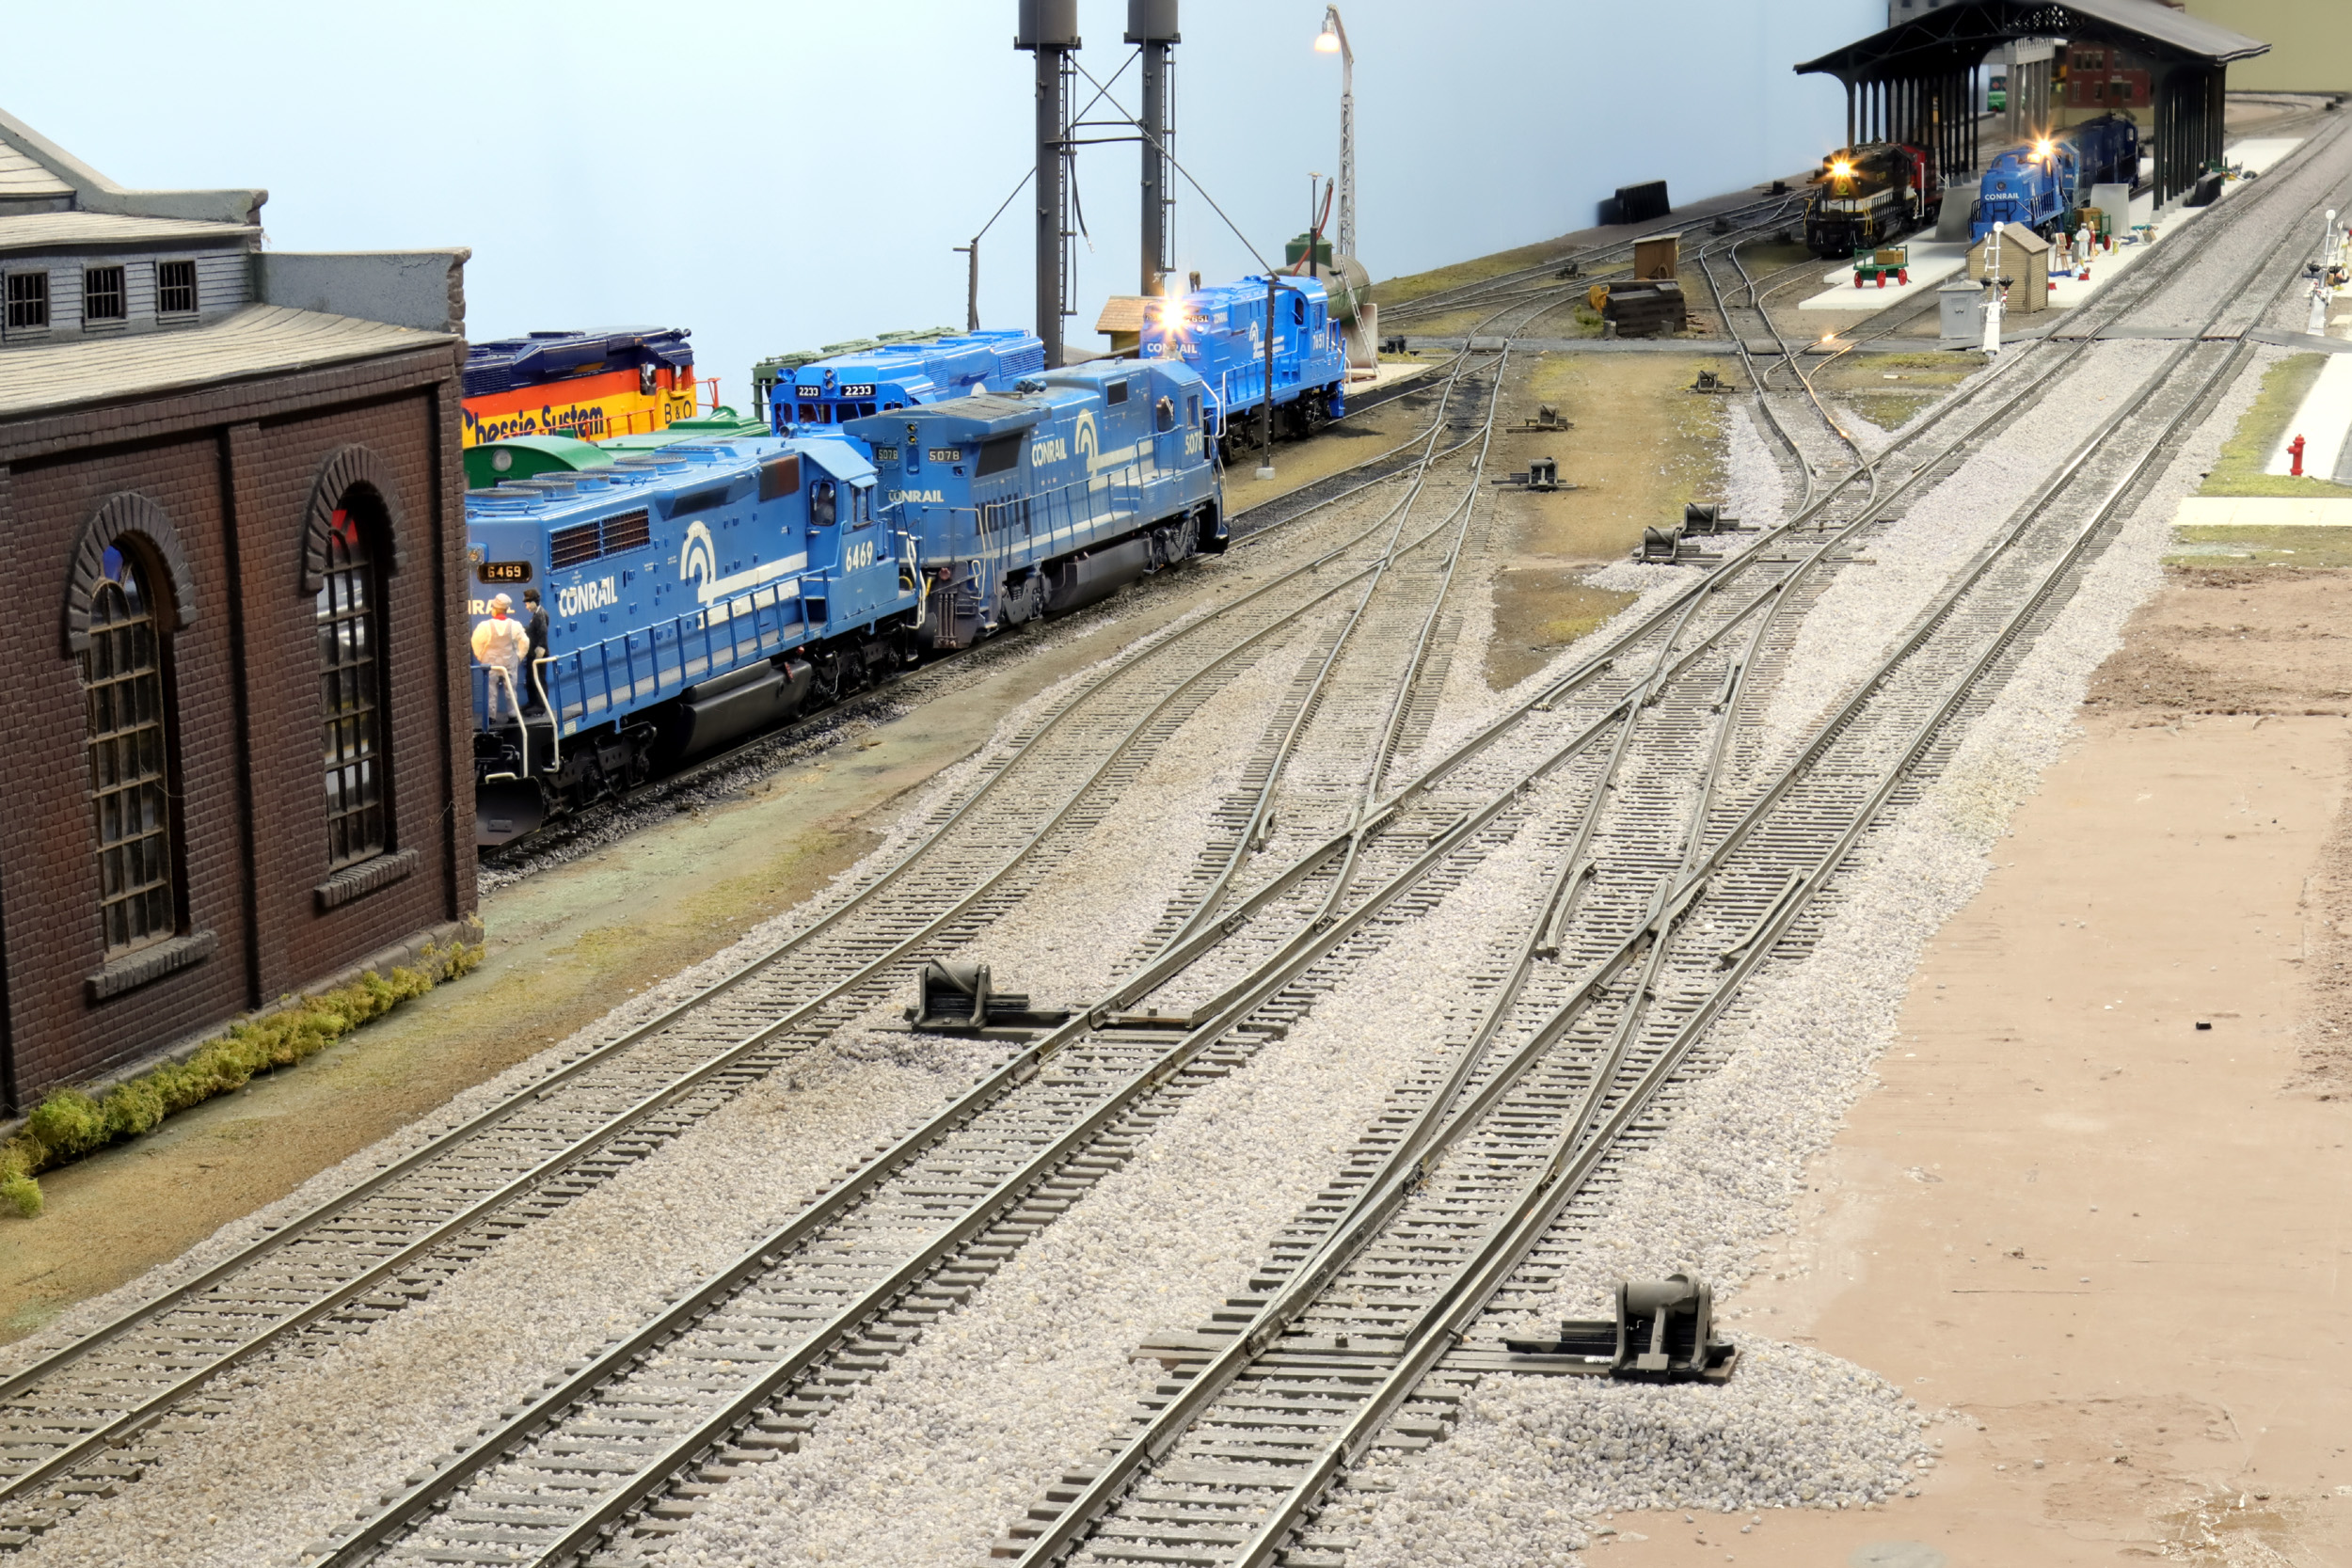
Weathering & Ground Throws
As some of the last things relating to ballast I airbrushed over
most of the code 100 track with the flat rail brown paint to give a dirty
weathered look and as further visual separation from the main lines with better
maintained track and ballast. It is pretty noticeable in these photos from a
distant angle but much less obvious when looking straight down on the track.
Since almost day 1 of making the layout my very early thoughts
were to have the layout be all manual ground throw turnouts. Most S Mod
turnouts were ground throws as well. But I changed my mind. All turnouts are
powered except 1 that will really never get used. All turnouts finally got their
ground throws as scenery only. I get they are oversized for O Scale but I
already had them. Good enough.
Old Man Handrails
I
can go for months without going into the center of my layout. I have had this
idea for a long time but finally did it because I am working on my layout. I
added handrails to the legs about 18” from the floor in 2 places to help me low
crawl into the center. The layout is just
grazing my back when I go under. Note I made them a bit longer on
the inside of the loop.

Added
5-25-25
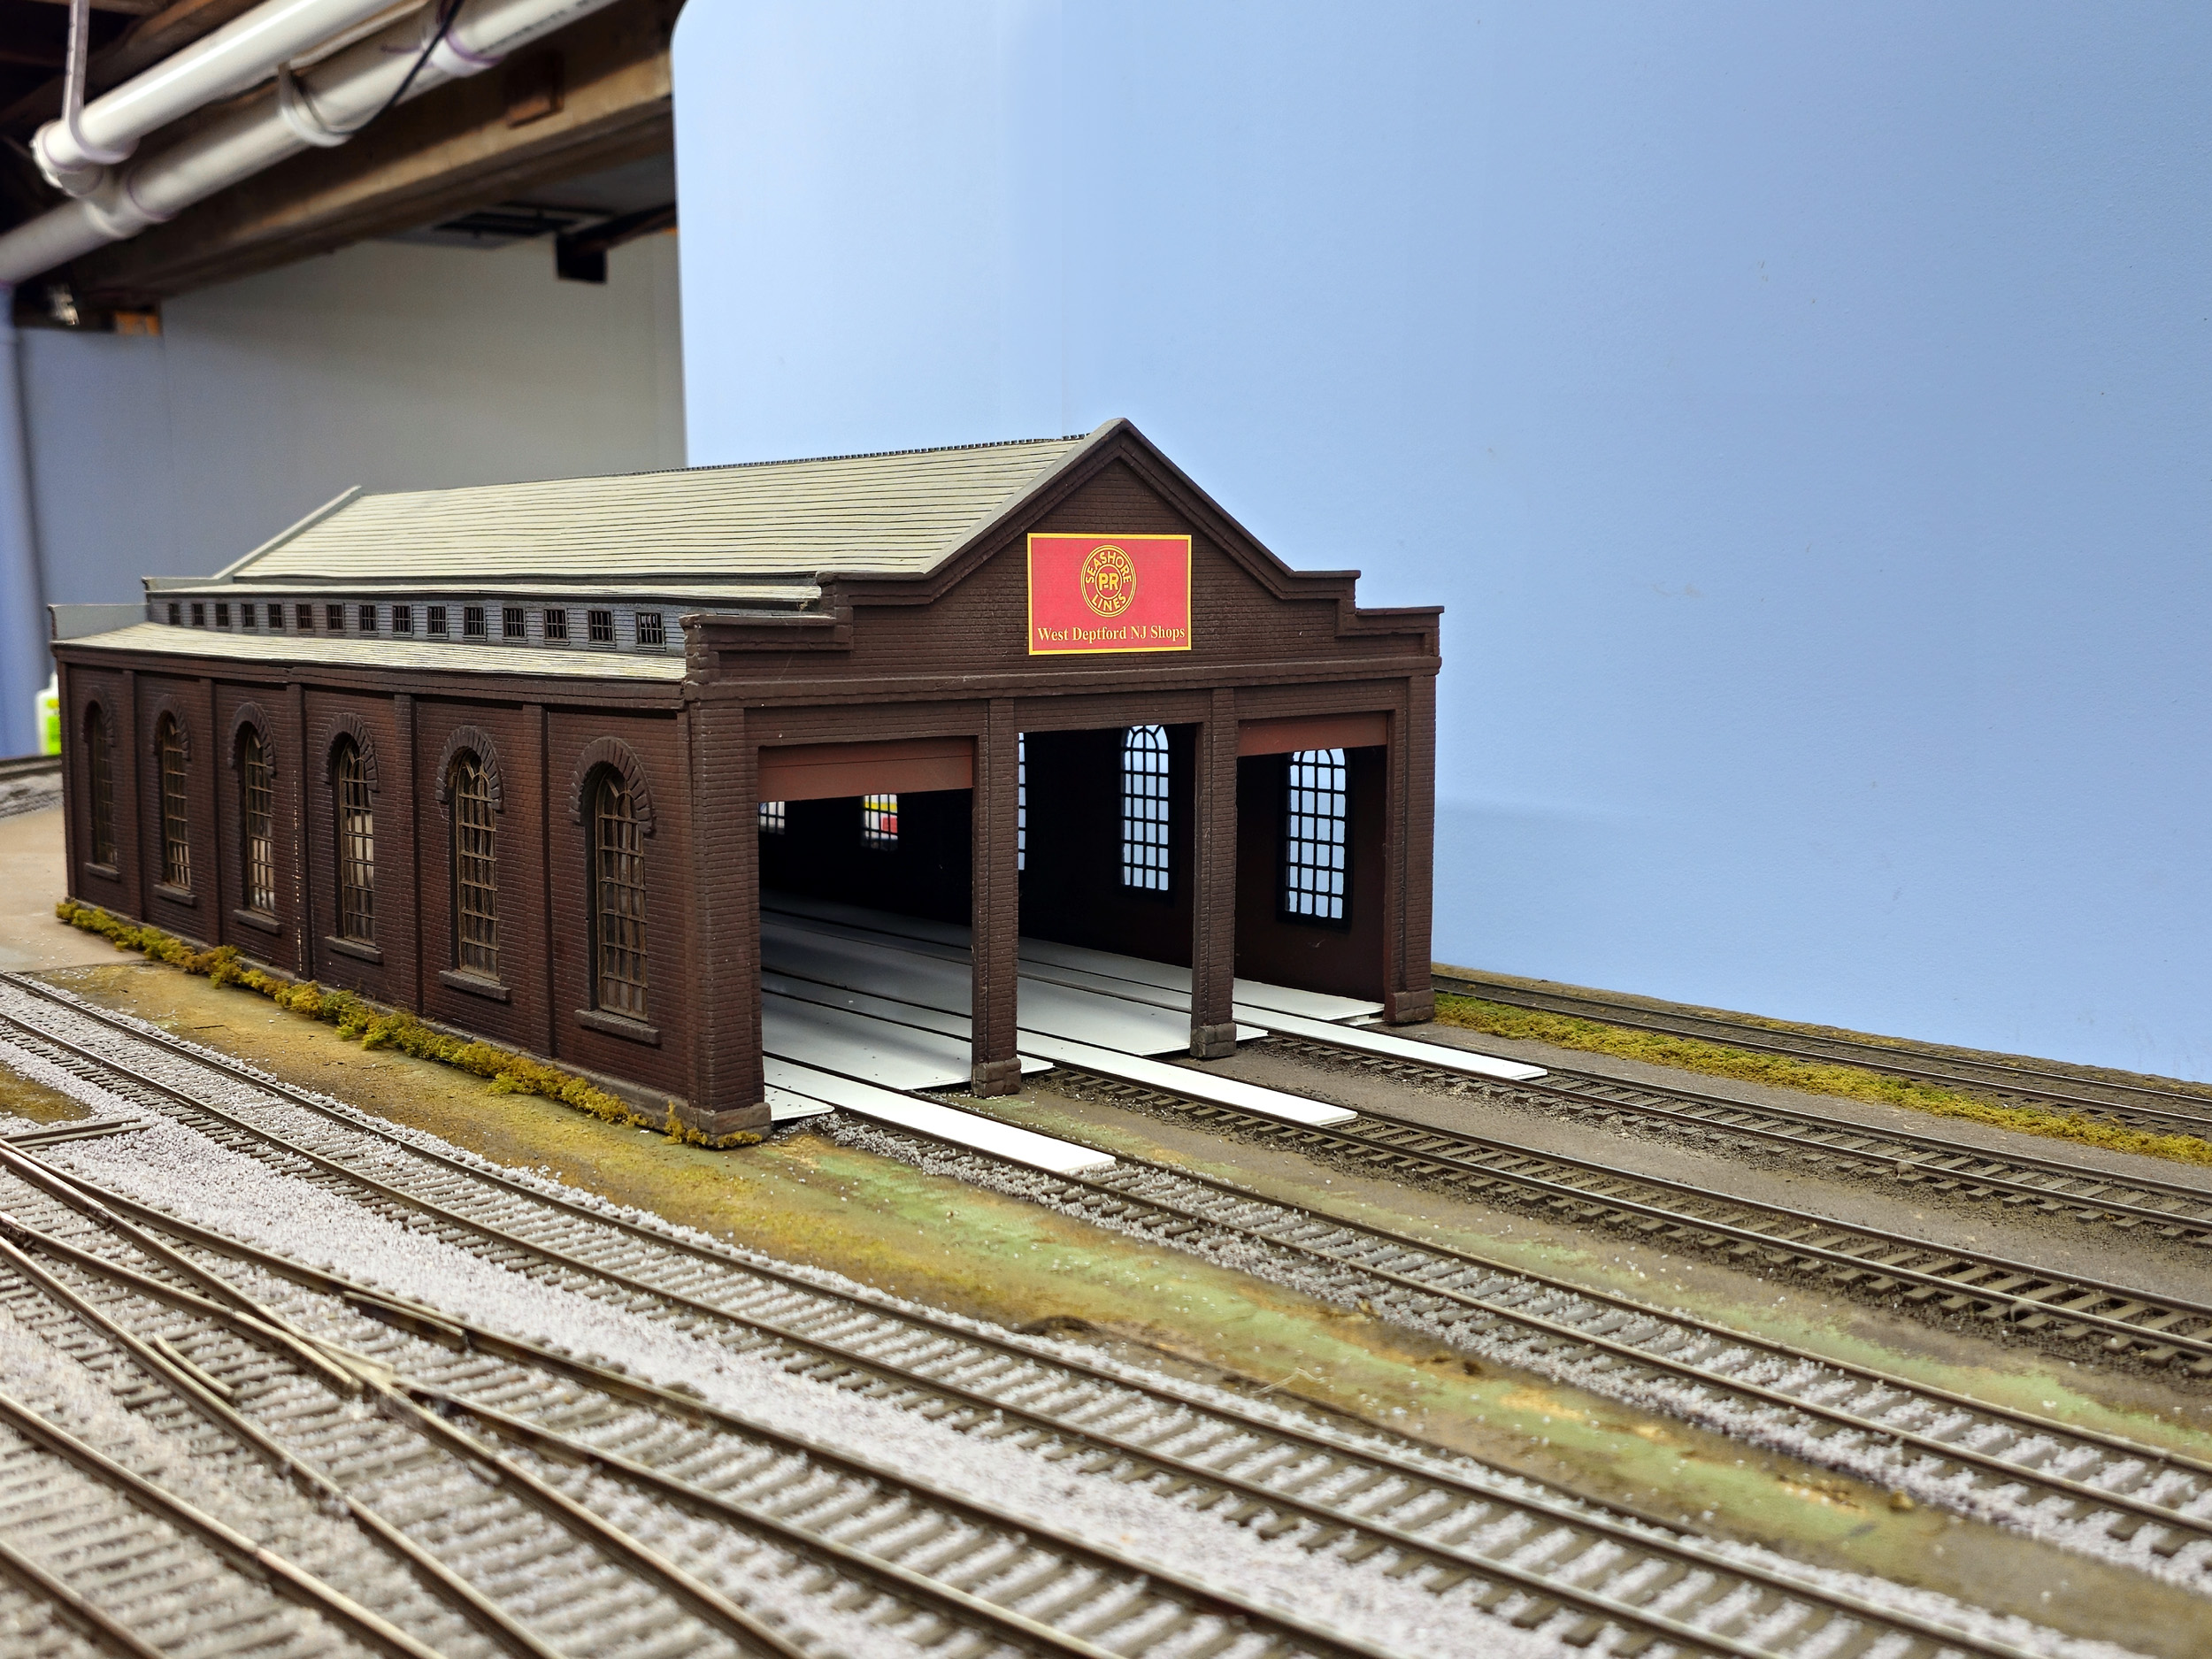
Engine
House Improvement
I am going to some significant effort to make the engine house
area a more completed area as it is a key scene on the layout. As previously
mentioned it is a Korber O Scale Trolley Barn kit. I have had it since buying
the original S Mod sections in 2006. Some things are not important for many
years until somehow they are. The back wall of the engine house had walls not
touching the ground. I was wondering how I could cover them somehow. And there
was an opening for a people door because I probably lost the door that was in
there. I started out to just design a new people door to fit the opening. But
the gaps at the bottom of the walls where still an issue that was starting to
annoy me. THEN I found this sheet of slightly embossed brick cardstock that was
just enough to fill the 3 openings.
So a new little project was born. I saw it as the 3 tracks used
to go completely through the building but the tracks were cut short and the
back wall was newly bricked off with 3 new doors added. It is always a plus if
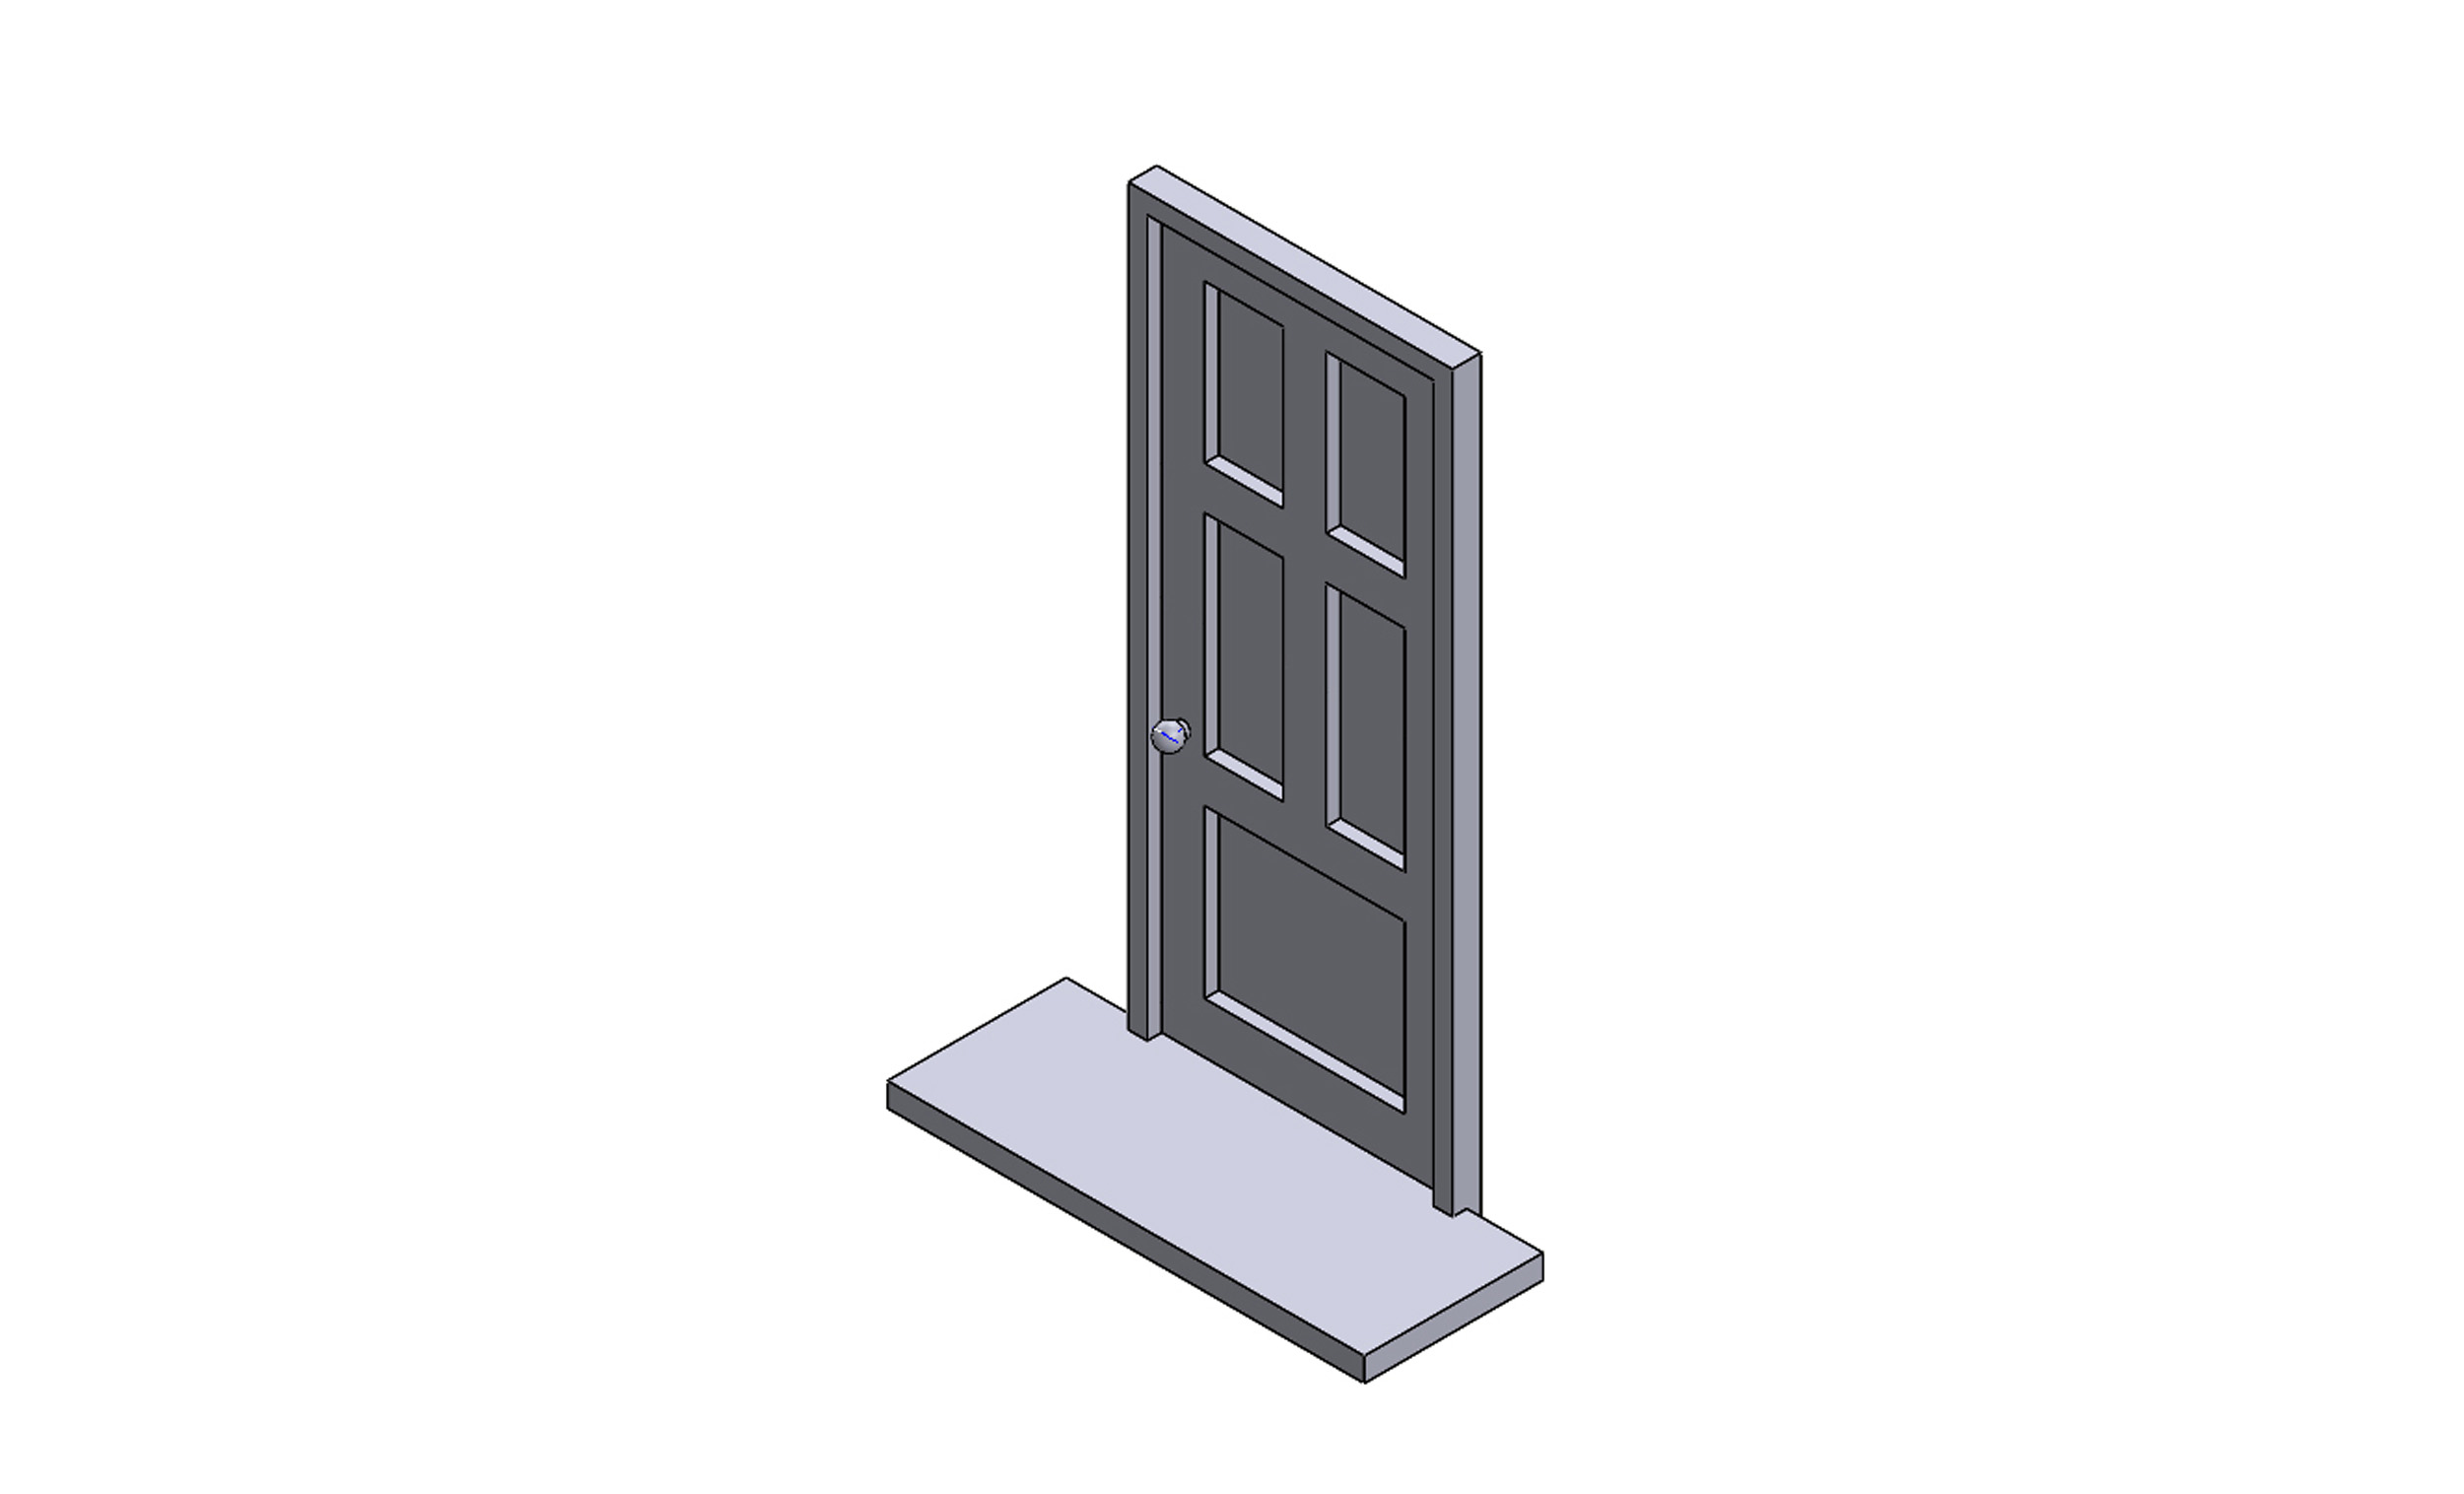
I get to design something new in Solidworks and 3D print
it. Both doors were a fast easy design and both printed really well.
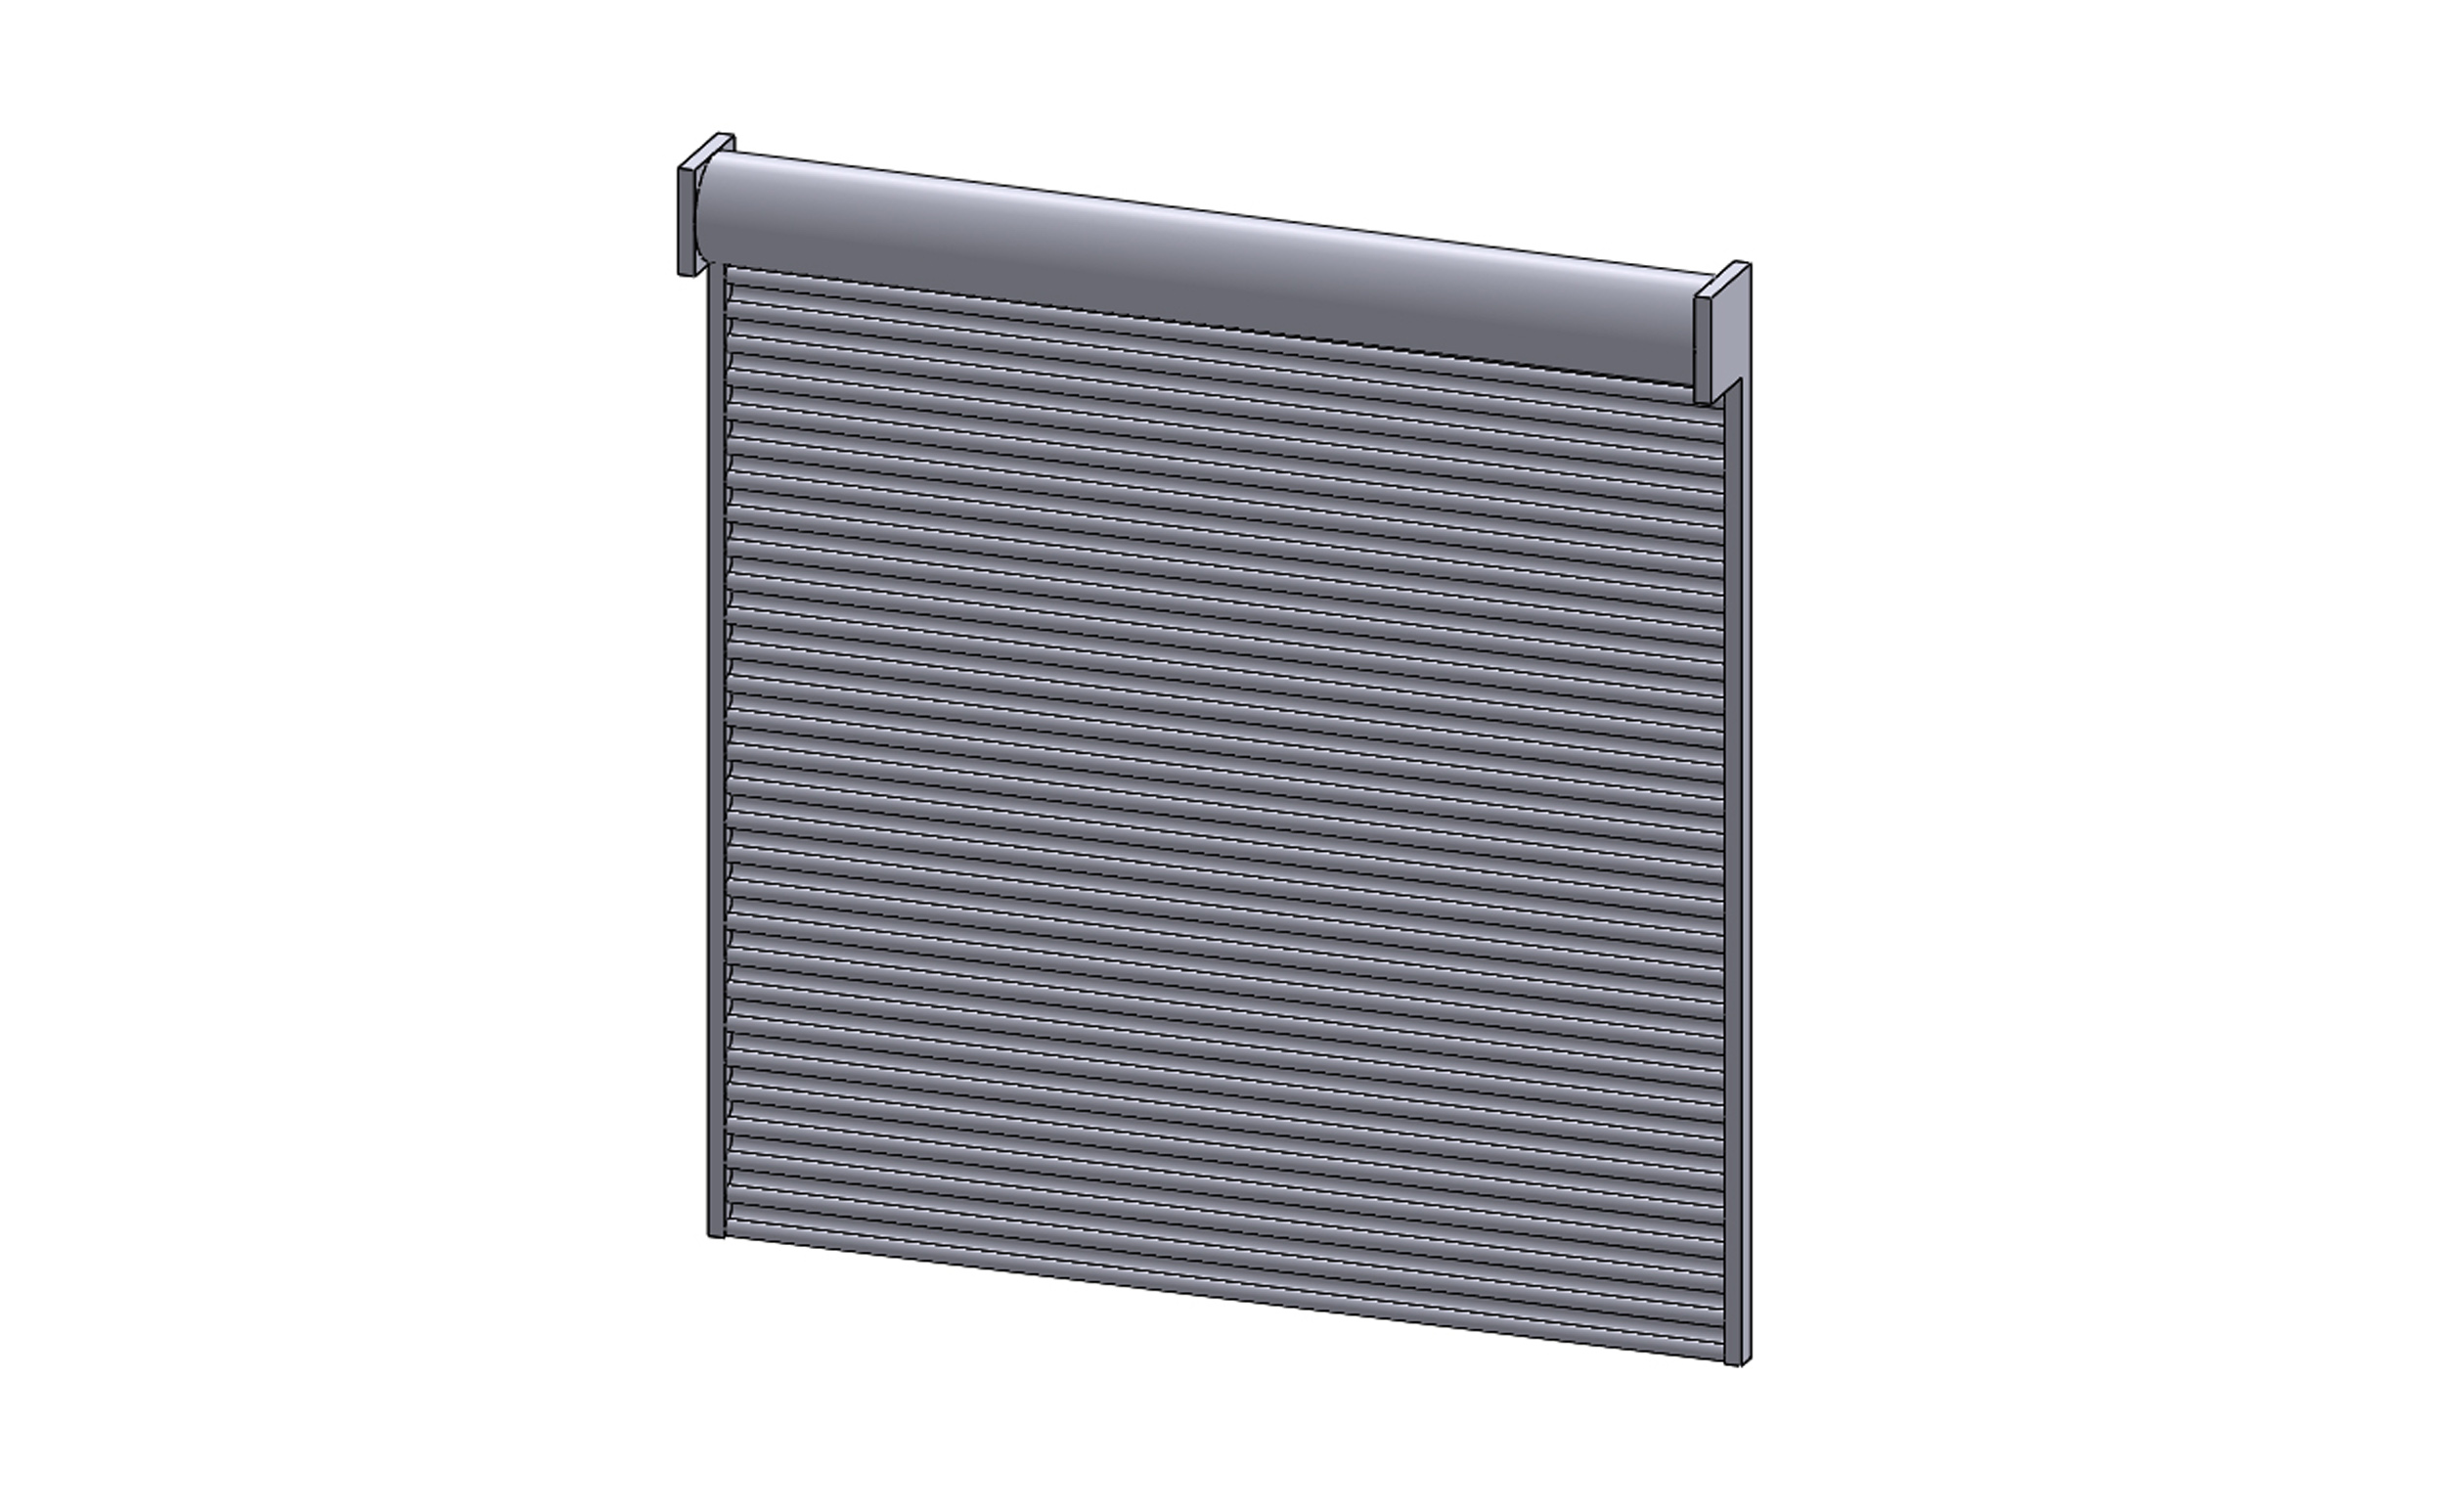
This is what it was partially showing the new track bumpers.
Were they supposed to be roll up doors?
This
is the brick sheet material.
Screen
shots from Solidworks.
The new end wall completed. It is all rather bright compared to the rest of the building but that is fine with me. It is a recently completed renovation! I see a blacktop parking lot back here. I will get some Gooseneck lamps to go over all doors in the front and back. I will make some new signs as well.


Revised
5-29-25
All photos and content © Lanes Trains 2005-2026