|
|
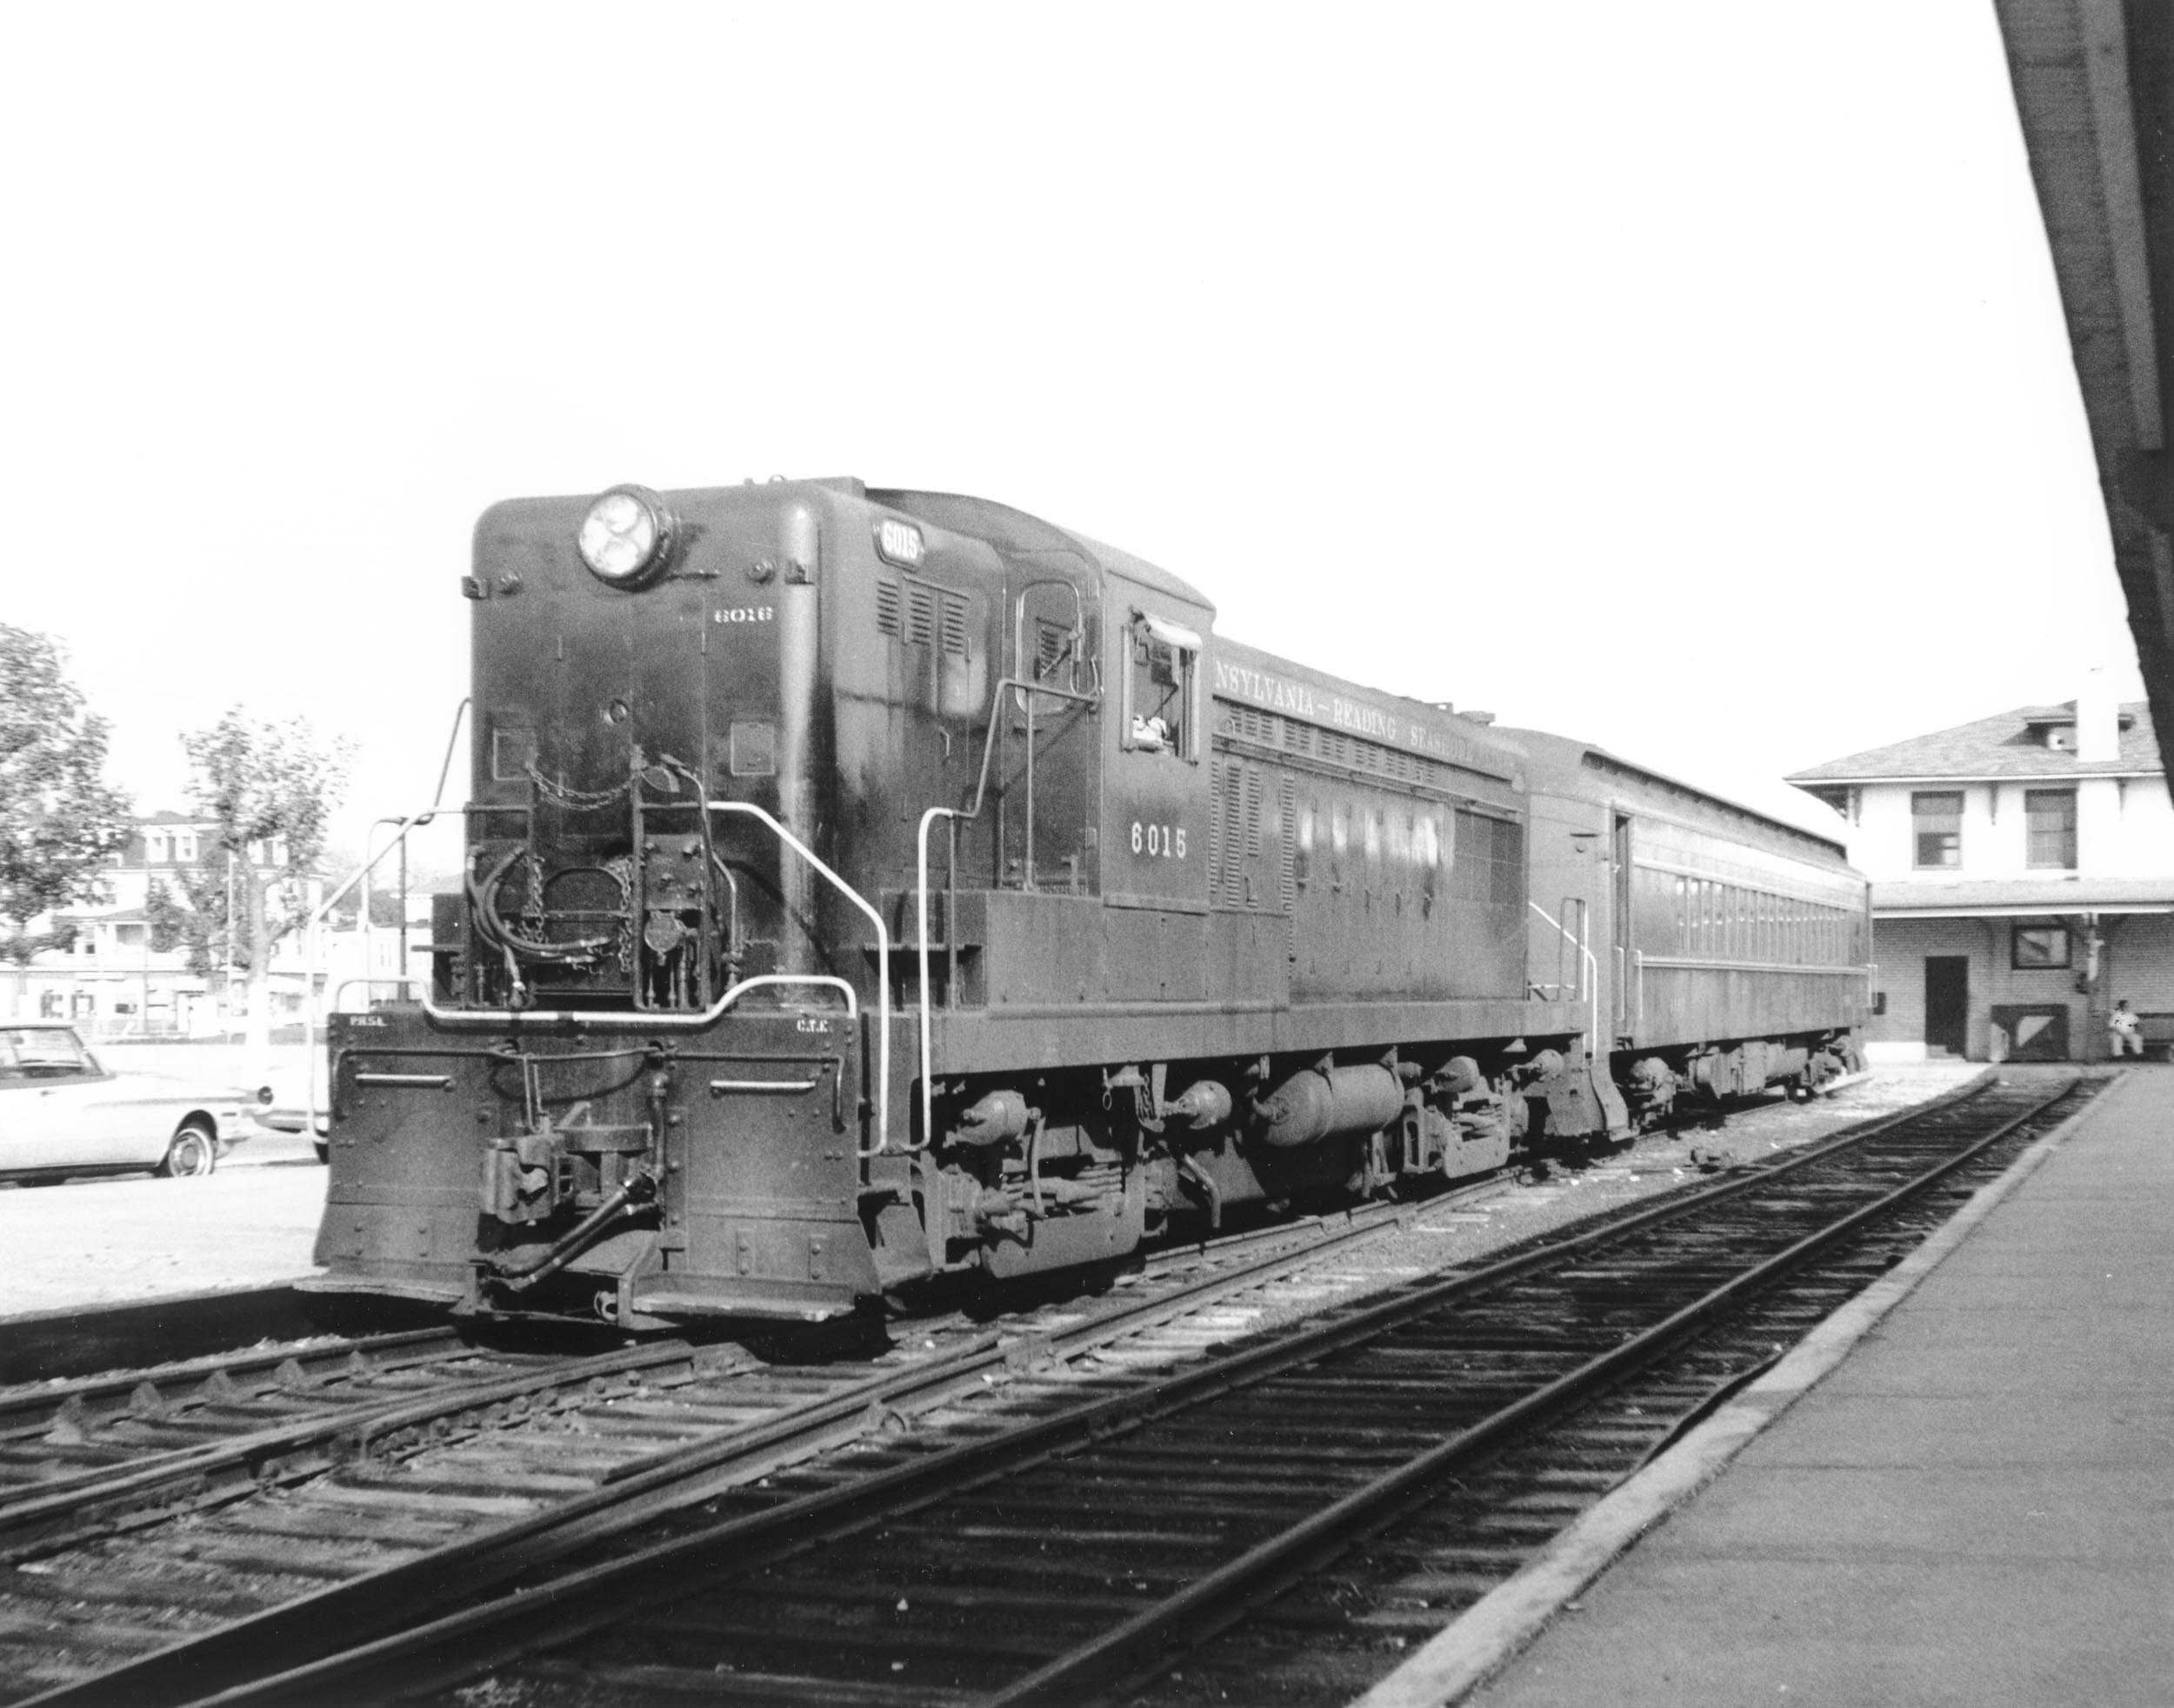
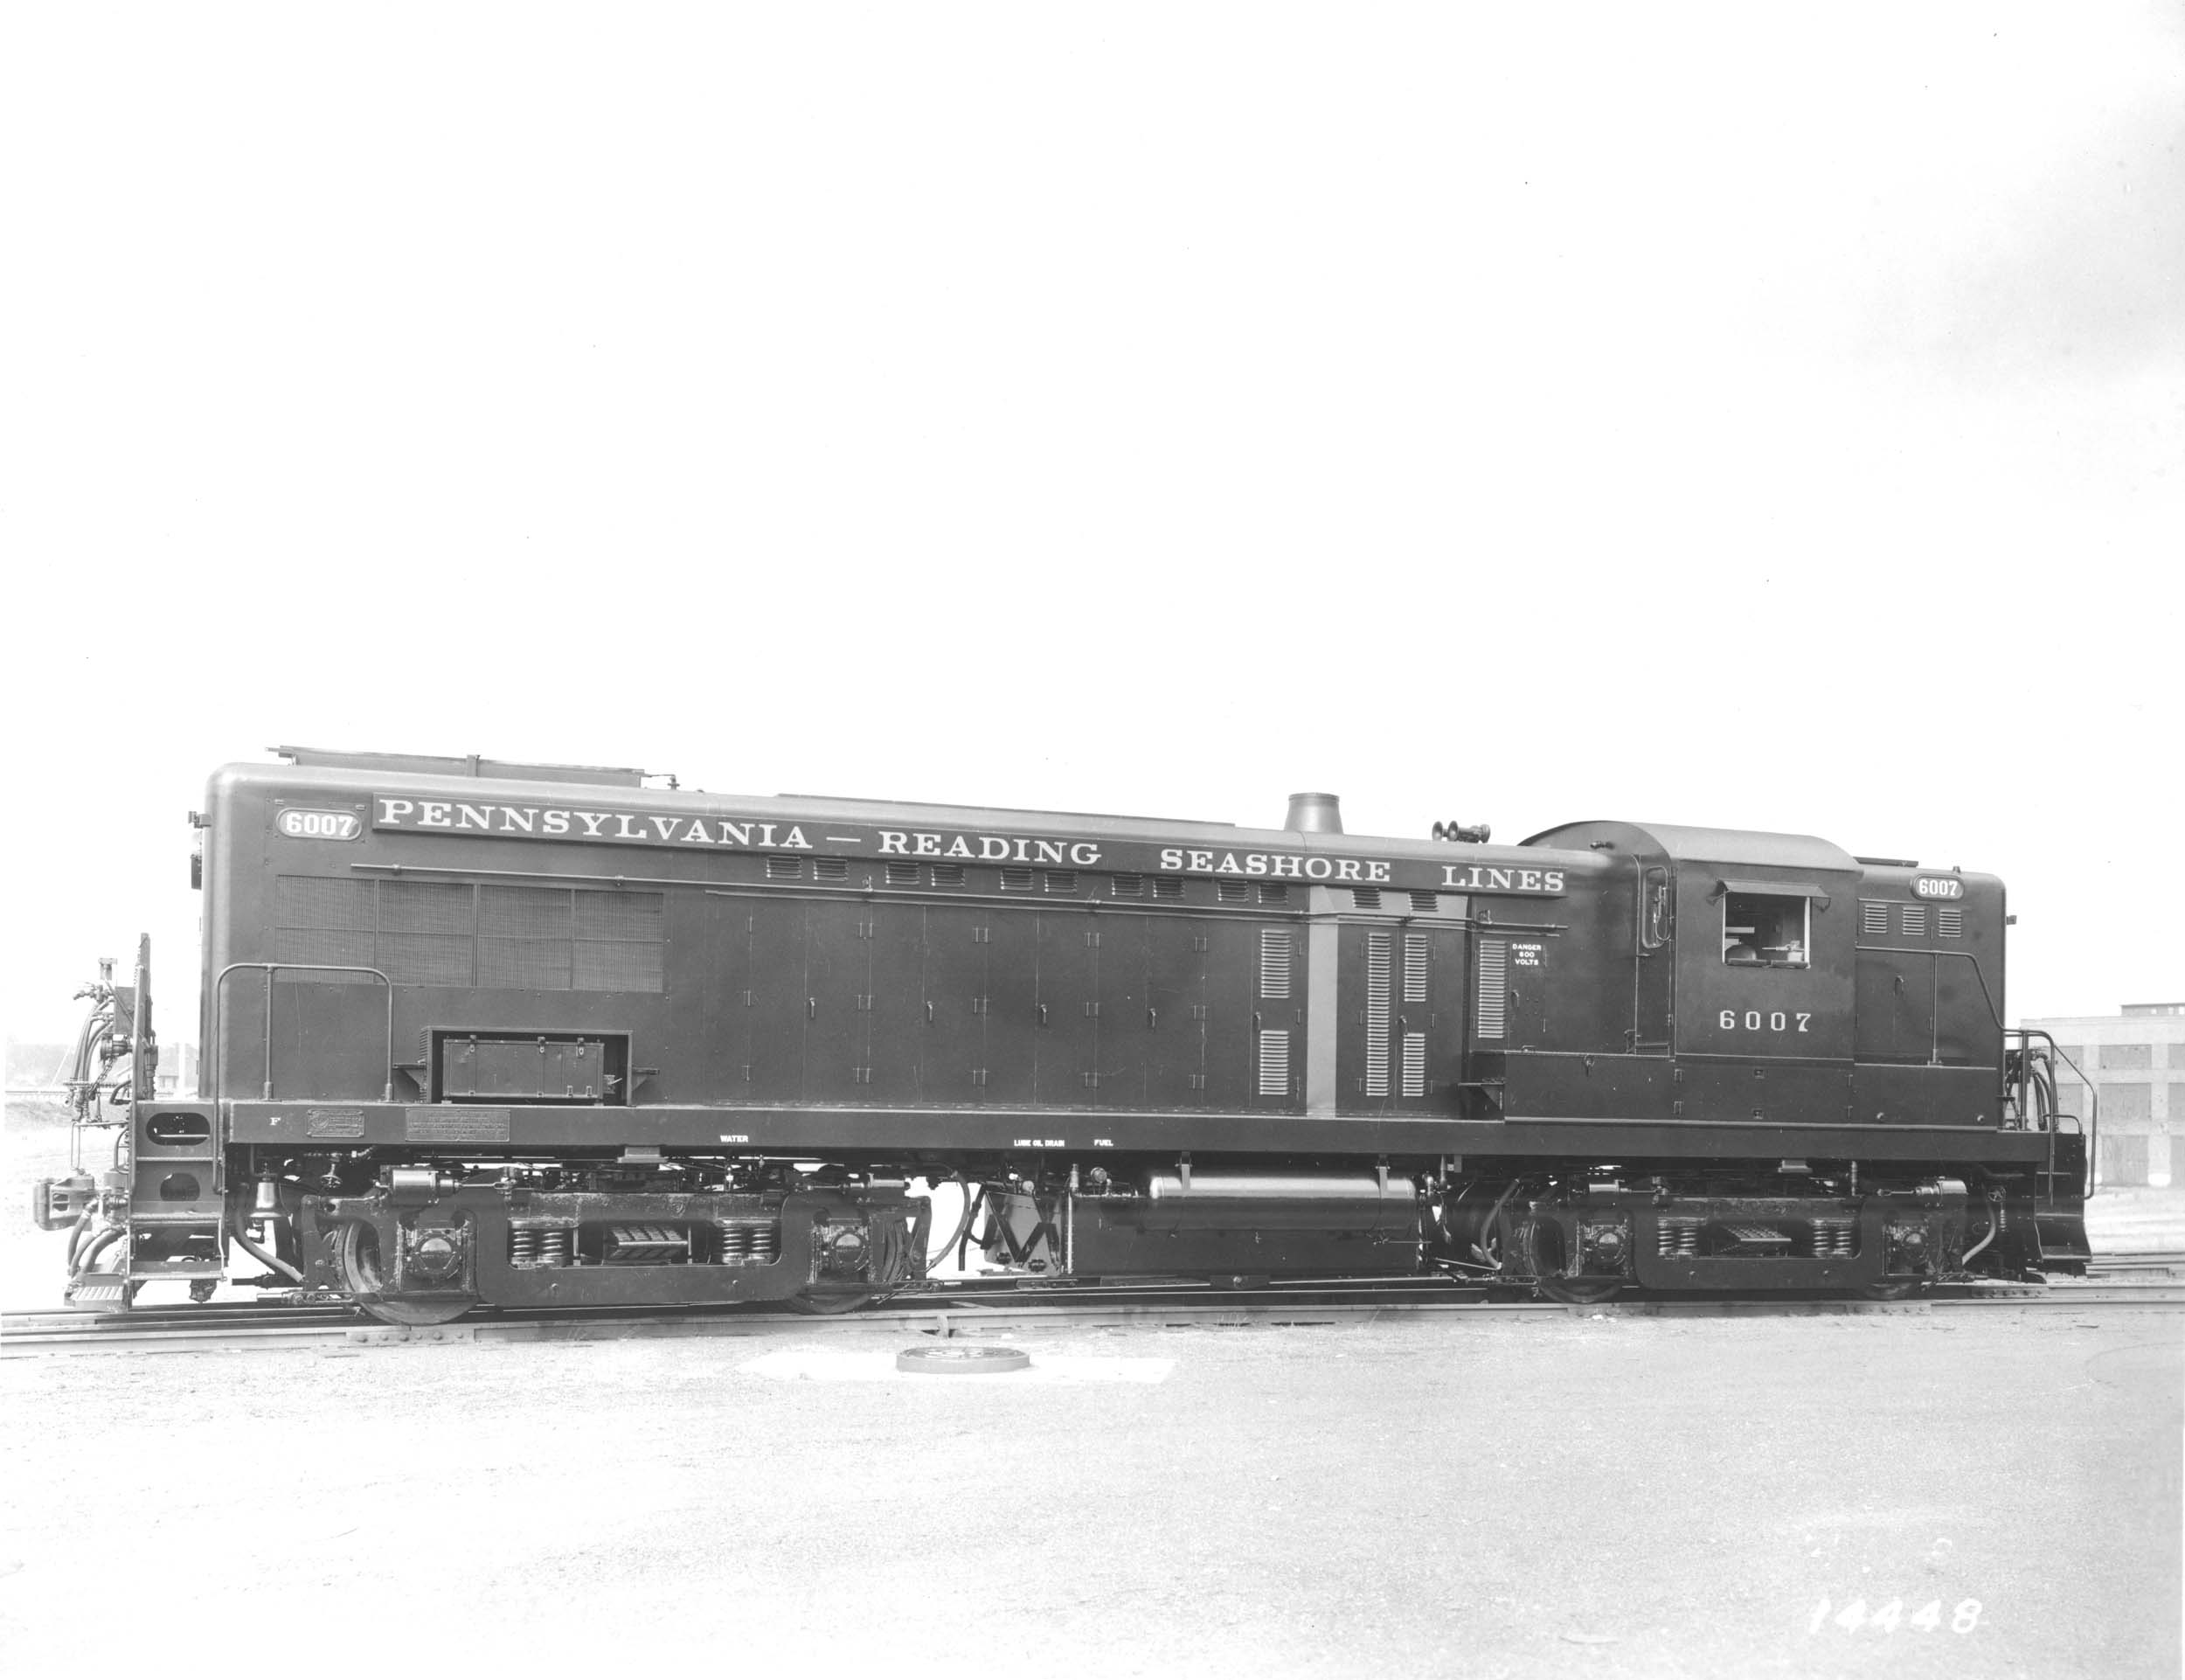
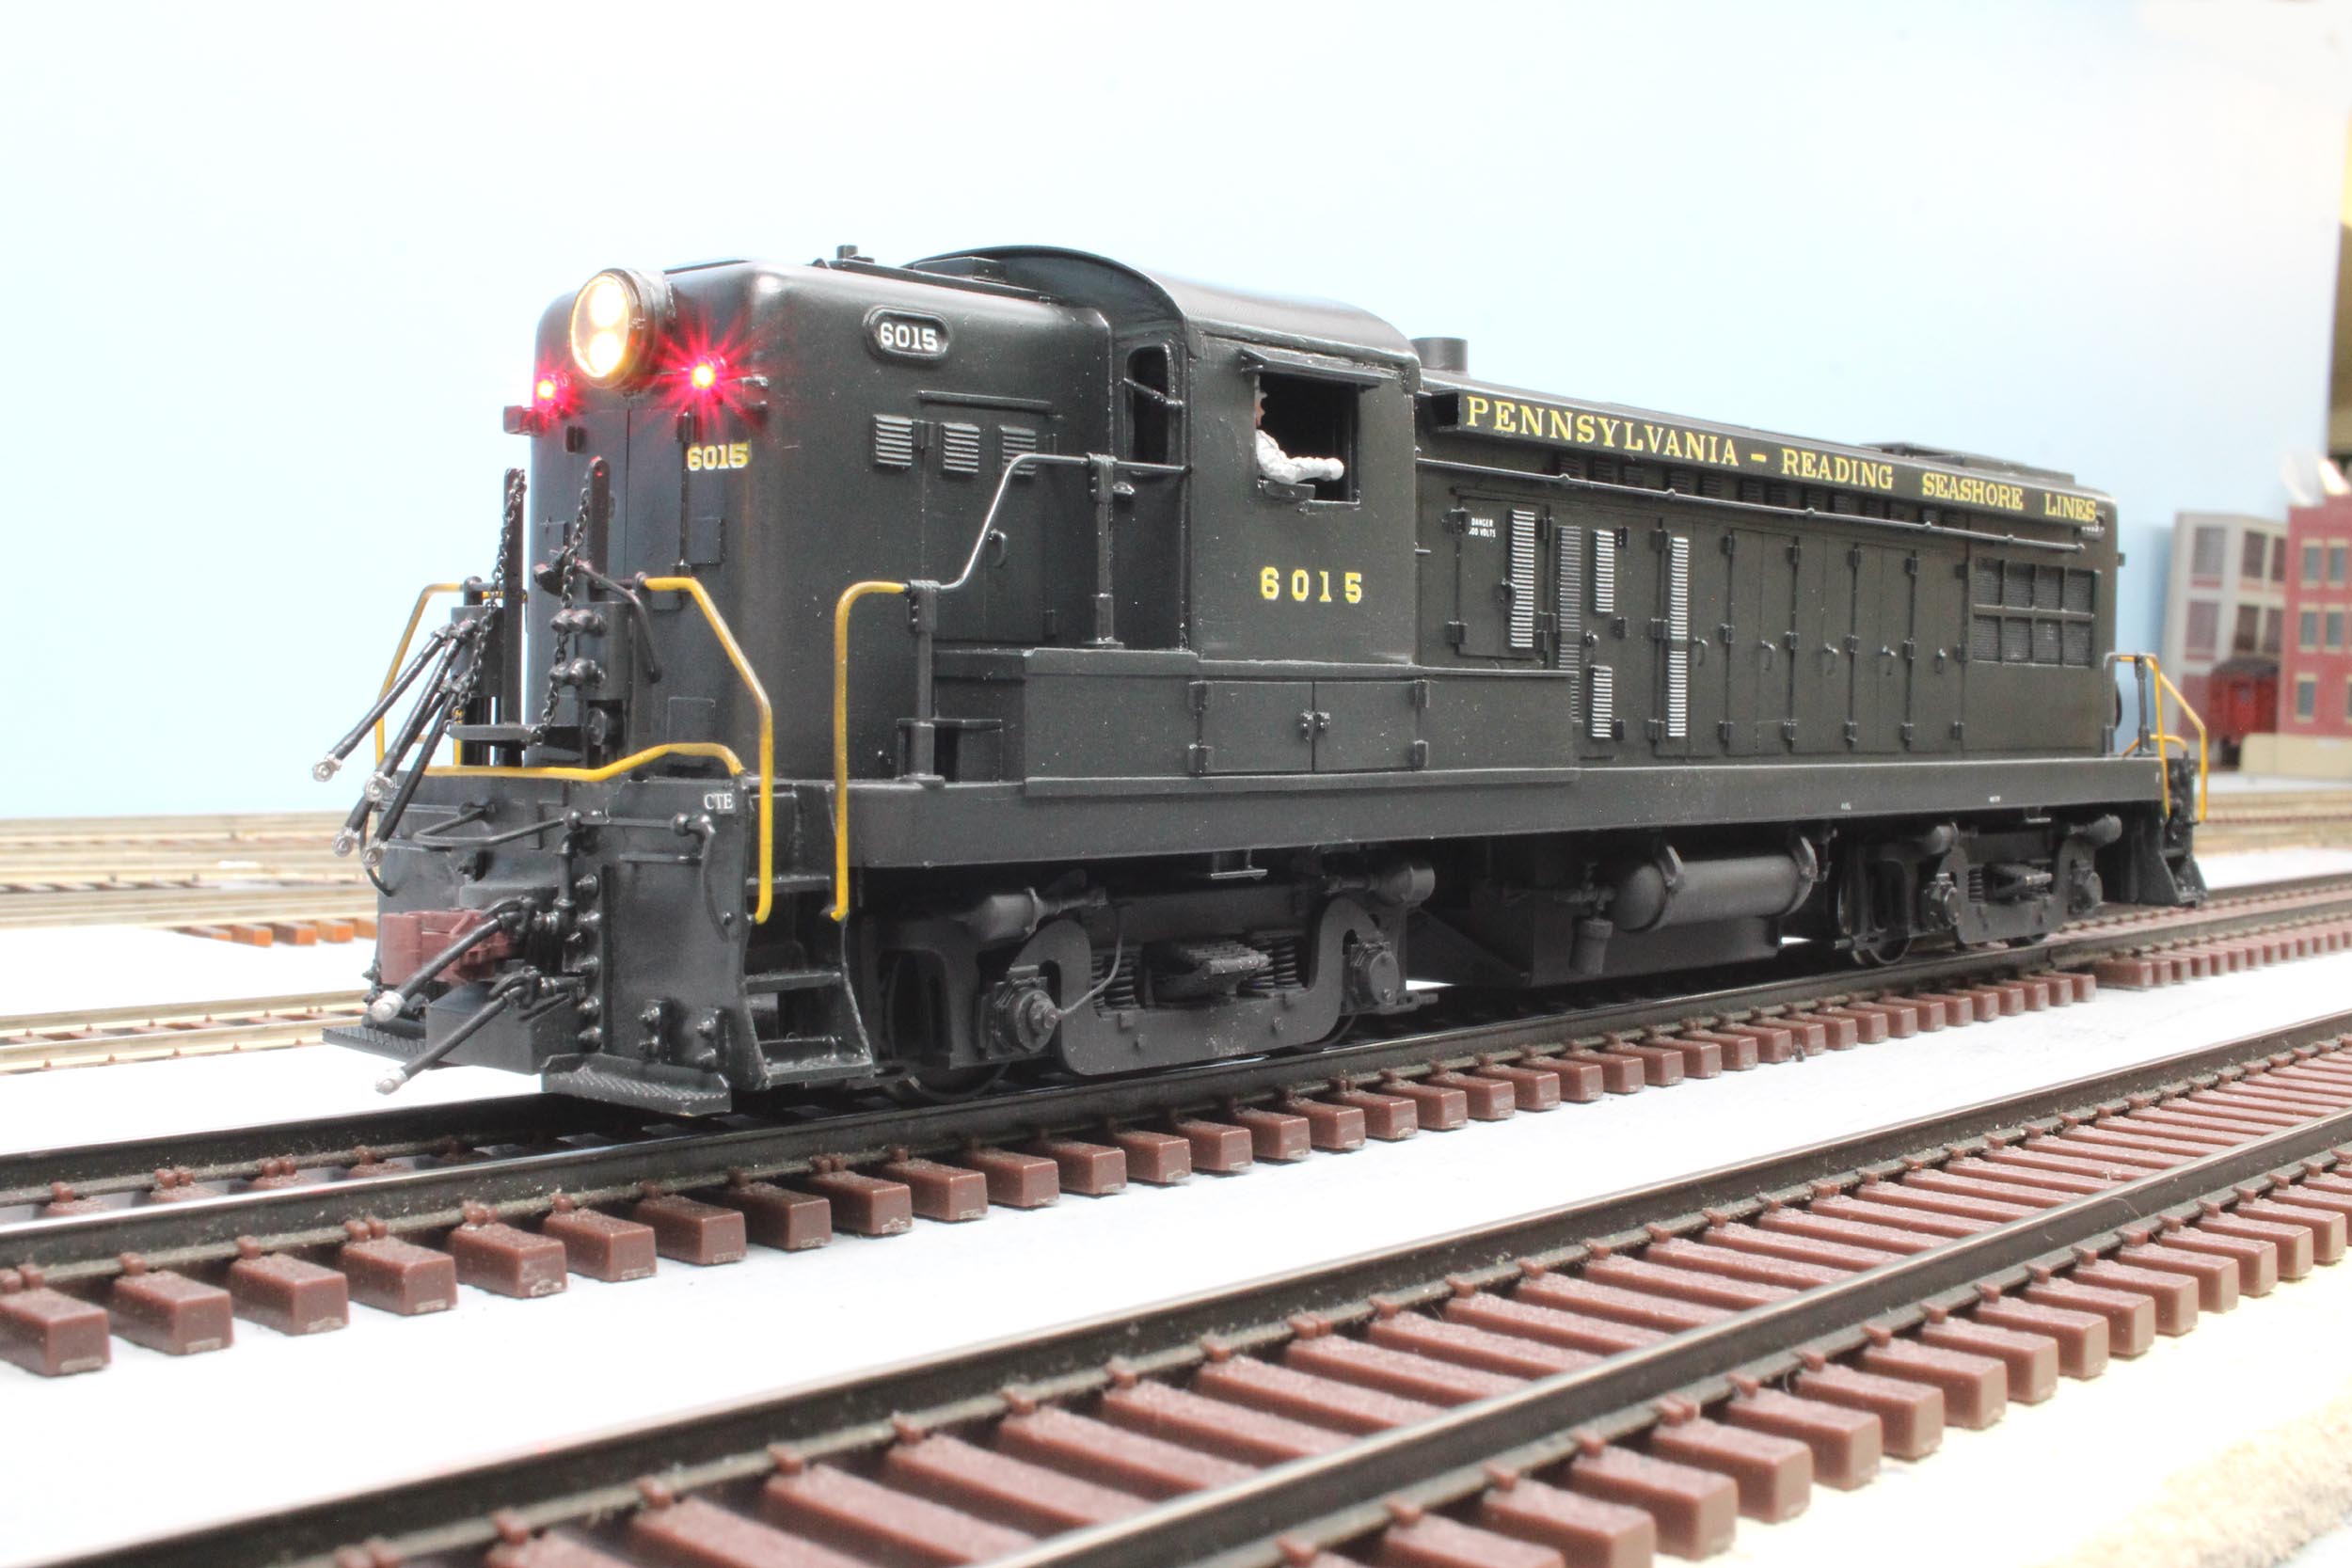
PRSL Baldwin AS16 # 6015 A One Of A Kind S Scale Model This is the “poster child” of
my modeling procrastination habits taken to an extreme level here. As seen
below, which is a bit more blog than my usual project page, I have worked on
this model numerous times since 1993 but have never completed it. This loco
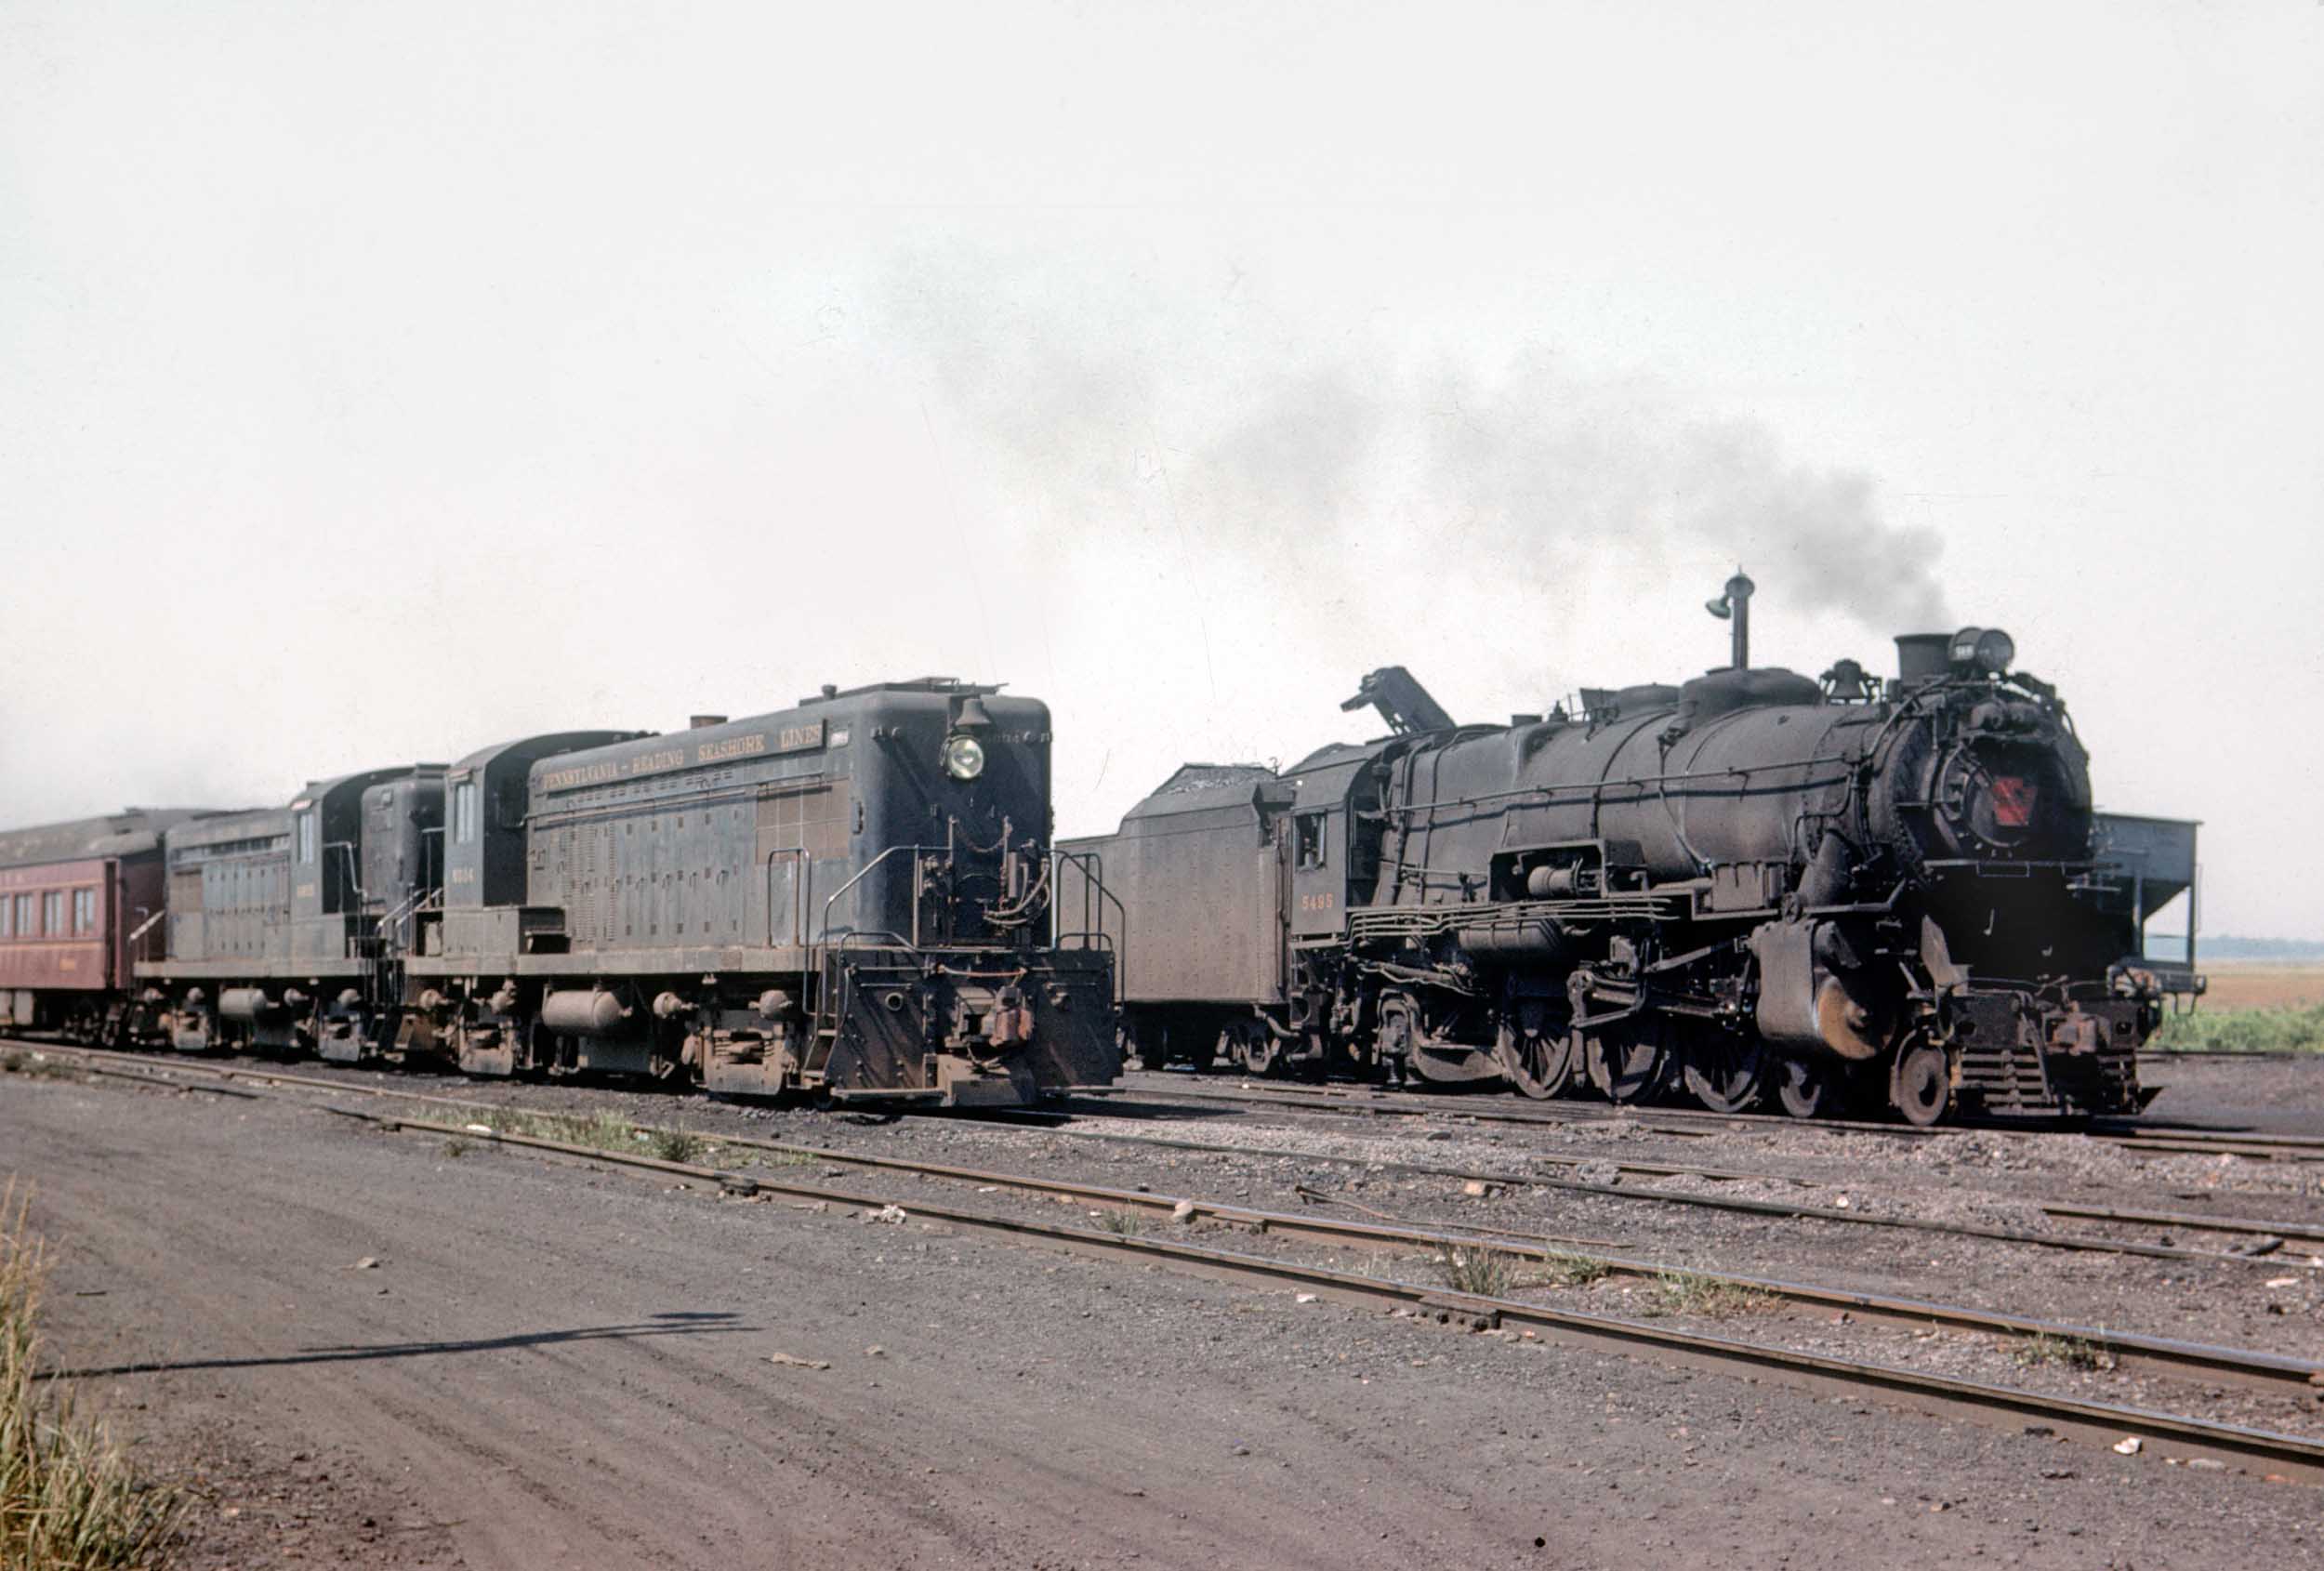
maybe be second in terms of time spent making it only to my K4 5495, which also ran on the PRSL. Starting
on 12-10-17 is the LAST time it will be worked on. It will be completed this
time.
I
won about 20 PRSL Builders Photo copy negatives on eBay. Builders Photos are
my driving inspiration. It is all
there to be seen and modeled. Since I model the 1956-57 era my model would
have to be back dated and completed as shown in the Builders Photos. Still
here are great variances in details especially at the loco got older and was
shopped.
|
|


I have kept much of my old text in place even though it is
obviously very wrong as seen by the 10+ year old dates.
The surviving old text is in black.
But I have inserted more and newer photos, making the timeline
slightly off in places. Some older photos are not the best, working with my
first or second digital camera in 2007. Note the evolution of electronics.
There have been 4 decoders used over the years.
How I Got The
AS16 Shell
I got
this locomotive as a shell only. I
acquired it in a “no holds barred” buy and trade deal about in about 1993. It
was scratchbuilt by a contract builder whose name escapes me at this point. It
took him 5 years to finish it and the intended customer
died waiting
for it! The builder was a HO modeler so
the S Scale shell was of no use to him. It wound up in the hands of a friend
who completely and totally taunted me by literally waving it in front of
my face and said I would NEVER own it. Even though this was well before
my PRSL interest really happened, I knew it was 1 of a kind and I wanted it. I
offered to buy the shell only on the spot for $500.00. No,
it was not for sale, not ever, and especially
not to me. It drove me absolutely
NUTS which was the intention. Well, never actually did come one day about 2
years later when I found something for sale that HE really wanted, an Overland
SD40-2 with Anti-Climbers (Production was about 20 models). I fully returned
the abuse in spades and was so ruthless that I actually got the shell
for free by the
time the trading and buying was done! I am not overly proud of it, but I got
the shell and this story is one of my all time favorites.
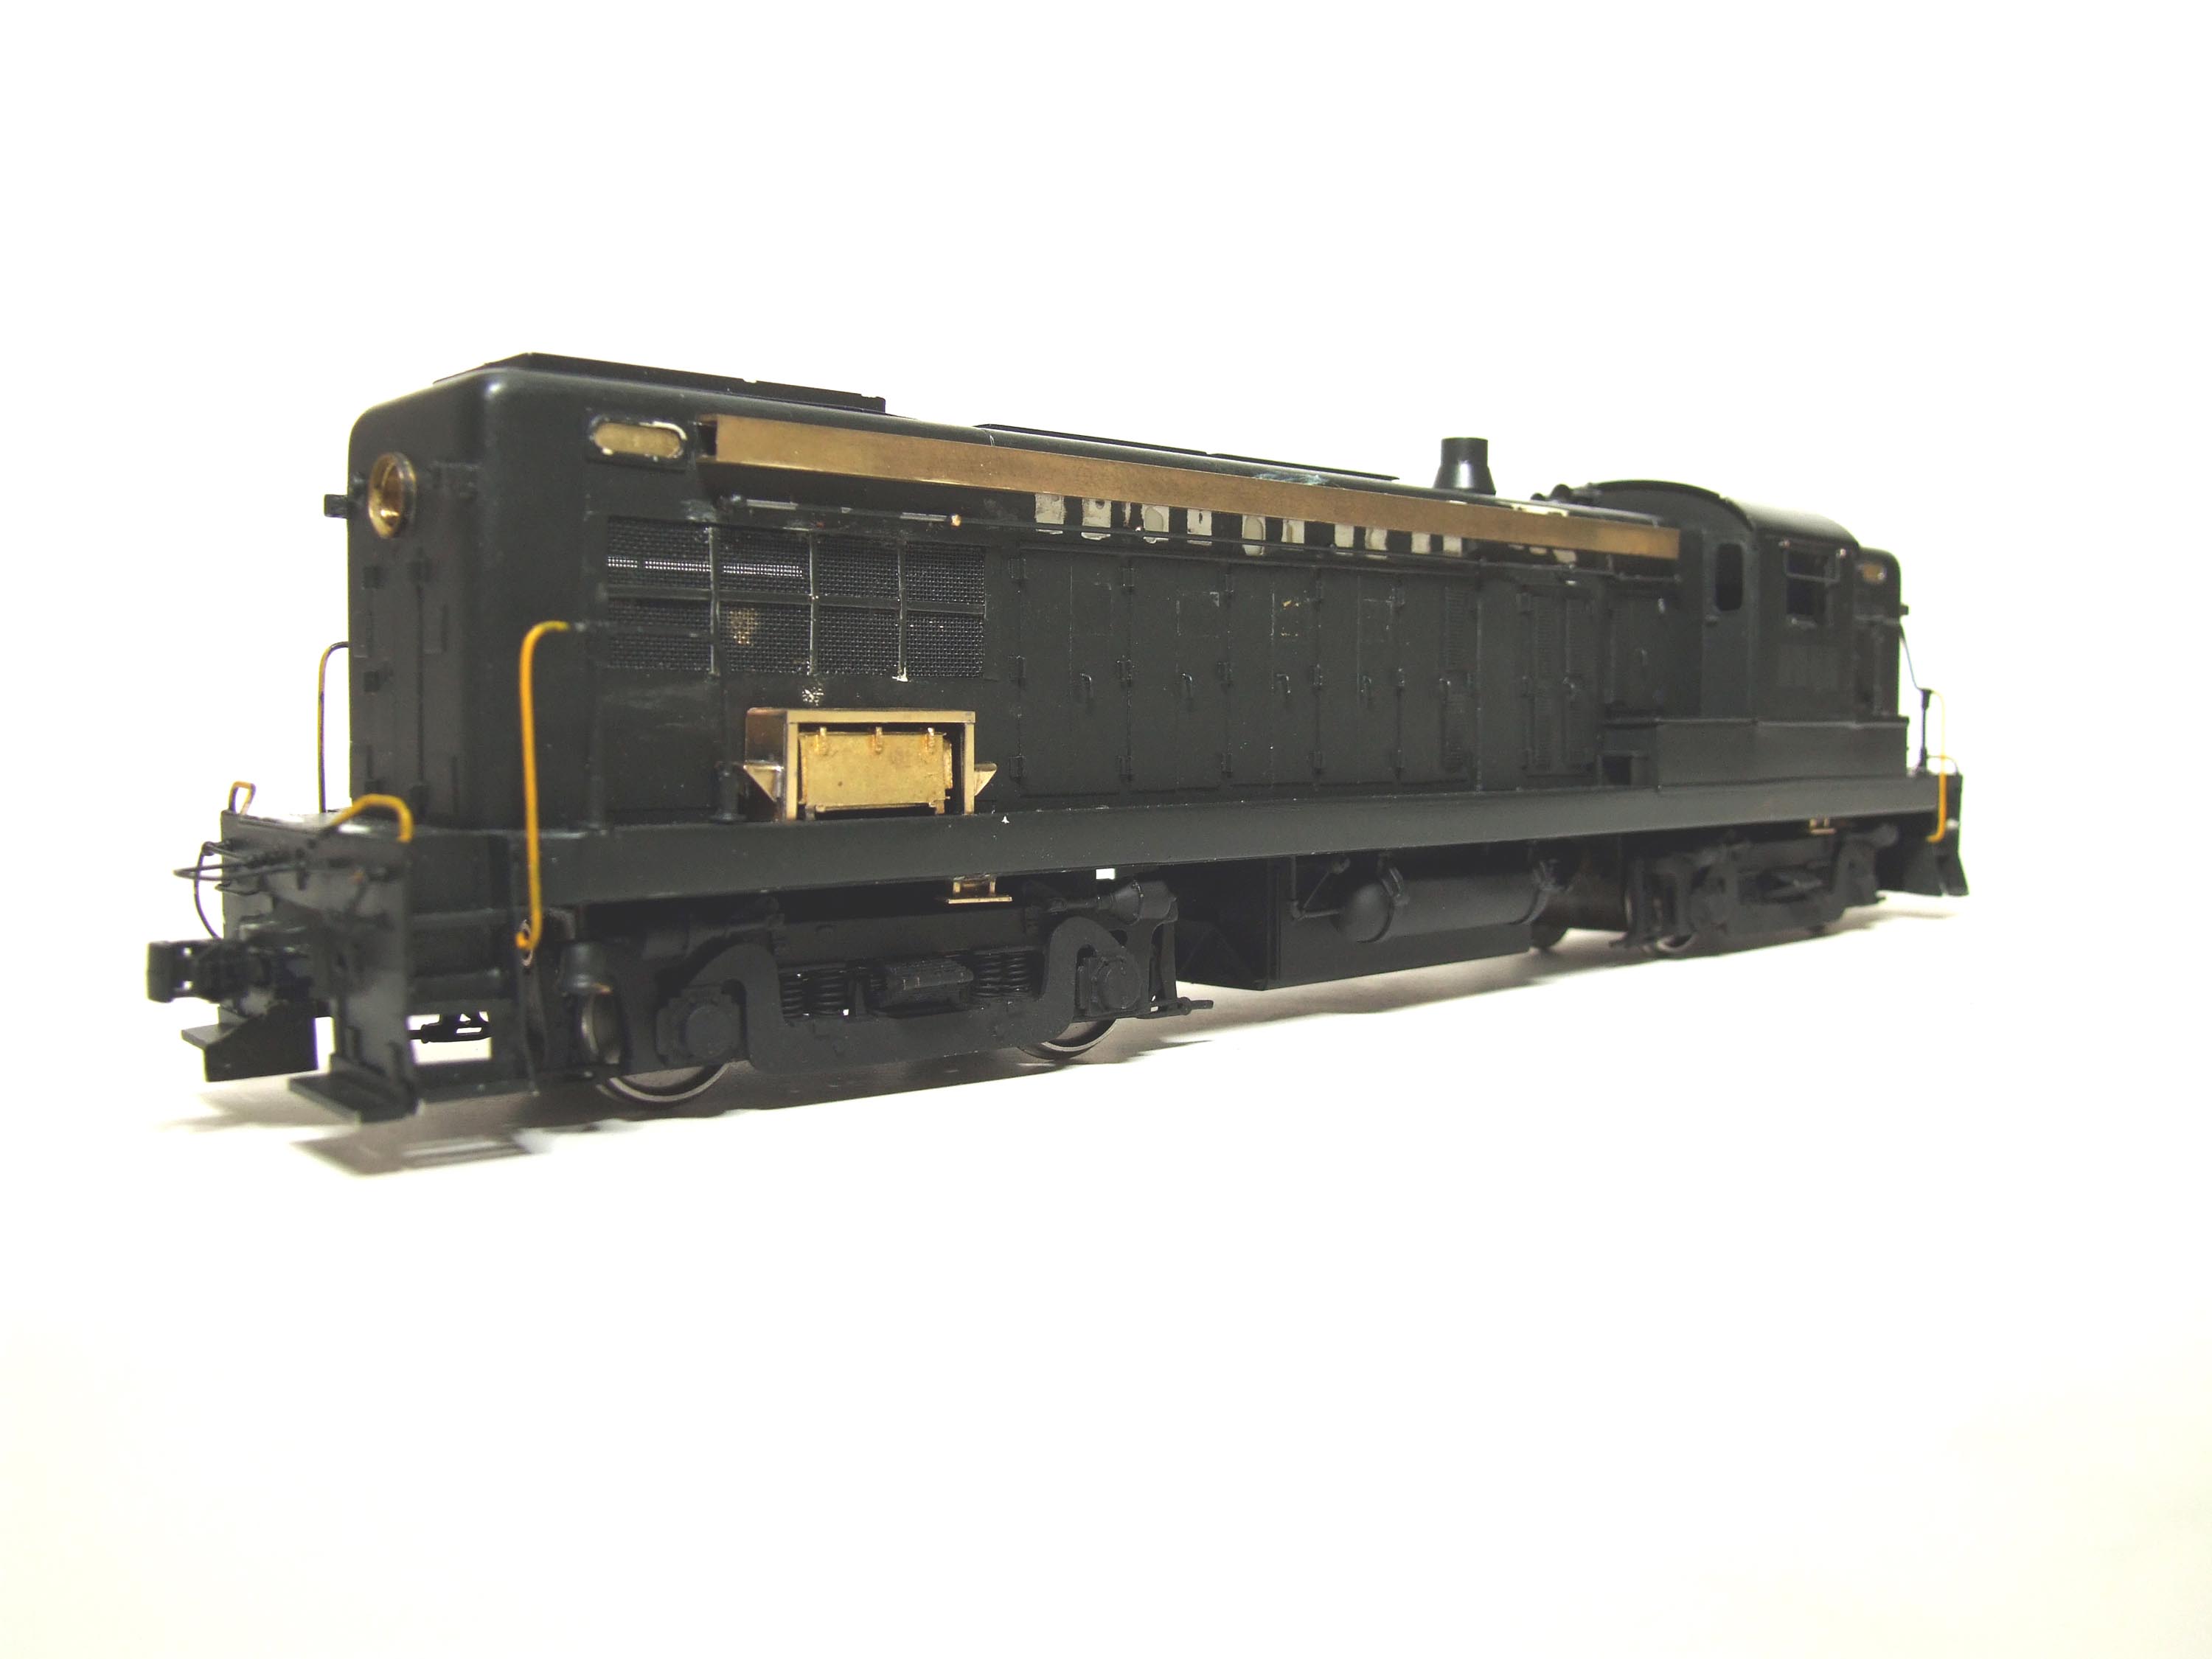
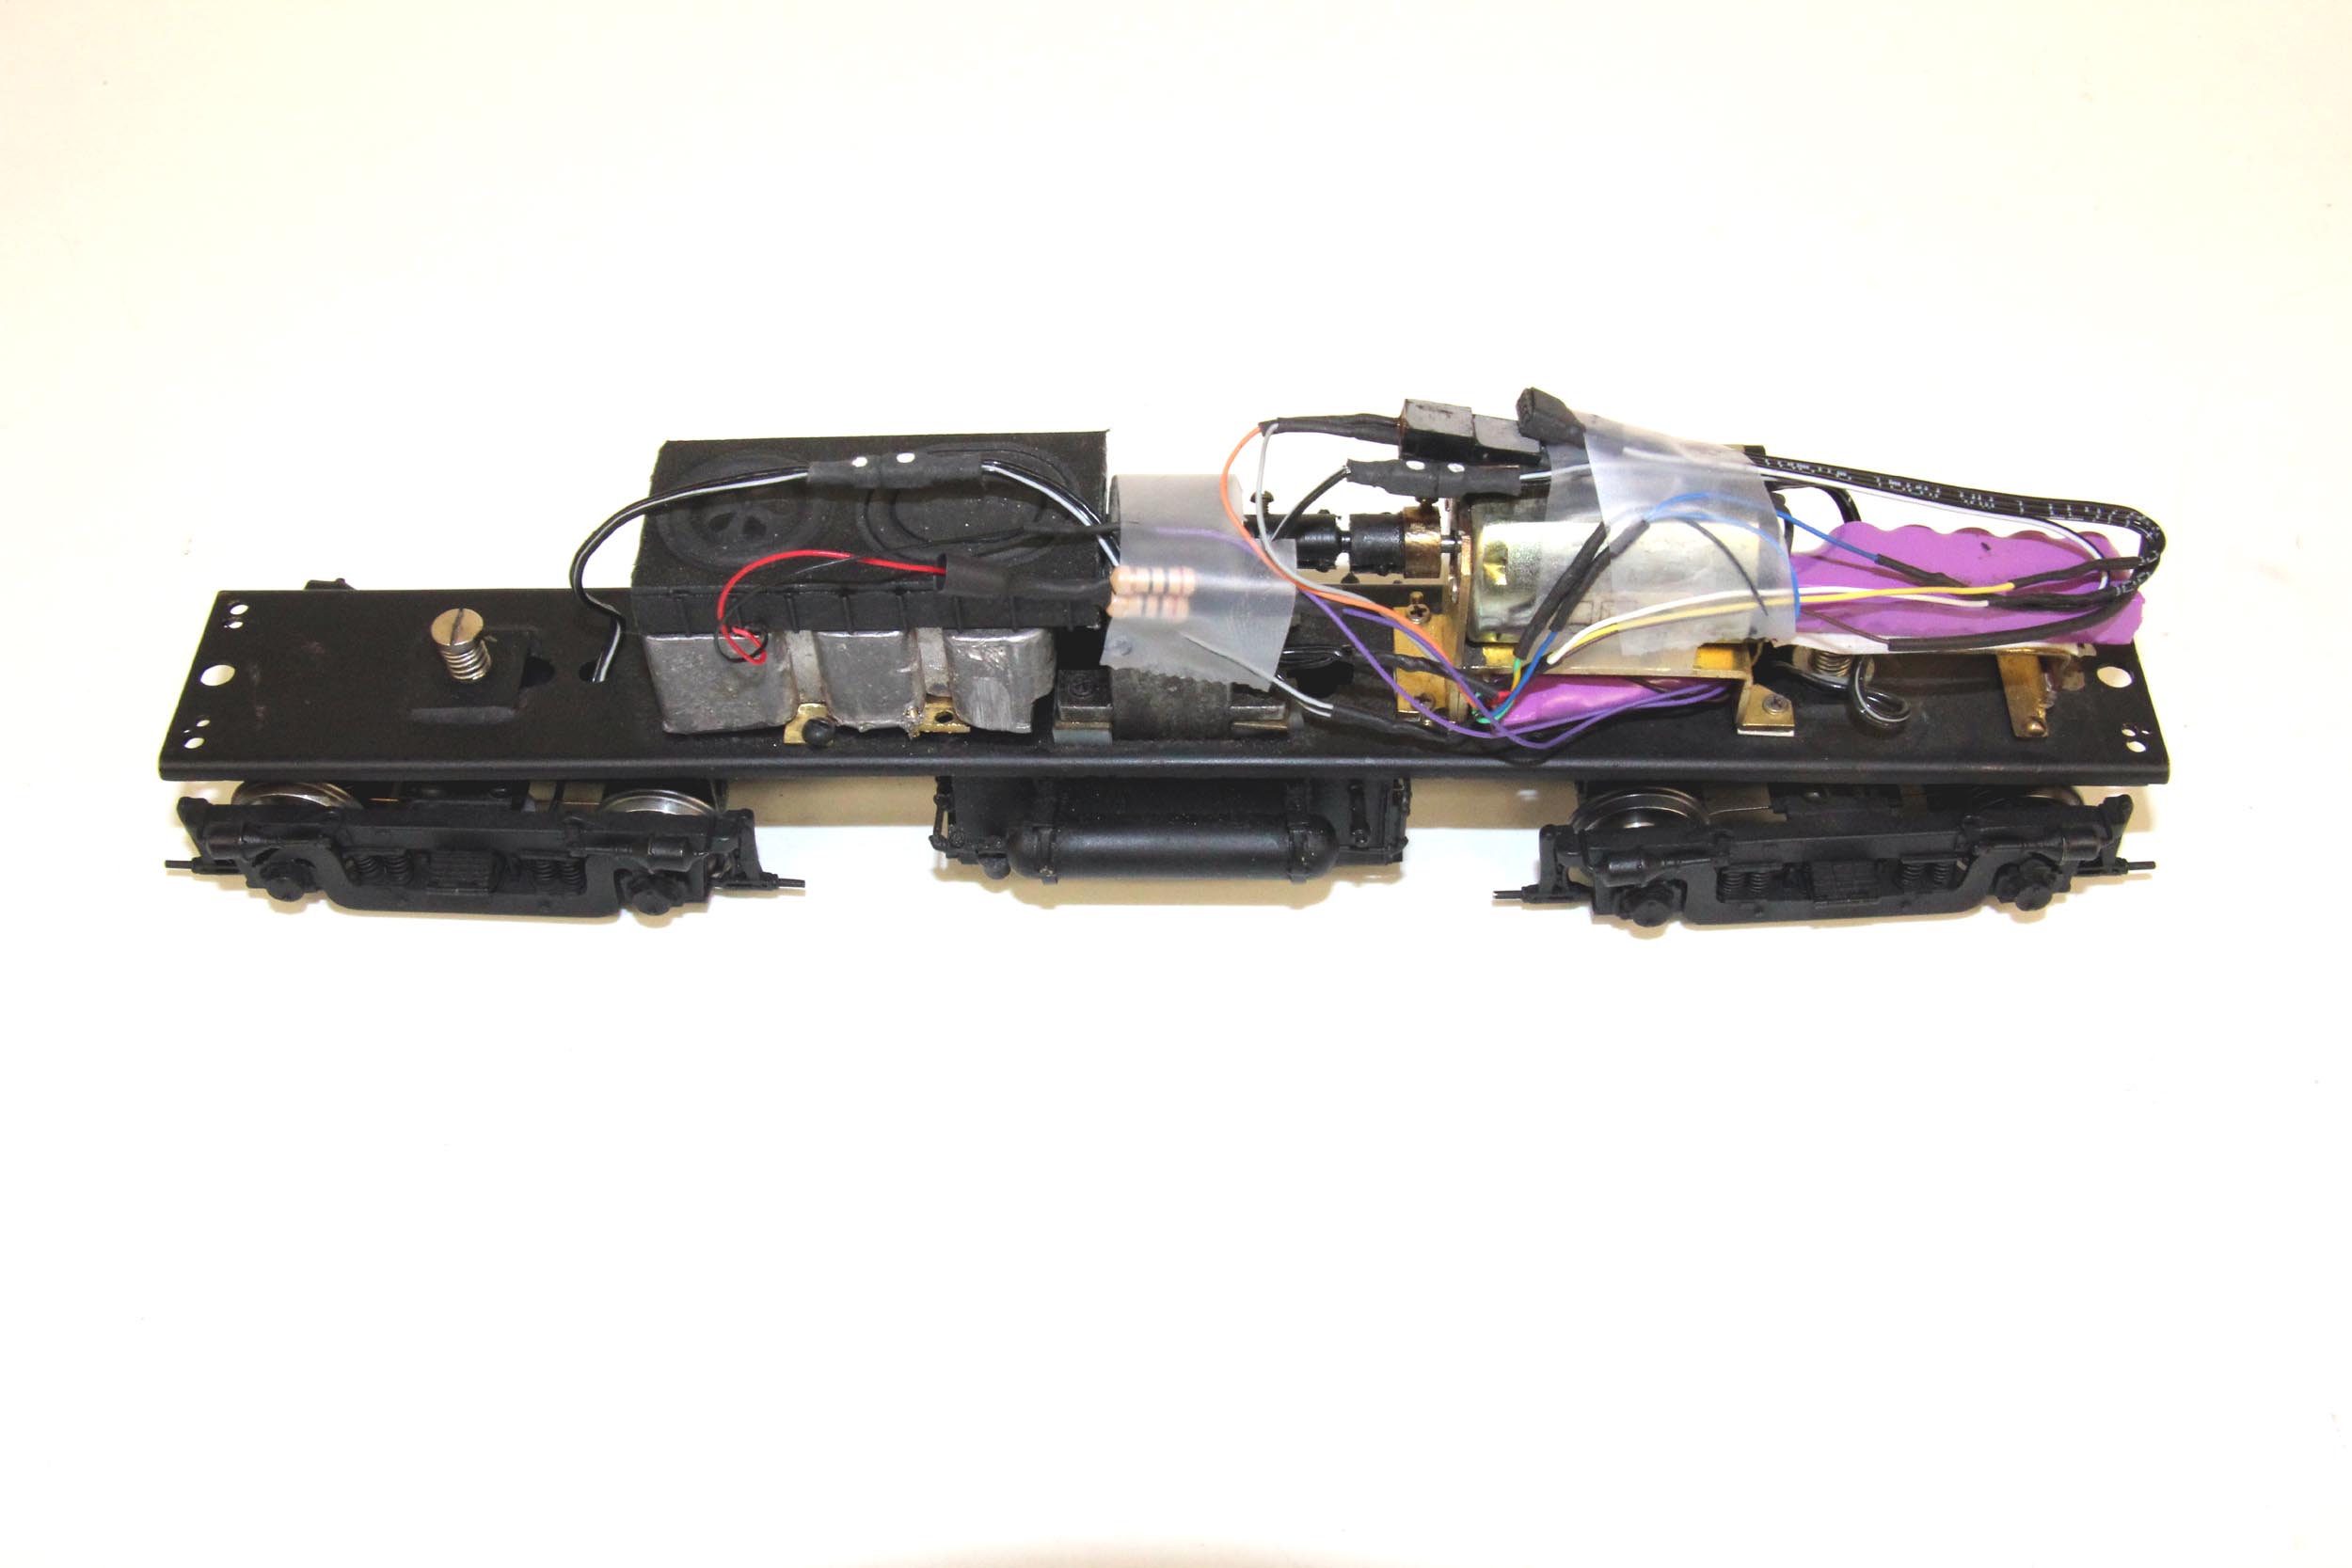
The Drive
The drive
is from a run of brass GP30 produced in 1997 from Greenbrier Models. In about
2000 large components of the GP30 run started to appear on eBay. I bought a
drive, moved the truck centers out a bit, and installed Southwind Models (now
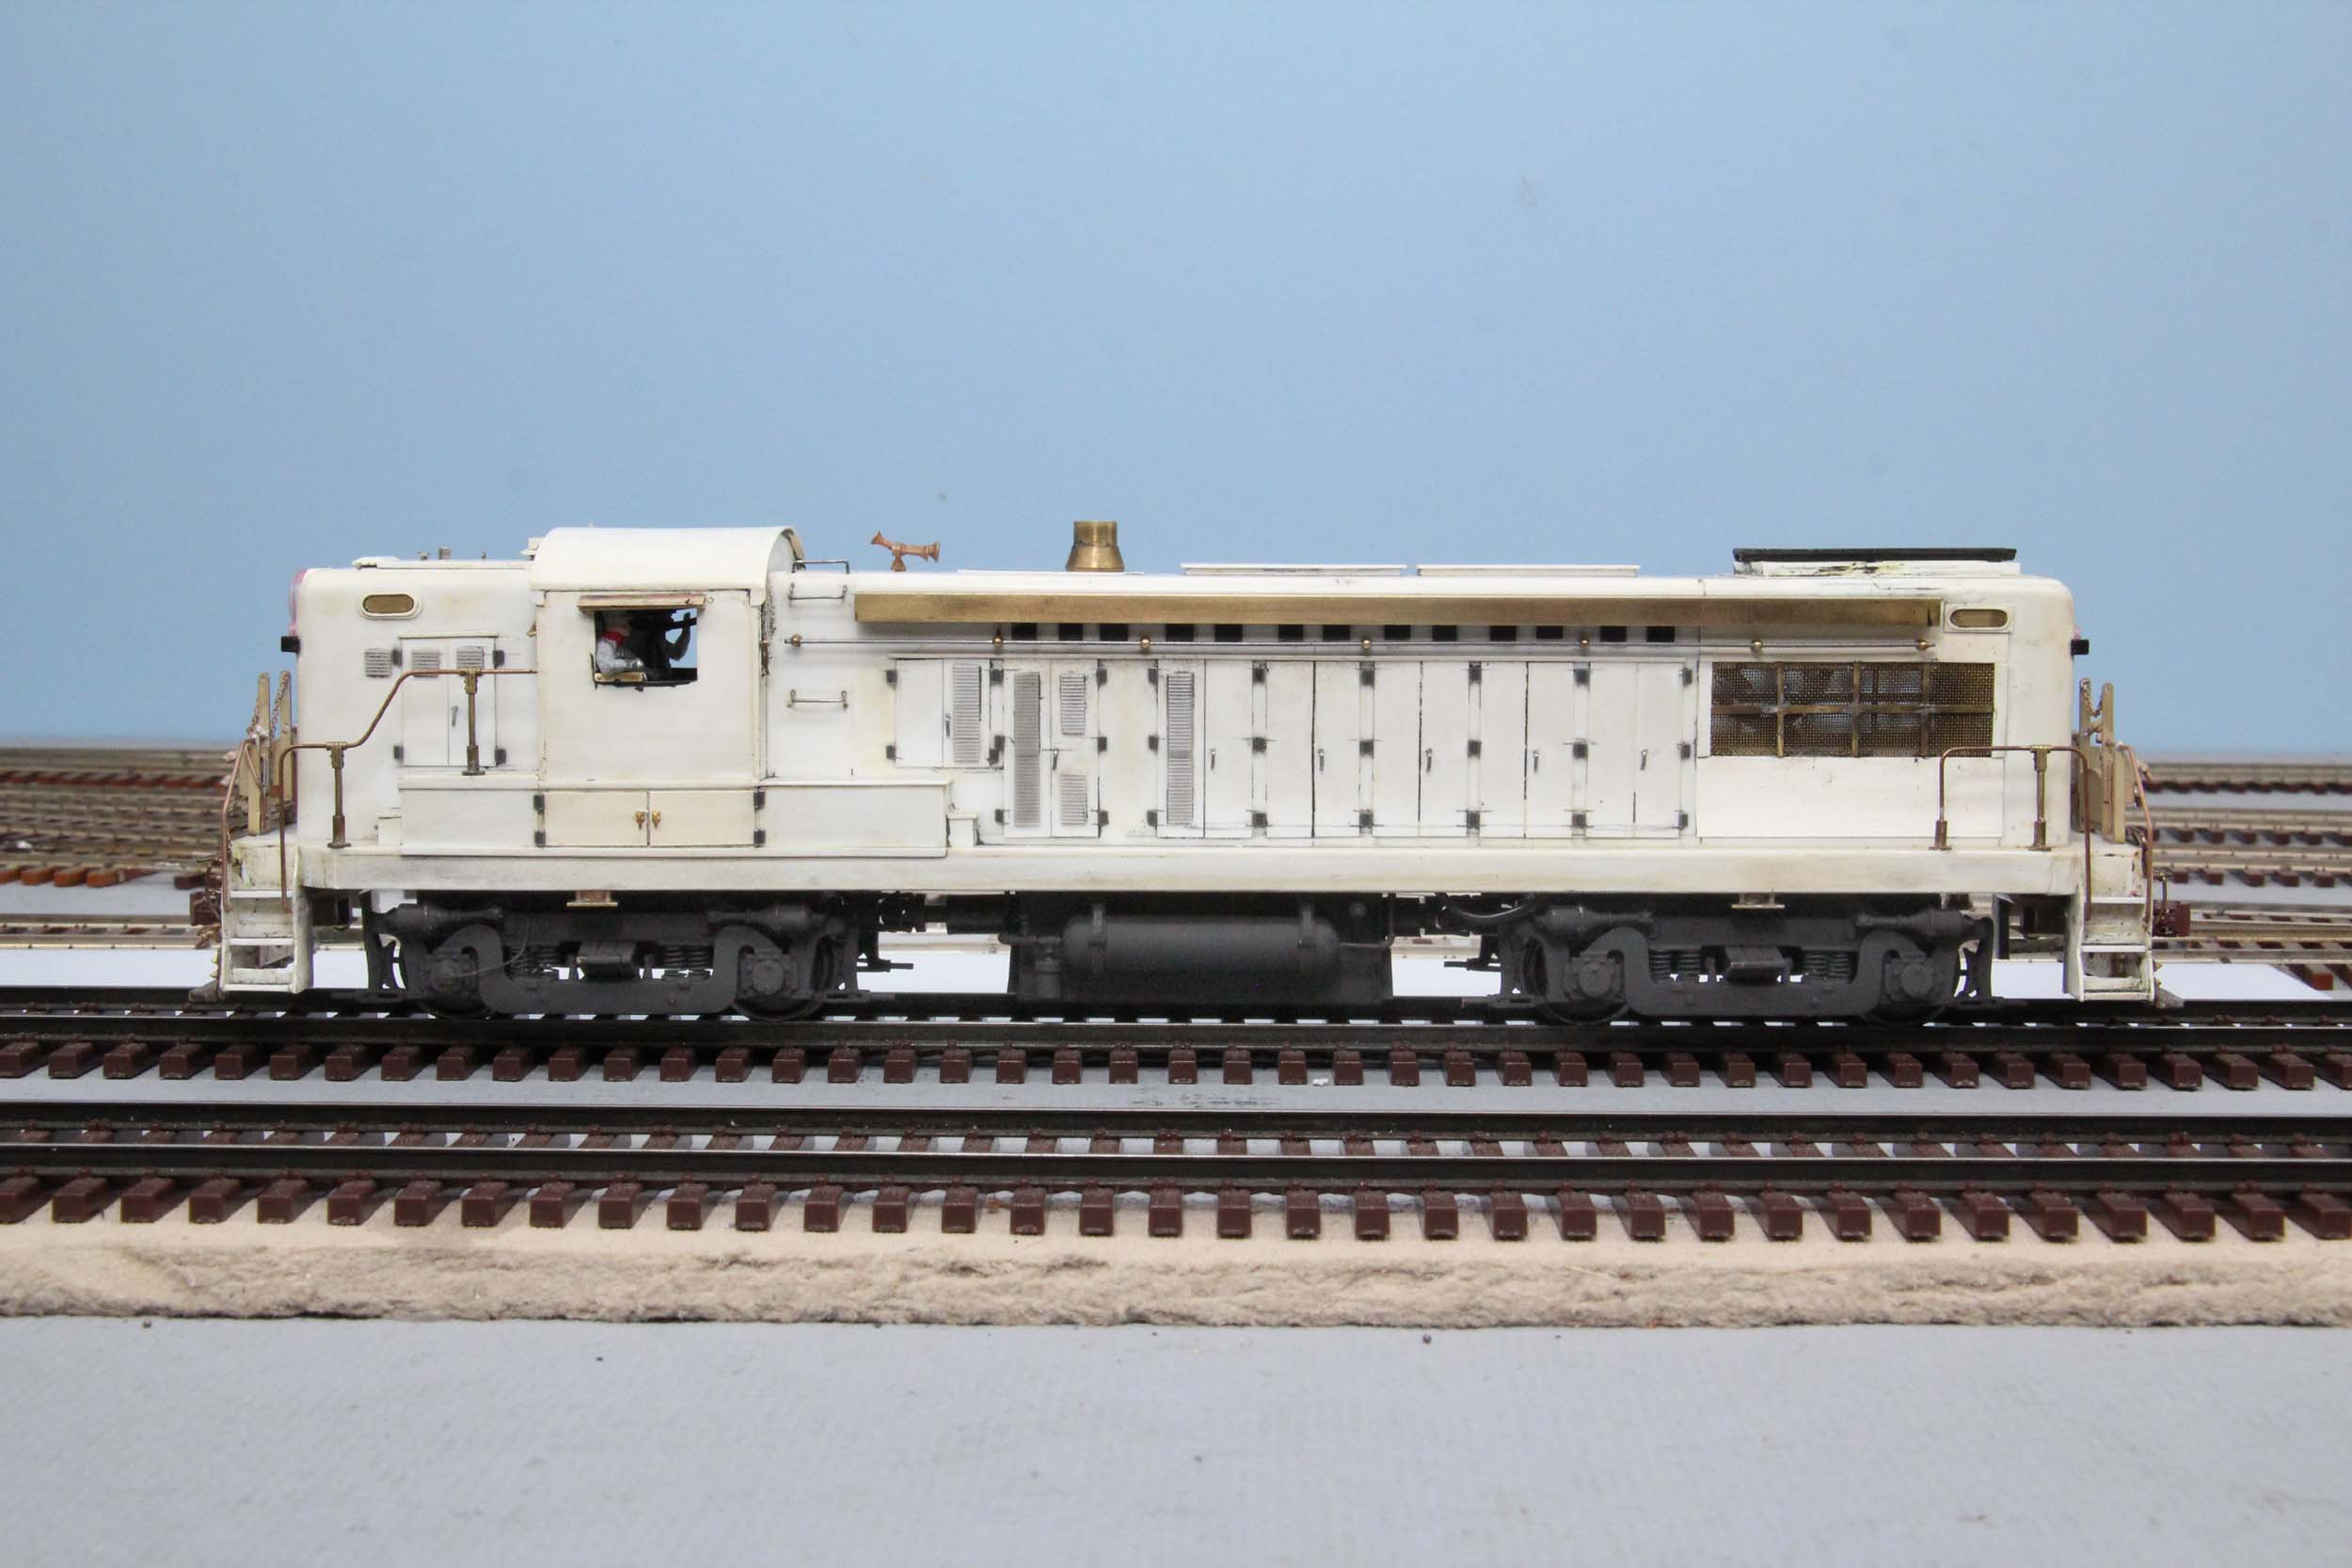
BTS) Alco sideframes. It runs REALLY well.
This is the
AS16 shell about as I bought it. Shown here on 12-15-05 it has had some work
done because a drive exists.
I knew the completion time would be extensive but so worth it. It had been about 8 years
since I last worked on it. I started making items then like the air tanks and
the long sign boards. I installed all wheel electric pickup when I discovered
phosphor bronze wire. That is very time consuming but necessary especially now
with DCC. It was probably the intimidation of how to get the sign boards around
the carbody hump on the fireman’s side that sent it back to the box for an 8
year nap. Decisions like that have proven to be good for me. When I get the
itch to work on it again, the results are significantly better because I have
improved as a modeler and now own tools I did not back then. The internet was
not available to me then as well. I can now blast out a question and hopefully
get an answer. That was the case here for a few details. I bought a Baldwin
PRSL Lettering drawing that was a great find. The original signboards I made
were discarded in favor of brass channel. It is not quite as correct because
the real signboard is a flat sheet that is frequently supported so it sort of
looks like a channel with lots of notches.
Scratchbuilt Parts
Revised 12-30-17
For
these parts I scratchbuilt in brass just before I learned Solidworks, I am not
sure I would do it any differently now. There is just an obscene amount of time spent in making these
parts.
My resurrection of the PRSLHS has caused me to work on my AS16
steadily for about the past month now. I just might get it done this time. I have
the fuel tank made. I mounted air tanks I made years ago from the last time I
was working on it. I now have
the long sign boards installed. I was eyeing how to make the cab interior. None
of it is dead perfect but it will due over what is in second place which is
nothing.
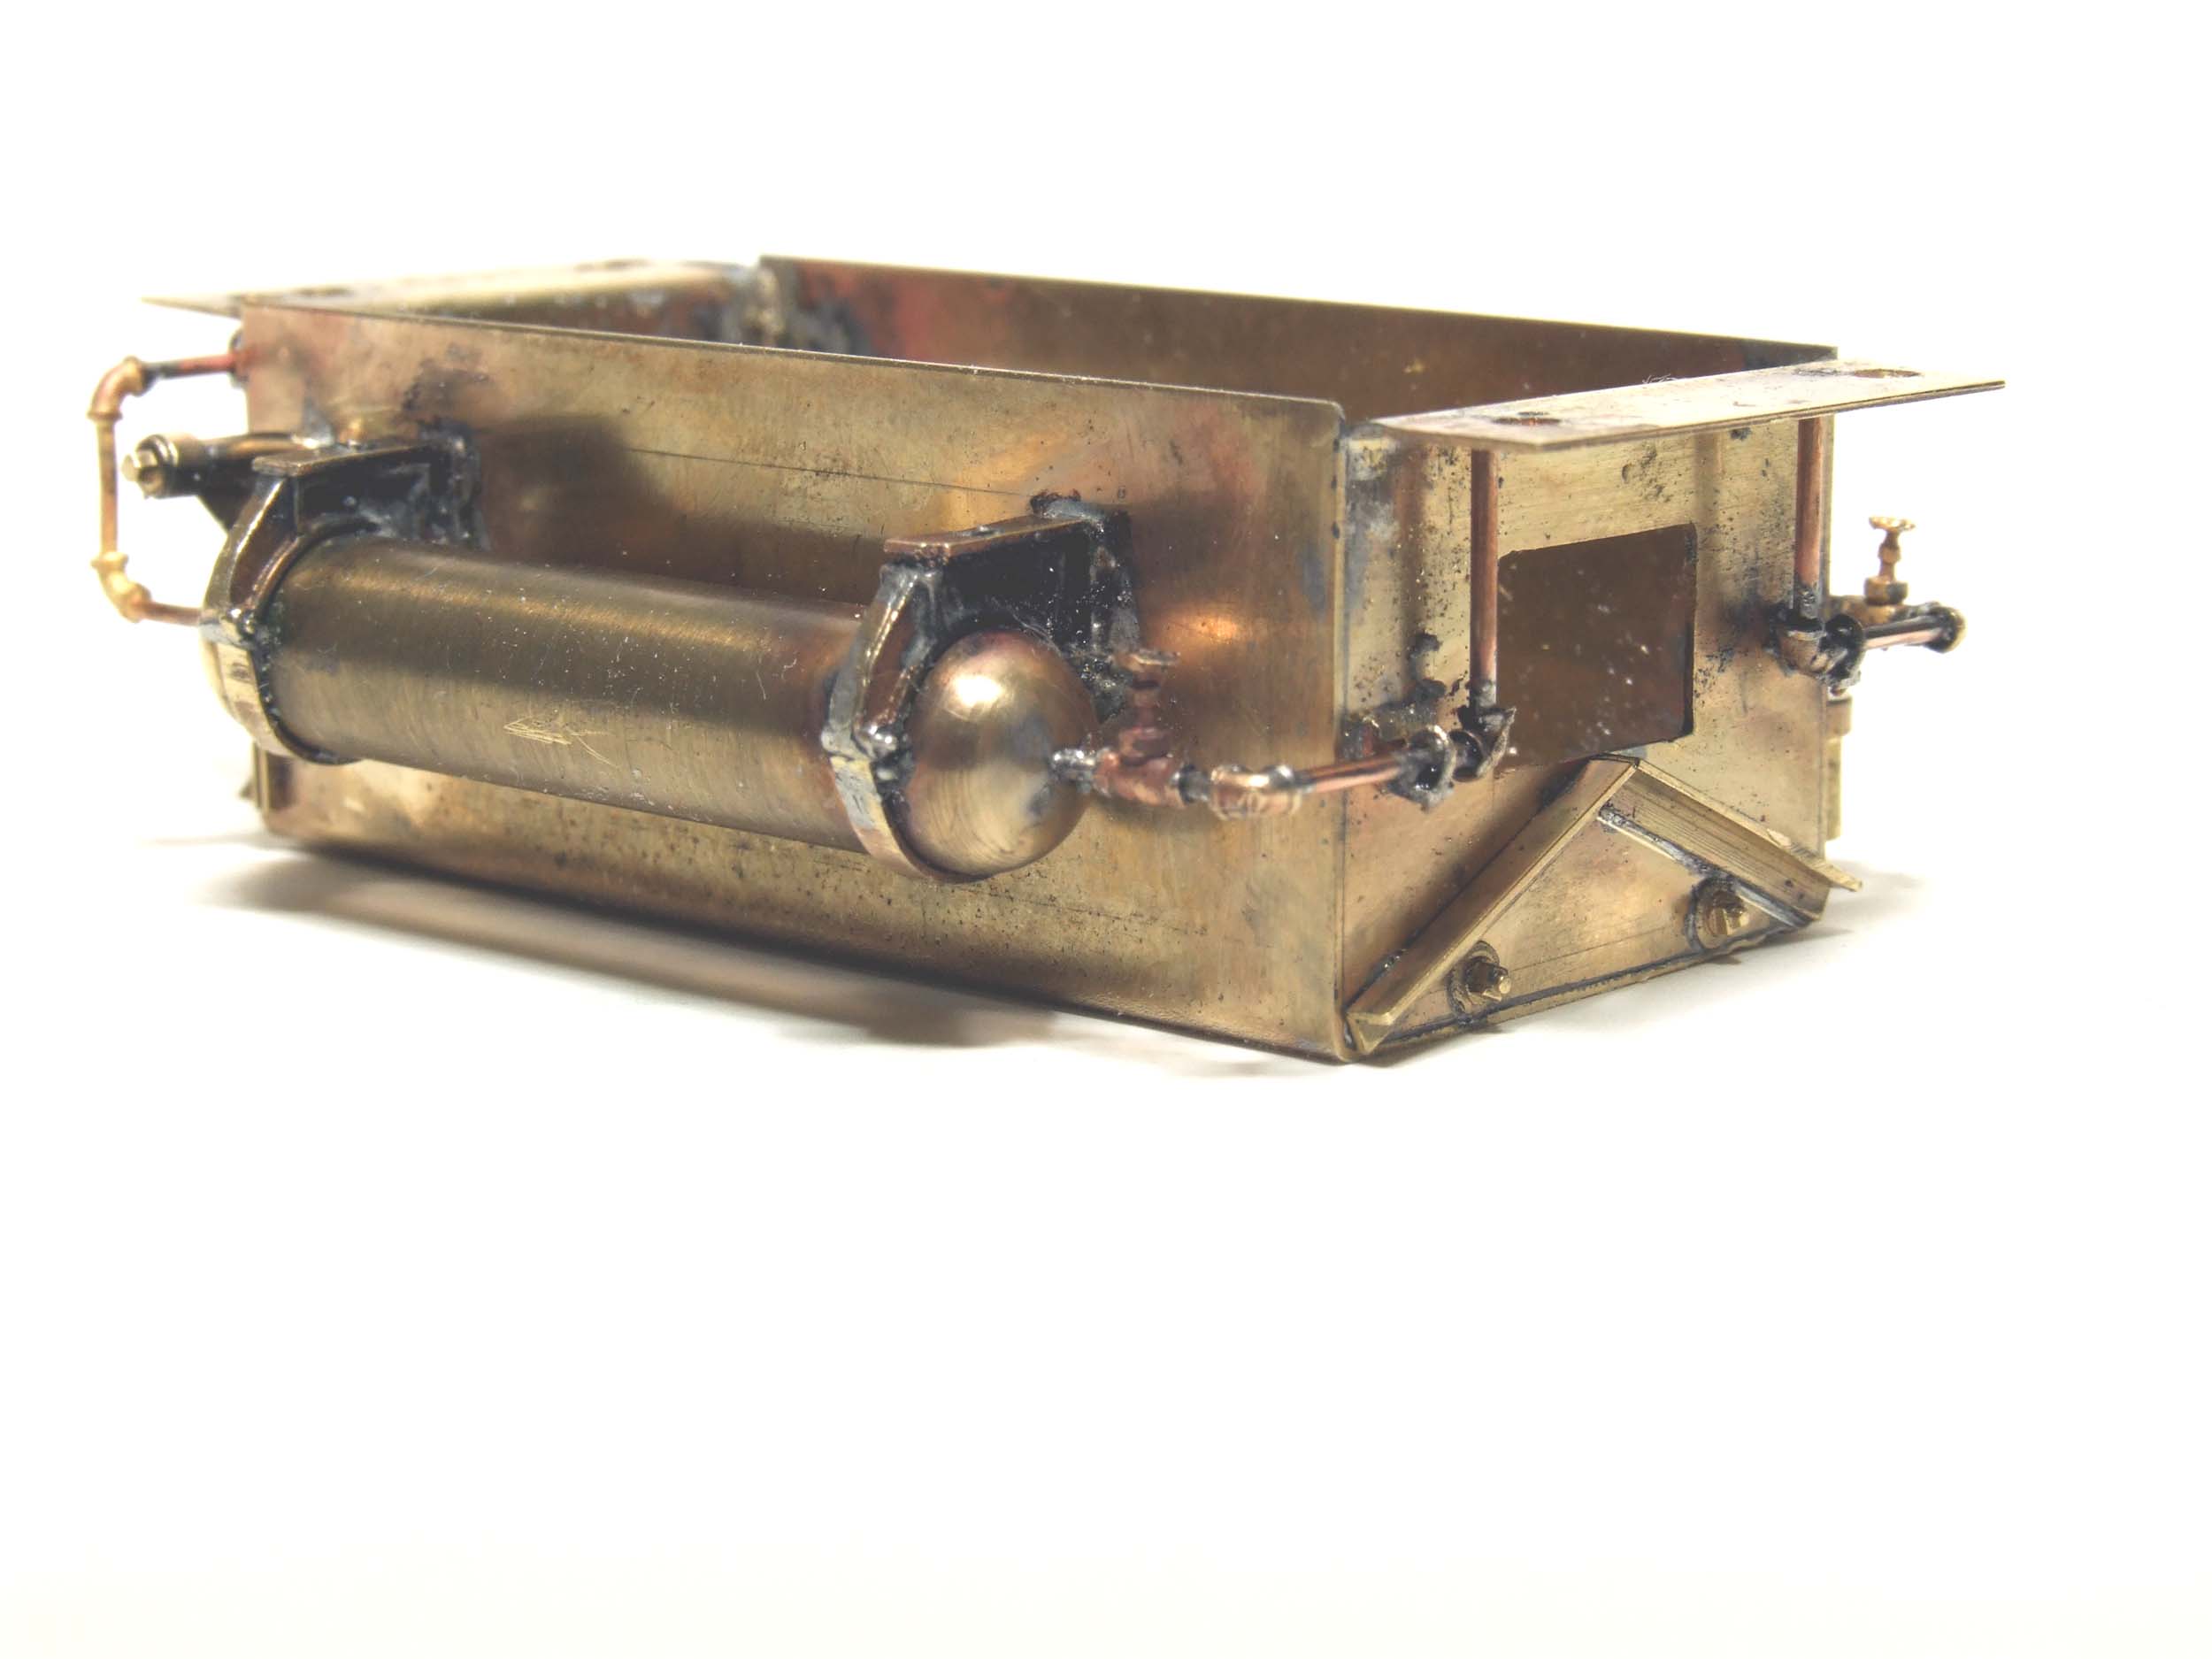
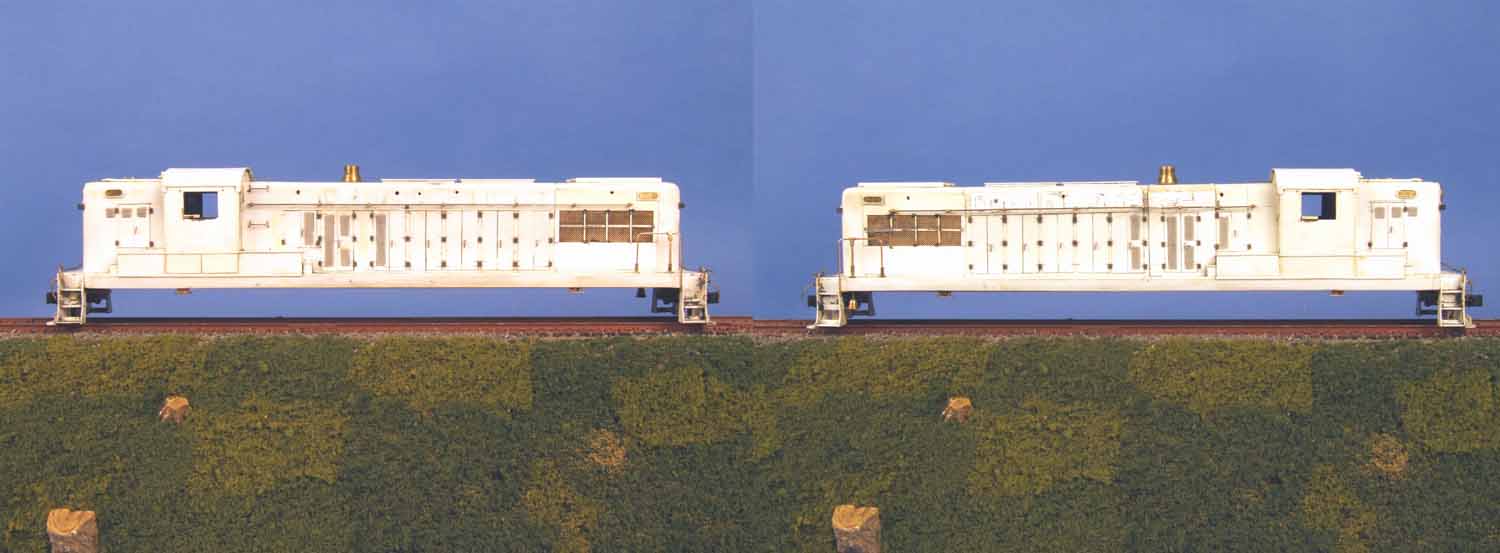
Fuel Tank
4-17-07 Update

Cab Interior
The
issue was how to make a cab floor wider than the opening in the body. I wanted
the crew to be at the windows leaning on the armrests. I threw some heavy
thinking time at it and was pretty happy with the solution. That is actually
the FUN part, figuring out how to make the part. I almost never make any
drawings. I figure it out on the fly. The cab floor is split in half. The front and back walls slide in place. A strip screws in
and clamps the 2 floor pieces in place. I originally had a cab light in place
but I am not going to do it now.

6-28-07 Update
The fuel tank is made and painted. The new MU
stands are almost done. I ran it for a night on DCC. It ran VERY well! I was
surprised in early May with the fact that LokSound makes a Baldwin sound unit.
I now have to go back and rewire everything for sound.
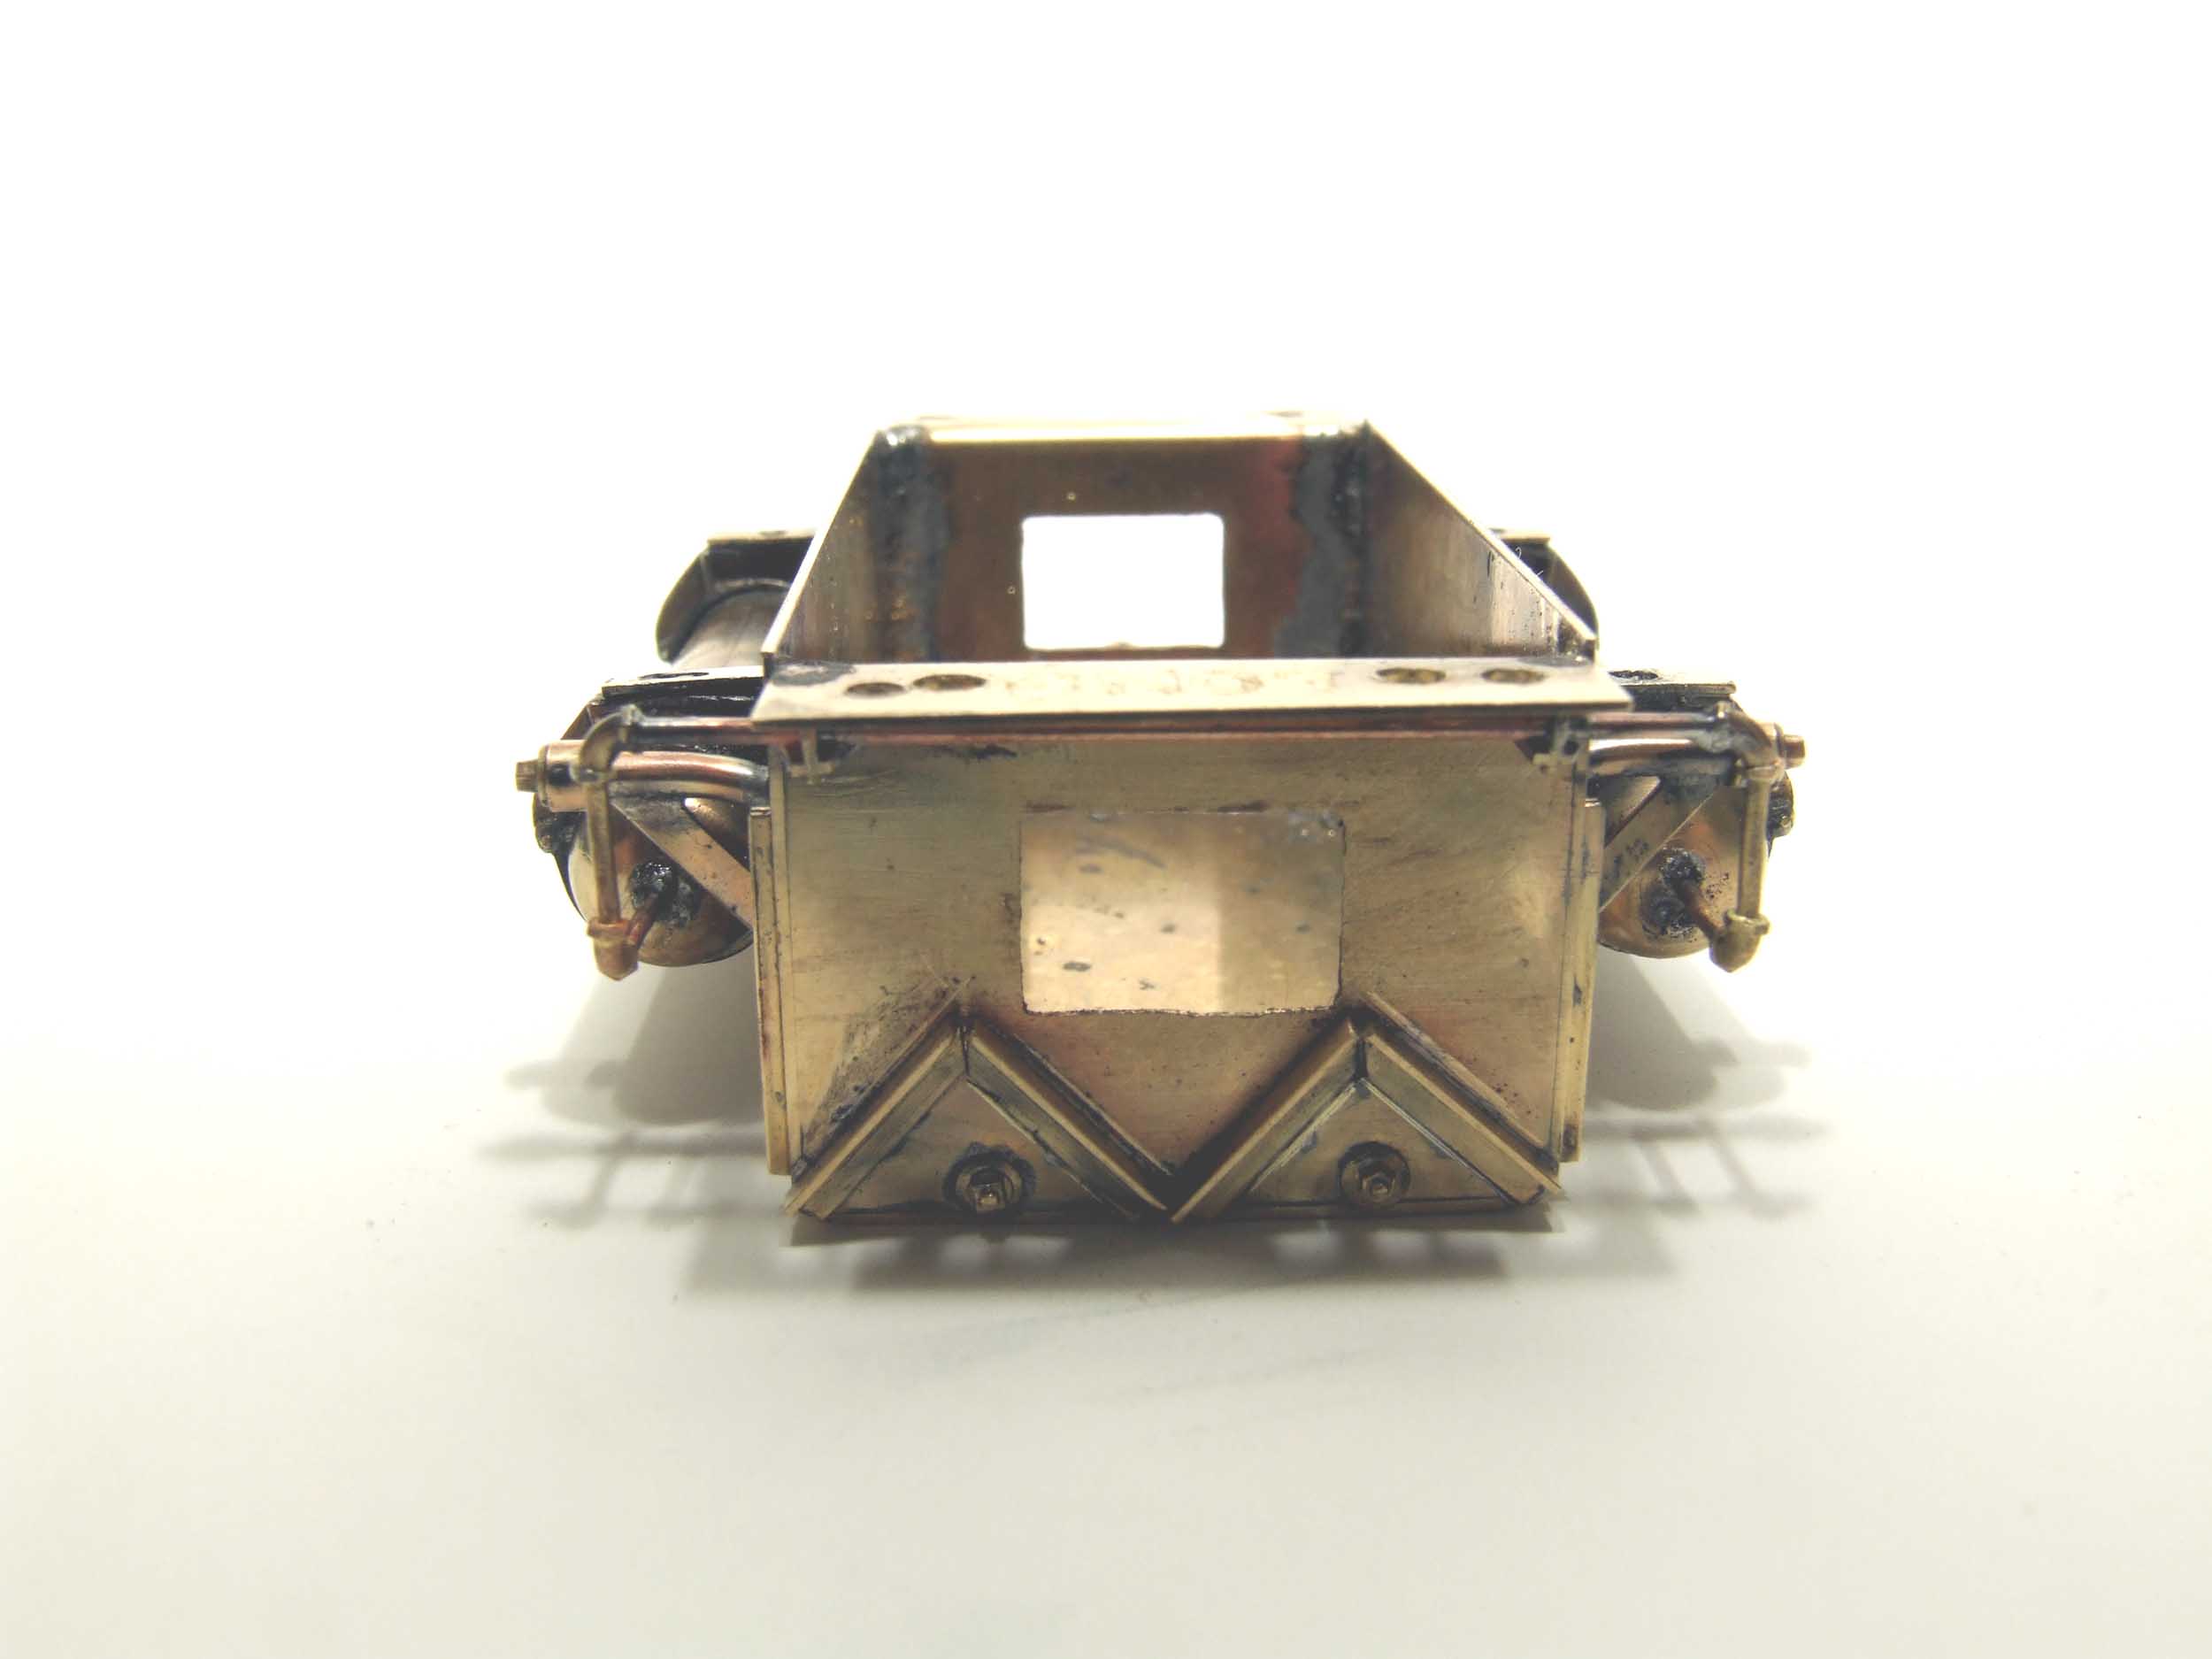
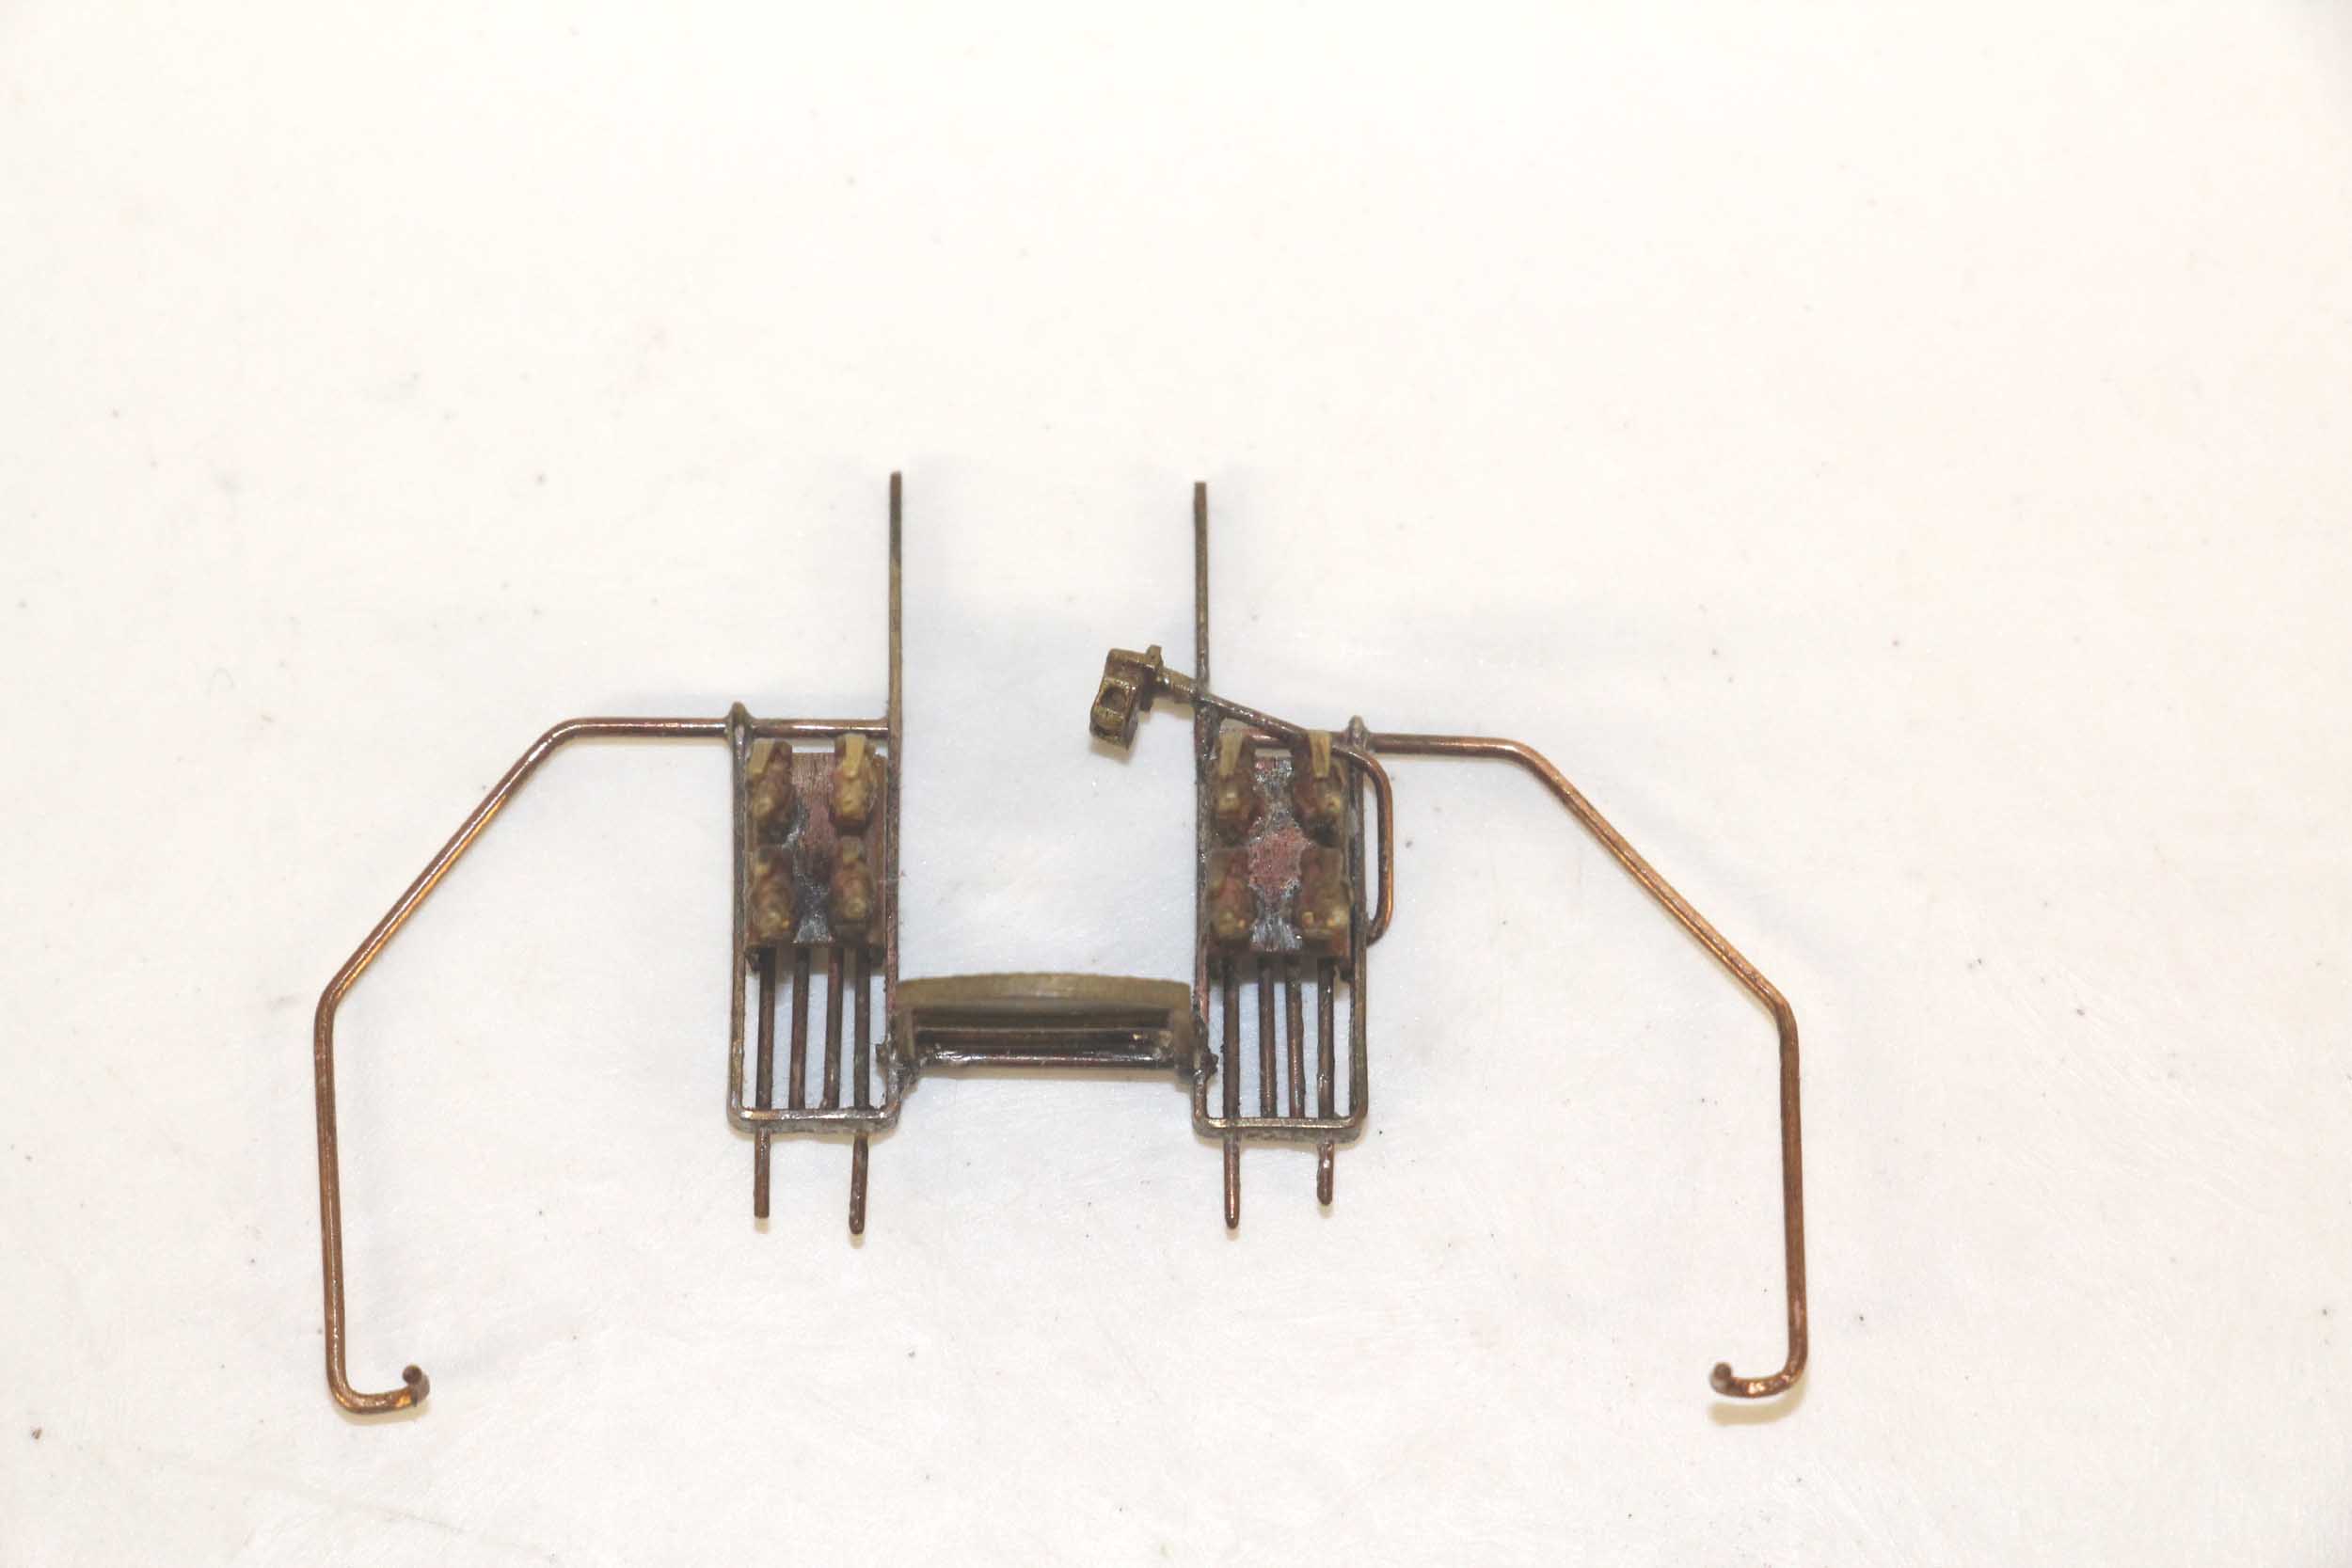
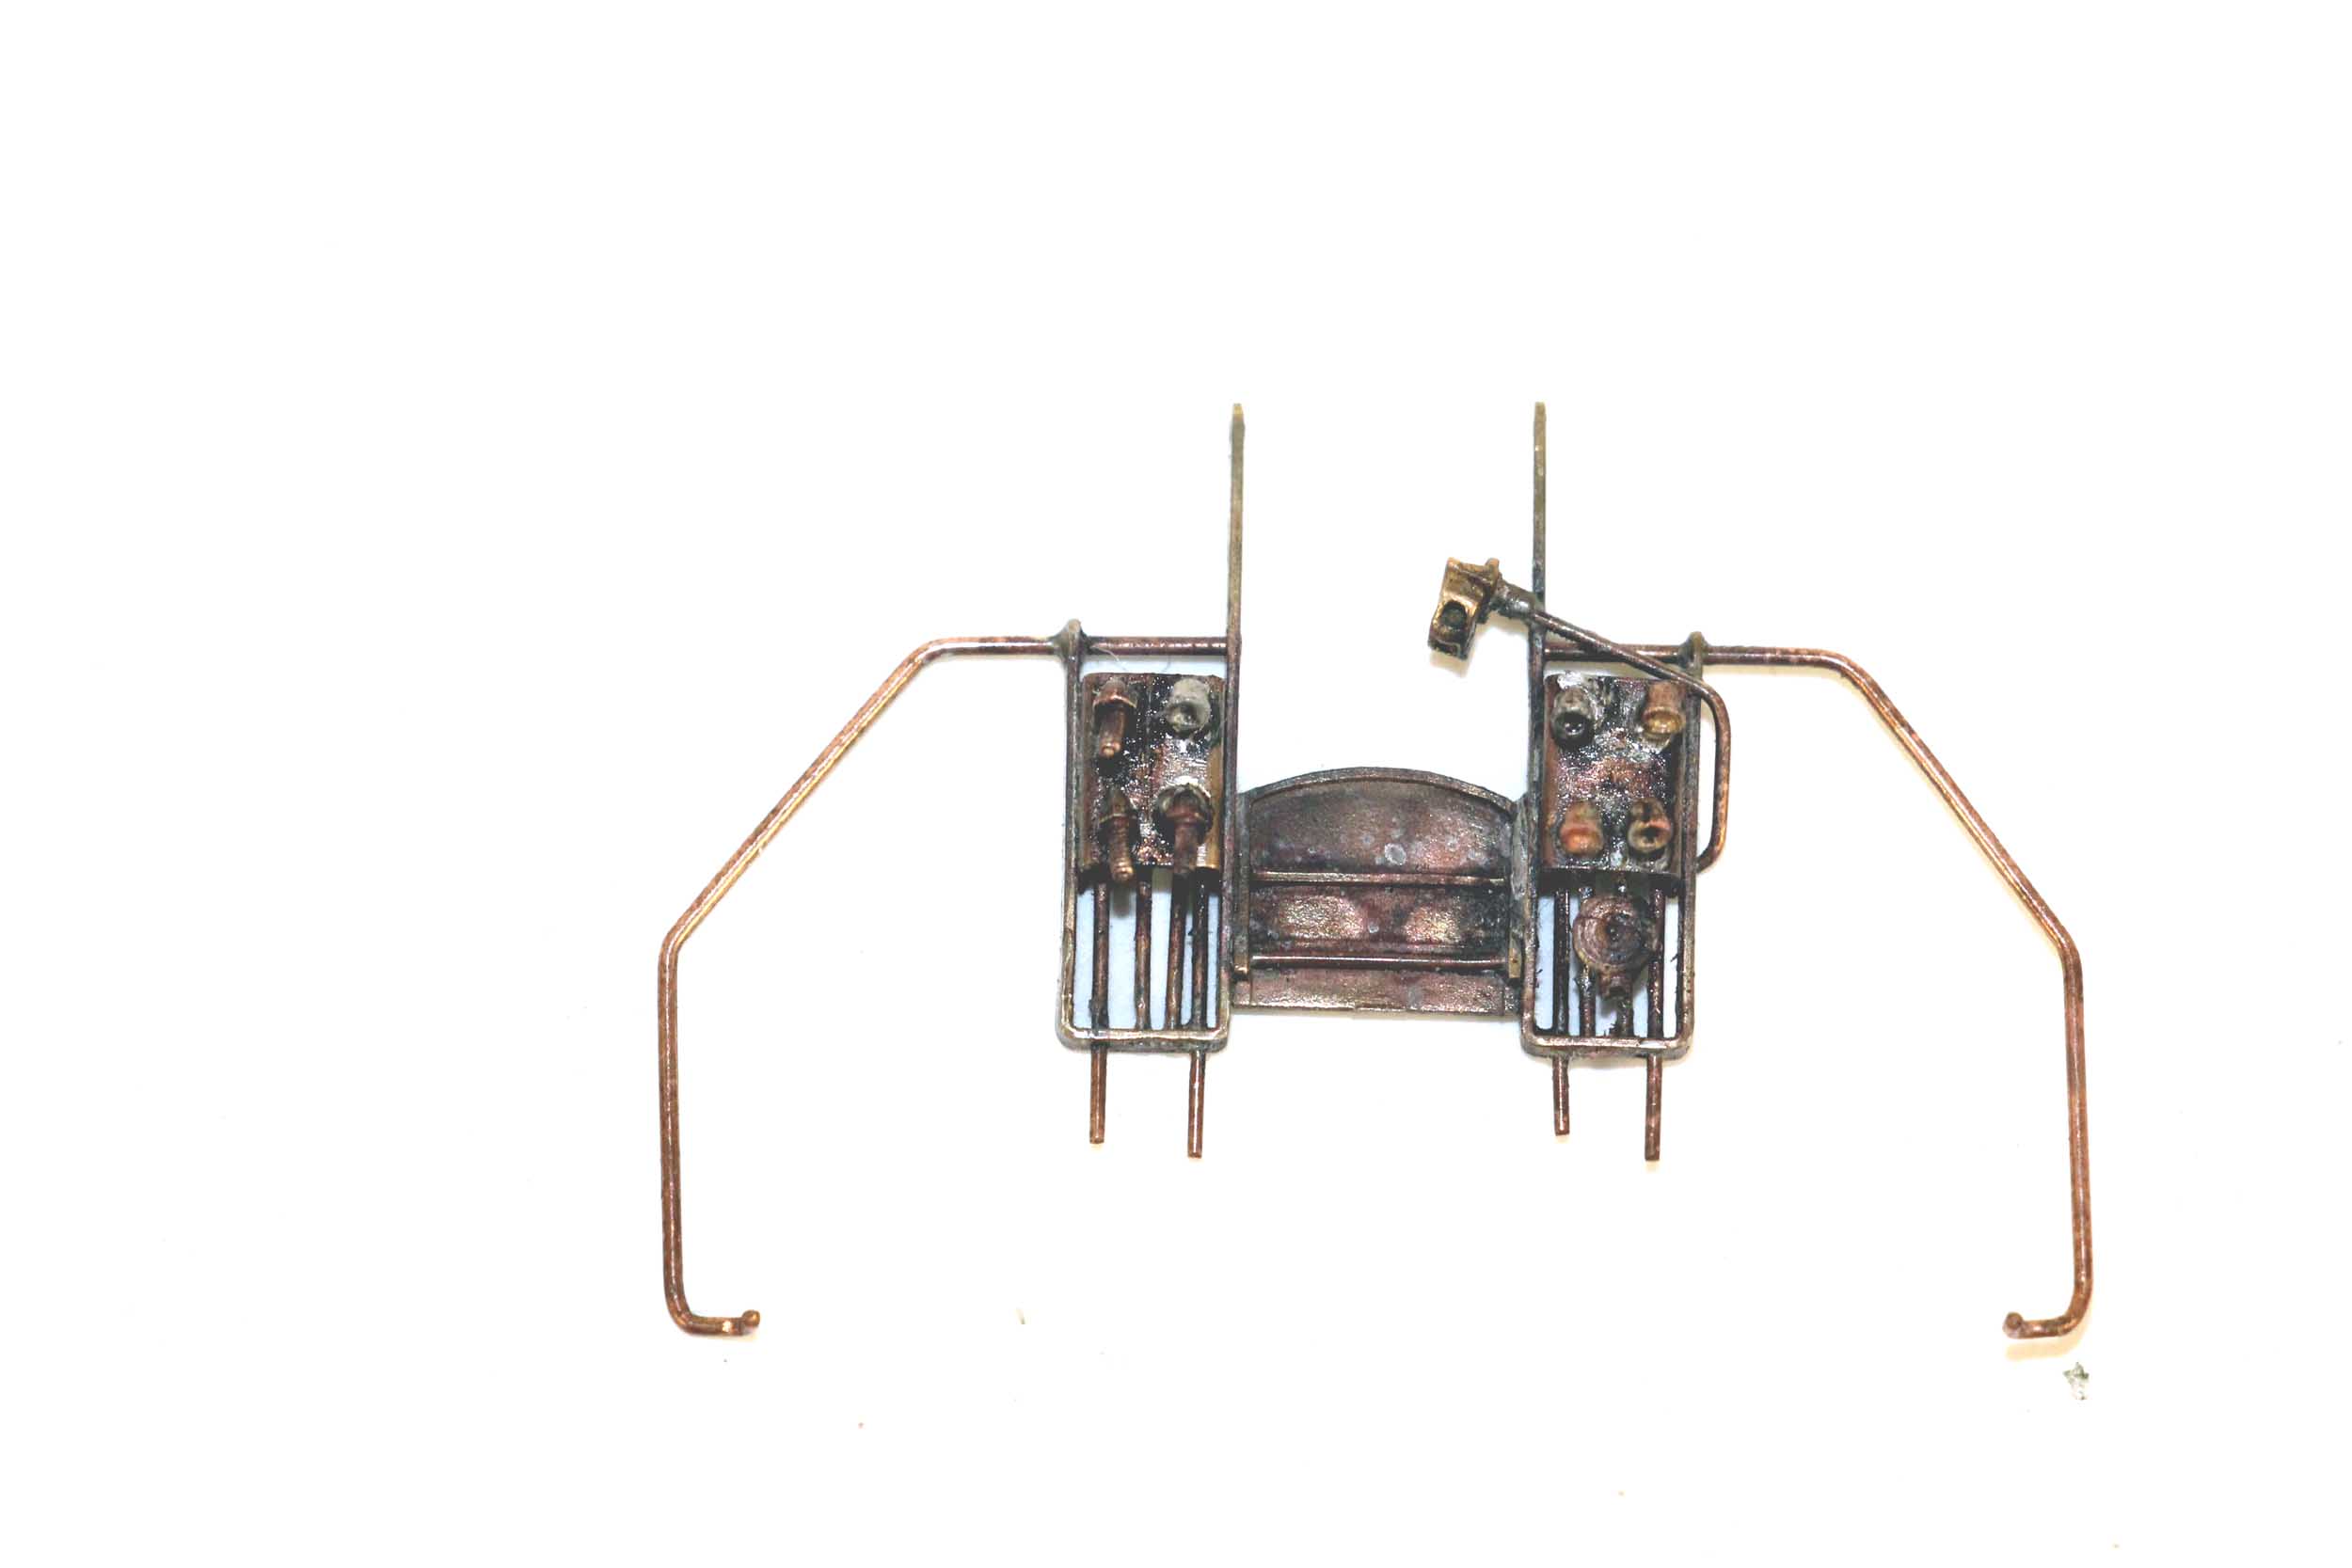
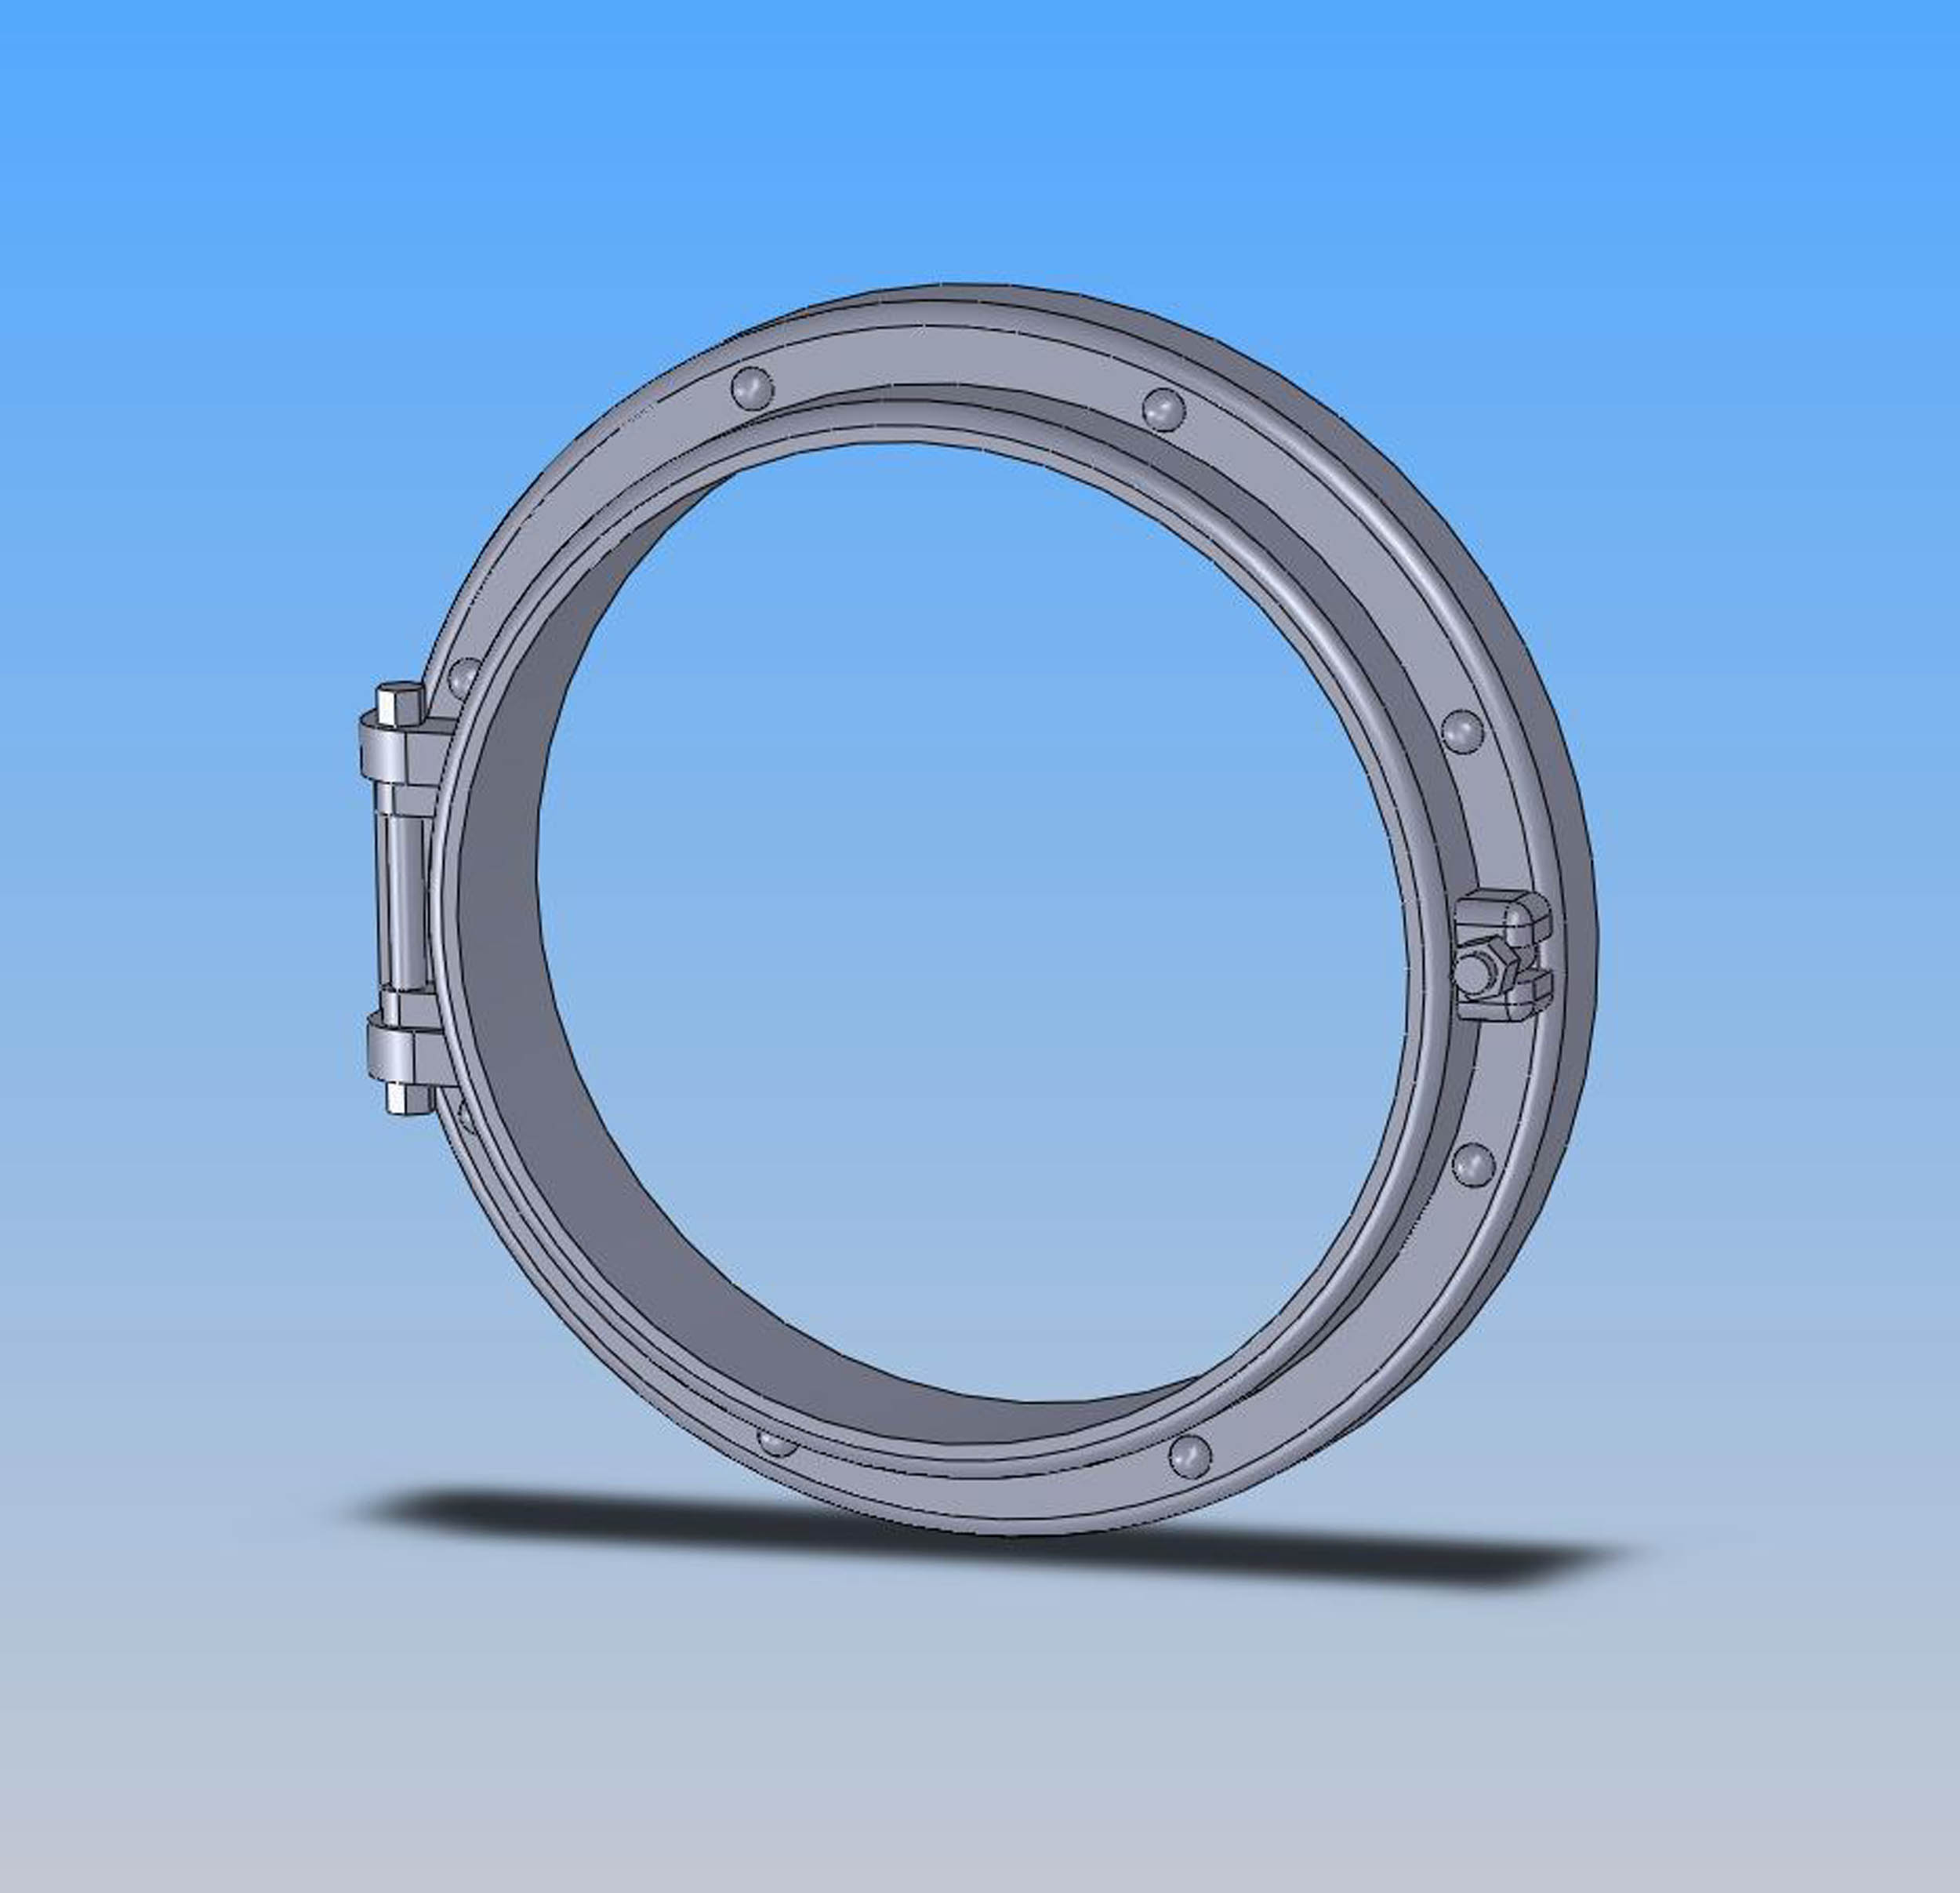
End Rails With M/U Hoses
Baldwins
were multiple unit controlled with compressed air not
electricity making them not compatible to run with other diesel loco builders.
Looking at AS16 photos there seemed to be many different configurations of M/U
valves and hoses. The first photo is how I made the end railings in 2007. I
never really liked the 8 train pipe valves per end as that was not correct. The
other photos are from 2017 when I wanted to fix them. I recycled the train pipe
valves, cutting them in half so I could attach hoses to them. They rest are
elbow castings trying to make 90 degree elbows look like 45 degree elbows. I
had great fear this whole thing would fall apart while making the changes but
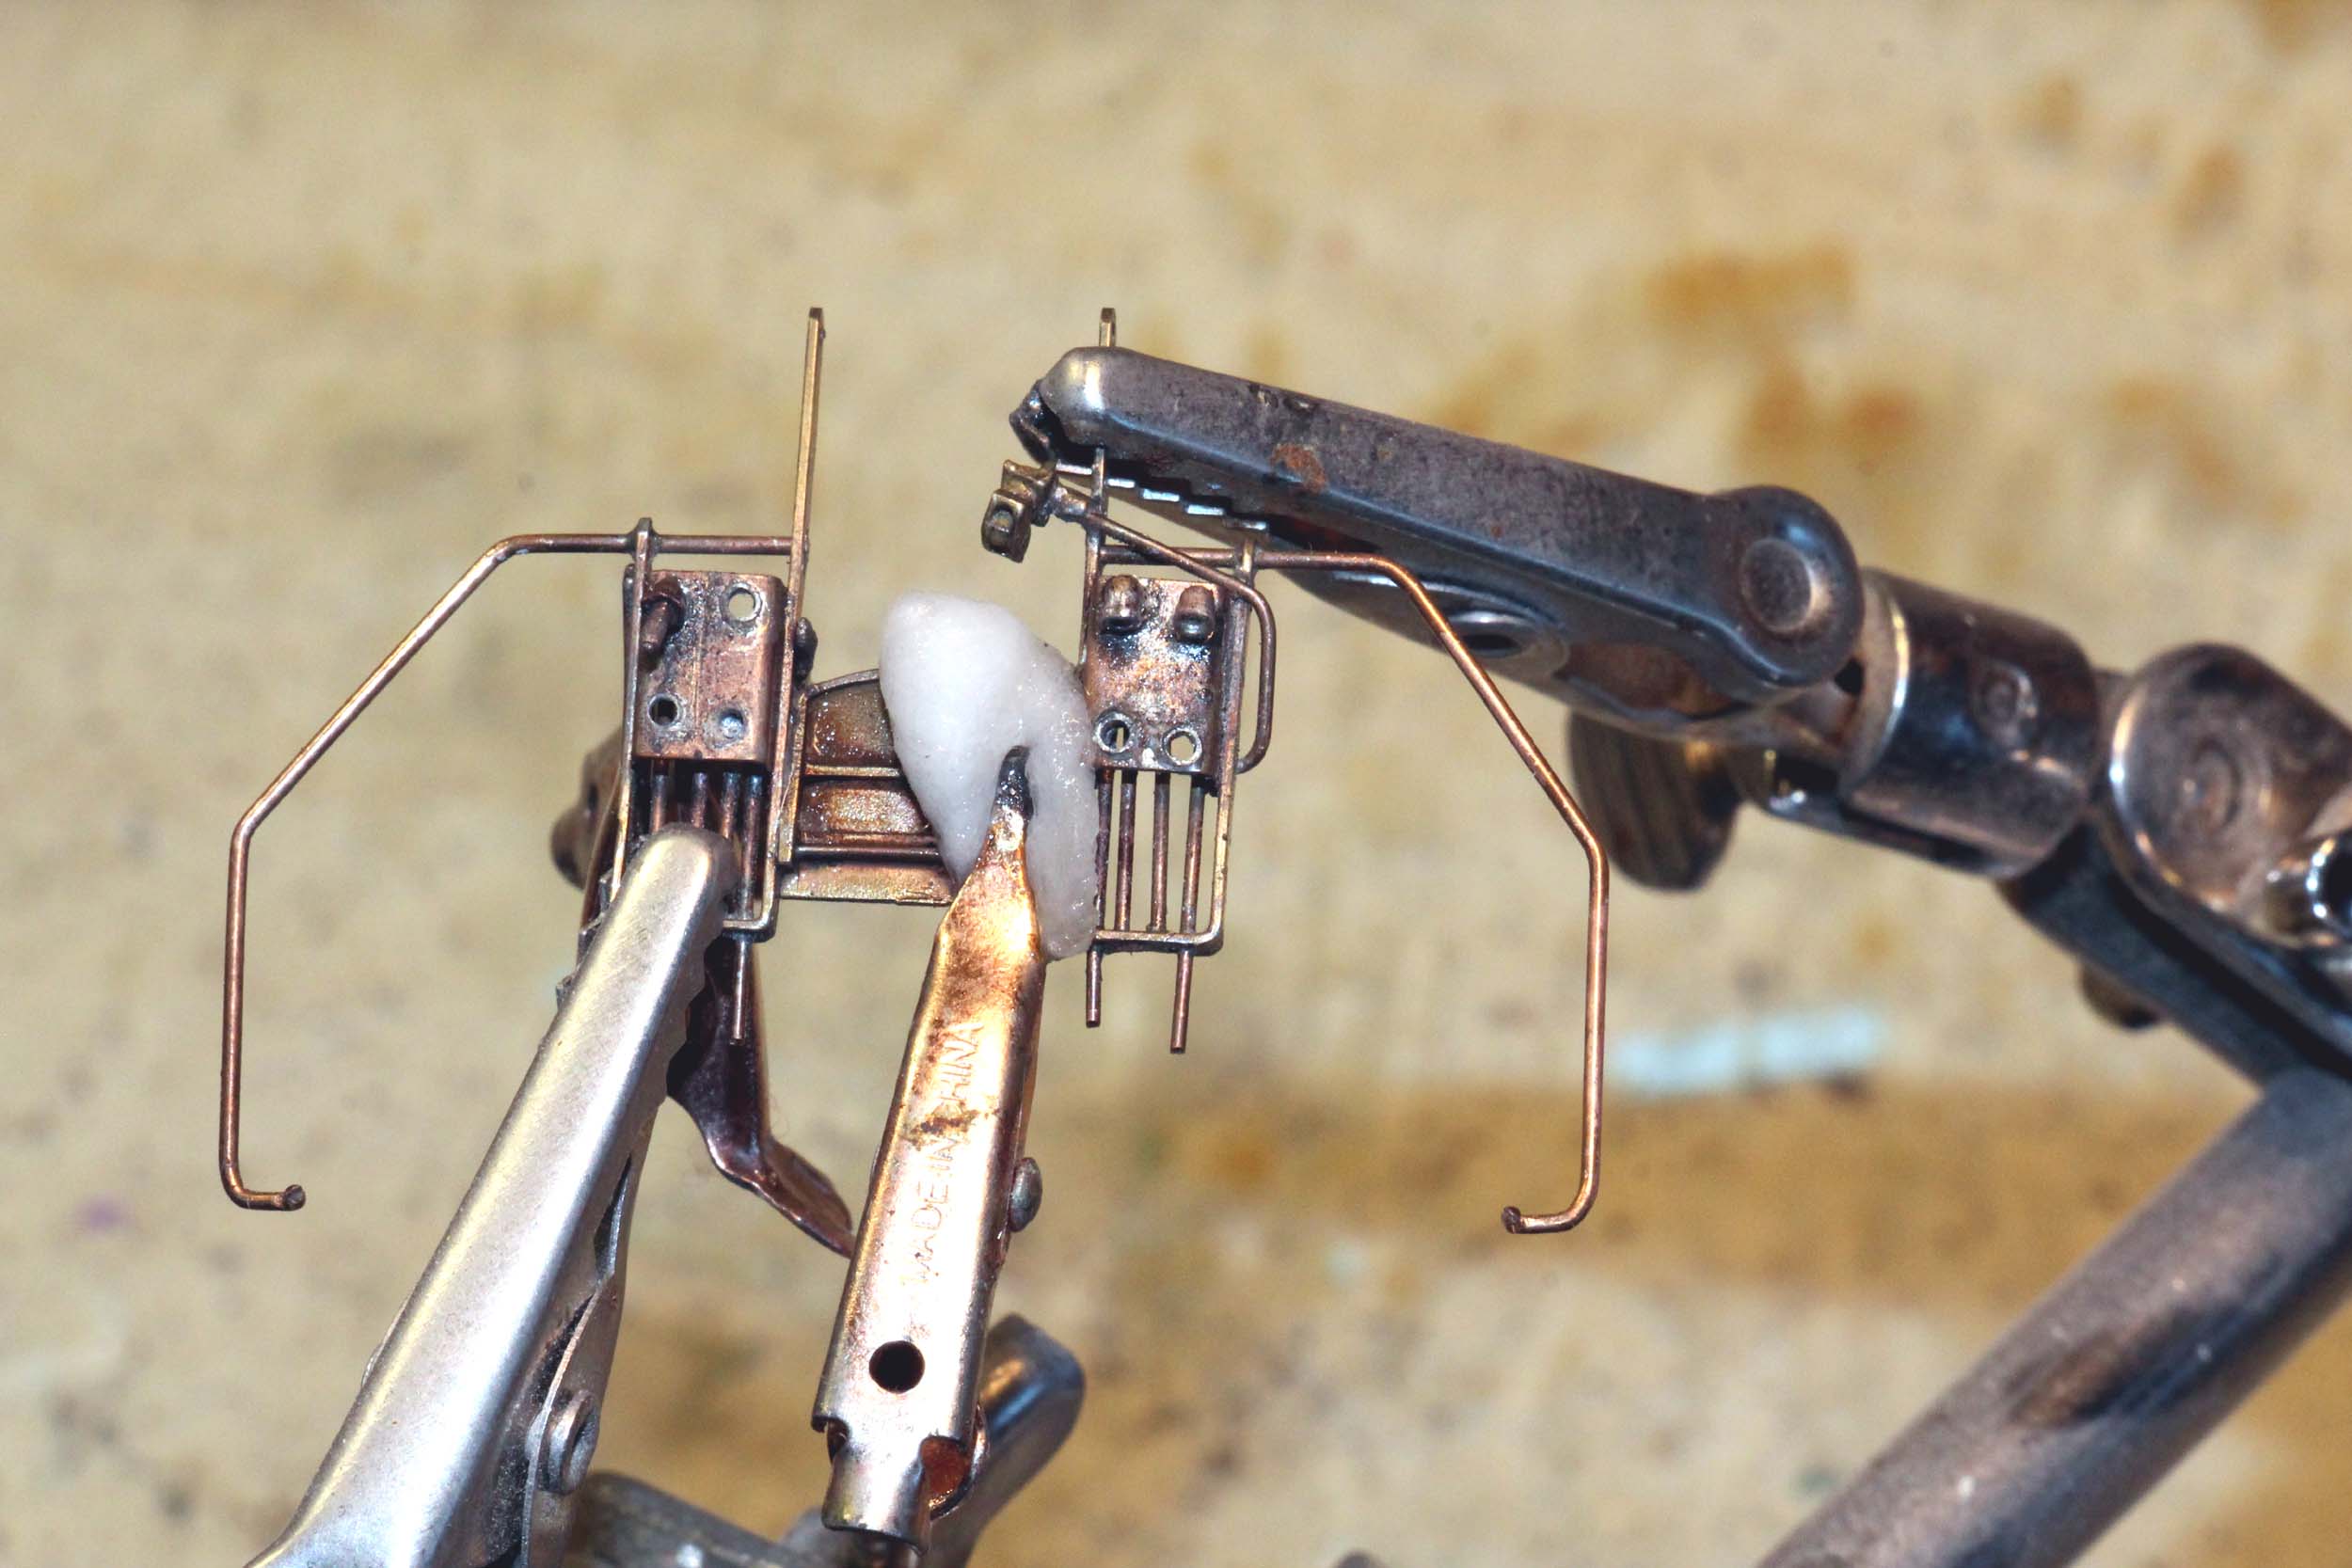
it did not happen. I used clips and a wet cotton ball for heat sinks. Work like
this simply cannot be can’t done with a conventional soldering pencil. You need
a resistance soldering unit like the PBL 300 watt Hotip. It all went really
well. I still have to add some chains to both ends.
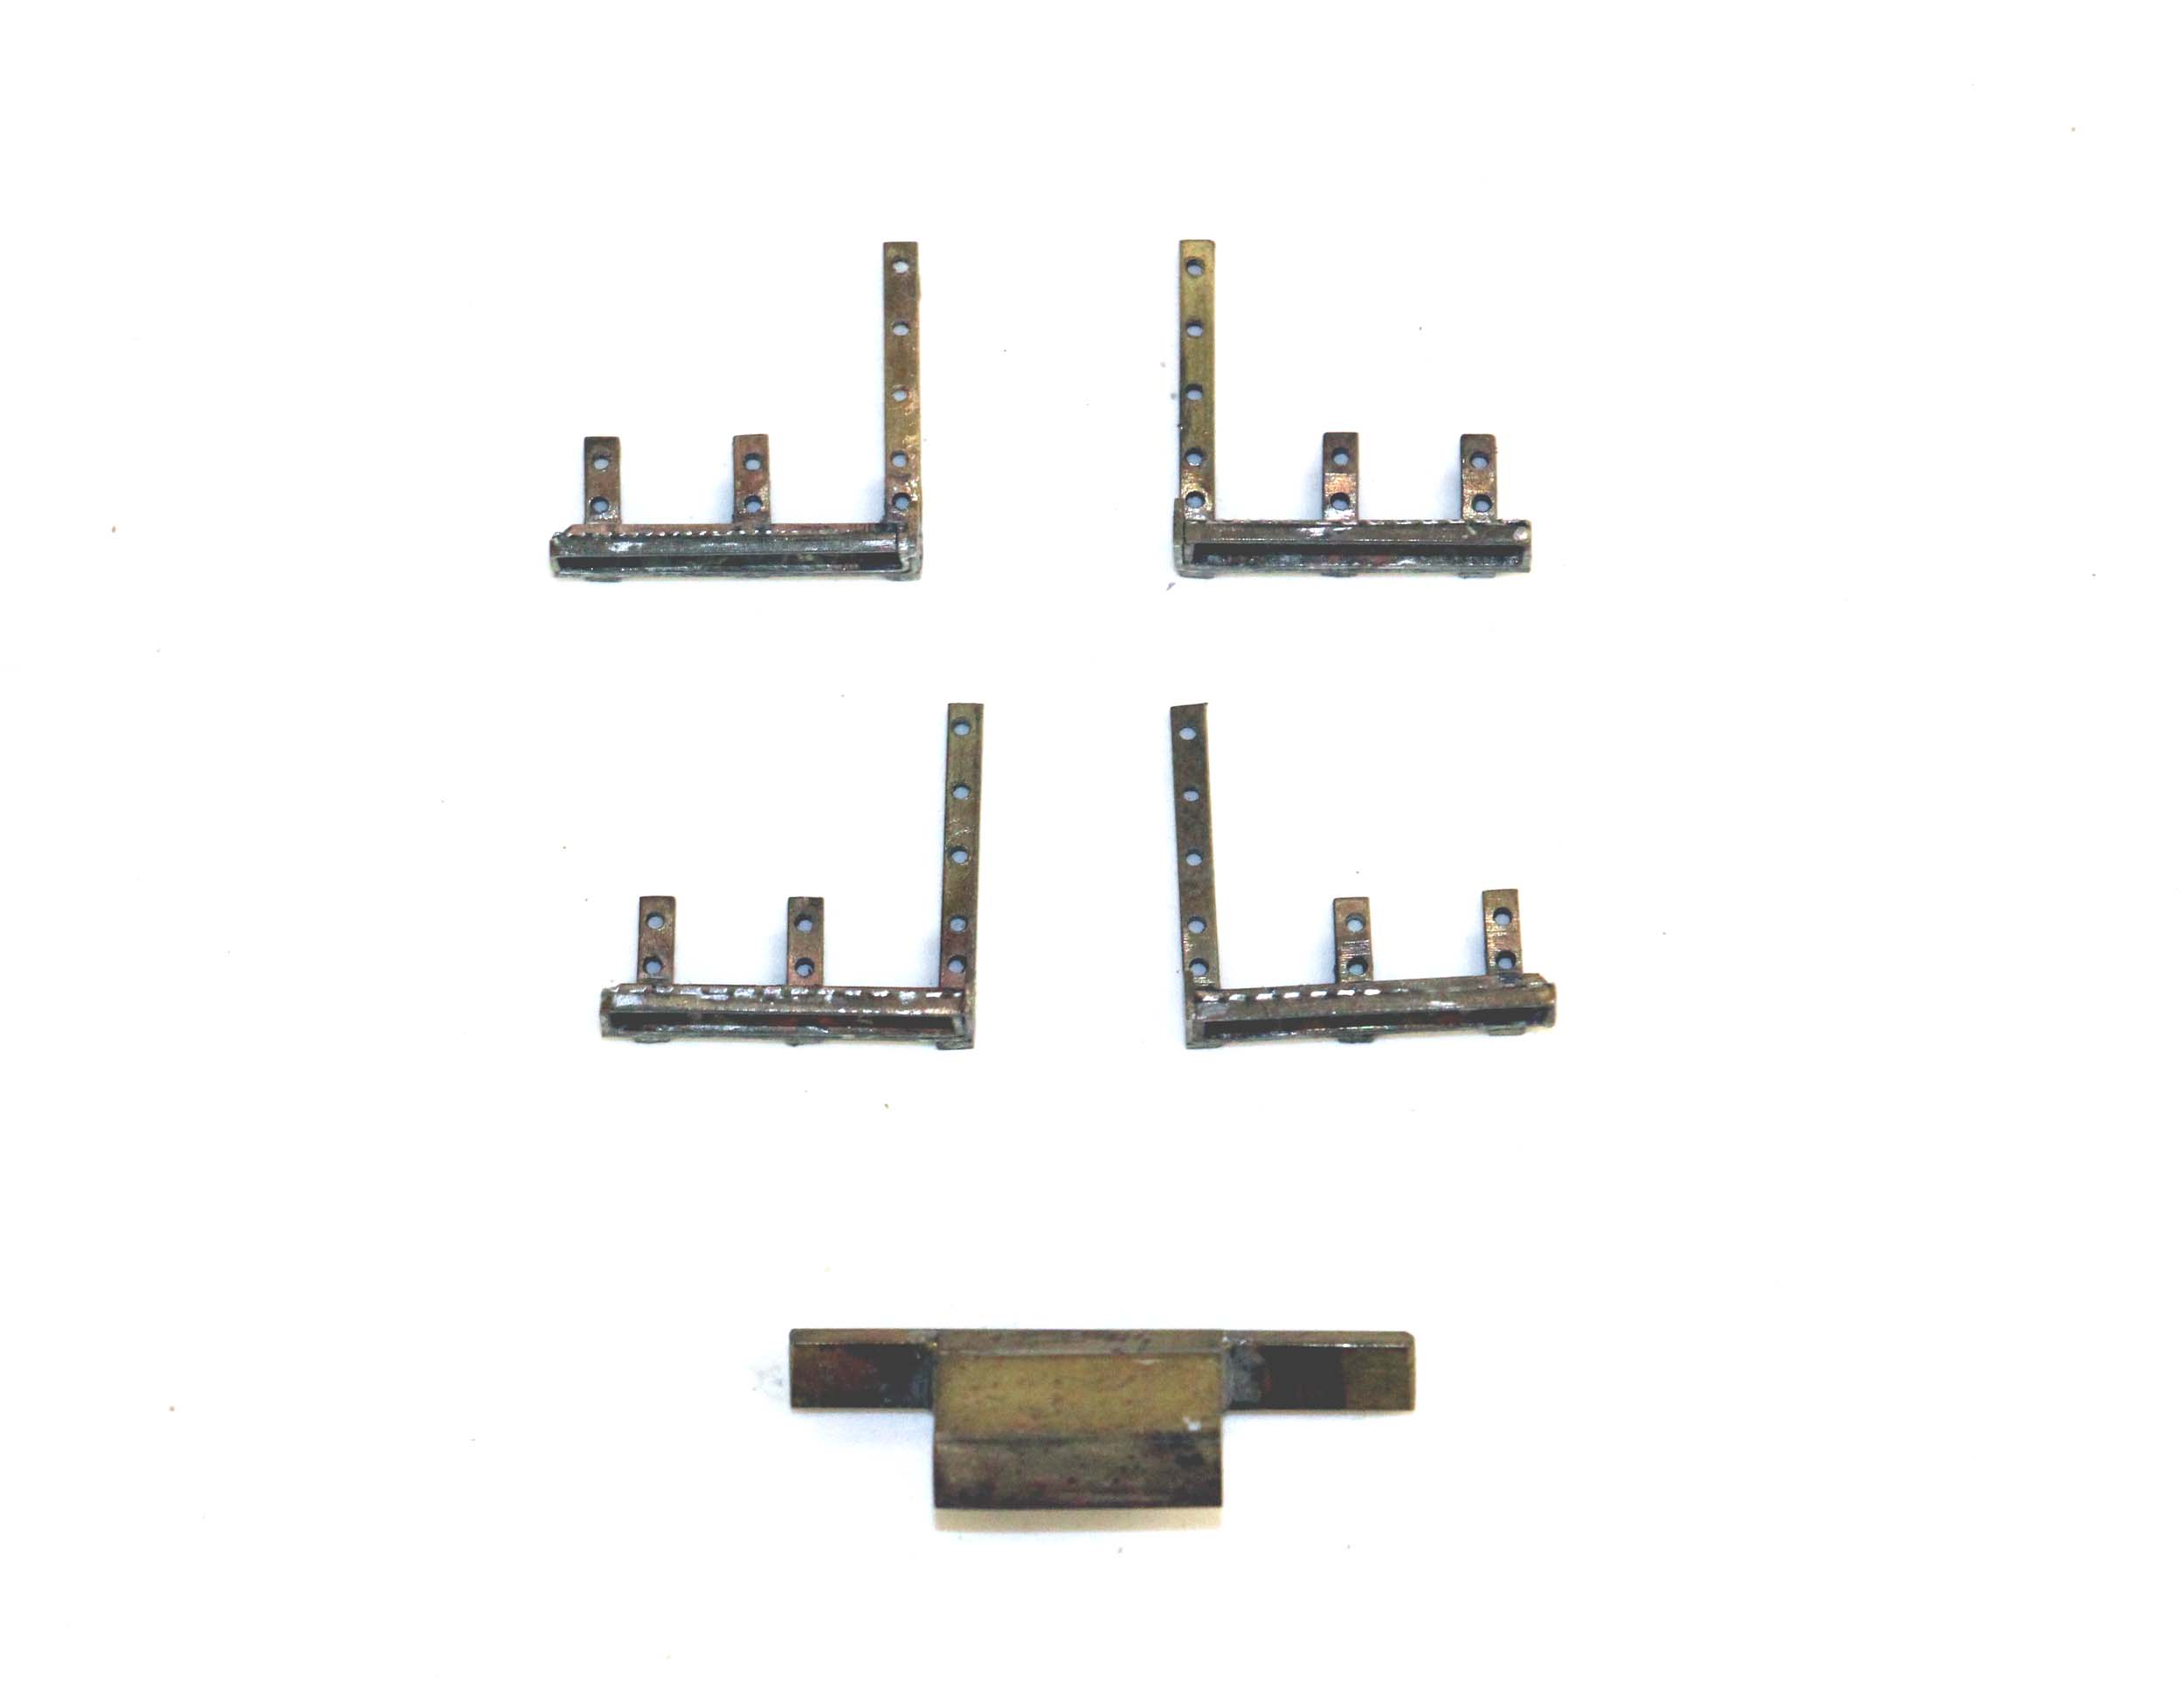
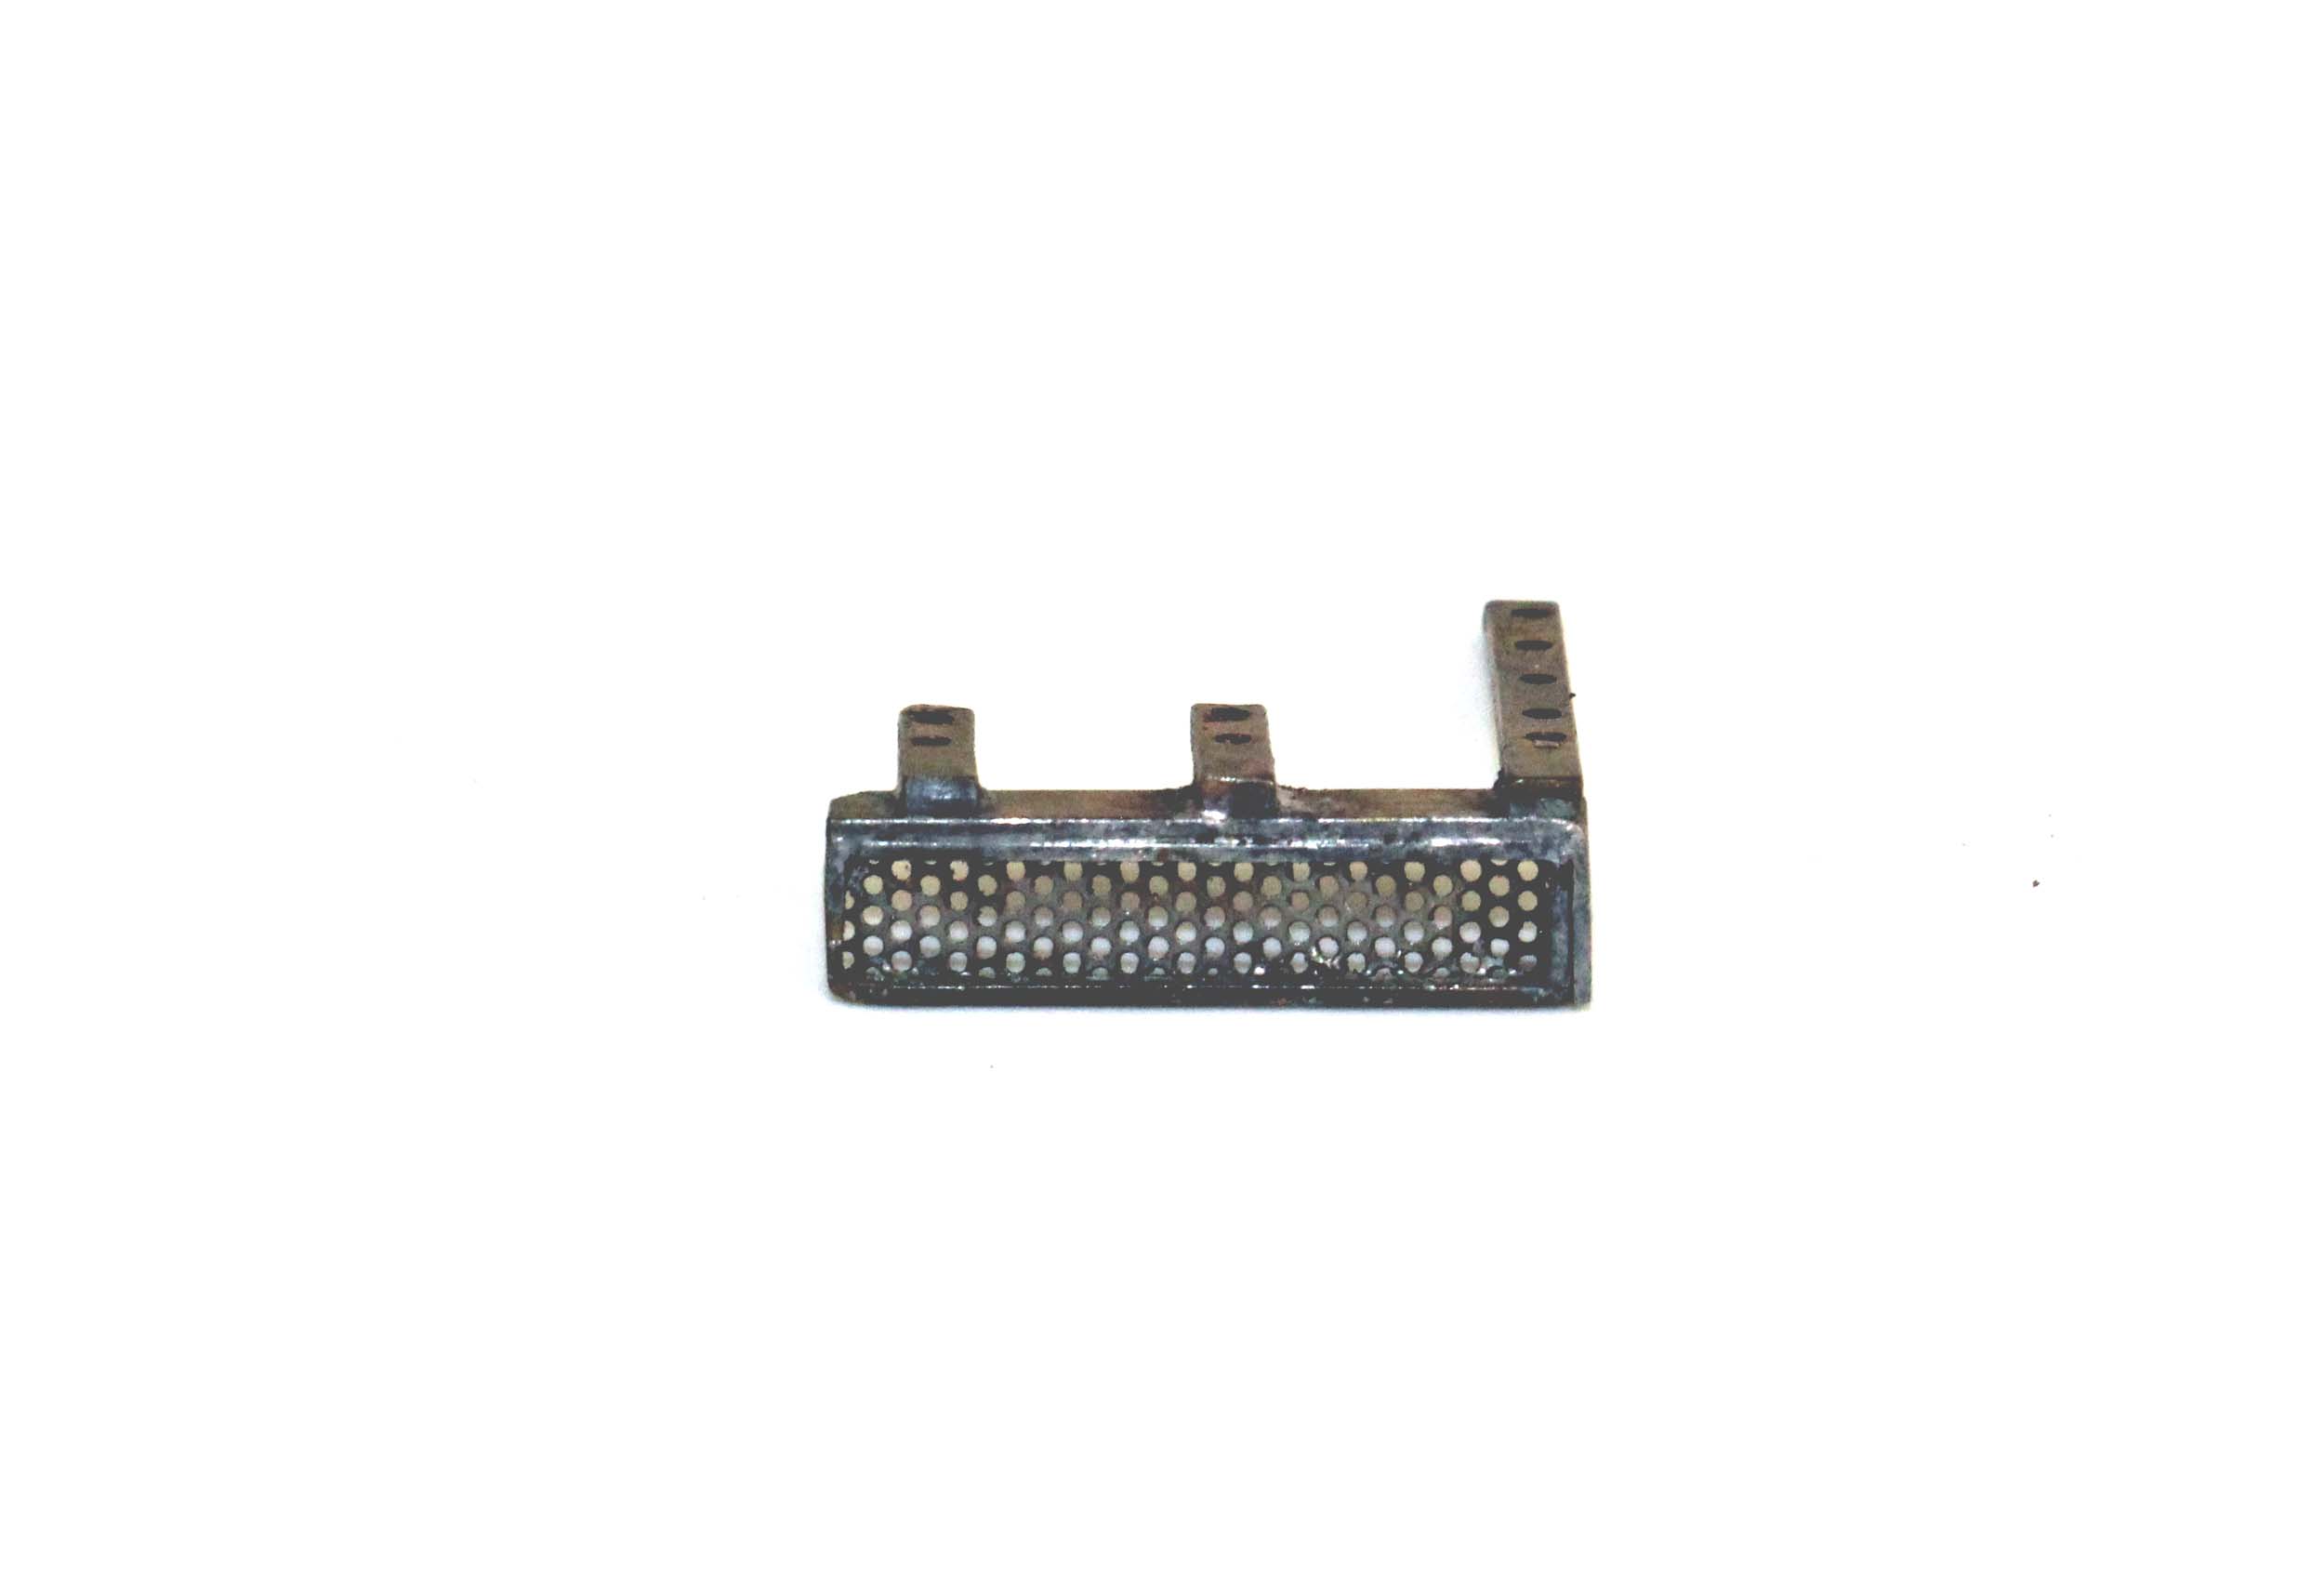
Footboards
I
wanted footboards with some form of an open grate. I am not sure if they were
round or rectangular holes but good enough. The other piece will go between the
footboards under the draft gear.

7-20-07 Update
The sound unit is in. Wiring DCC and sound
can be a challenge in the narrow hood units like the AS16 and GP9. I try to fit
in the biggest speaker possible. While the sound is not going not straight out
of the top of the shell because there are no fan openings etc. as I usually
prefer, I am taking advantage of the large screened openings on the sides.
Since I am currently using LokSound units, their 100 Ohm speakers really limit
the available speaker variety. I really wanted lit numberboards, but after a very
close call with slightly melting and almost ruining my GP9 I decided against
it. I have put a lot of
additional time in making sure the model stays together. Major brass detail
parts like the signboards are getting bolted on with 00-90 screws being used as
studs. Other parts are being pinned with wire when they are glued together.
After all of this time and effort I do not want to have to repair it and do
touch up. This is the very reason why I model almost exclusively in brass. A
good solder joint is forever.
Note the cast weight I made next to the gear
tower.
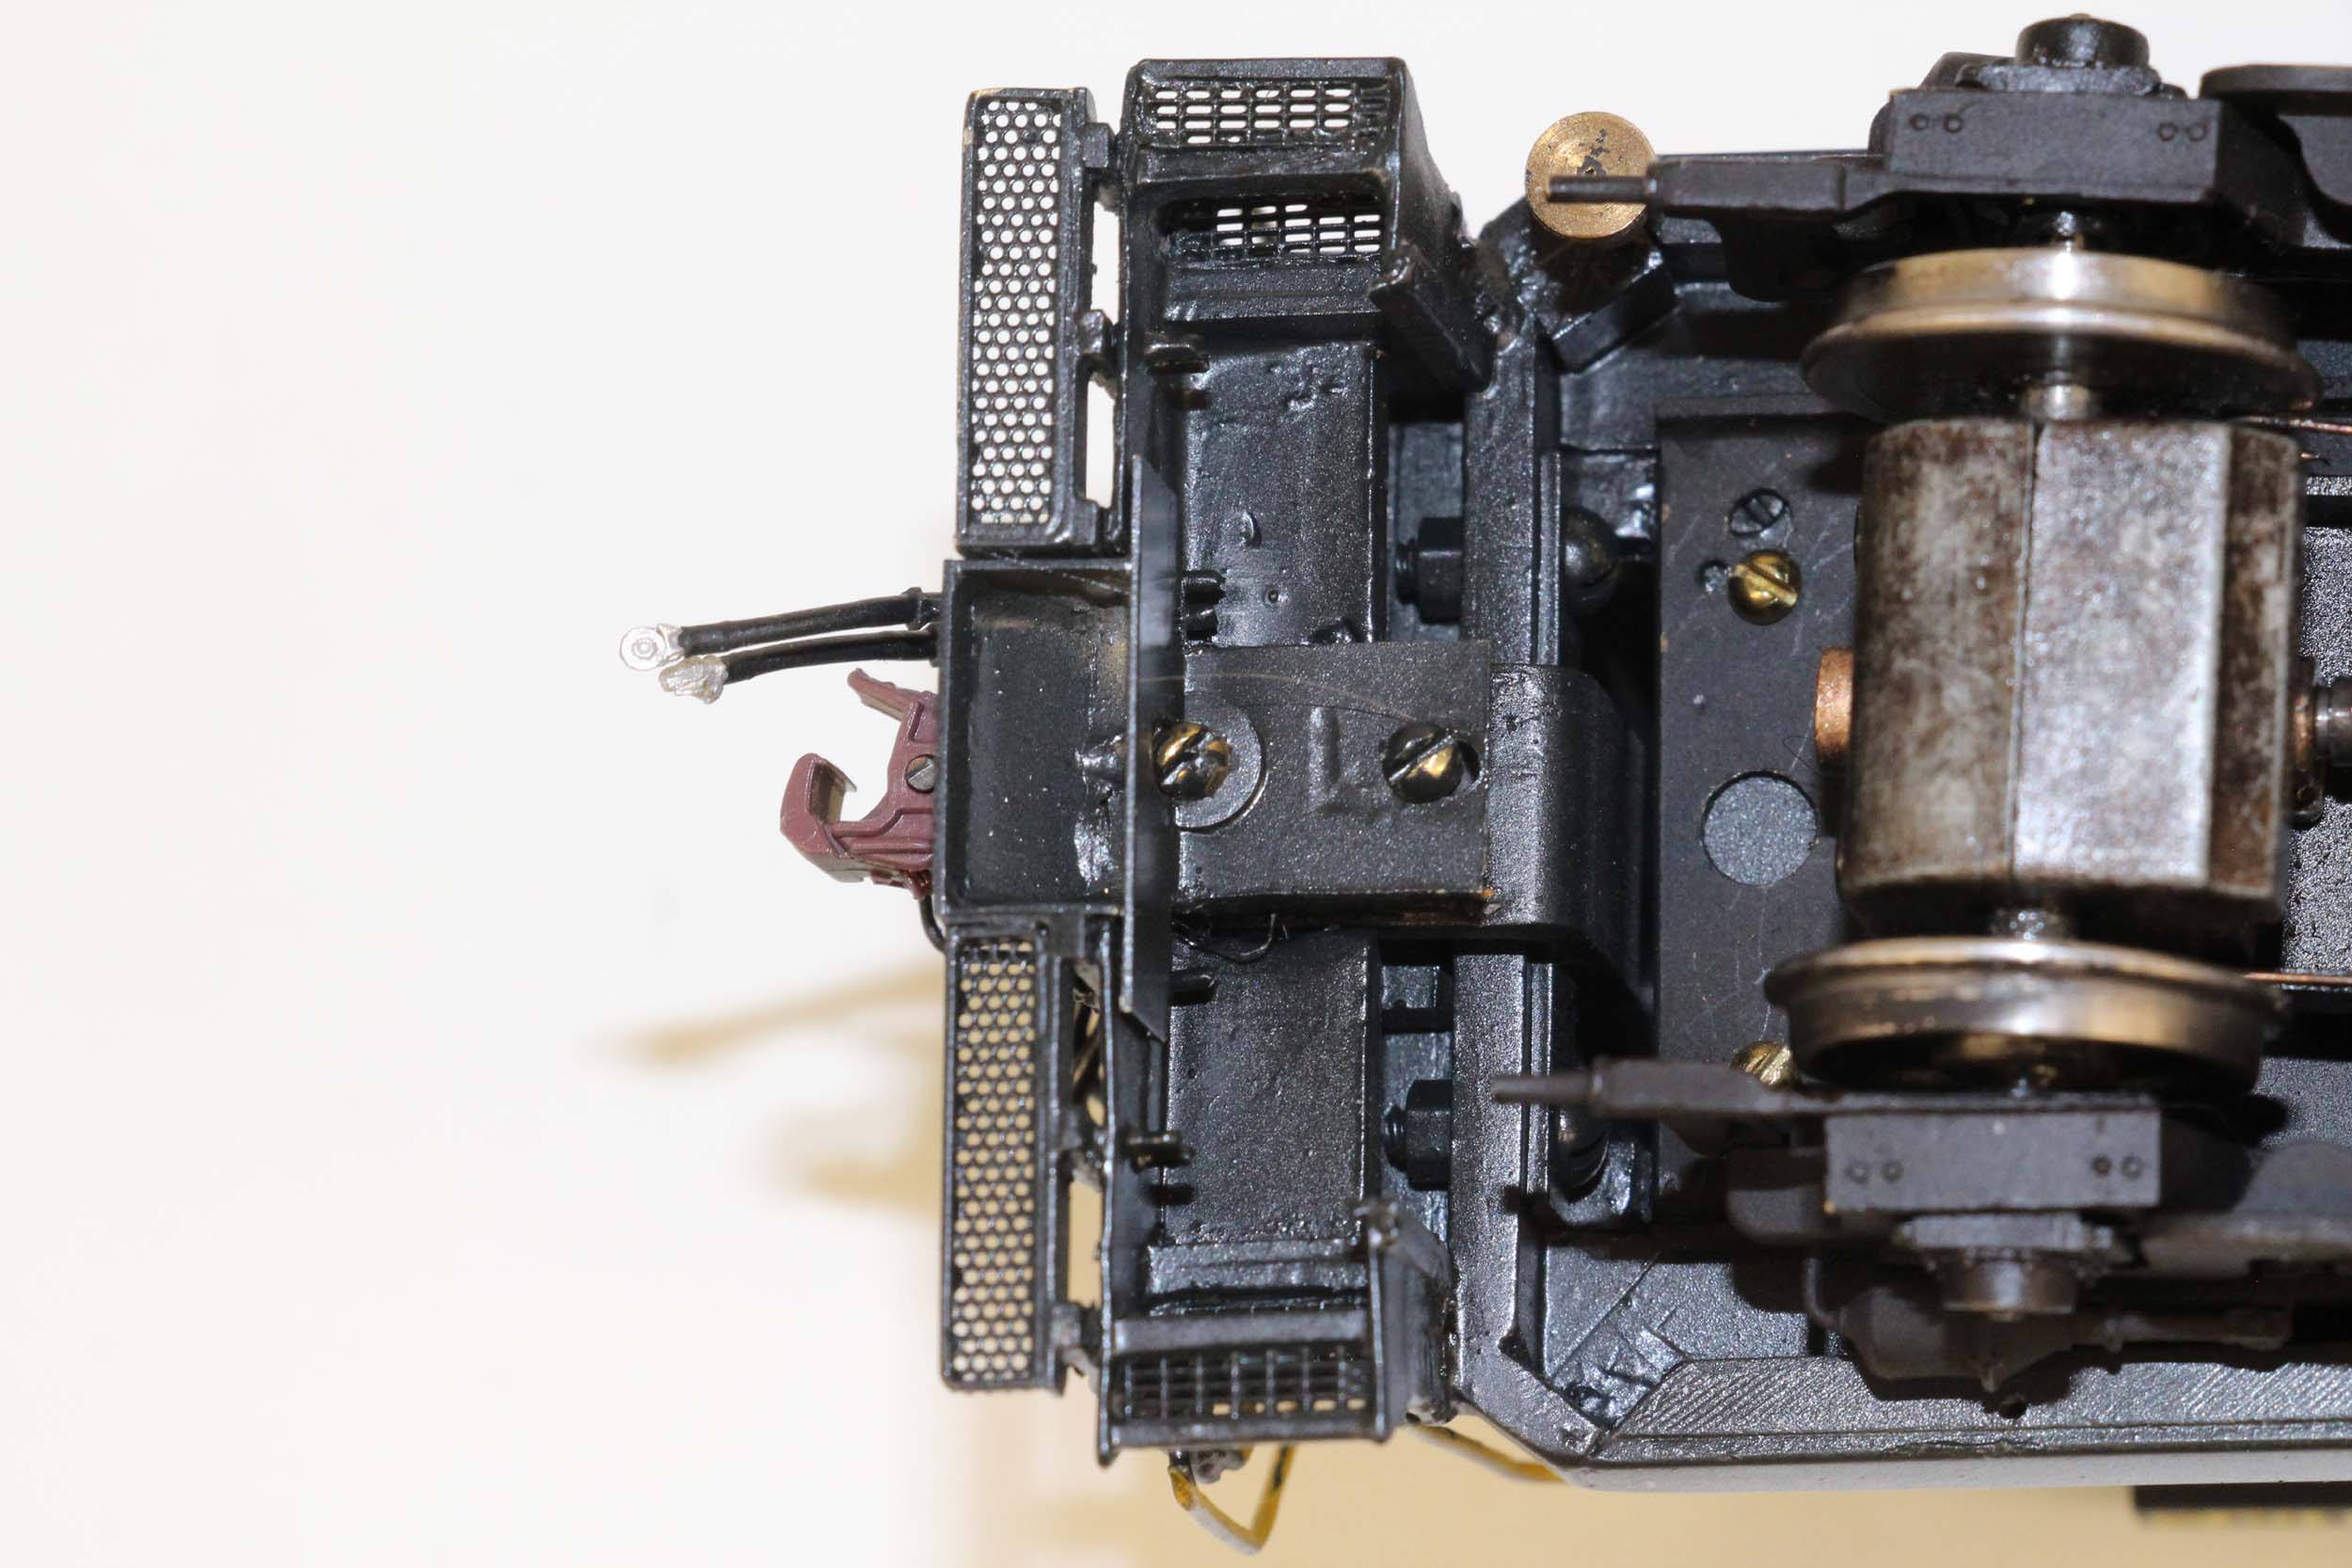
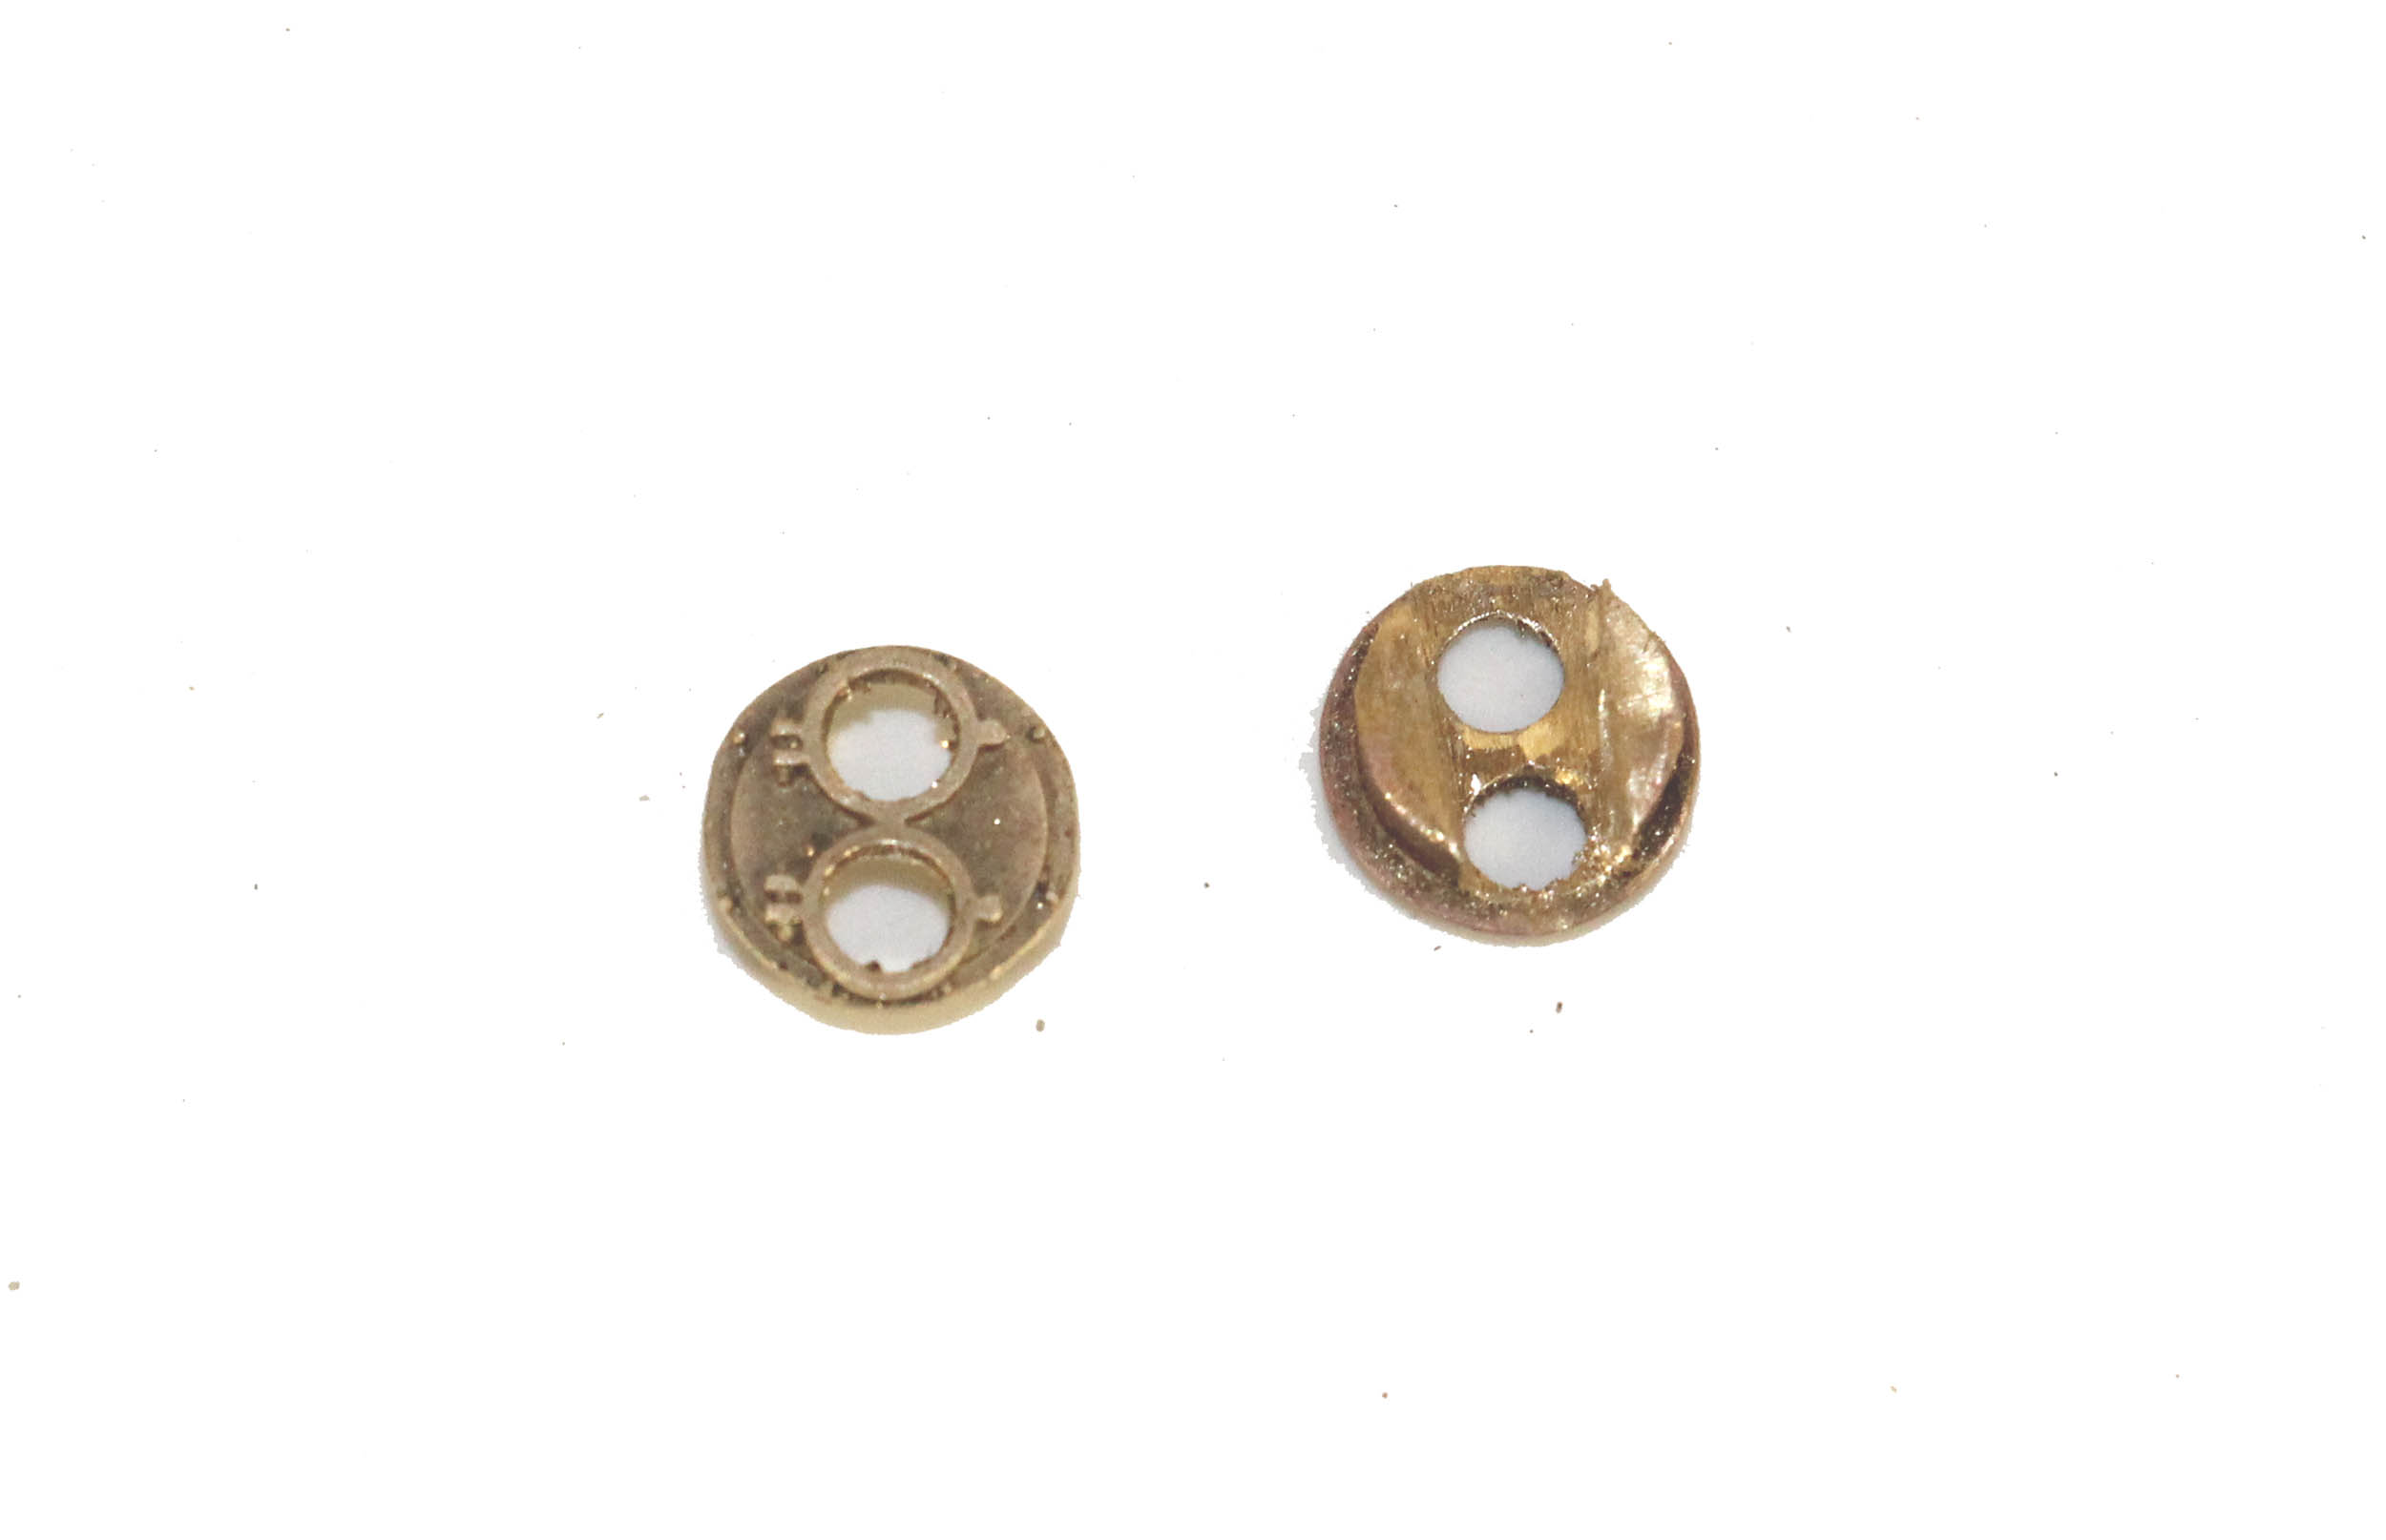
Loksound decoder And Soundtraxx Speaker

I co-opted a Train Control box from a parts K4 pilot. As
shown in the Builders Photos, there is an up and over walkway. I made the walkway part pretty easily. The
biggest anxiety attack was
when I was drilling the holes through the deck to mount the parts. I got pretty close but still had to make a
little wiggle room to get them lined up perfectly
.
On 7-24-07 I took the biggest leap of faith so far when I
stripped the paint. After working on the shell for a few months now I was
pretty sure it was made from Evergreen styrene. In spite of getting $45.00 of
Chameleon Stripper, I actually had visions (no make that nightmares) of pulling
a sagging goopy blob of plastic from the soup when I dunked it. I can now
attest that the Chameleon Stripper (no longer available – Scalecoat makes an
identical plastic stripper) was safe for at least this shell and another one I
stripped yesterday. I did a little test on the inside before going for the big
dunk. The paint did not fly off but
there were no signs of damage or crazing. 2 hours later after some pretty
steady scrubbing with a small stiff paint brush it was pretty good. A few steps
got knocked out in the fray but they will be repaired.
10-8-12
I am back on it again. Procrastination sometimes works on
my favor. There is now a Tsunami Baldwin decoder. I ripped out the LokSound
unit. I never really liked it anyway. I am getting custom decals made by Jerry
Glow. I have moved on to using RailMaster Deep Bass speakers with the Tsunami.
These are all good things.
10-12-12
The Tsunami is
installed and it is running very well. Some details are made and are not
installed yet.
A lot of details
and rework have to be done.
This is the “test
run” portrait on 10-12-12

A YouTube clip of this test run is here

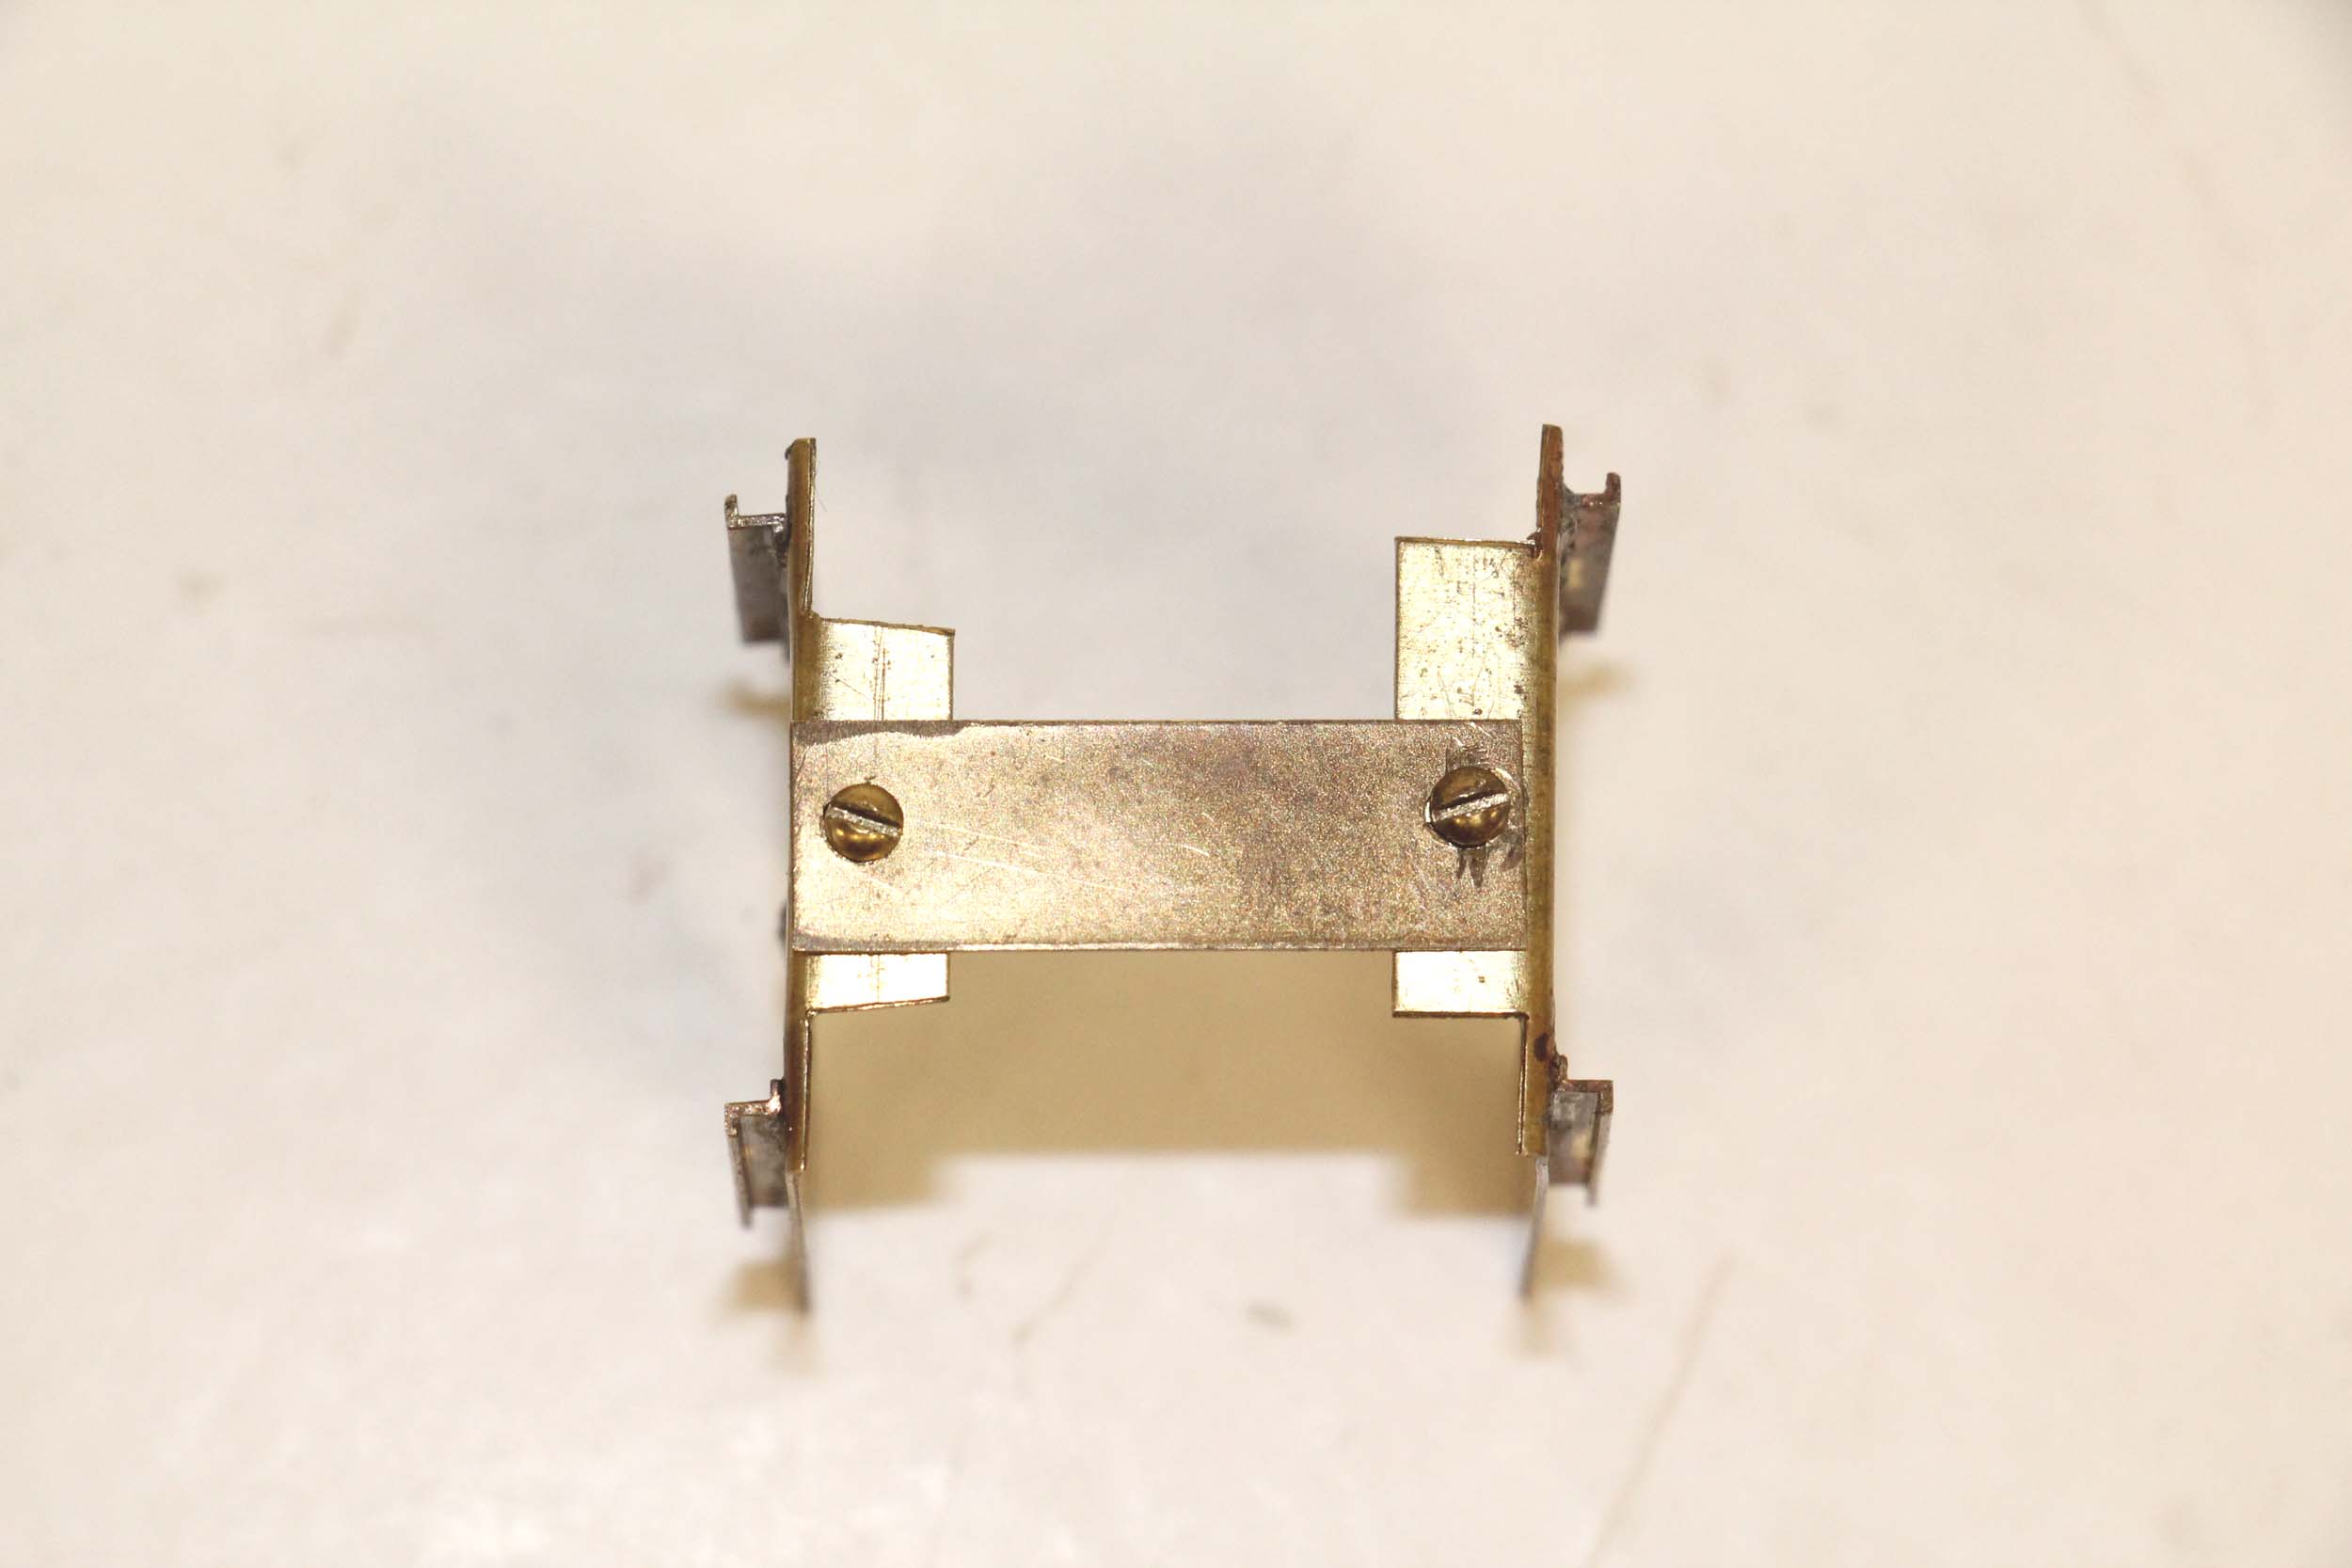
Coupler Mounting
12-10-17
This
coupler mount was likely done before I stripped the paint in 2007. I had GREAT
concern of a collision or hard coupler hit, and if the pilot would survive the
impact. The plastic has proven to be a bit brittle. I would have rather
attached the couplers to the drive but could not see how that would work while
filling in the draft gear and pilot. I went to some rather extreme building
making this elaborate coupler bracket tying it into much thinker areas of the
shell.
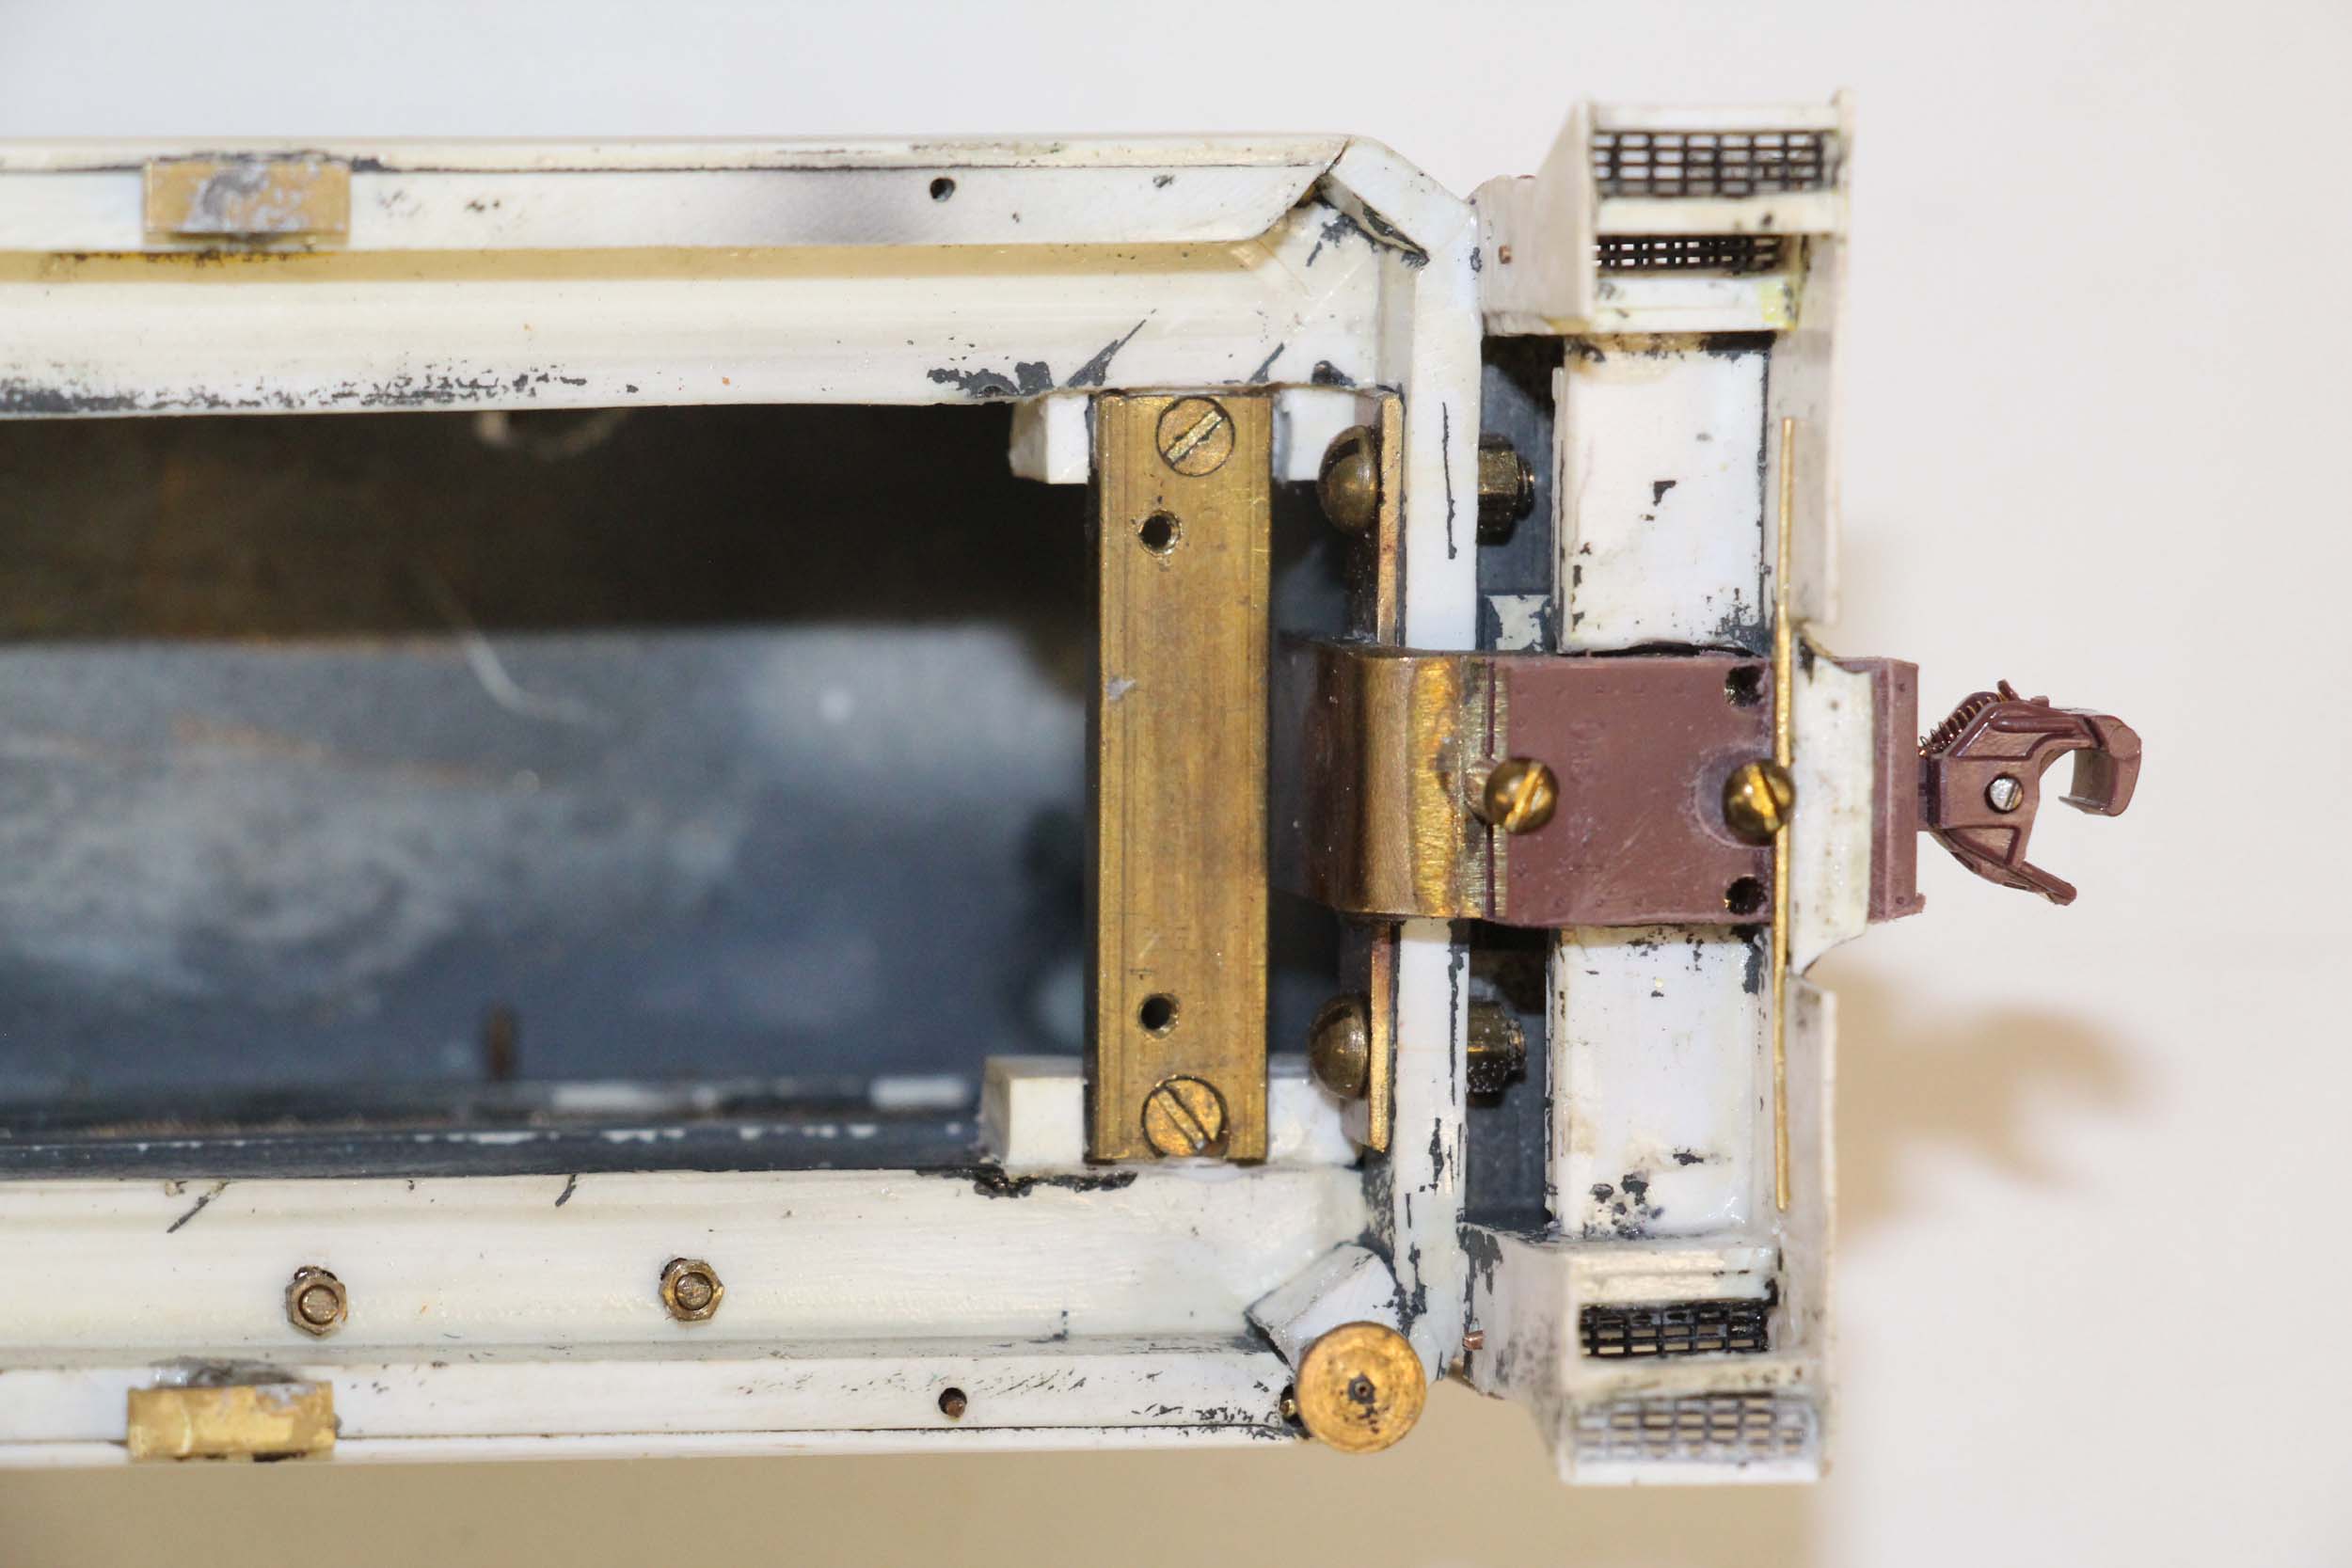
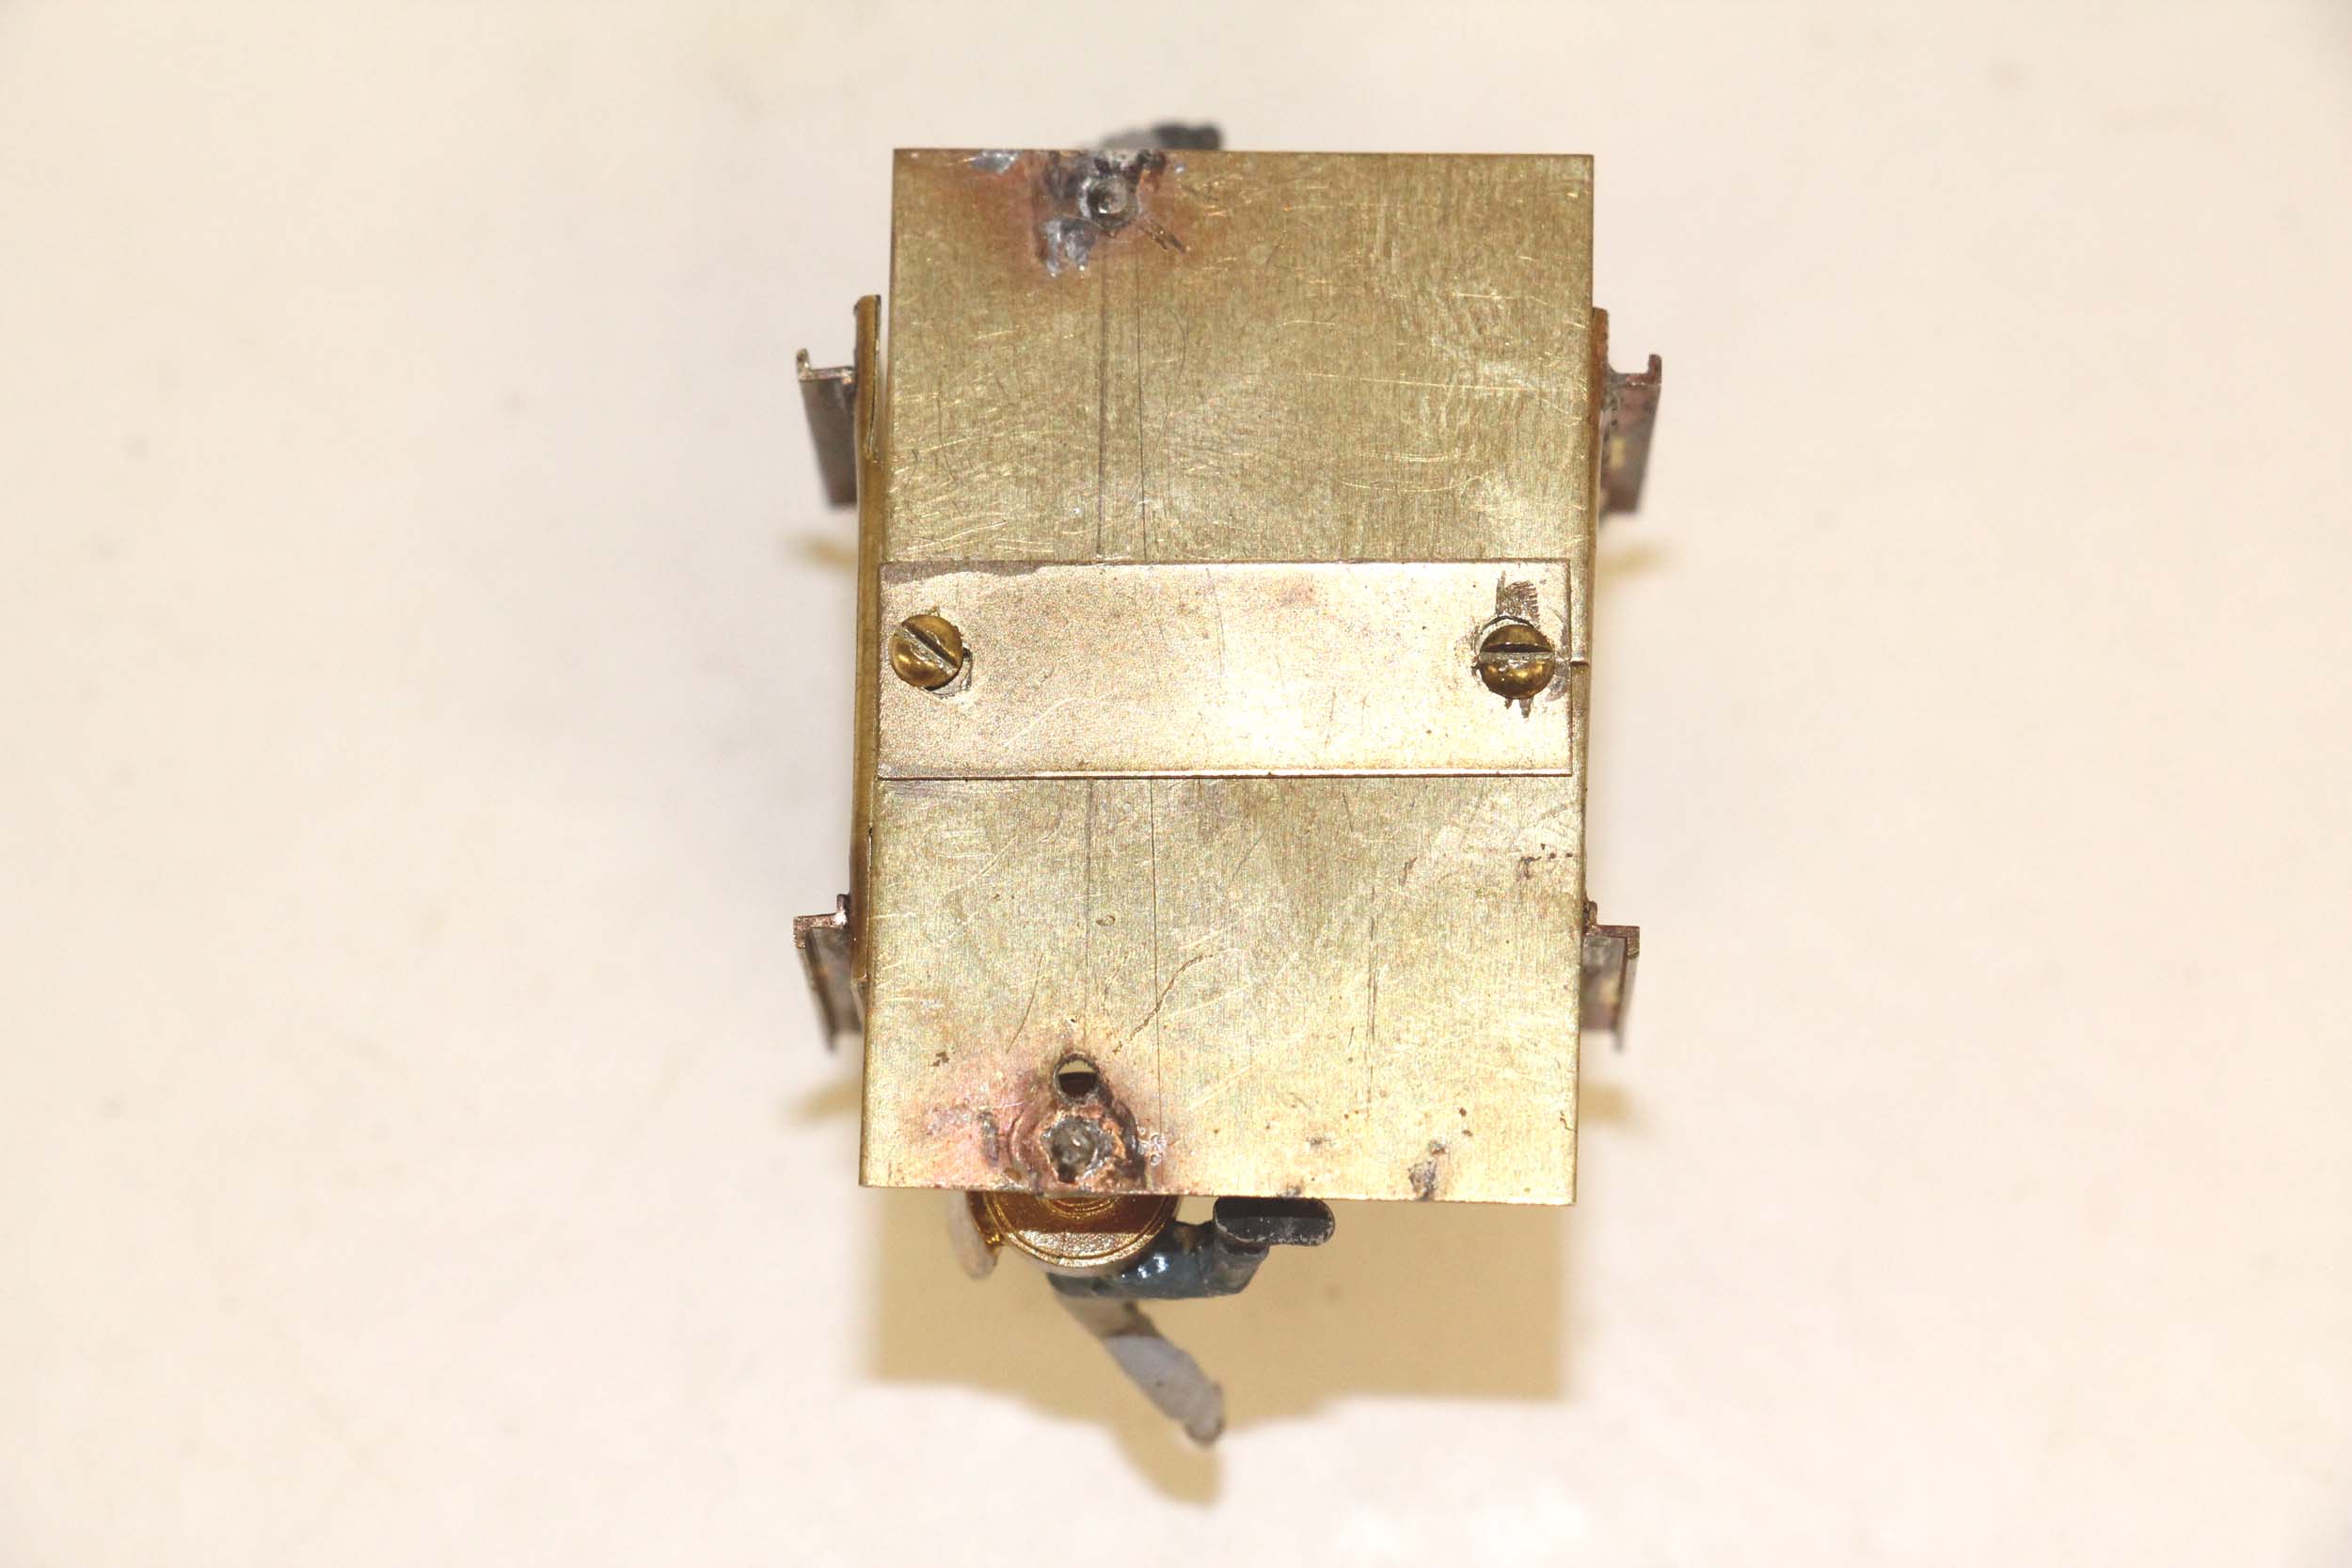
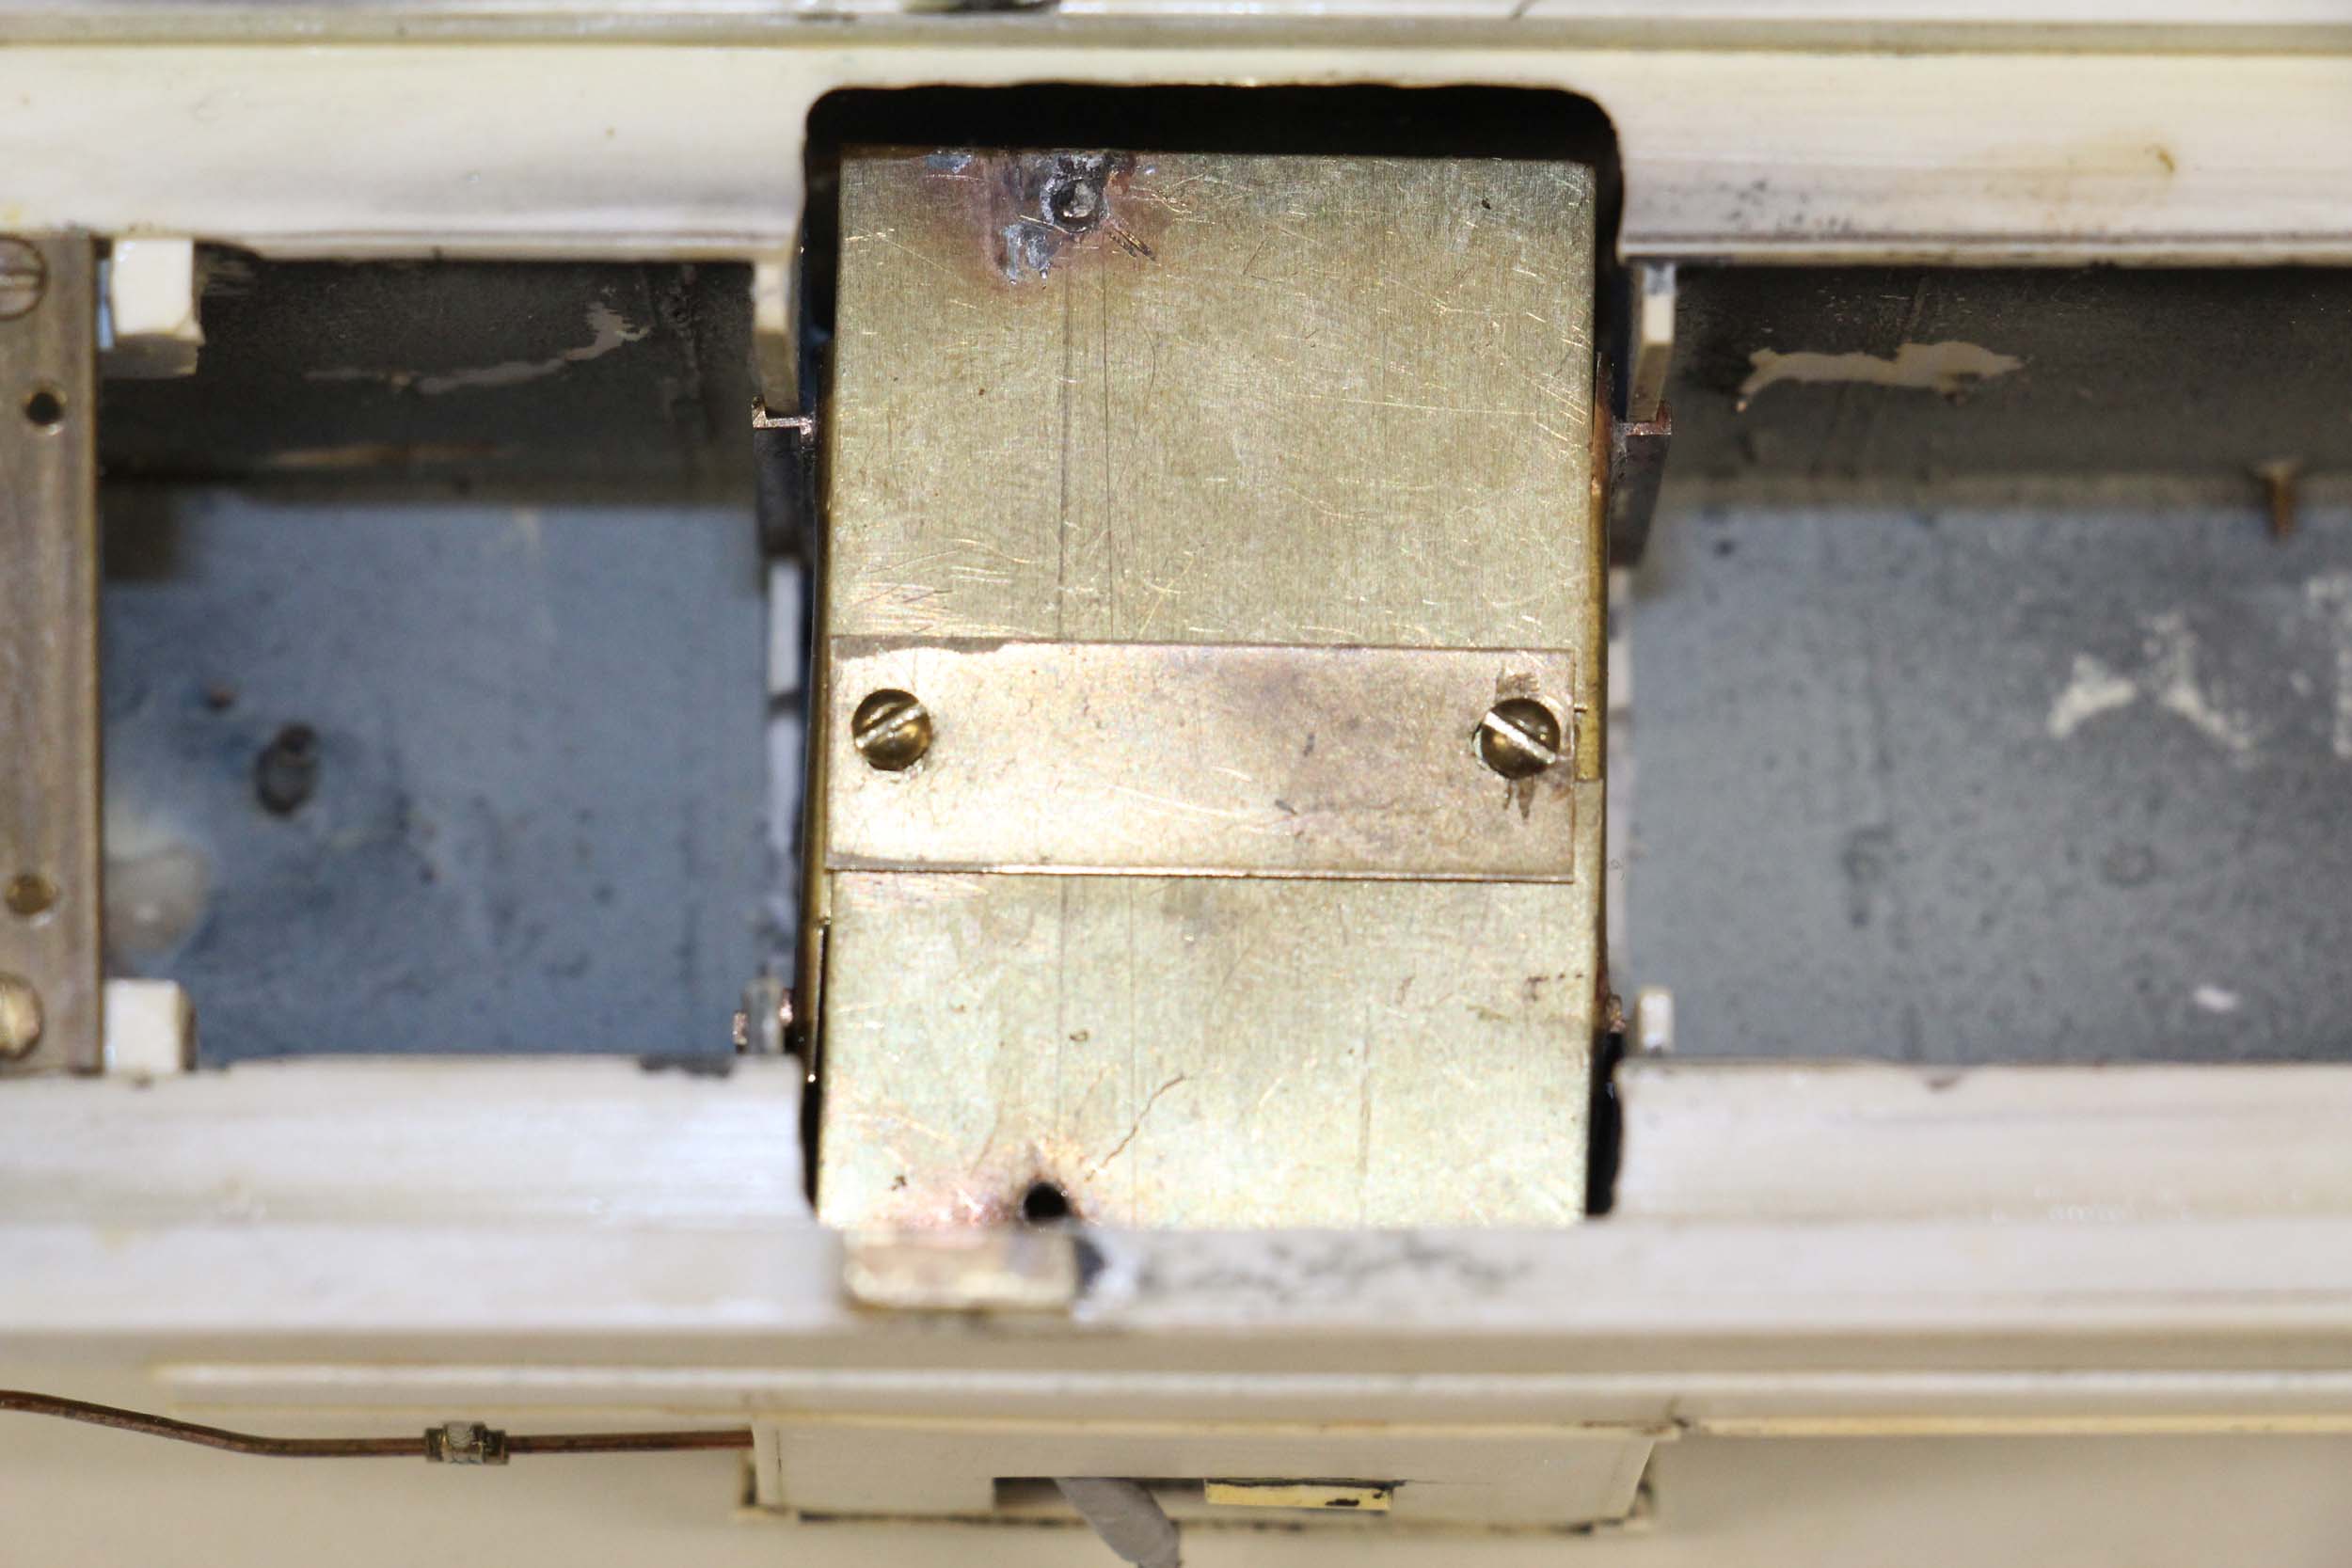
I
reworked the housing that goes under the draft gear. I really did not have a
plan for how to do it well in 2012. It is a bracket that screws to the bottom
of the Kadee coupler box. This makes coupler replacement possible because it is
all removable. The bracket is a bit wider than the draft gear for additional
strength and protection.
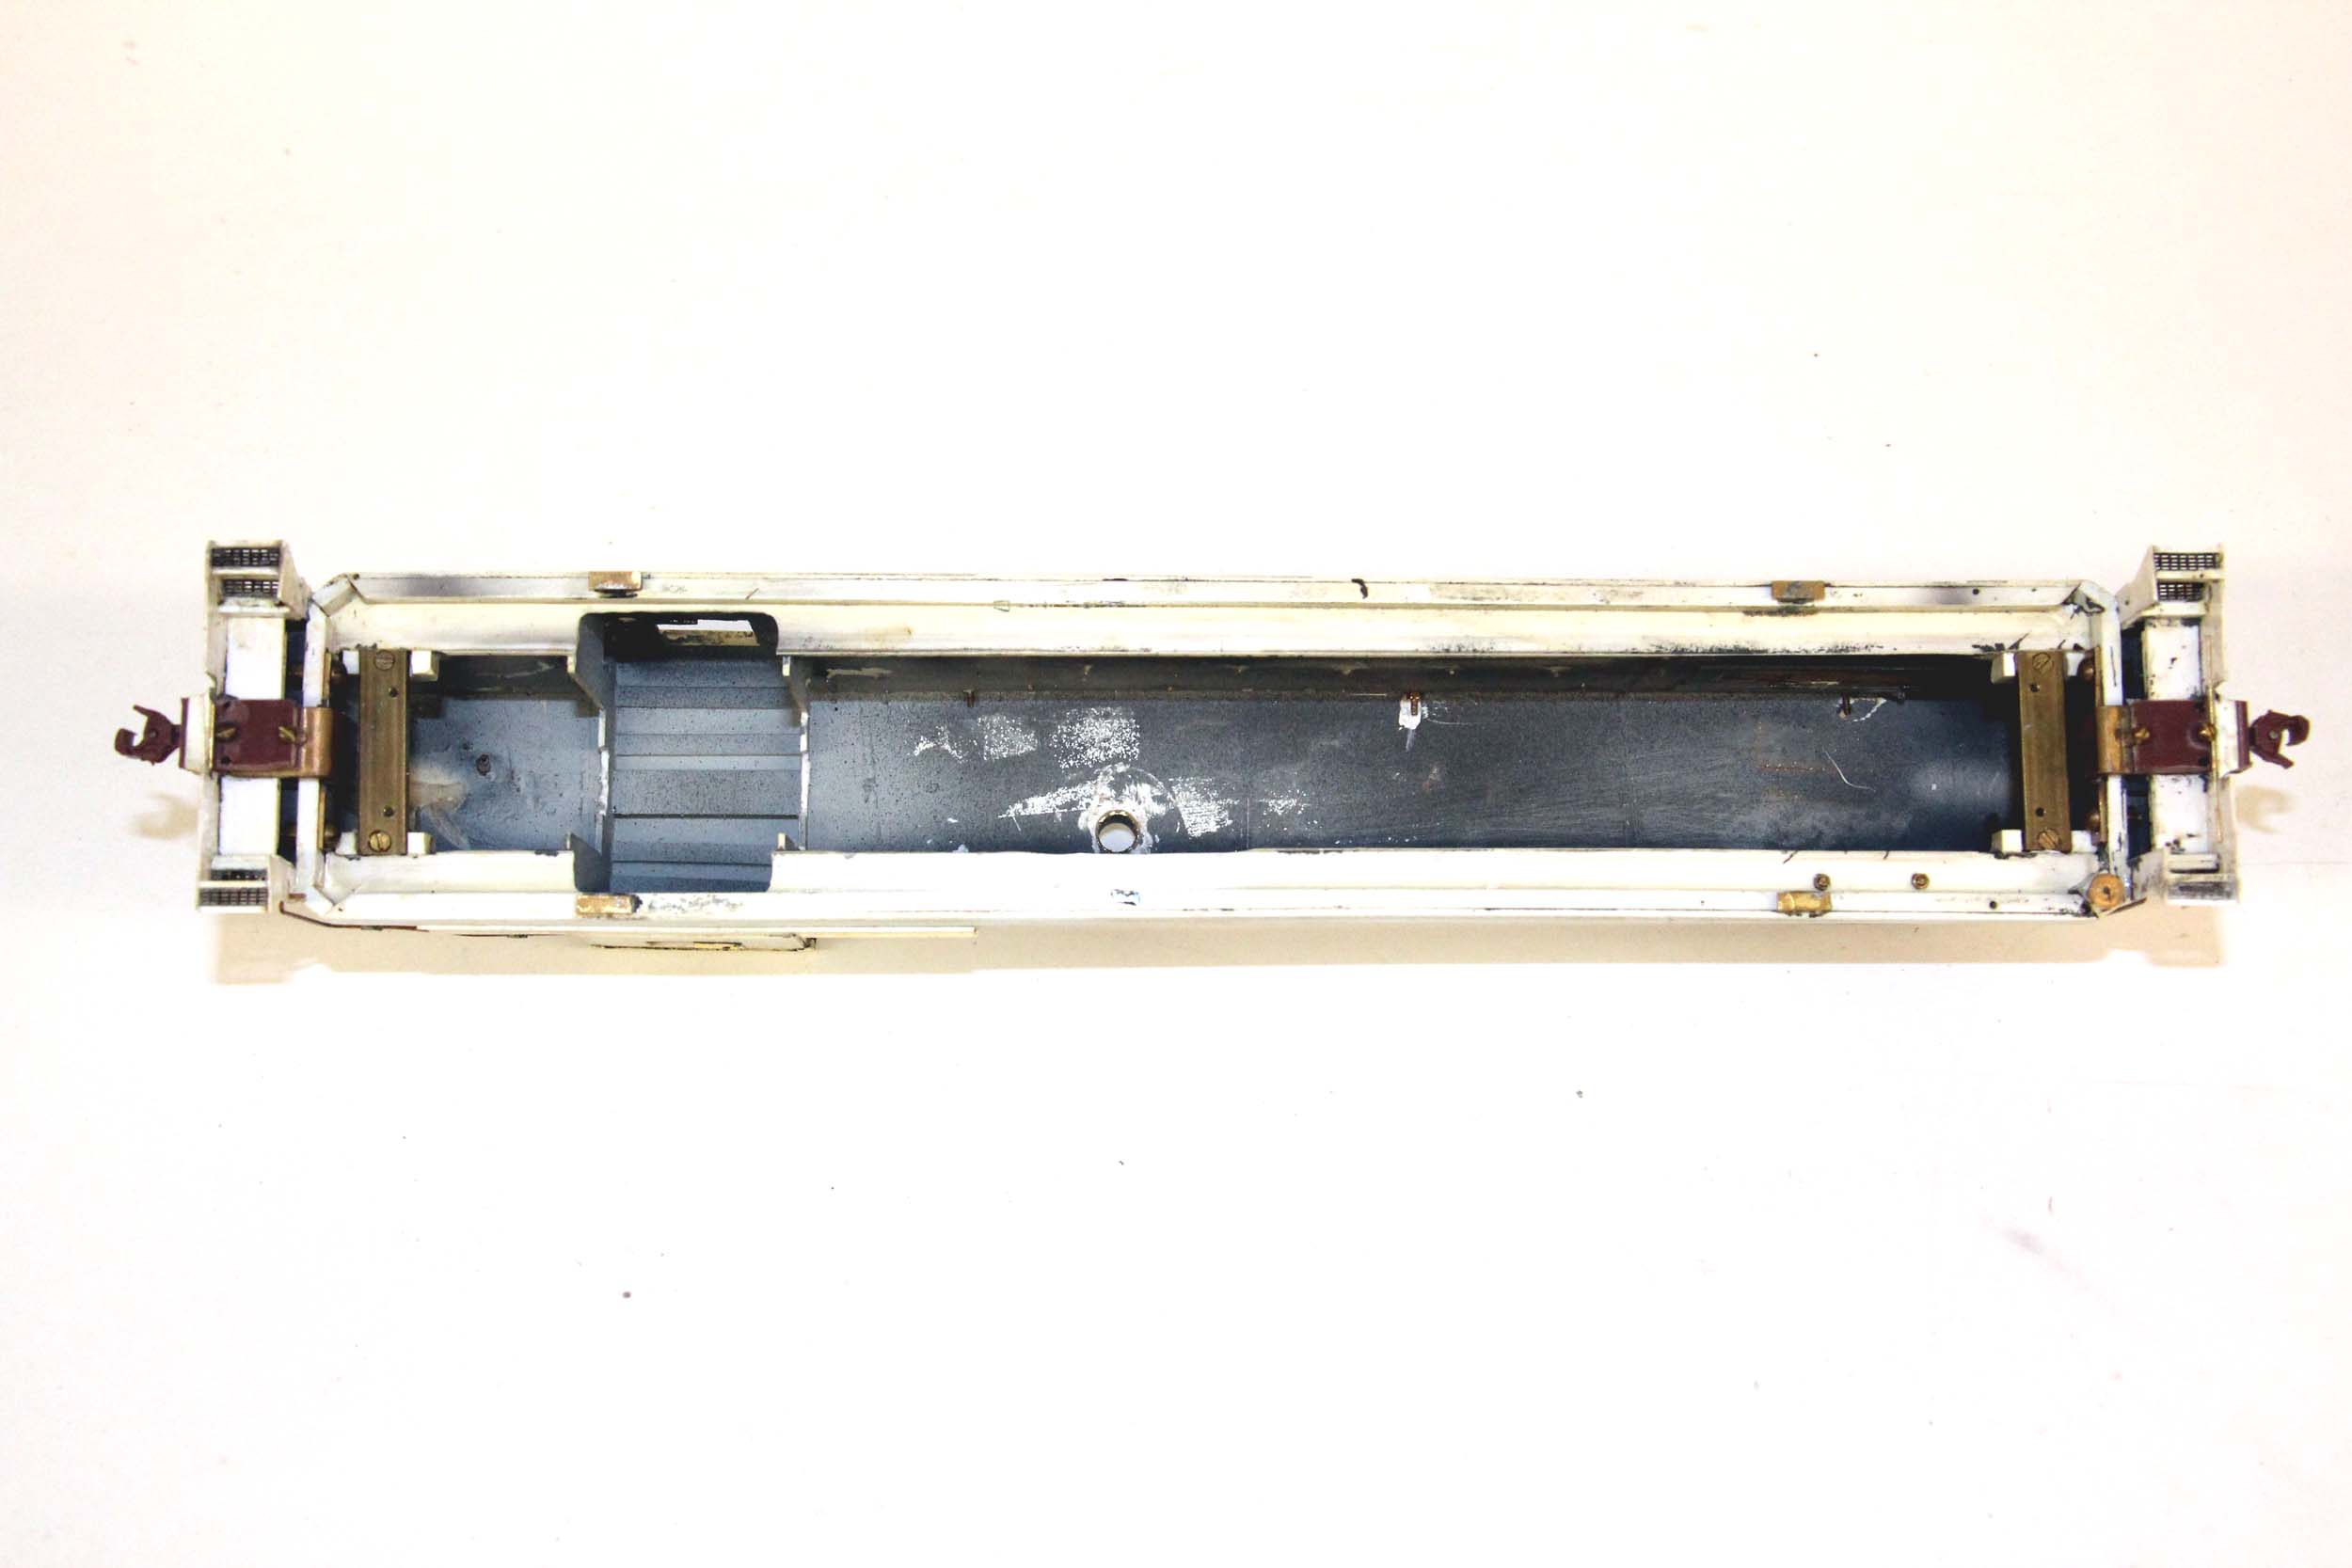
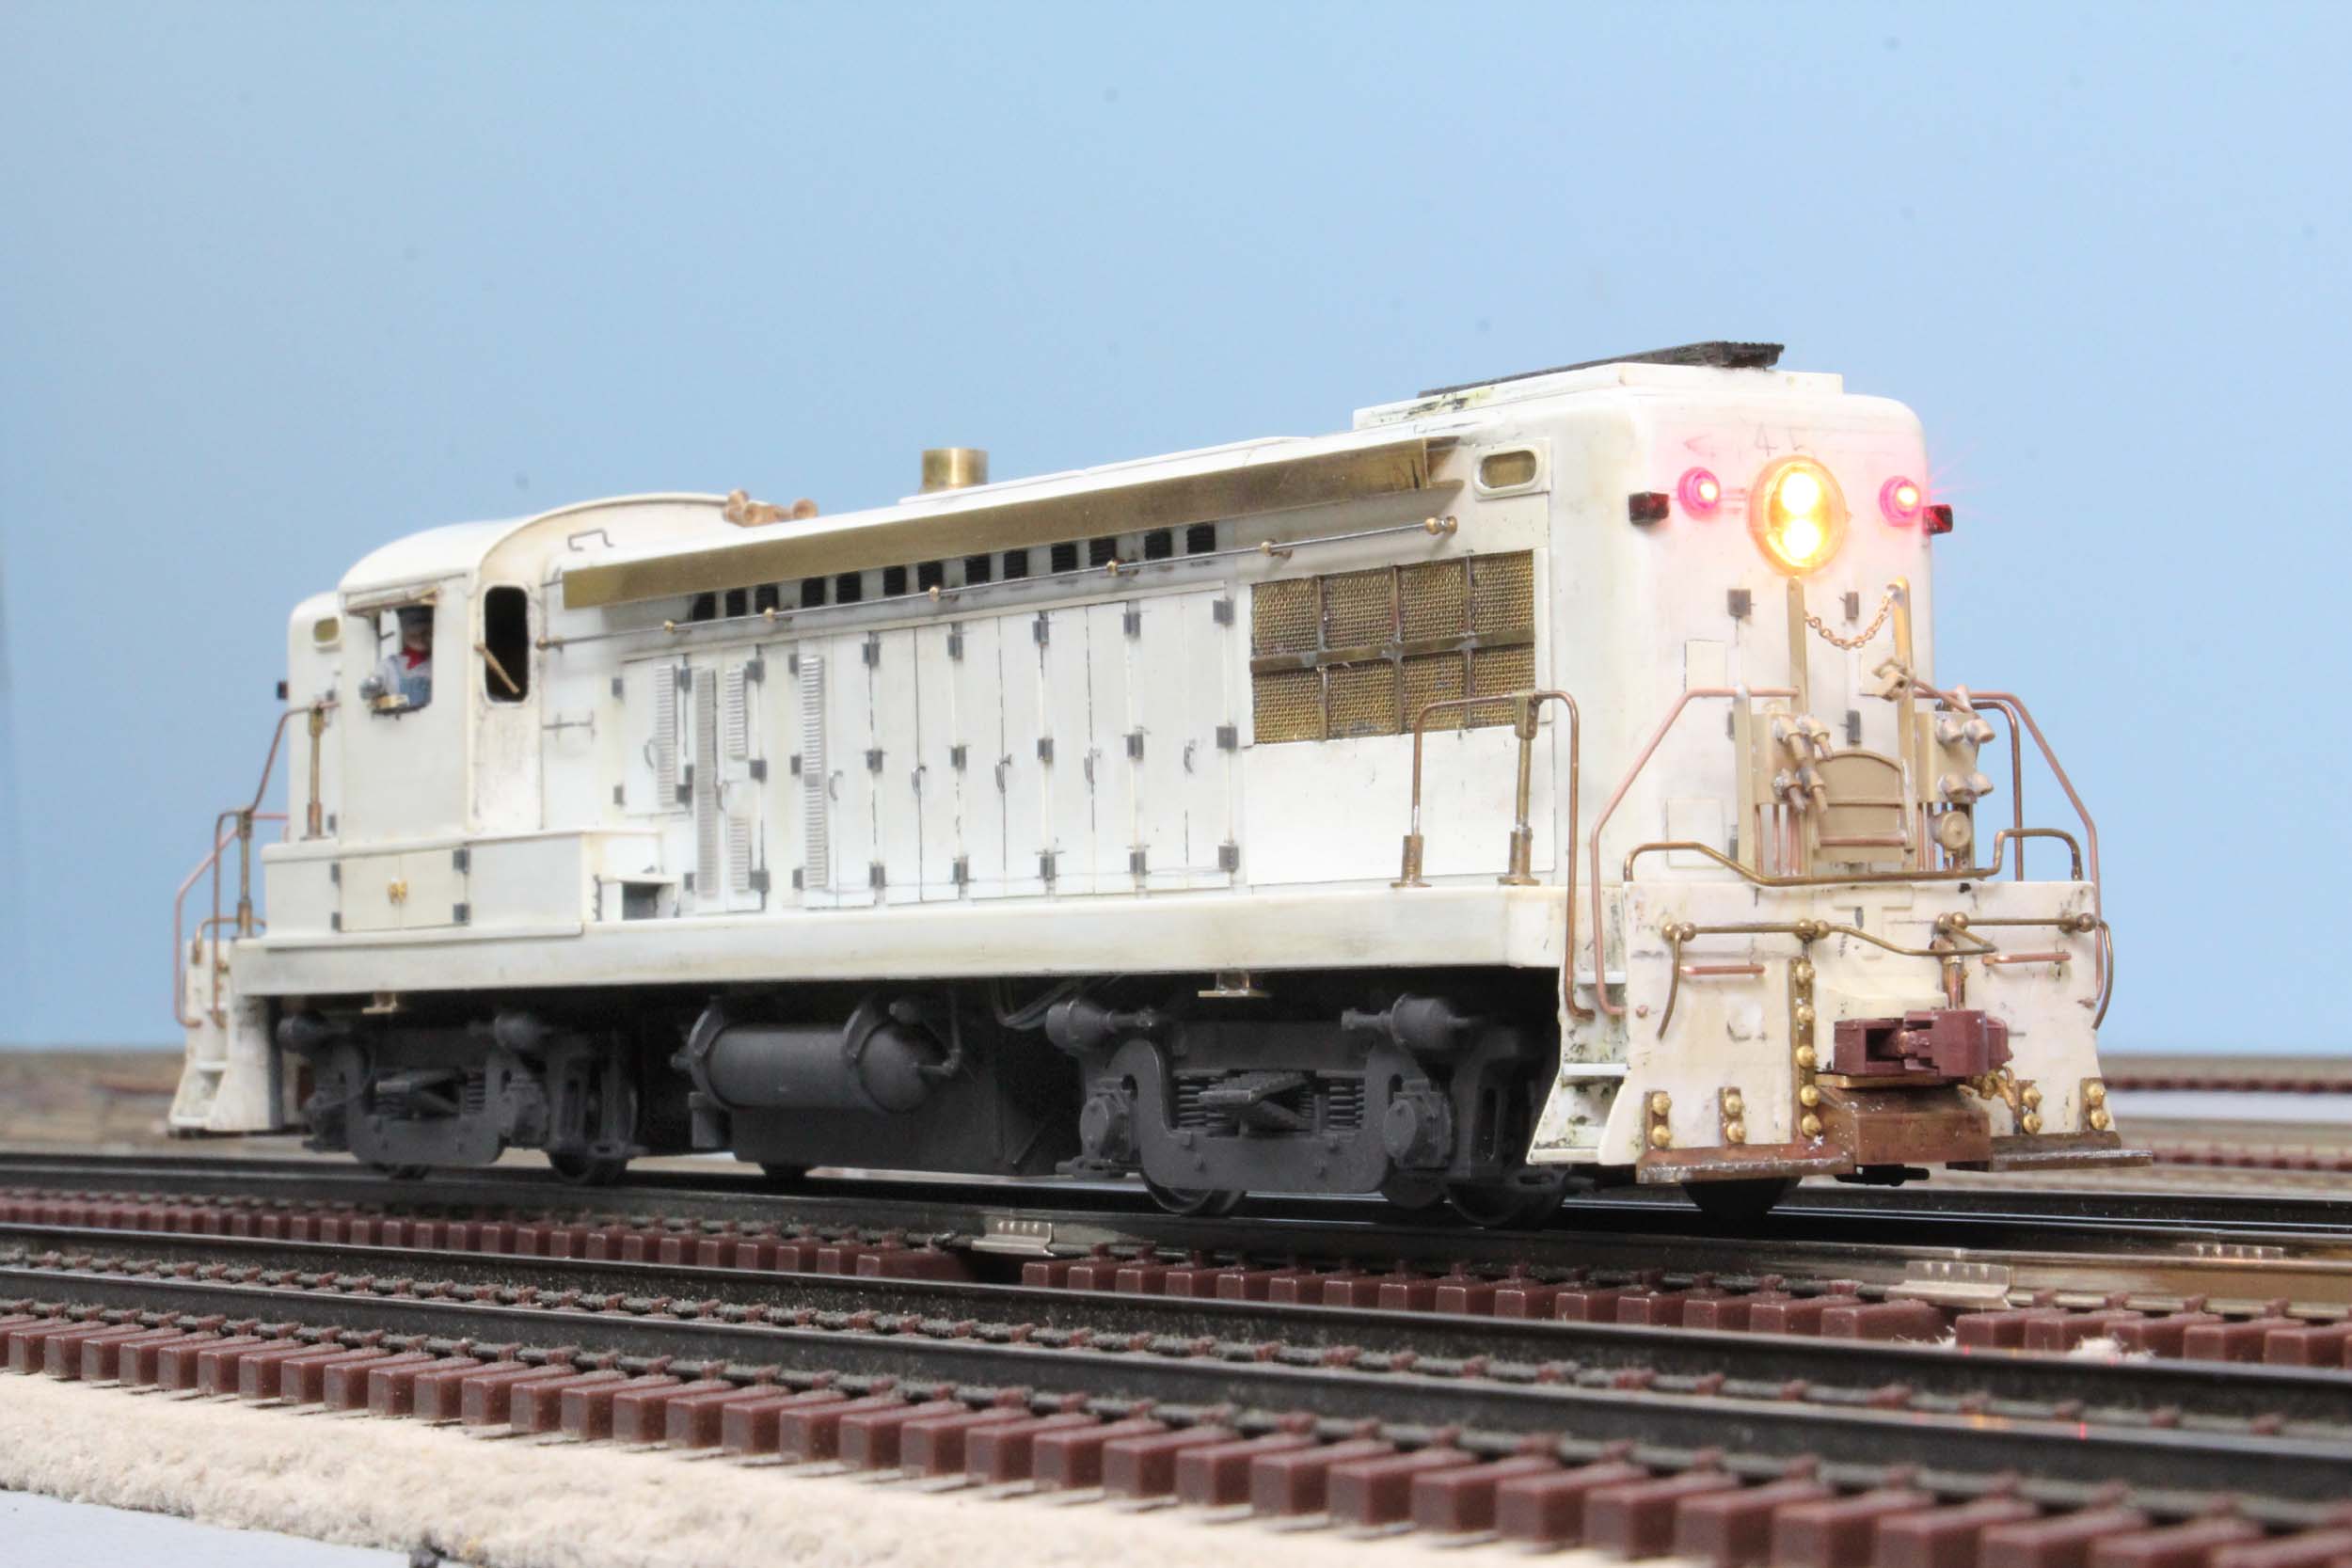
Many projects have been done since I last worked on this. In 24 years
after getting the loco shell it is time to get it done. Today I installed the
LAST of 4 decoders and speakers. This first photo is a Mini Soundtraxx Baldwin
Tsunami2, Current Keeper capacitor bank and a RailMaster DLG8 speaker. I did
not cut grooves into the backs of the wheels for this loco. I started doing
that later. With the Current Keeper that fixes many pick up issues. No lights
yet. The last time I worked on it was going to be incandescent lights. I am
using all LEDs now, and have to make a complete new light system. I also
installed much better driveshafts than the cobbled together pieces I was using.
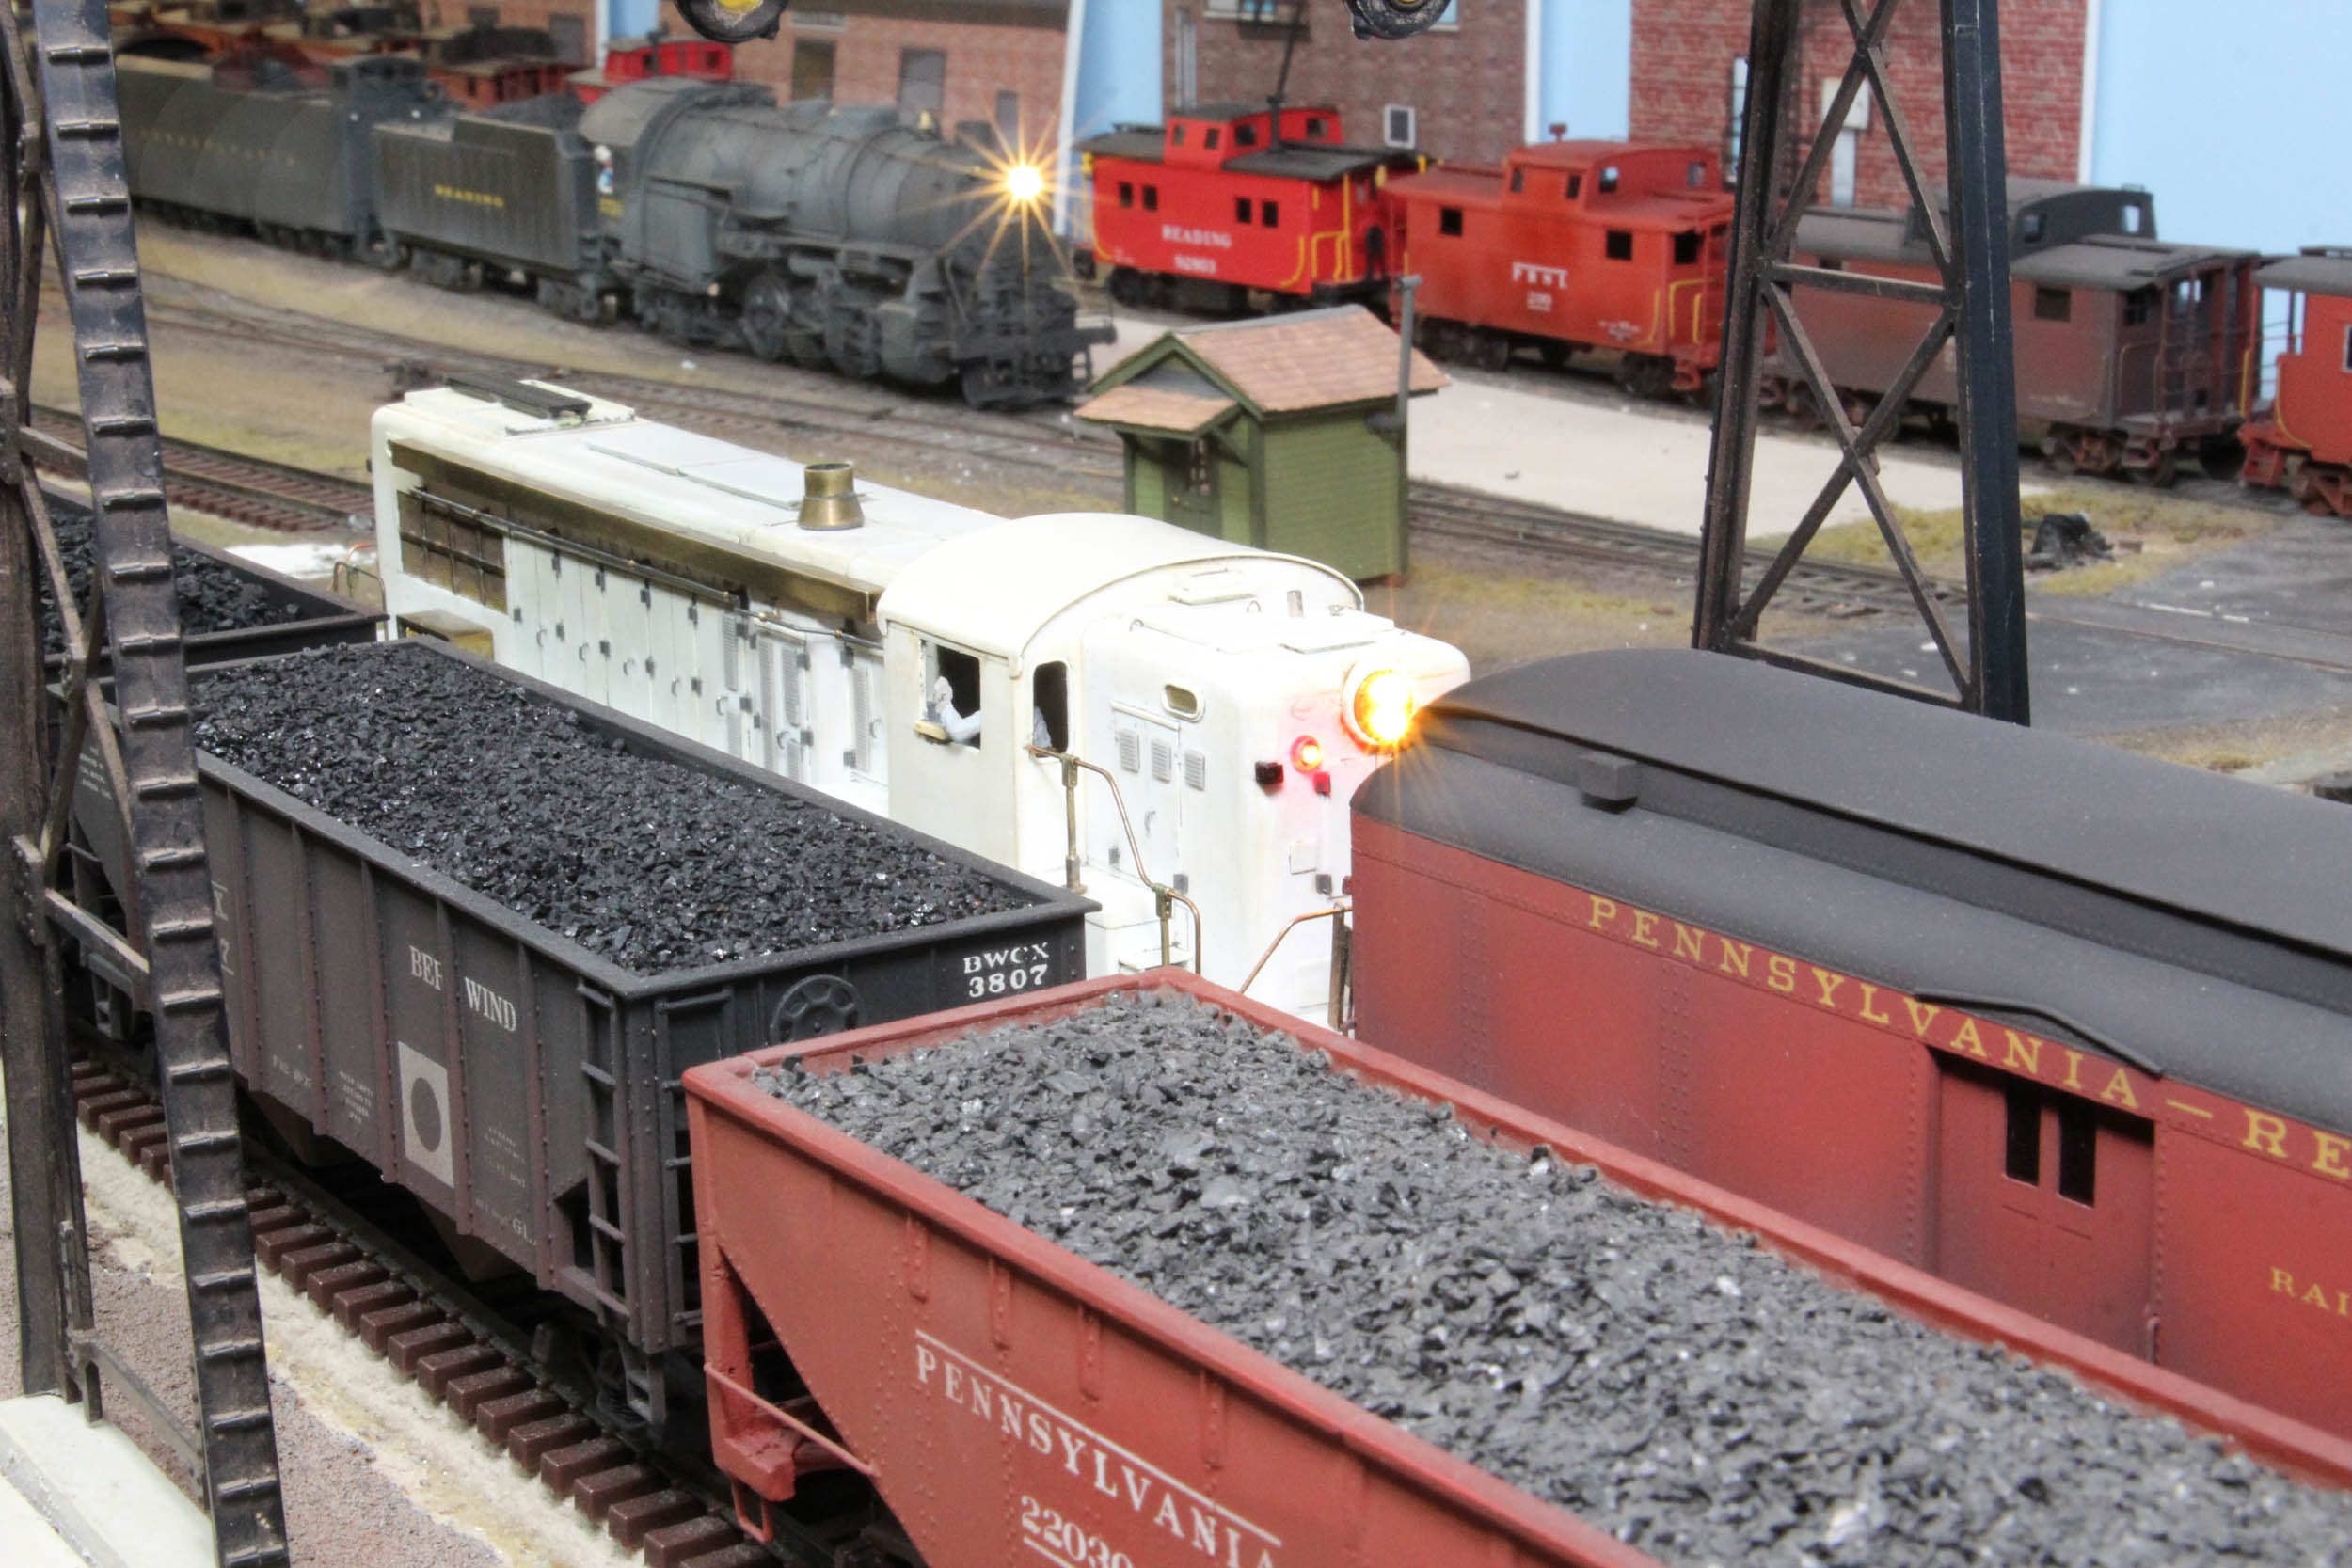
It was great to pull a PRSL train of my “HOT” PRSL P70 that did not exist that last
time I ran it in 2012.

Added
12-30-17
Let
There Be Light
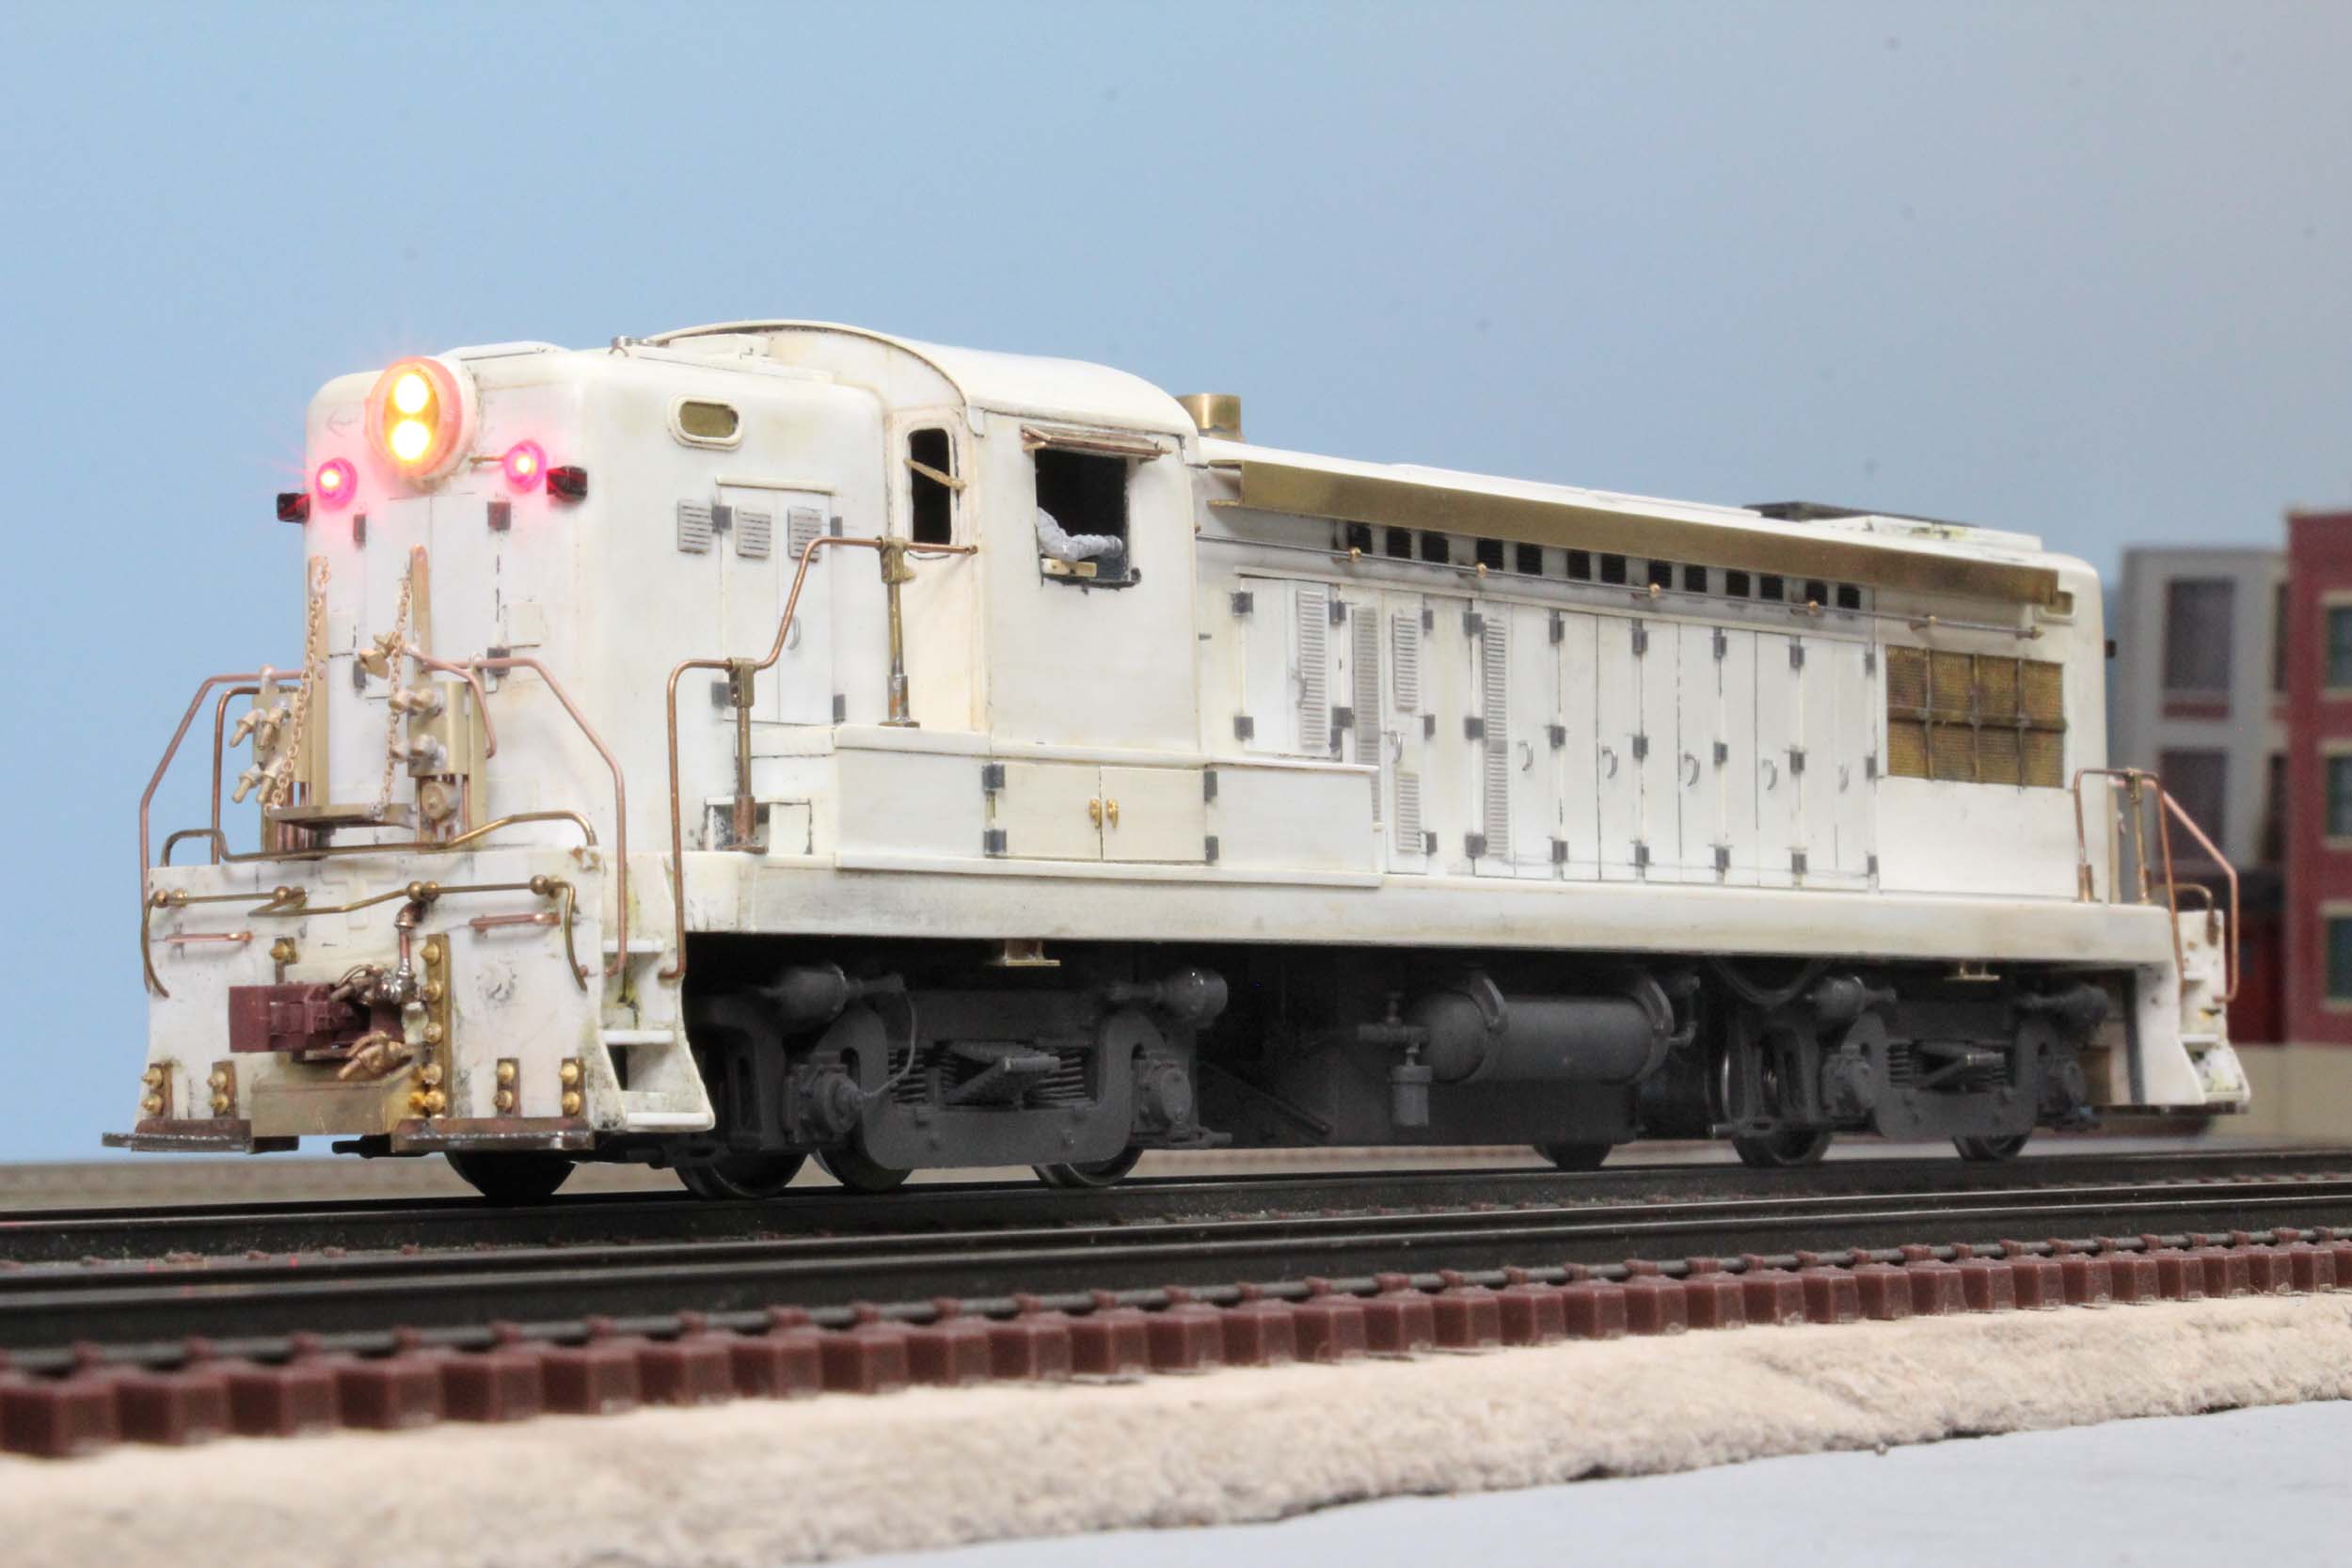
I consider lighting to be slightly more important than sound.
Some of my locos can have just a motor decoder only but they WILL have a nice
lighting system. The first photo is a Solidworks screen shot of the marker
lights. The next photo is the headlight bezel ring. These are the only 3D
printed parts on this loco.
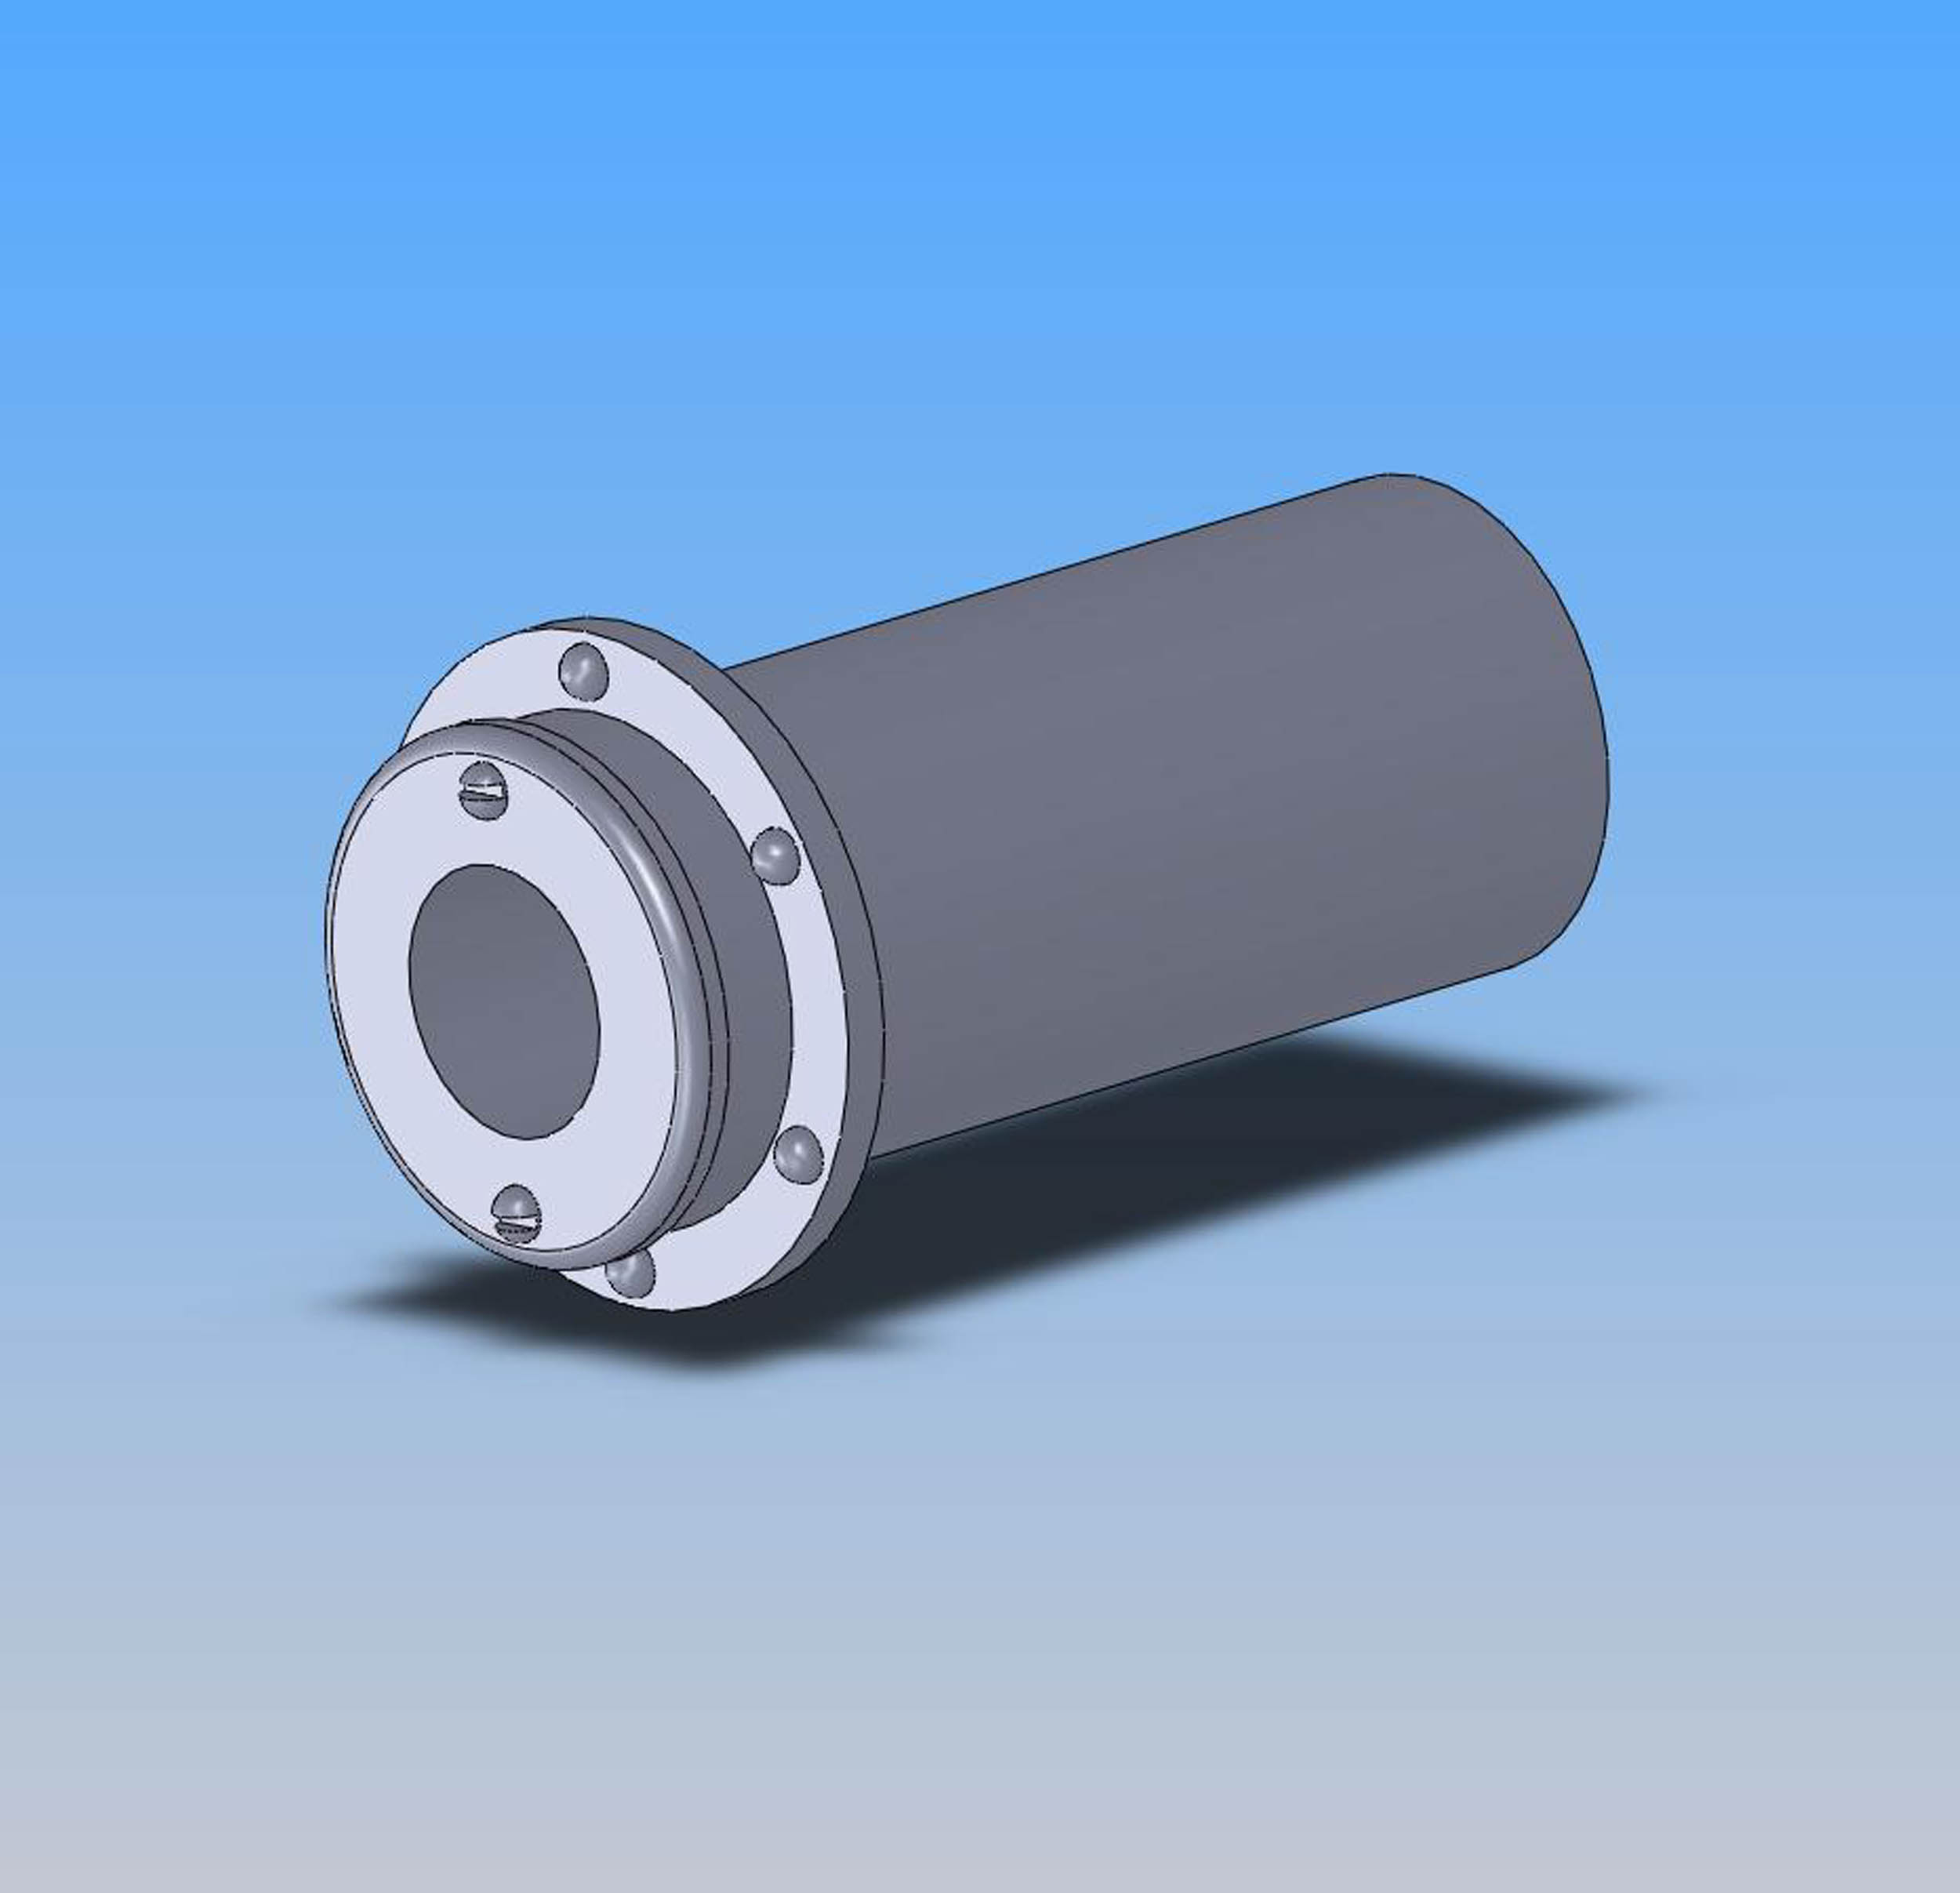
This is a BTS 07079 Alco 2 bulb back up light http://www.btsrr.com/btsdet01.htm
that just happened to fit perfectly in the existing headlight holes. I soldered
it into a round brass tube that is also the led holder. I really wanted to use
3MM LEDs because I like very bright headlights, so I modified the casting
extensively. The above bezel fits around the outside of the backup light
casting. A clear lens will cover the casting.
Finally some new progress. I
wired the 3MM and Pico red LEDs for the marker lights. The marker lights are
not really as large and bright as shown in the below photos. The marker lights are
translucent red and with the red LED really GLOW. It should not be that large
once the shell is painted. This is the first time the marker lights have ever
worked. The bottom right photo is inspiring for when it is really done and
painted.


Ready
For Paint
Added
1-7-18
I looked at the model through my “current” eyes and saw some
things for the first time I needed to fix. There was no “hinges” or handles for
the doors under the cab. There was no windshield wipers.
I glued things on that have been loose and test fitted for many years. It was a
great feeling to know the build is done. Onward to painting.


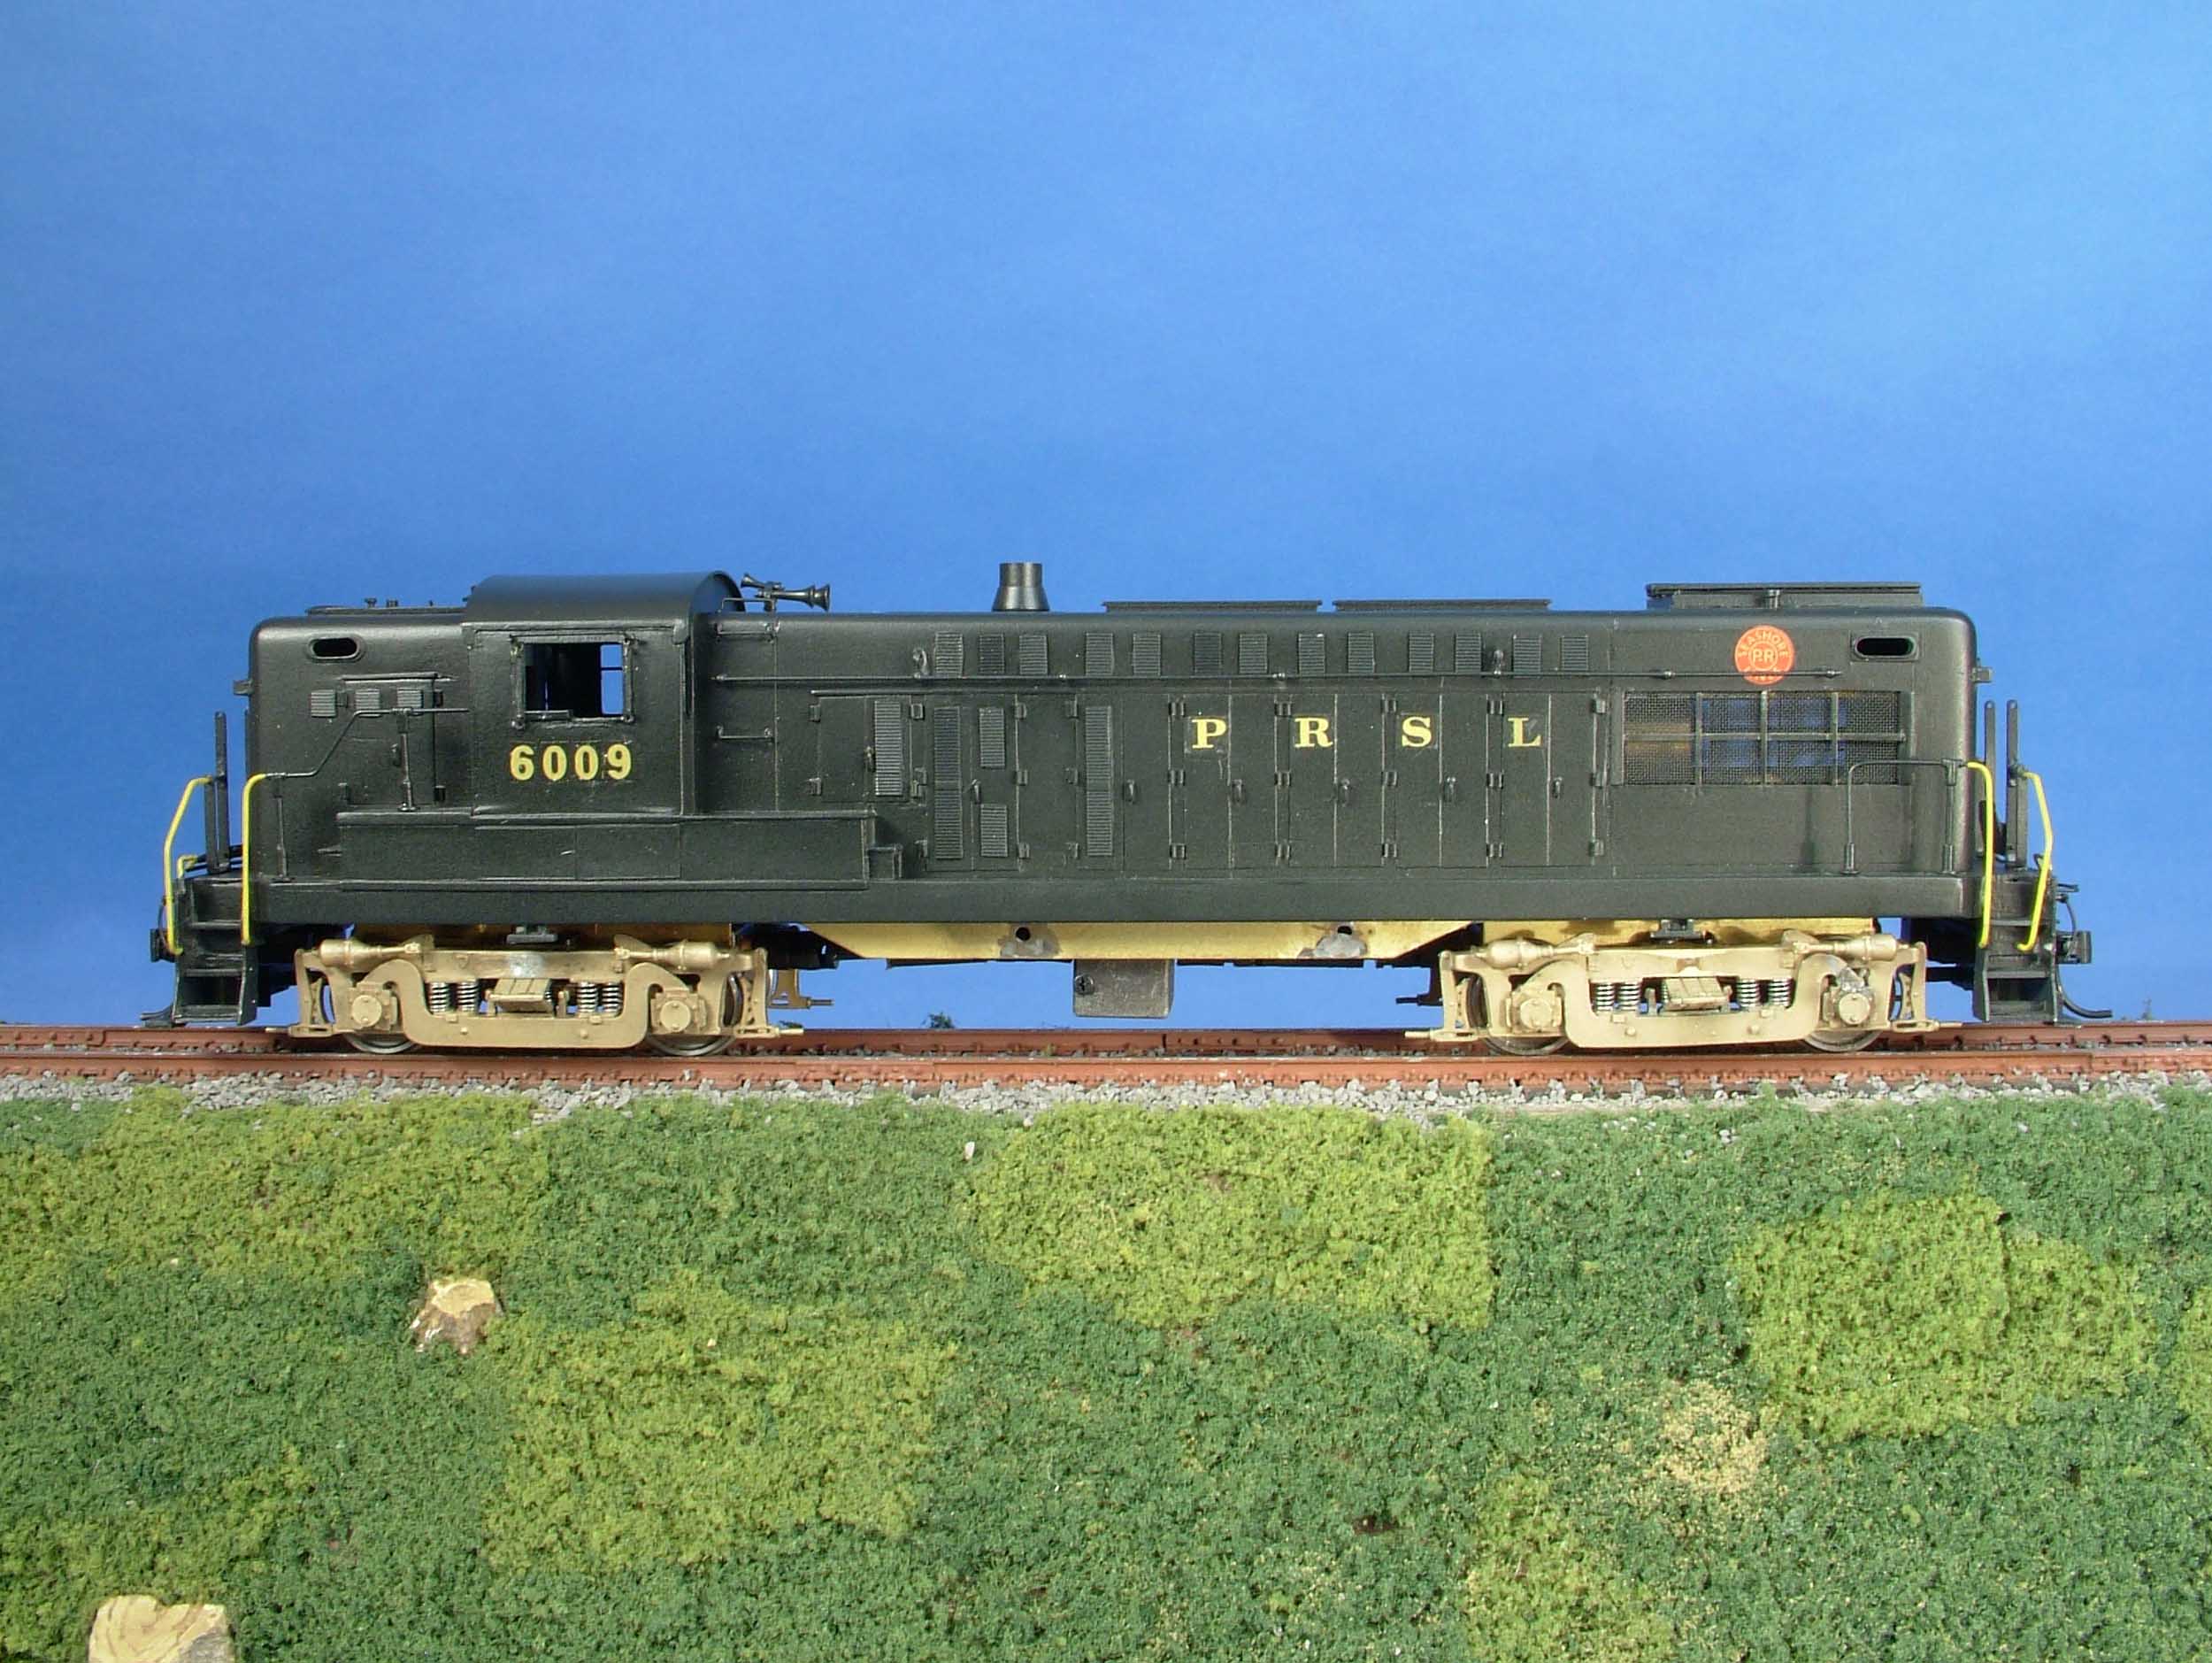
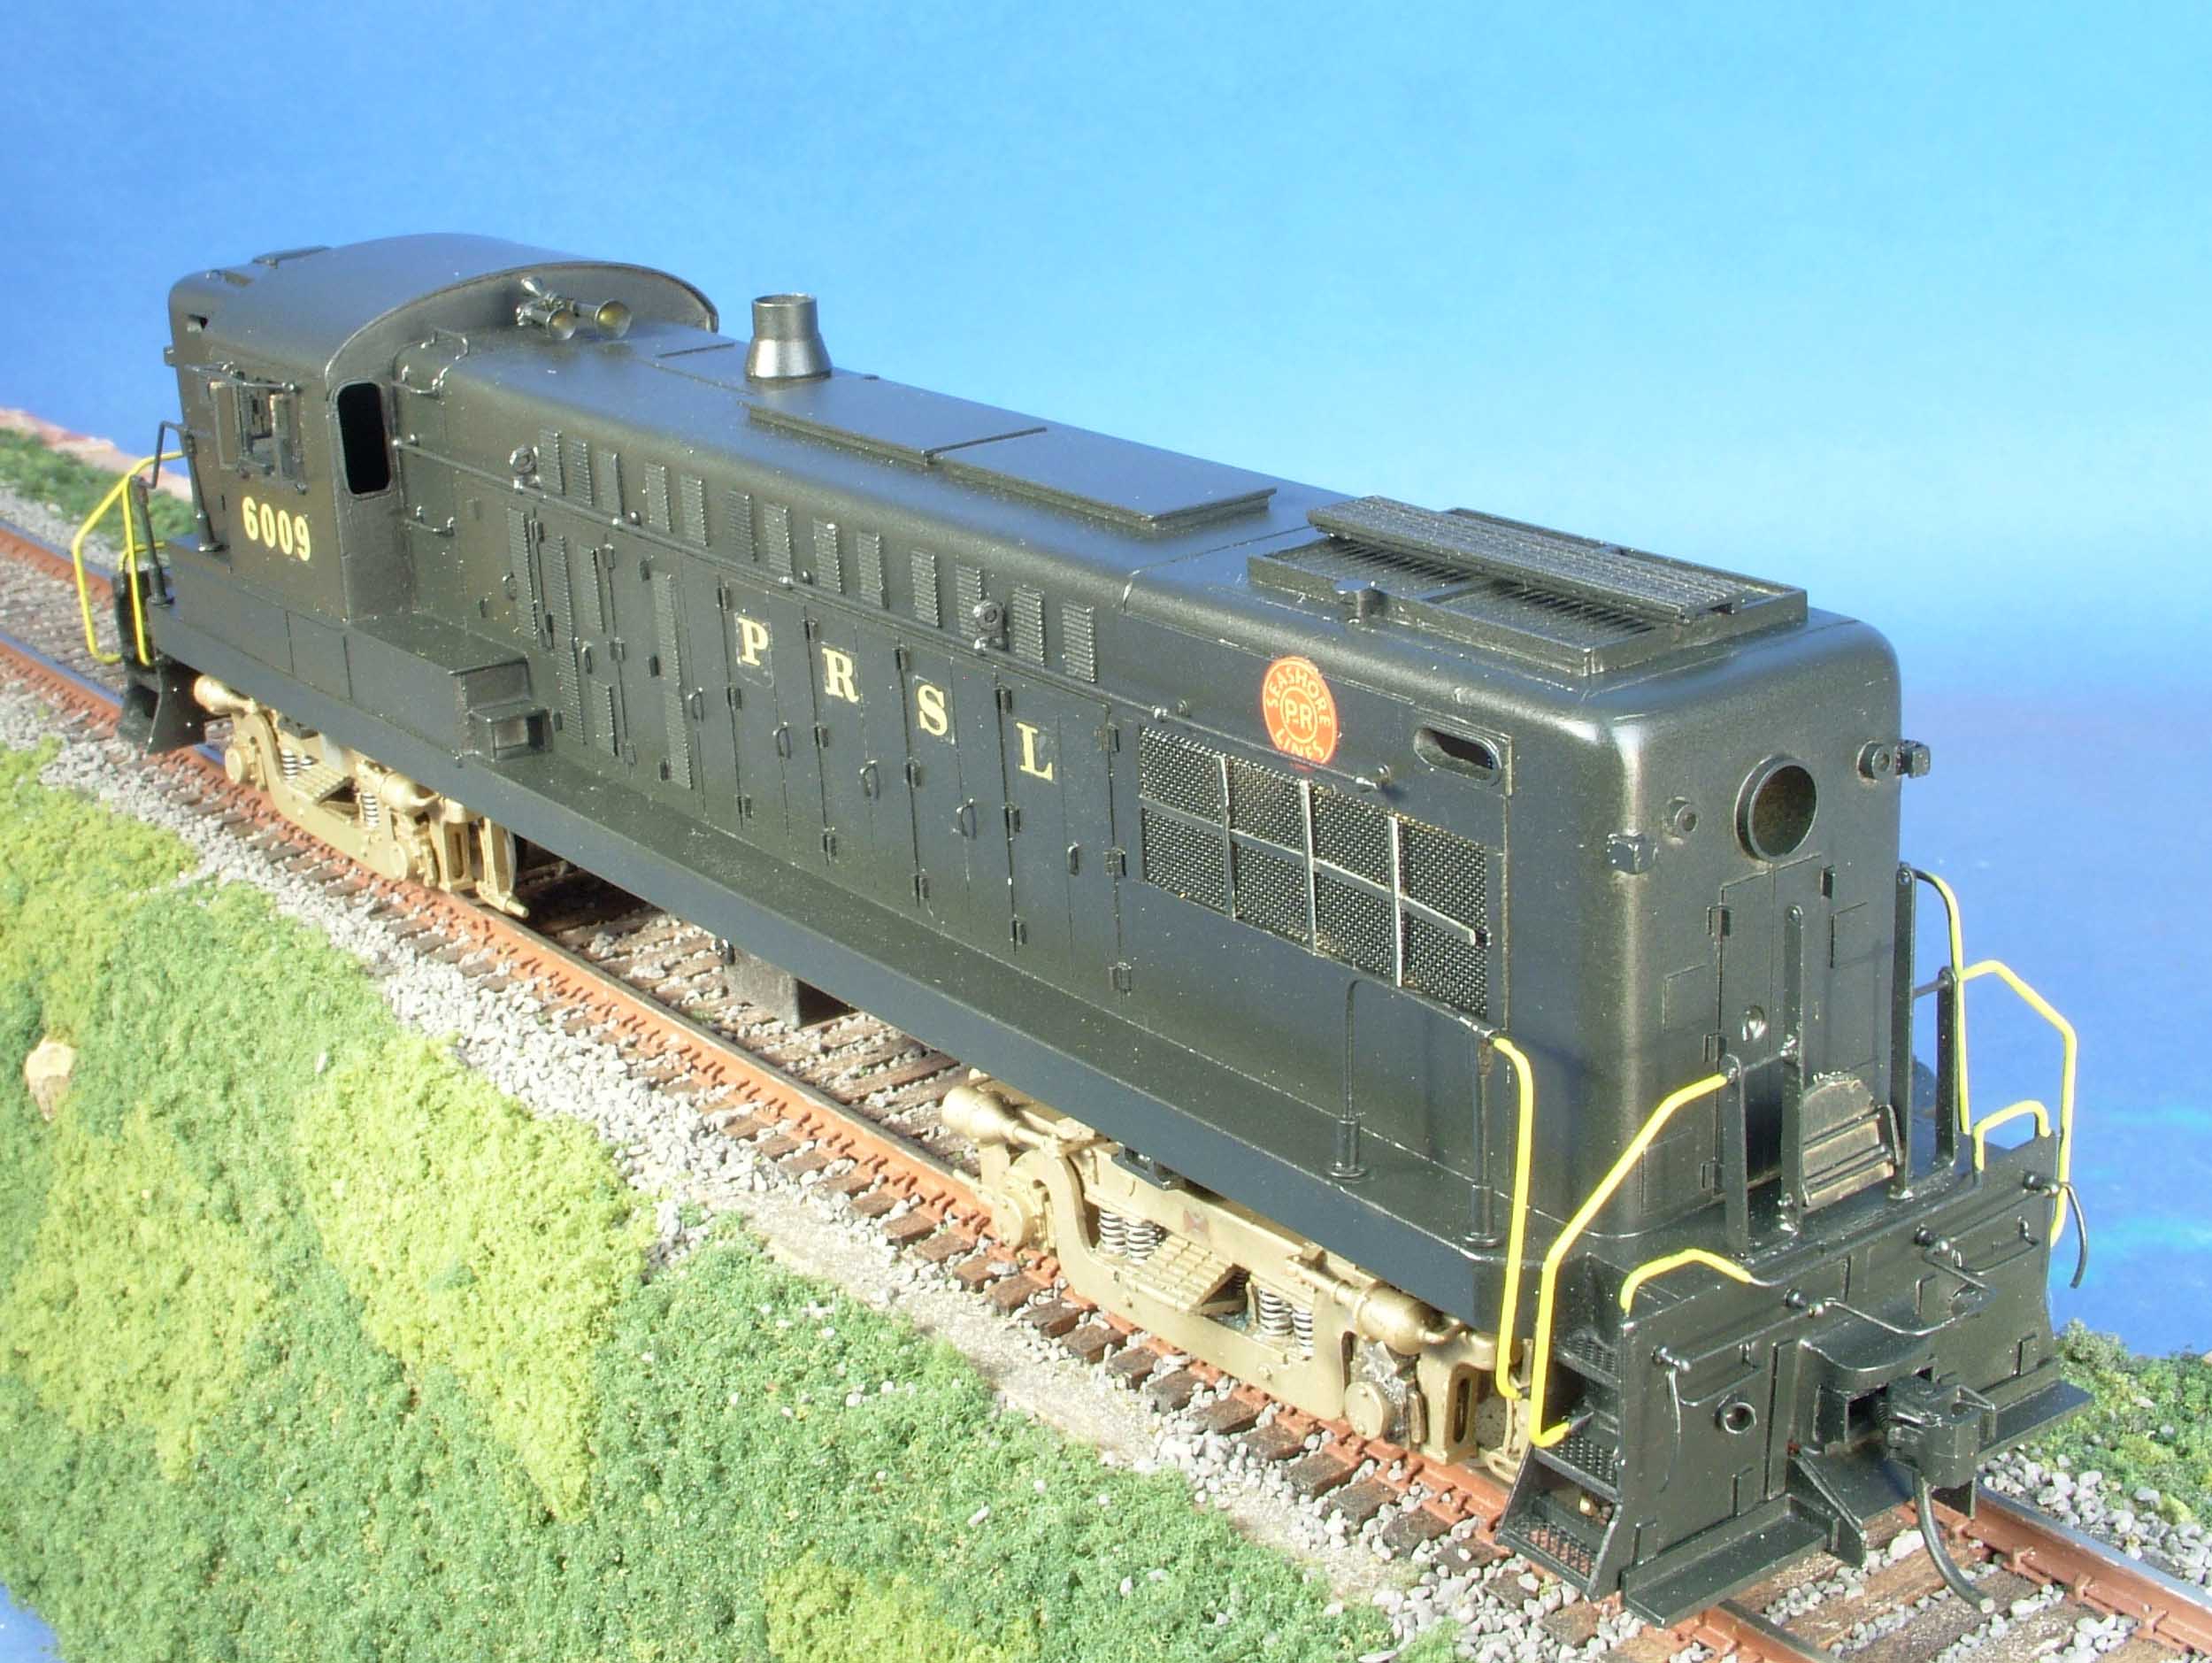
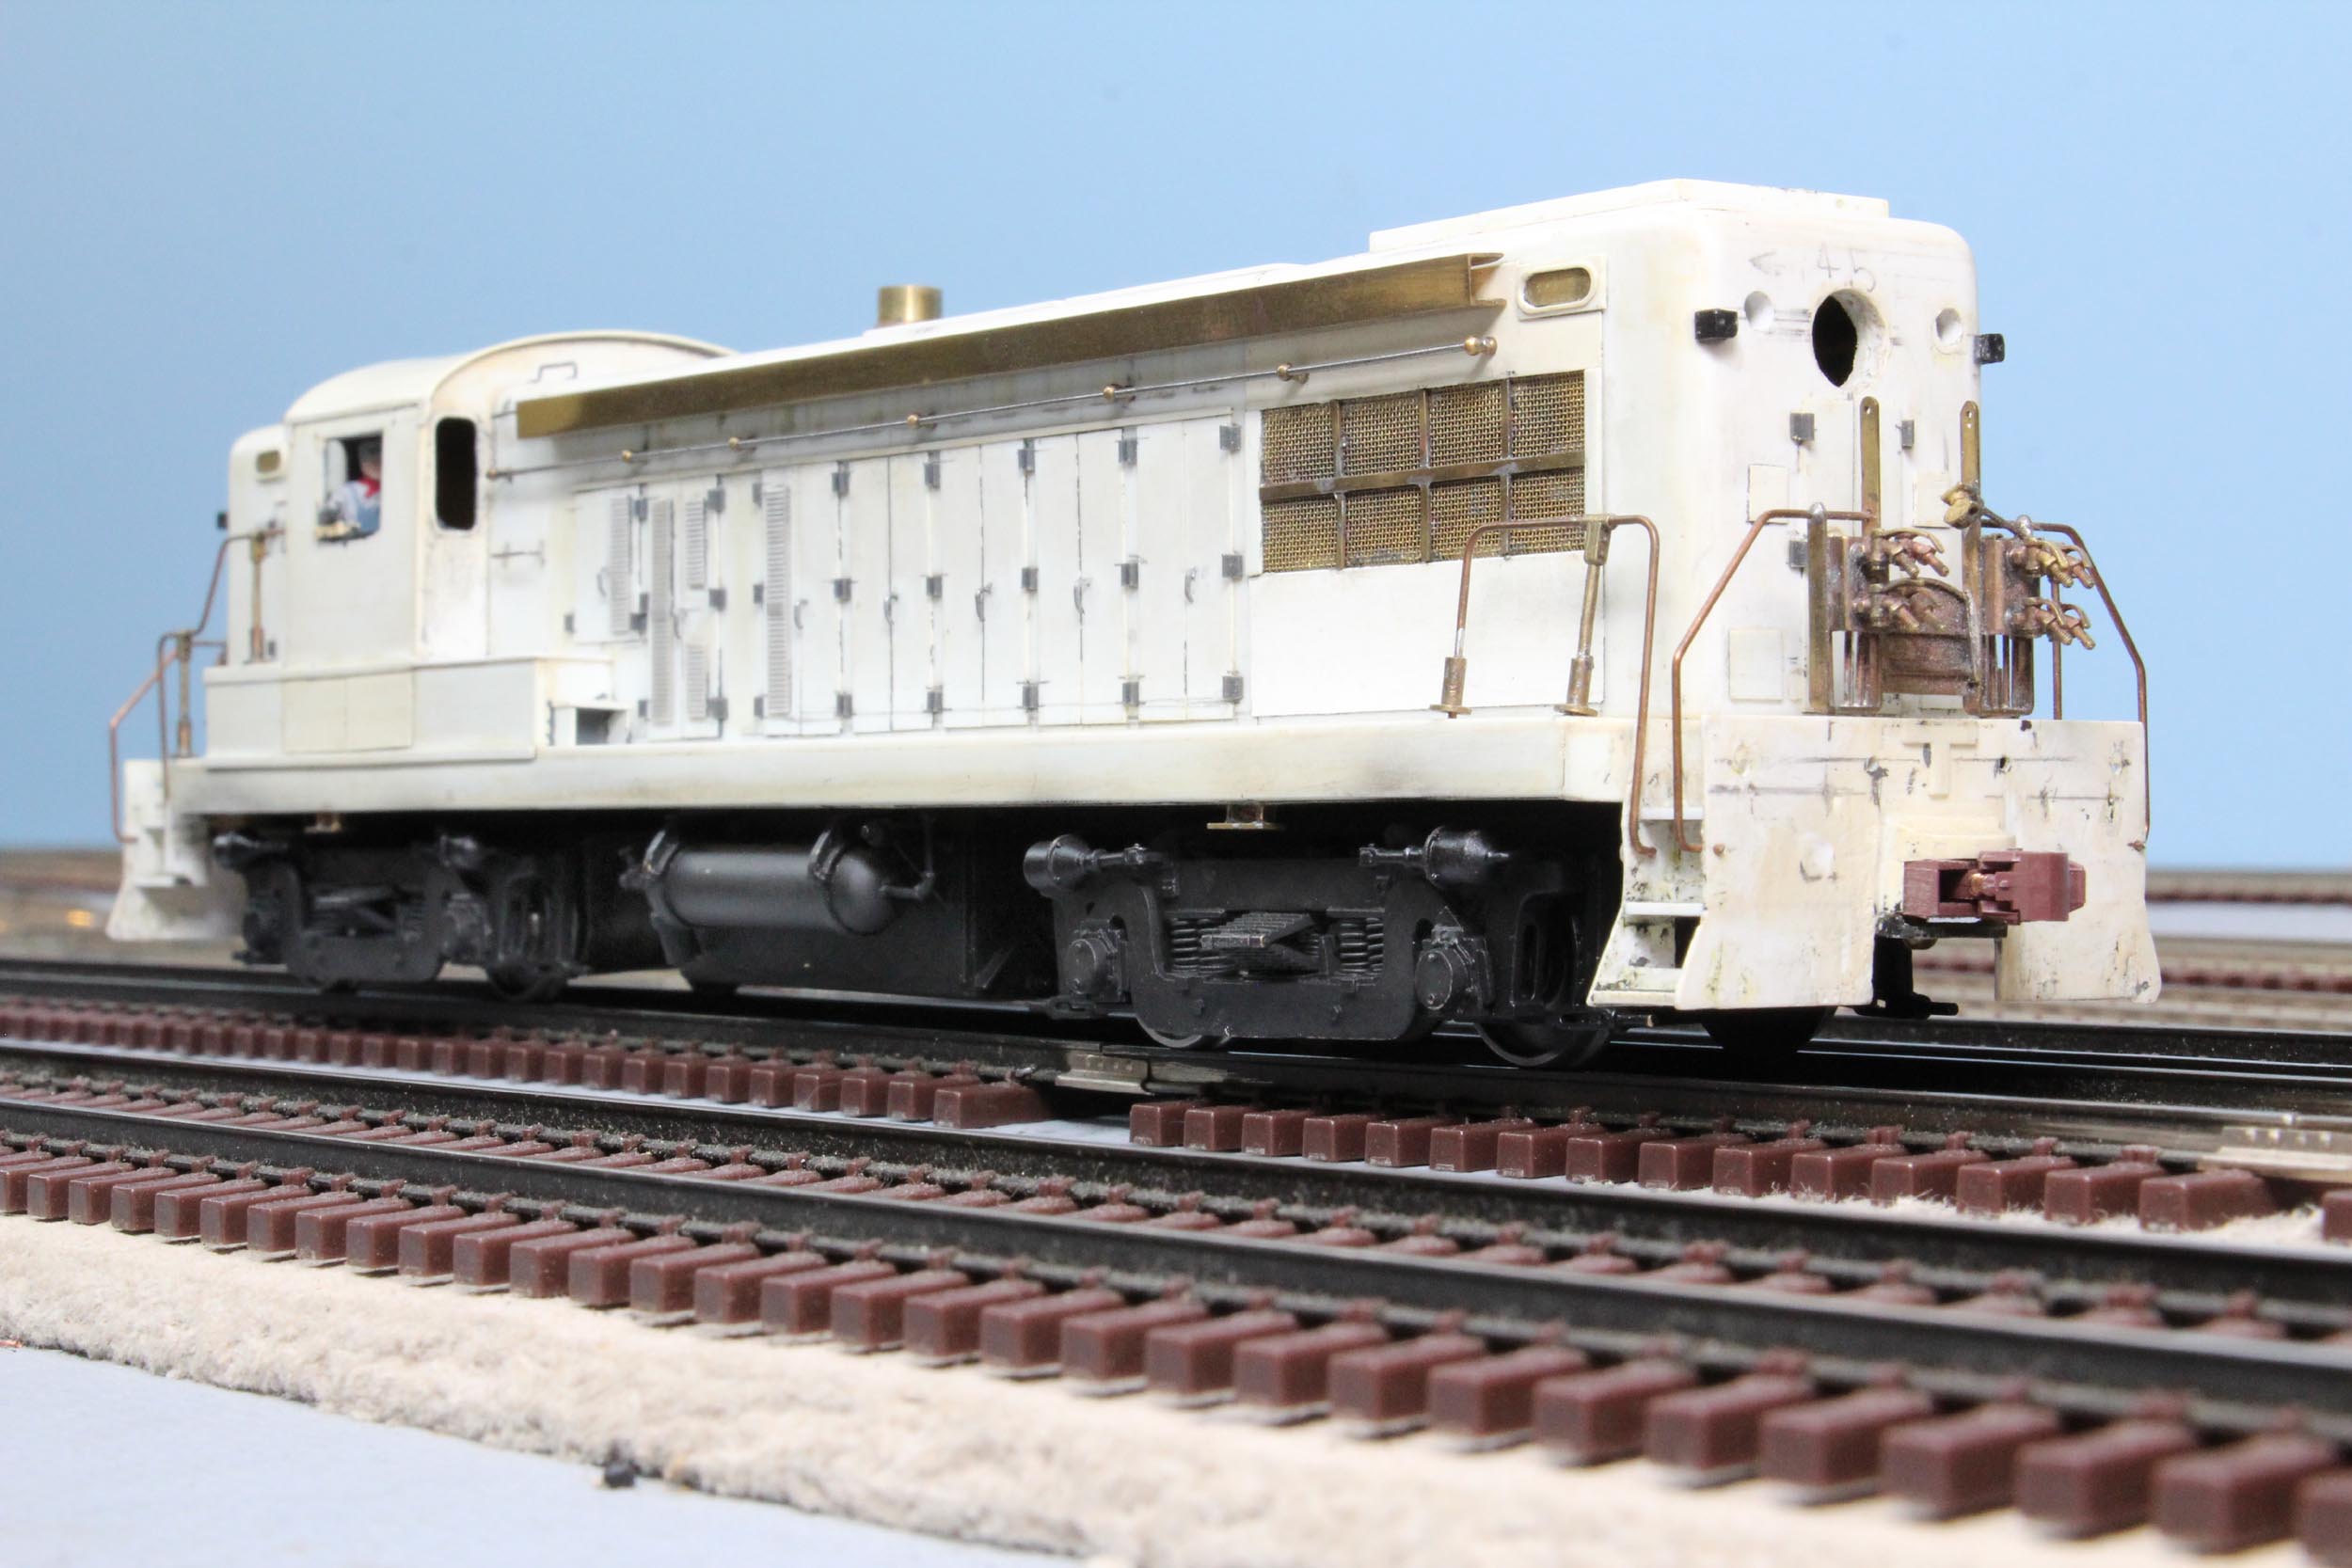
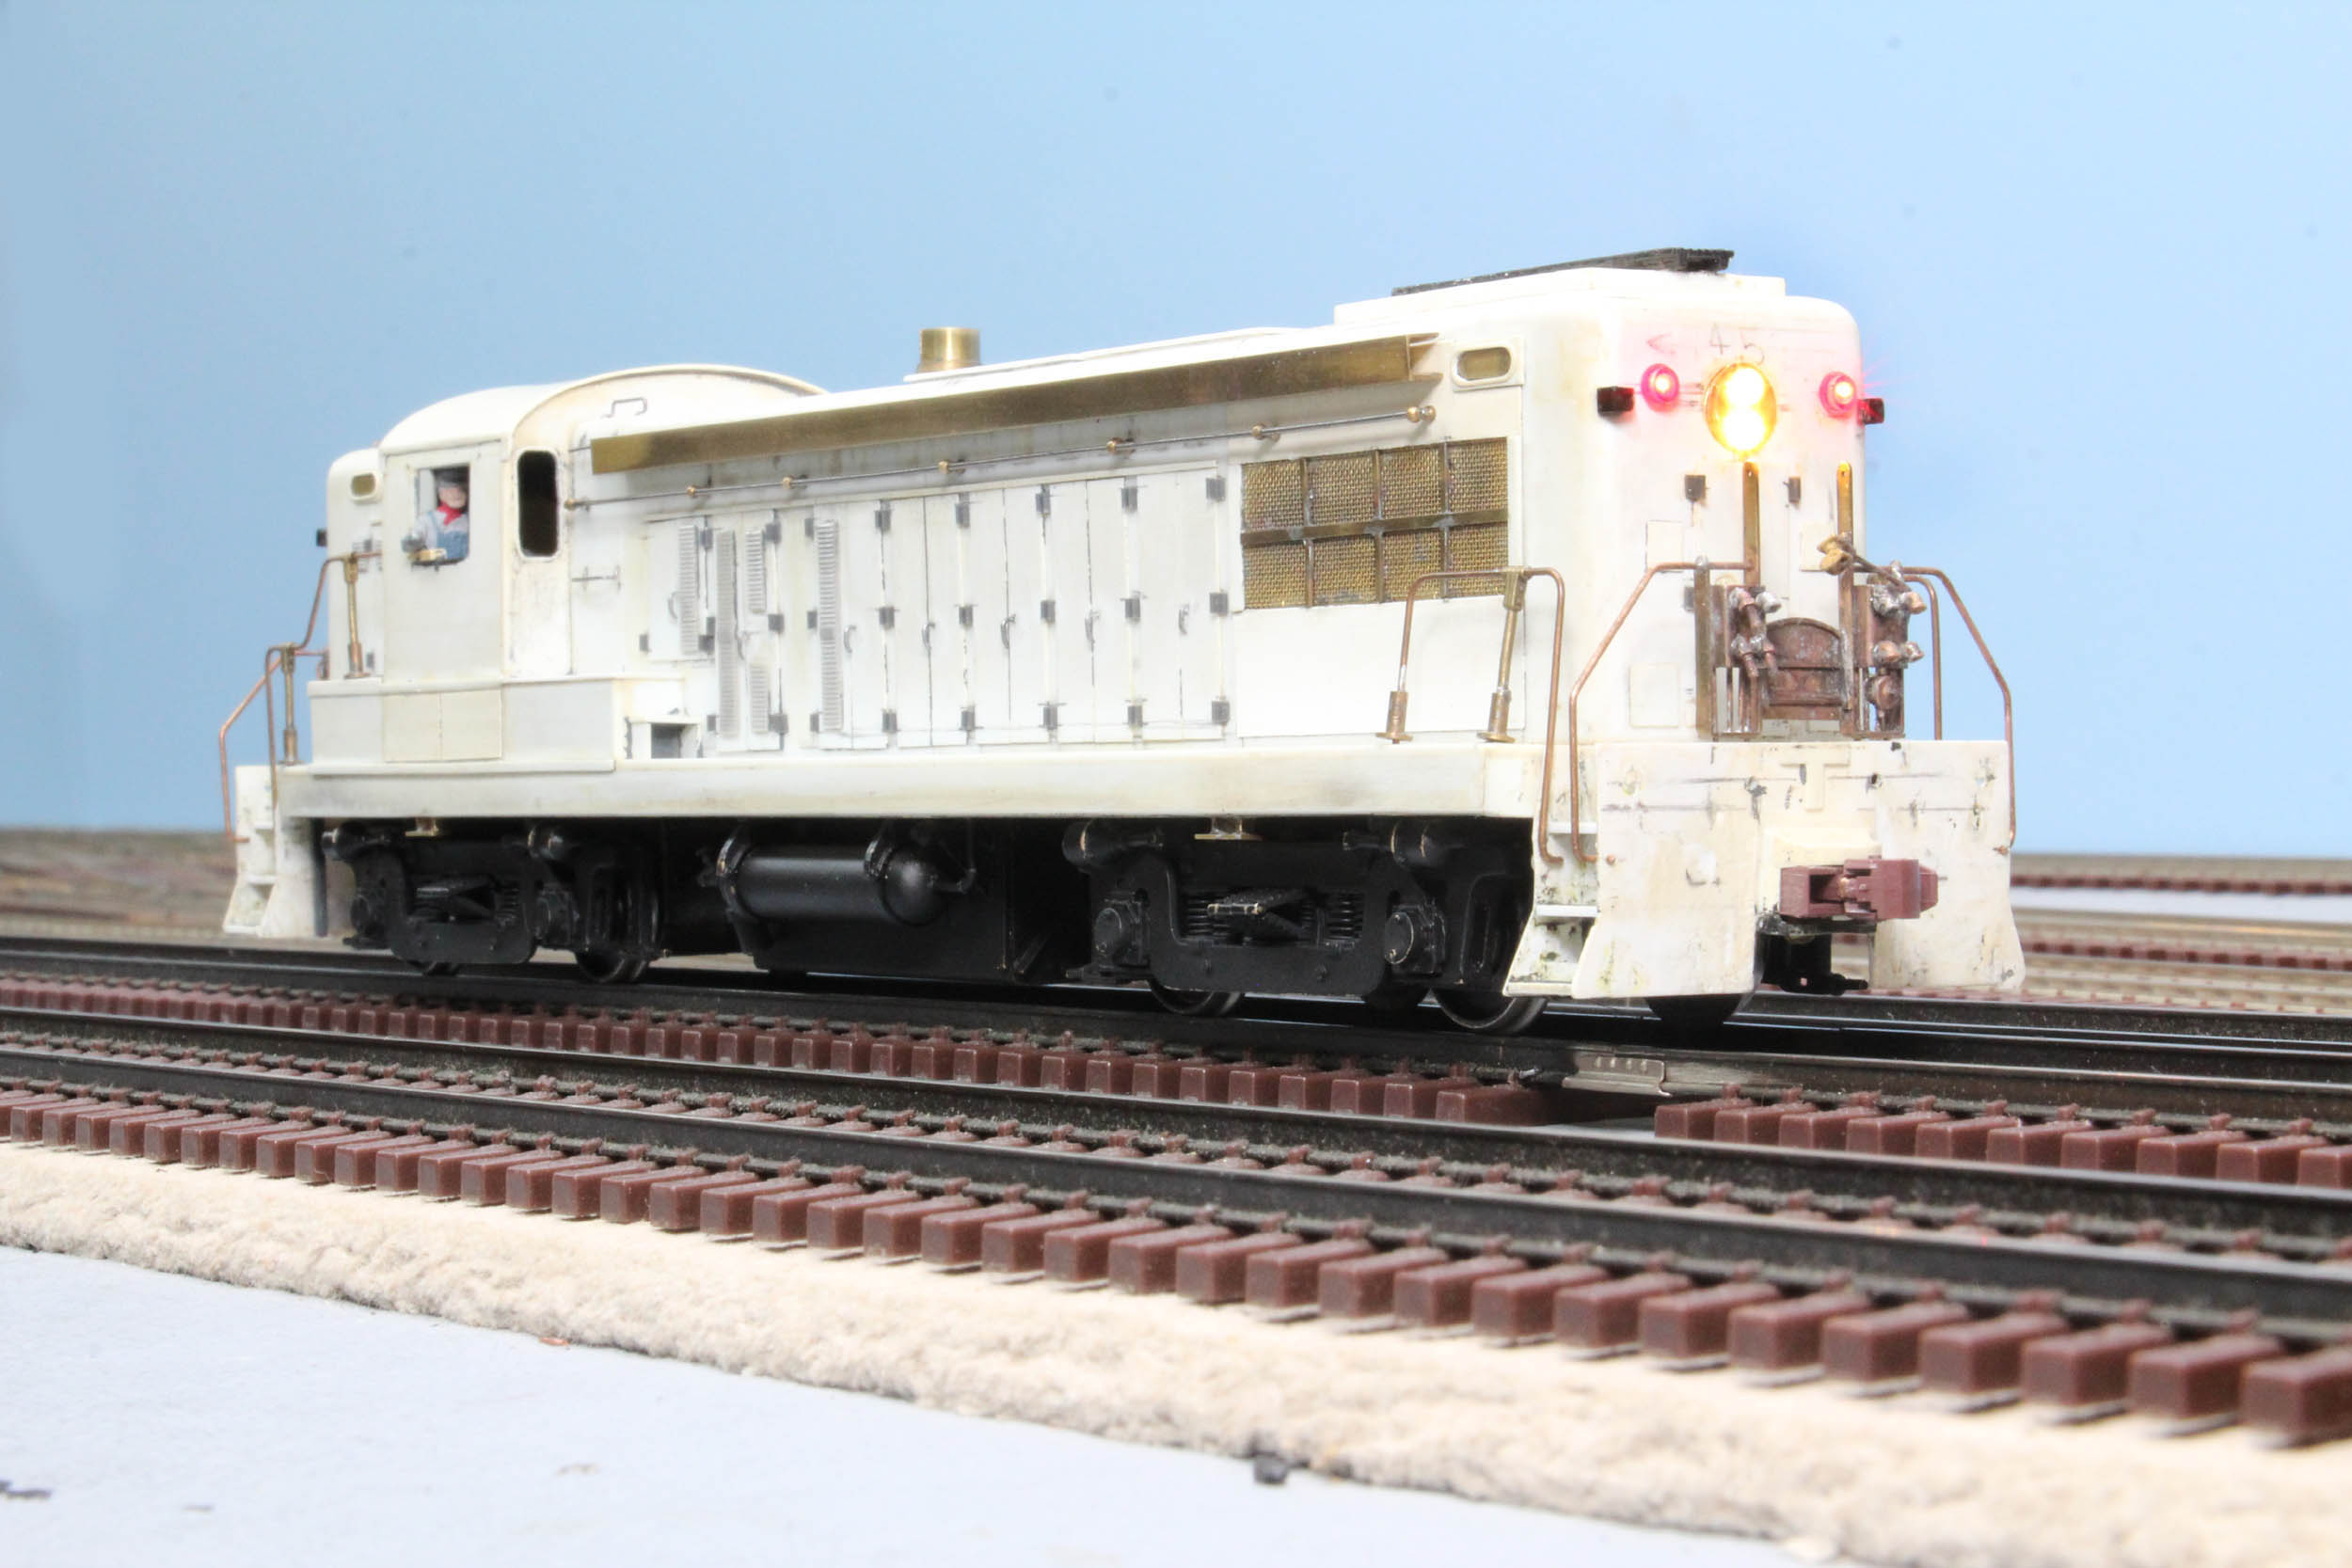
Completed
1-11-18
After all the starts and stops over many years I am SO happy it
is finally done. It is a lifetime project that took on a life of its own. But
some things that are important cannot be rushed. The below is not the model I
could have made even 5 years ago. It is significantly better, and hopefully I
will not have second thoughts on what else I should have done to it in the
future.


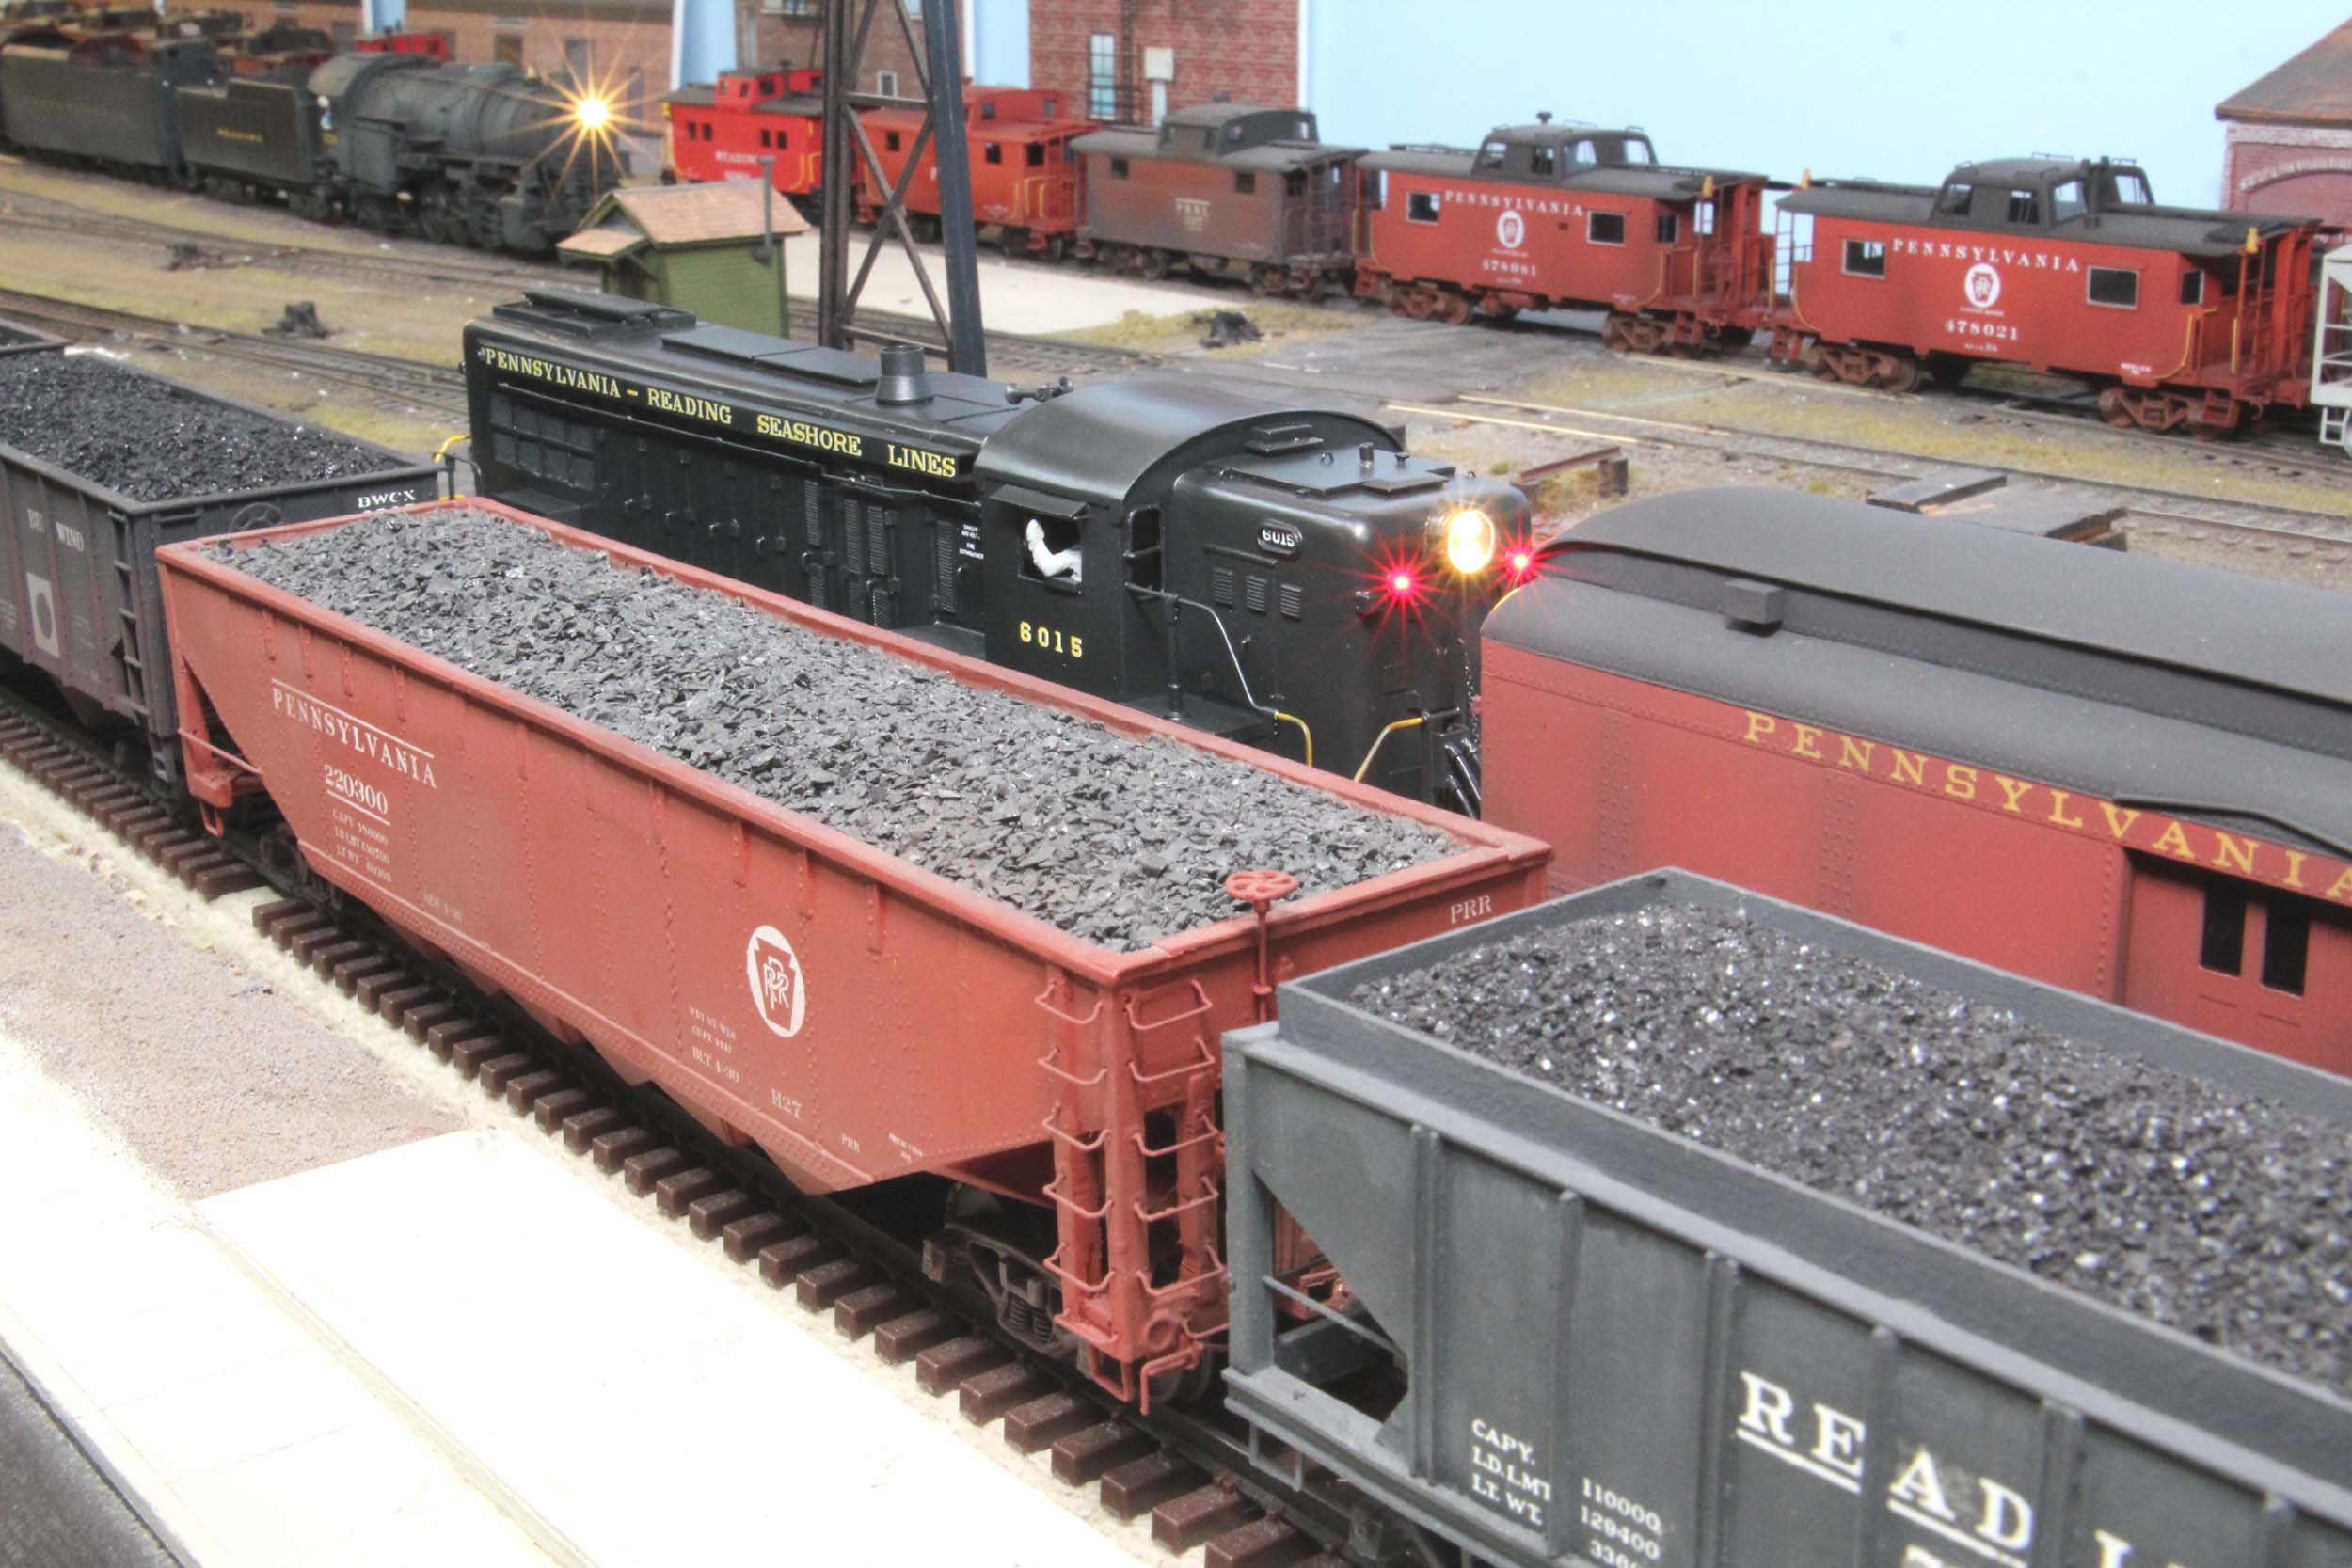
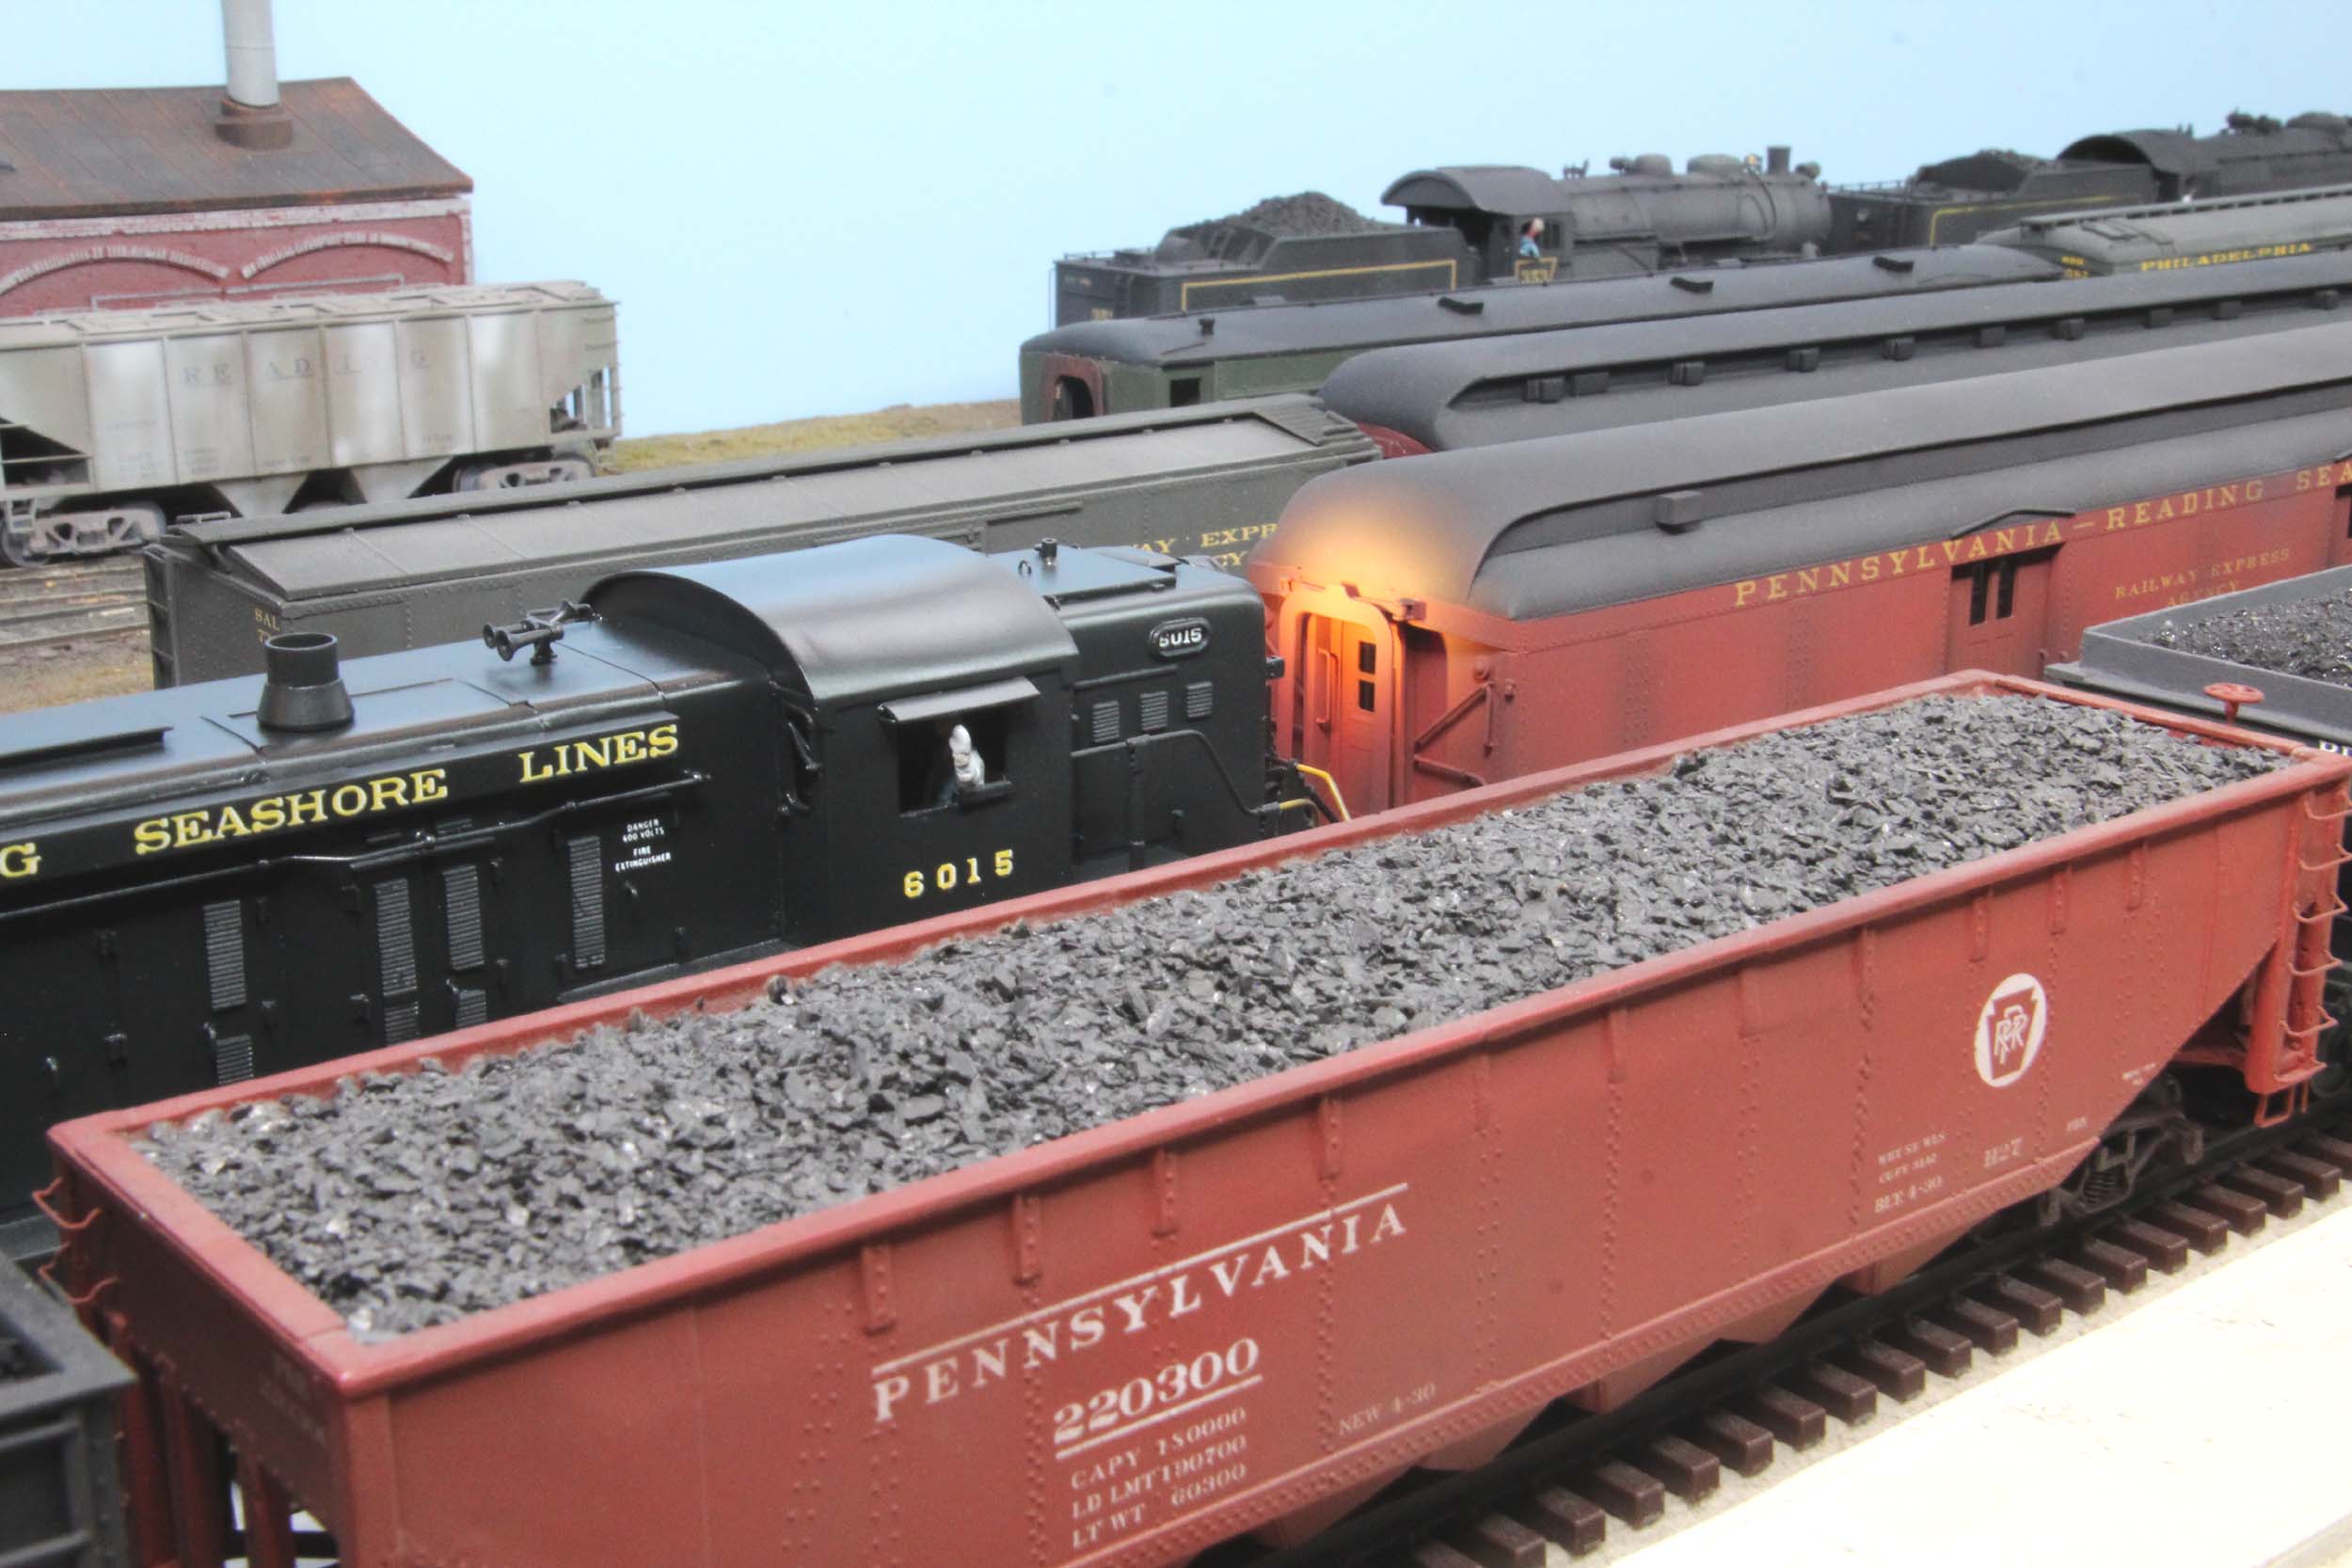
Maximum
PRSL
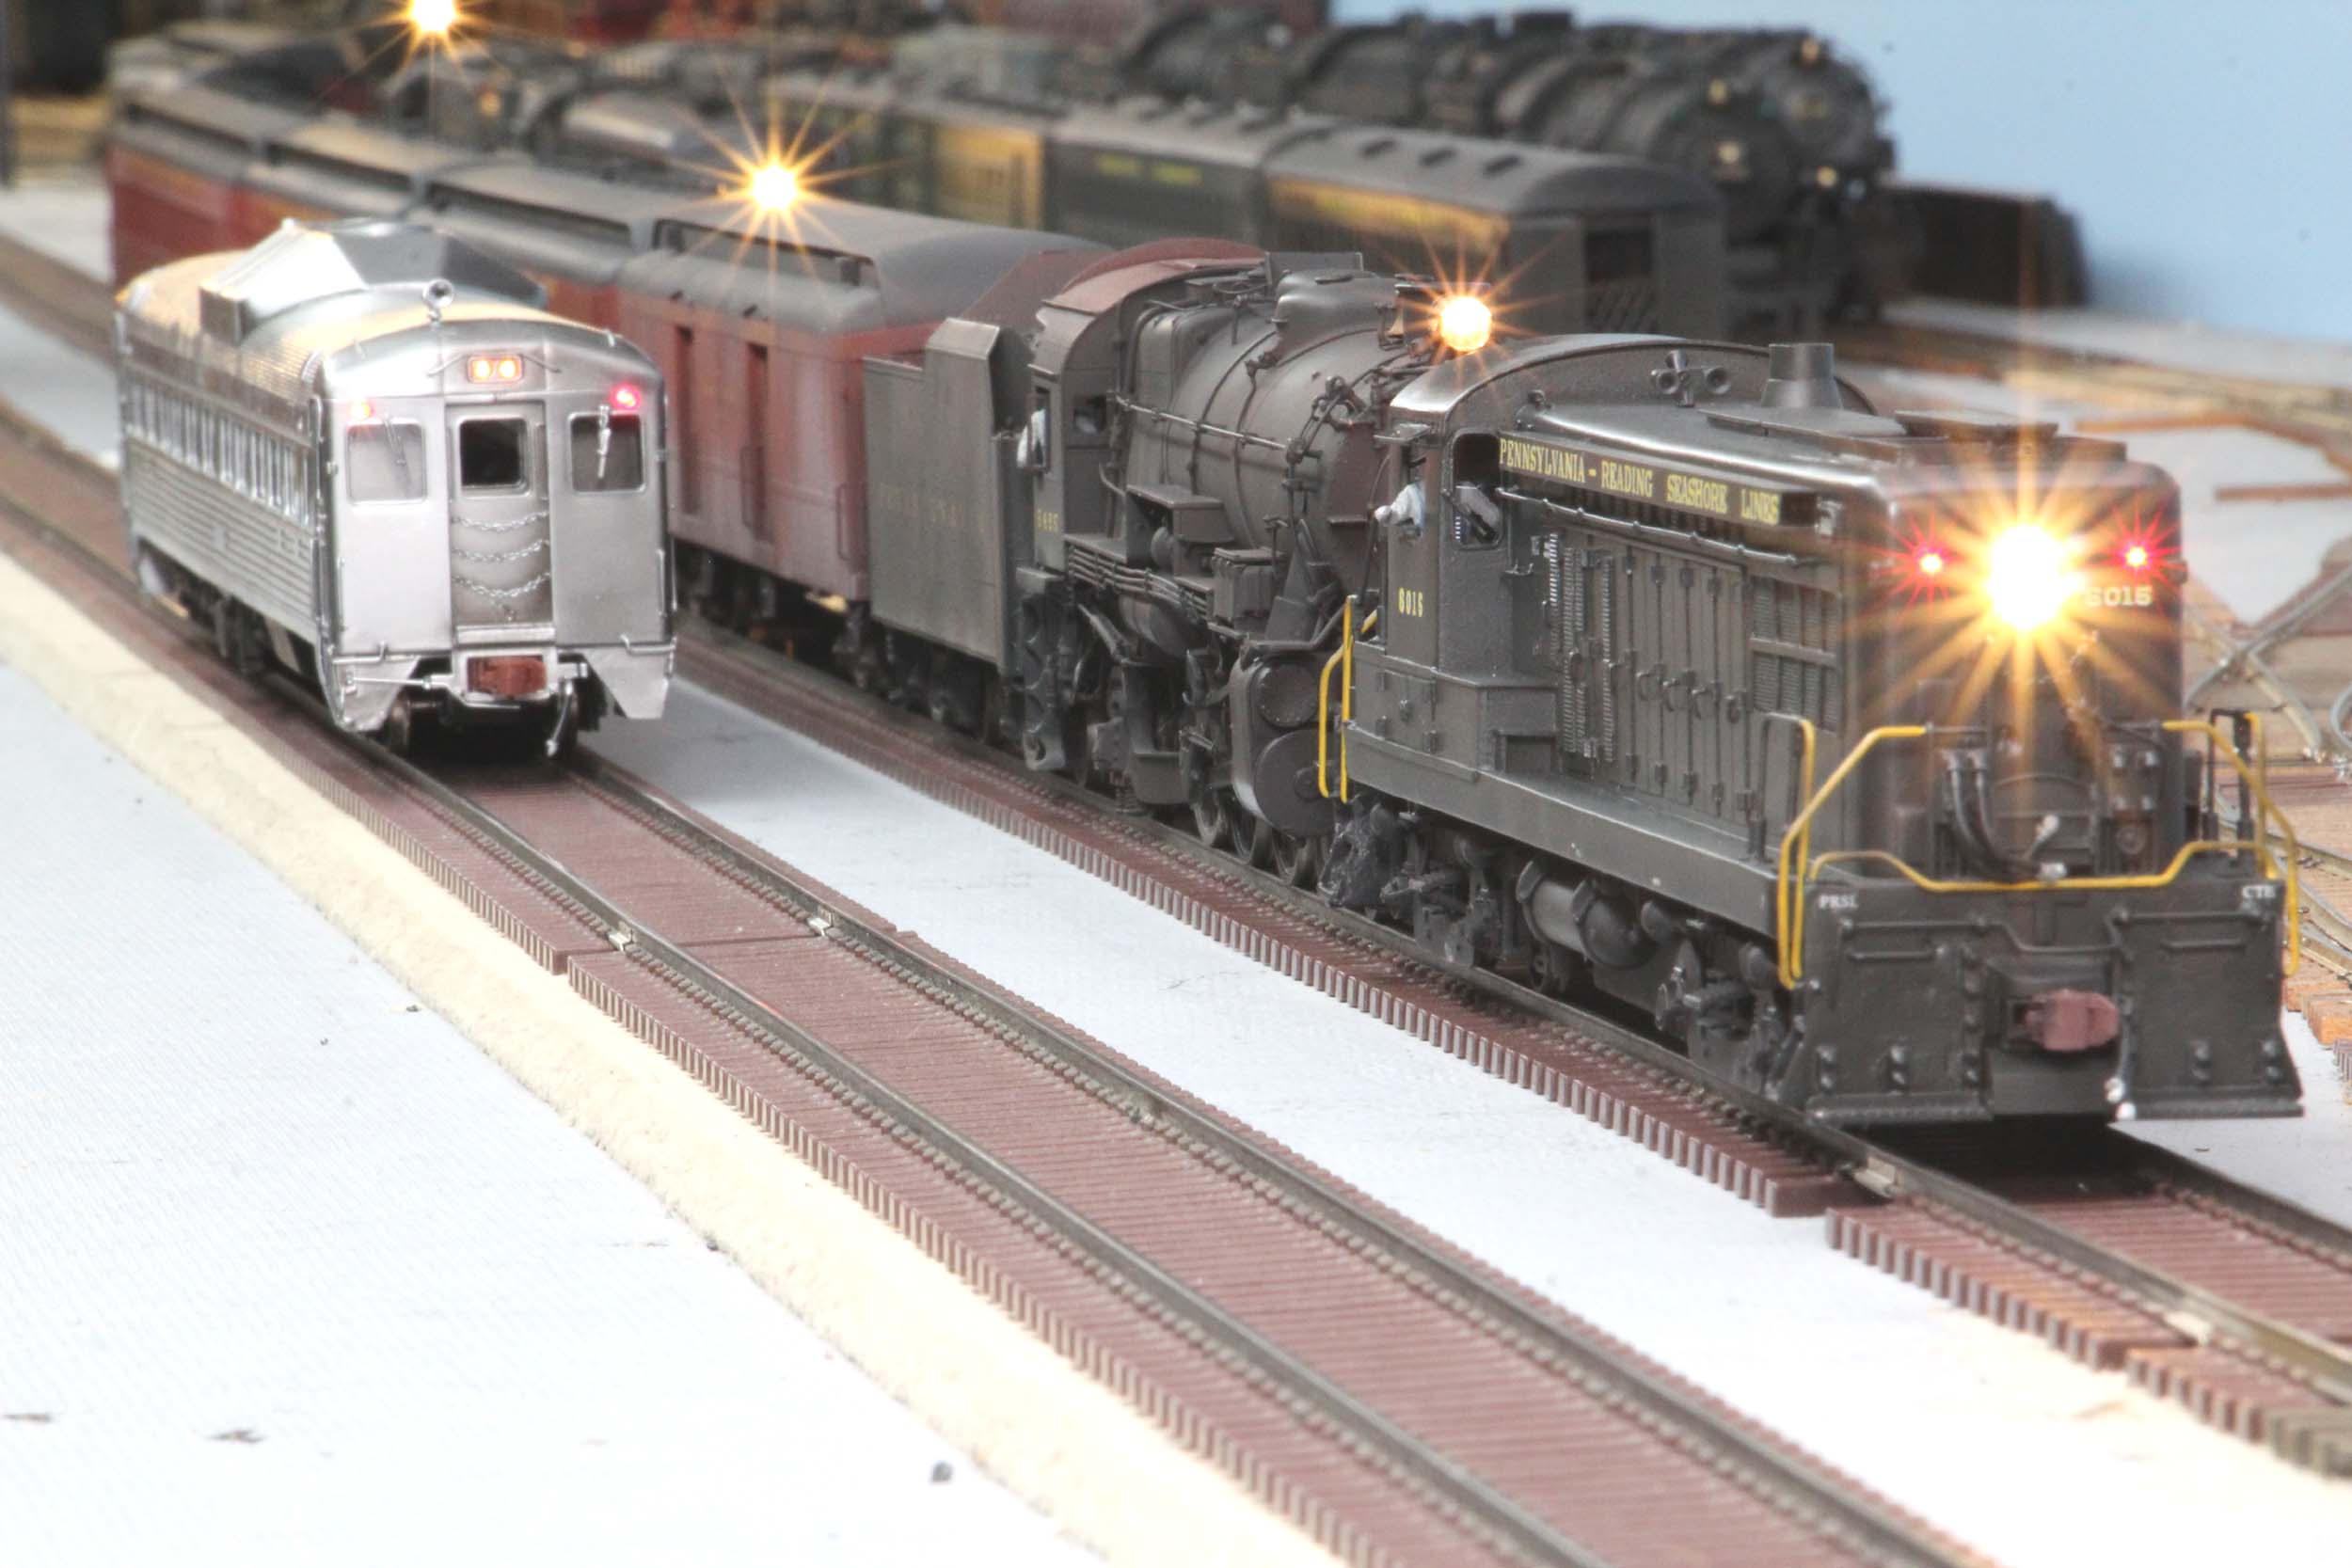
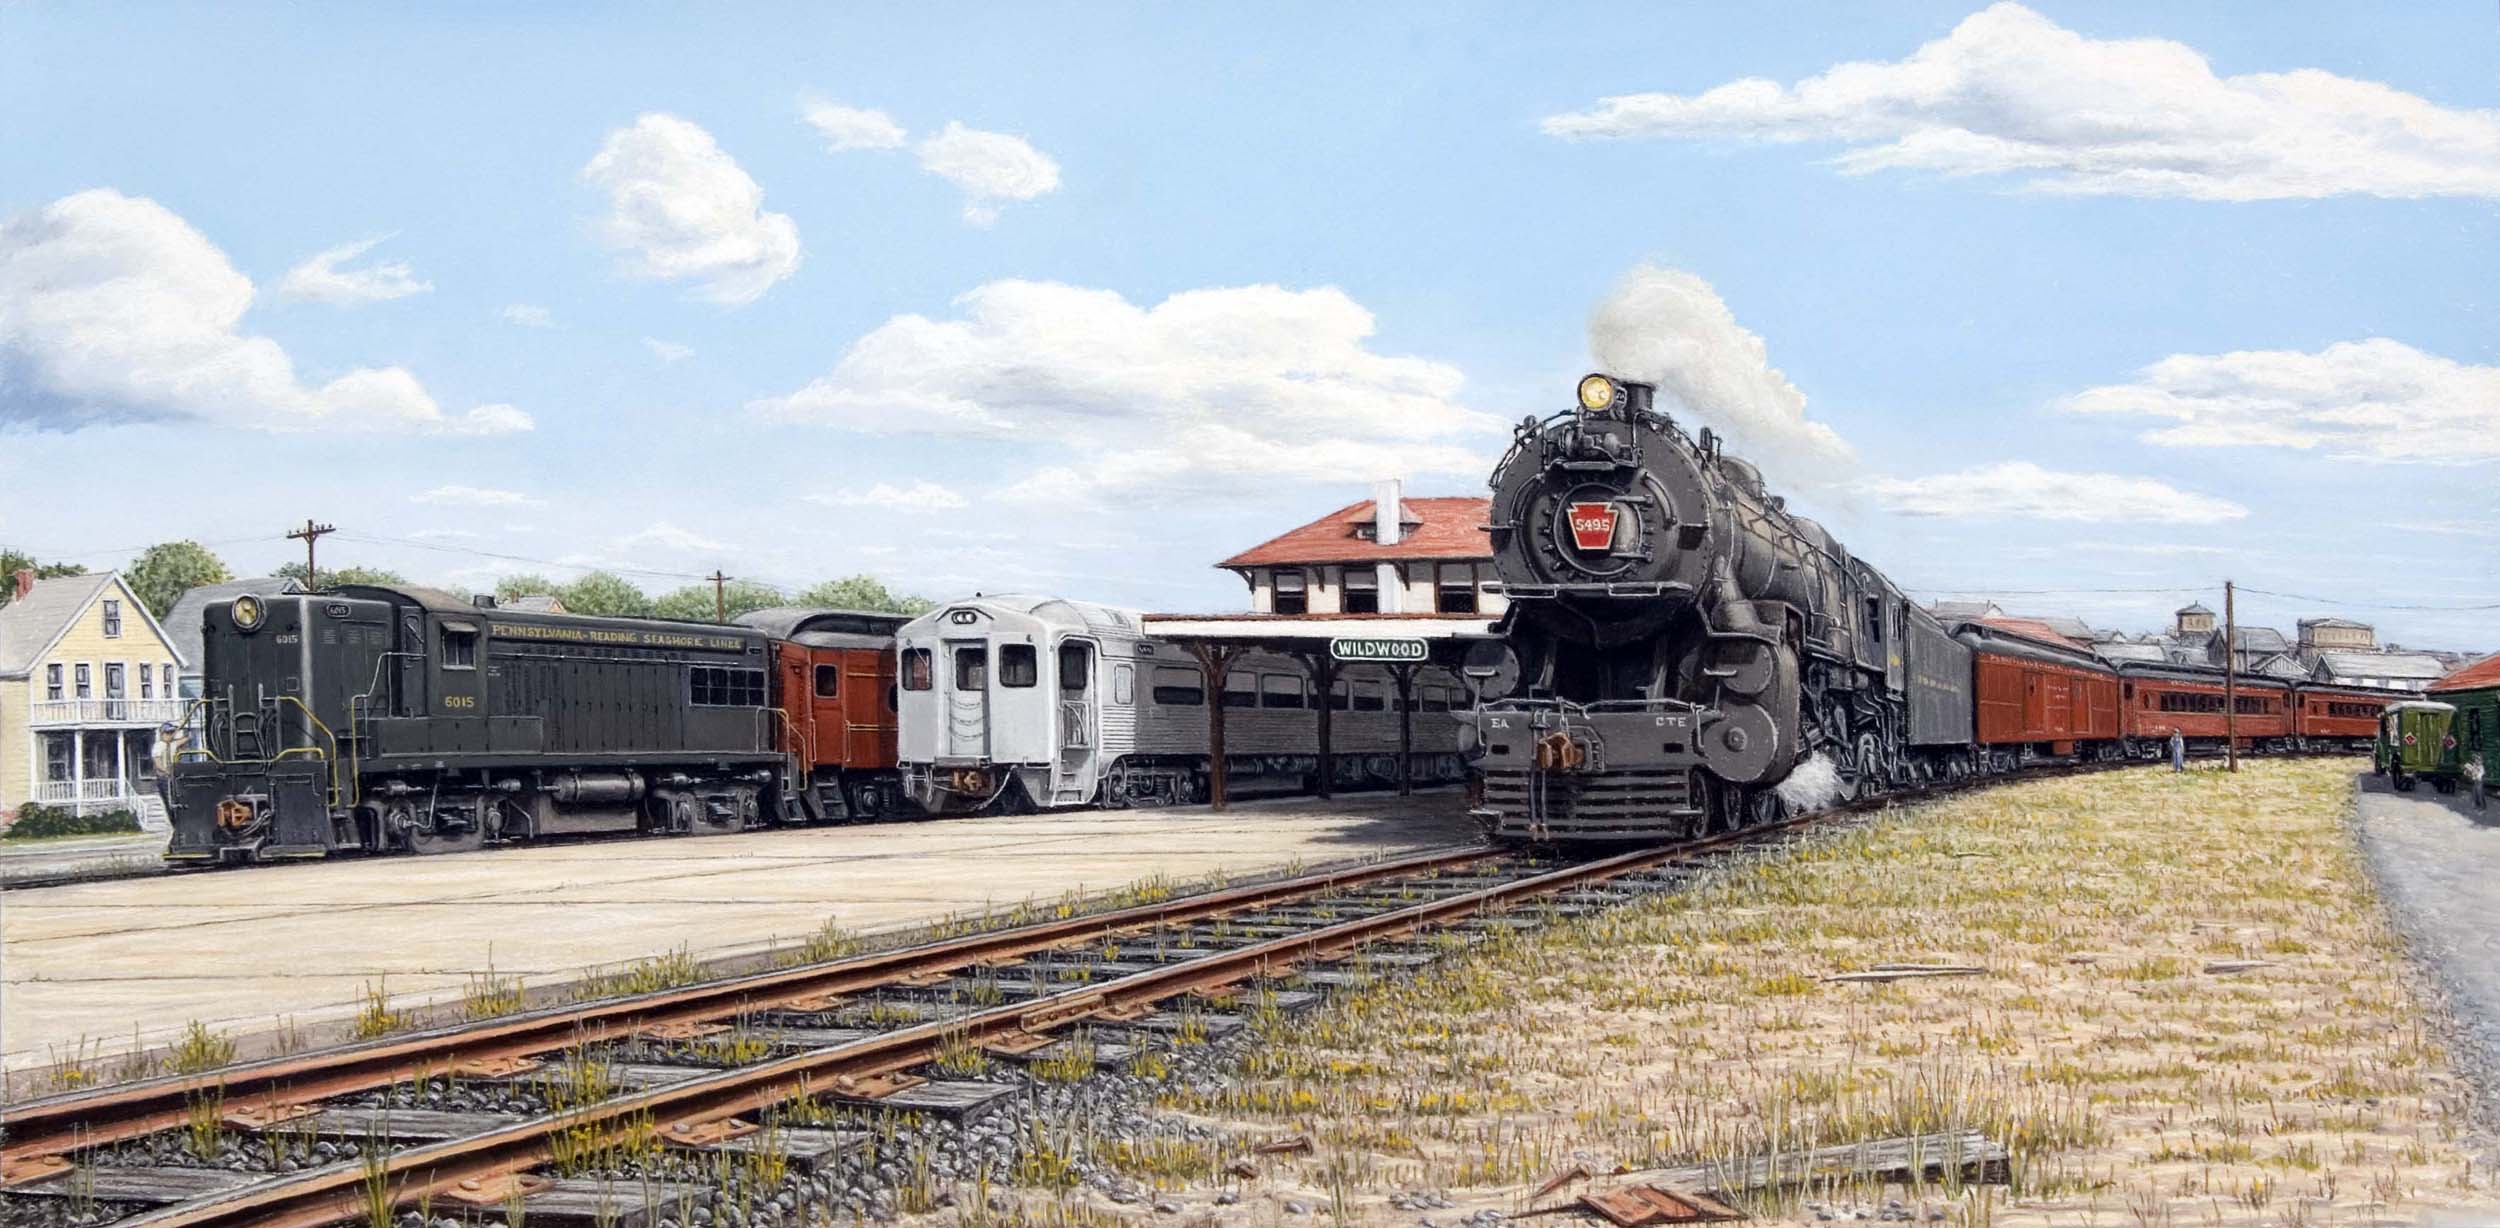
I
don’t think I can possibly squeeze any more PRSL in this photo. All of the icons
are finally here, RDC M405, AS16 6015, and K4 5495. They are the stars of my
Wildwood painting completed in 2009. All I need is Wildwood Station!
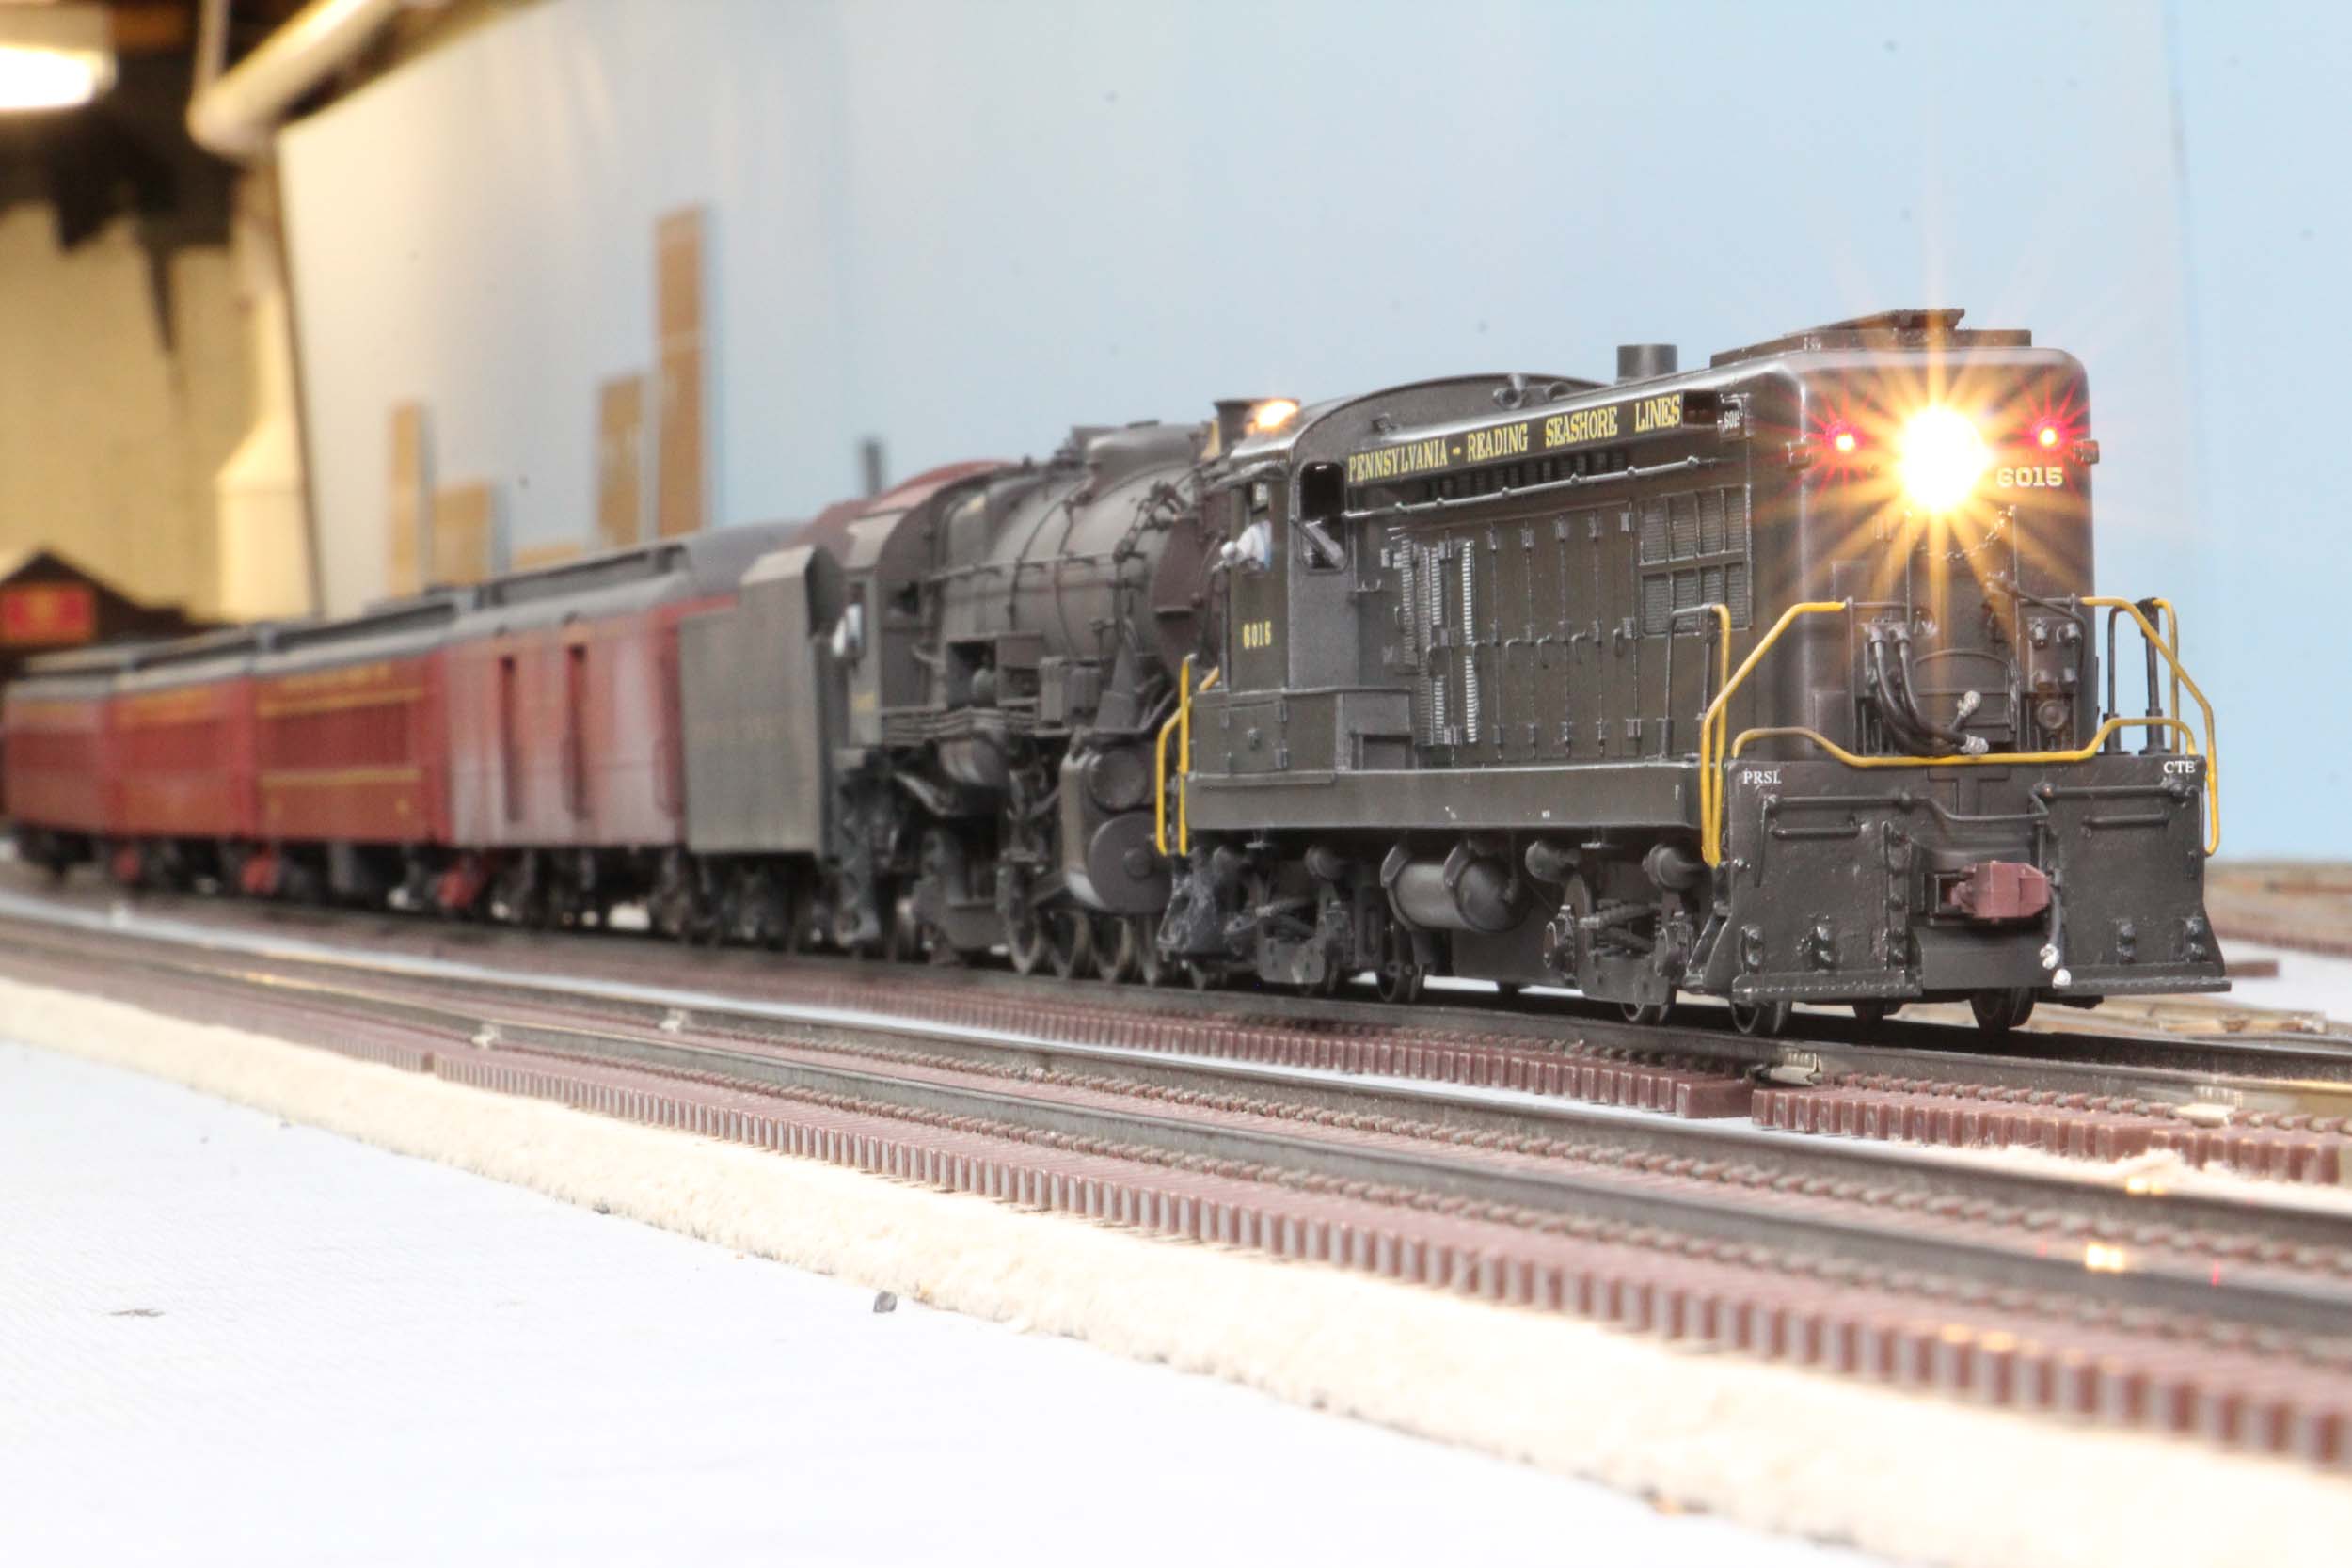

Added
1-20-18
A week after completing my AS16 I rediscovered this photo of a
test run on a friend’s layout on 3-28-07. What a difference start to finish for
my completed model!
Added
4-6-25
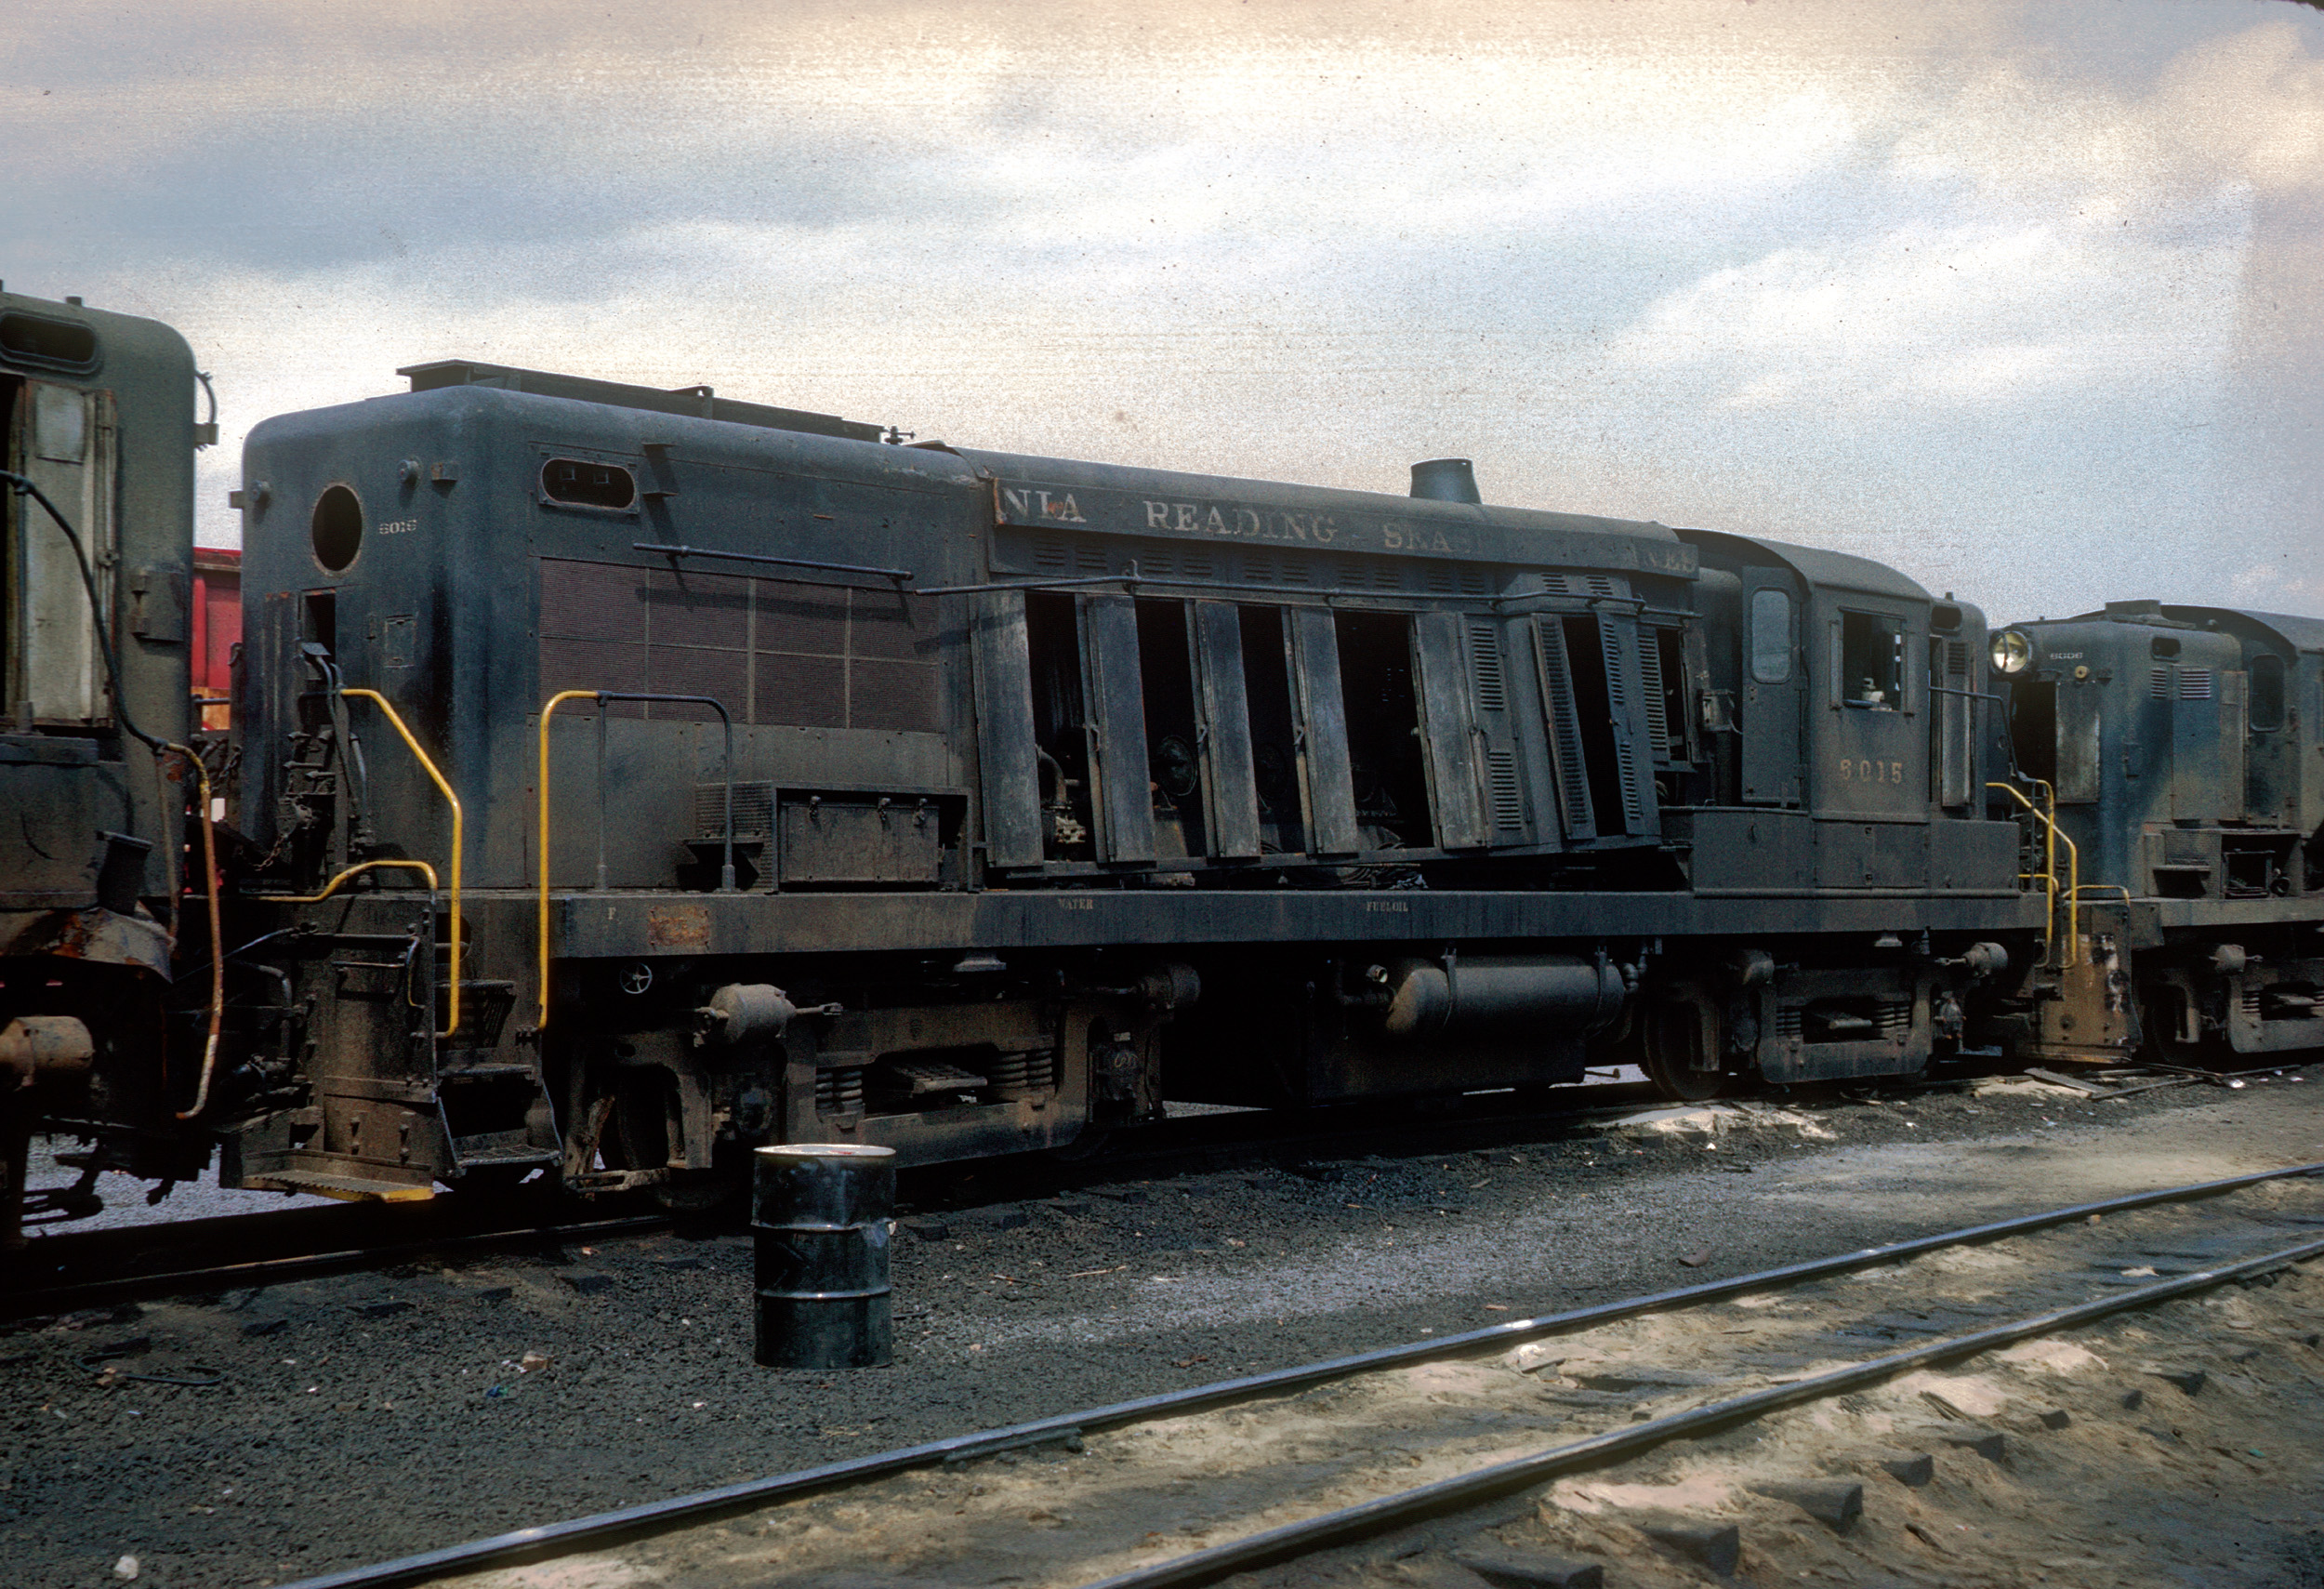
There have not been many PRSL slides for sale on eBay for a few
years. This one appeared in March 2025. It fell into my “it’s different” category
so I bought it. 6015 has seen better days waiting in Camden to be scrapped. No
date was on the slide.
Updated
4-6-25
All photos and content © Lanes Trains 2005-2025