|
|
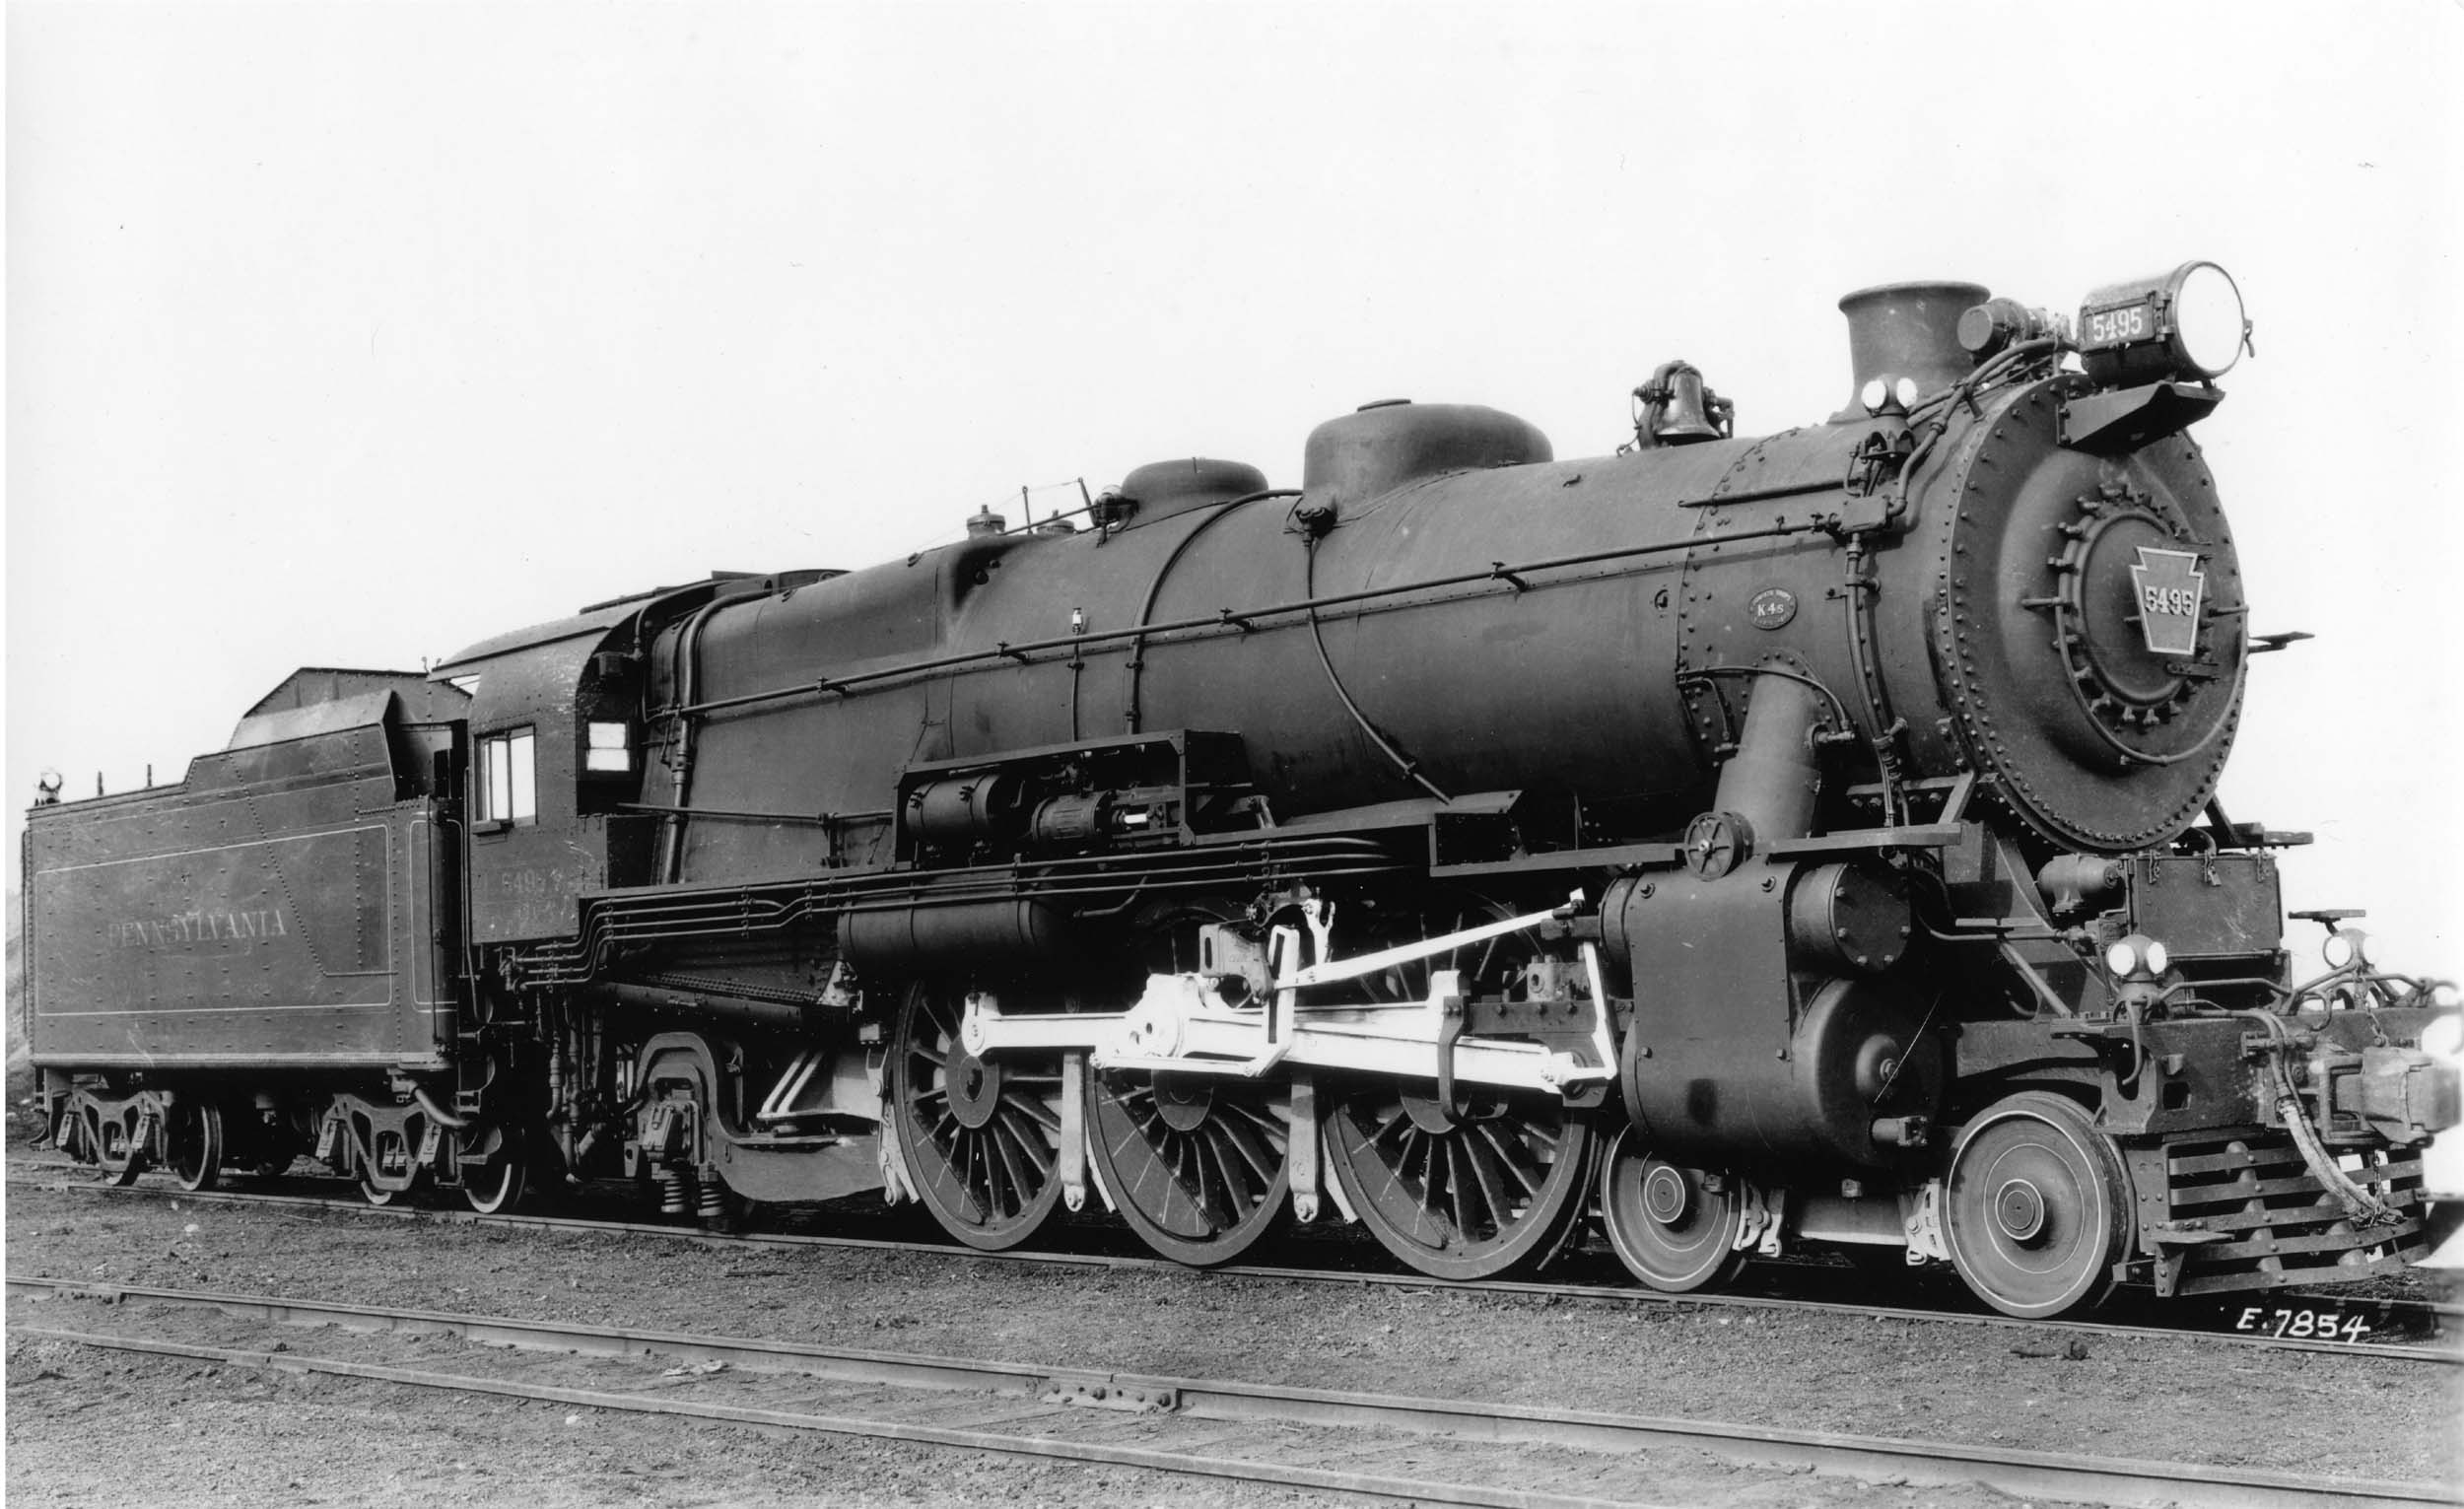
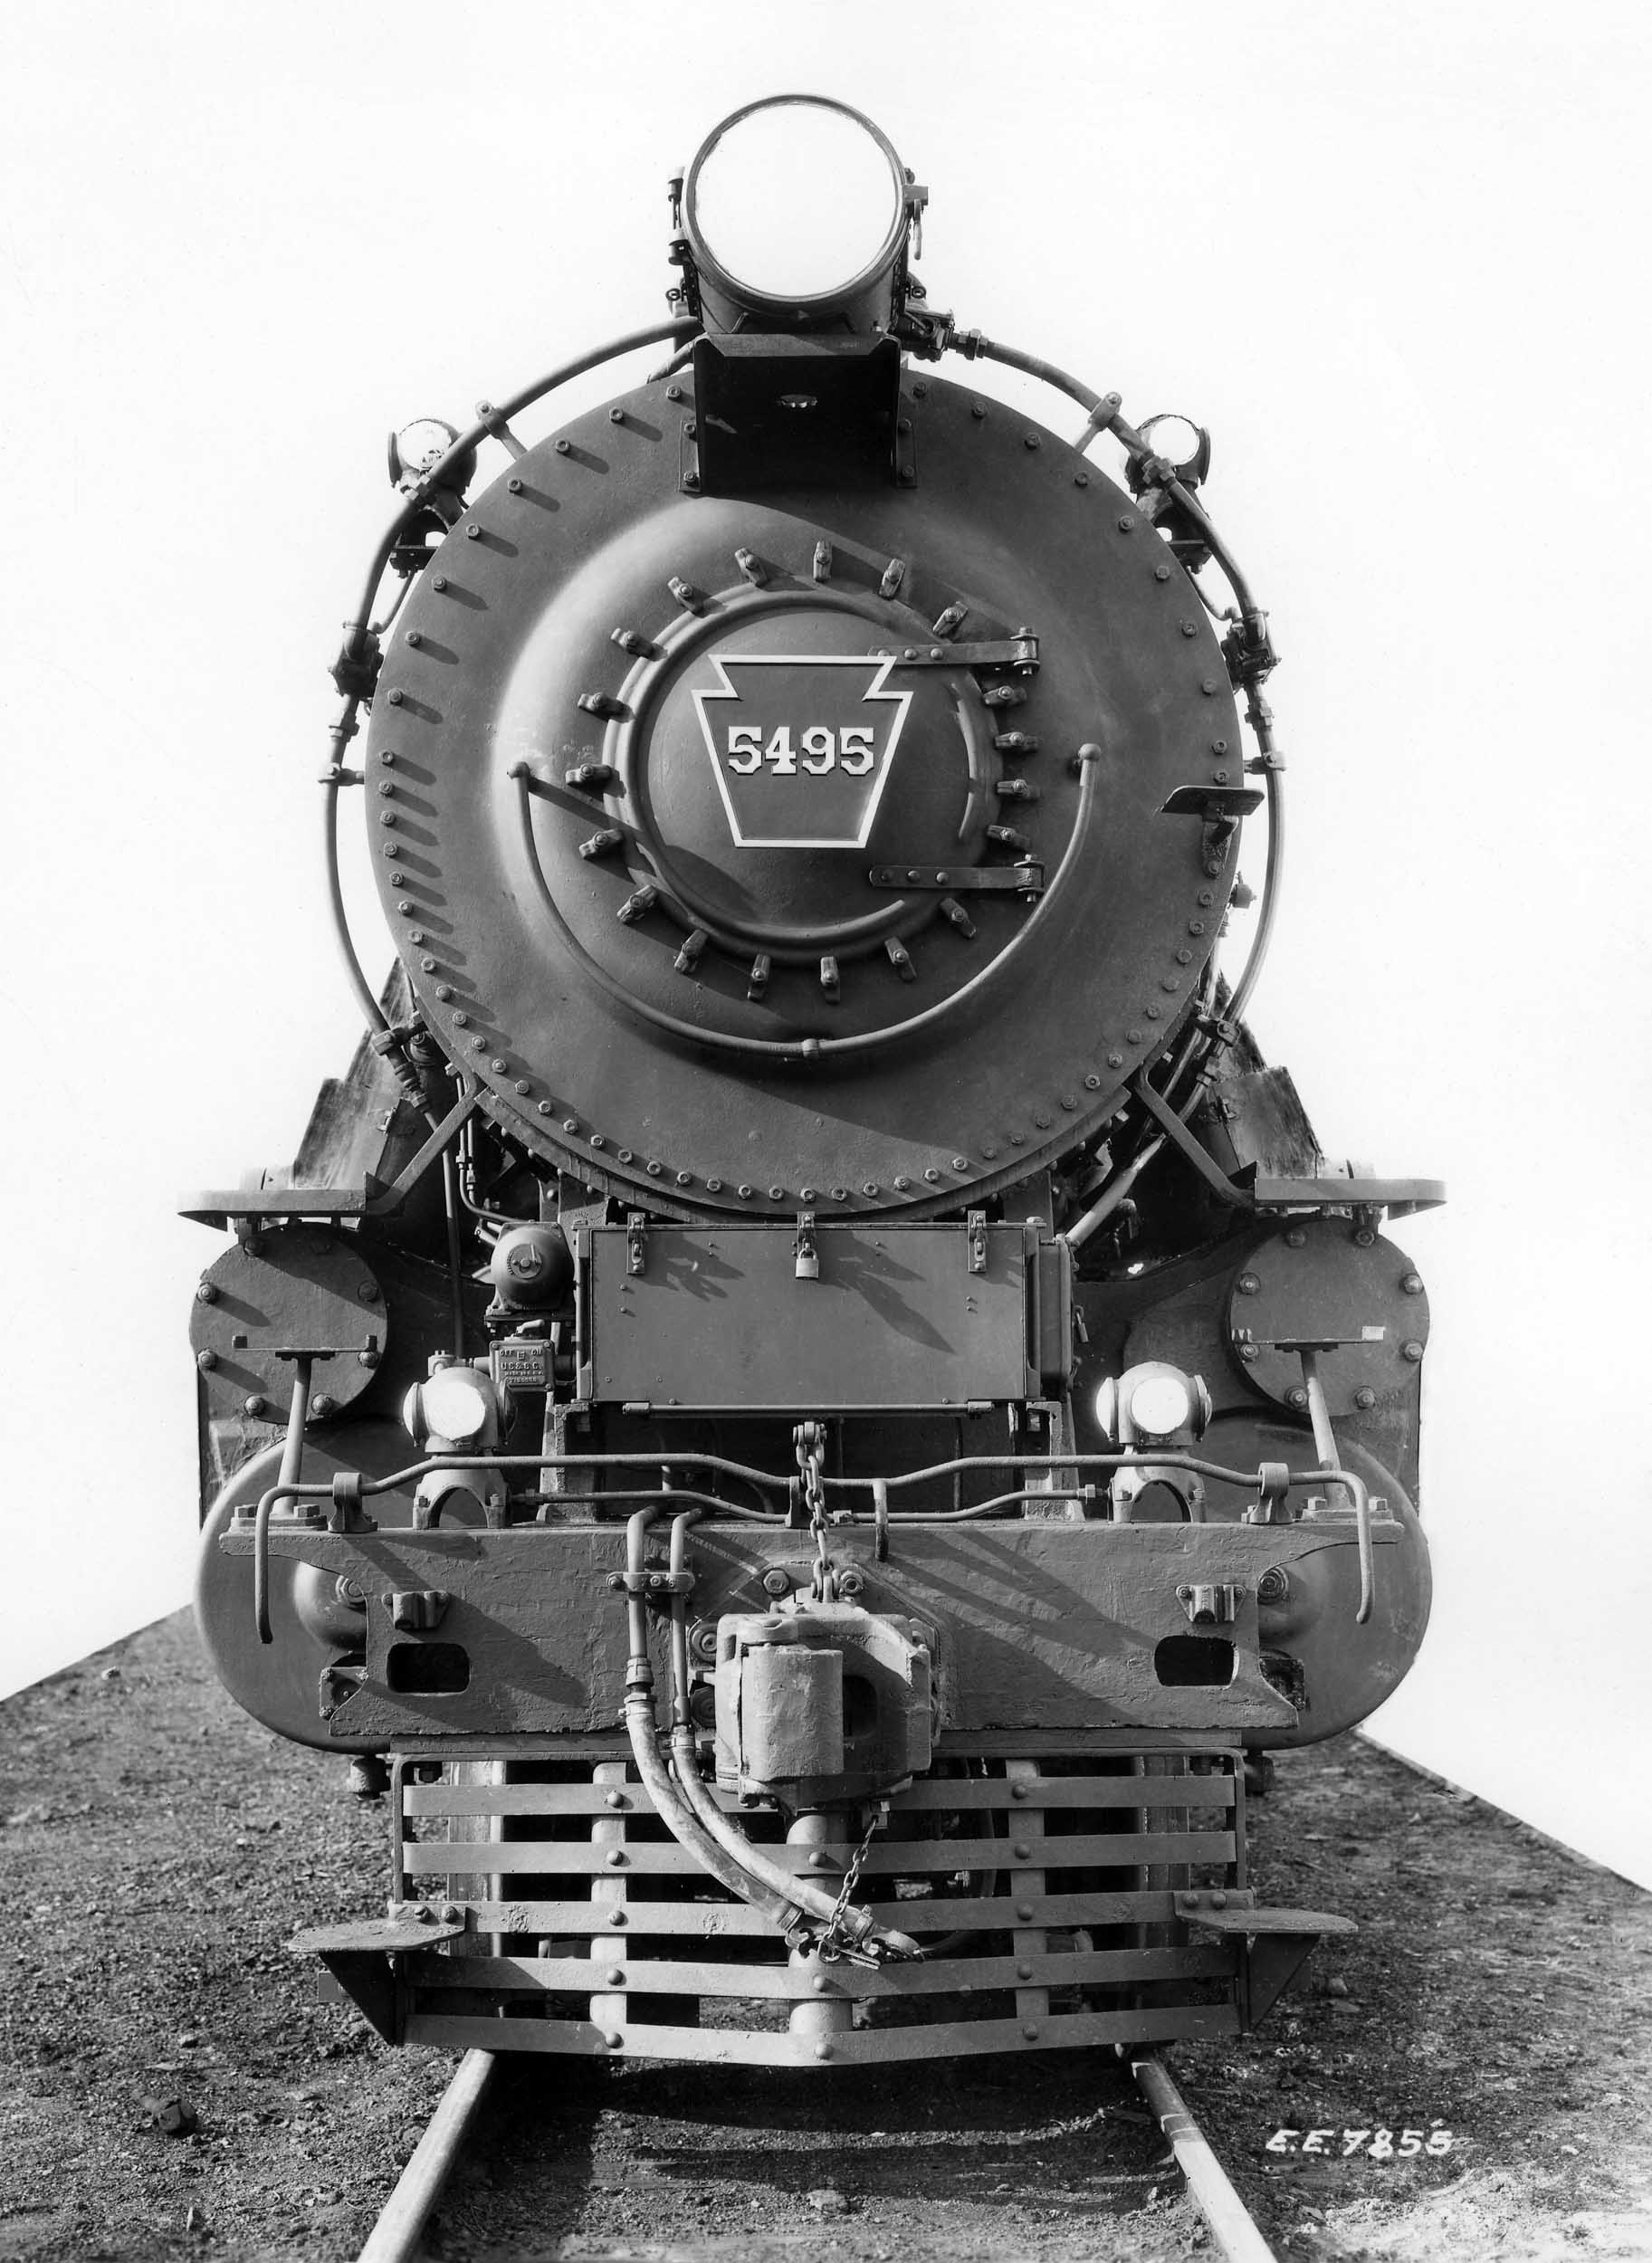
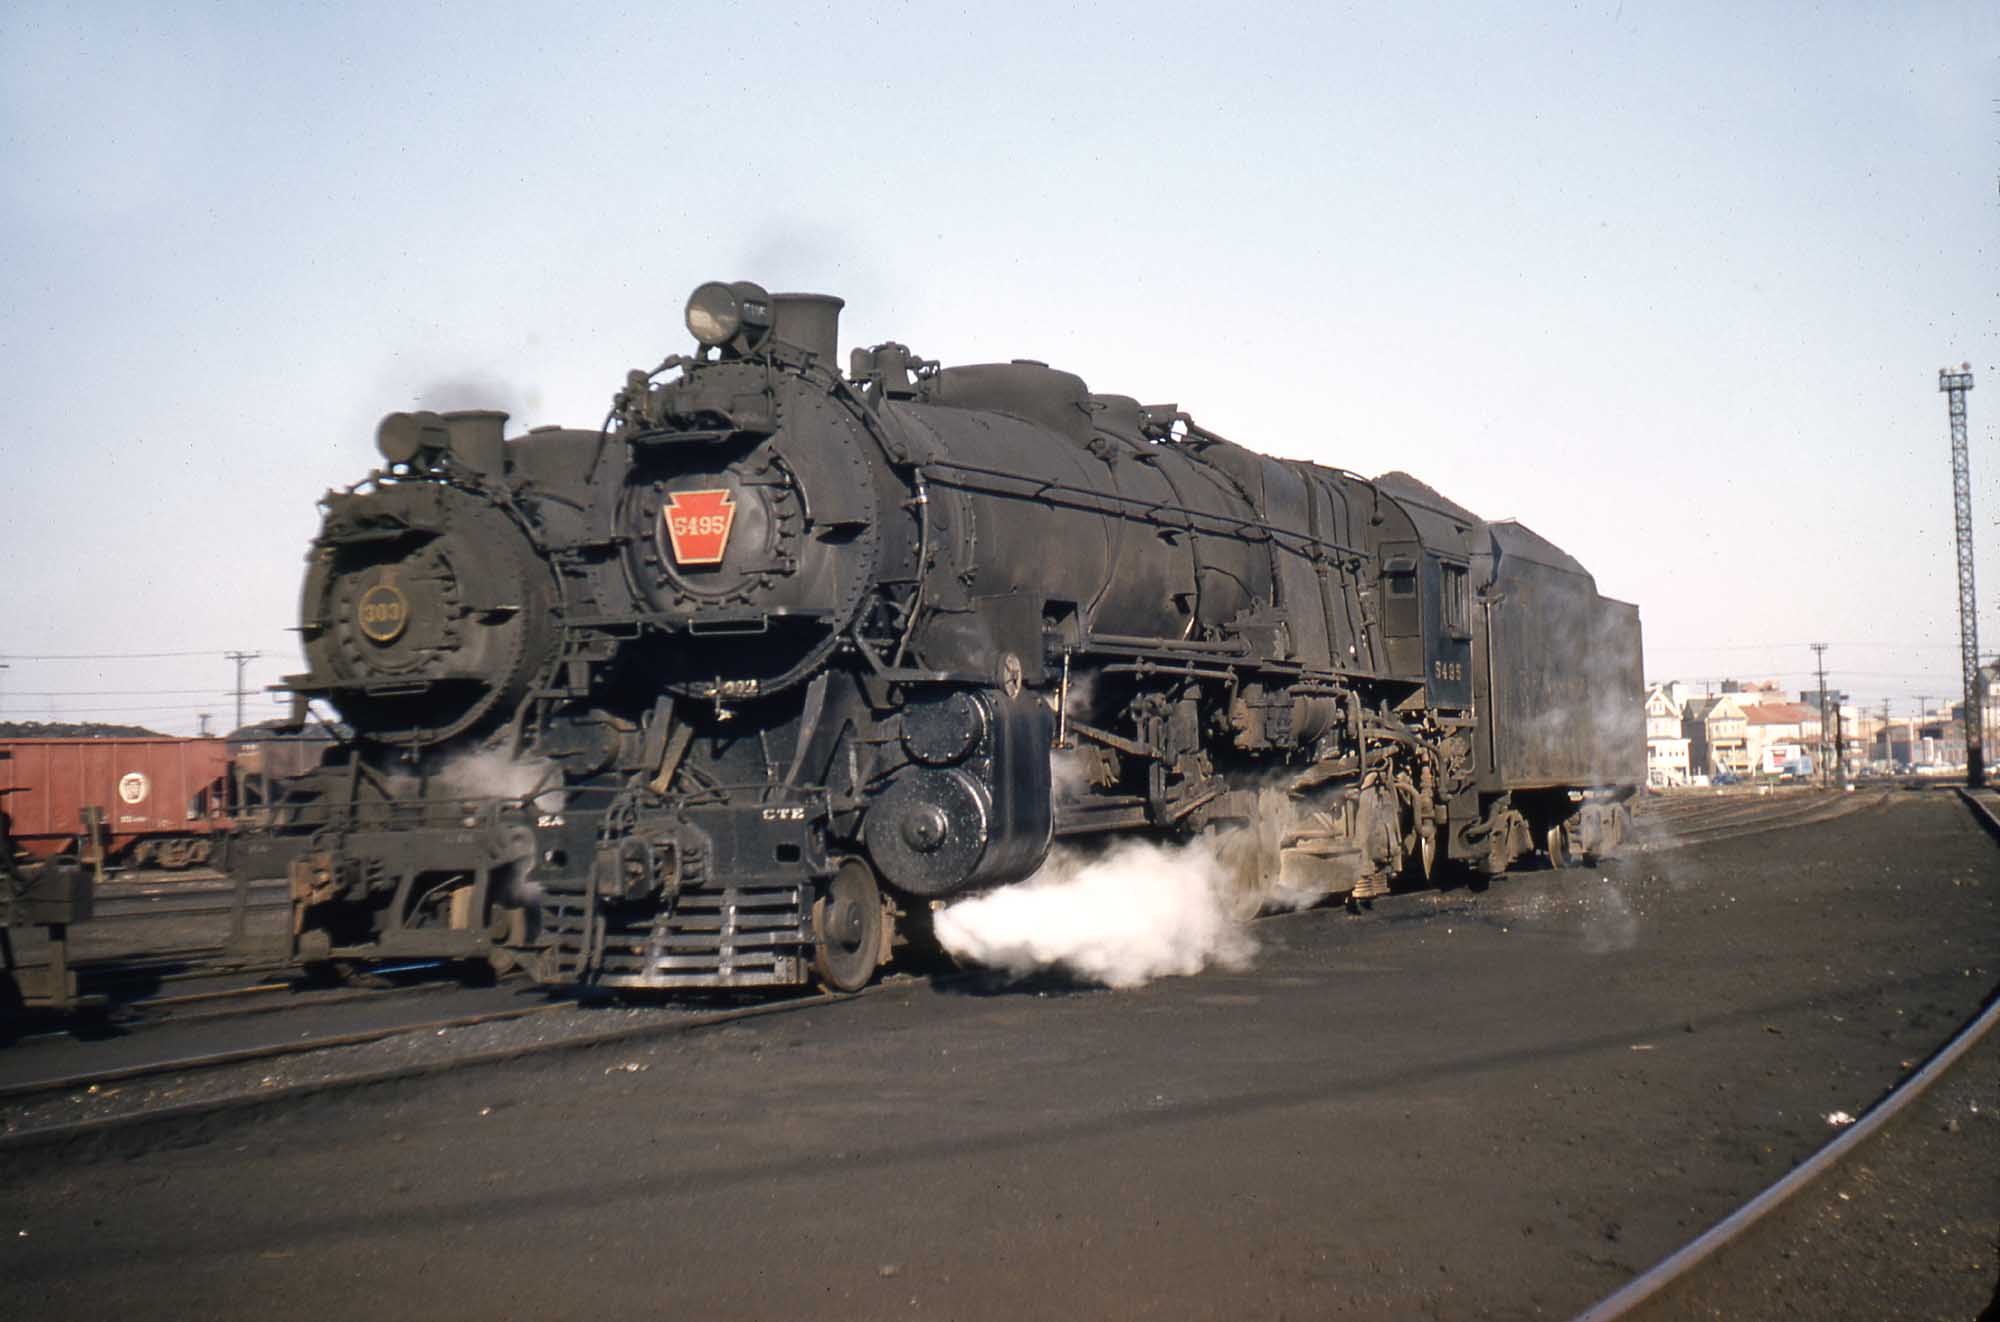
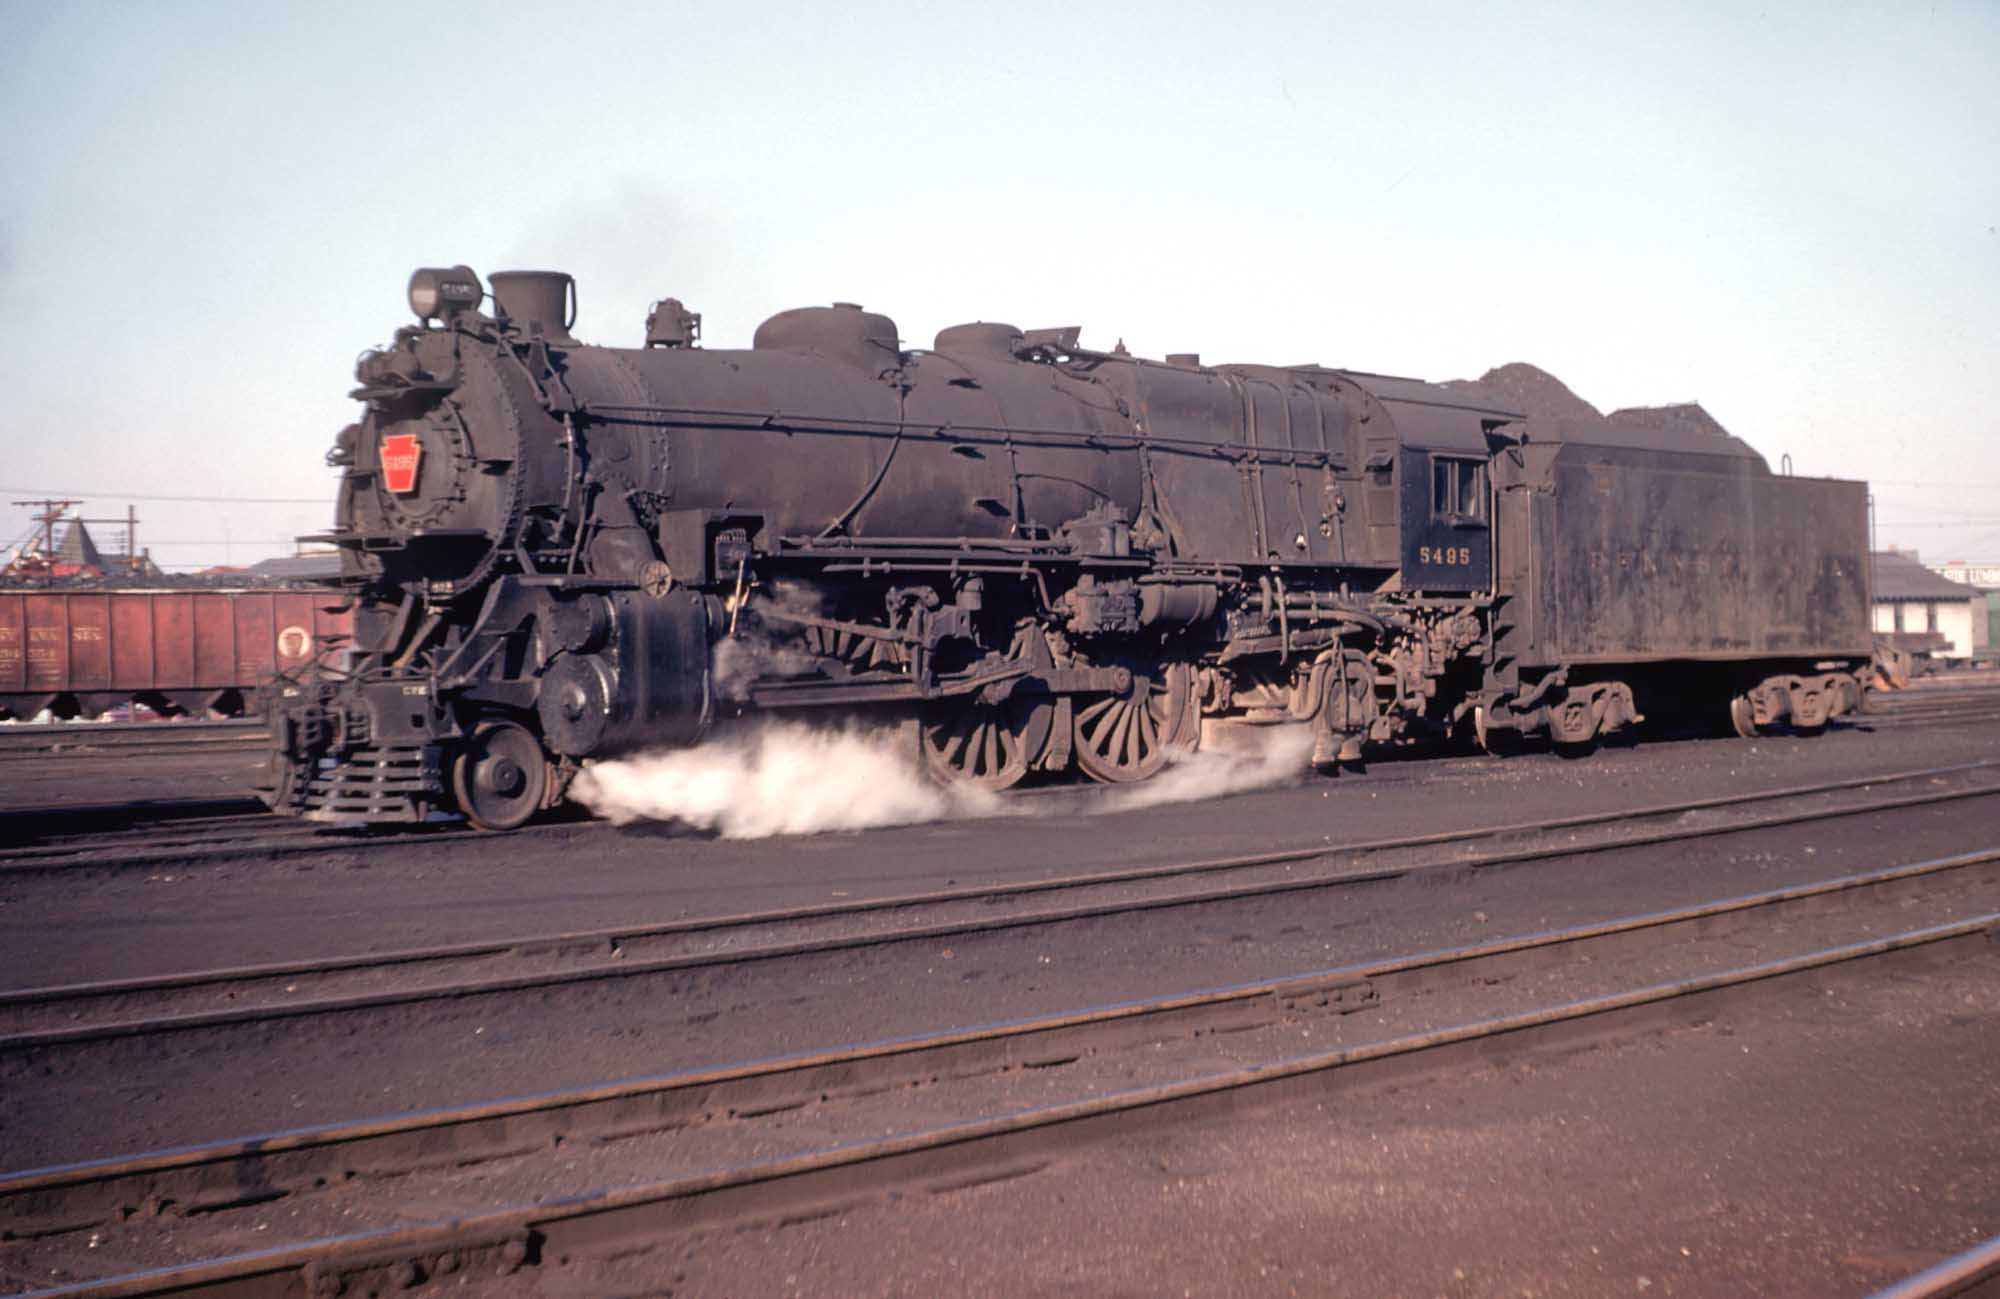
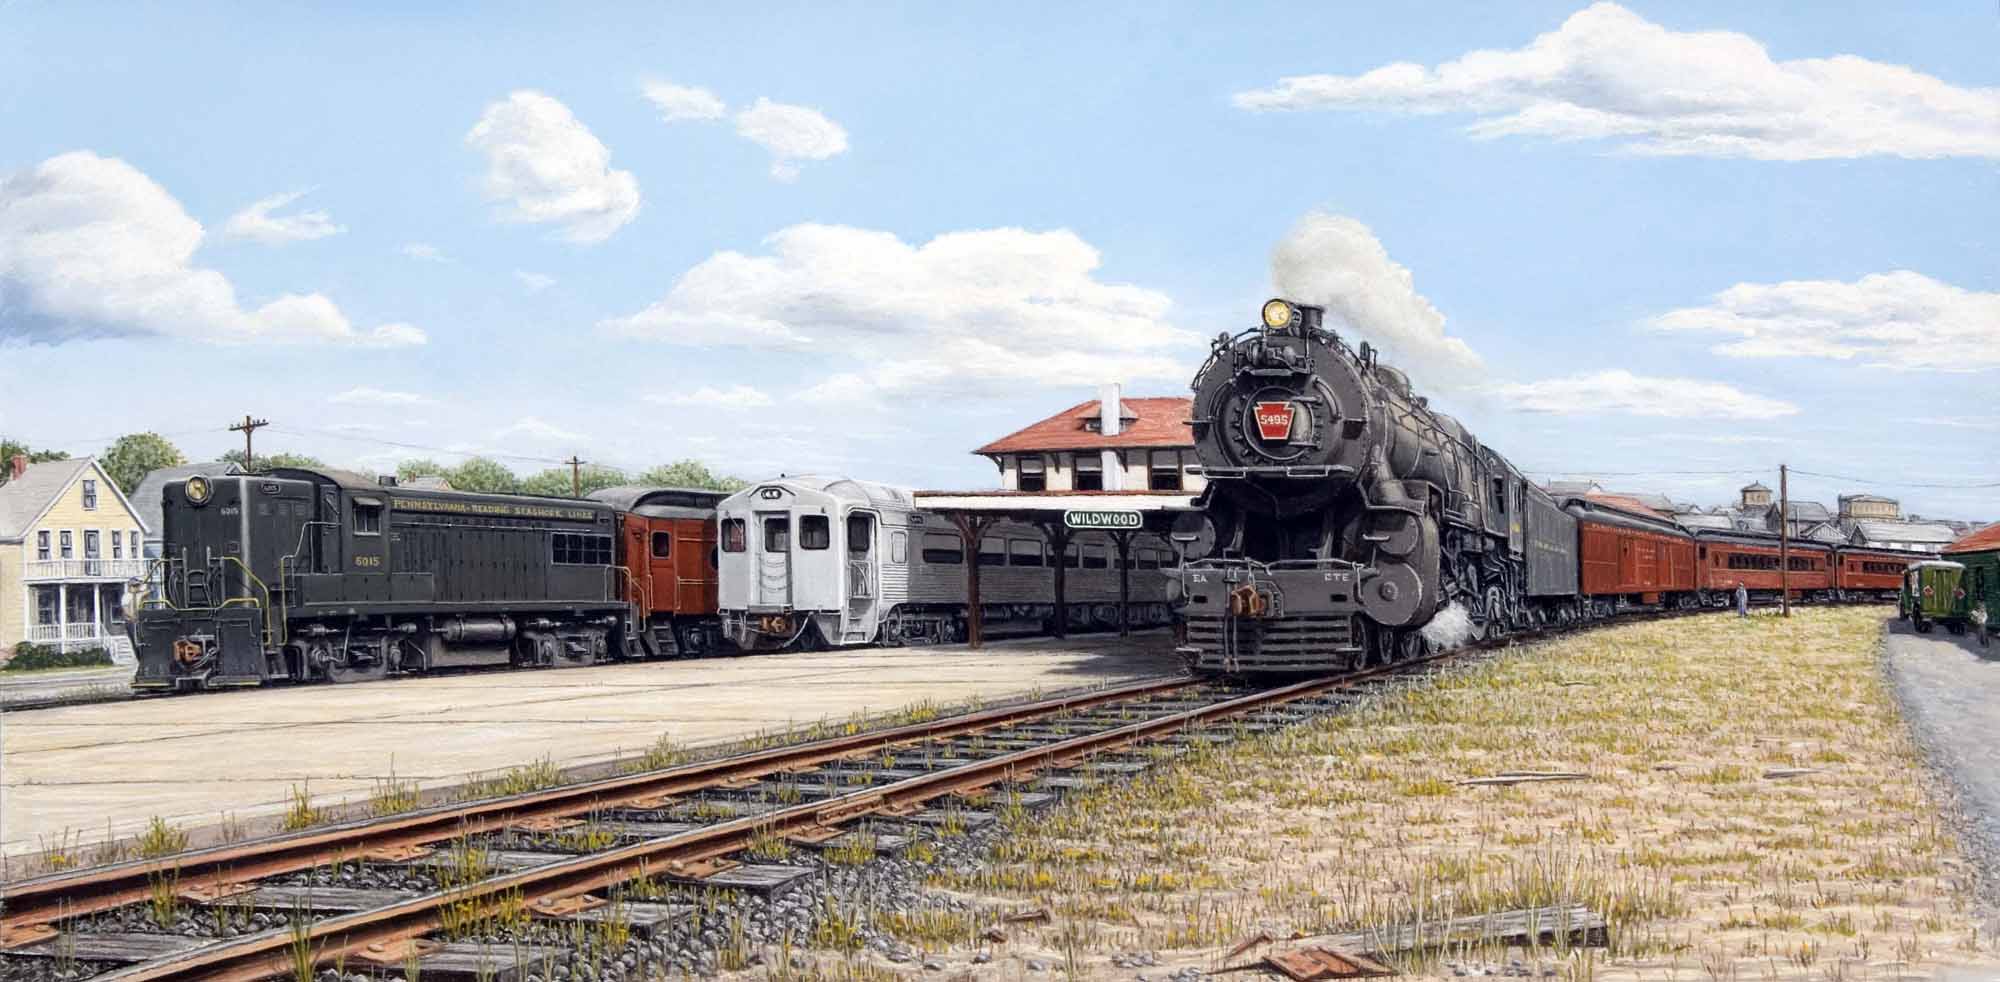
Click on the photos to make them
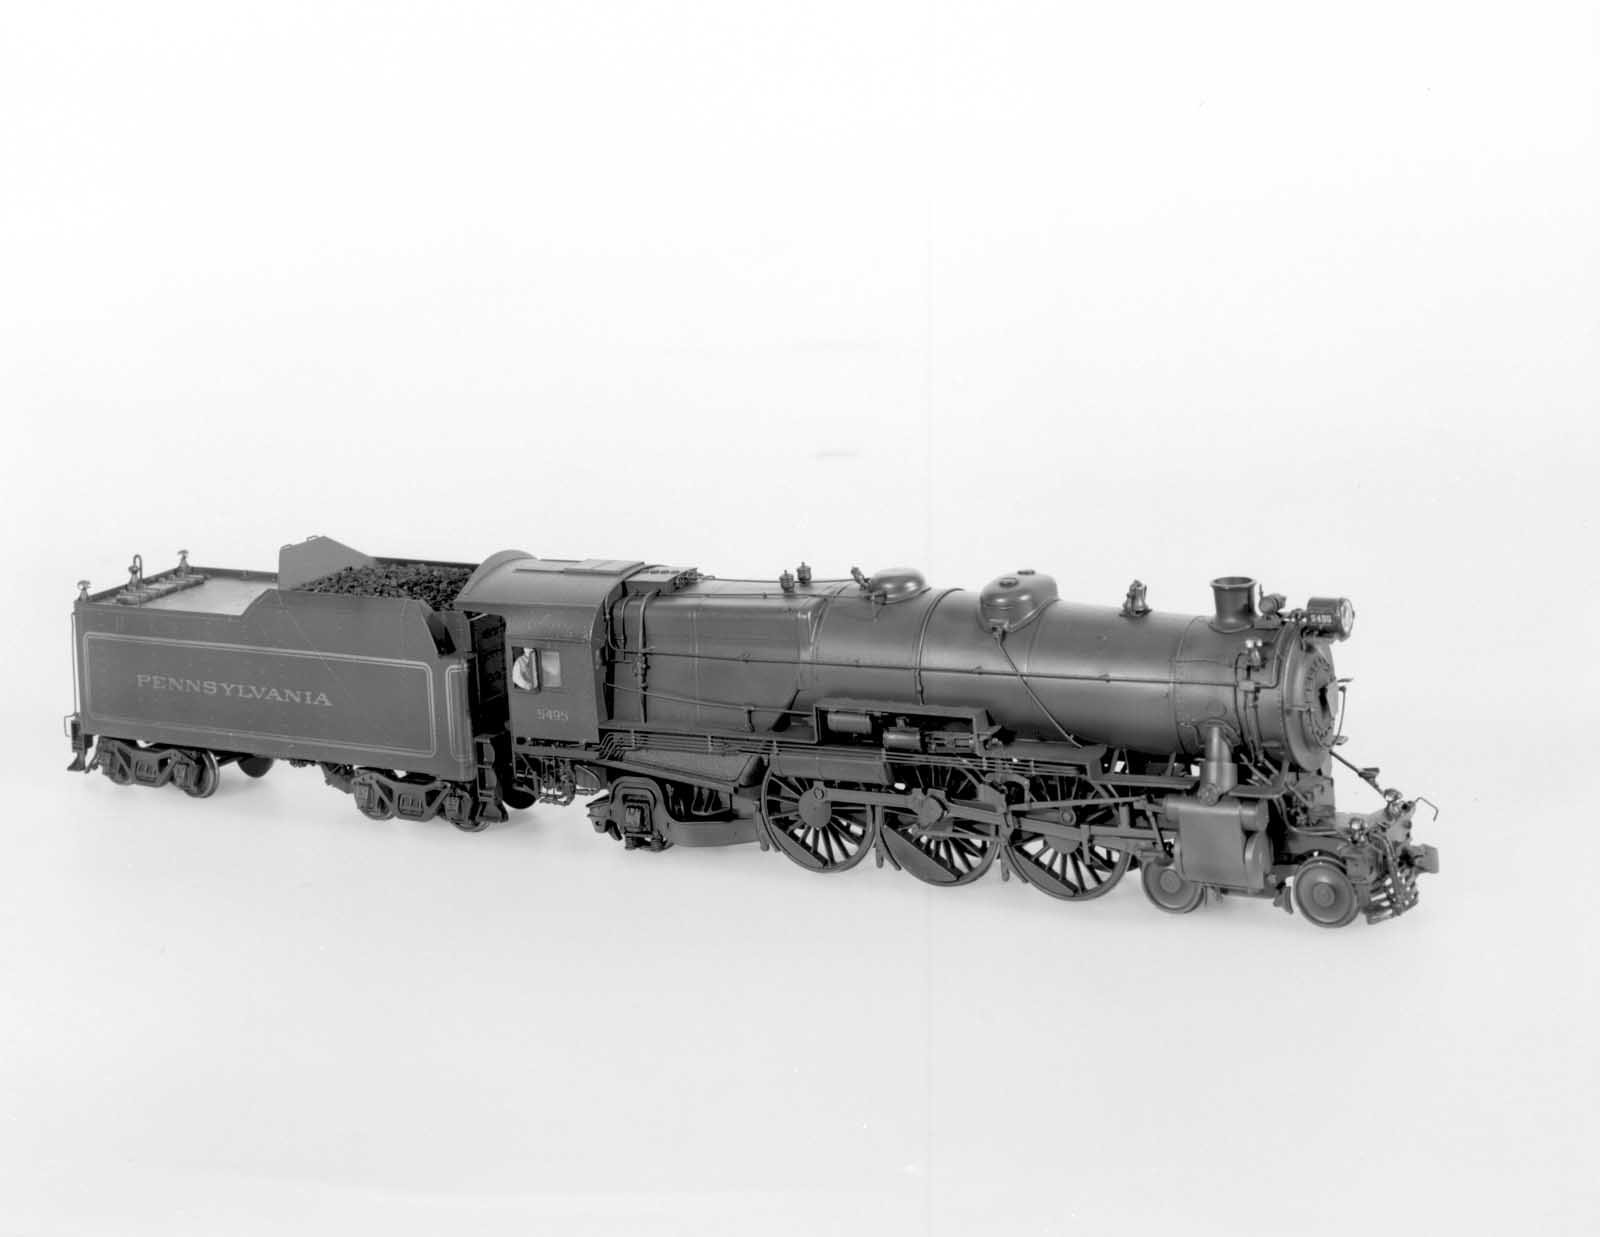
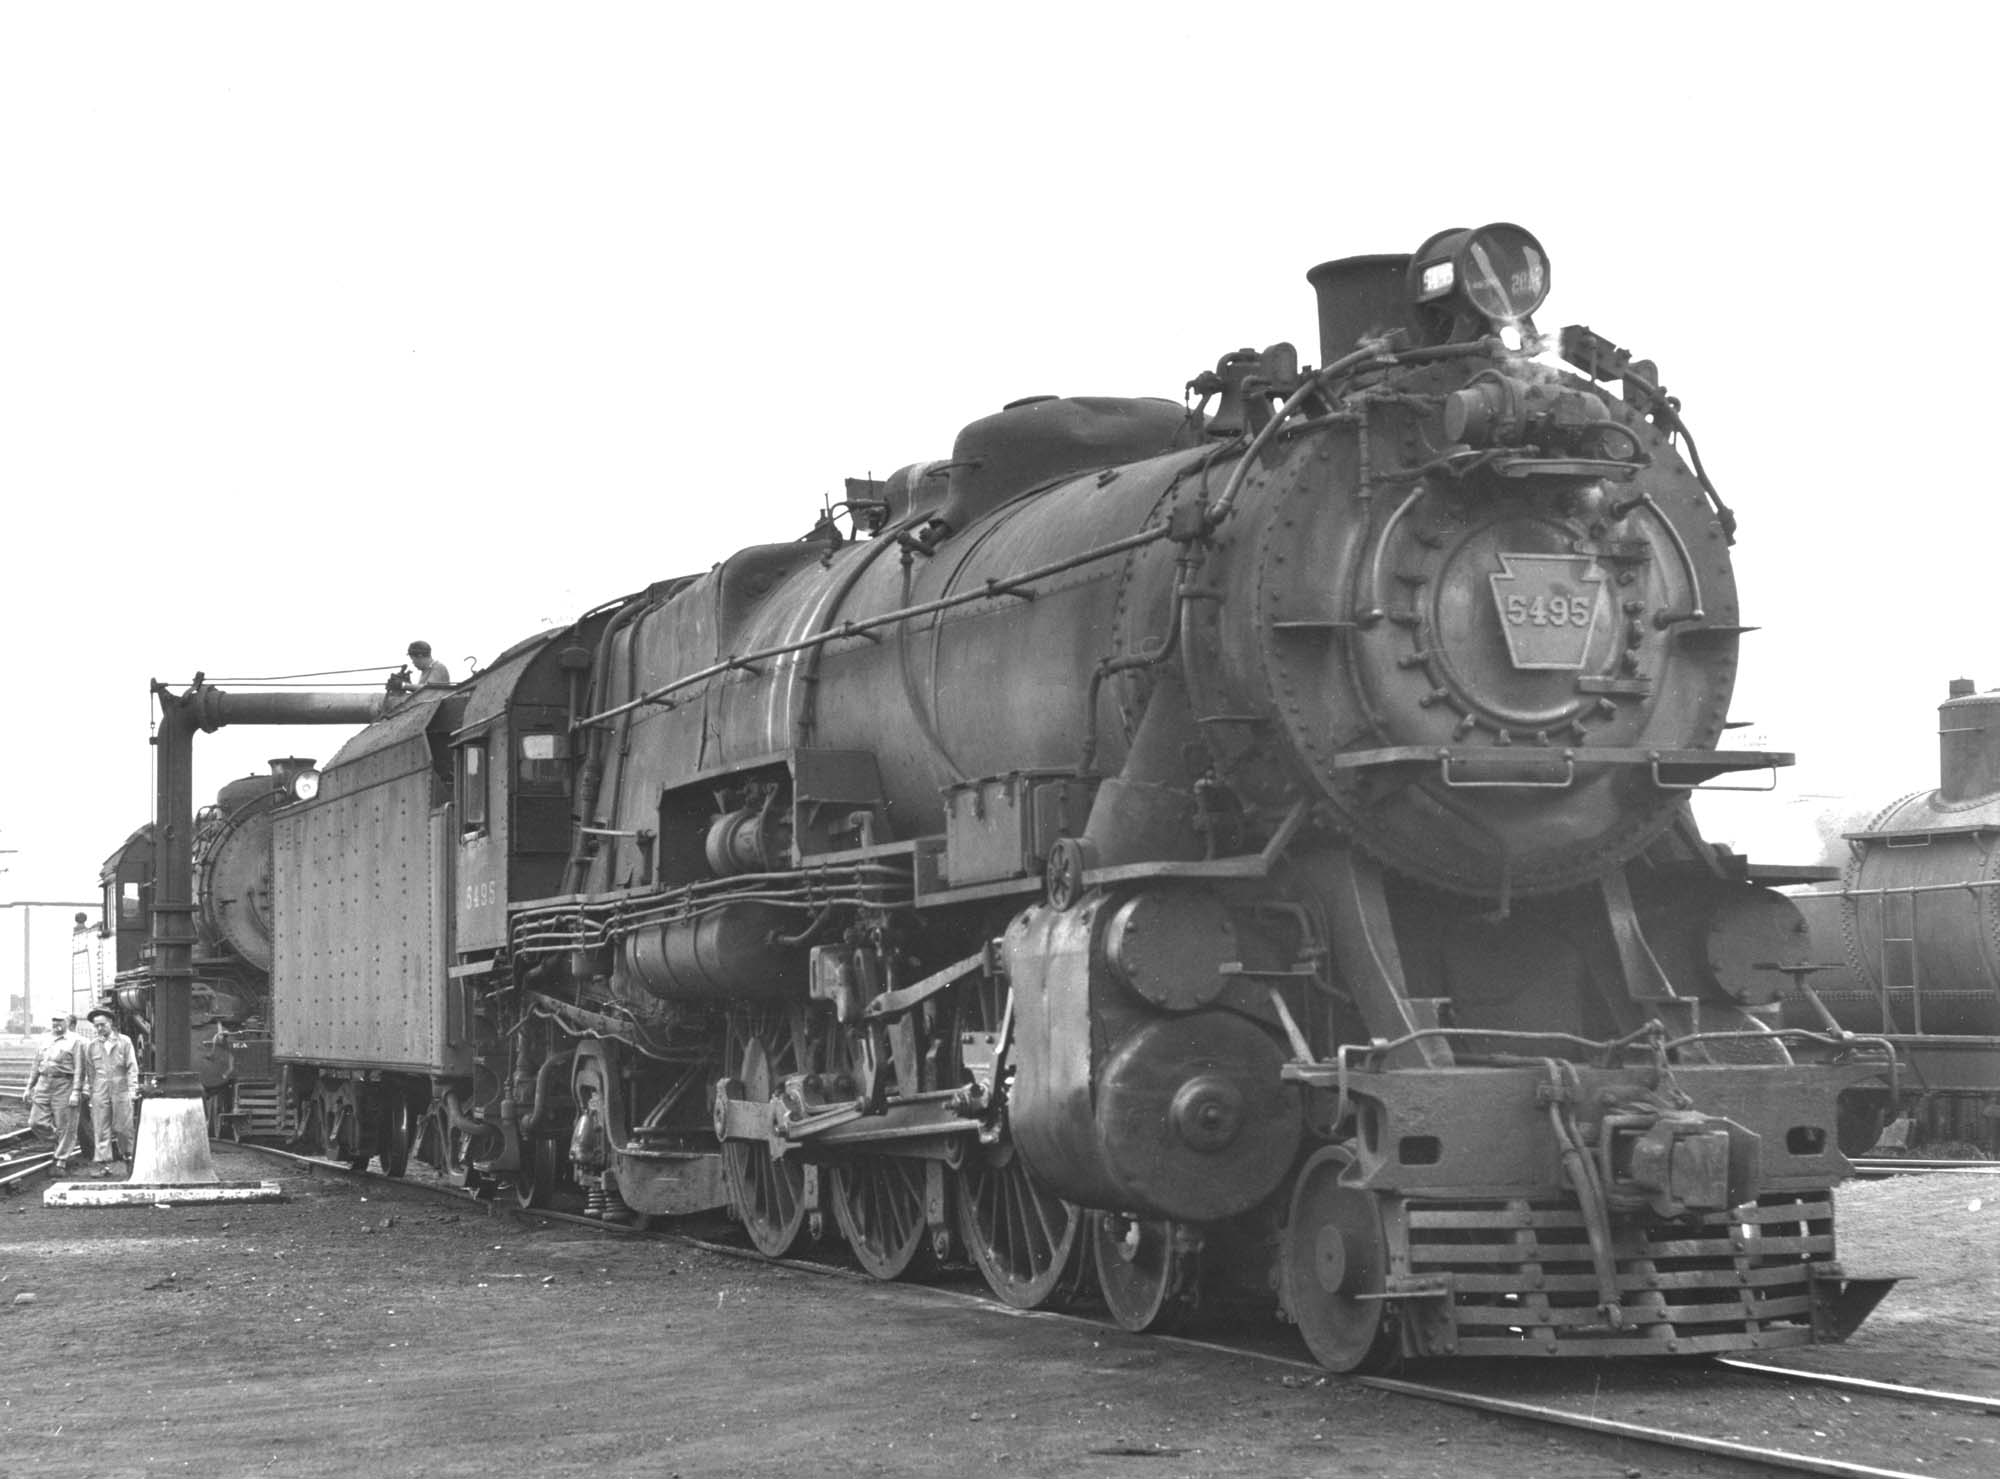
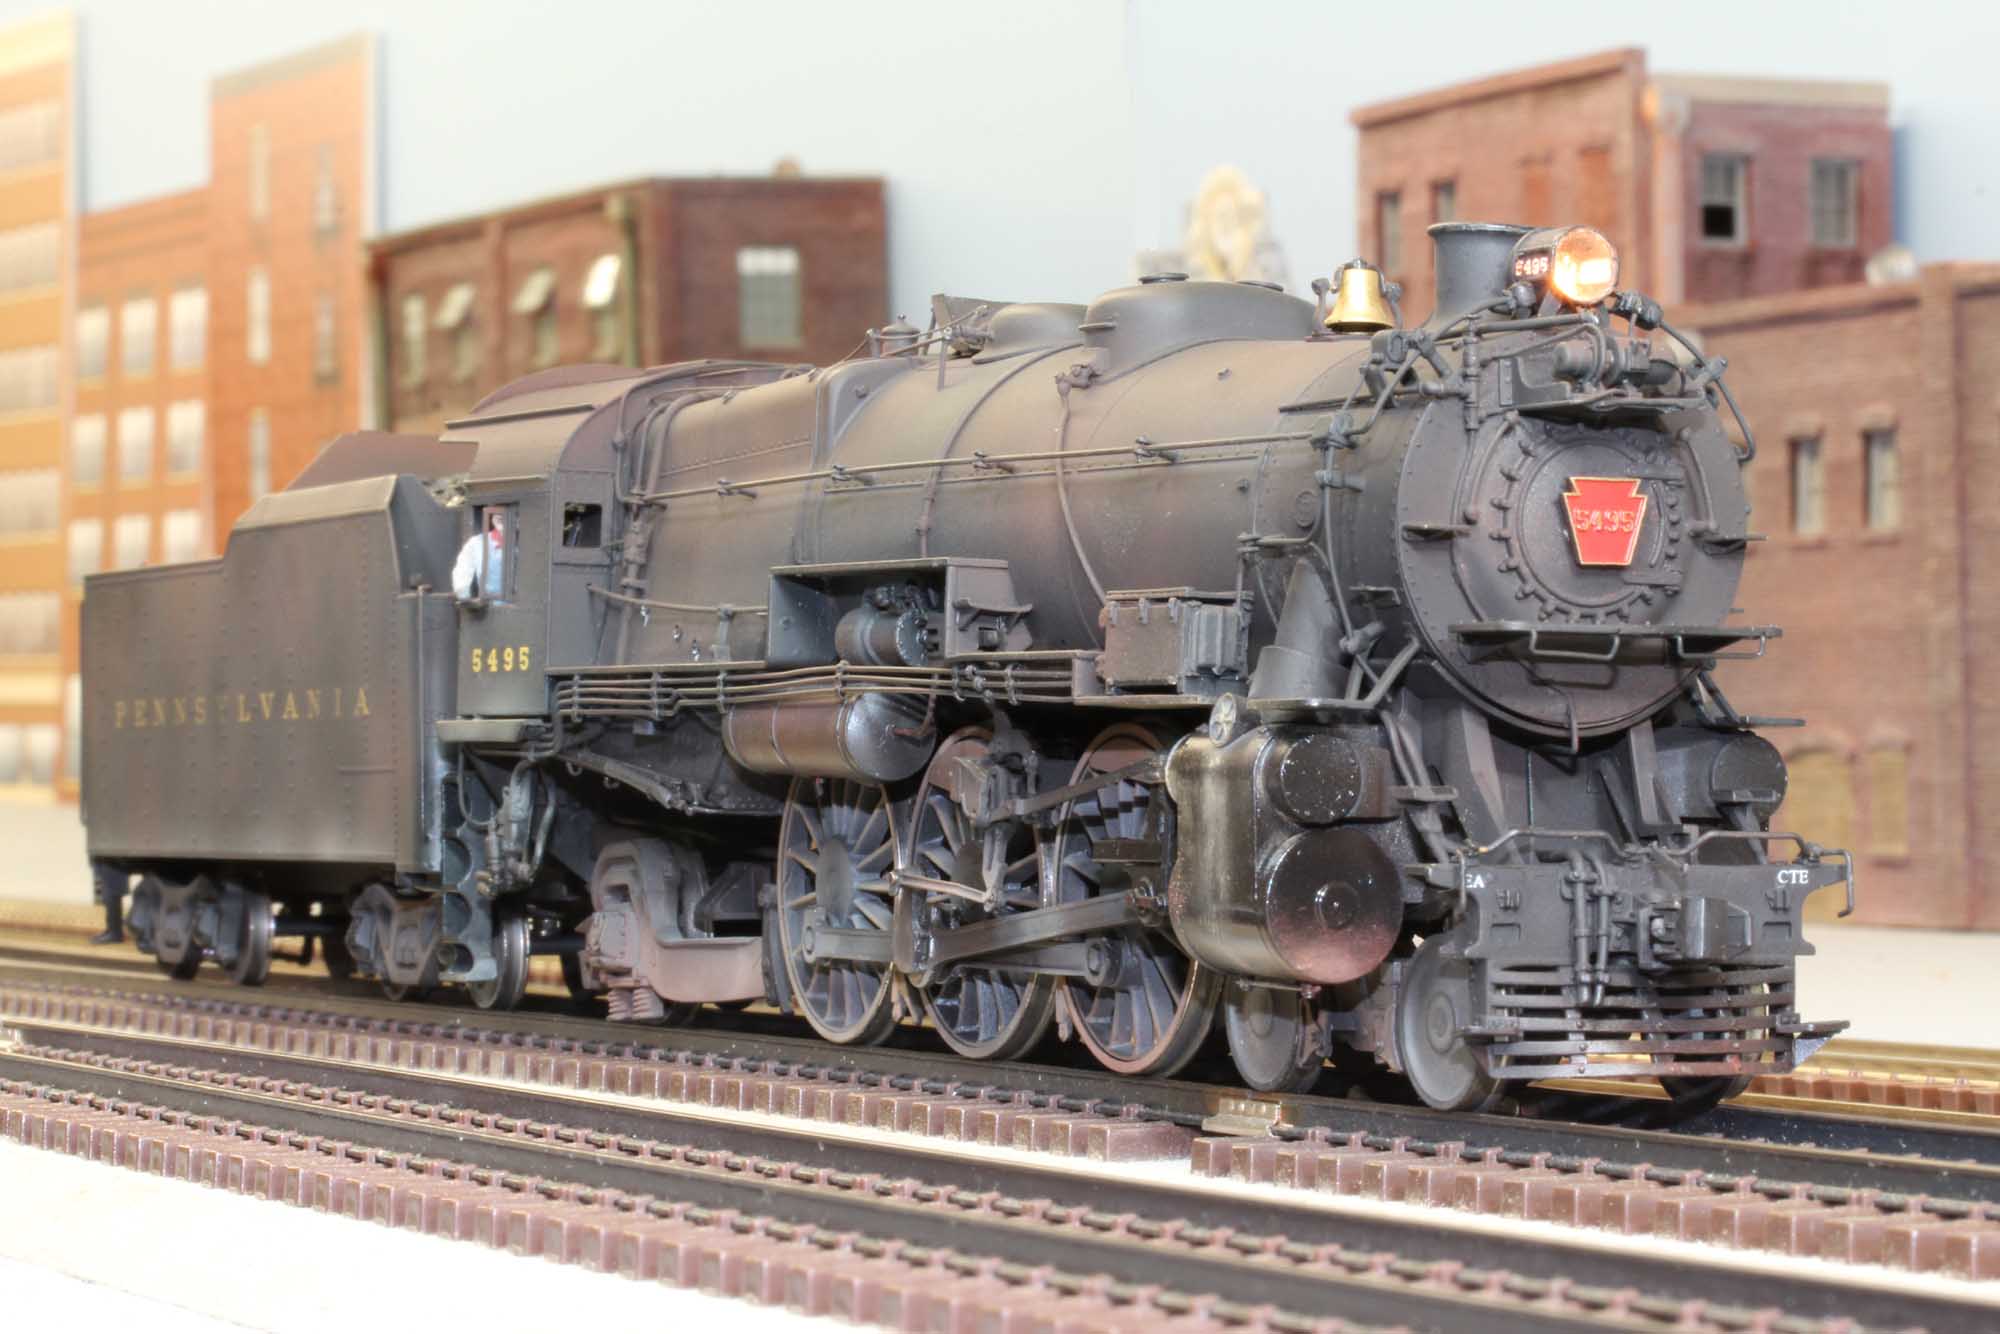
larger I detailed my 1928 as built Omnicon
K4 as #5495 as it was in the end of PRR
steam. The difference should be apparent in
the photos below, as a builder’s photo and much later in the 1950s in service
in Atlantic City.
|
|


This K4 project has been in my mind
since about 1995.
K4 5495 History
Built in Juanita February 1928
Construction Number 4182
Dropped from the roster April 1956
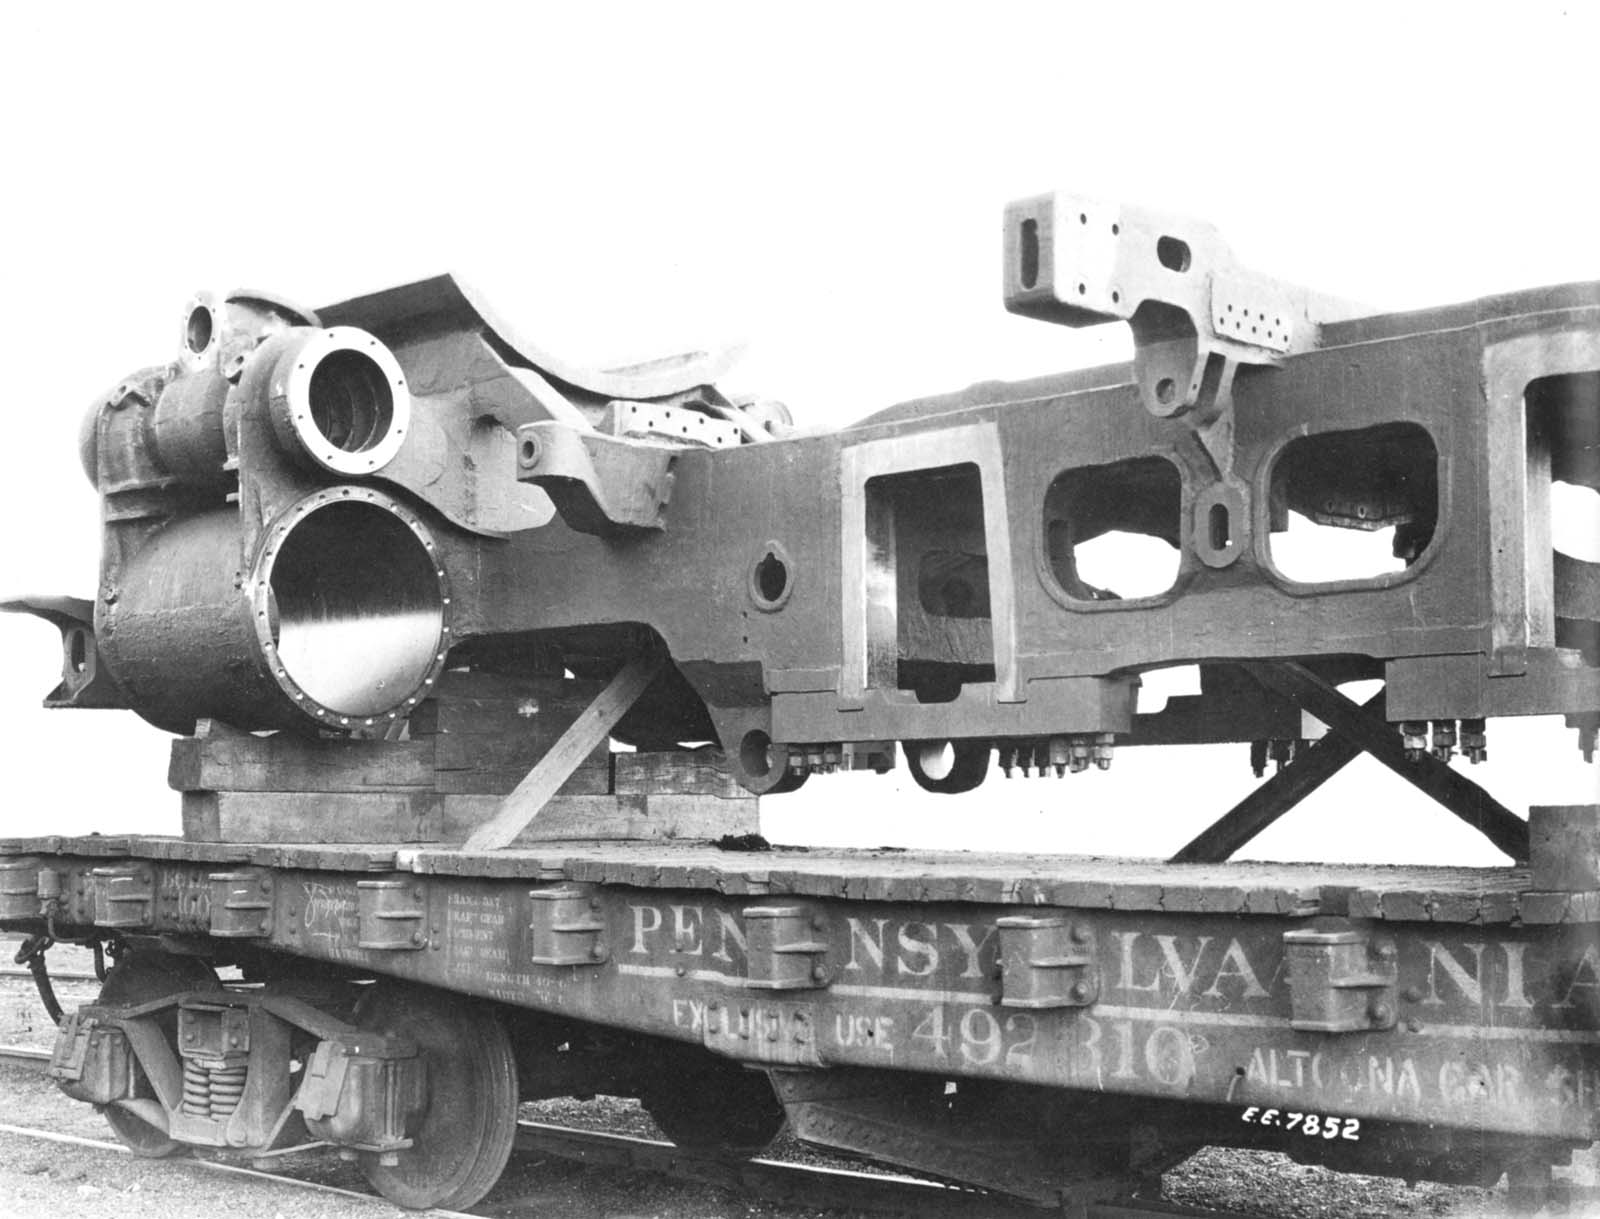
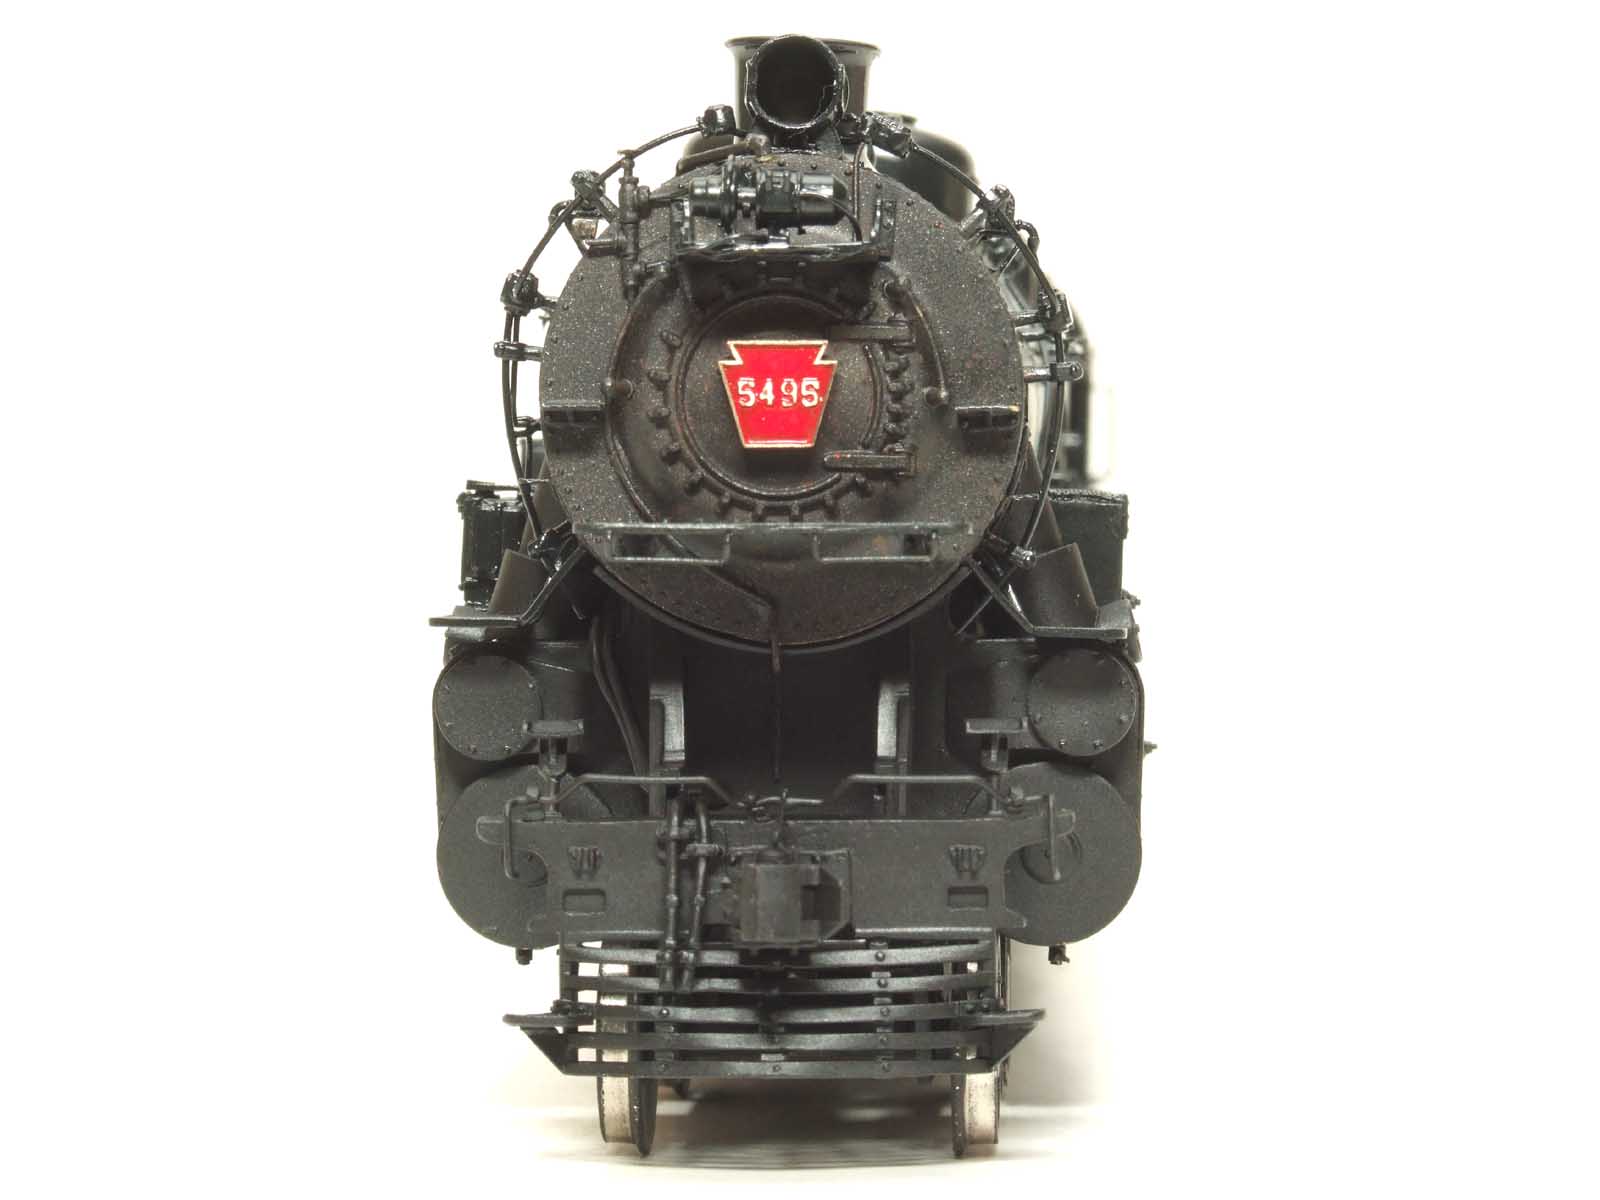
5495
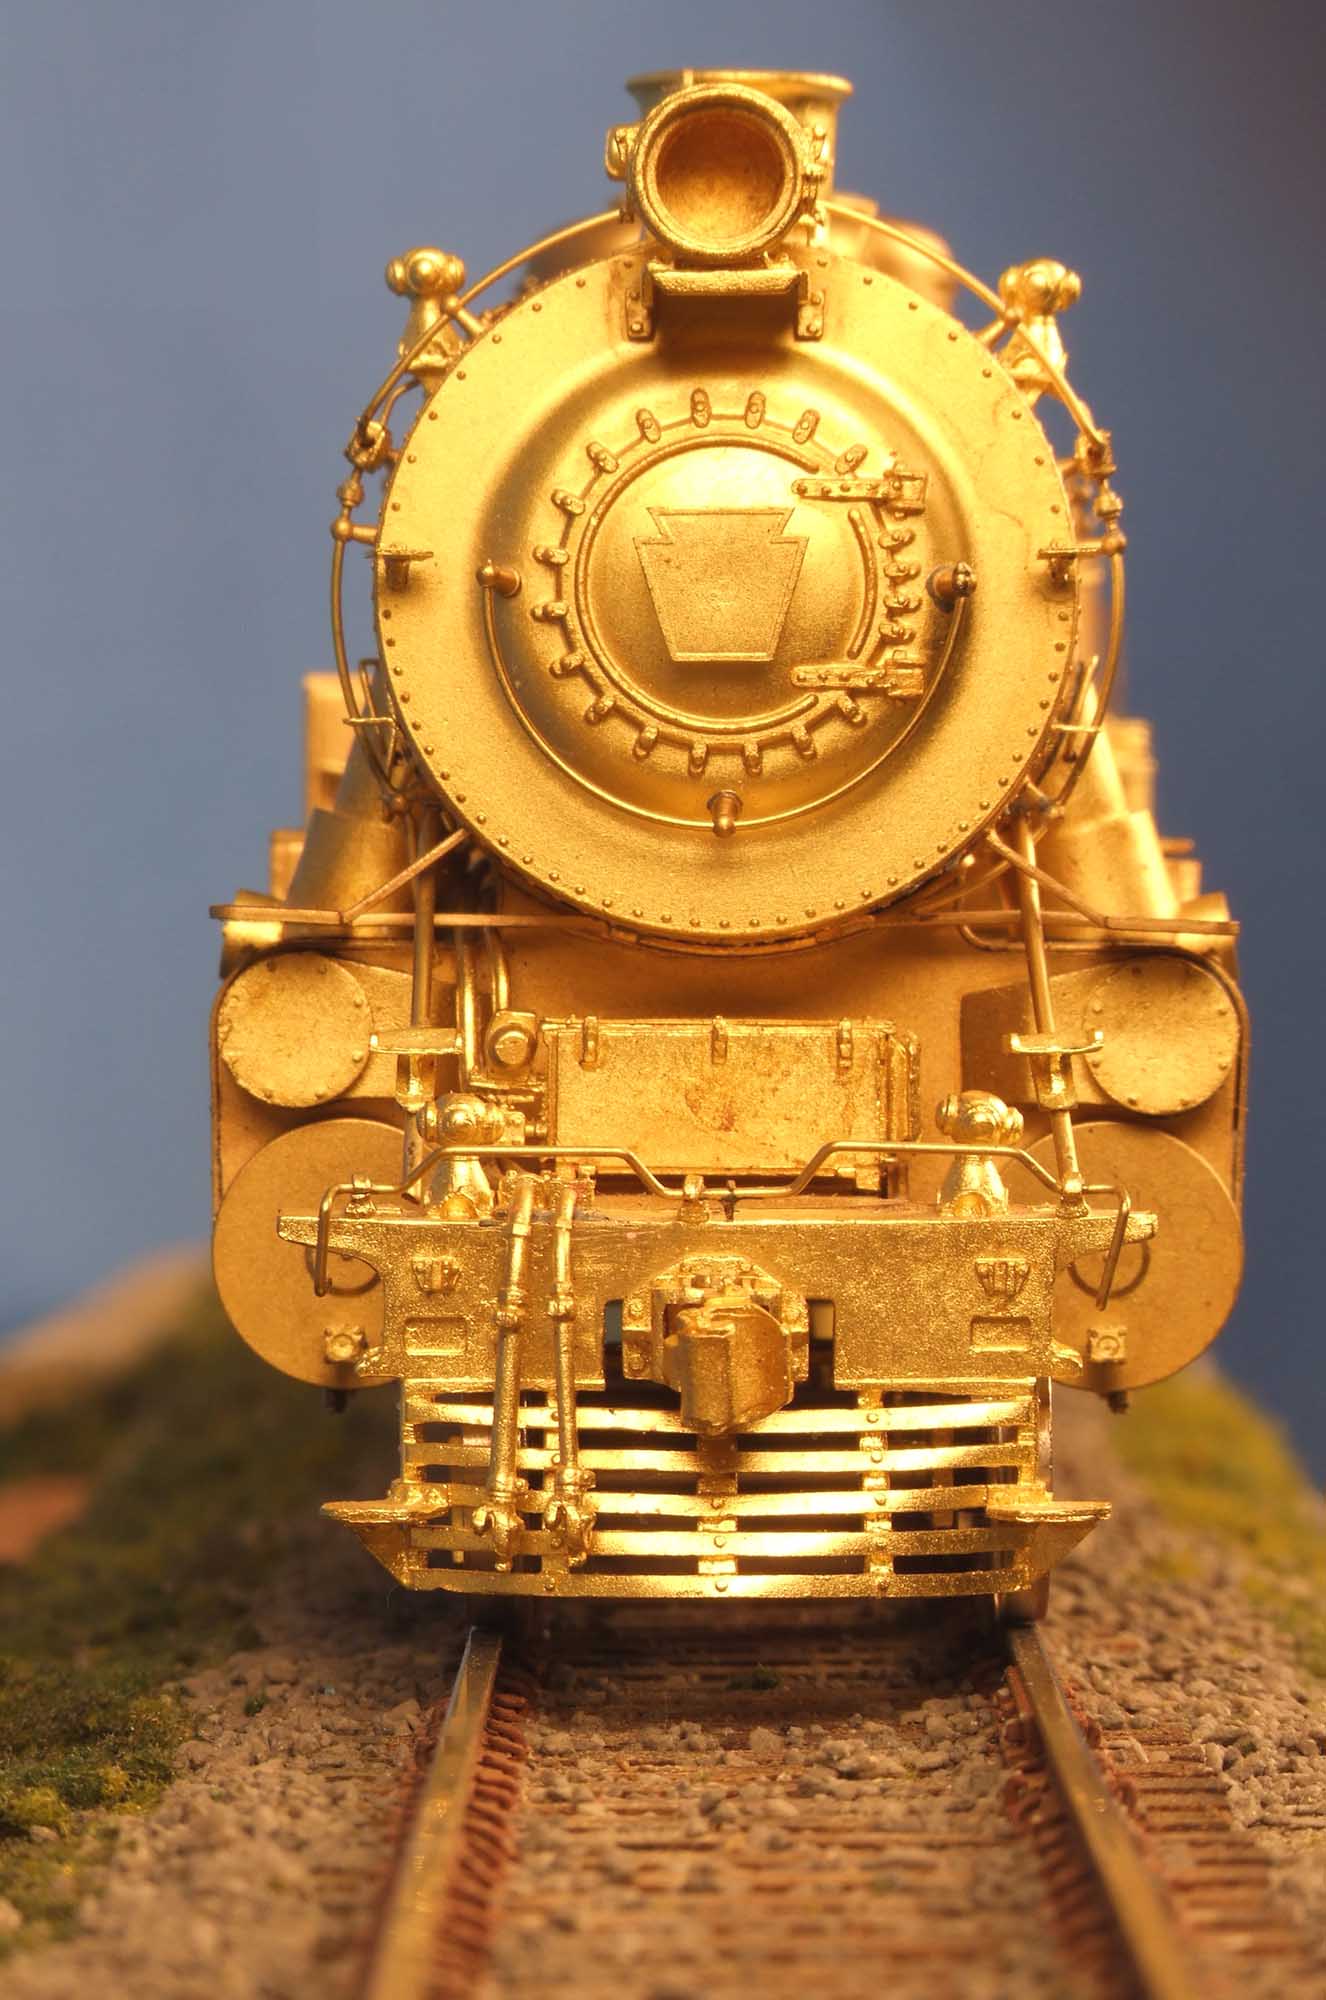
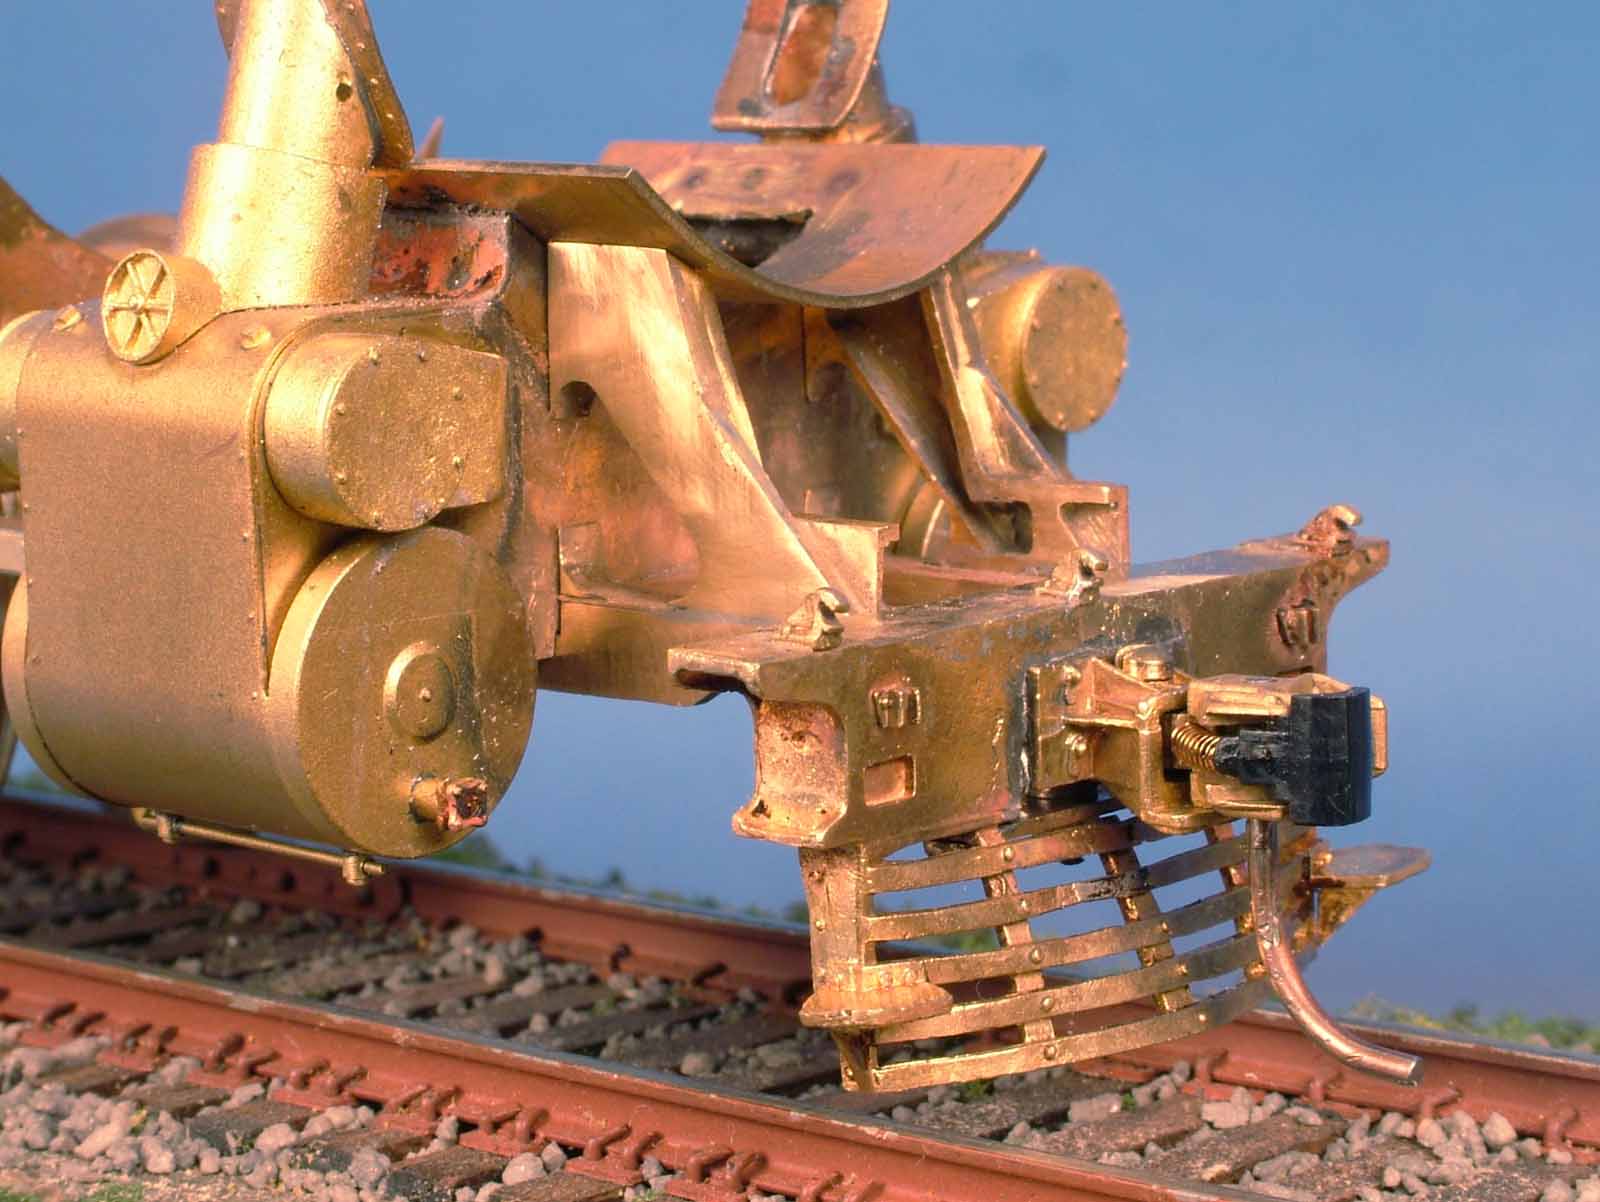
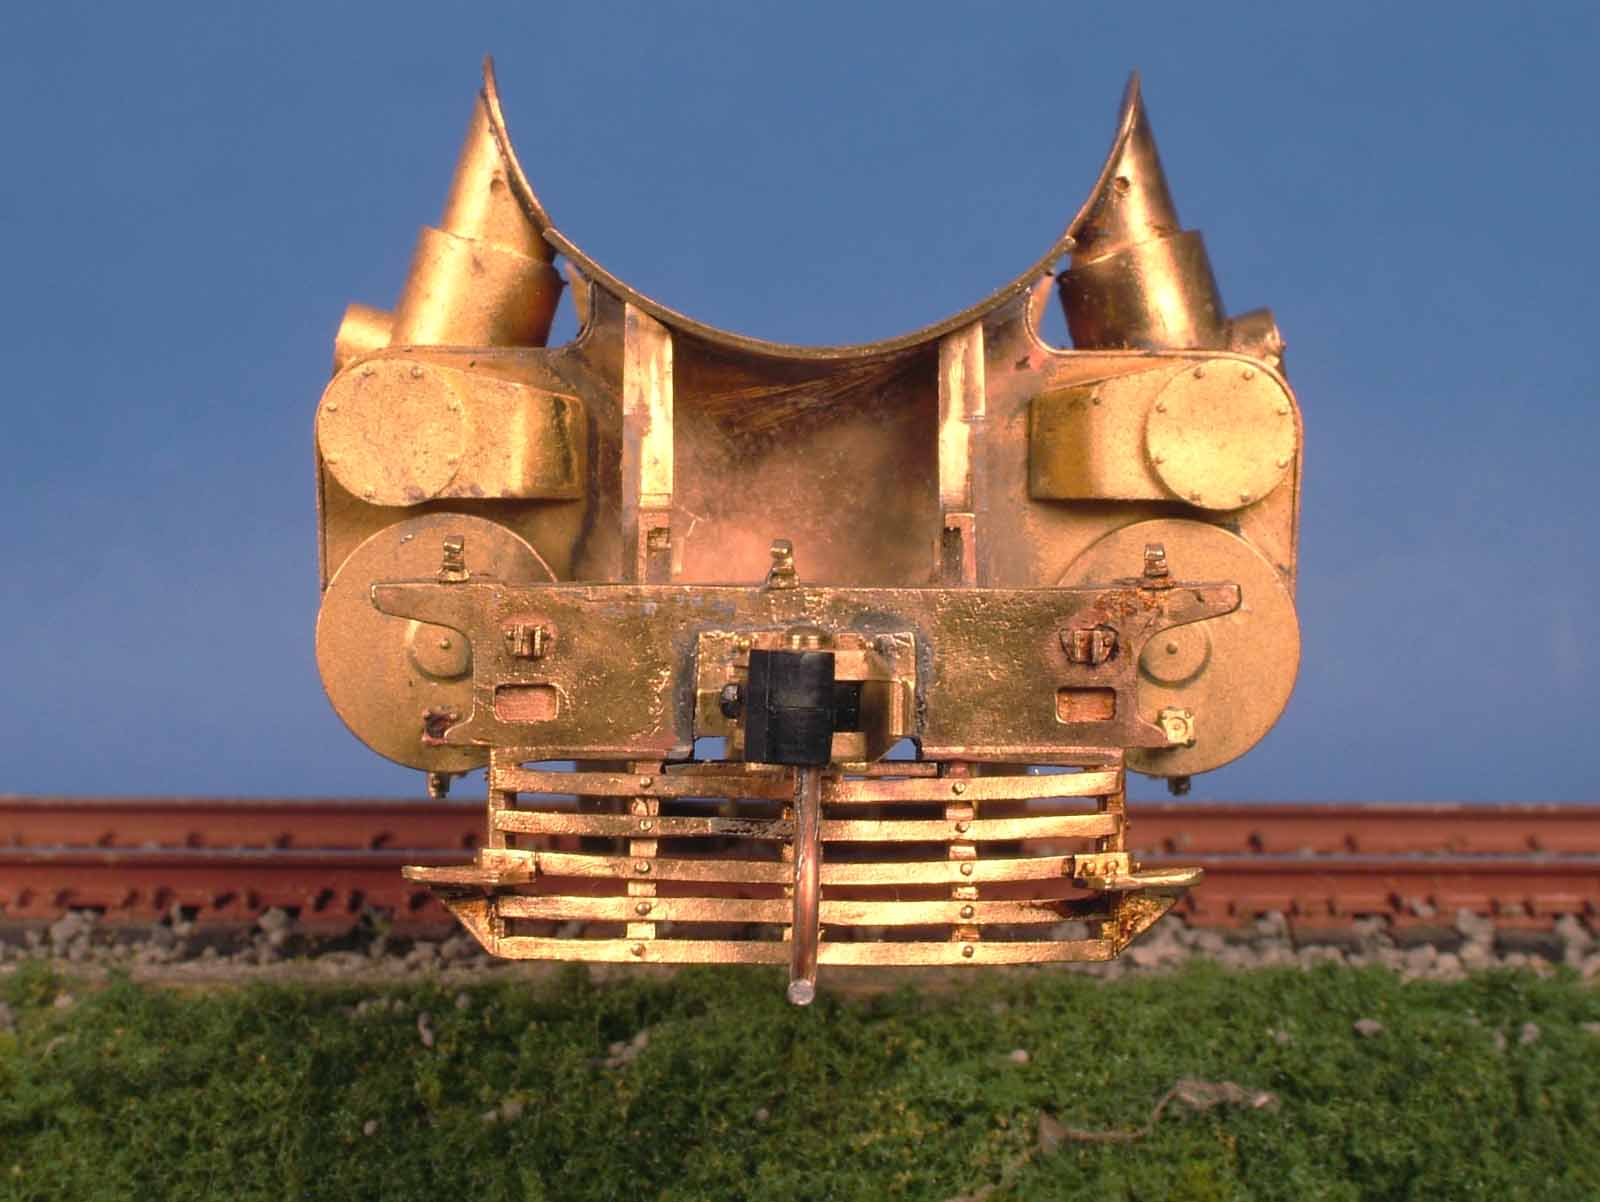
was in the last batch of K4 made which was unique in that they had a 1 piece
cast frame. The cast frame is visible mostly from the front because of diagonal
braces that ran from the pilot to the cylinders. Train manufacturers – even
high end O Scale brass importer Kohs have mistakenly made a K4 numbered as 5495
and 5497. They are wrong without simulating the cast frame. I can spot it
instantly.
It
ran late into the steam era since it was newer then other K4s. Another unique
feature was that it was never fully modernized as it kept its original pilot to
the end, but got the modernized boiler front and headlight position change.
5495 became a small obsession of mine because it ran on the New York and Long
Branch, and more importantly the PRSL. It was the subject of Builder’s Photos
when it was new as seen above.
All
of these factors played
into my decision to model 5495 as close as I possibly could. In some ways is
good that I waited until now to do this since my modeling skills have improved
to tackle such an involved project. But that is a blessing and a curse. You
could forever be waiting to start a project and never actually get to it. The
pieces I made to simulate the cast frame braces would have been much easier for
me to make in Solidworks than to actually machine them. I could have probably
designed them in about 3 hours. Actually machining them possibly took 50+
hours. In Solidworks, I can click “mirror” and have the opposite side designed
instantly. It is just that simple. I did
not learn Solidworks until 2008. There are MANY Solidworks produced items on my
5495 but the cast frame braces were made “Old School”.
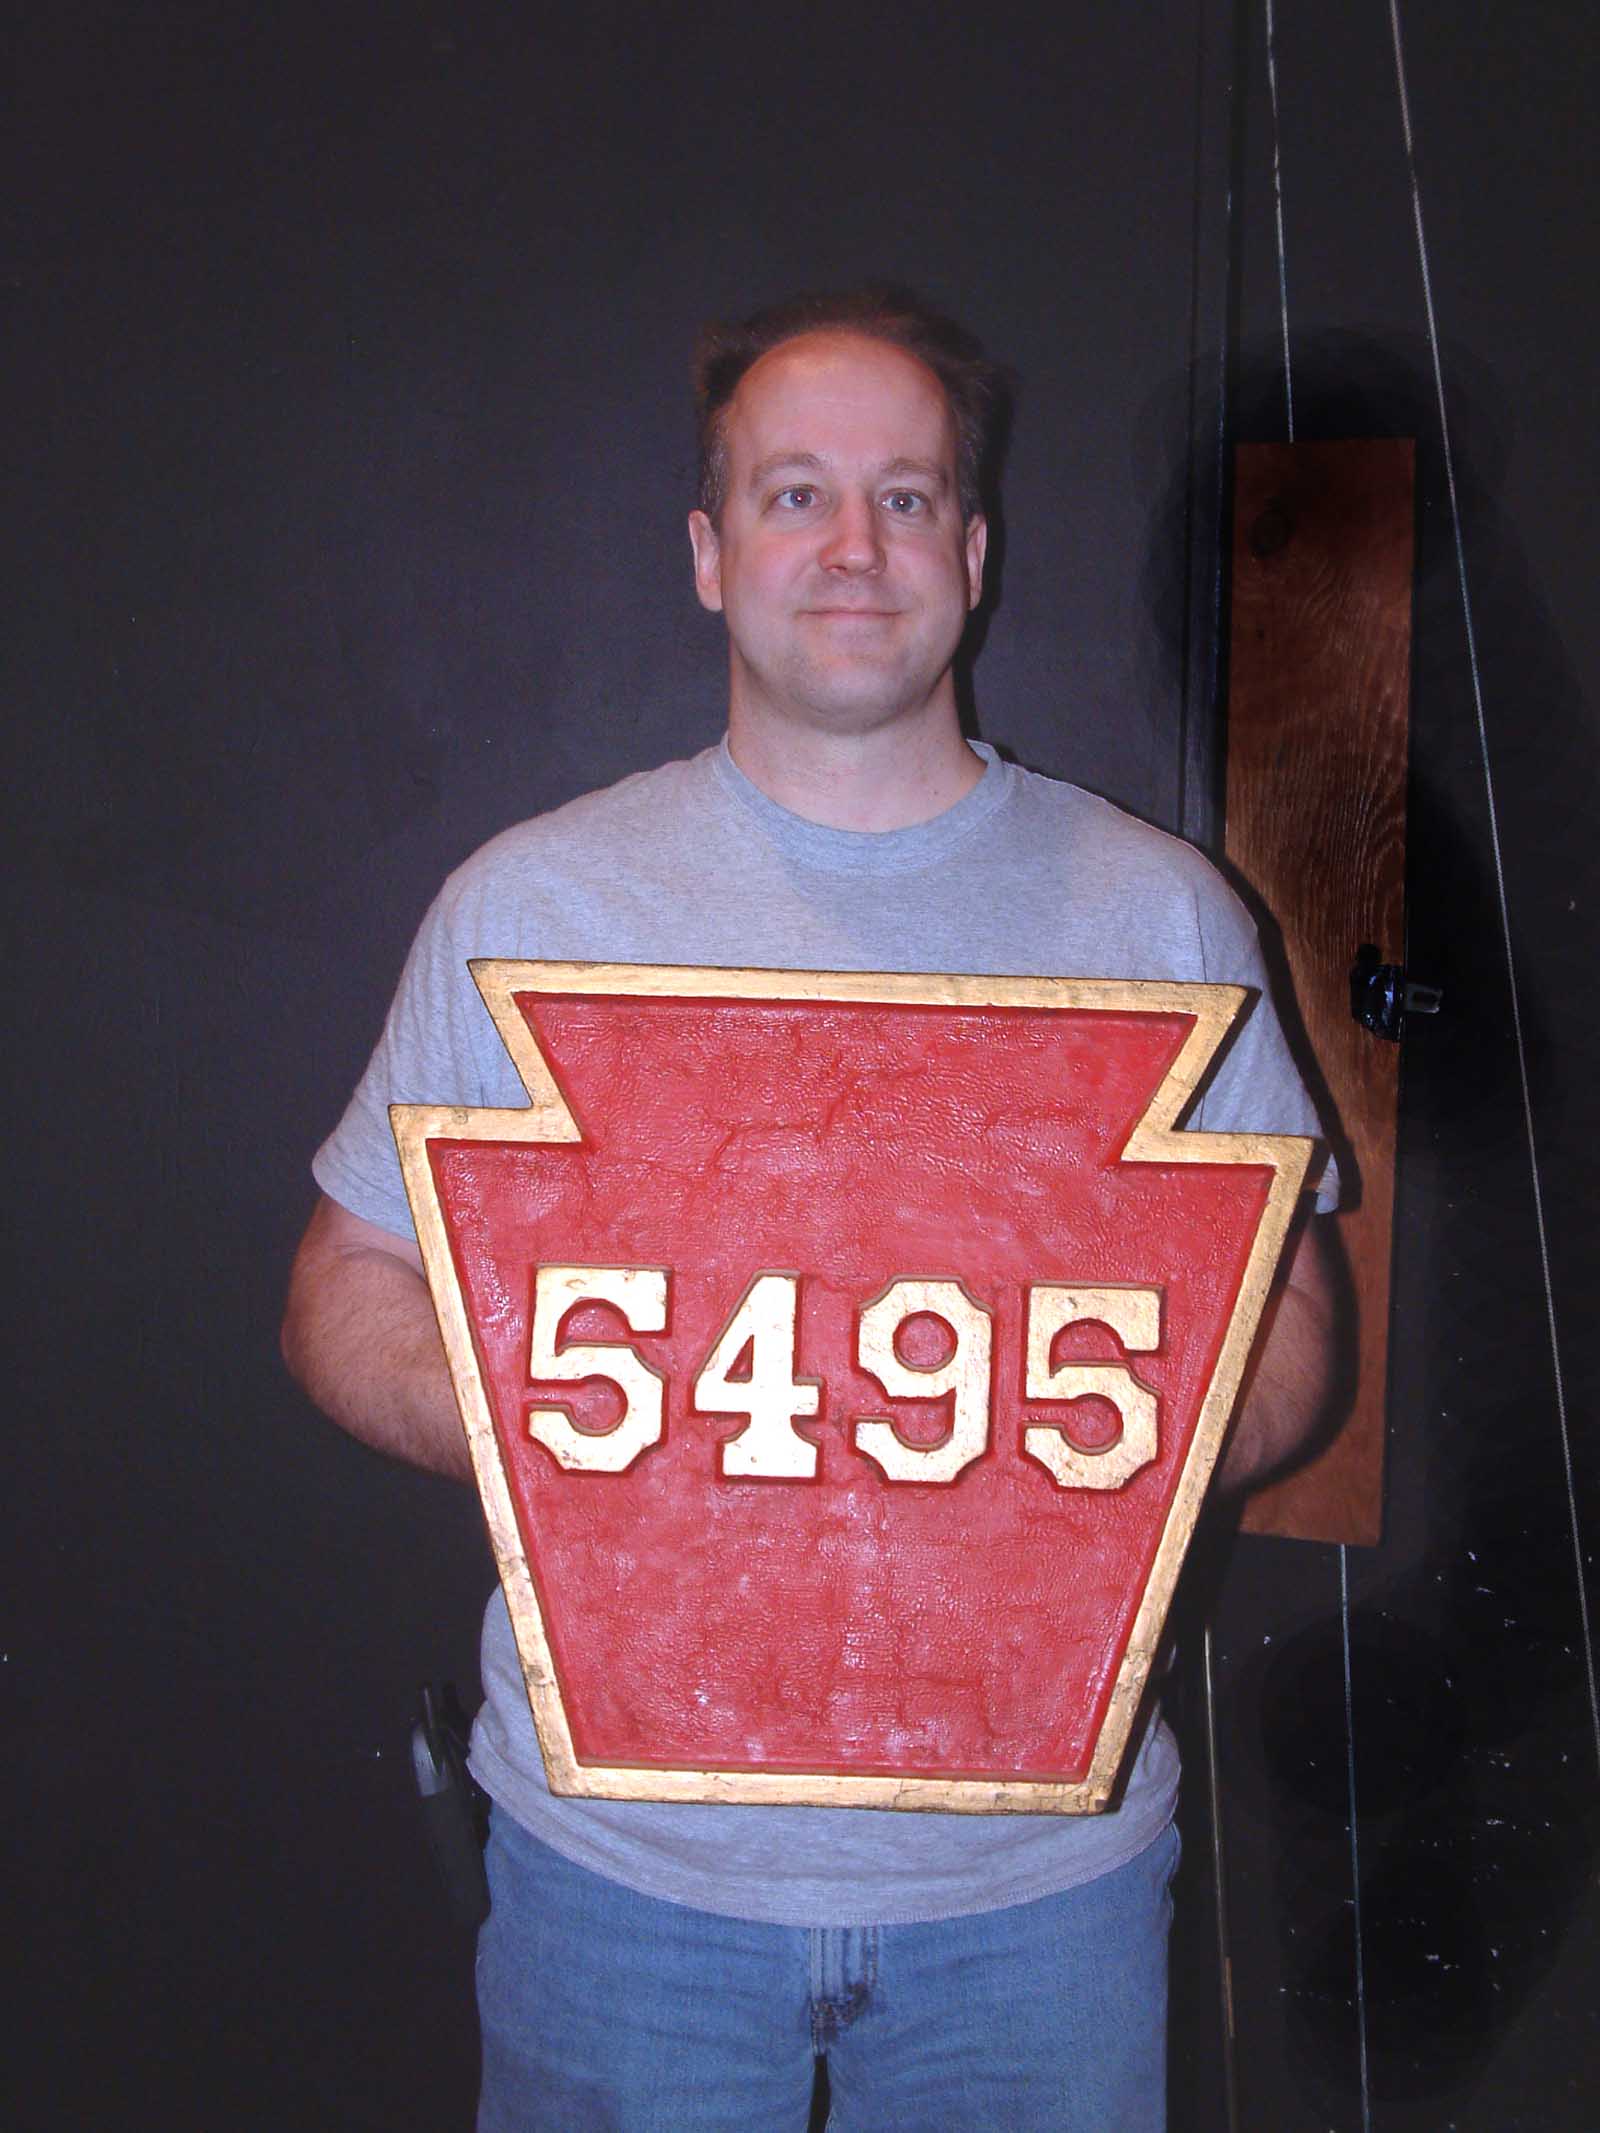
Left Photo
The
decision to actually start my model project happened because of one of life's
occasional strange occurrences. I have often wondered who owned the number
plate to 5495, and if I may actually own it someday. That question got answered
on 2-15-05. In an unbelievable set of
circumstances I got to hold the REAL 5495 number plate for about 2 minutes at a
Phila. Chapter meeting of the PRR T&HS as it was being donated to the national PRR T&HS. This strange but true!
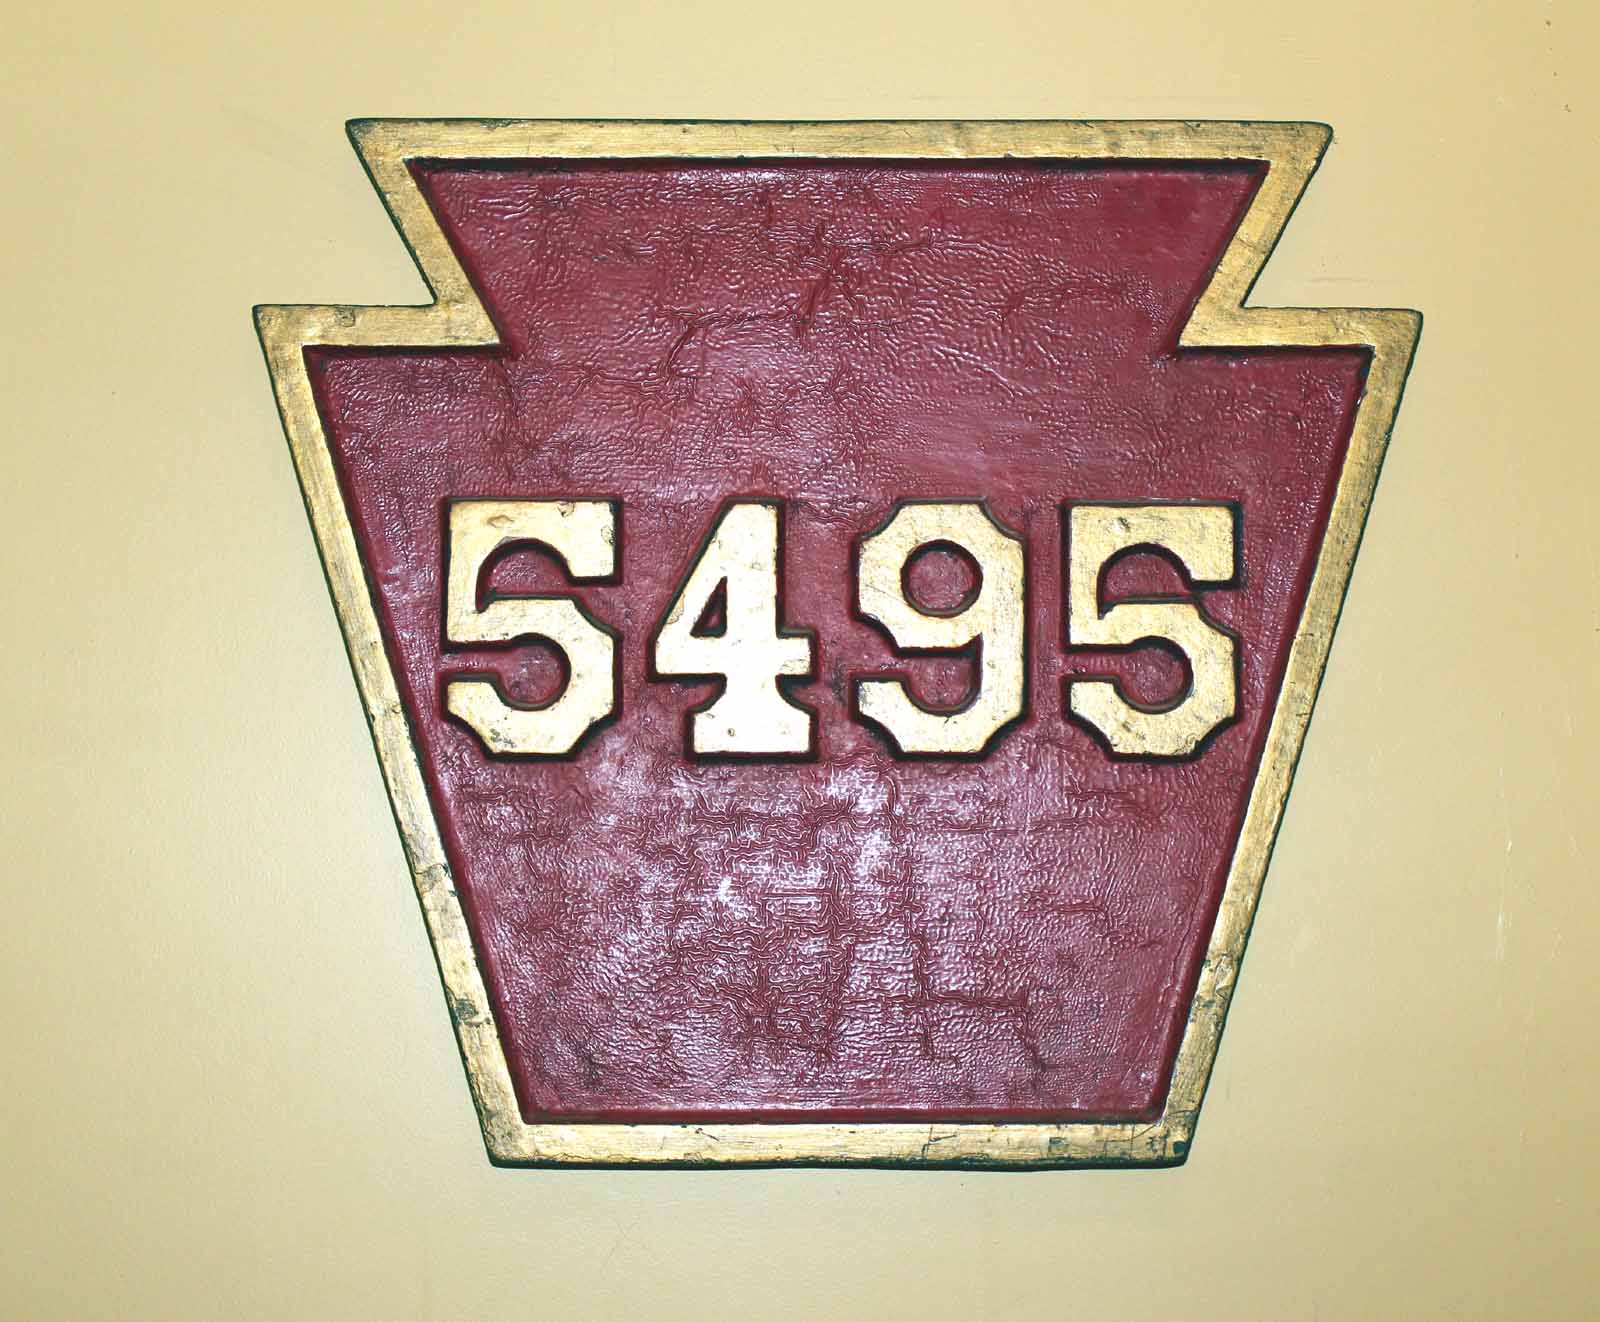
Middle Photo
I
was reunited with the real 5495 number plate on 5-15-12 at the PRR T &HS Convention.
It was hanging on/in the wall in Lewistown Station – just stunning! I am pretty sure it is original paint from
being removed from the locomotive. It had a surprisingly rough finish. I would
still love to have it though!
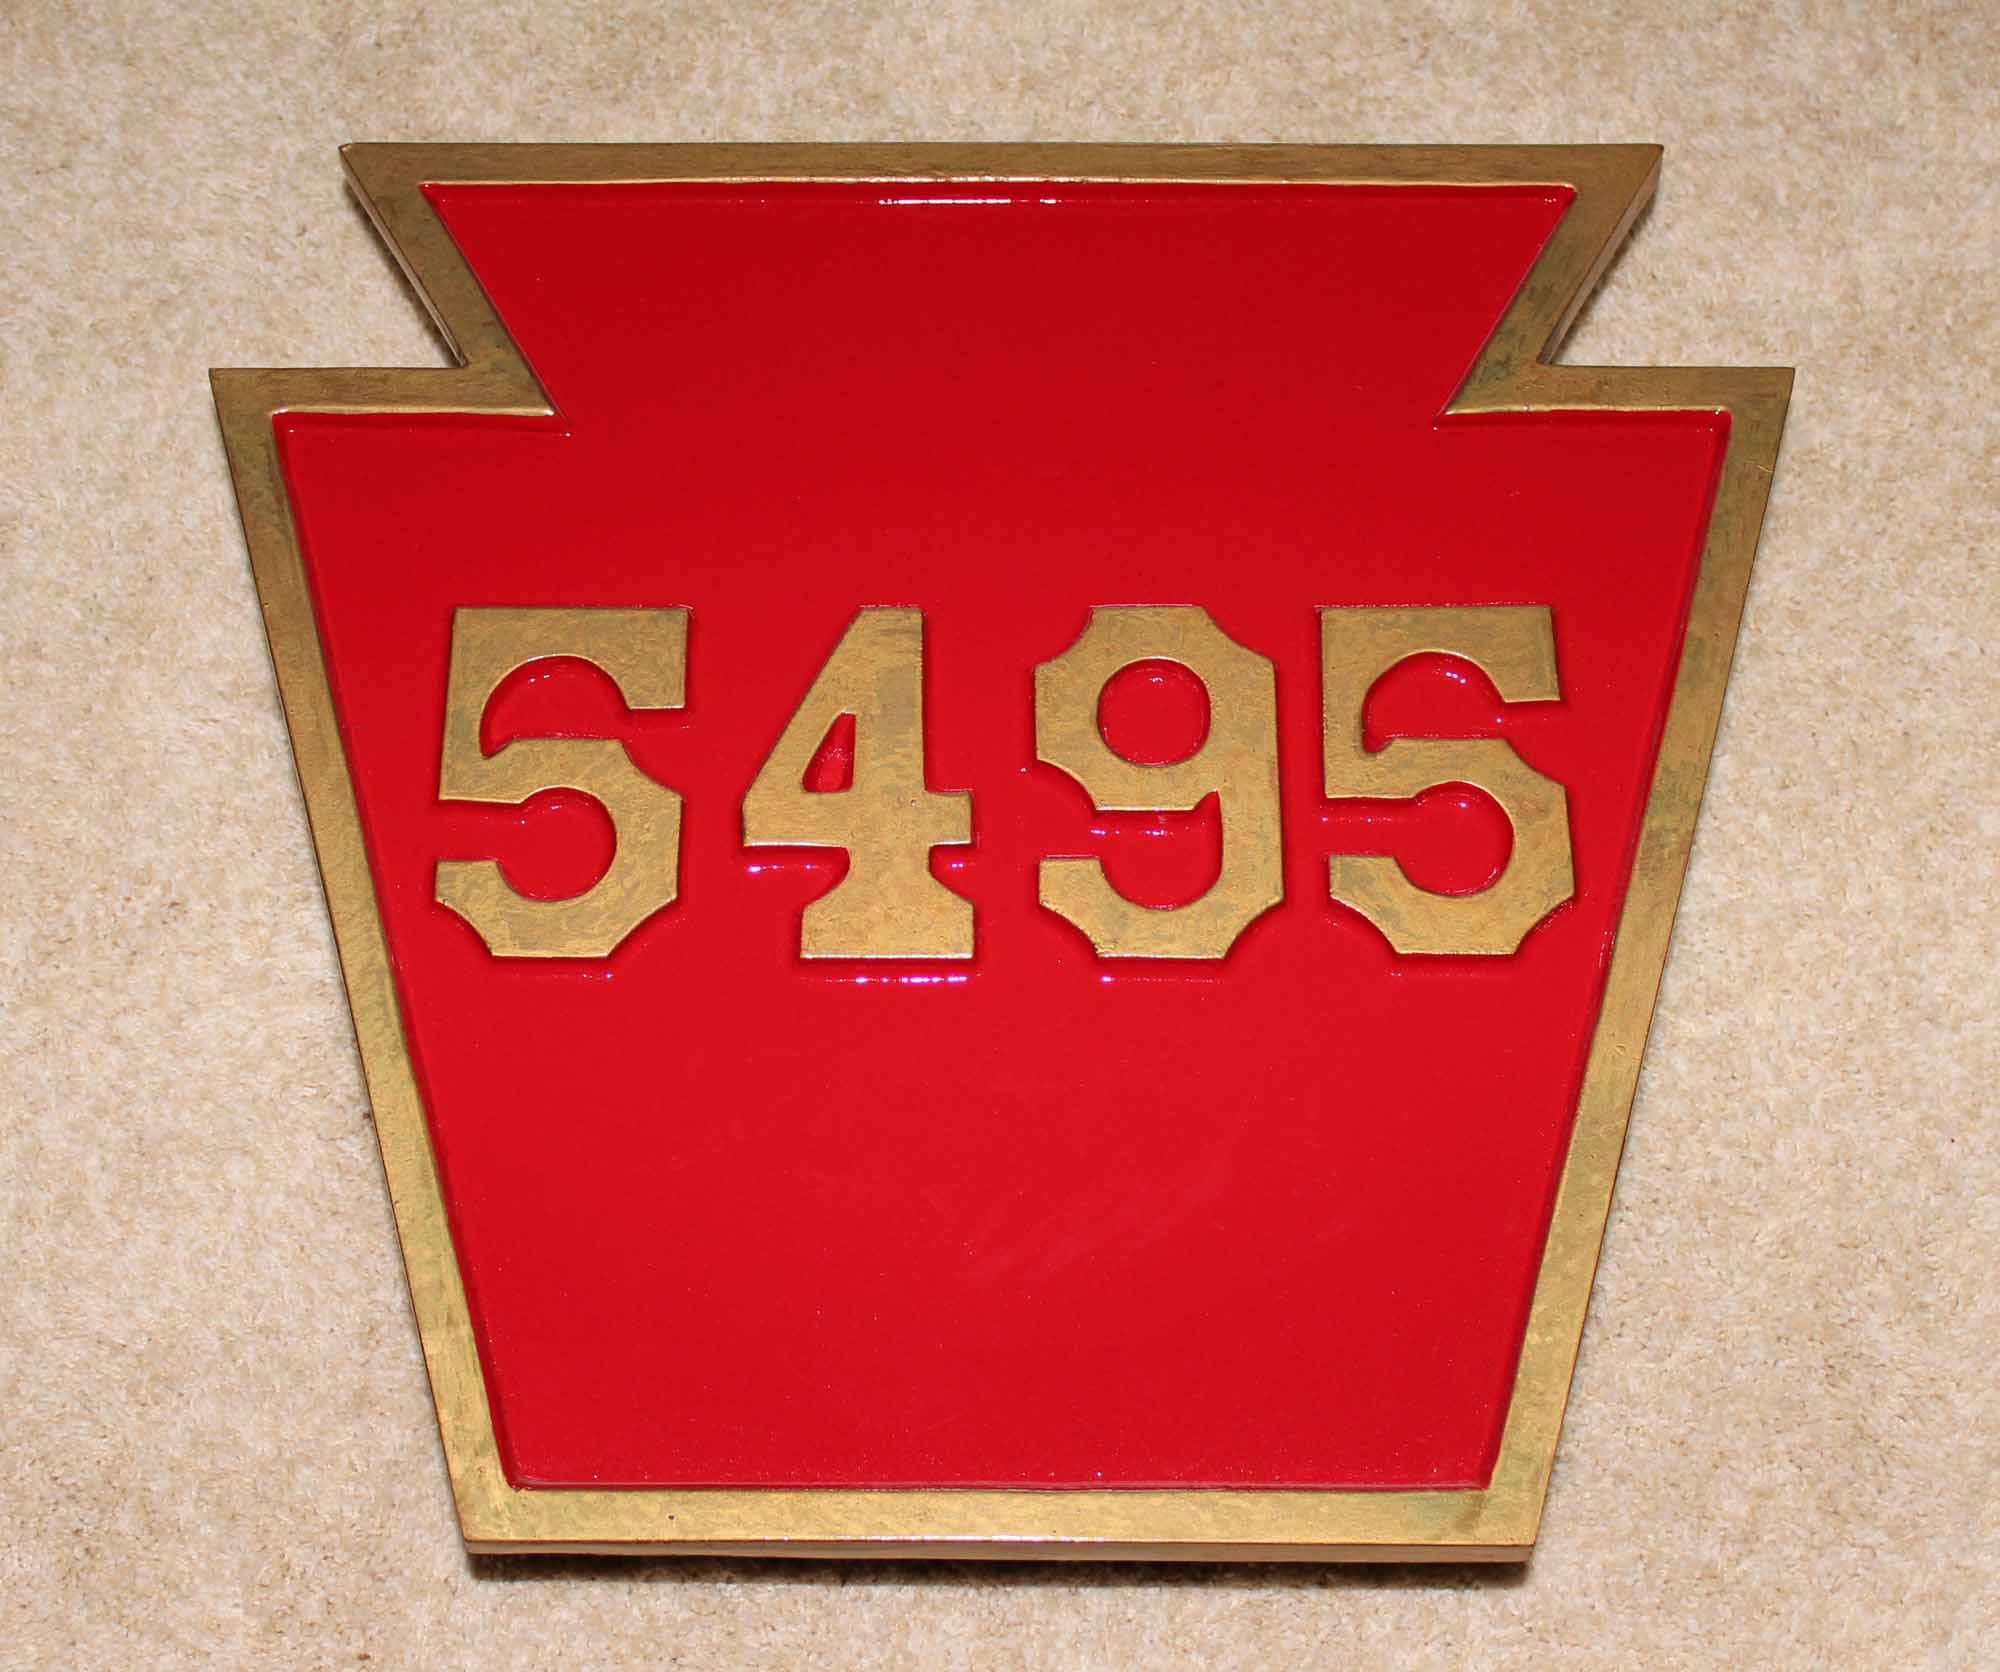
Right Photo
This is my reproduction 5495
numberplate I bought in 2009 that is very accurately cast from the real PRR
numberplate drawing.
I also had this painting commissioned
in 2009 to go with my numberplate the features 5495.
I have been collecting photos and data
for many years.
It was just time to start the new & improved 5495 –
which is what I did in 2006.
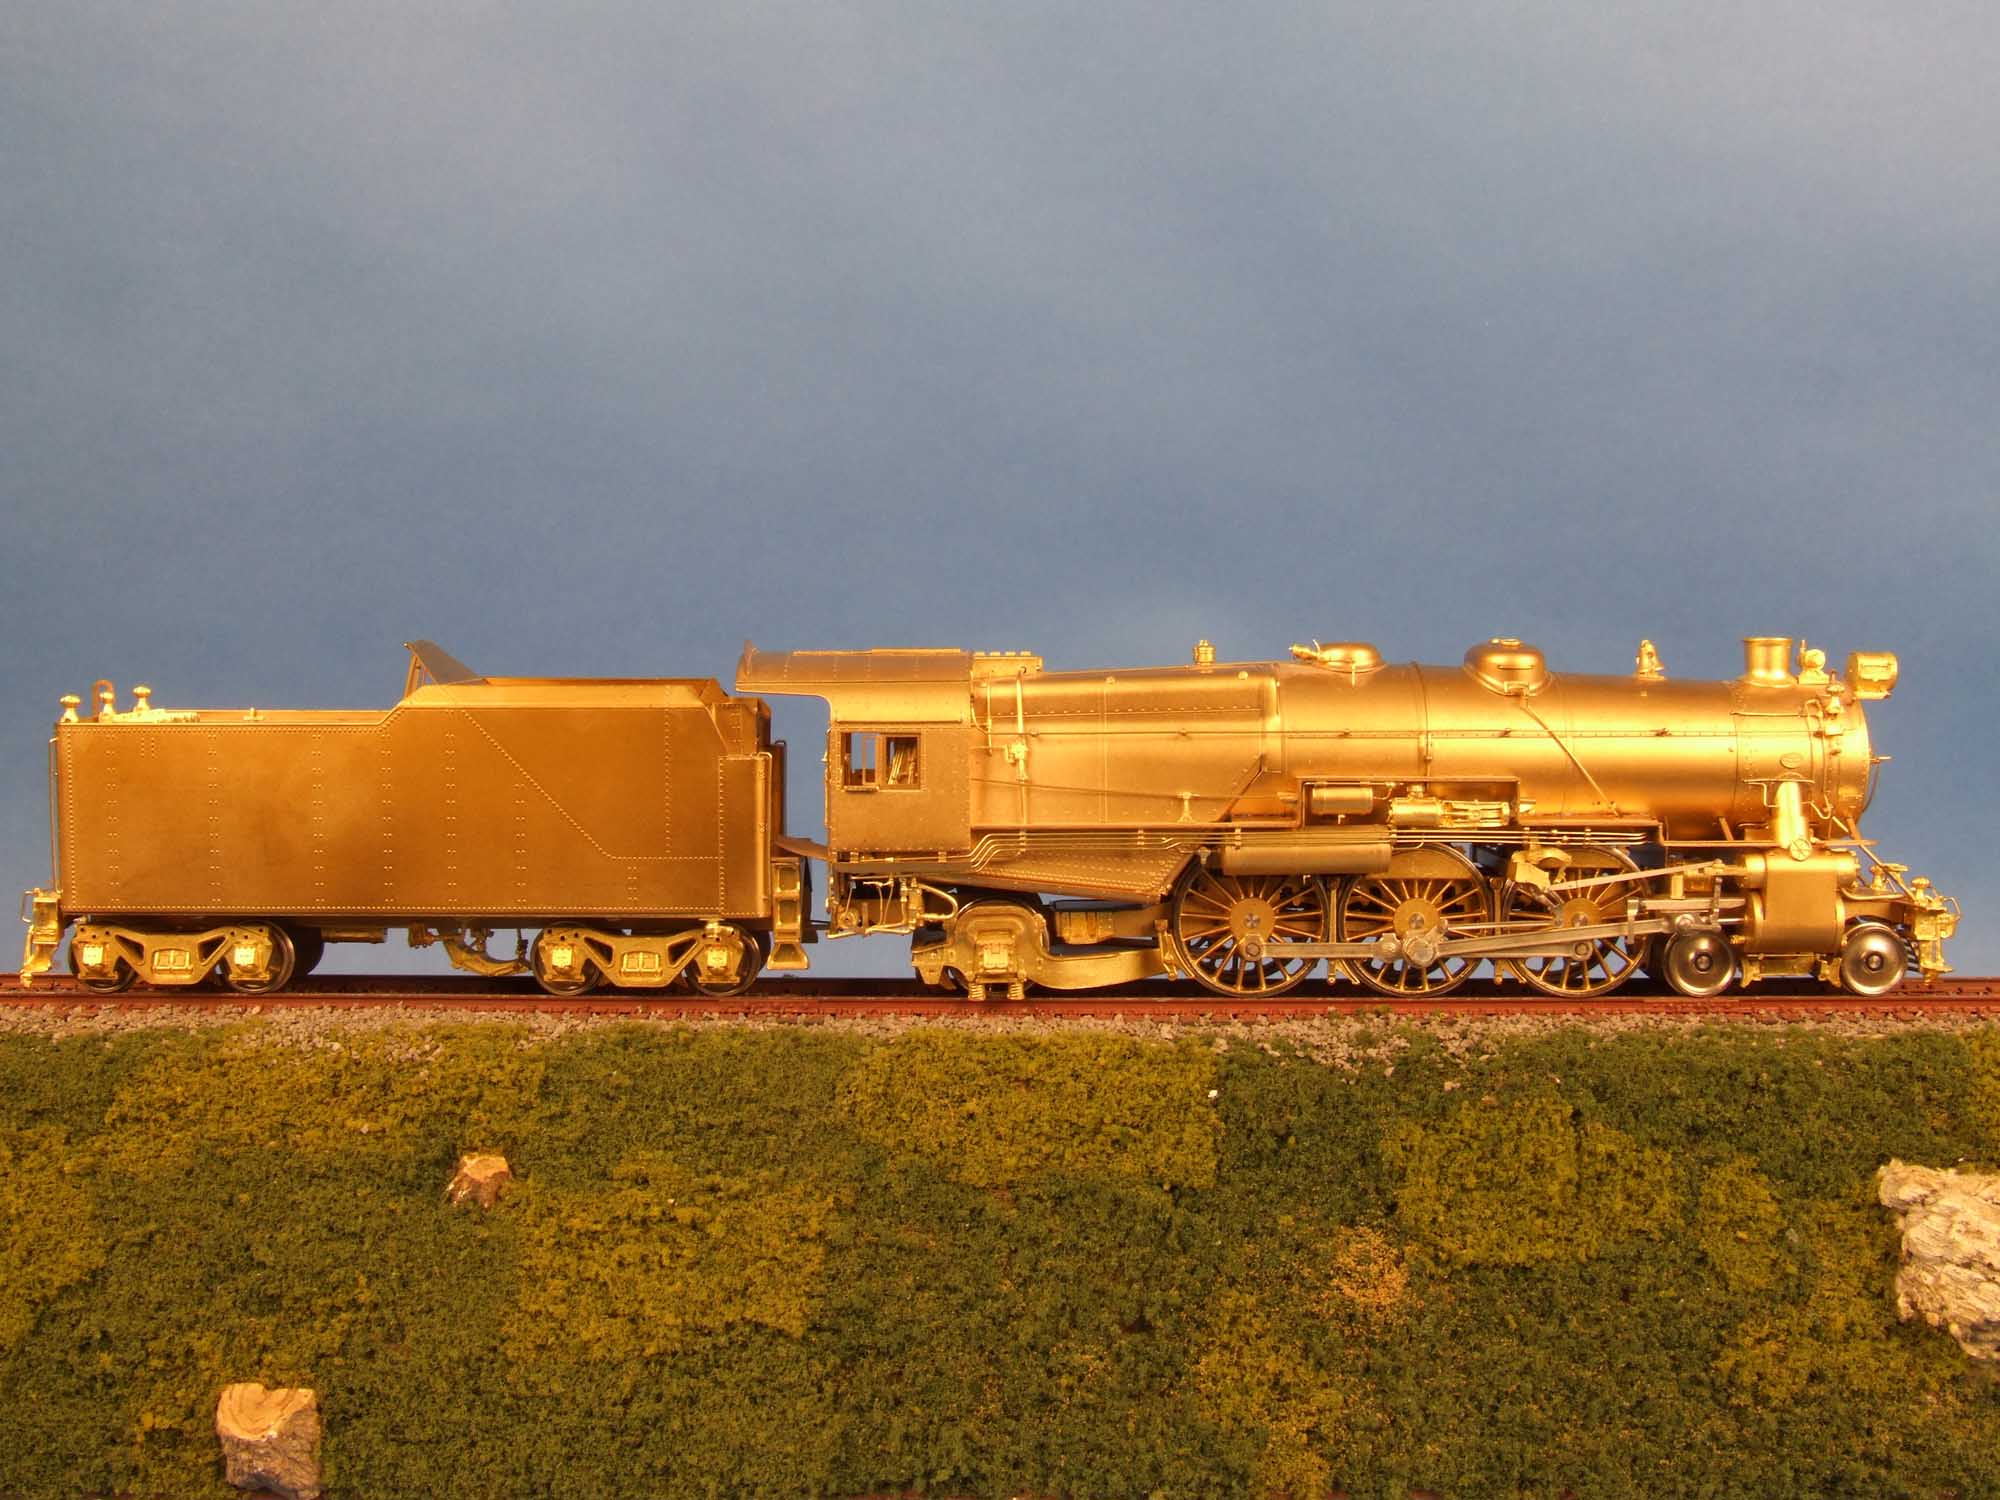
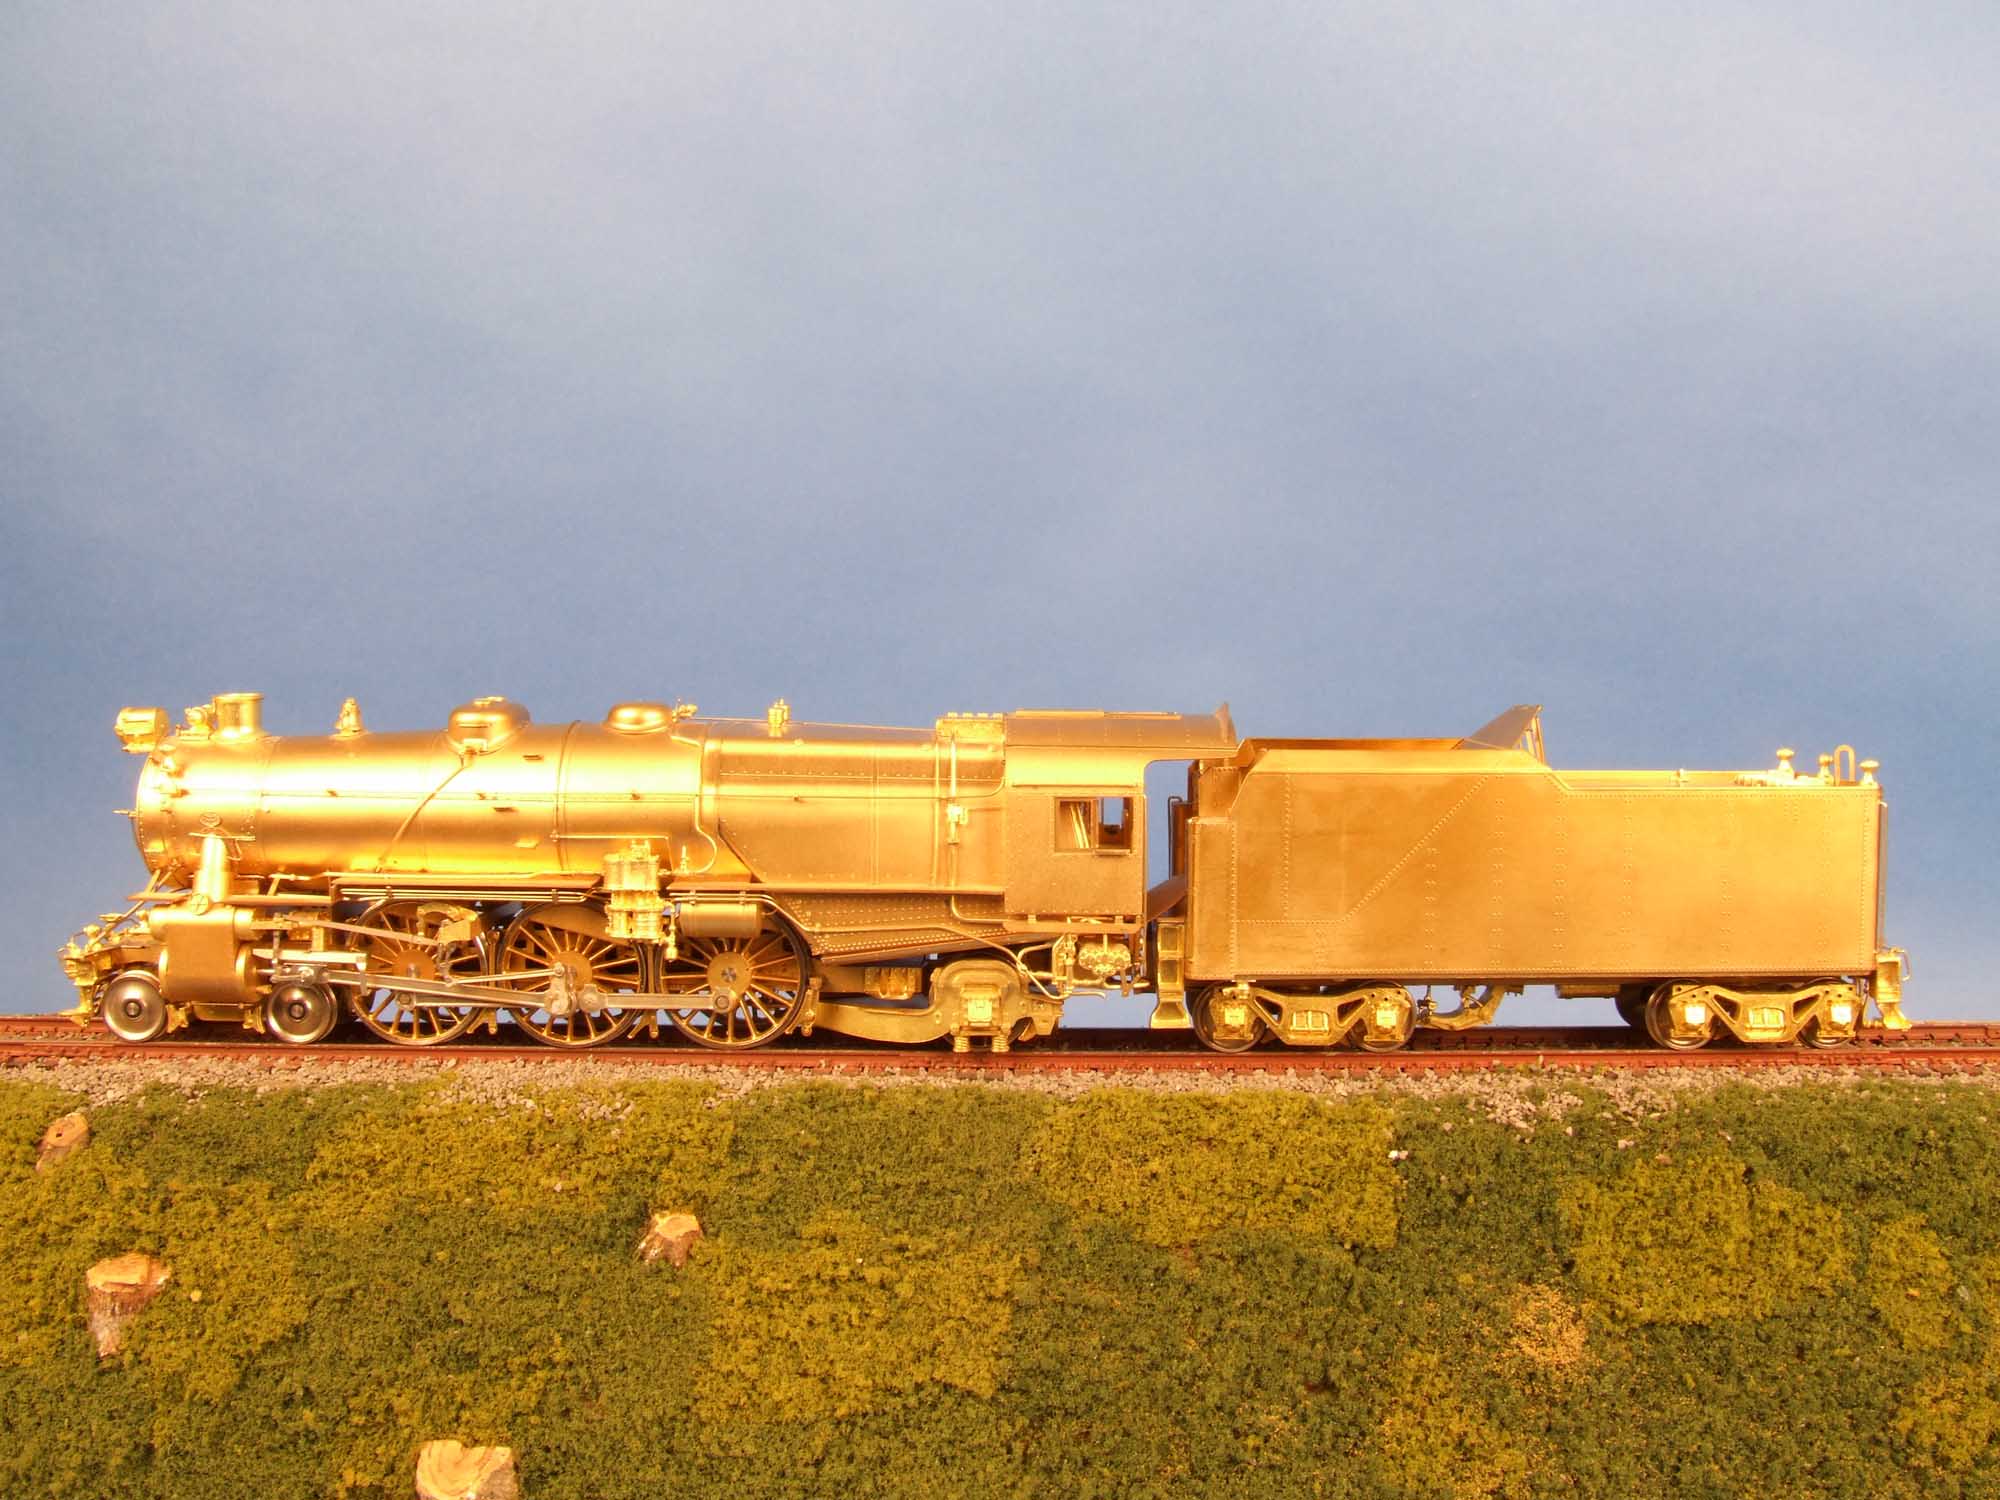
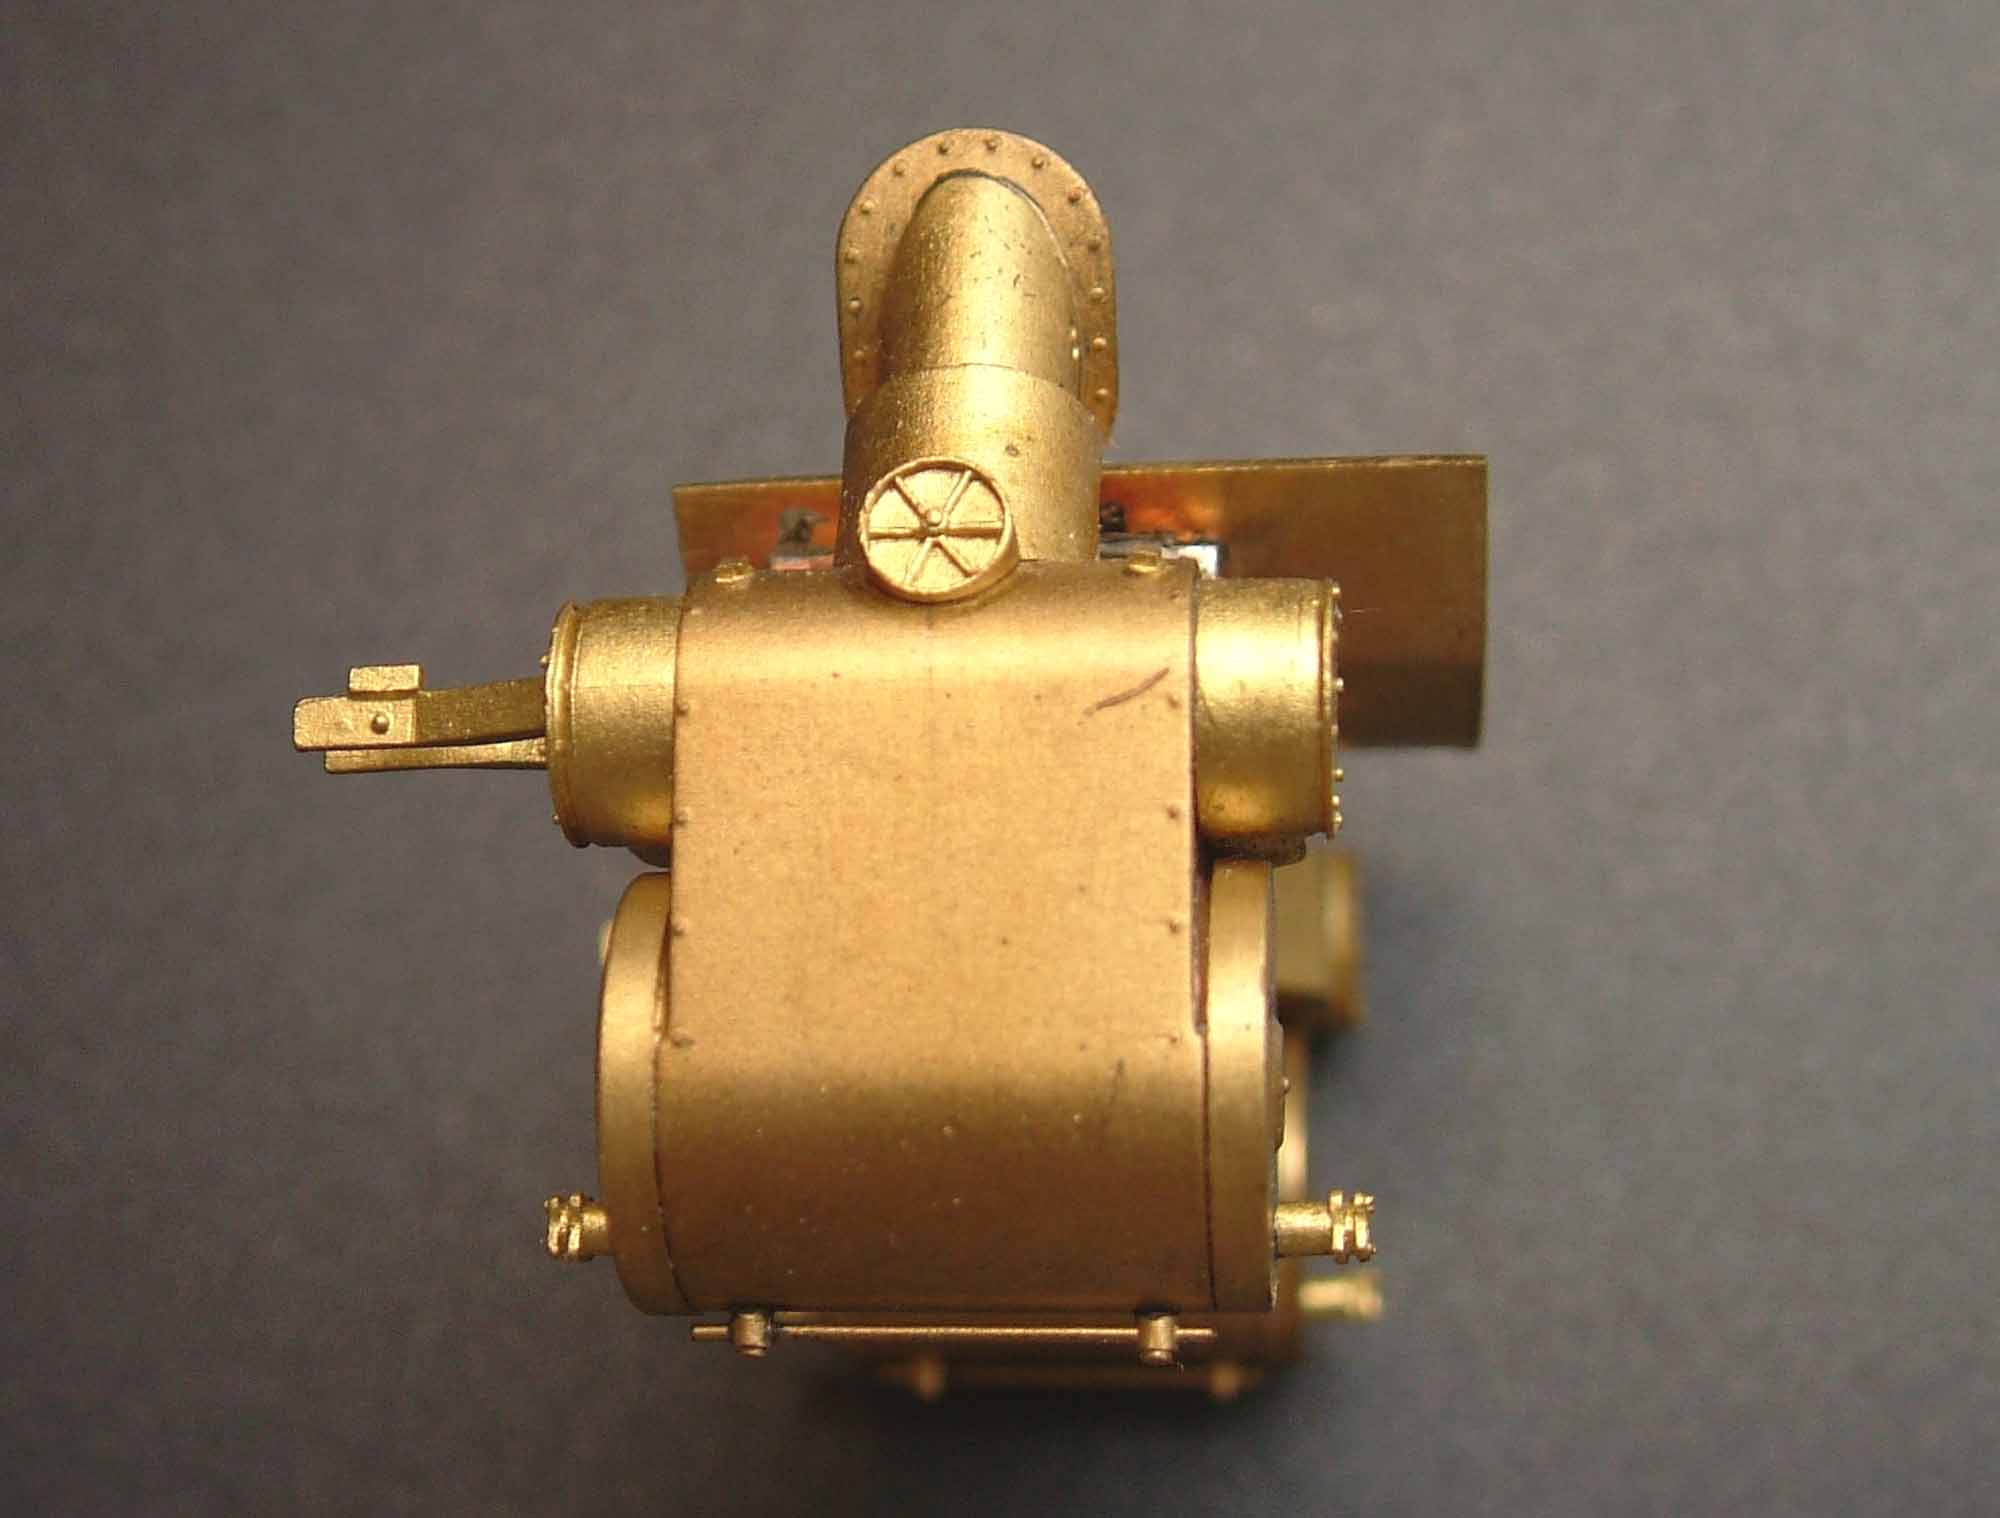
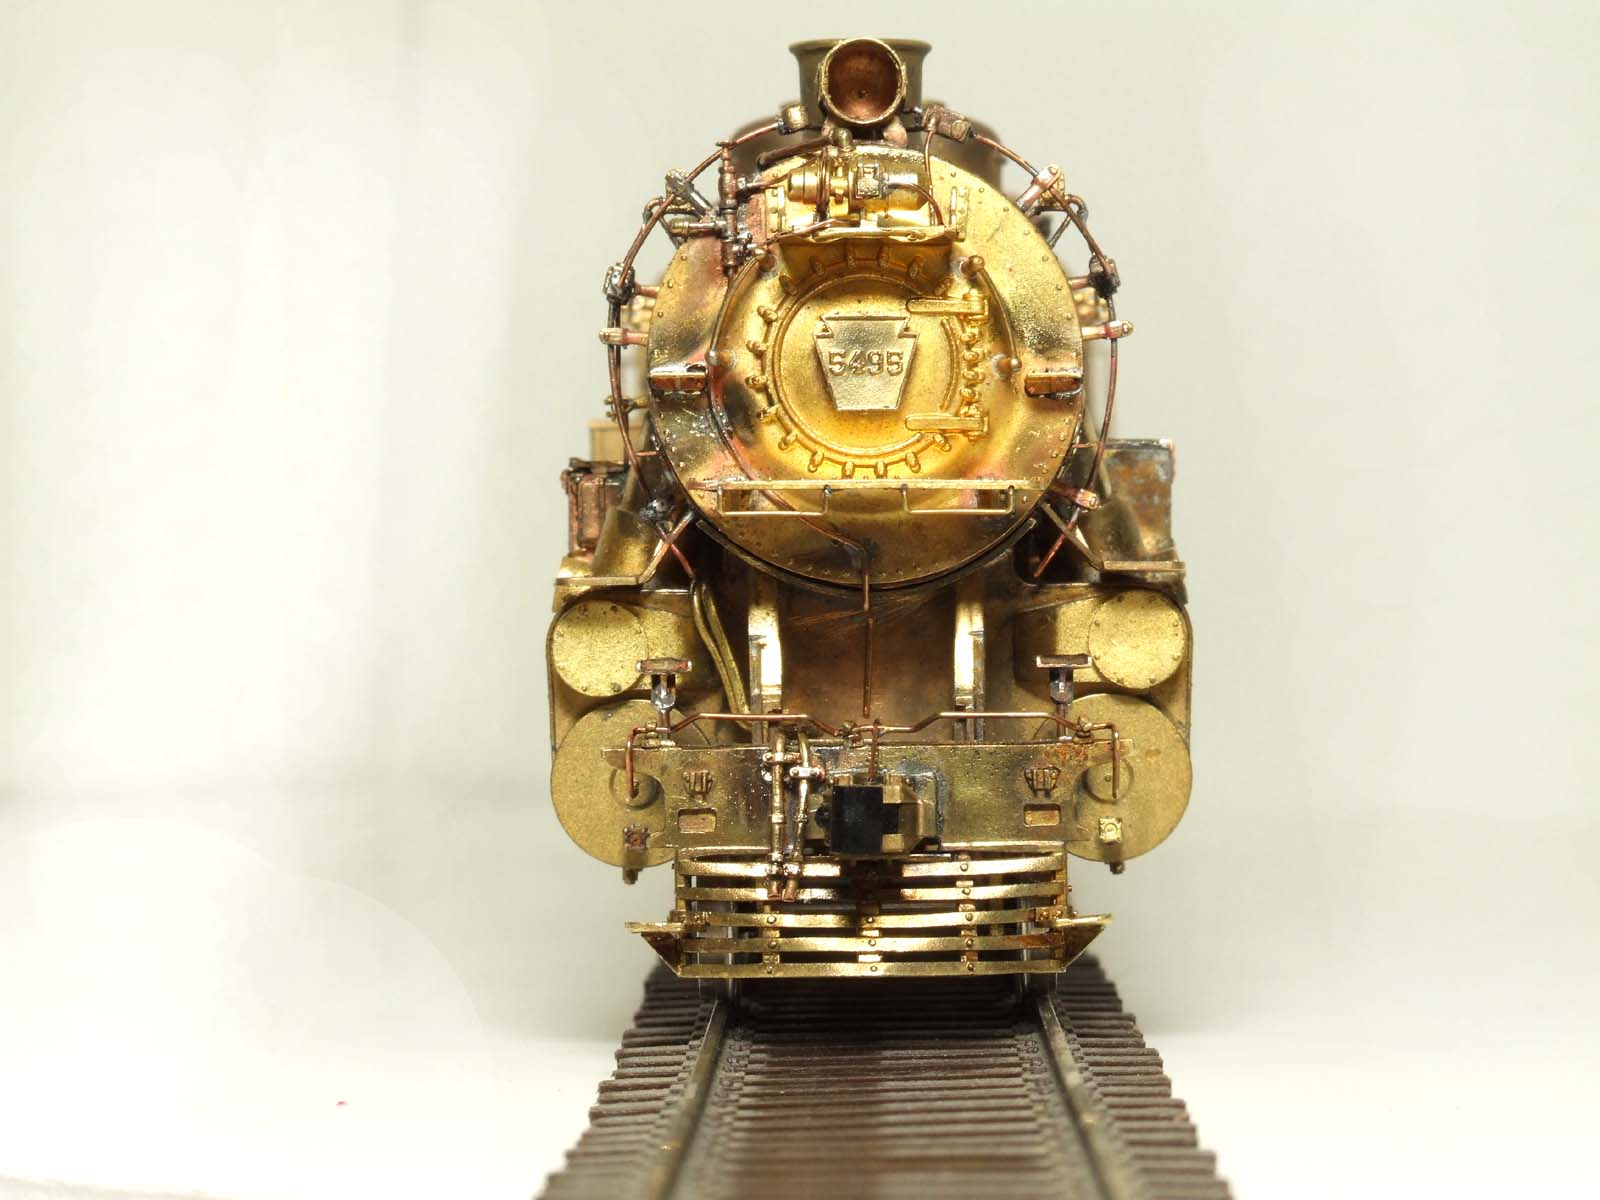
The
Model
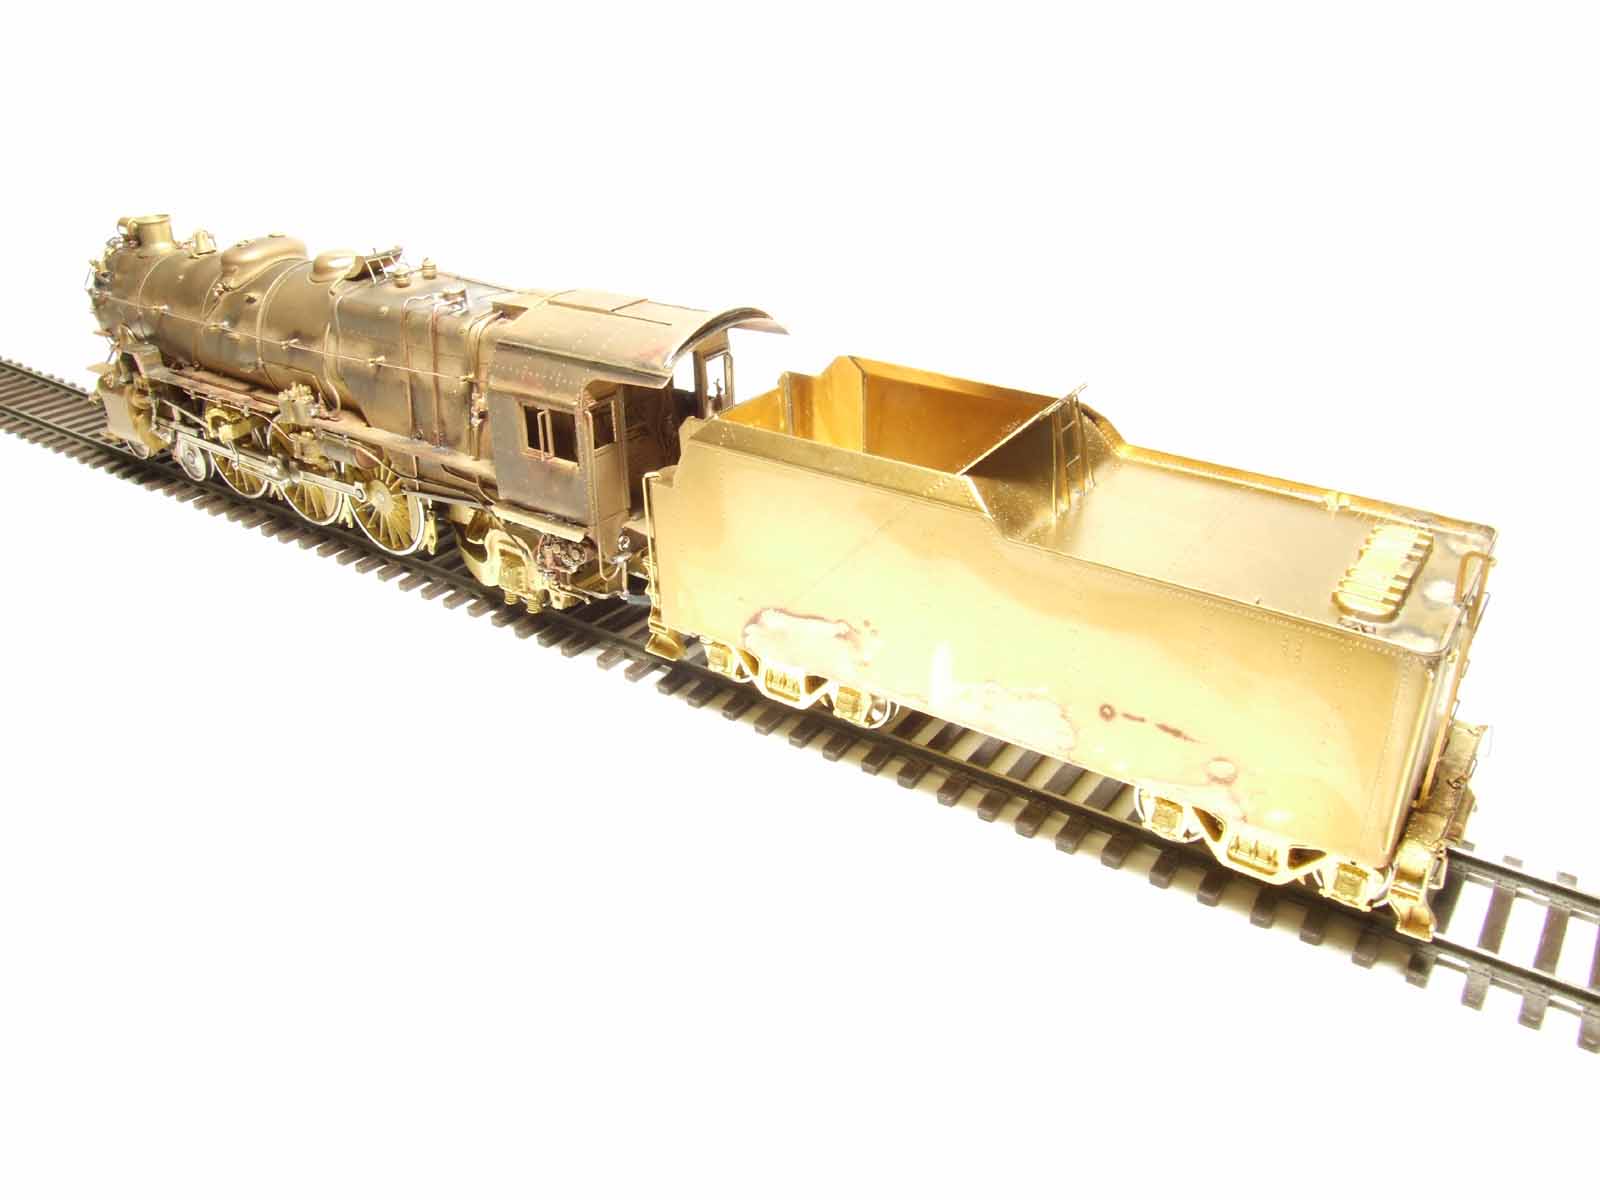
This is the out of the box Omnicon K4 I started with. It is at
the far
opposite end of being modernized – essentially
as built by the PRR in 1928.
I wished I was in S Scale and knew about the PRR when these were
built in about 1987 by Samhongsa.
I could possibly have influenced Omnicon to have some built as
modernized and saved a lot of work!

I
knew that if I was going to make a viable 5495 simulating the cast frame
diagonal braces was an absolute MUST. My machining skills are fair, but my
Unimat mill leaves much to be desired in accuracy. Changing machining
directions can be hazardous to the piece being made because of the table slop.
By the time you see you are in trouble the piece you are making is scrap, and
you are starting again.
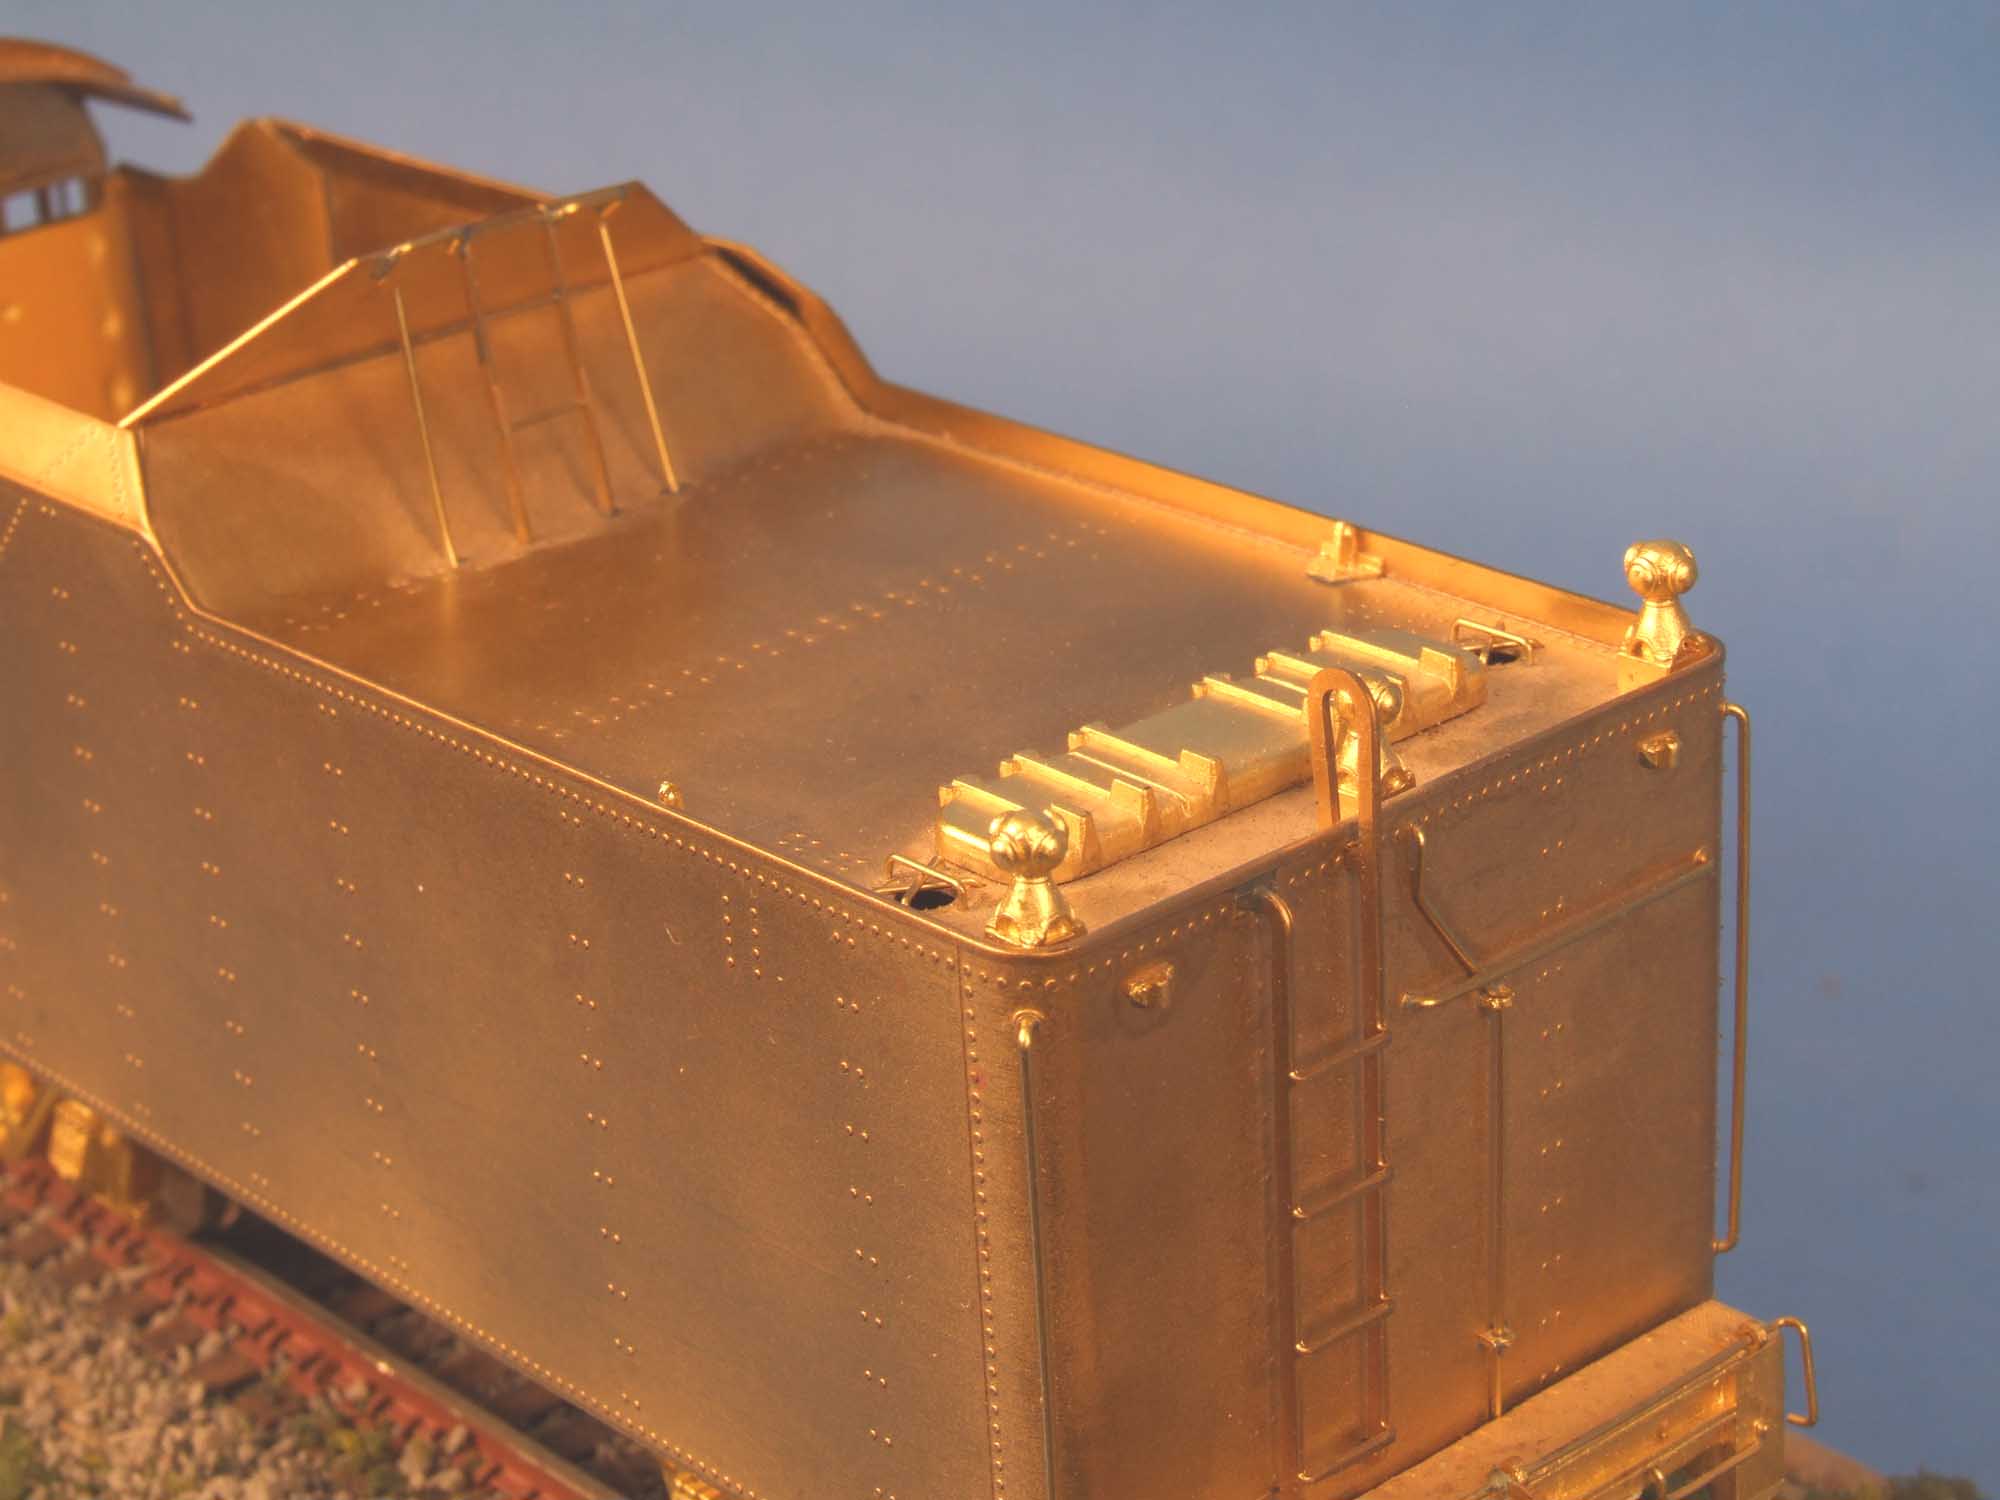
Getting Started
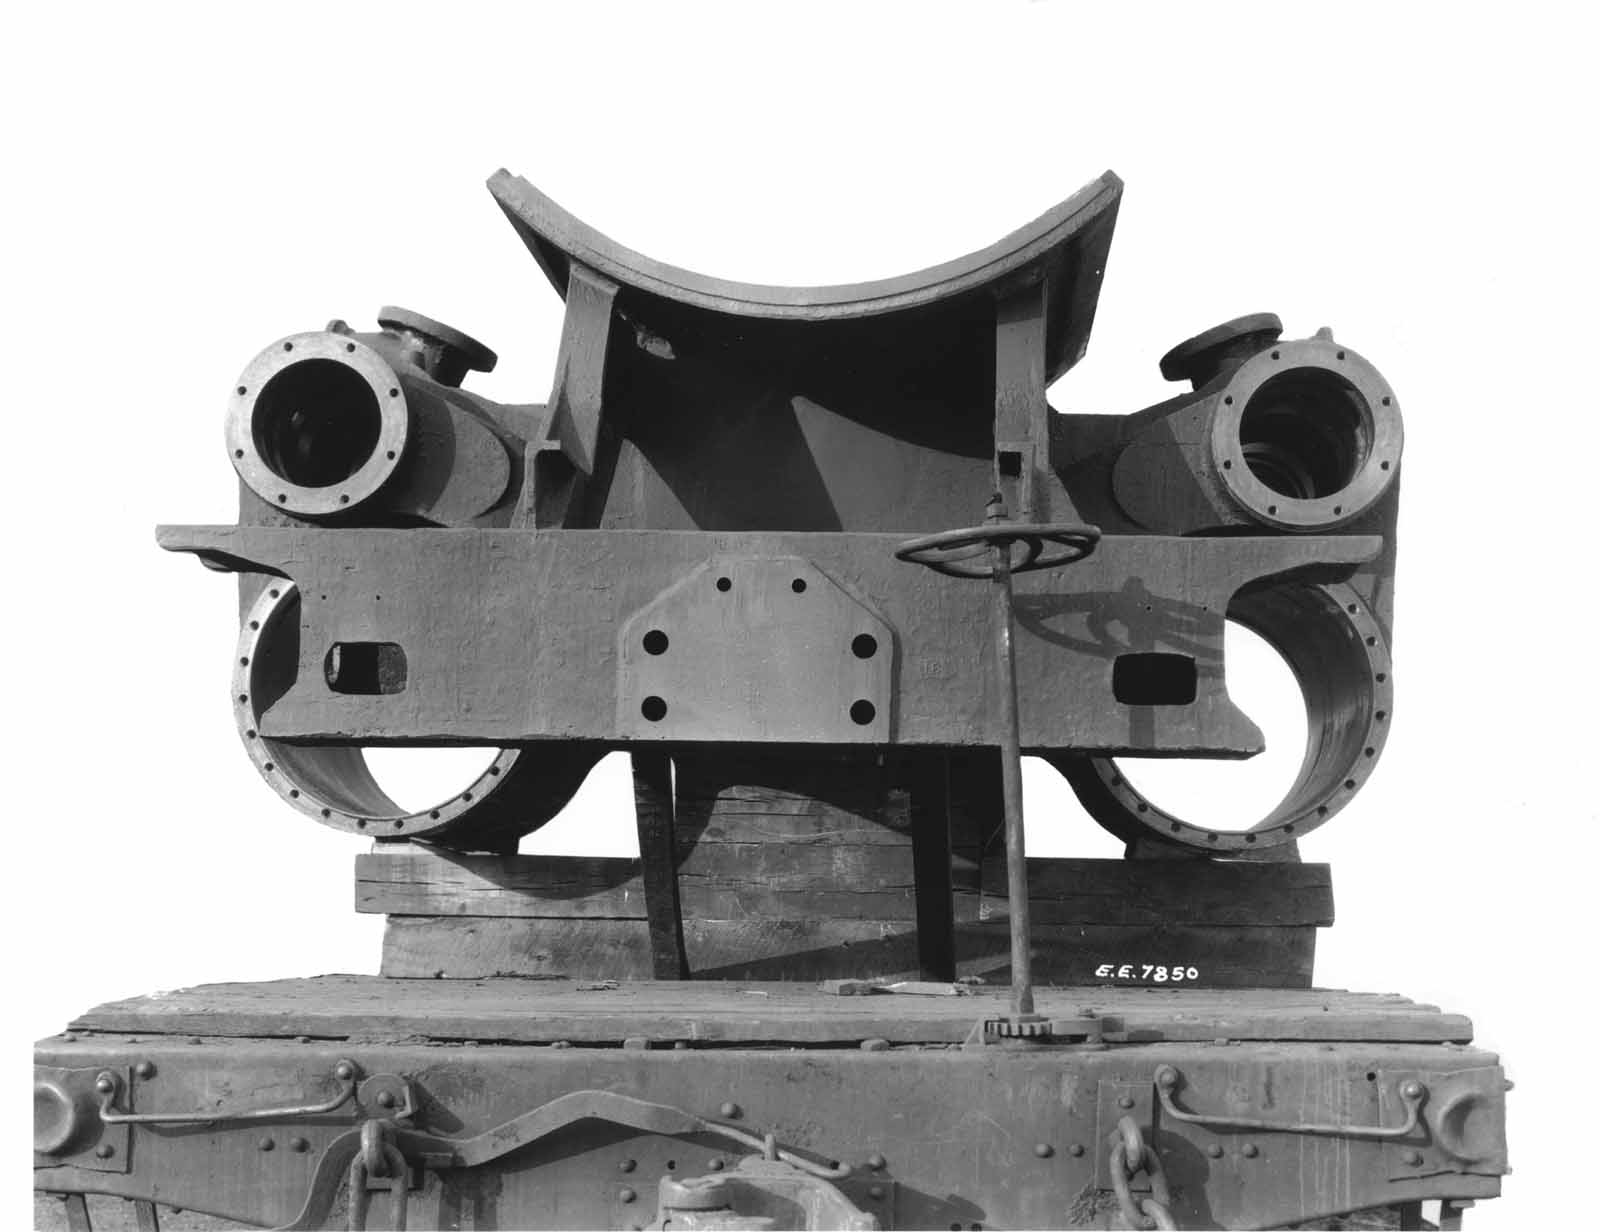
These are Builders Photos of the K4
cast frame
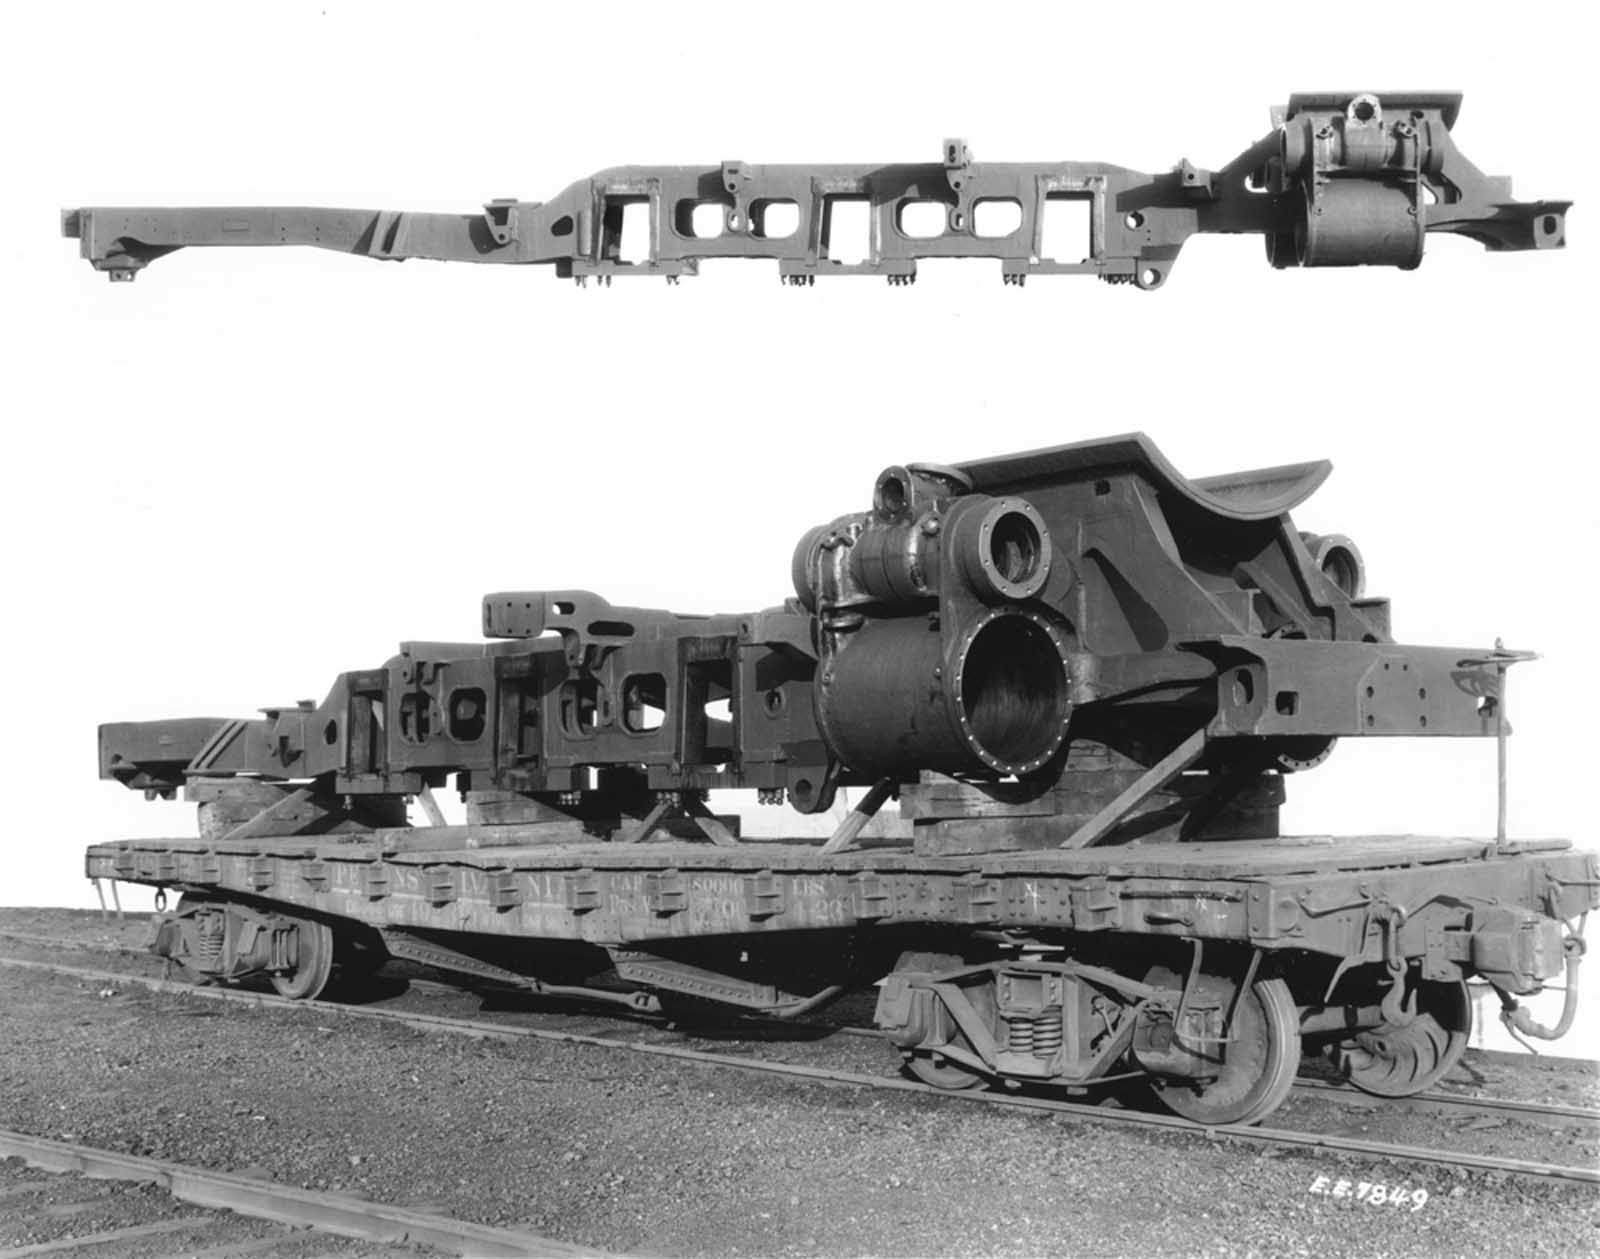
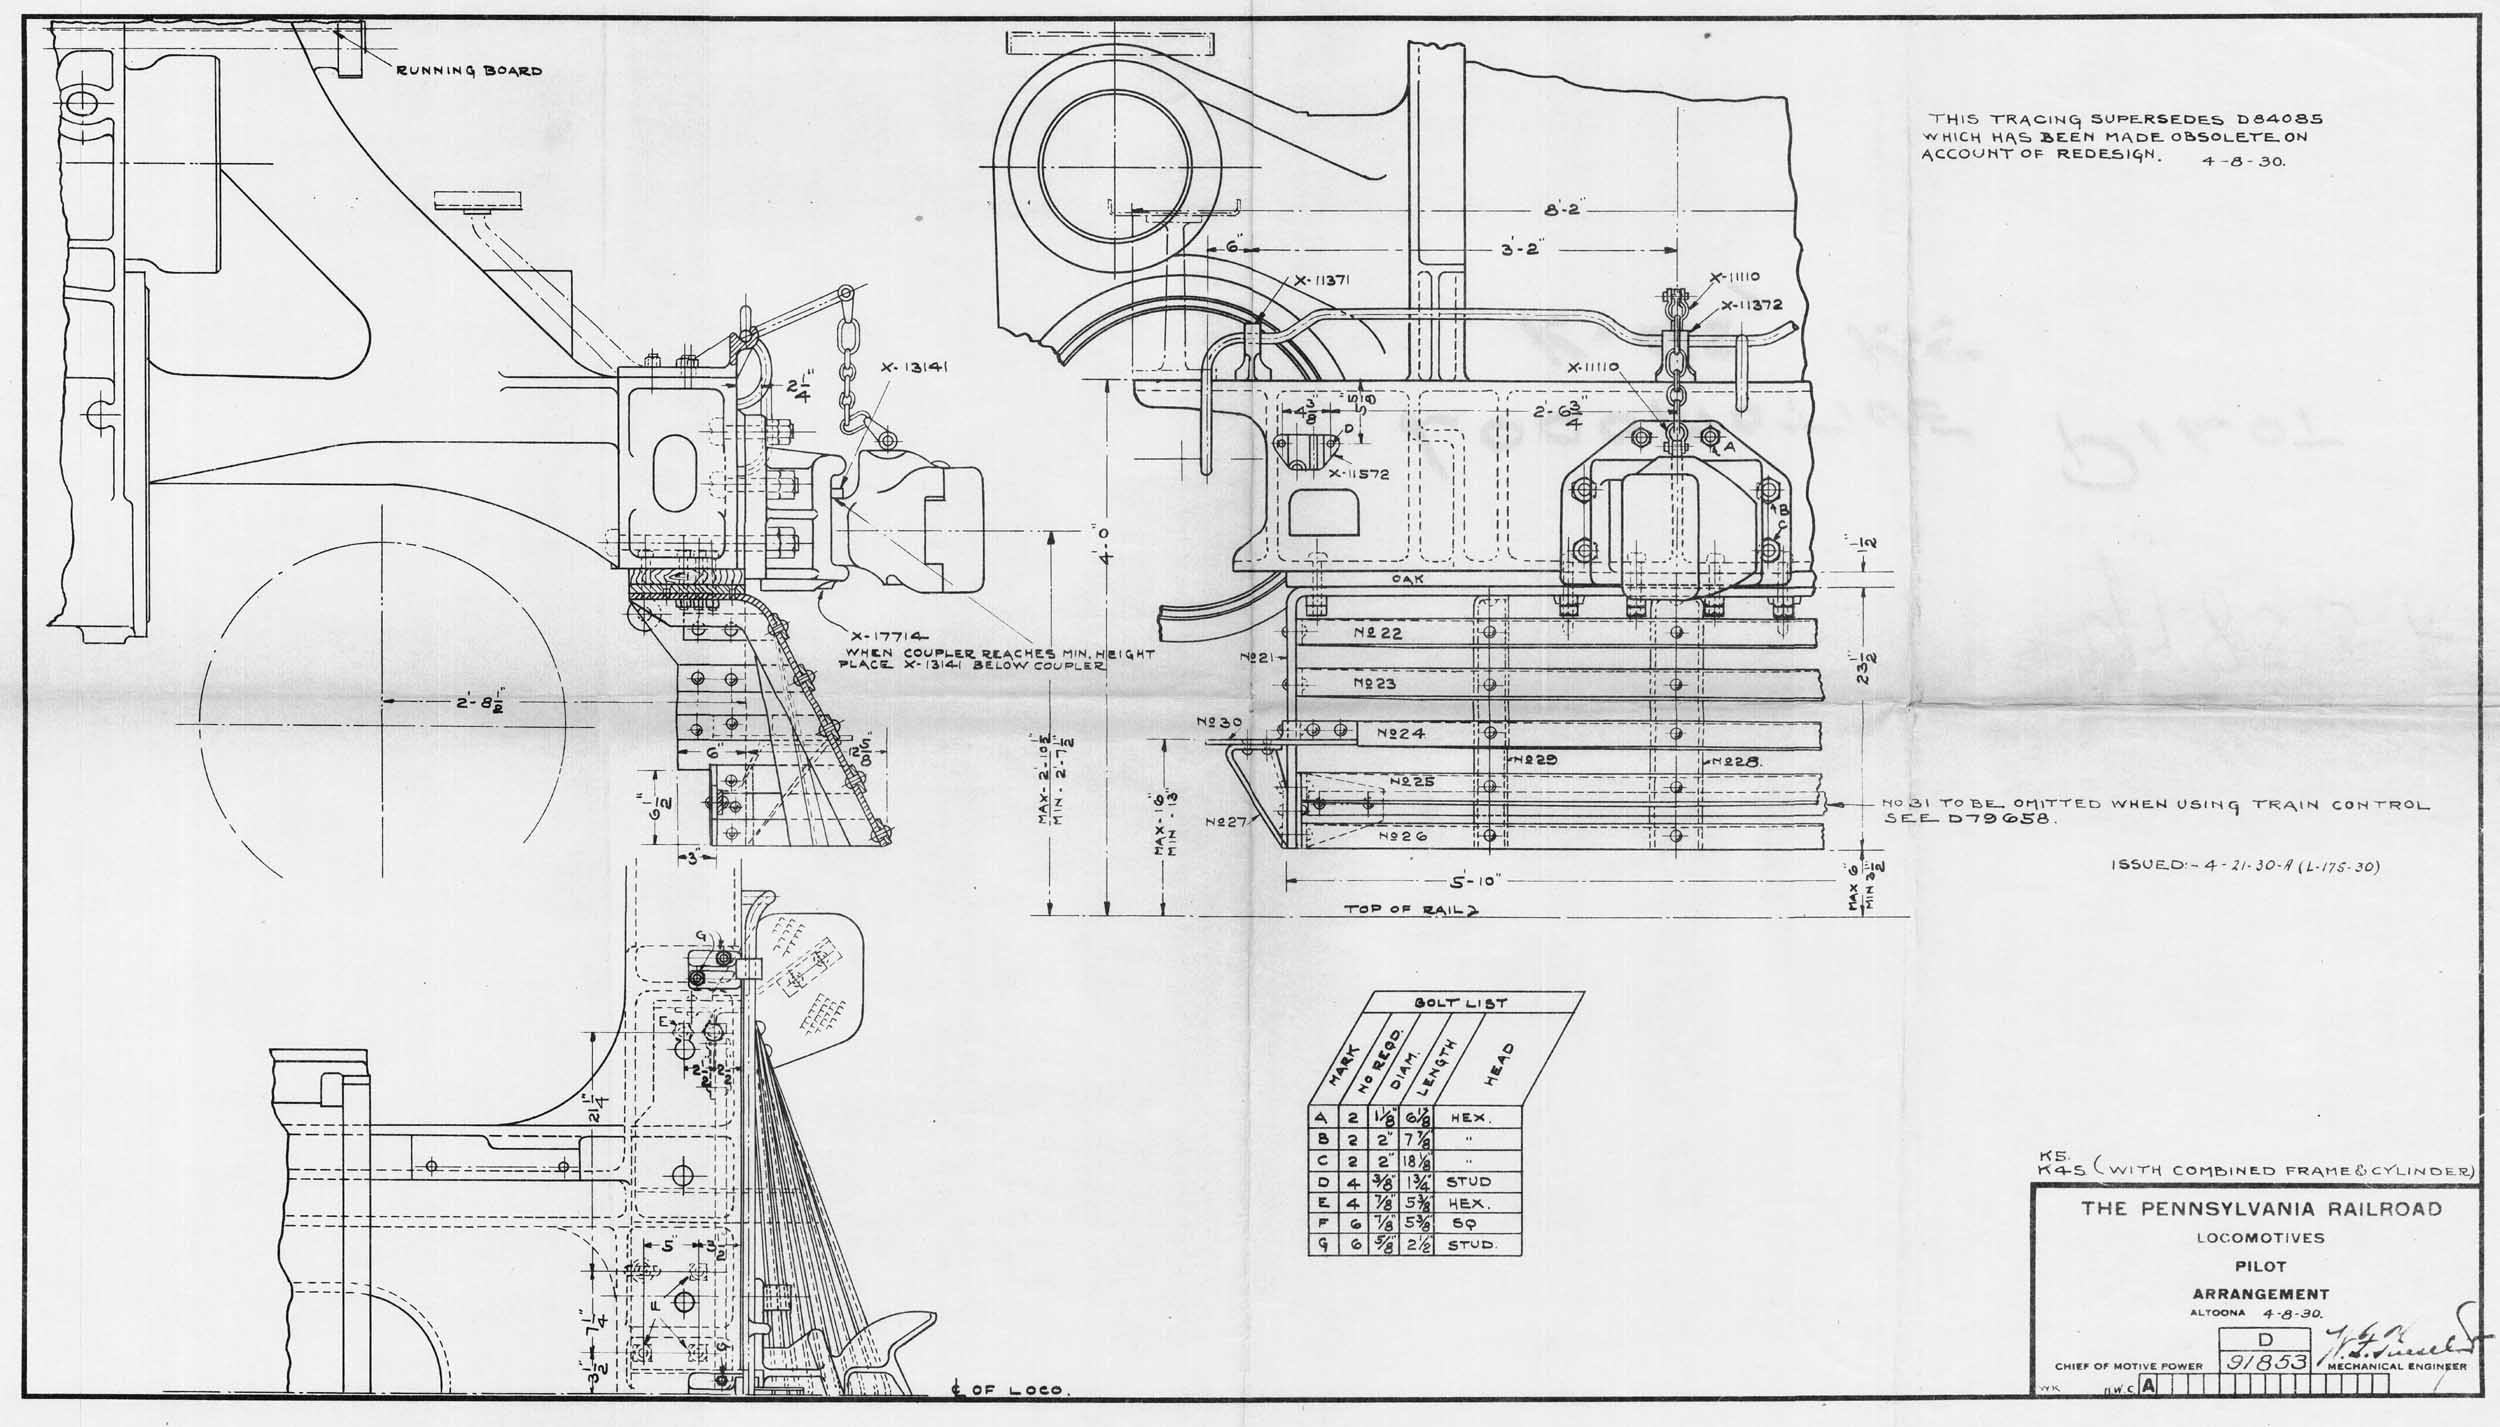
I won this cast pilot drawing on eBay
on 4-20-10 - well after that area was completed, and the model was
painted. It is just my luck!
The first pieces I made were a larger under boiler cylinder sheet
and rear cast frame cylinder braces.
The under boiler cylinder sheet came
out almost to the boiler front as on the real 5495.

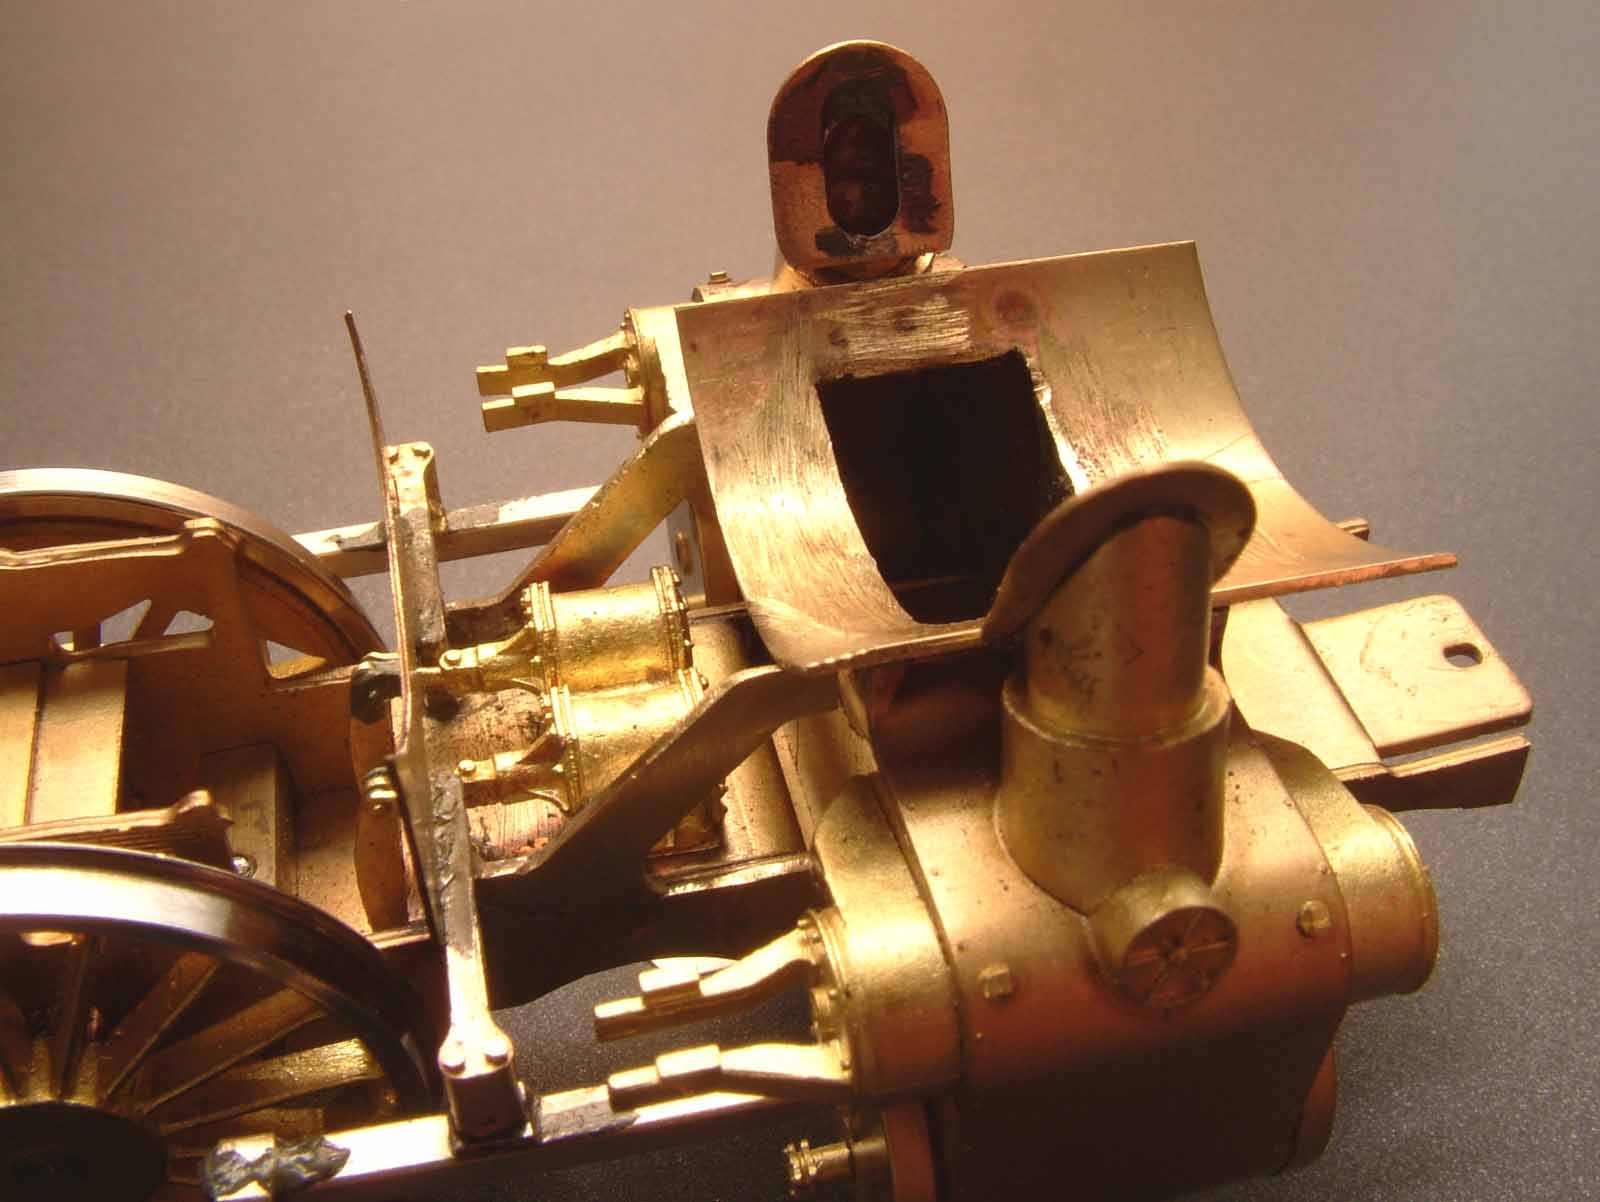
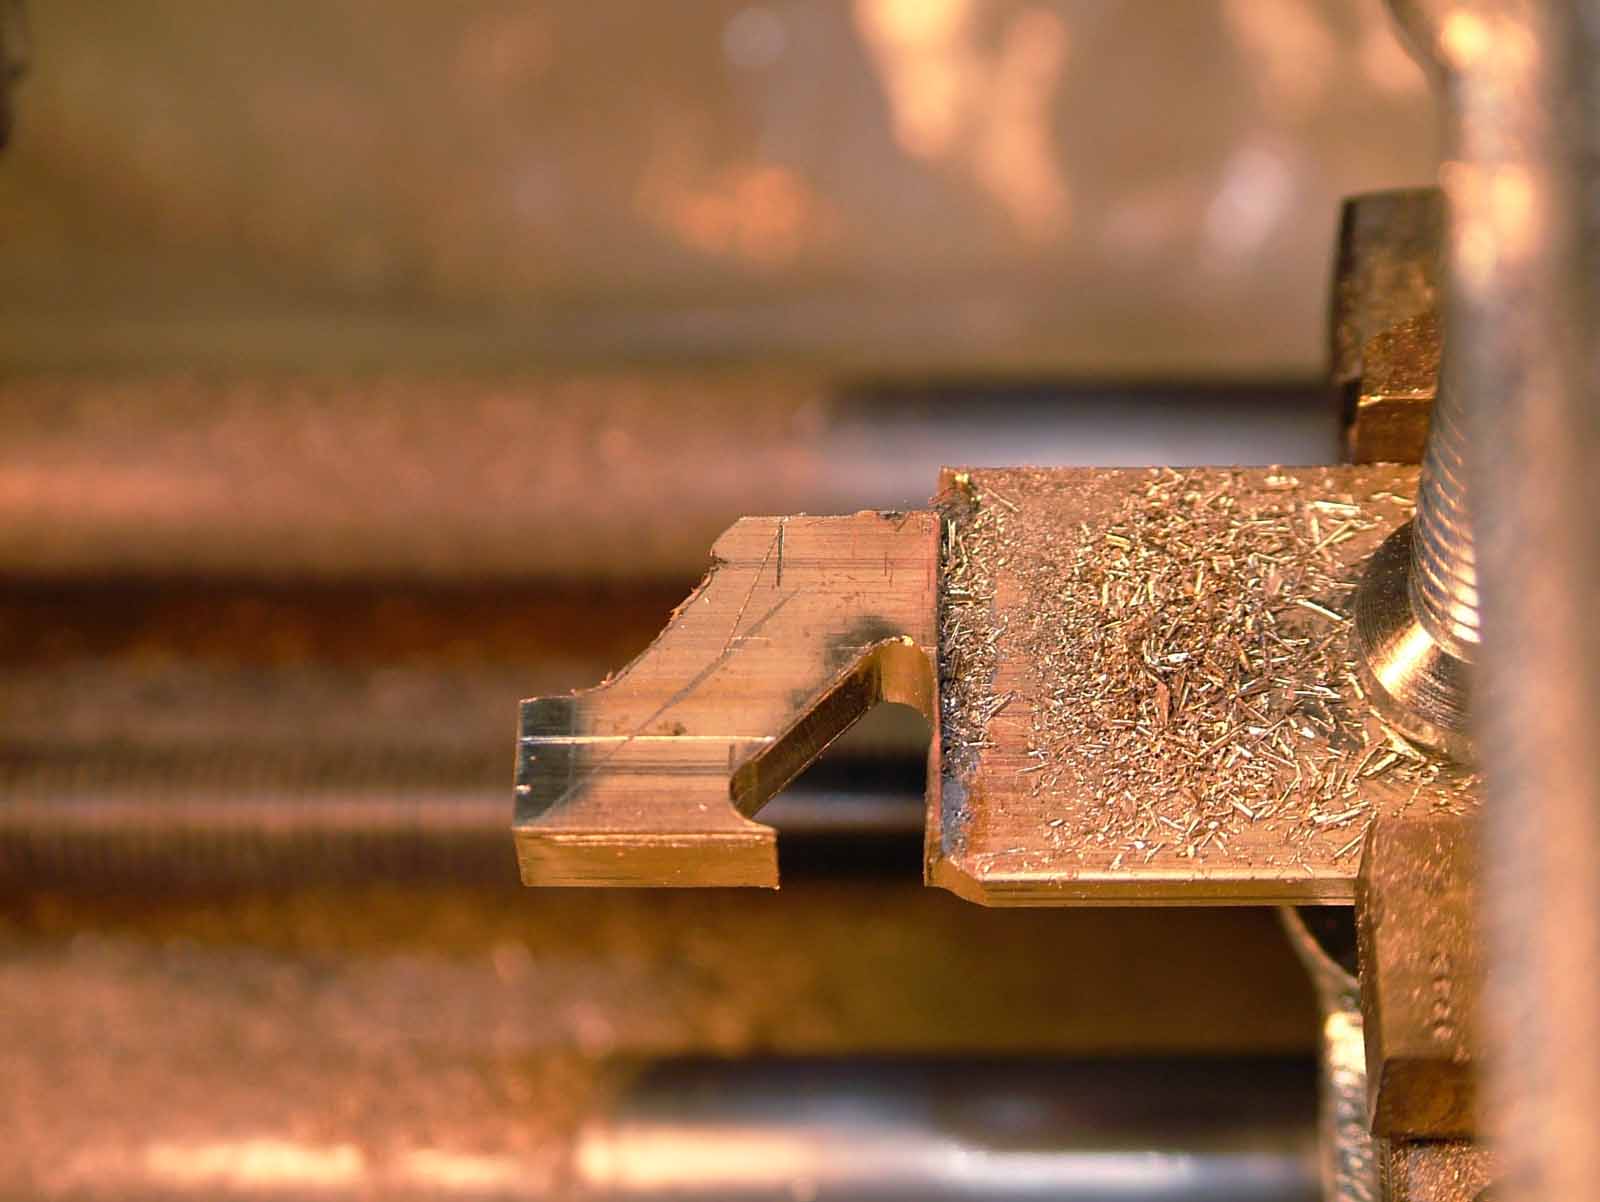
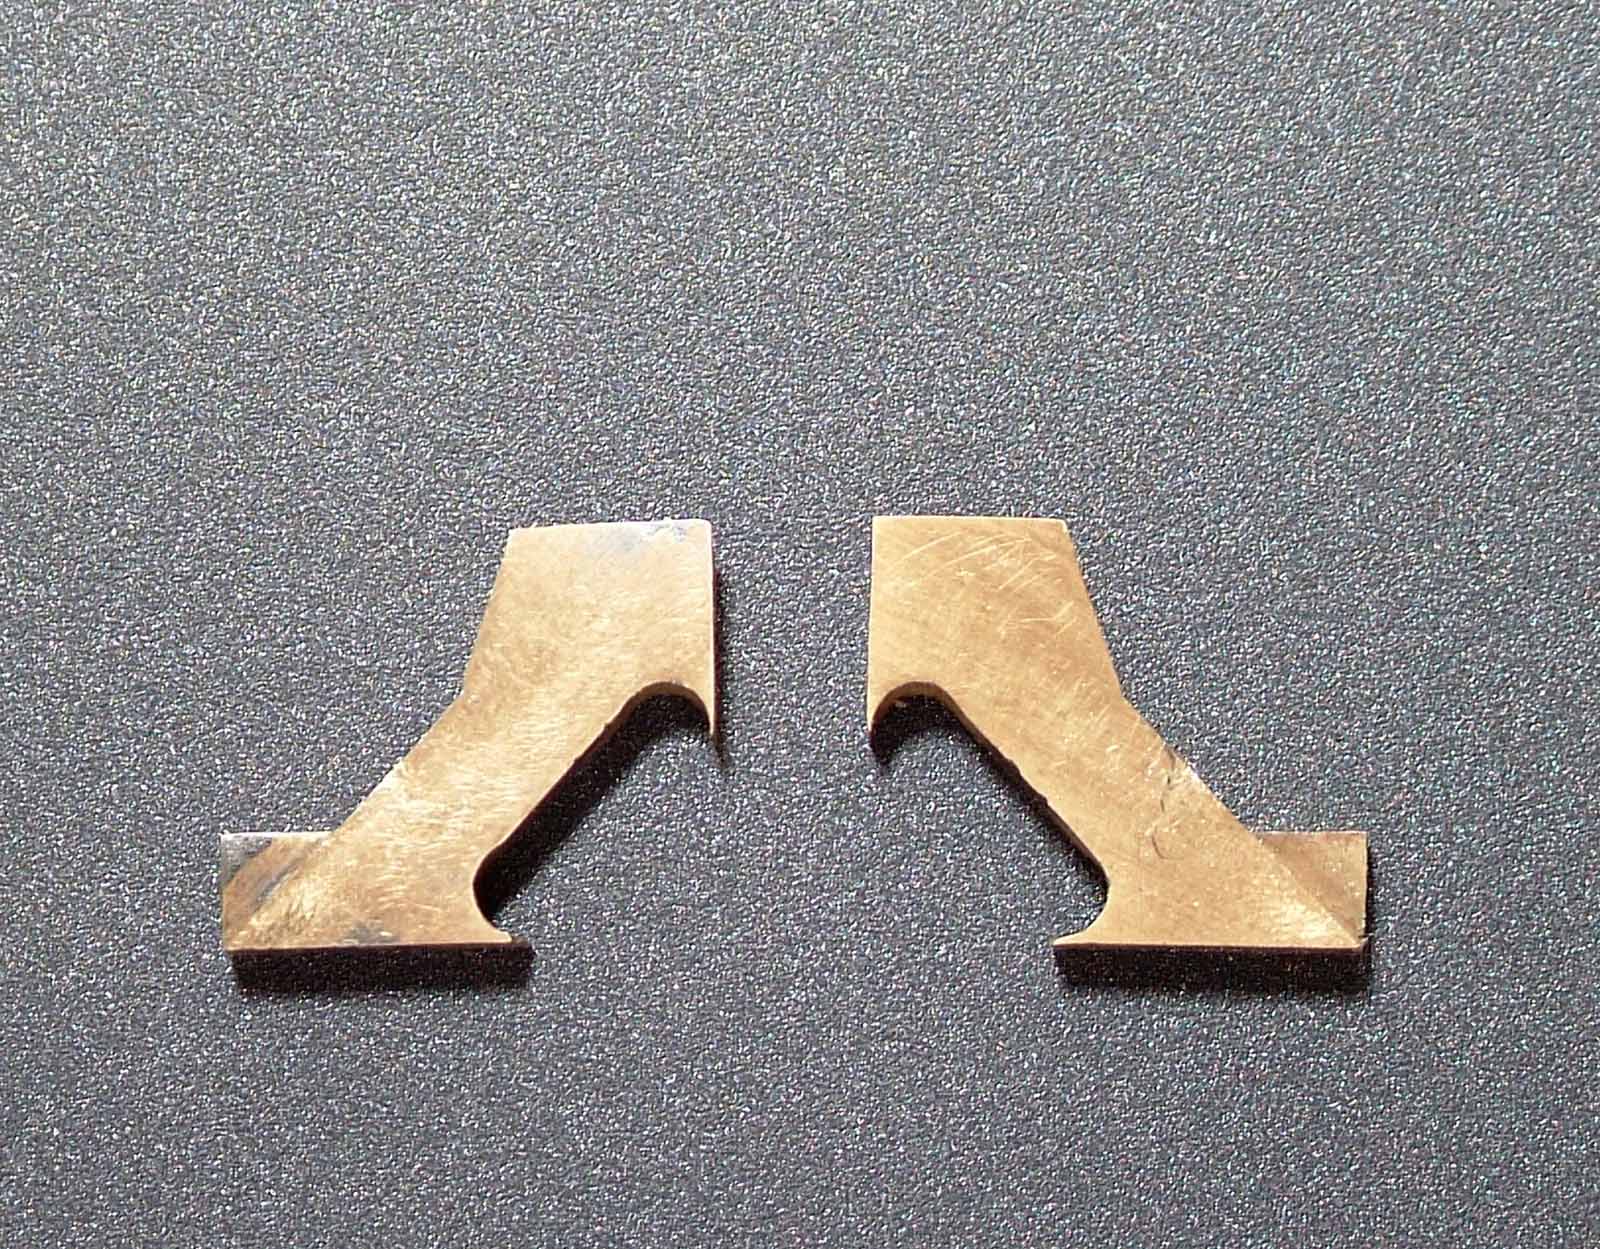
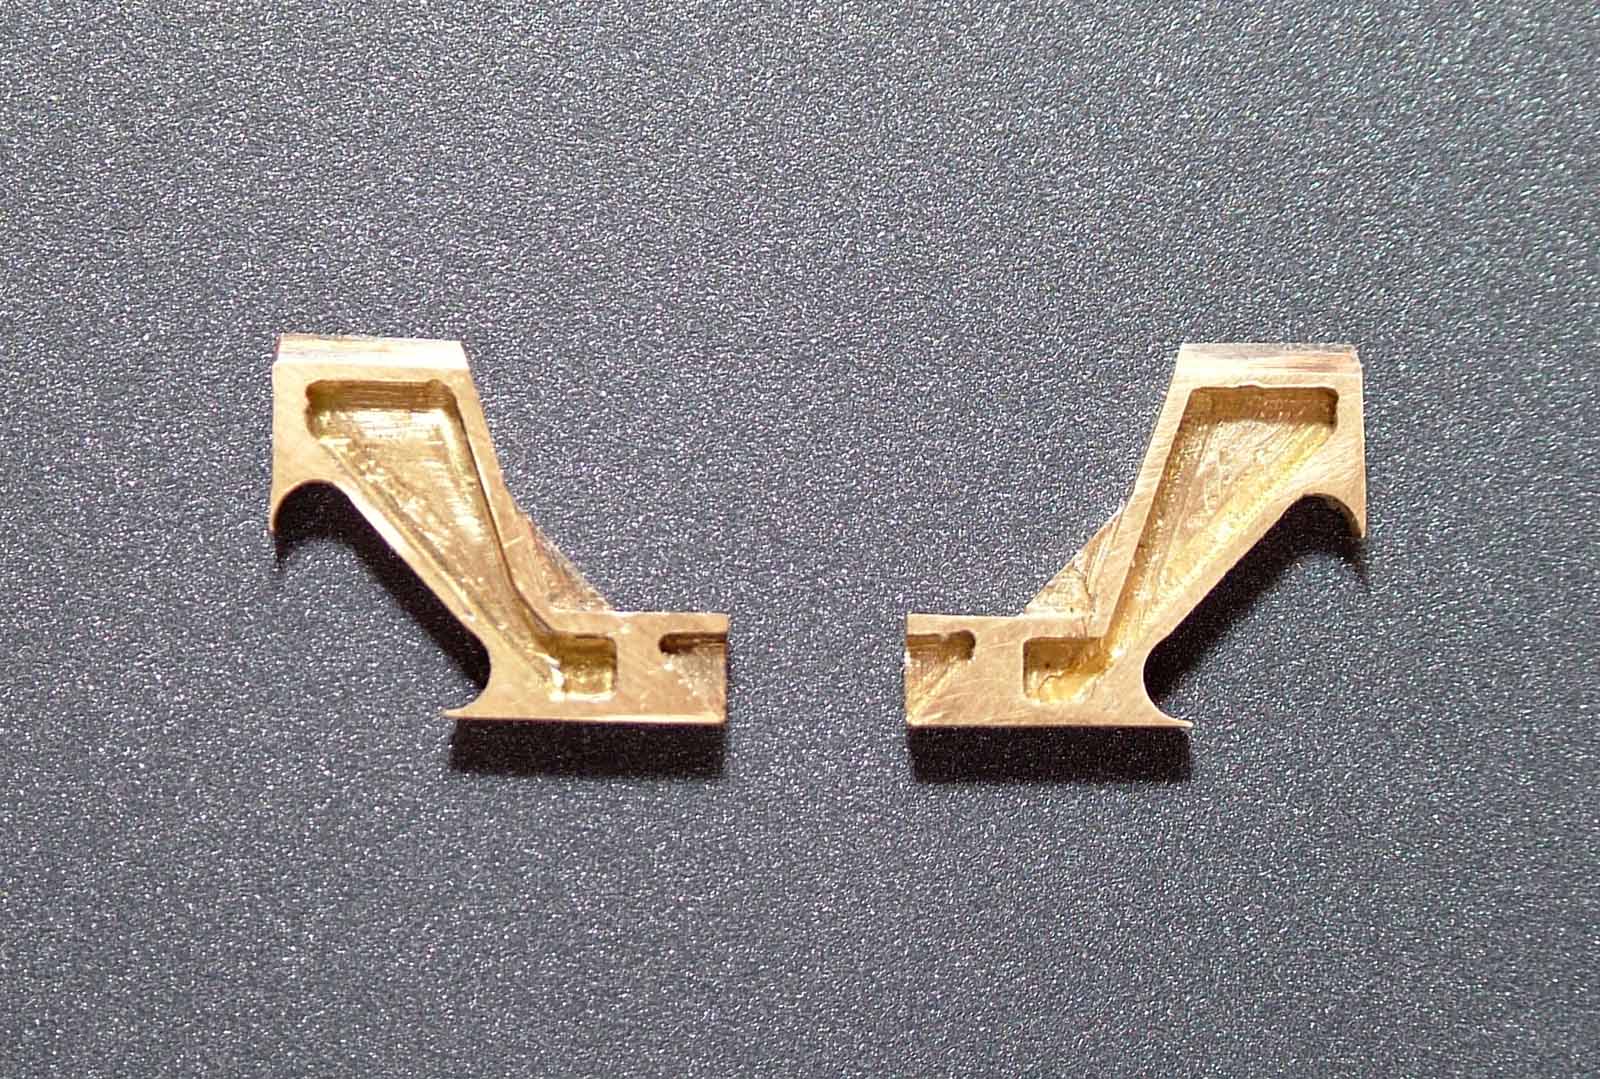
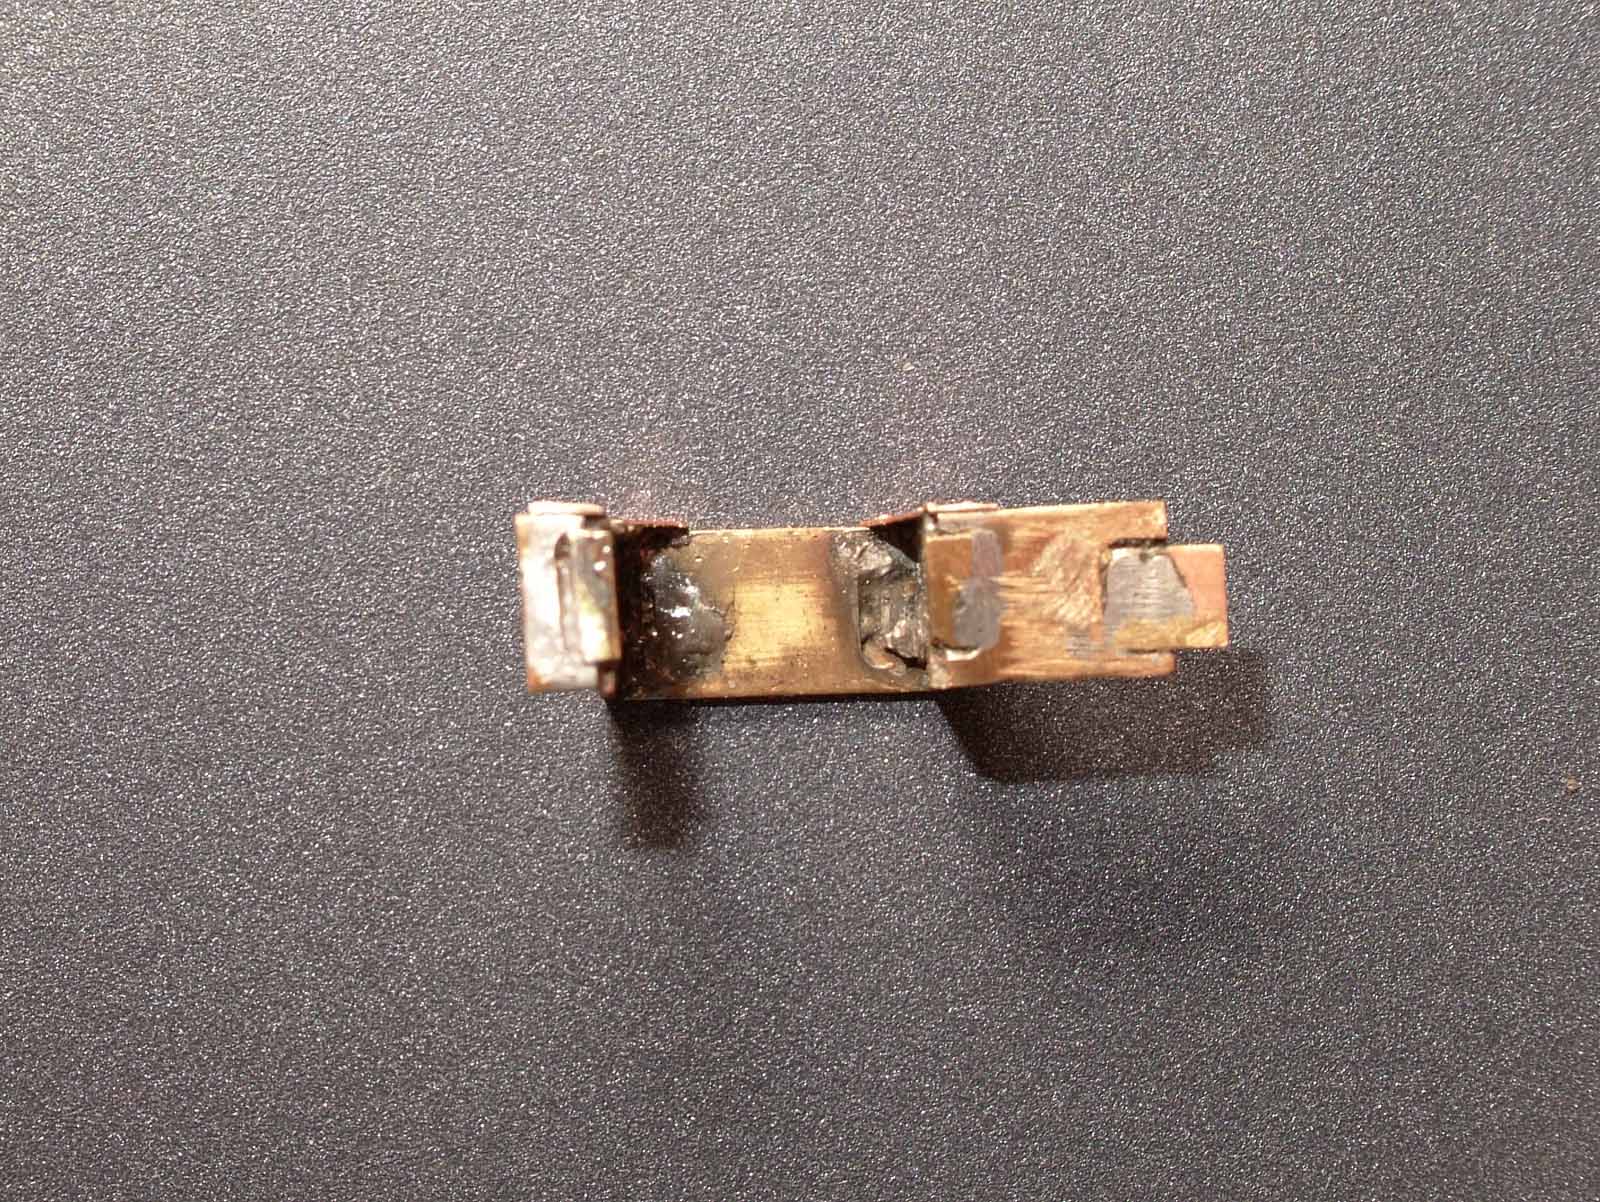
This
is the progression of making the back cylinder braces. I made them first since
they were going to be easier to make. I had to get a feel for how to make such
a complex piece on my Unimat Mill, which is not known for being overly accurate.
The photos were taken on 5-13-06. I was only making them in silhouette because
they are going to be mostly hidden by the cylinders. The best way to make
identical pieces is machine them at the same time, which is what I did.
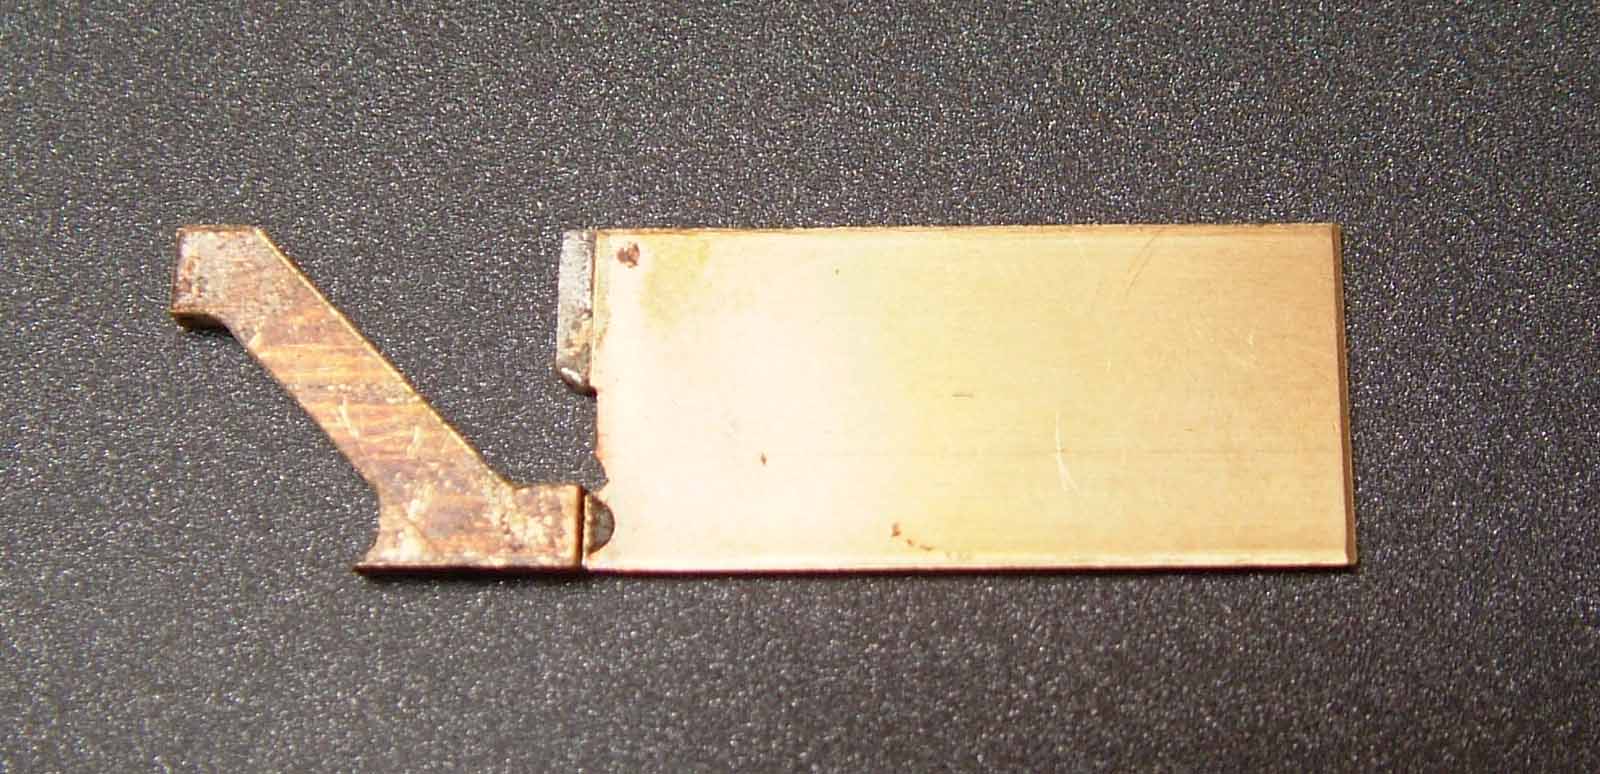

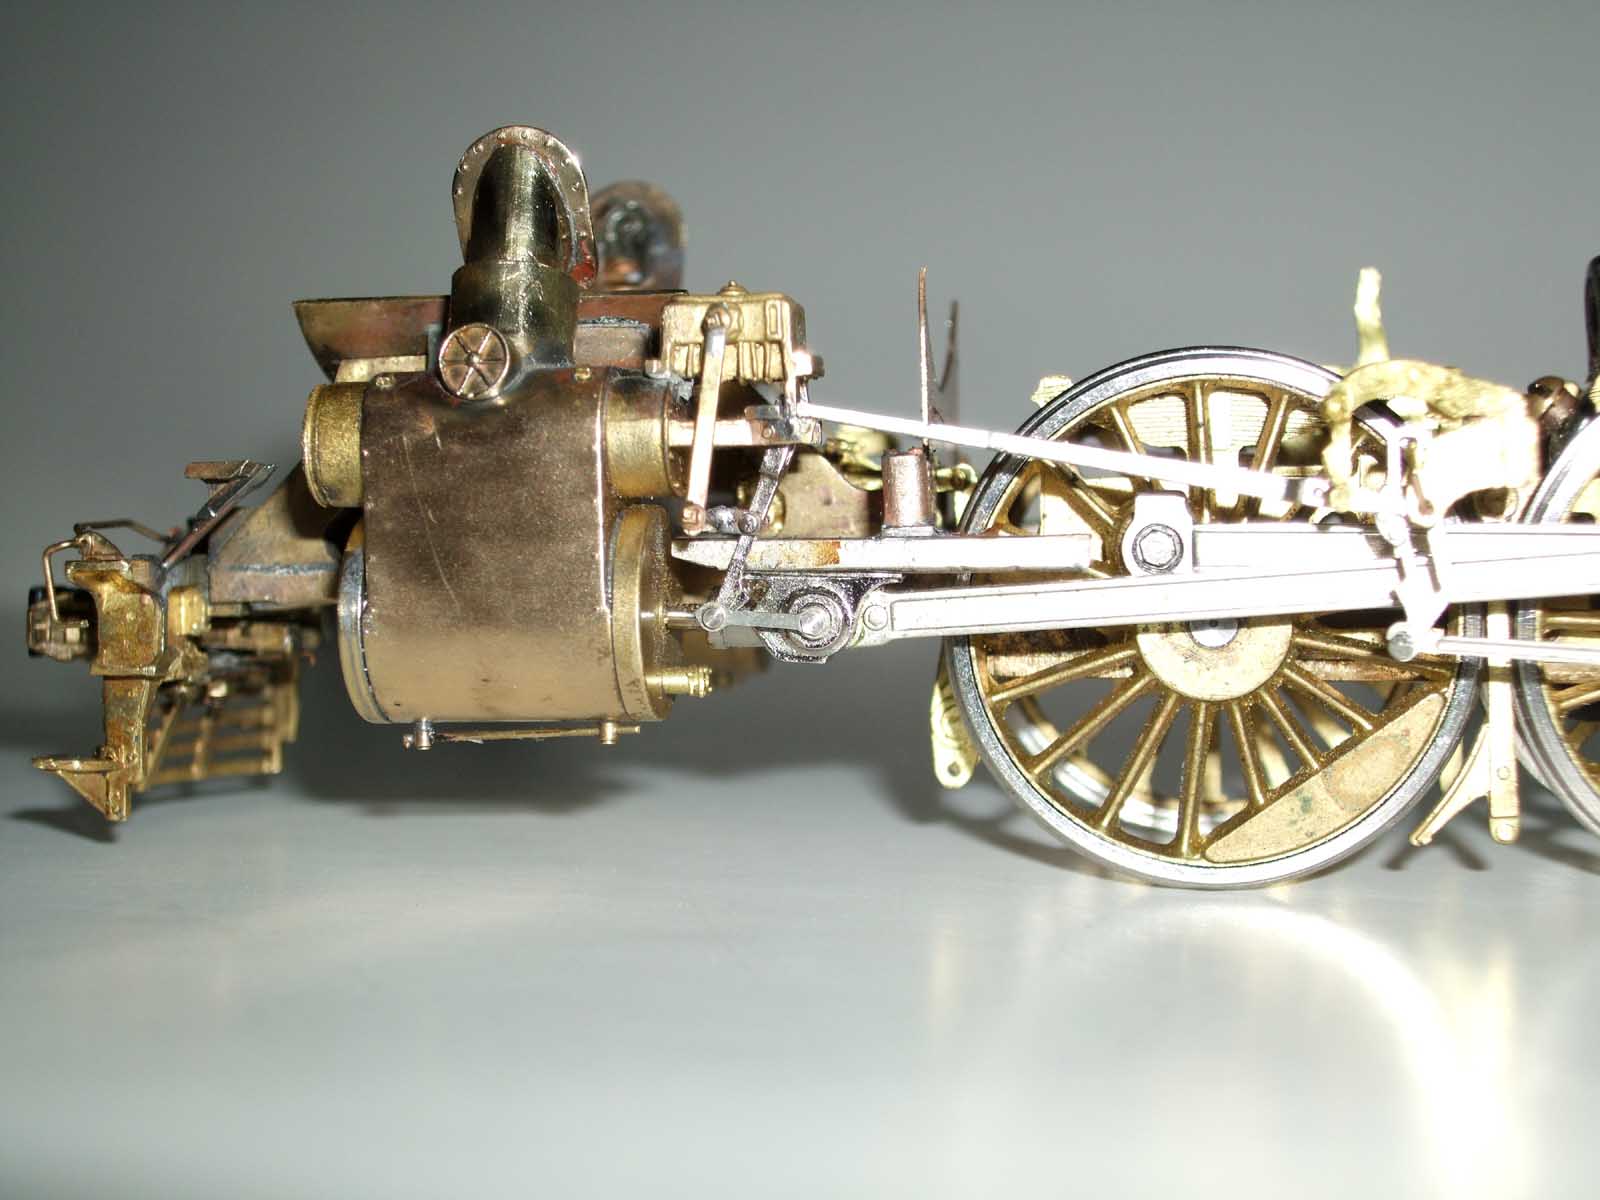
The
next pieces I made were the signature front cast frame diagonal braces. I did
NOT want to make them twice so I thought about how I was going to machine them.
I decided that everything must be machined in one direction only so I had to
relocate the item a LOT. I roughed out the profile with 2 of them soldered
together. I then soldered them to a base holder piece of stock for all the
detail machining. It took me about 50 hours to machine, fit and hand file them
to the frame and pilot.
It was SO worth it though!

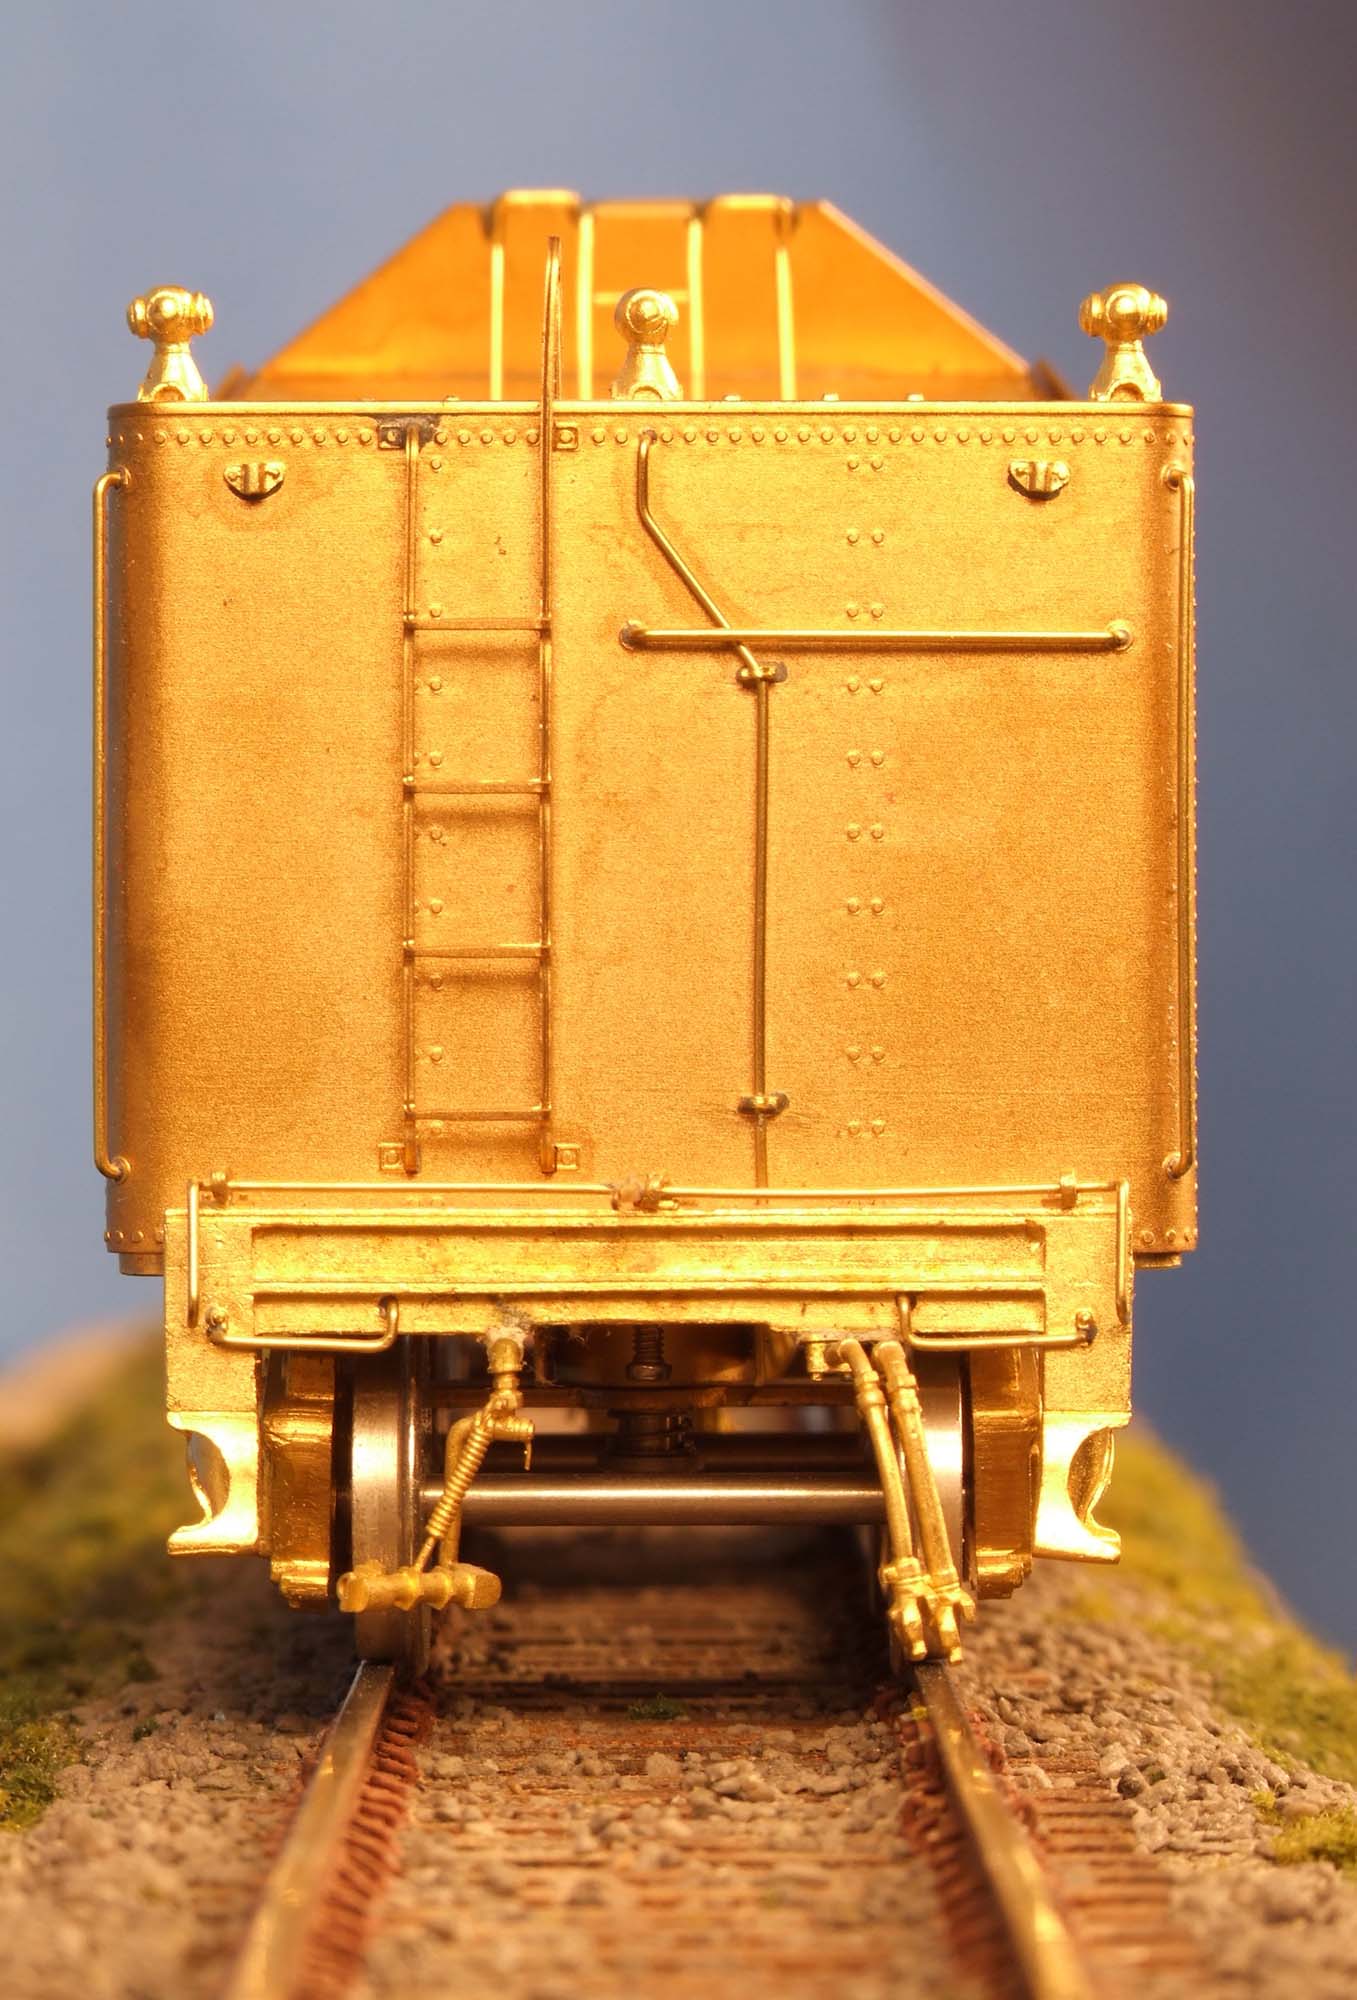
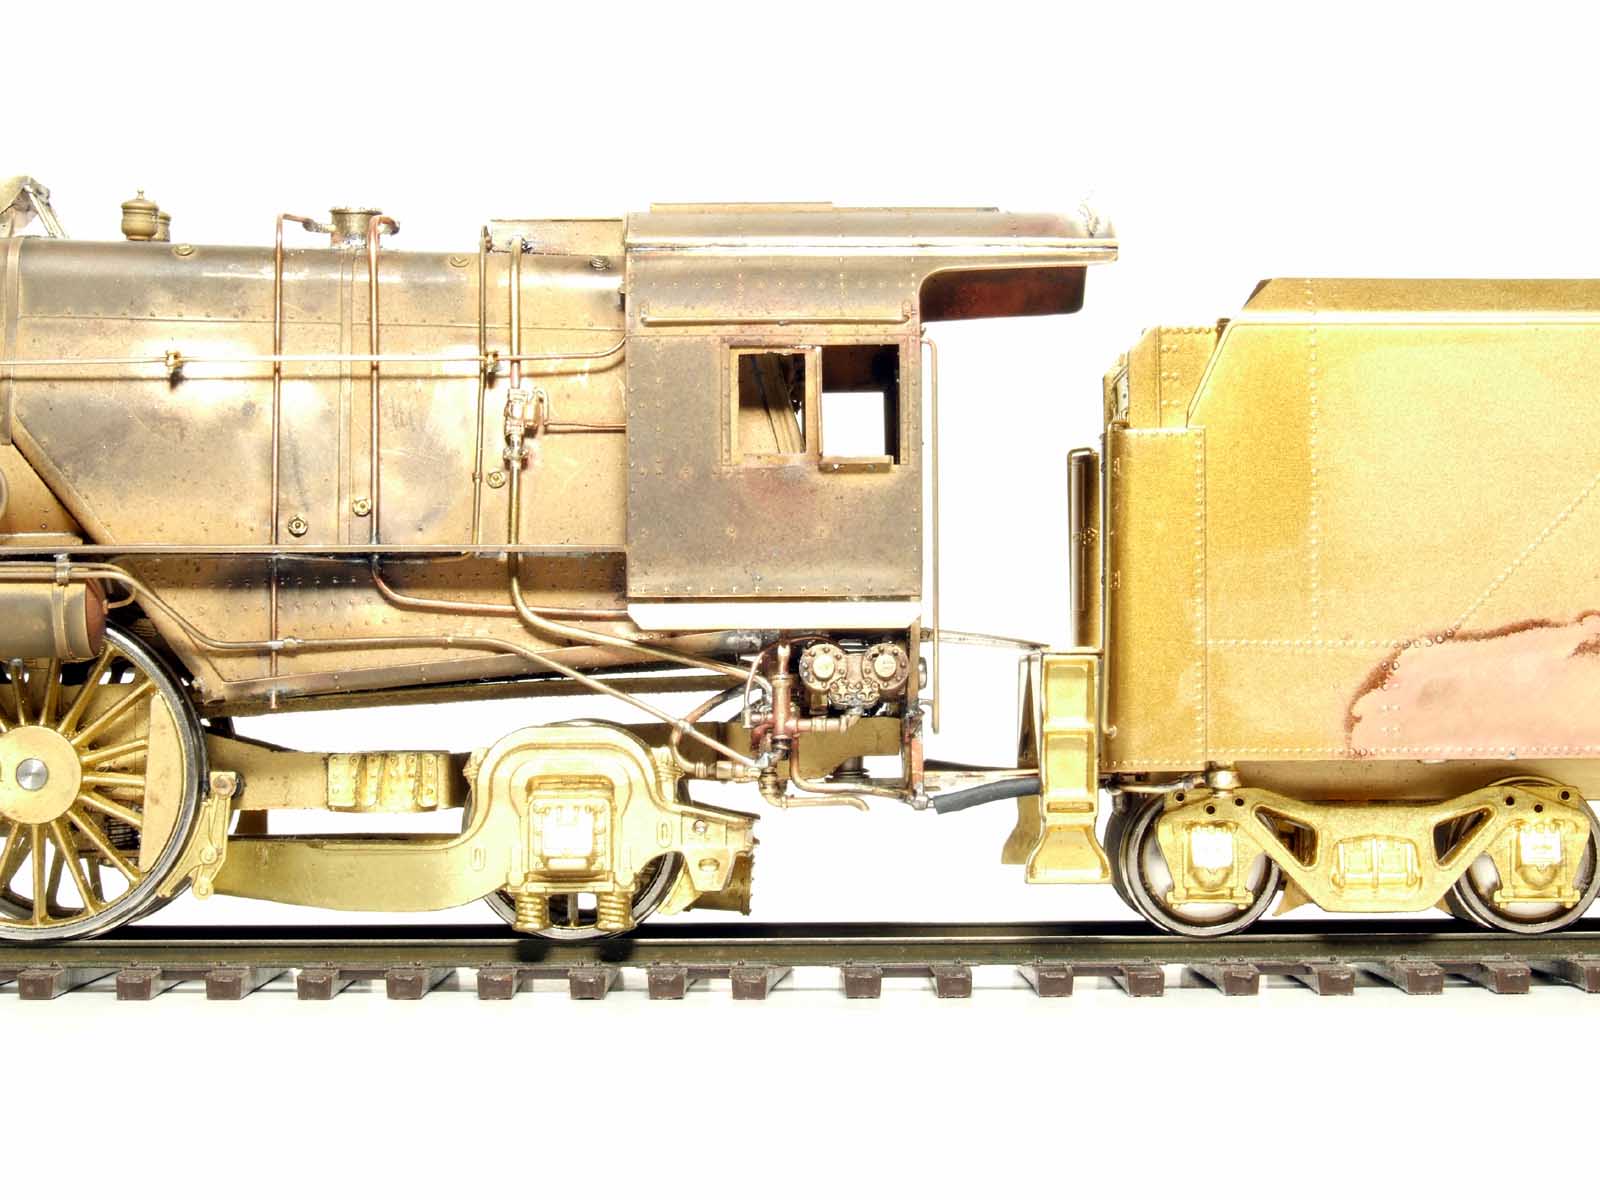
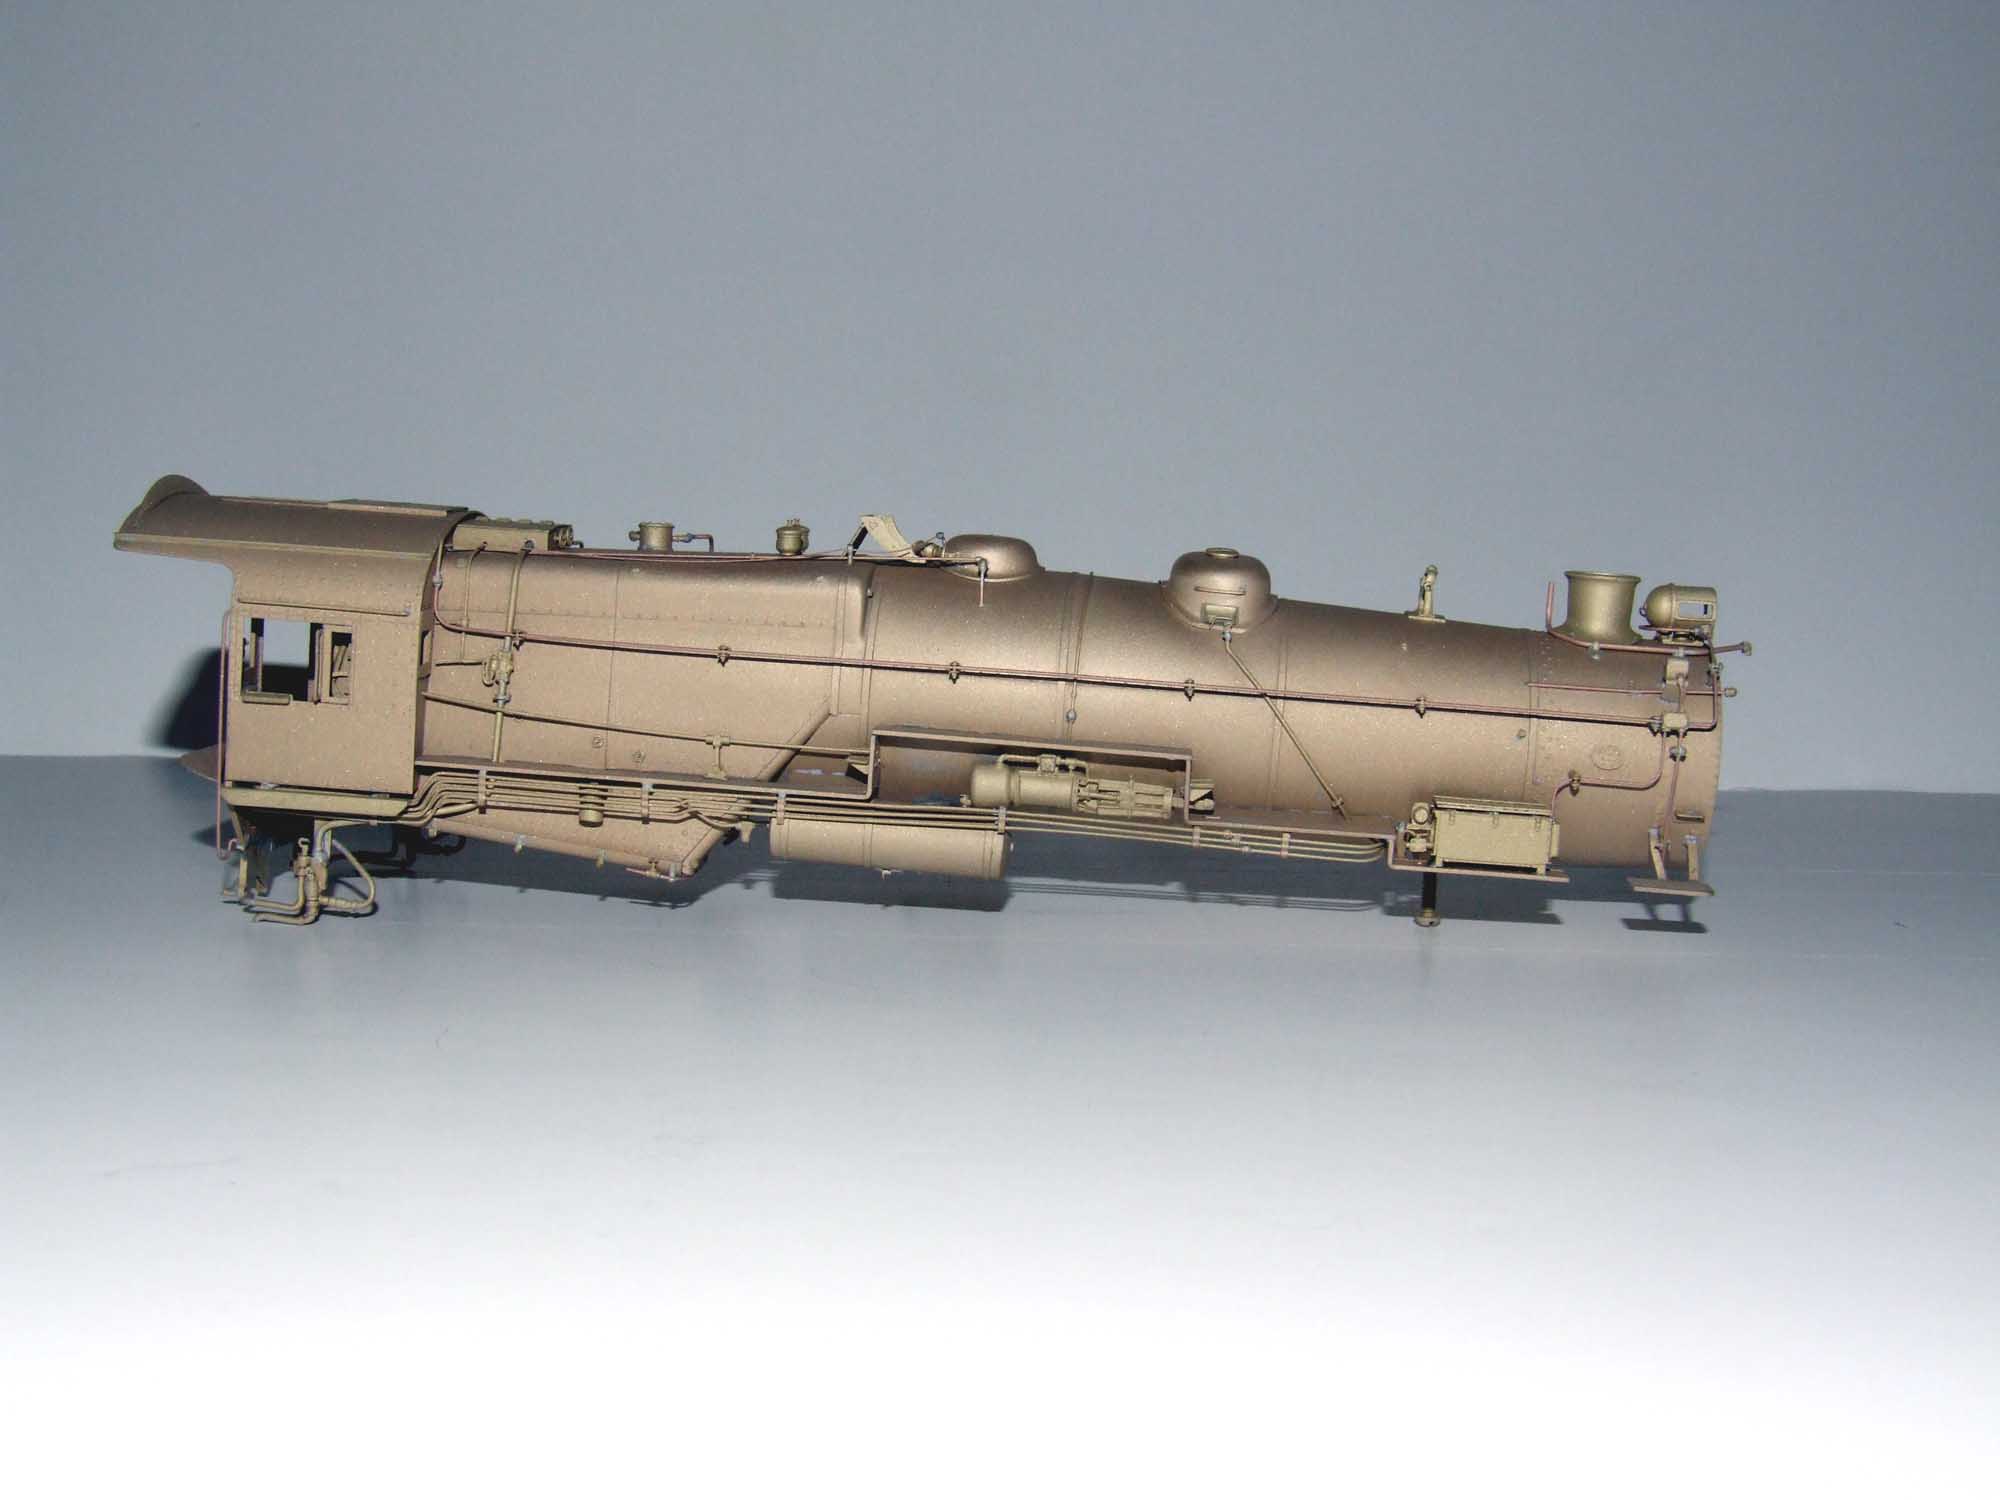
I
had to modify the fireman’s side walkway near the cylinder so it would clear
the lubricator I added to the top of the cylinder. Since Omnicon K4 walkway
material is a little scarce these days, I carefully measured, and recycled all
the walkway that was originally on the model. It was cut with a shear so there
was NO loss. I measured the K4 at Strasburg for the profile. It turned out
surprisingly well.


January & February 2009
I am progressing along adding some new parts like the unique
Tombstone marker lights.
The lubricator now has working linkage.
On February 18, 2009 I installed a Medium Tsunami and gave 5495
its first test run.
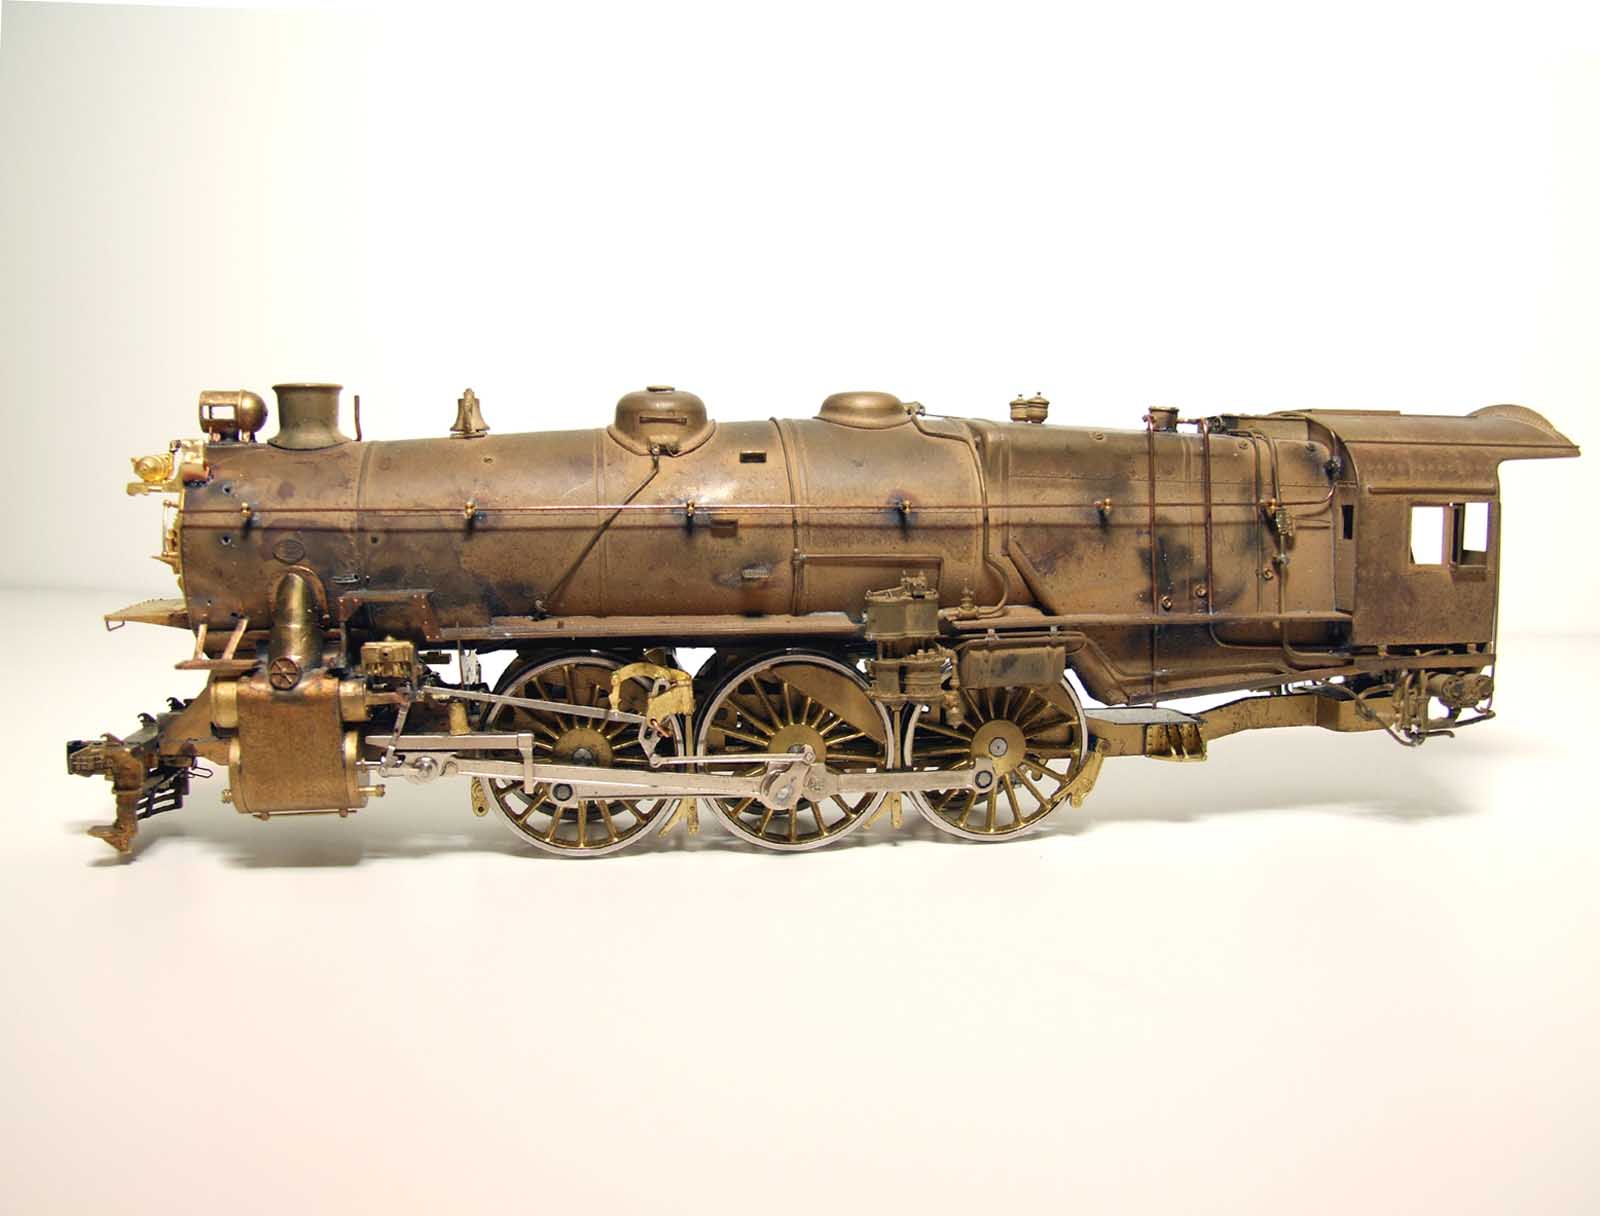
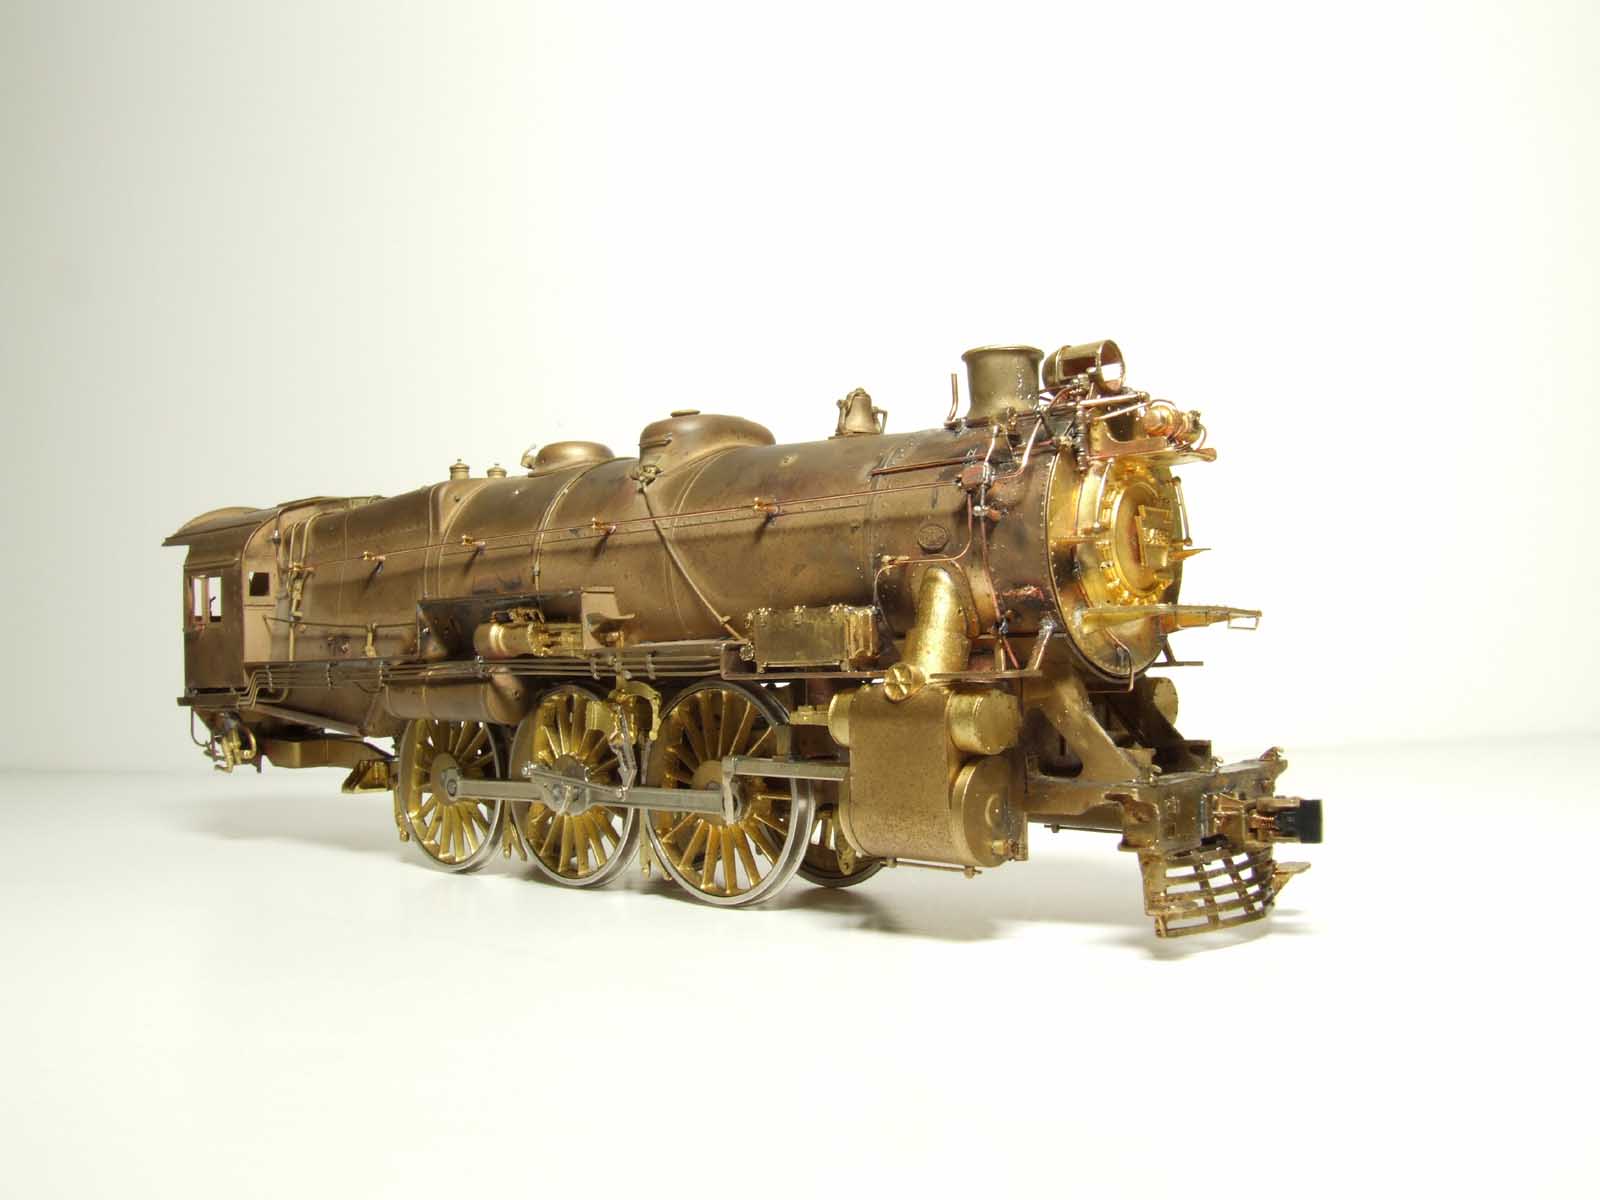
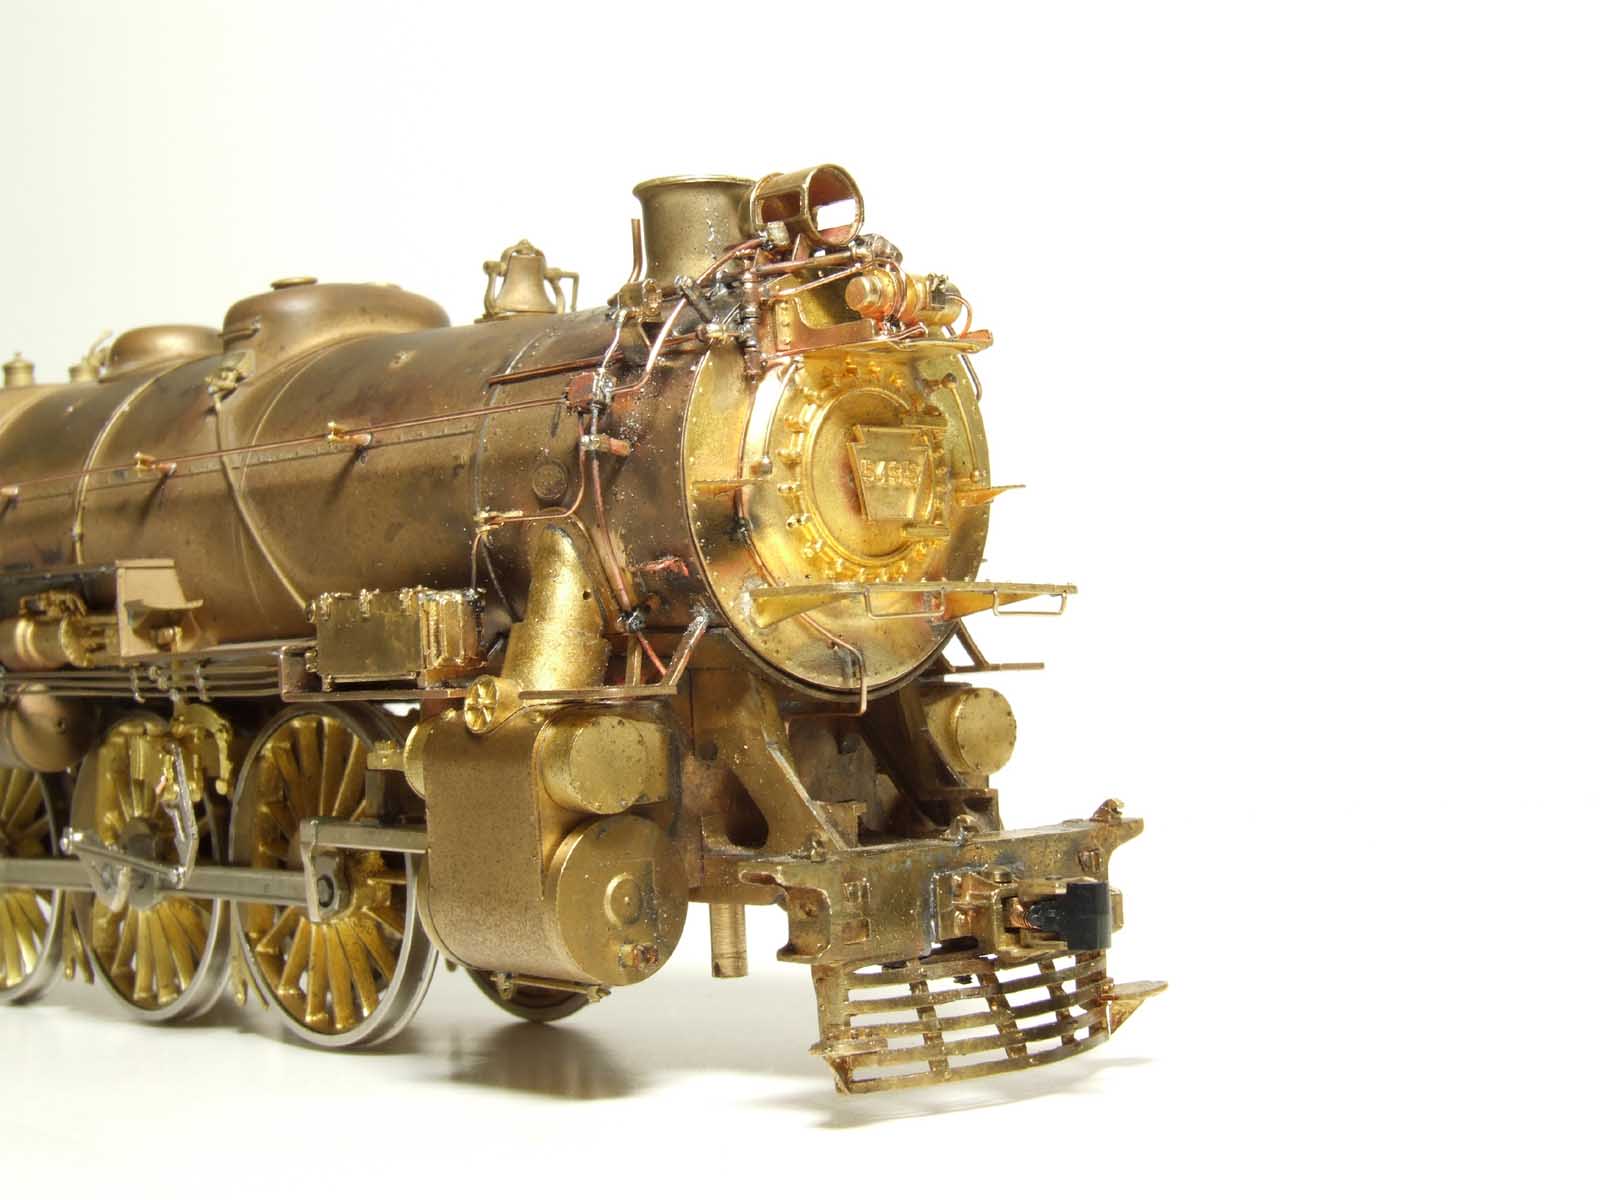
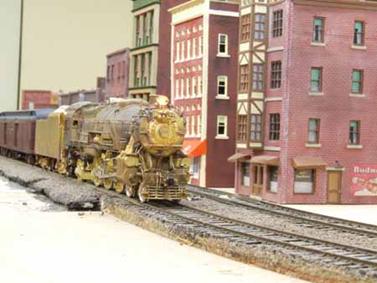
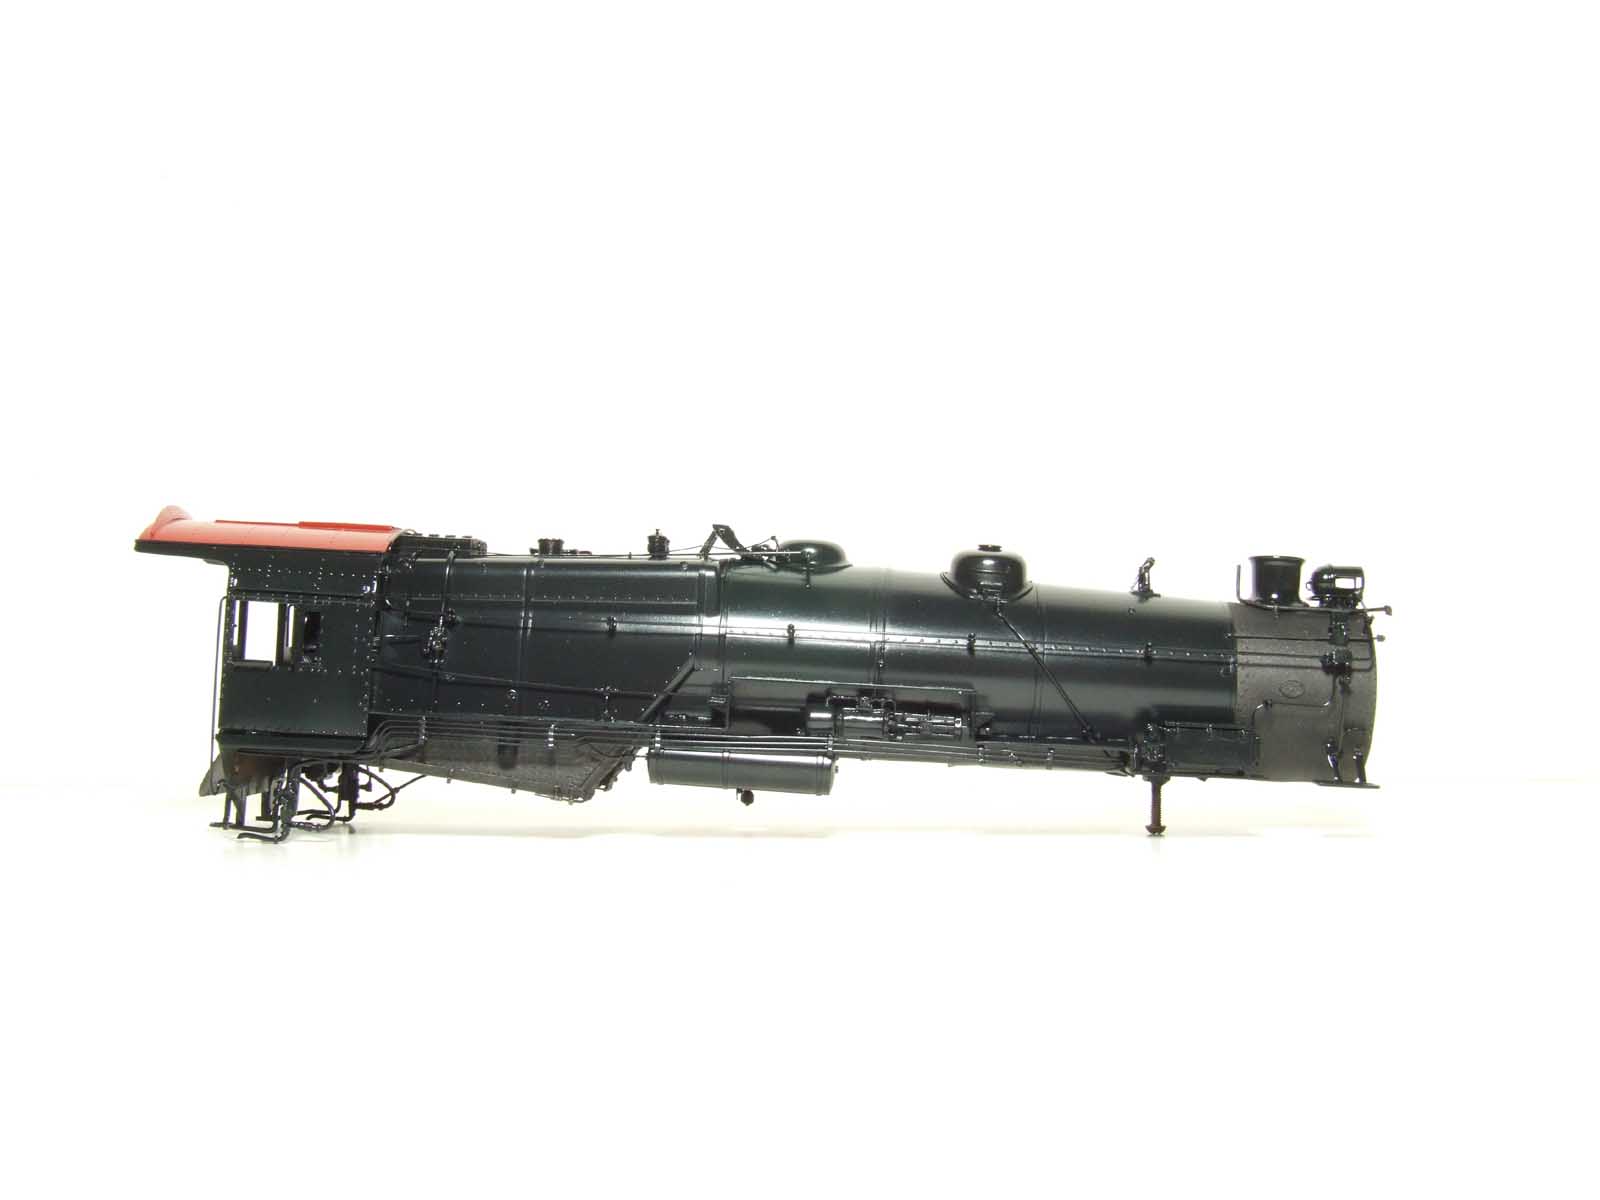
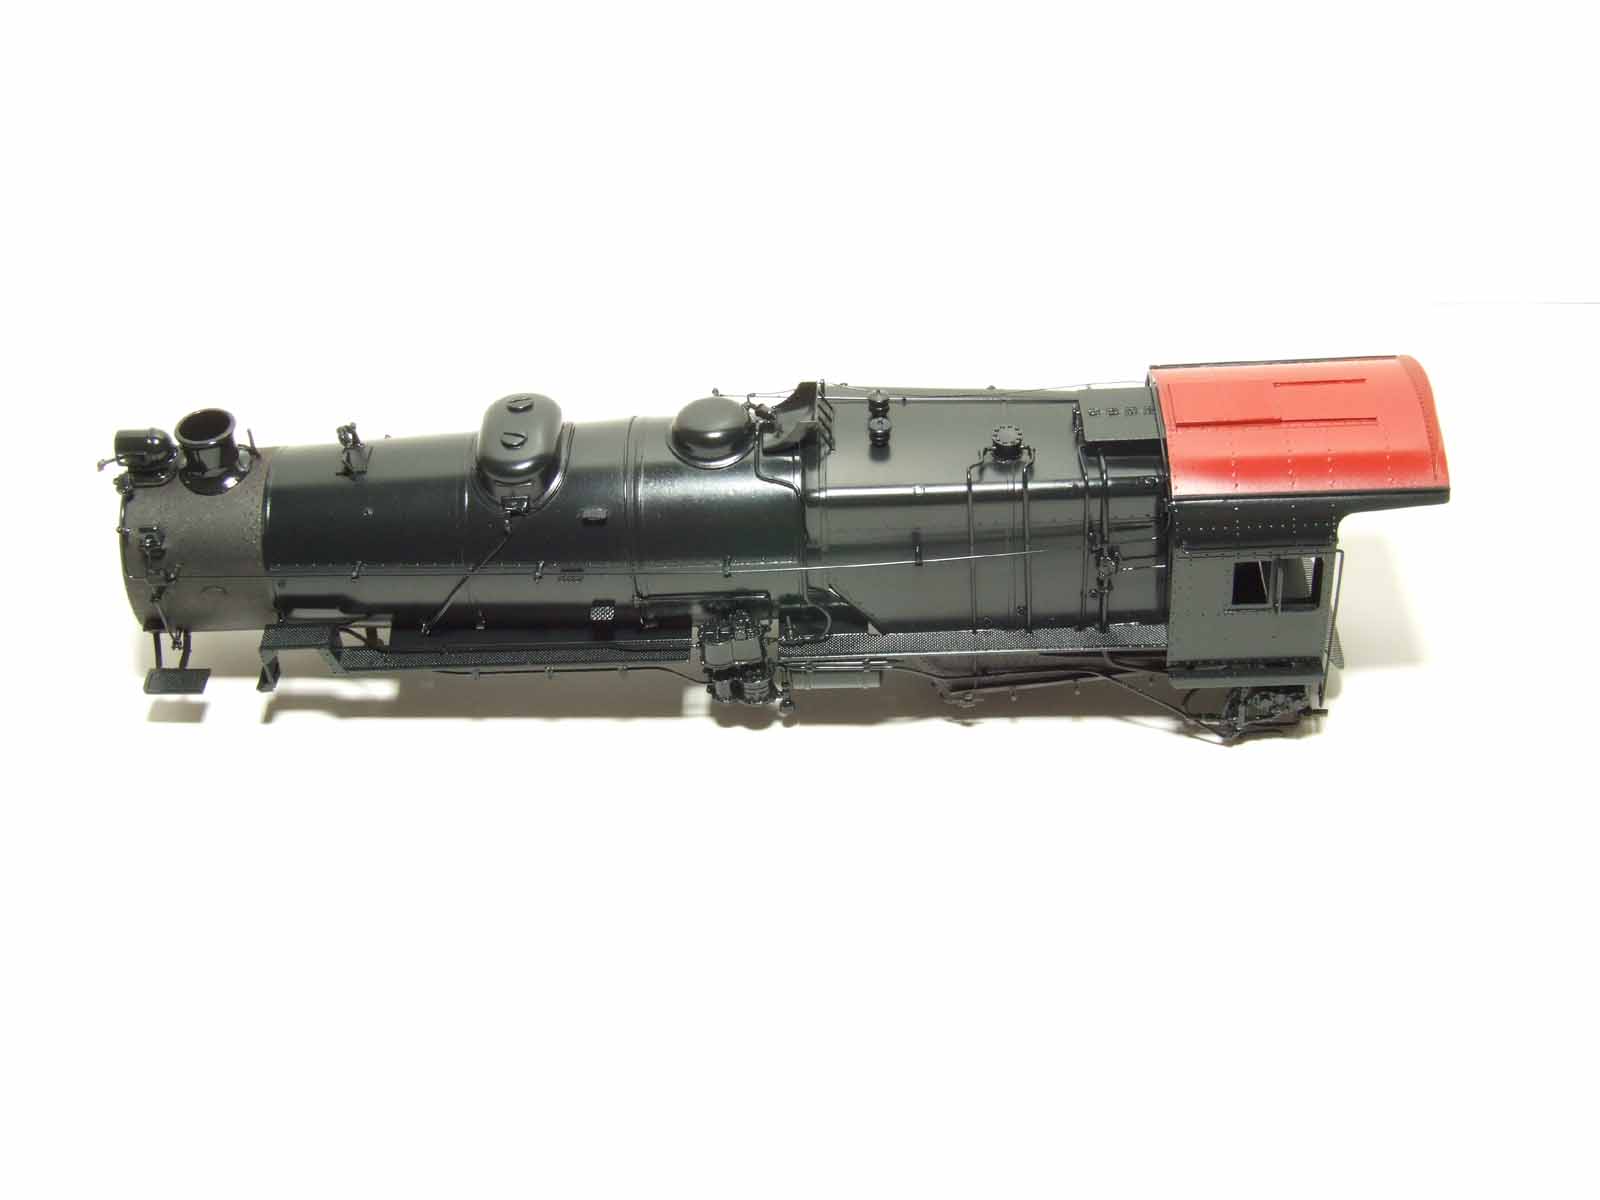
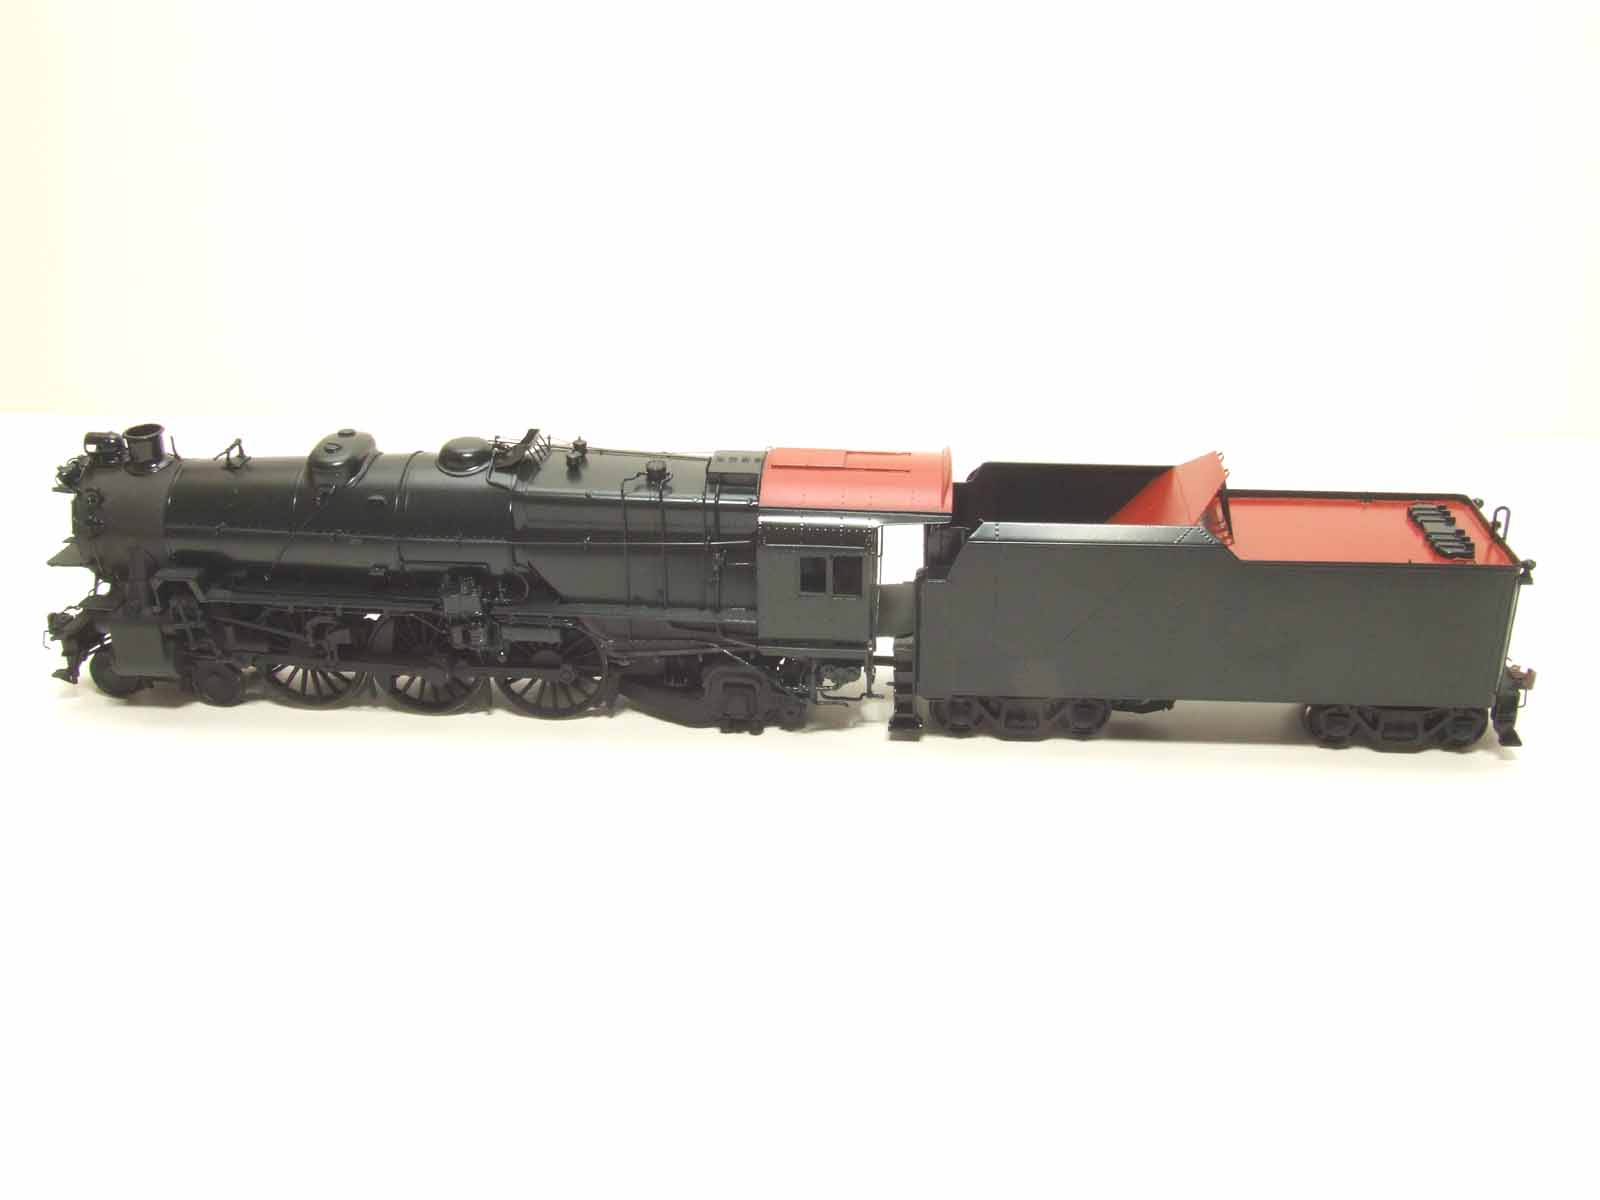
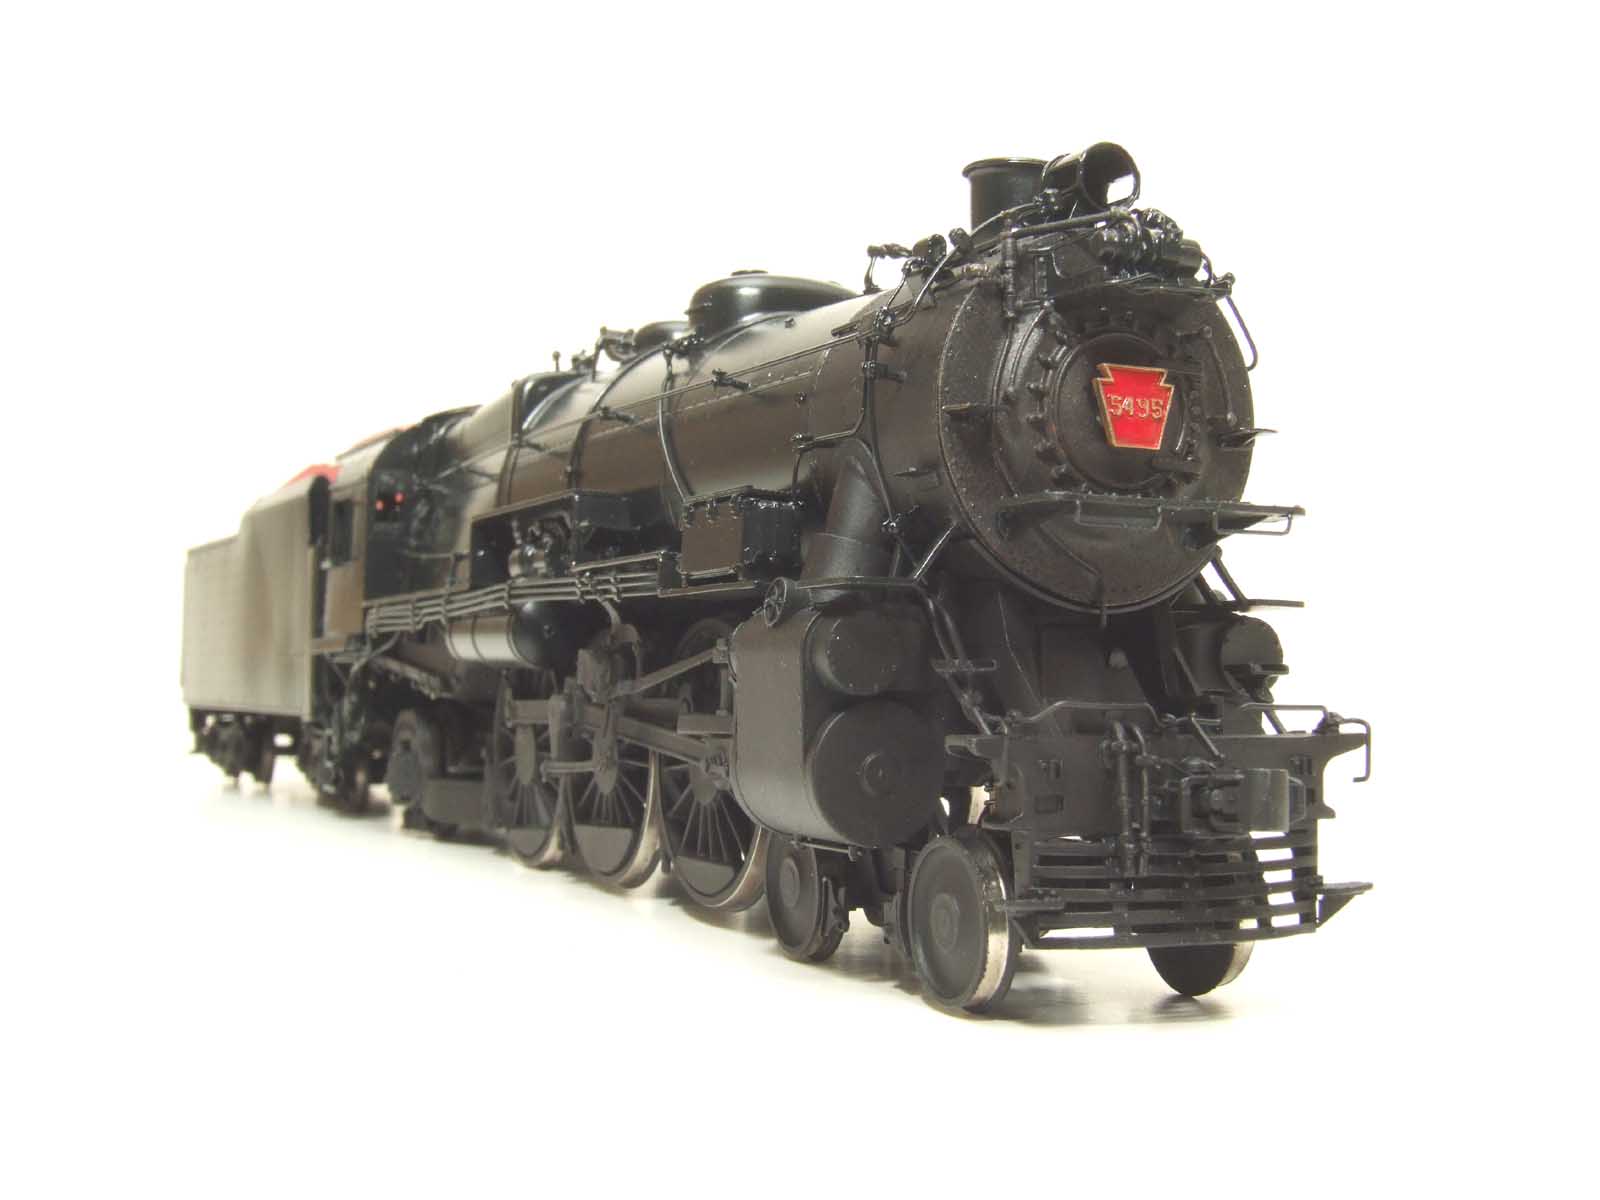
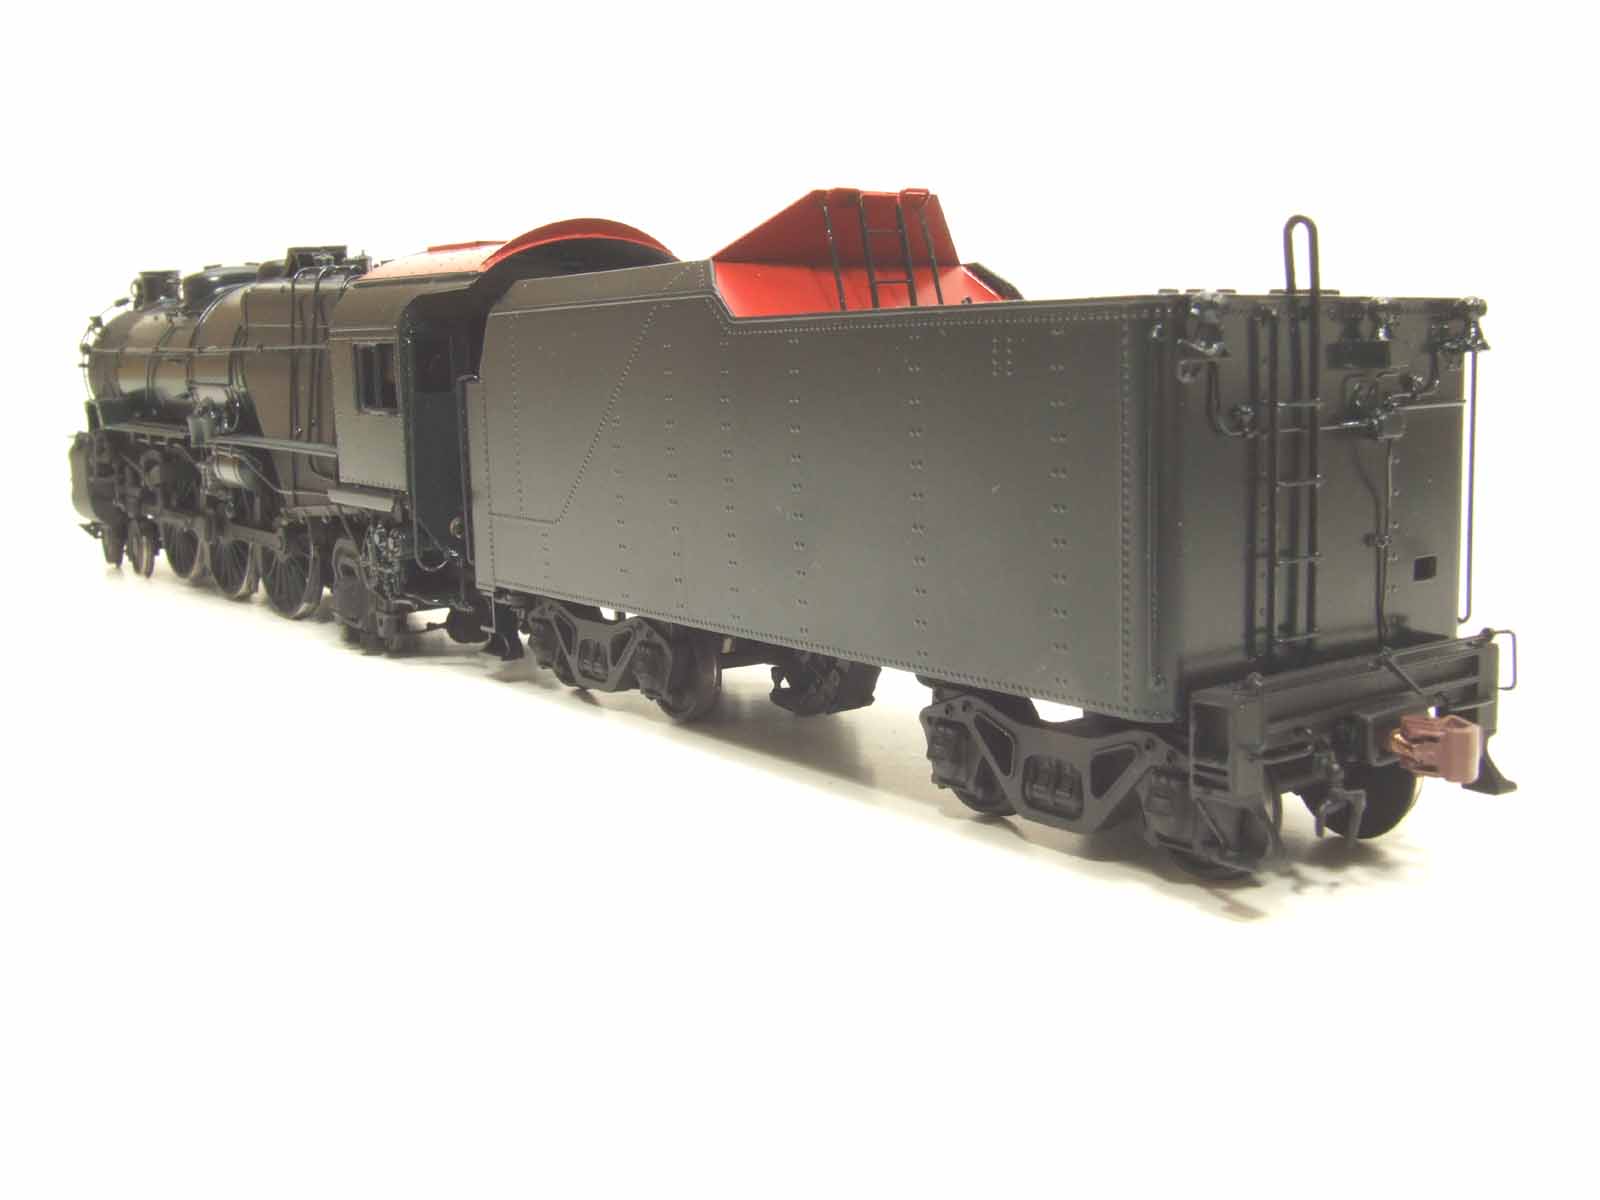
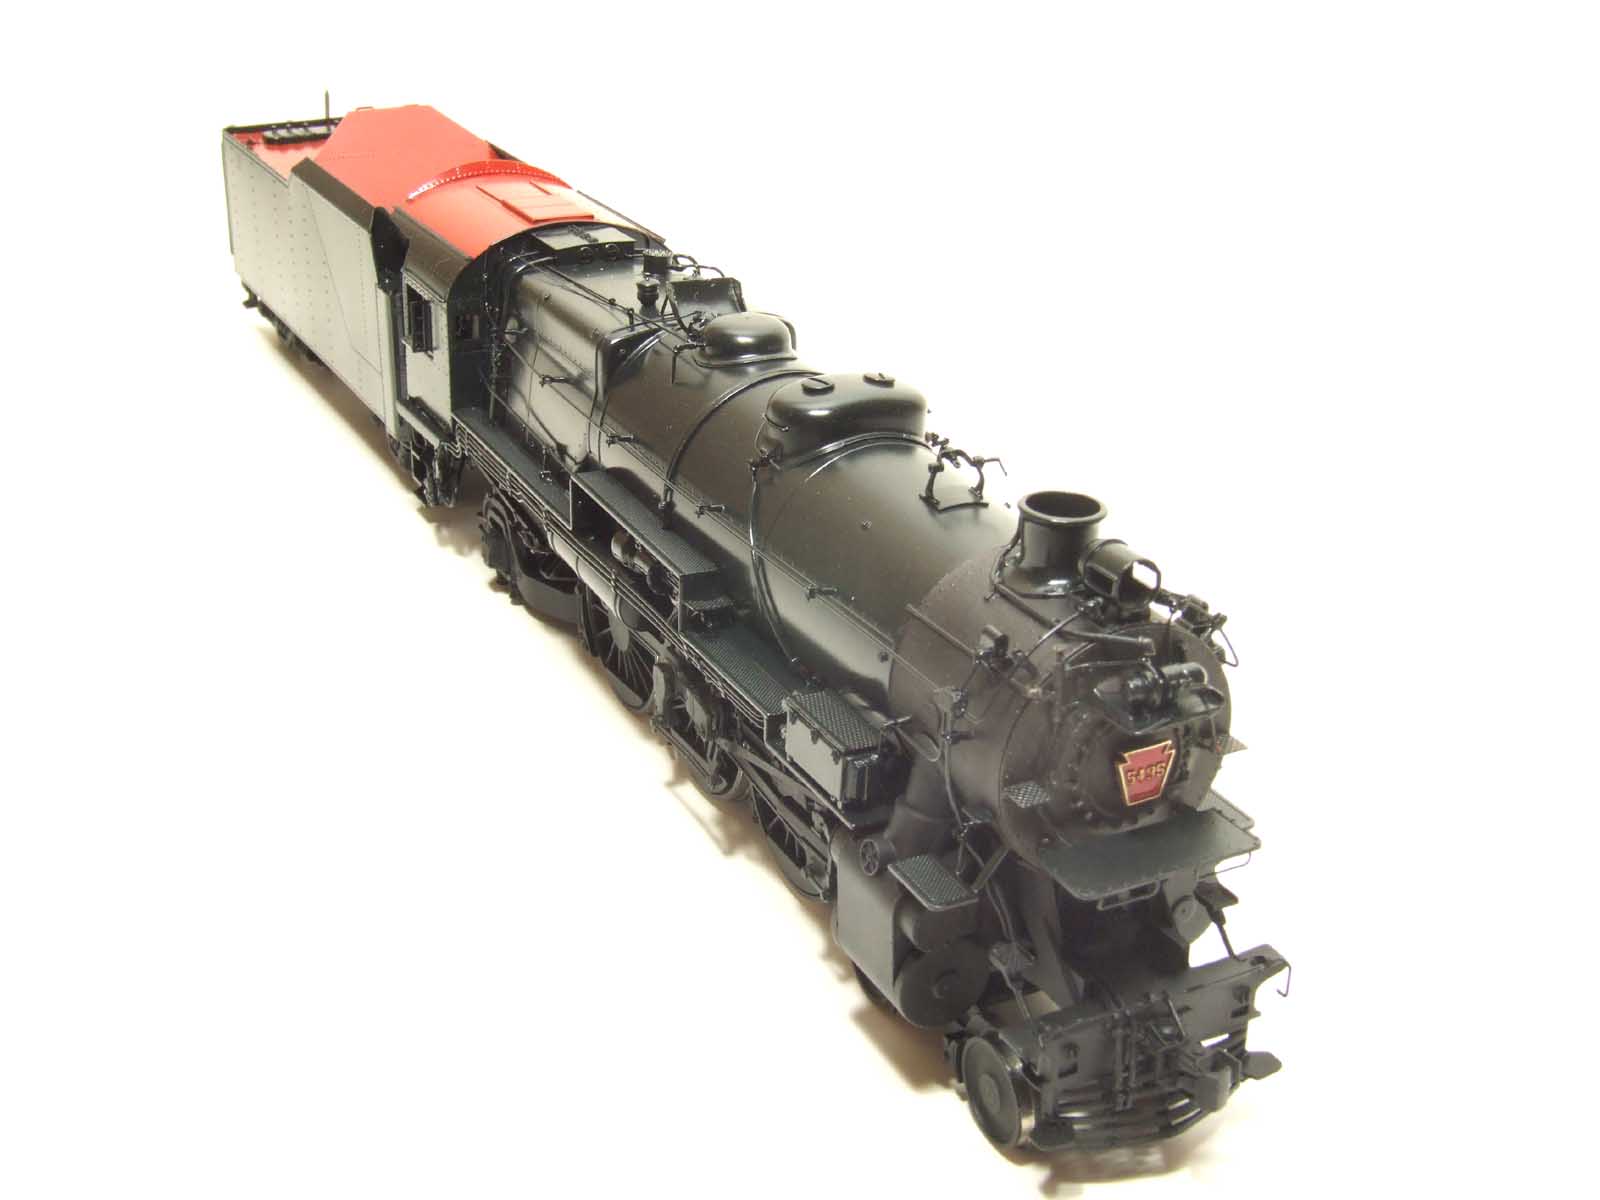
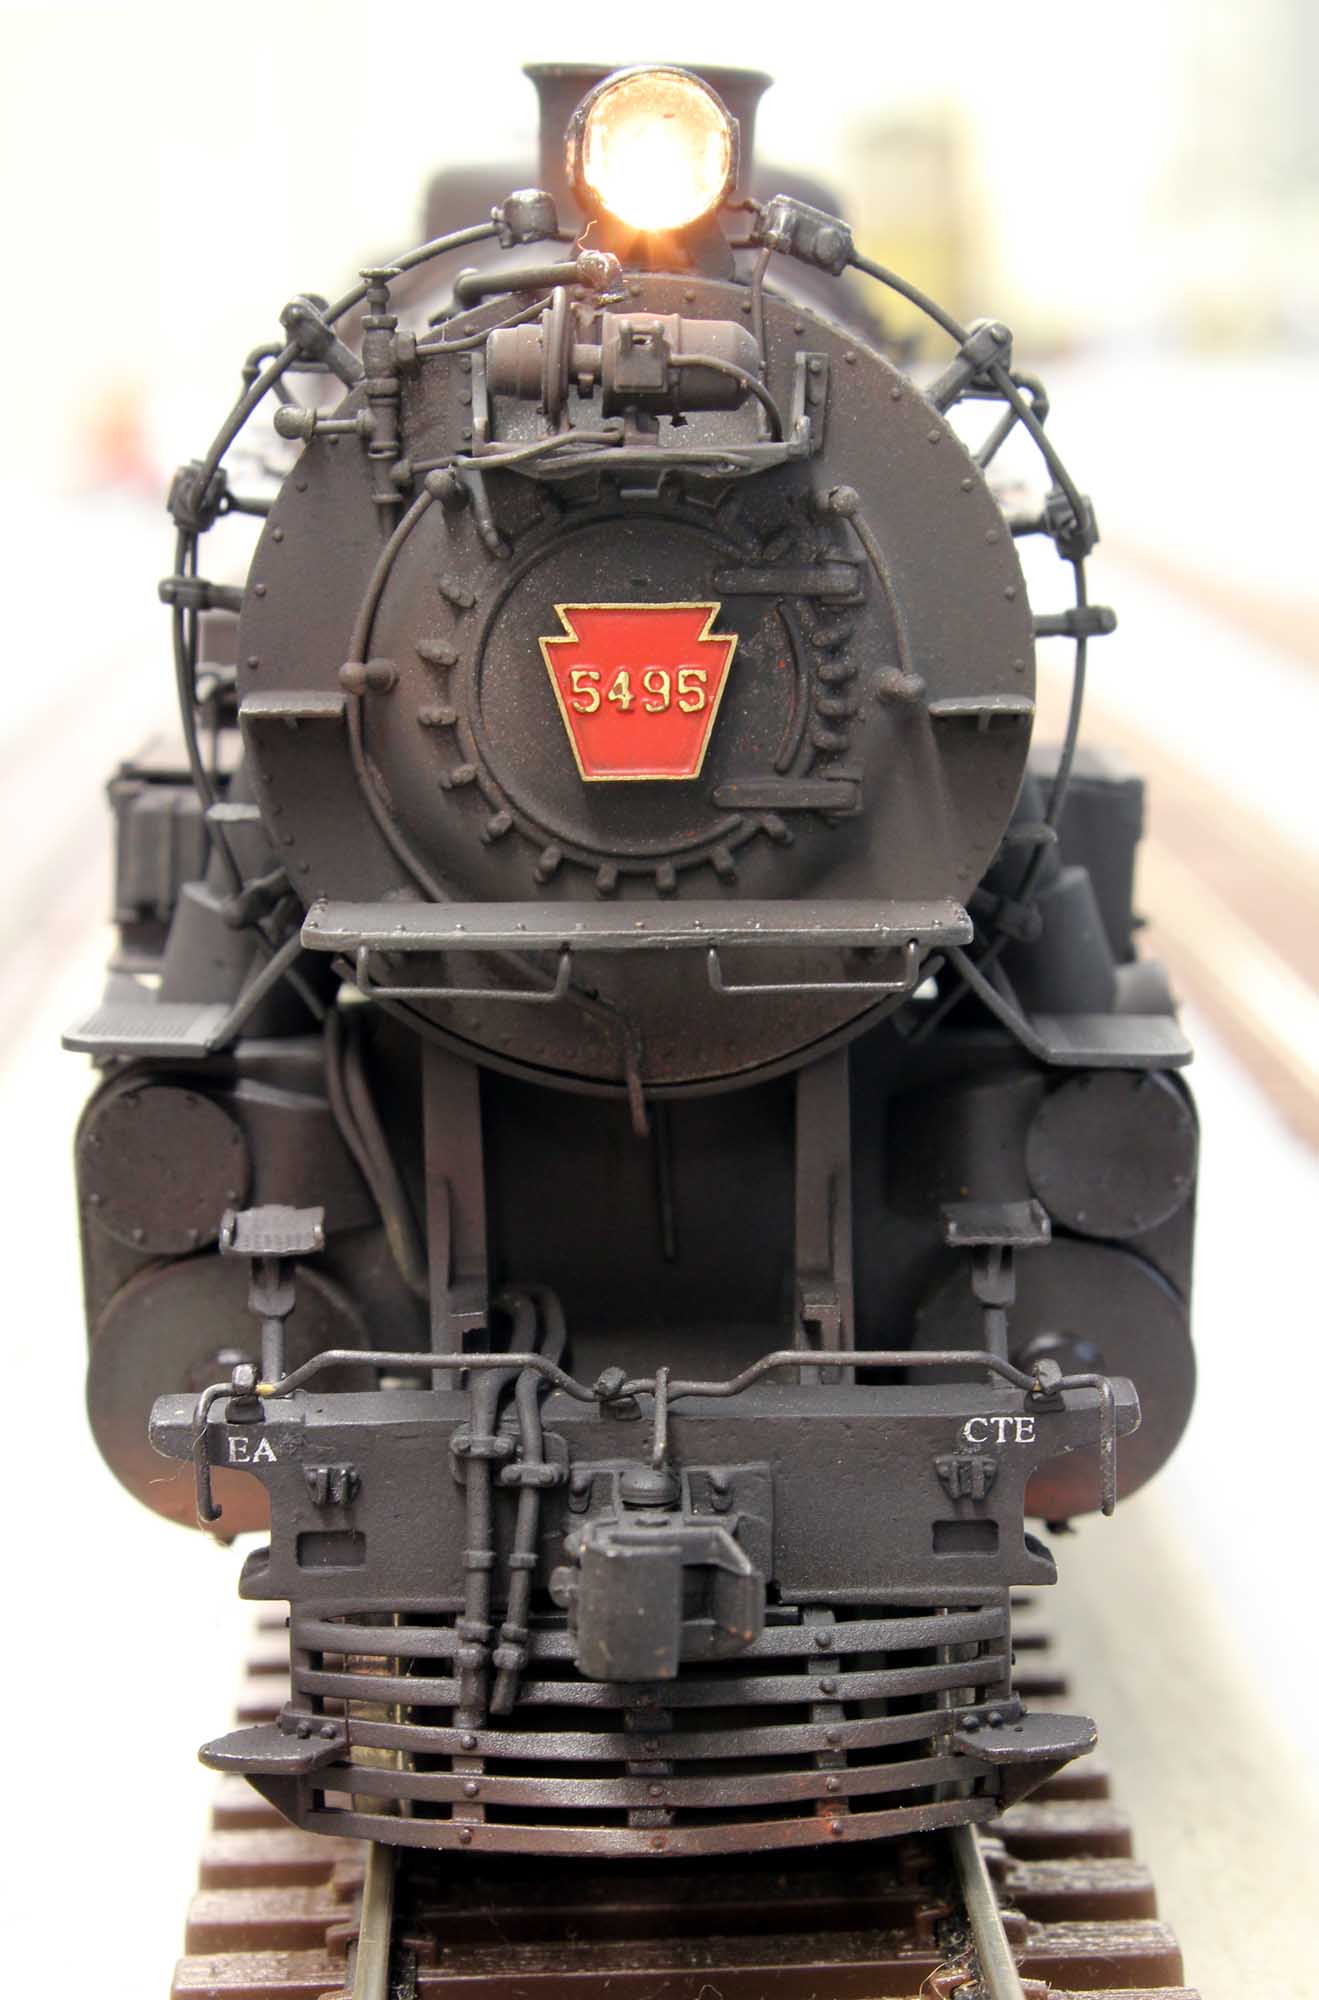
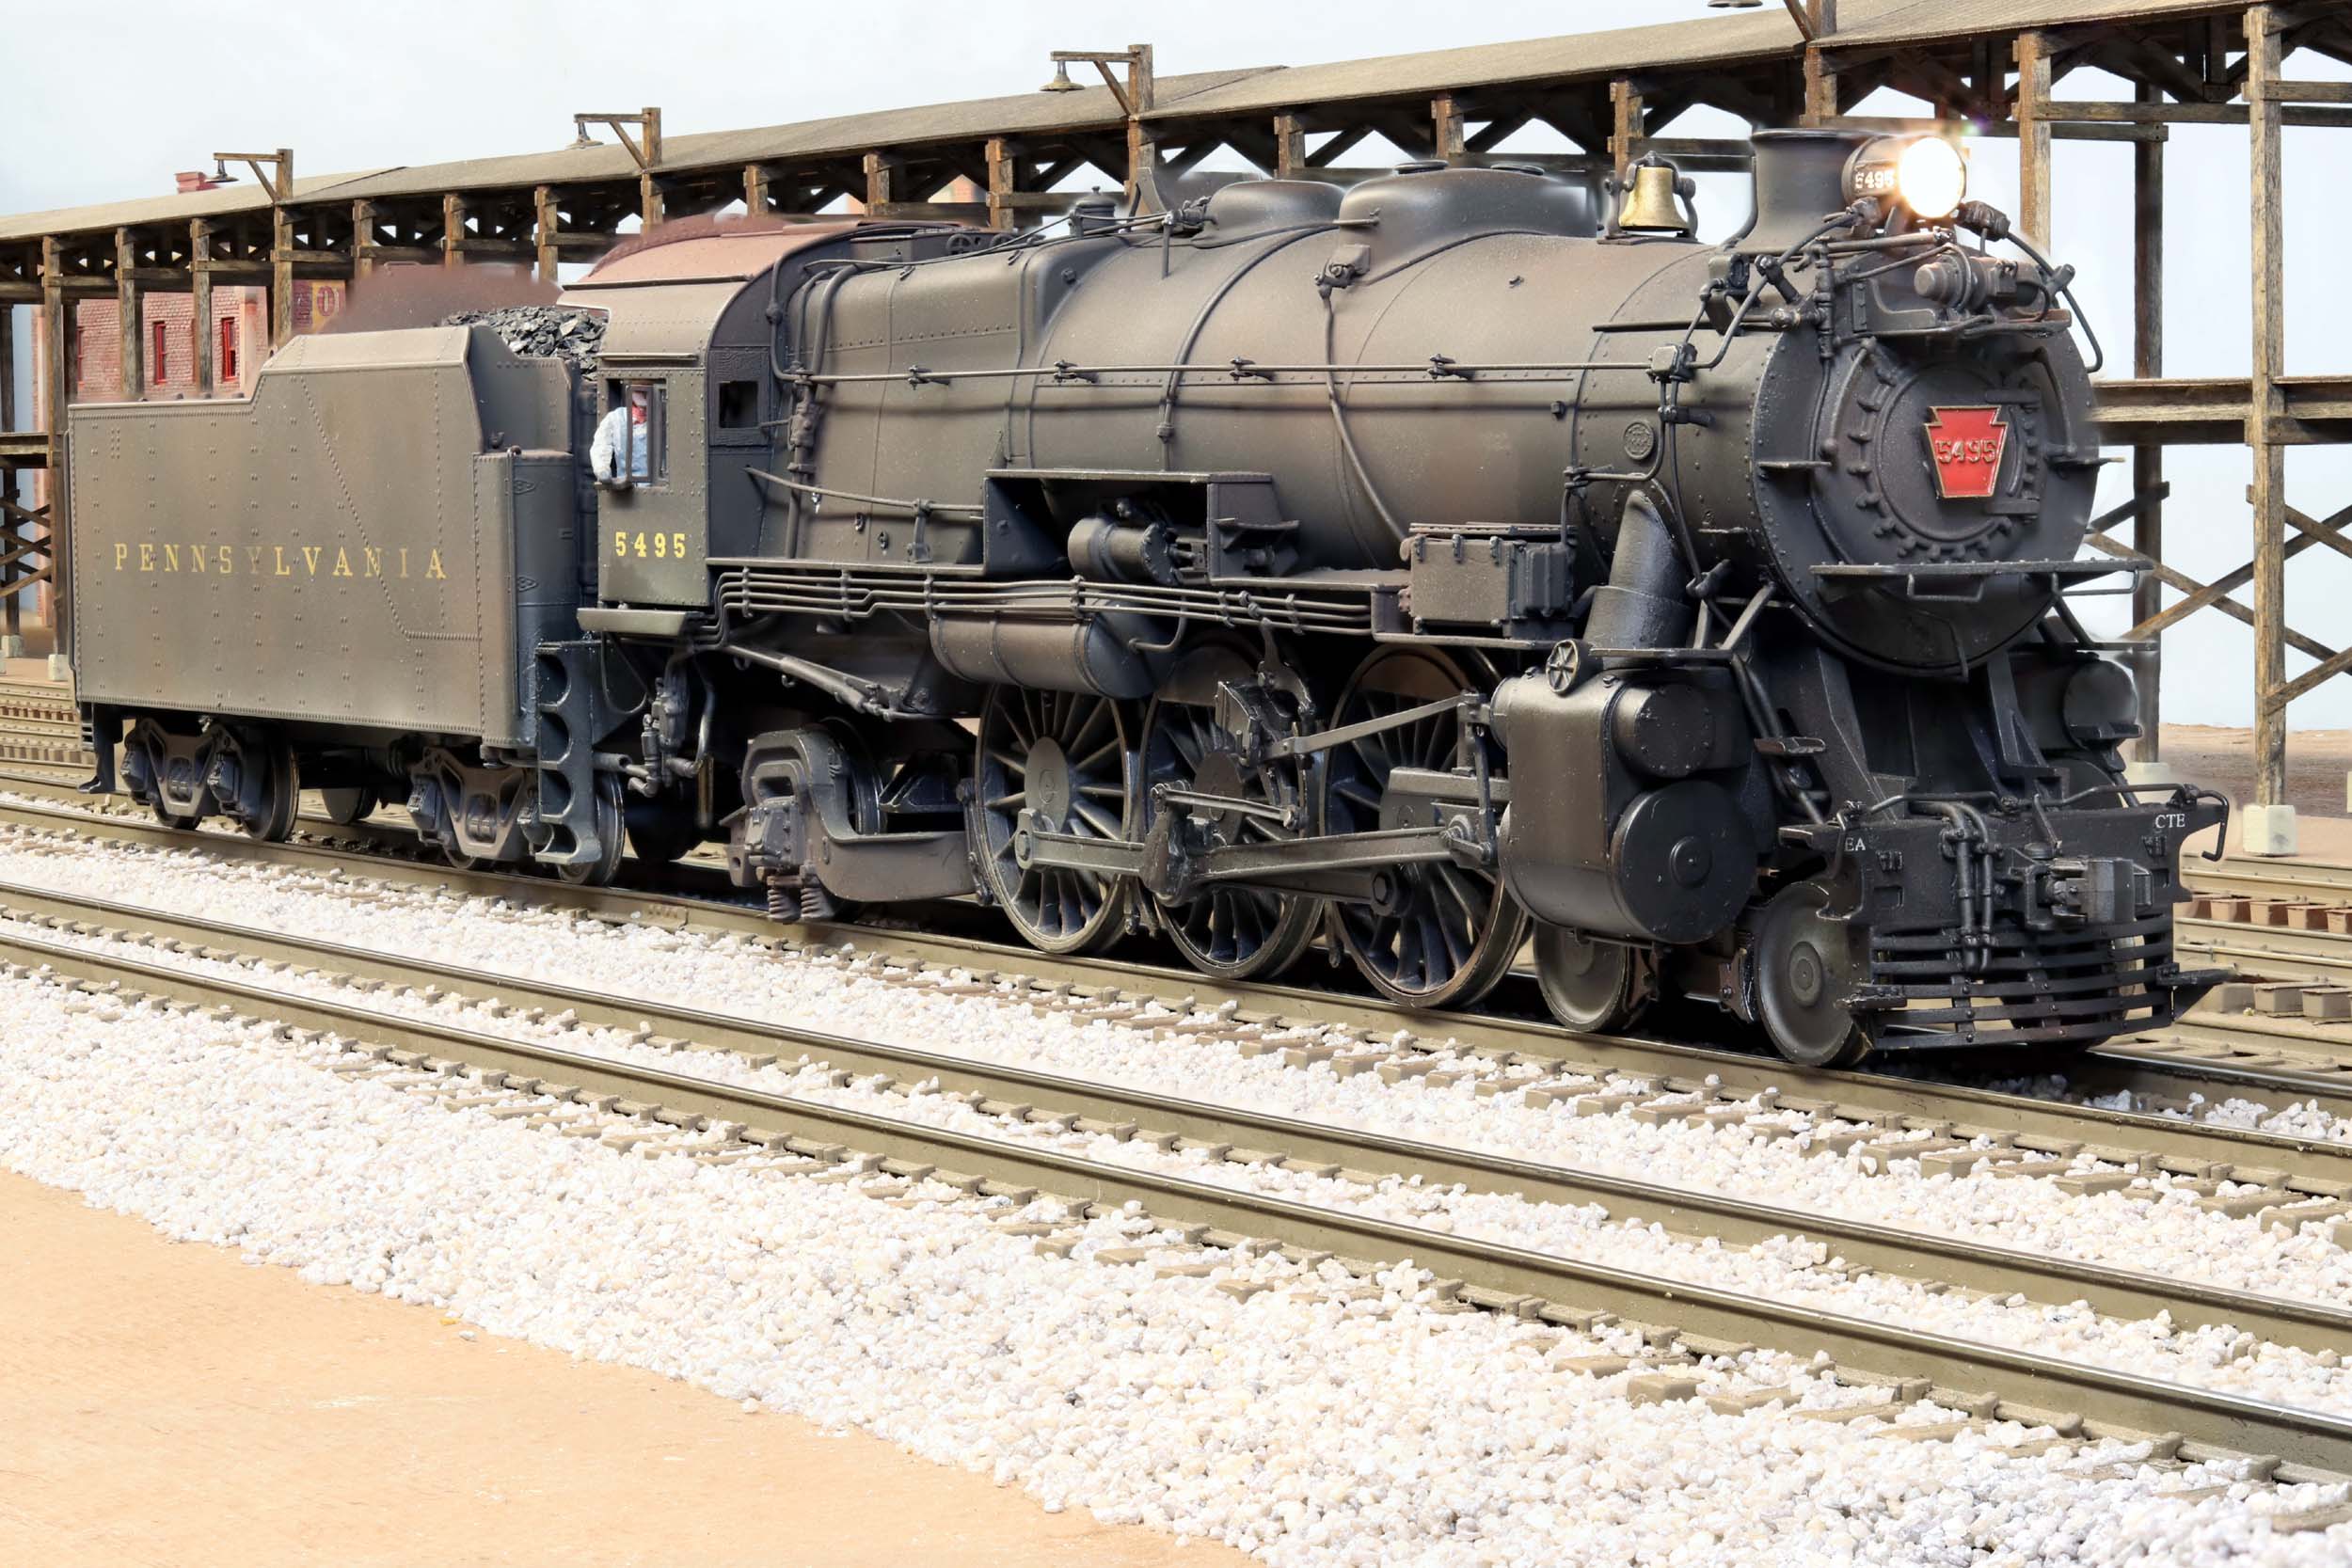
The Locomotive detailing is DONE!
These current 5495 model photos were taken on 2-26-09
Click on these 3 photos to make them larger.

On the left is my first K4 I
painted in 1995 to represent 5495 as built. It is
completely without any modifications from Omnicon. I soon realized that I liked
the more modern era better and this loco had to go. I traded it at some point
for a bare brass K4 which lead me to this modernization project. Hopefully when
the K4 at left is compared the prototype and my current model, the many
modifications I made with new parts added are obvious. I don’t know how many
hours I have in this so far, but it is by far my most involved project to date.
There are only a few castings that have NOT been moved or replaced. It is
absolutely the only S Scale PRR K4 locomotive with the unique “Tombstone Marker
Lights”. 1 of my L1 1788 also has the tombstone marker lights.
I thought about it but decided to NOT recreate the large DENT
that is in the sand dome! See the middle photo.


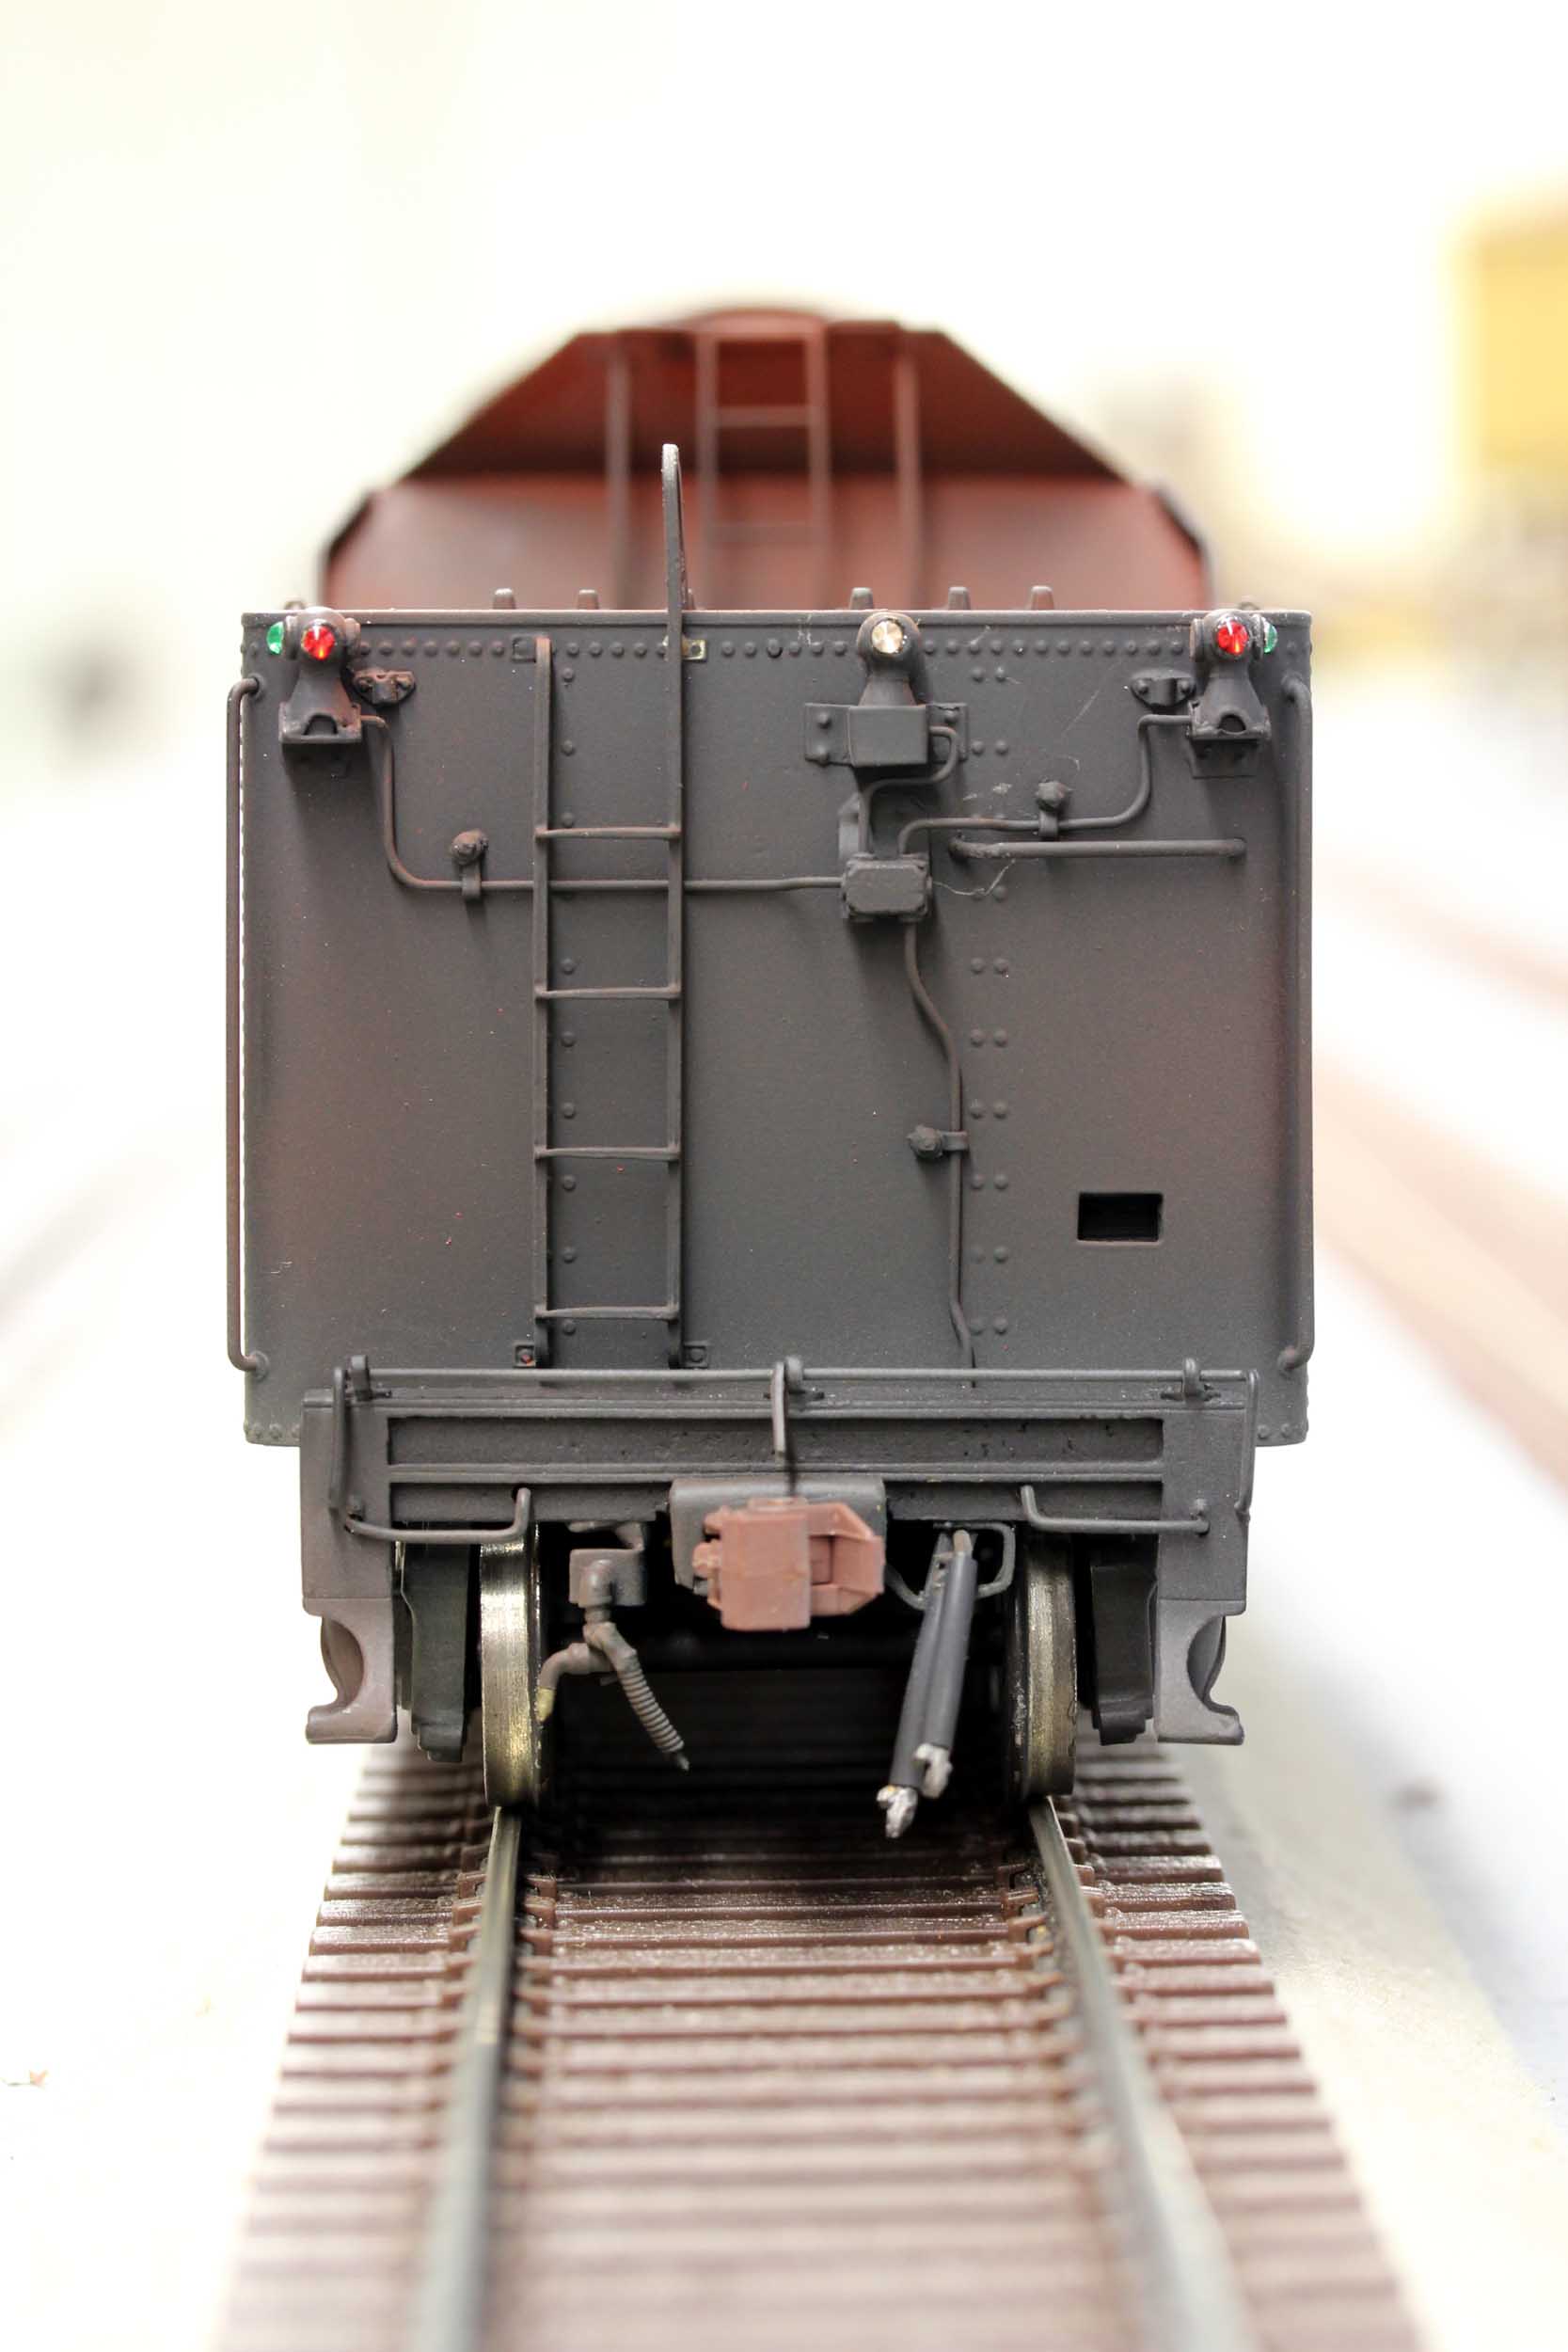
Note the water injector
feeder “hose” in the middle bottom. I have filled the holes for the marker
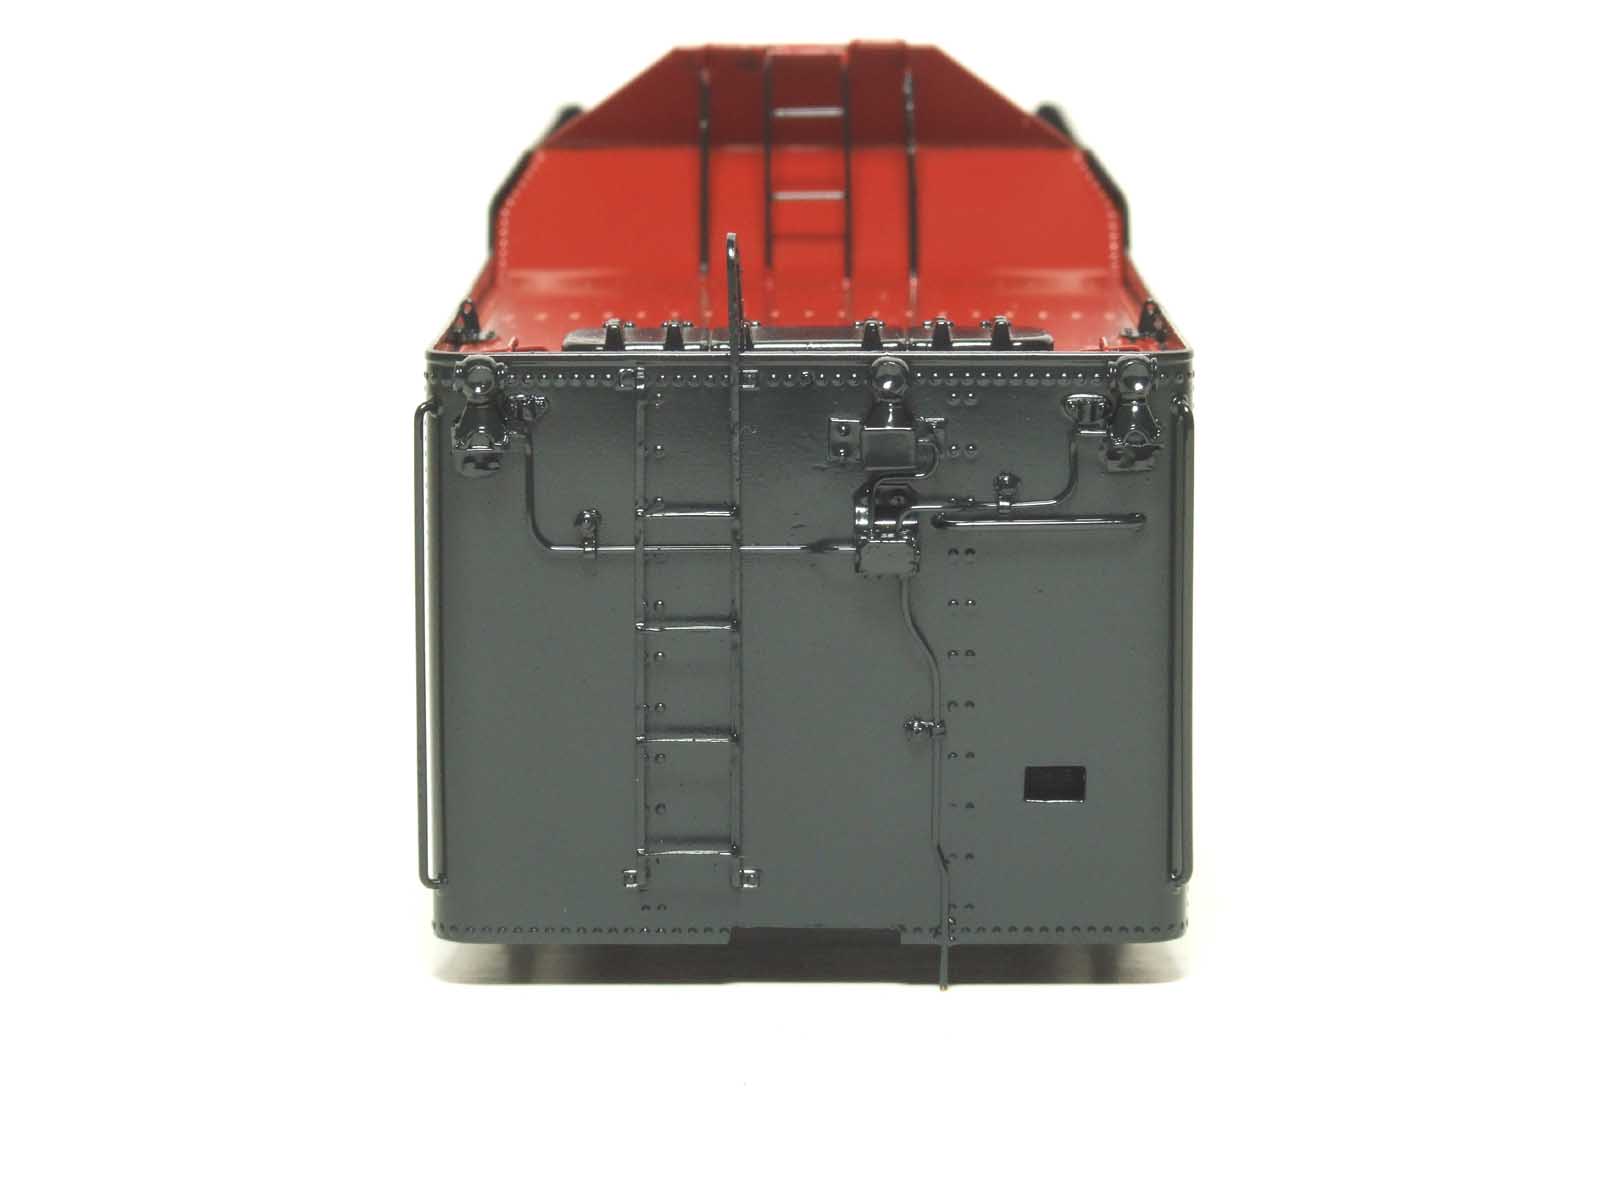
lights on the deck on the right. I have to move the tender marker lights to the
rear wall to complete the locomotive modernization.
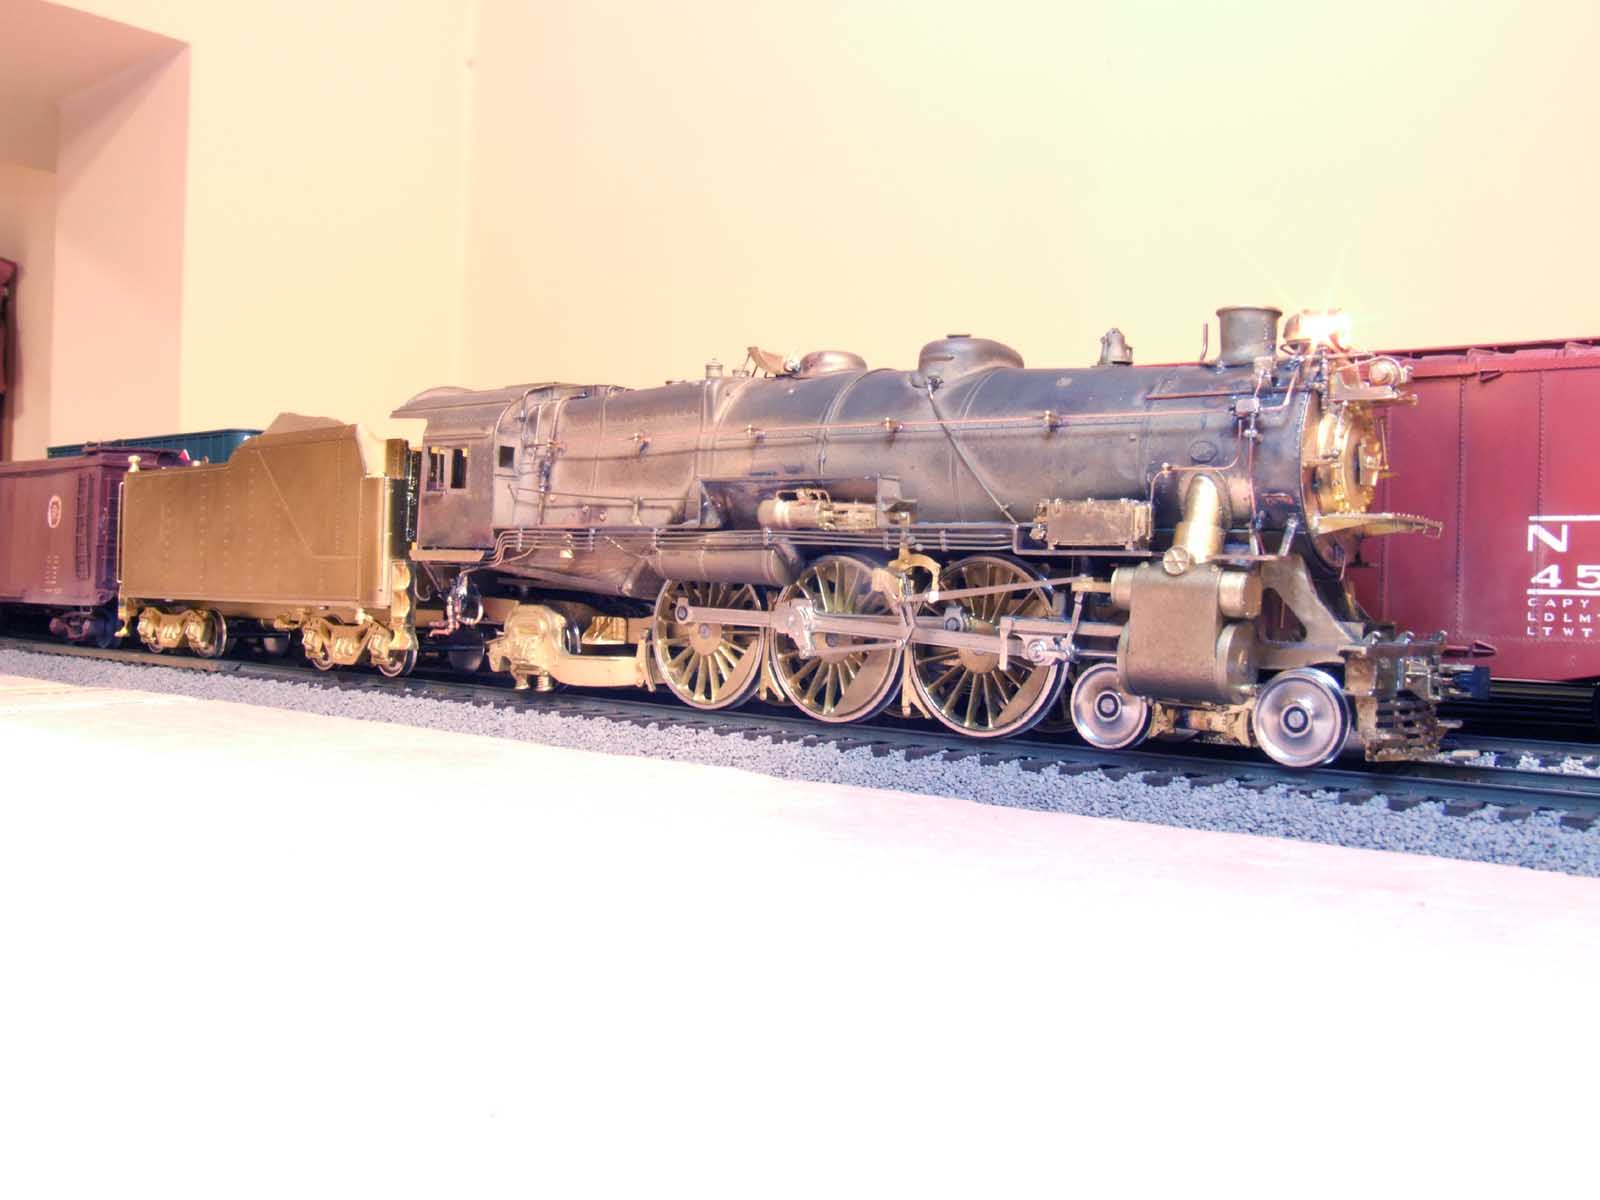
1-30-10 Update
I found and fixed the intermittent shorts. It runs very well now.
Click the below photo for a short video of 5495 running on my
modular test loop.
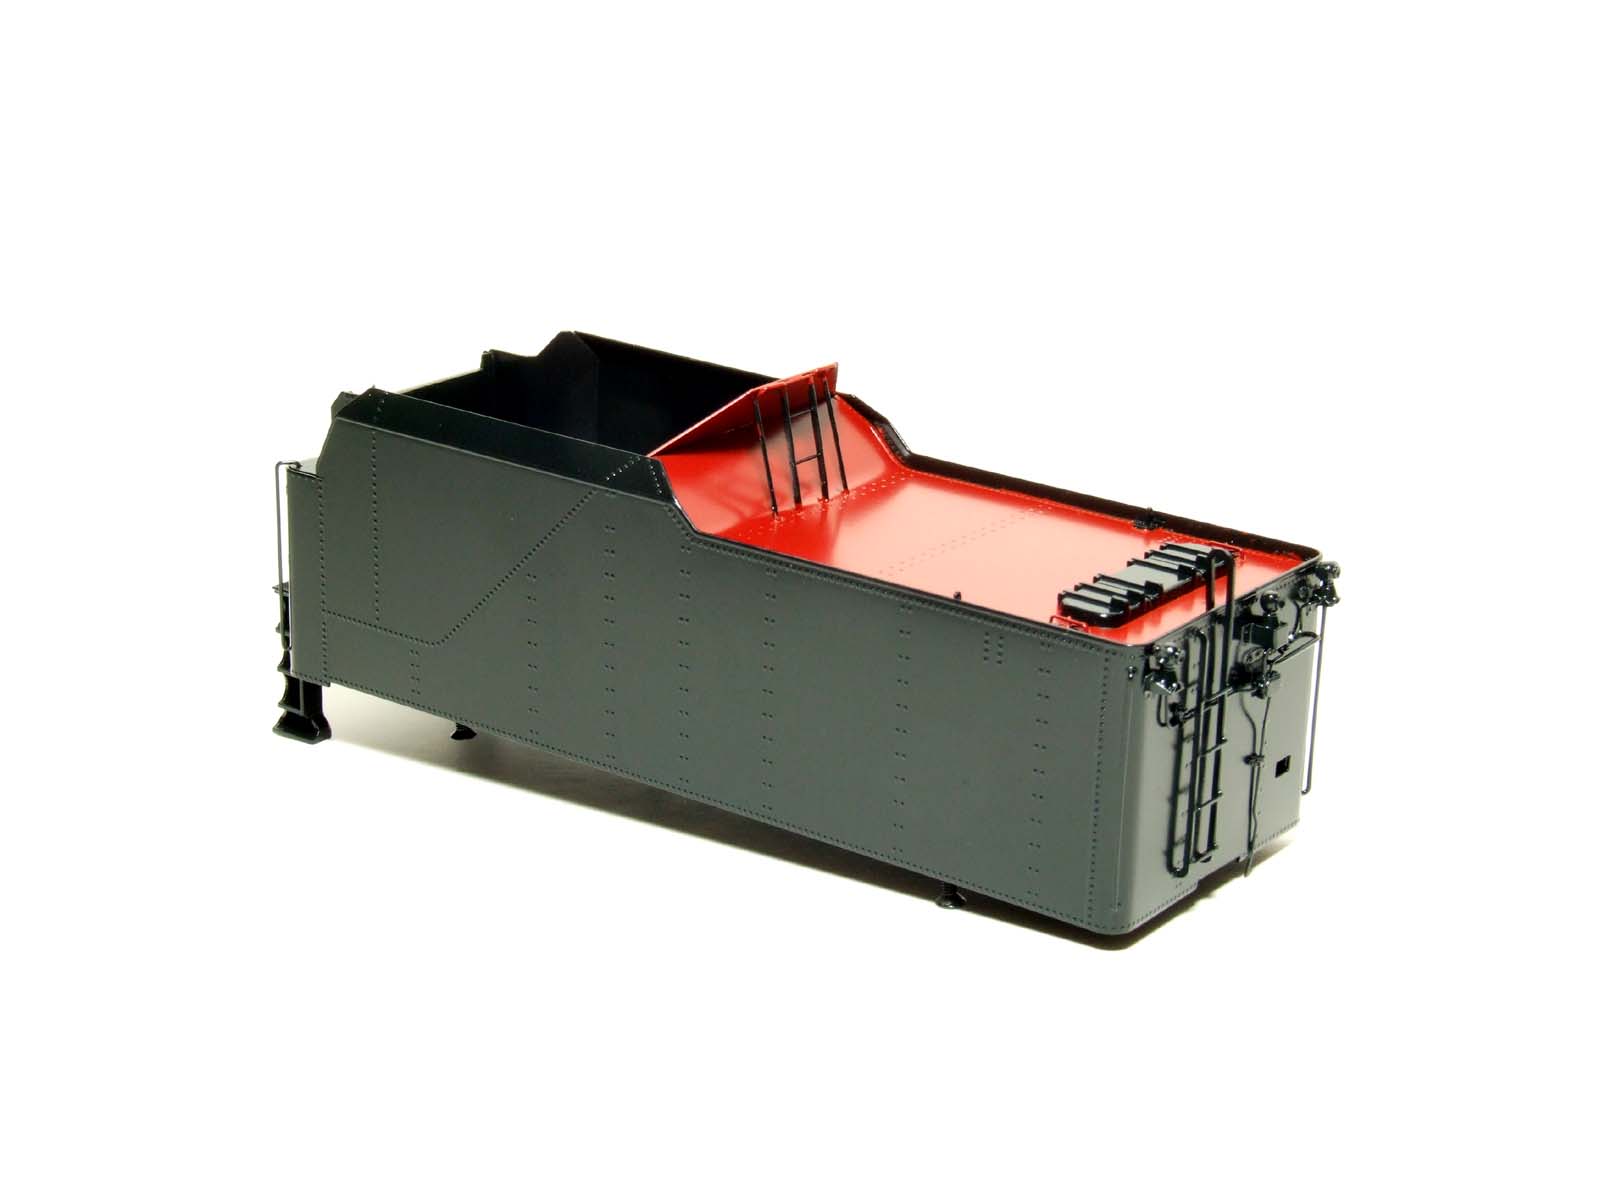
3-13-10 Update
In preparation for painting some parts
made their trip through the blast booth. Blasting is by far the best way to
clean brass just before painting.

3-21-10 Update
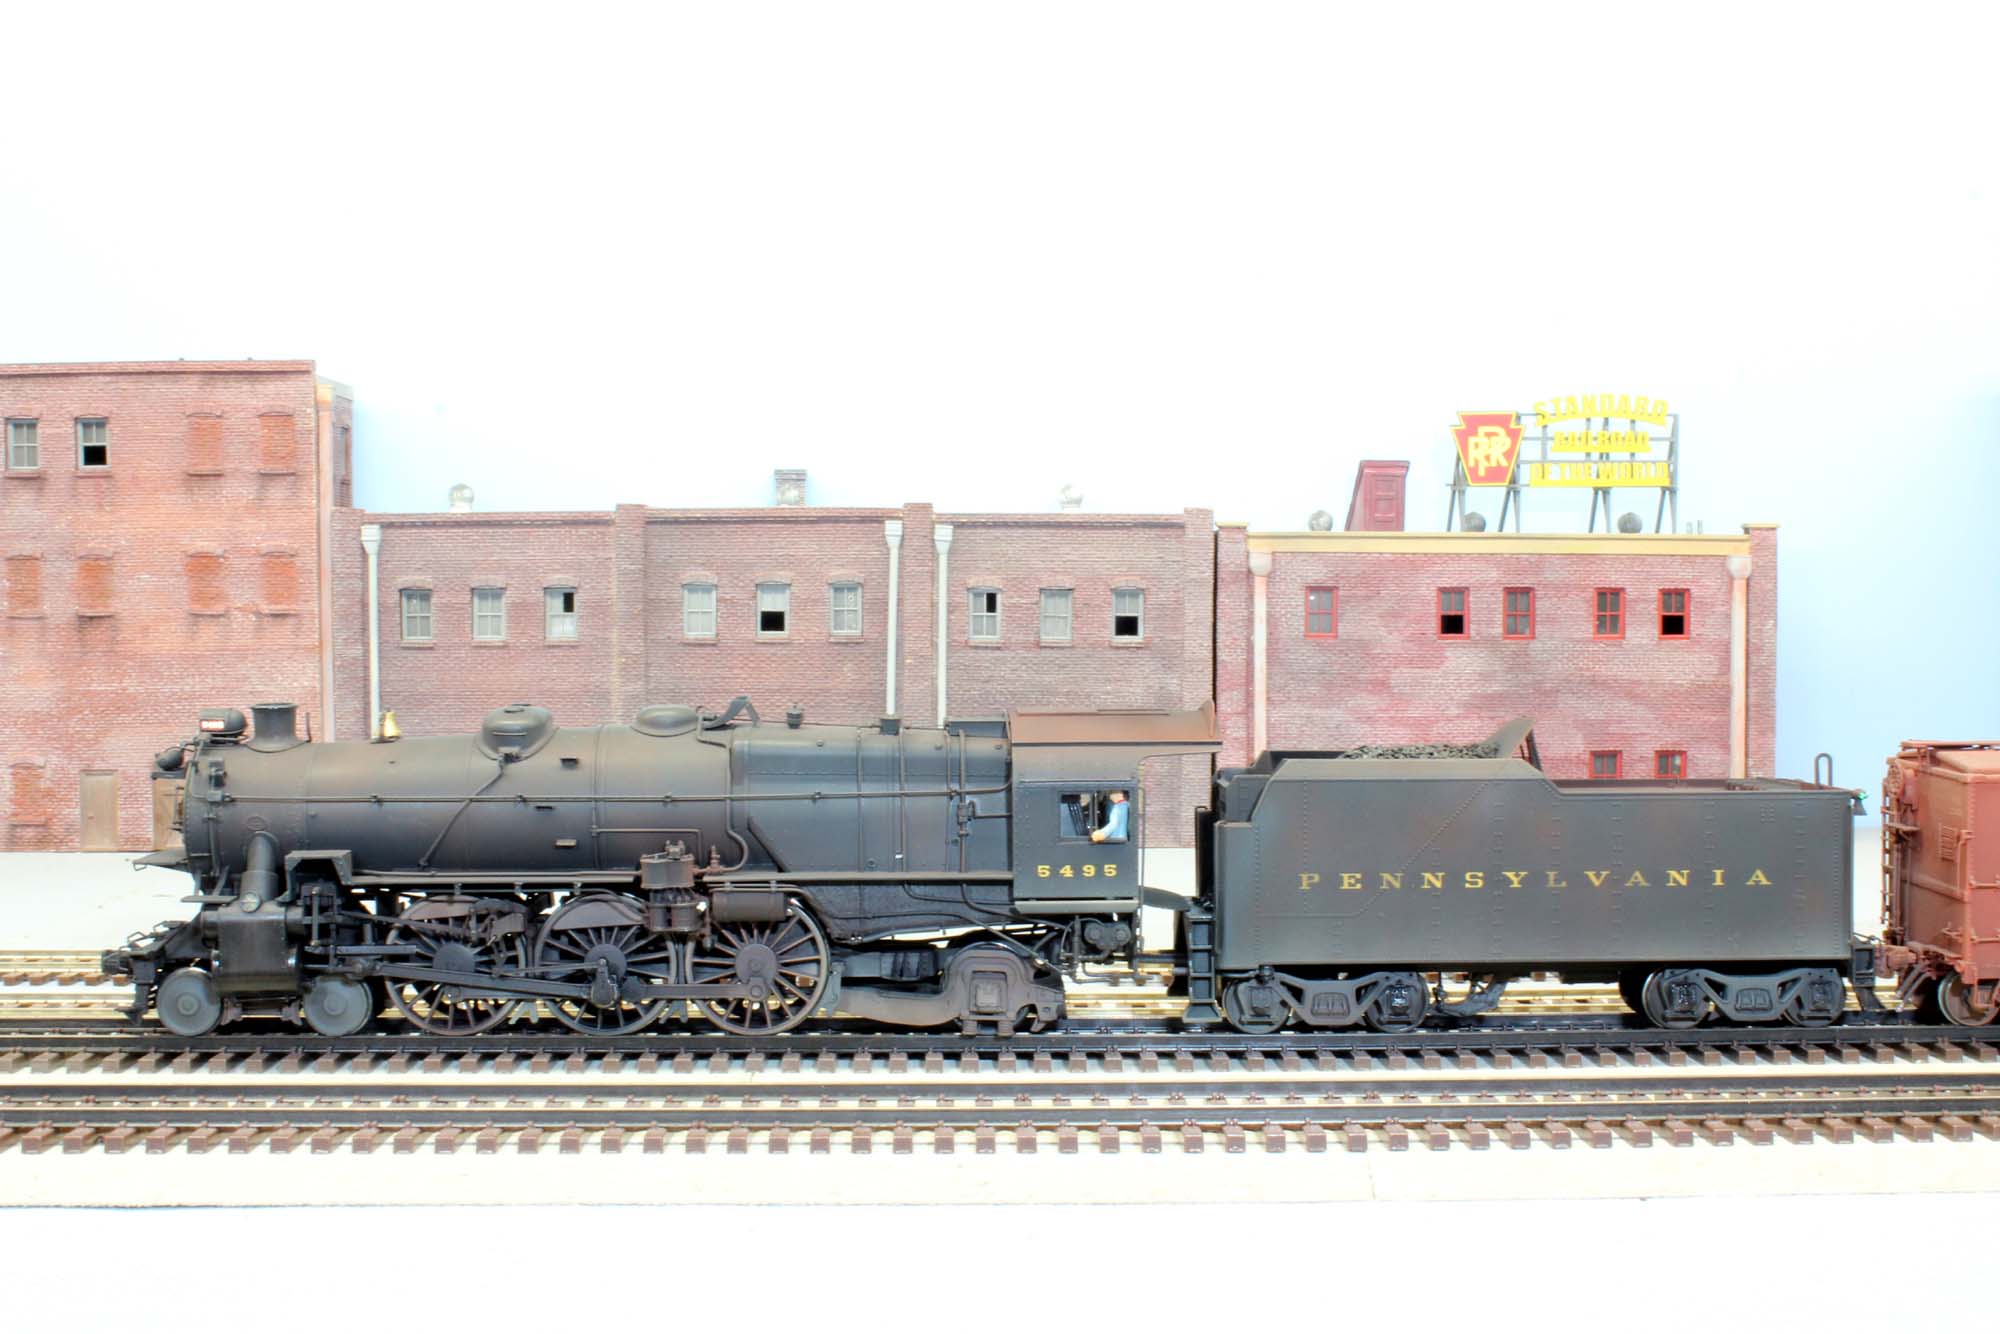
After almost 4 years under construction 5495 finally has some
paint on it!
I temporarily assembled 5945 to get a look at my 4 years of work.
It took my breath away!
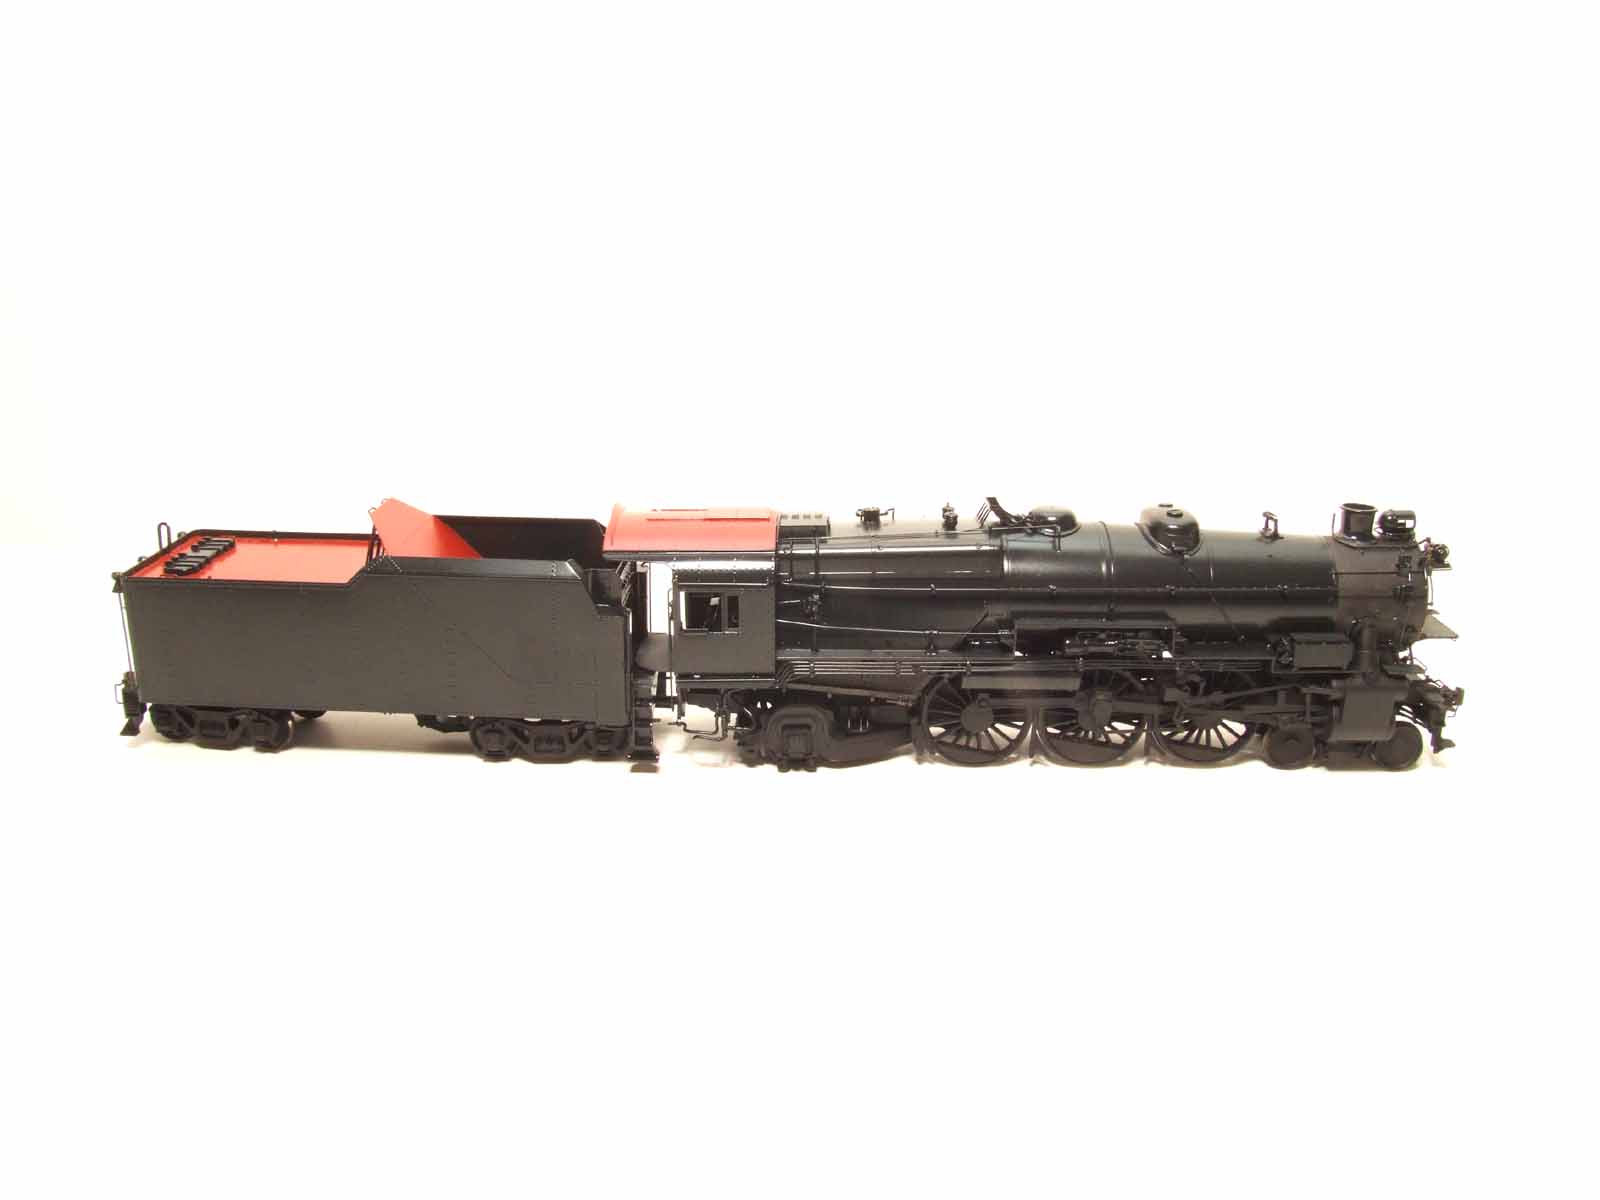
Photos Taken 11-6-12


Added 6-16-13
The Summer
2013 Issue of the PRR T&HS Keystone
featured my Wildwood painting on the cover. I wrote an article on the
progression of making 5495, my interests in the PRR and the especially the
PRSL.

The rebirth of K4 5495
Added 7-1-16
A
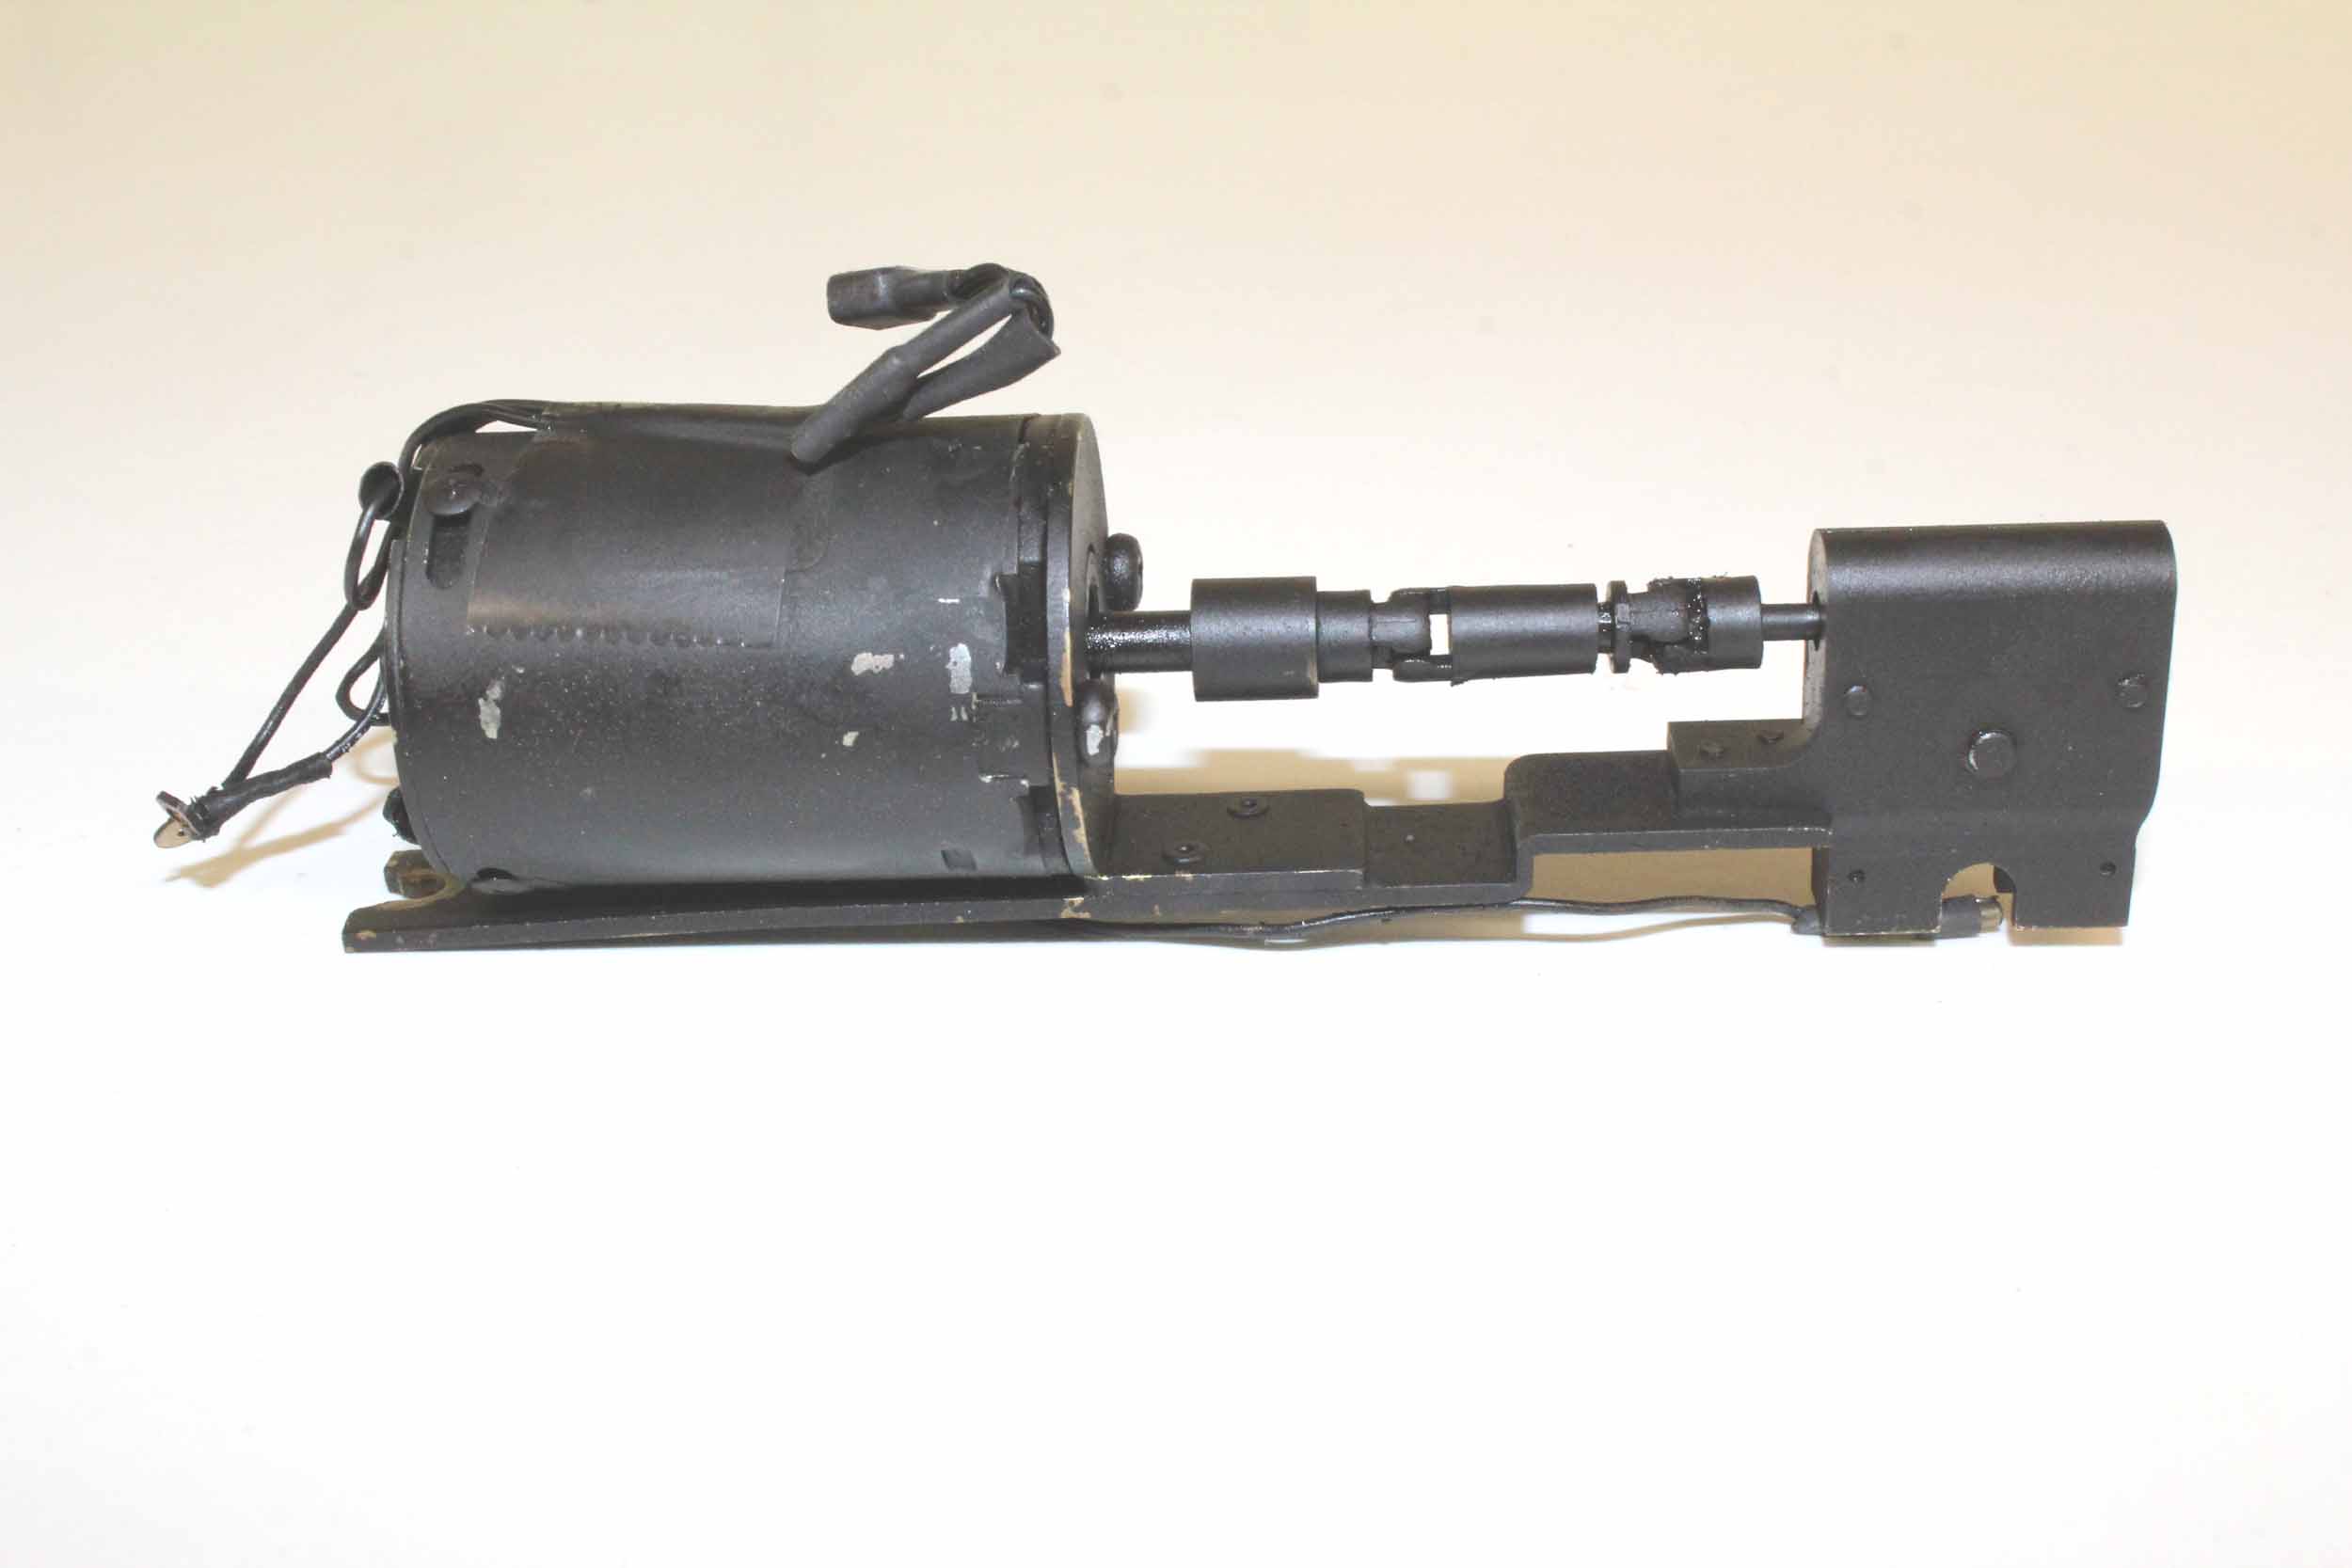
brutal problem came to light within a few months of finishing 5495 in 2012. The
Samhongsa free rolling gearbox was NOT designed well, and was by far not
capable of handling the stresses of running S Scale trains. Locomotives sitting
in boxes for 20+ years do NOT break until they are run. It was very deceiving
because they run very well on flat layouts like mine. As seen below there is a
brass worm gear contacting a plastic gear which contacts the 2 small gears on
the rocker arm. Ironically the brass worm gear was
stripping the teeth in the center of the worm clean - TWICE - in a very short time with moderate running on my flat layout.
I robbed a gearbox from another K4 for the first time it stripped out, and was
lucky to get a replacement but that did not fix the problem forever.

To
further complicate things there was no new gearbox available to swap out and
replace the CRAP Samhongsa gearbox, without a complete
disassembly and changing the axle gear. Others had done it. I was not so
confident of getting it all apart, and back together
again with perfect quartering.
So,
K4 5495 was boxed for years – AGAIN – until a fix could be made. It HAD to be
made as a drop on gearbox with no other modifications needed. Besides there was
other Omnicon locos with this same CRAP
Samhongsa gearbox. There was plenty of room for me killing multiple locomotives
by swapping axle gears and getting the quartering wrong. It had to be a simple
fix. It was my also my very strong contention that there was nothing wrong with
the original axle gear. It should not HAVE to be removed. Making a gearbox to
FIT the original axle gear was the way to go.
My
friend Brian Jackson came to the rescue with designing and machining a complete
new drop on replacement. It is
a machined work of art.
The time and money Brian spent on this project is just obscene. He has a
massive CNC milling machine with amazing accuracy. It is like using a nuclear
missile for swatting a fly but it got the job done. I cannot thank him enough
for making this happen. No one else in the world would have done it. Northwest
Shortline is also to be commended for their ongoing tech help with Brian in the
design process, and also for making the gears.
All
of my Omnicon steam locos with the original free rolling gearbox would become
disabled eventually if I ran them and did not have this new gearbox. I am
somewhat going to miss the free rolling aspect for moving locos by hand. But at
least I can run them now without the stress of thinking I was doing damage to
the gears.
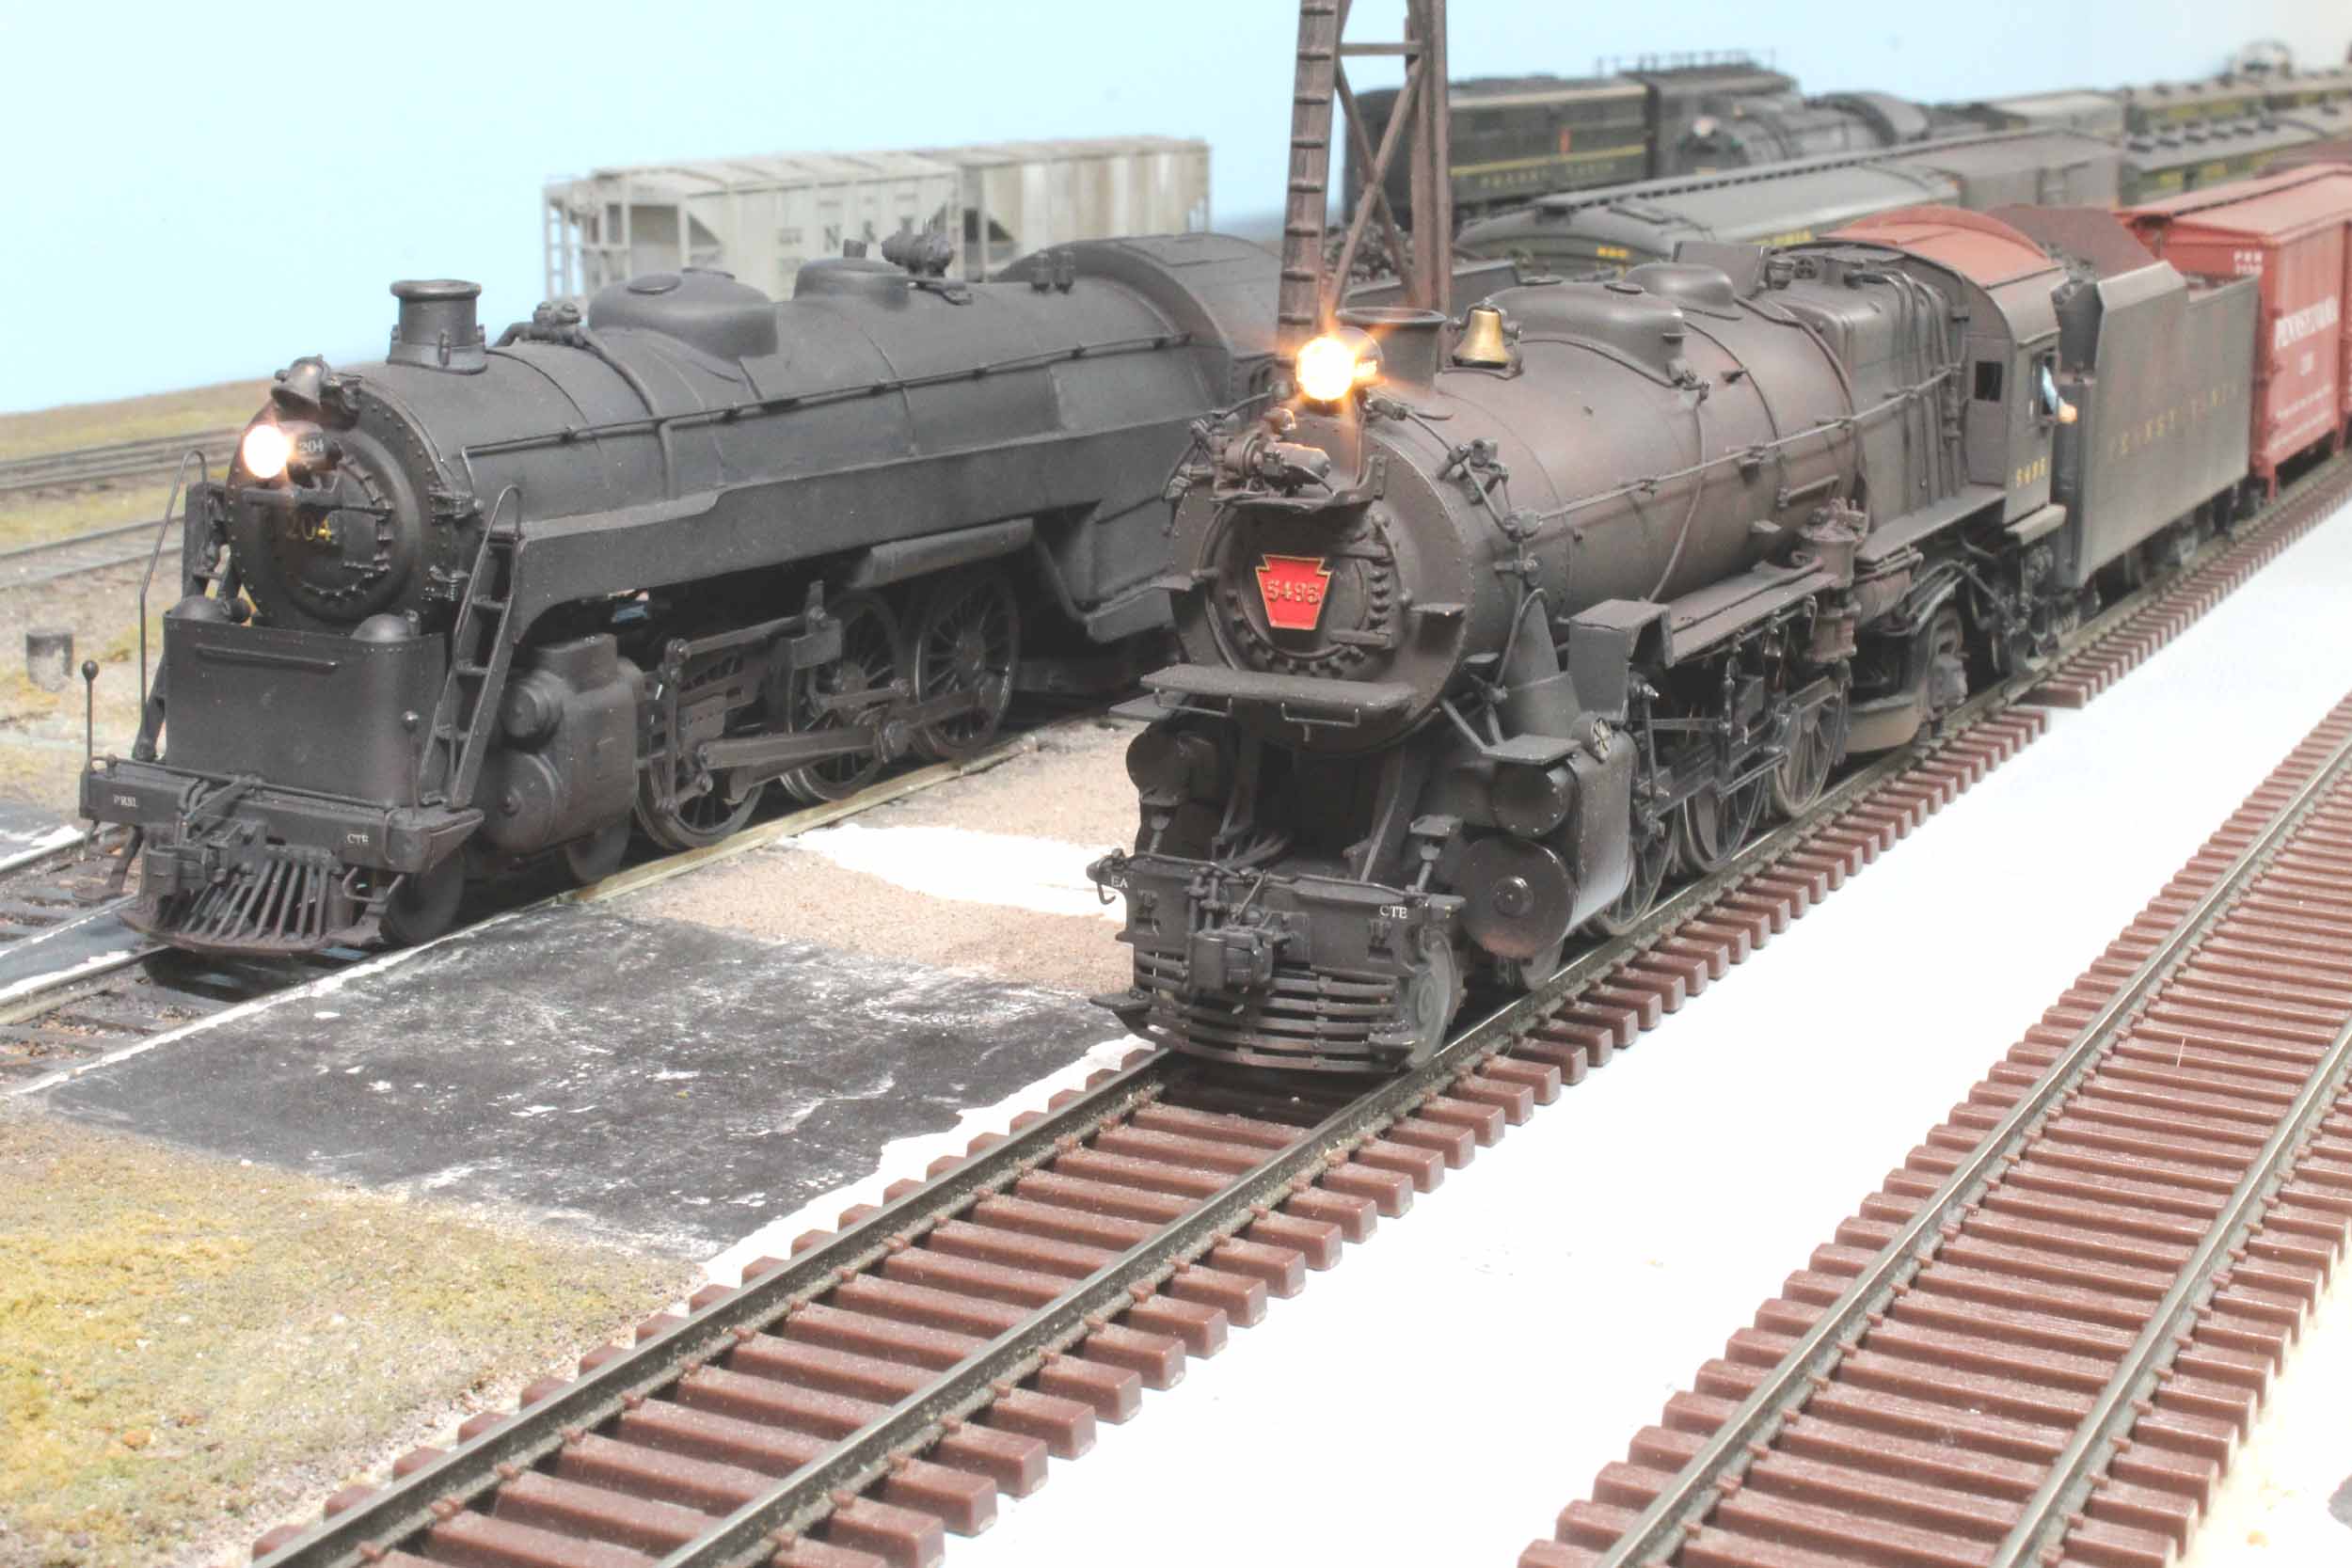
The machined work of ART


Posing with Reading G-1sb 204
The
new surface mount LED headlight installed 7-2-16
A
new portrait on 7-9-16
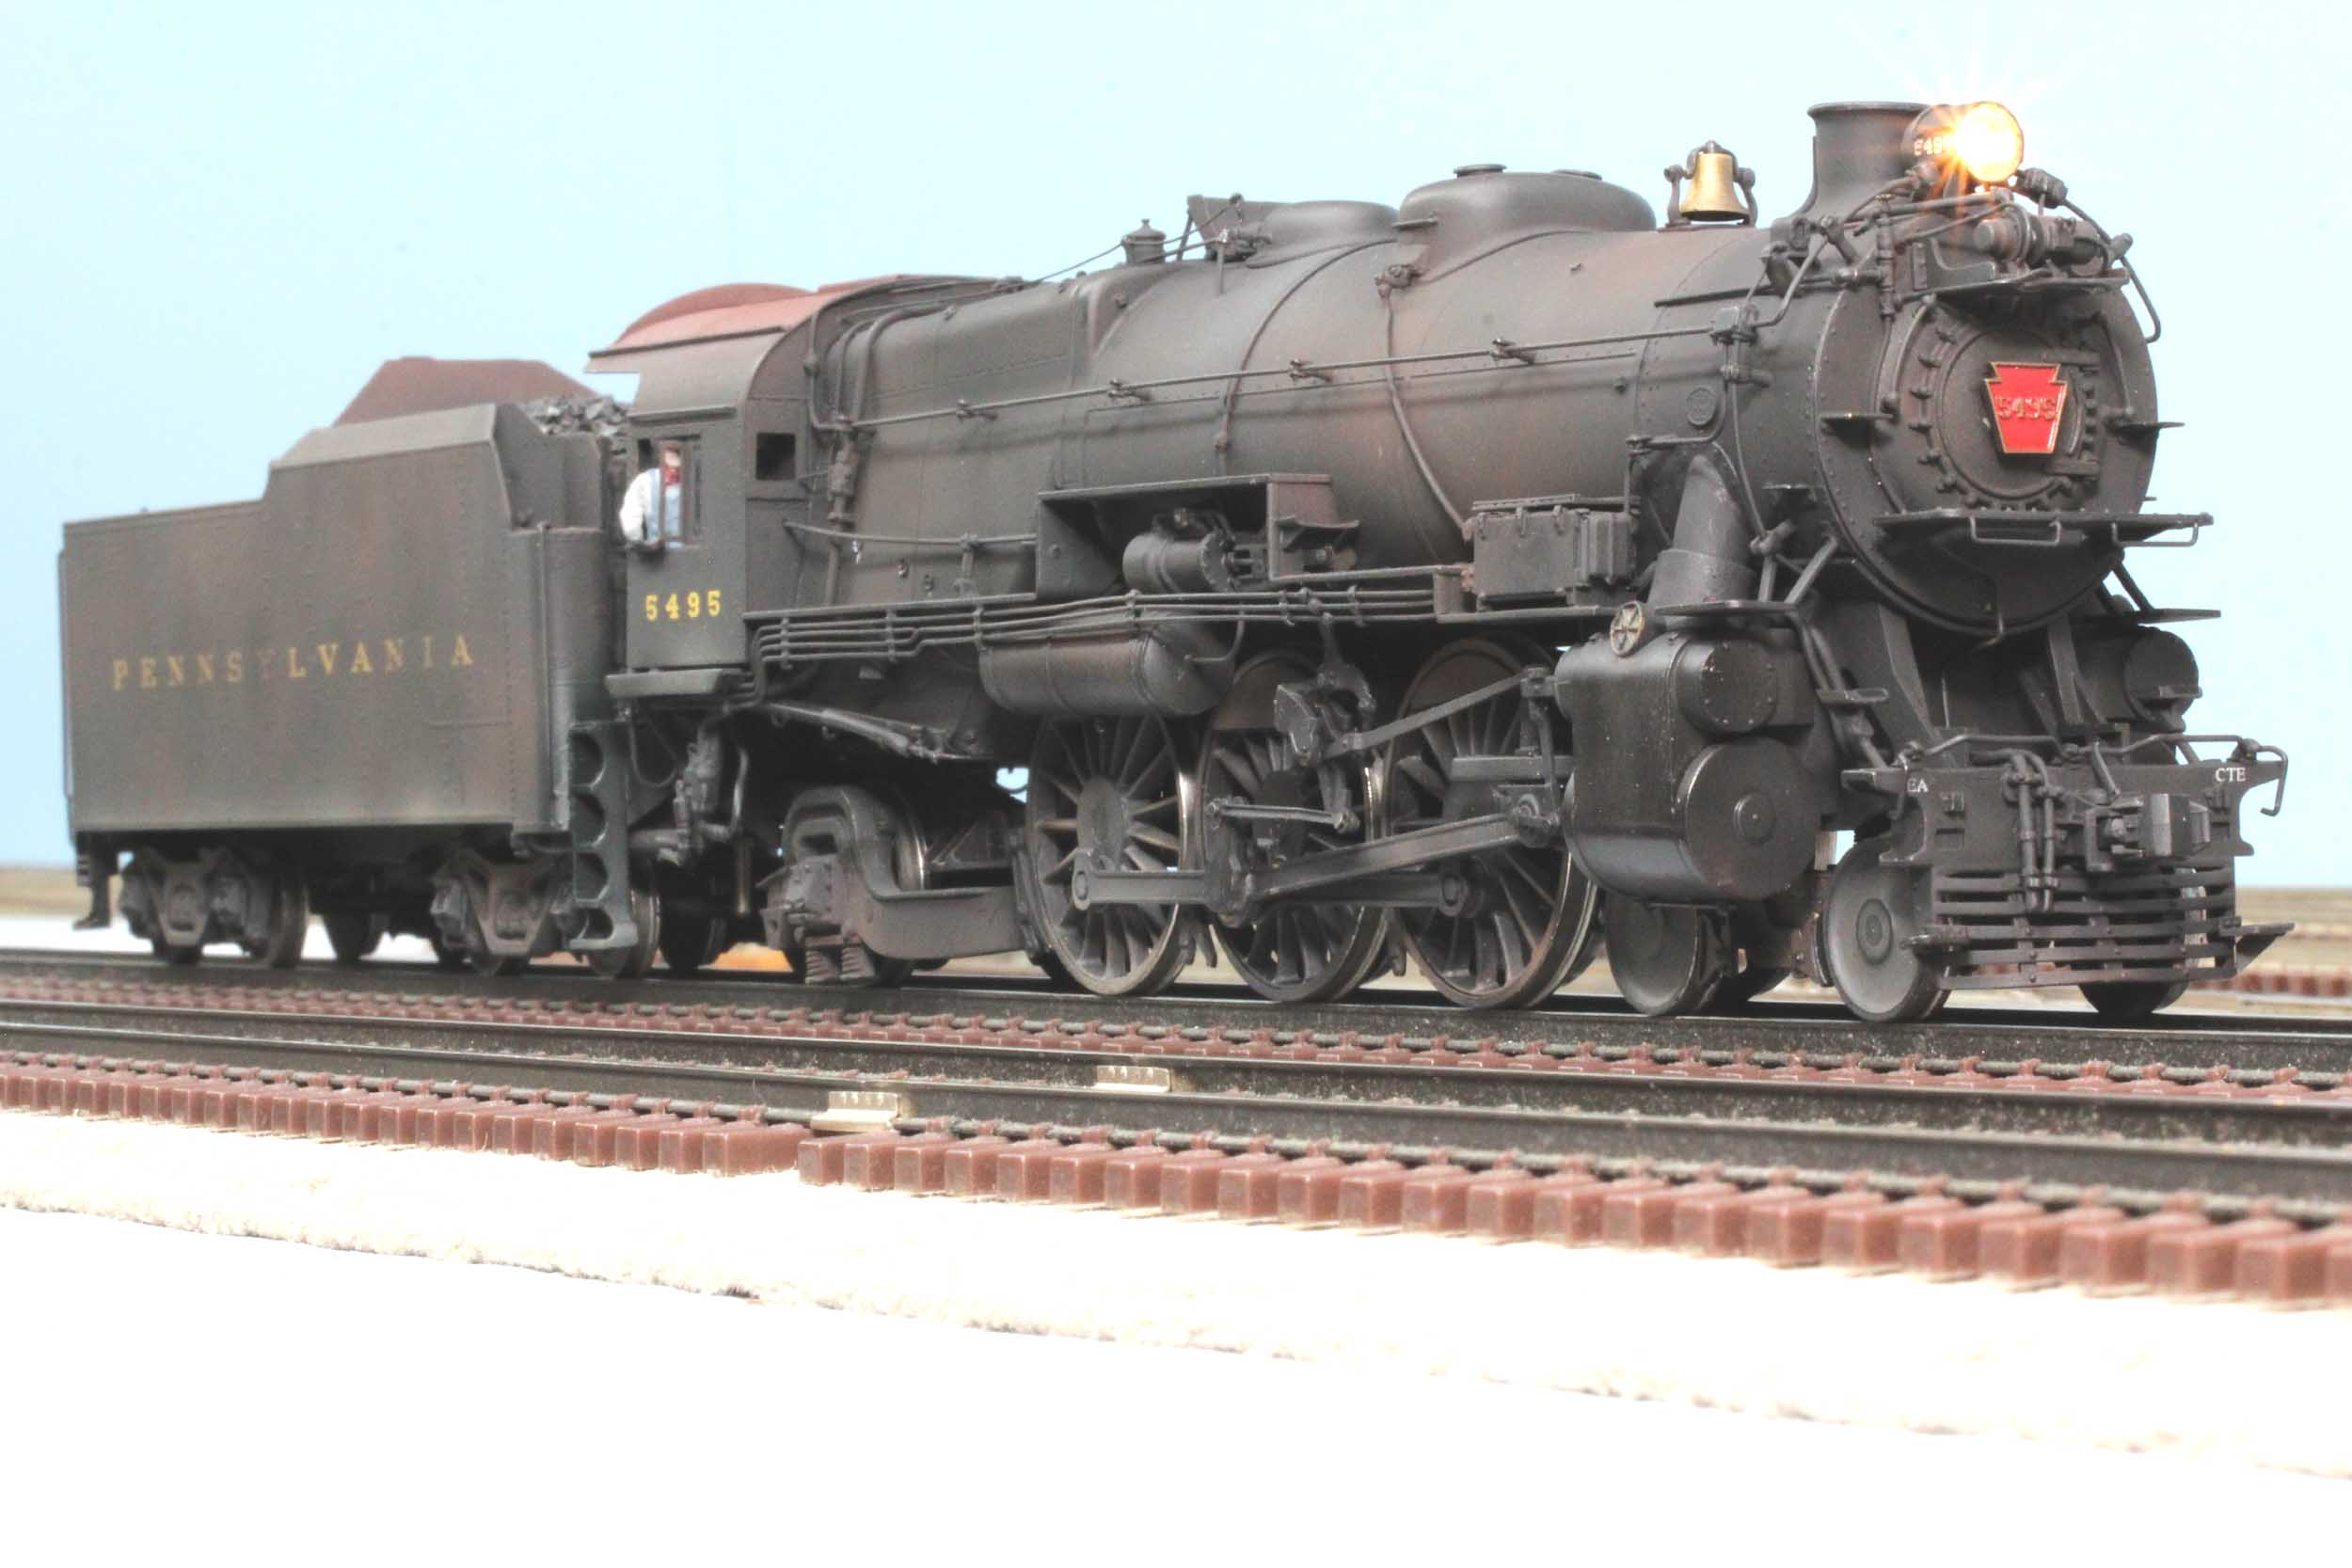
Photo Stacking with Helicon Focus
Added
12-27-19
These are a number of photos taken at very slightly different focus
points compiled by Helicon Focus into 1 photo for amazing clarity and depth of field.
The photo at left was 54 photos taken and combined into 1 photo. I finally have
a roster shot I like that shows the detail I worked so hard to make..


Updated
2-27-19
All photos and content © Lanes Trains 2005-2020