|
|
An S Scale Community Project USRA Pacific To PRR E6 Atlantic By
Sam Powell
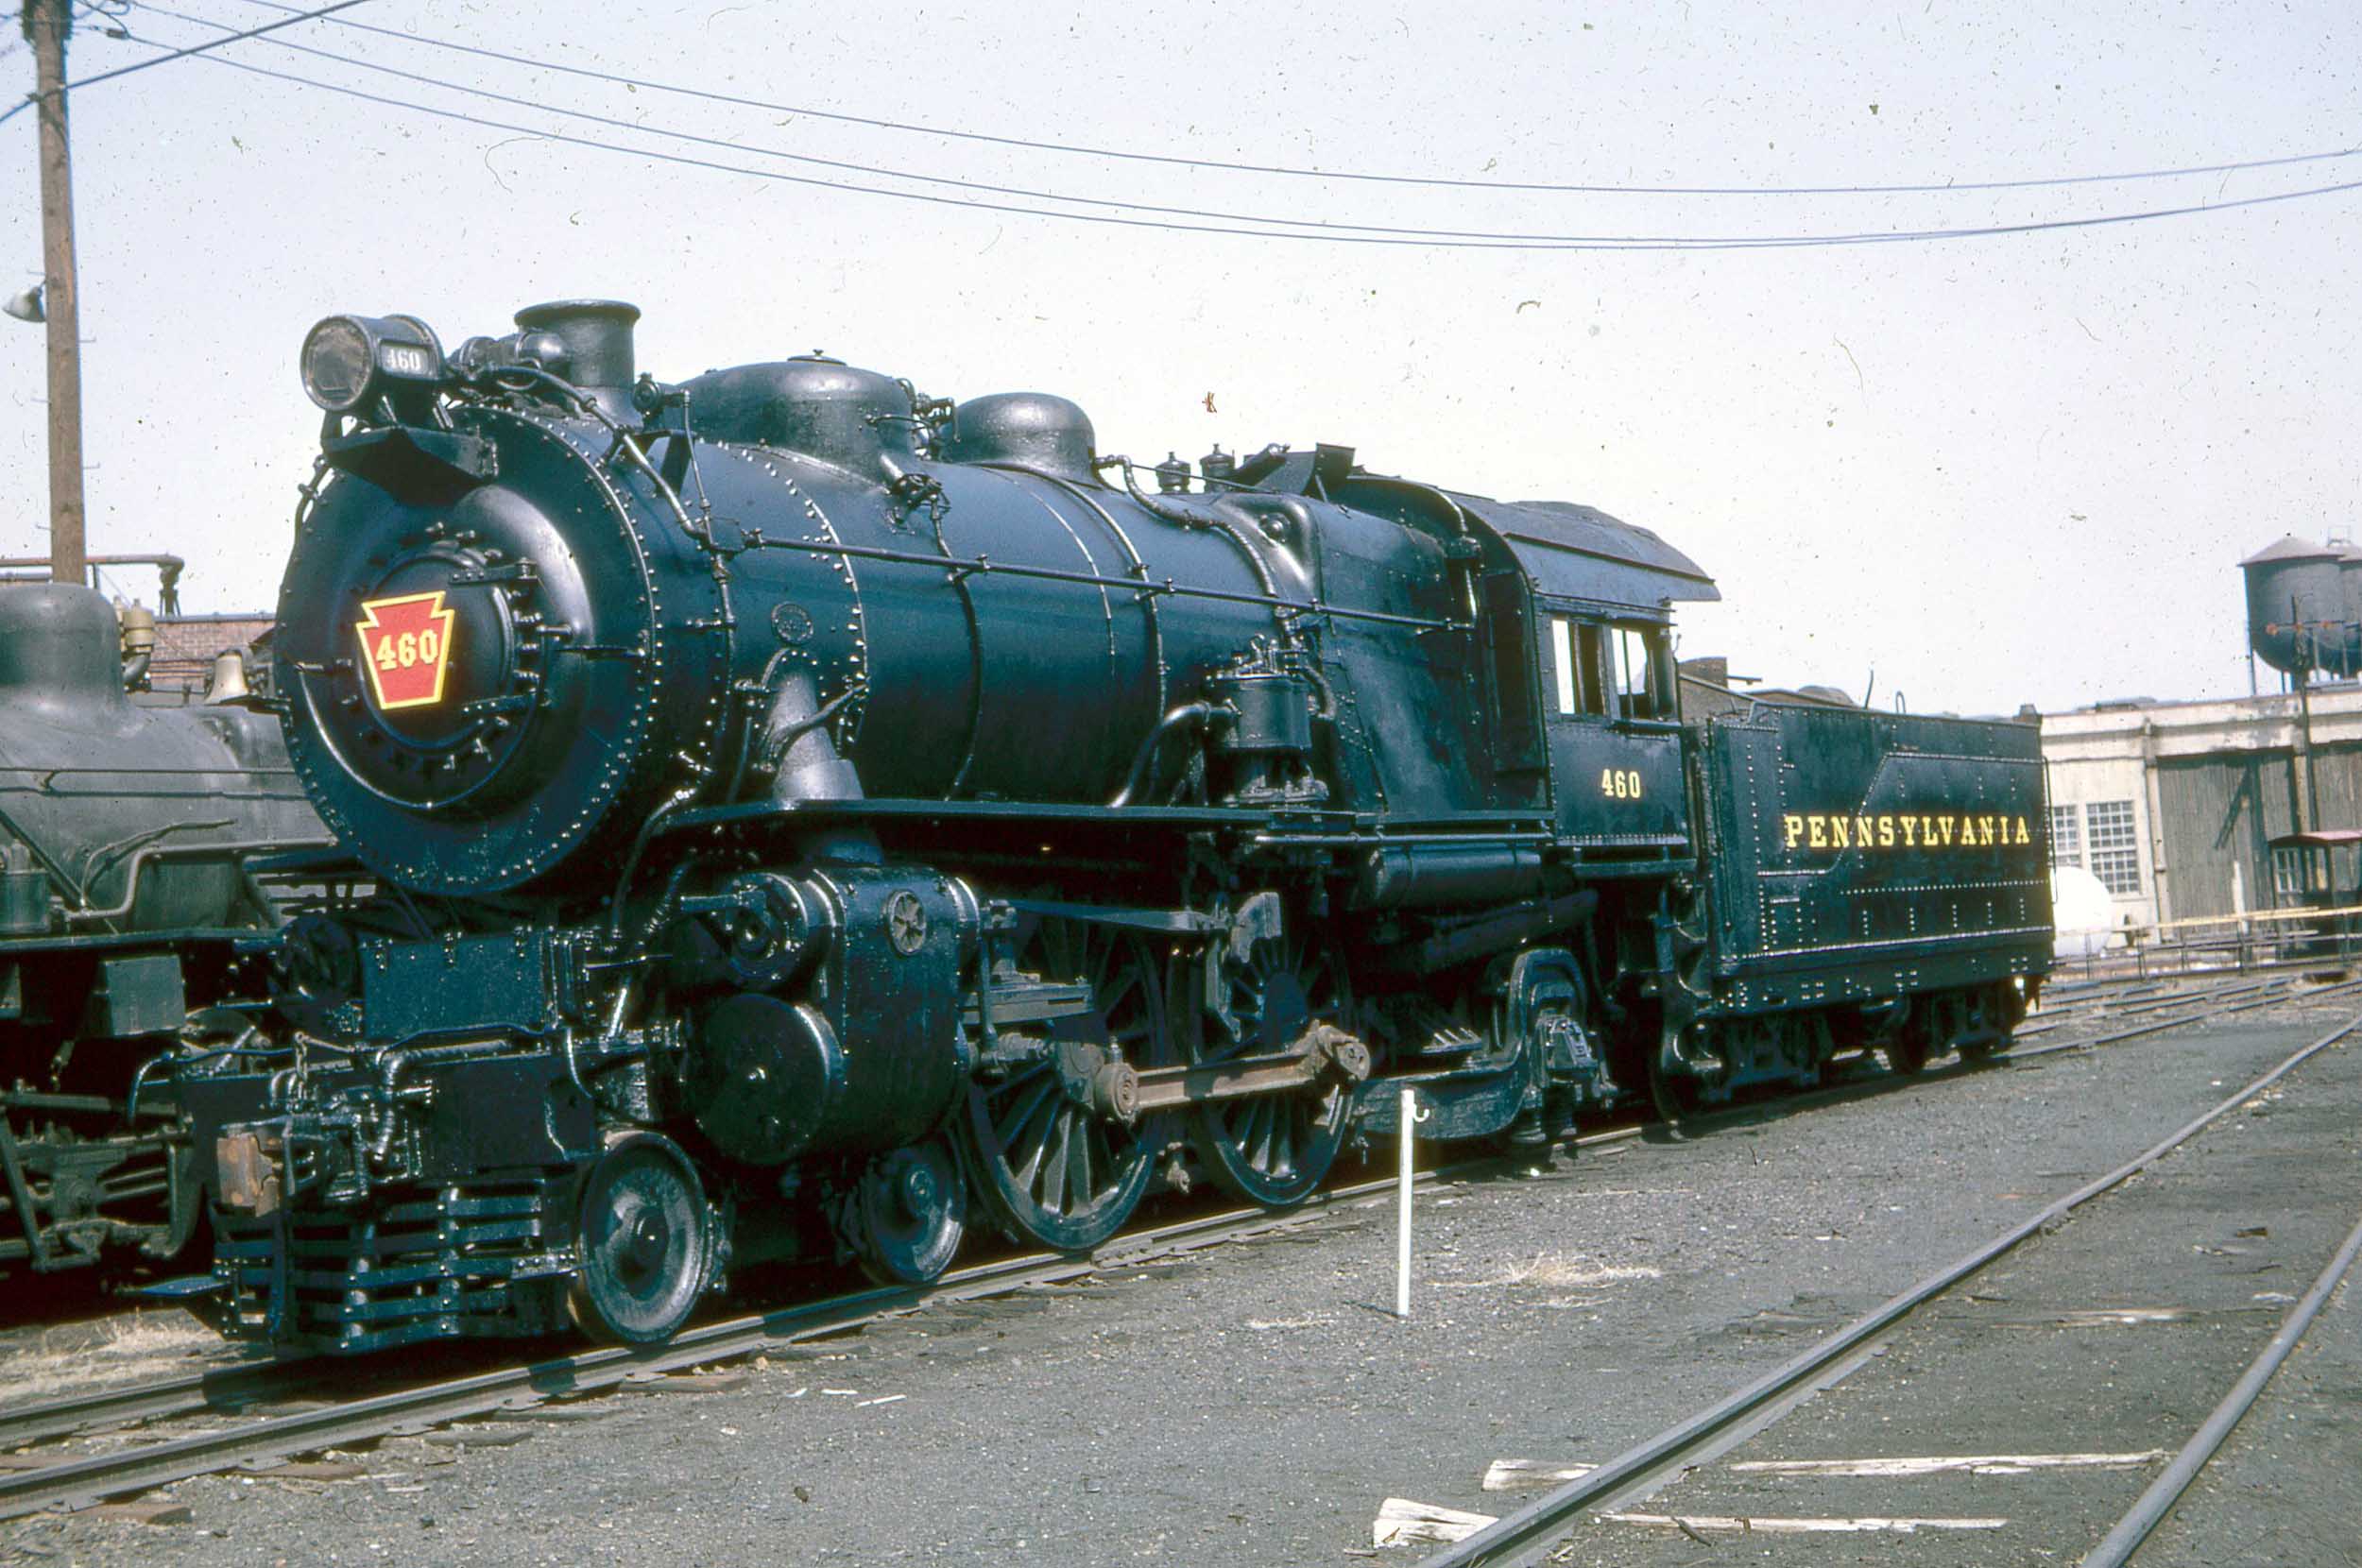
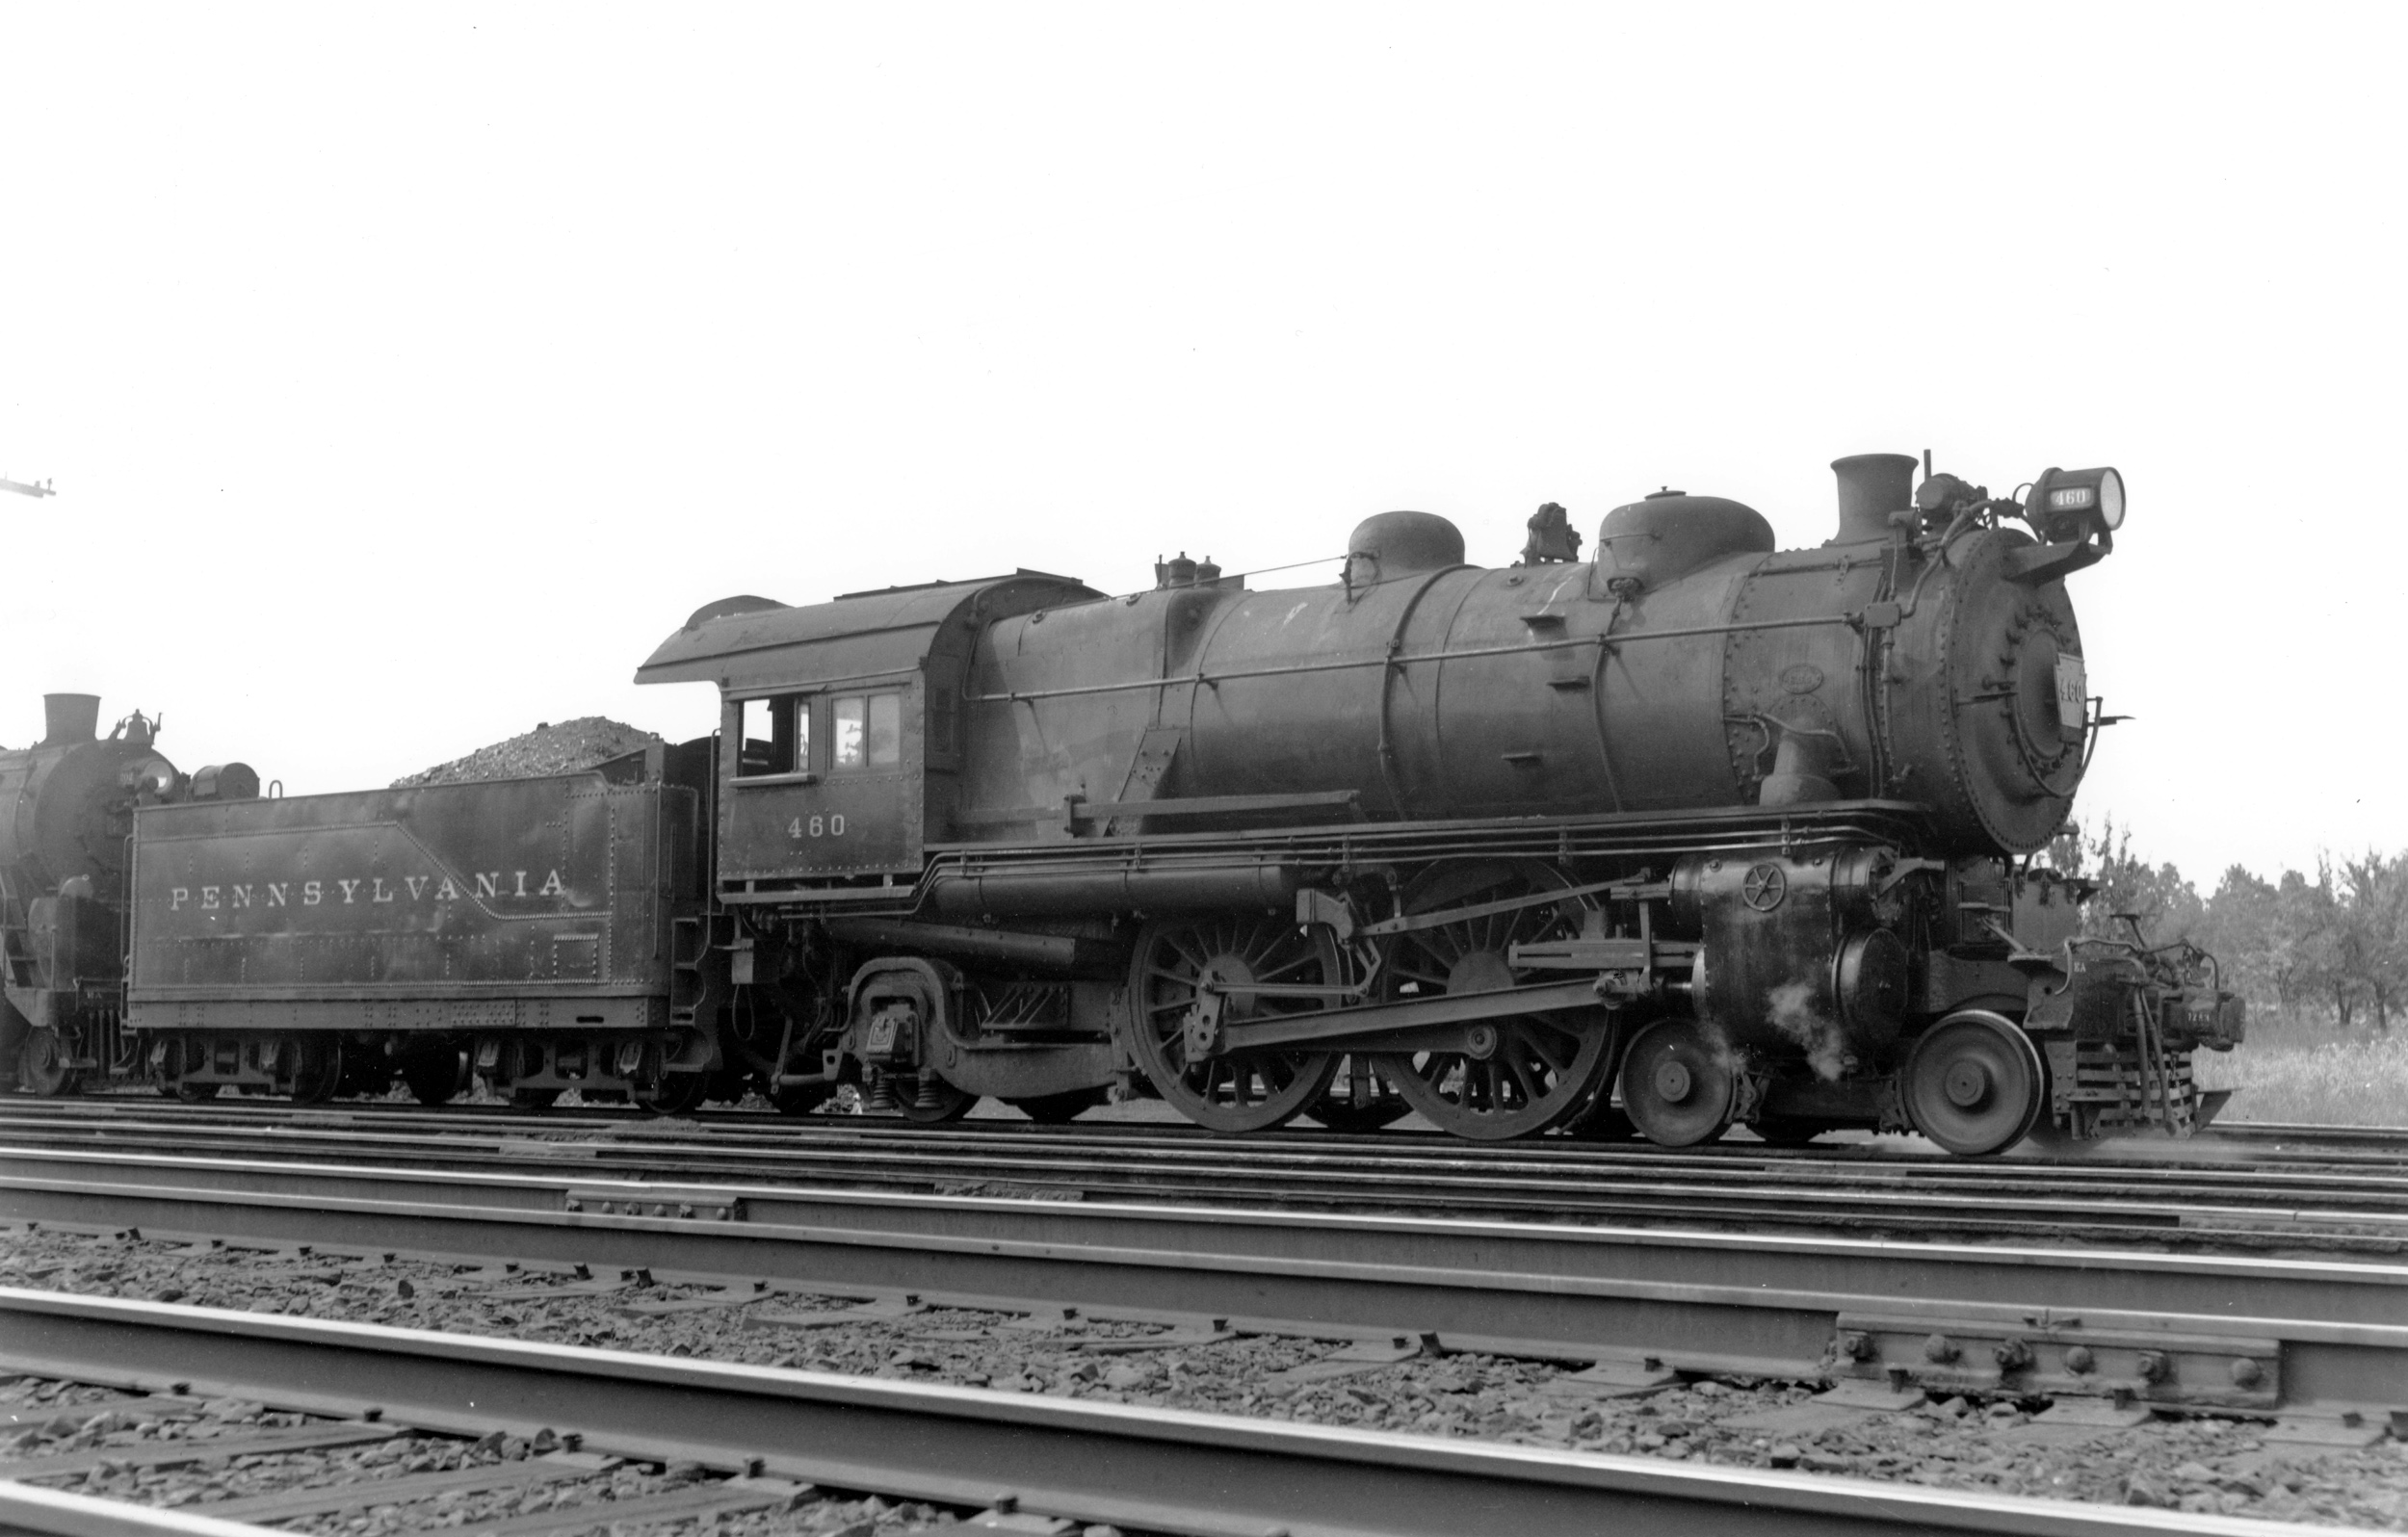
Bill Volkmer Photo
460 Hammonton NJ 7-5-53 I
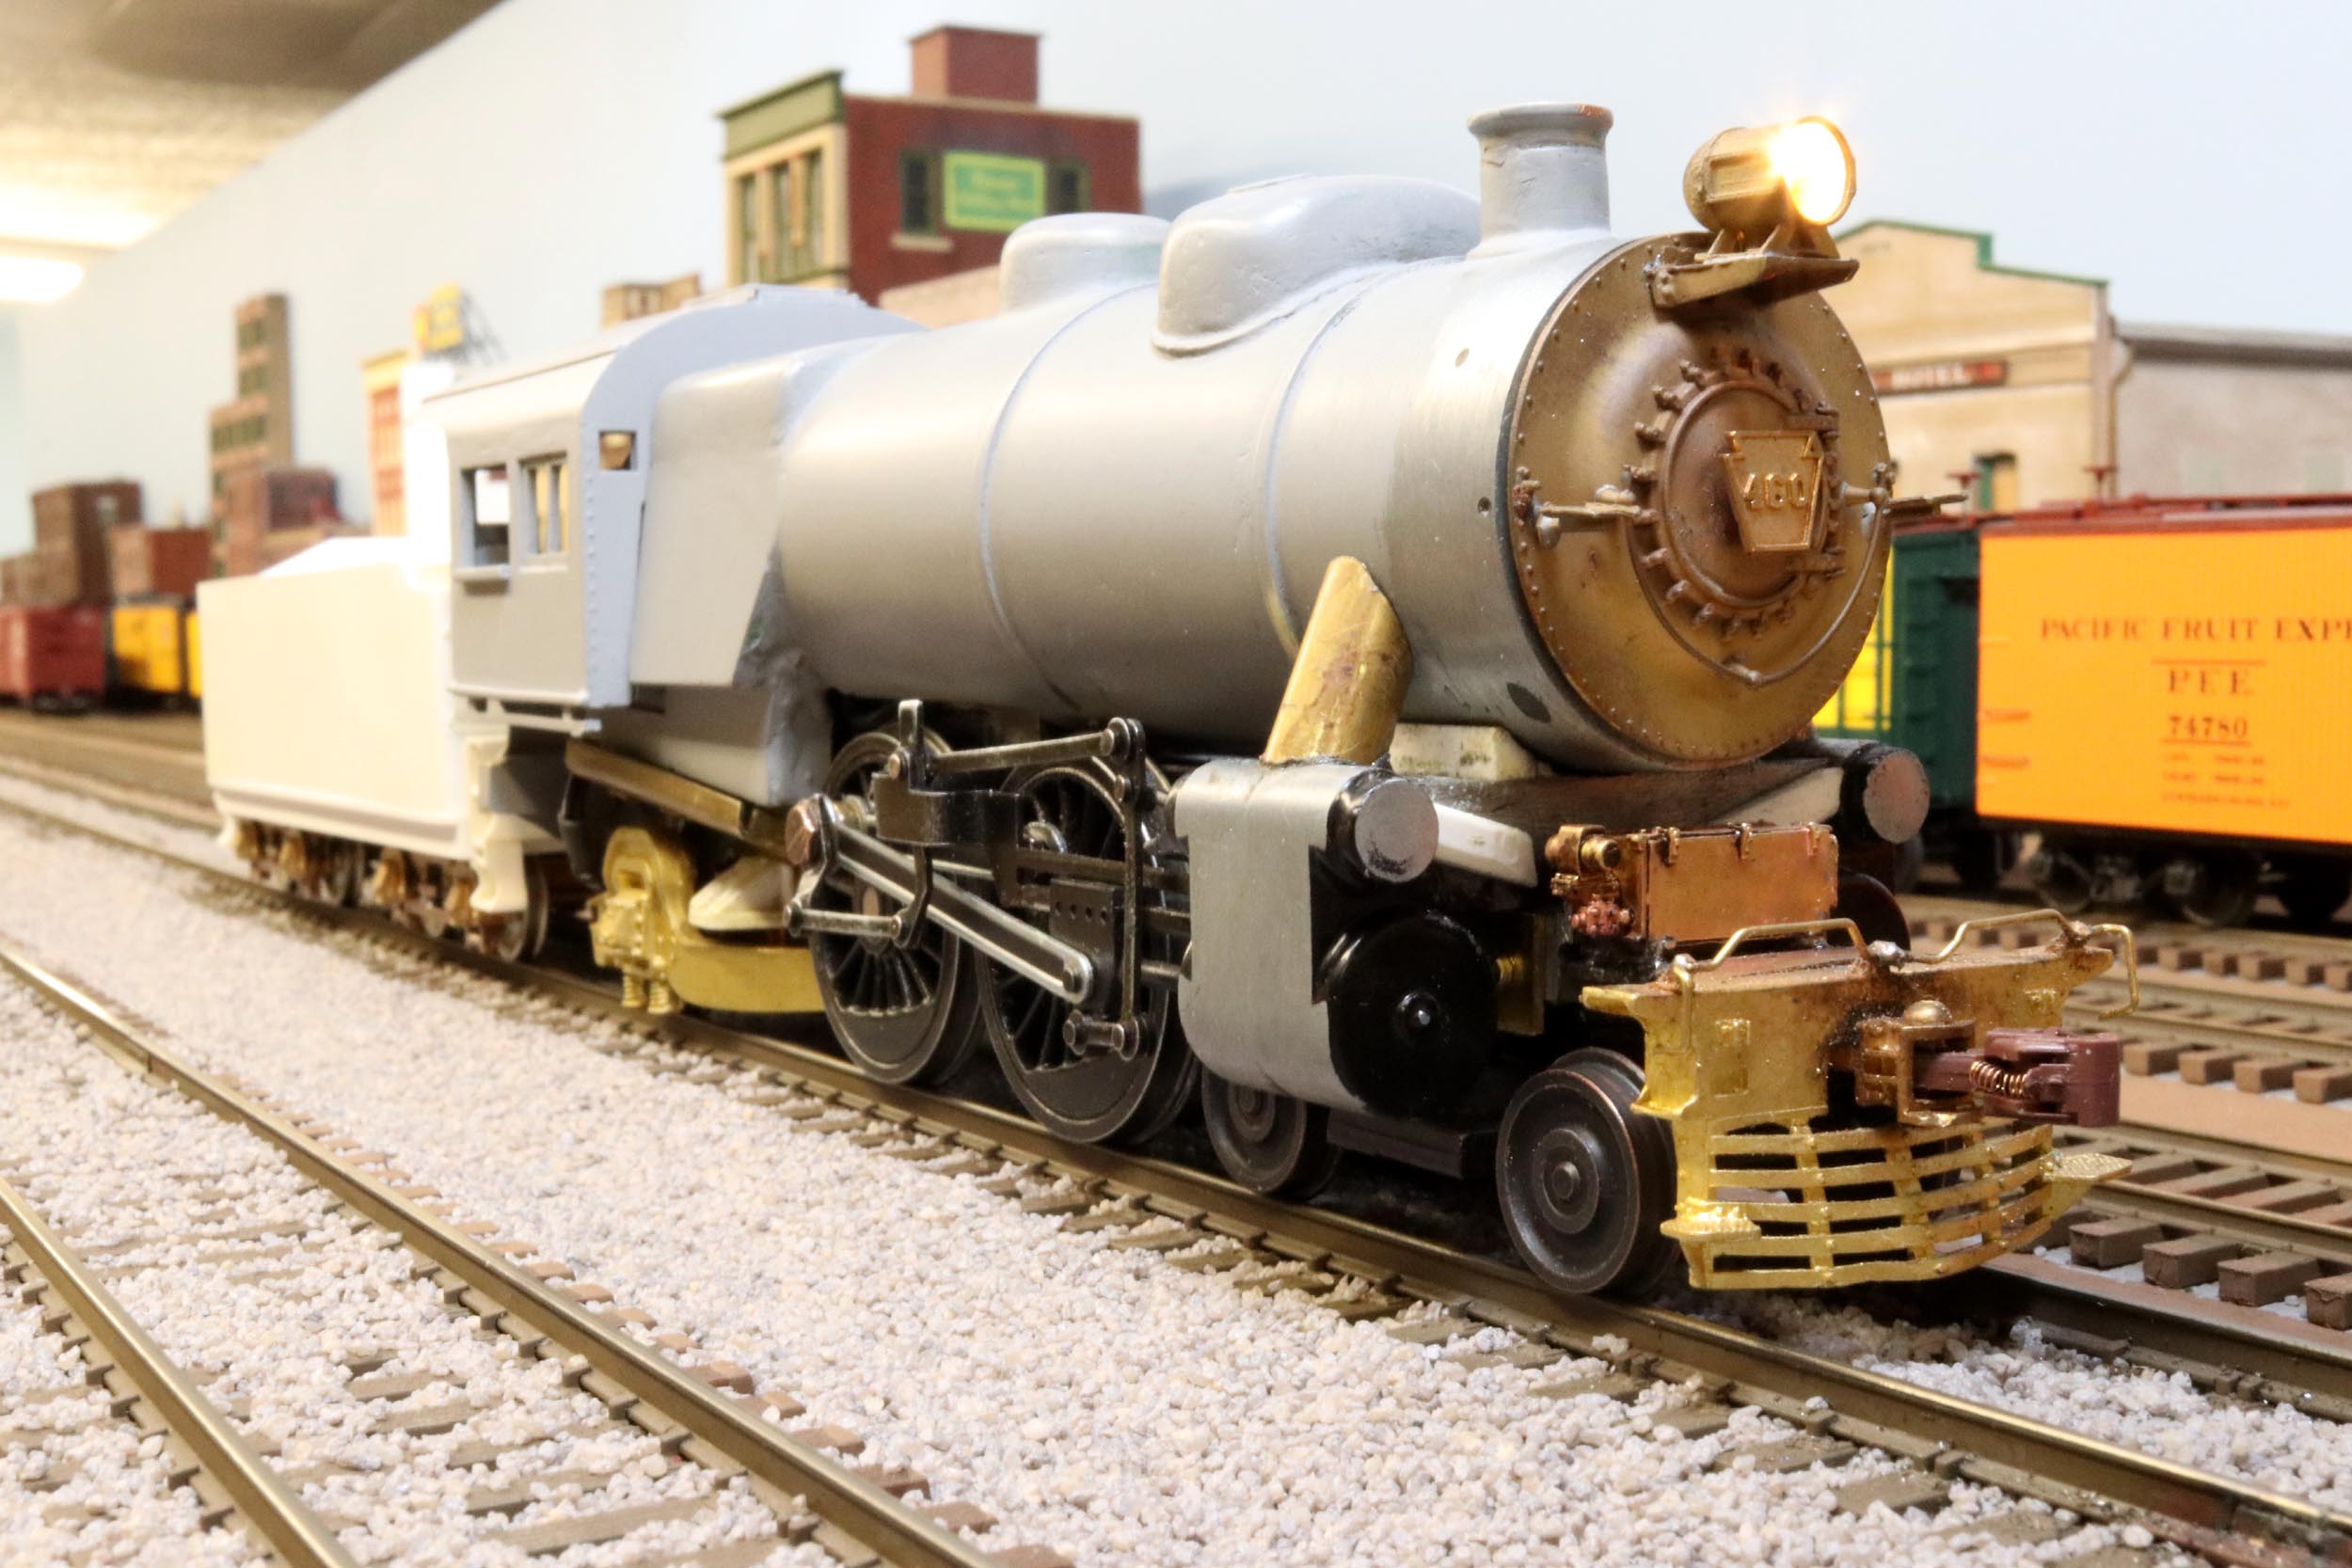
wanted to have the PRR counterpart to my Reading P-7sb, which is the PRR E6. Many E6 ran late into the PRR steam era
in PRSL service. I did not choose 460 because it is the “famous” Lindbergh locomotive. I chose it because it was
retired from PRSL service in January 1956. The real 460 is close enough to me
to visit and use for research. It went through a 8
year long cosmetic restoration that was completed in October 2016. |
|


The opportunity to get this PRR E6 without completely building it
myself came to me in a tragic unfortunate circumstance. In the fall of 2015 my
good friend and famous S Scaler Sam Powell emailed me to say he was converting
an American Models USRA Pacific to a PRR E6. I did not know how Sam was doing
it but I knew he could. In early January 2016 Sam asked if I had any parts he
needed. I sent him a brass boiler front, headlight and pilot I had leftover
from K4 modernization projects. I goofed with Sam all along that once it was
done he should just send it to me. About 2 weeks later Sam very suddenly passed
away while shoveling heavy snow.
I
thought this loco might be lost to me forever. It would have been very awkward
(and rude) to contact Sam’s wife asking for it. I felt a connection to it, as I
just sent Sam some parts, and it was his last active S Scale project. Fate or
Karma intervened in another very unusual circumstance when the loco wound up in
the hands of my friend Pieter Roos in June 2016. For some unknown reason some
of Sam’s trains wound up for sale at a Connecticut
S Gaugers club meeting – when Sam lived in Maryland. Pieter did not know
of the project connection between Sam and I, but he knew I would want it. I got
the locomotive from Pieter in July 2016 just as Sam left it.
It is my goal to finish and enjoy this locomotive in tribute to
Sam Powell.
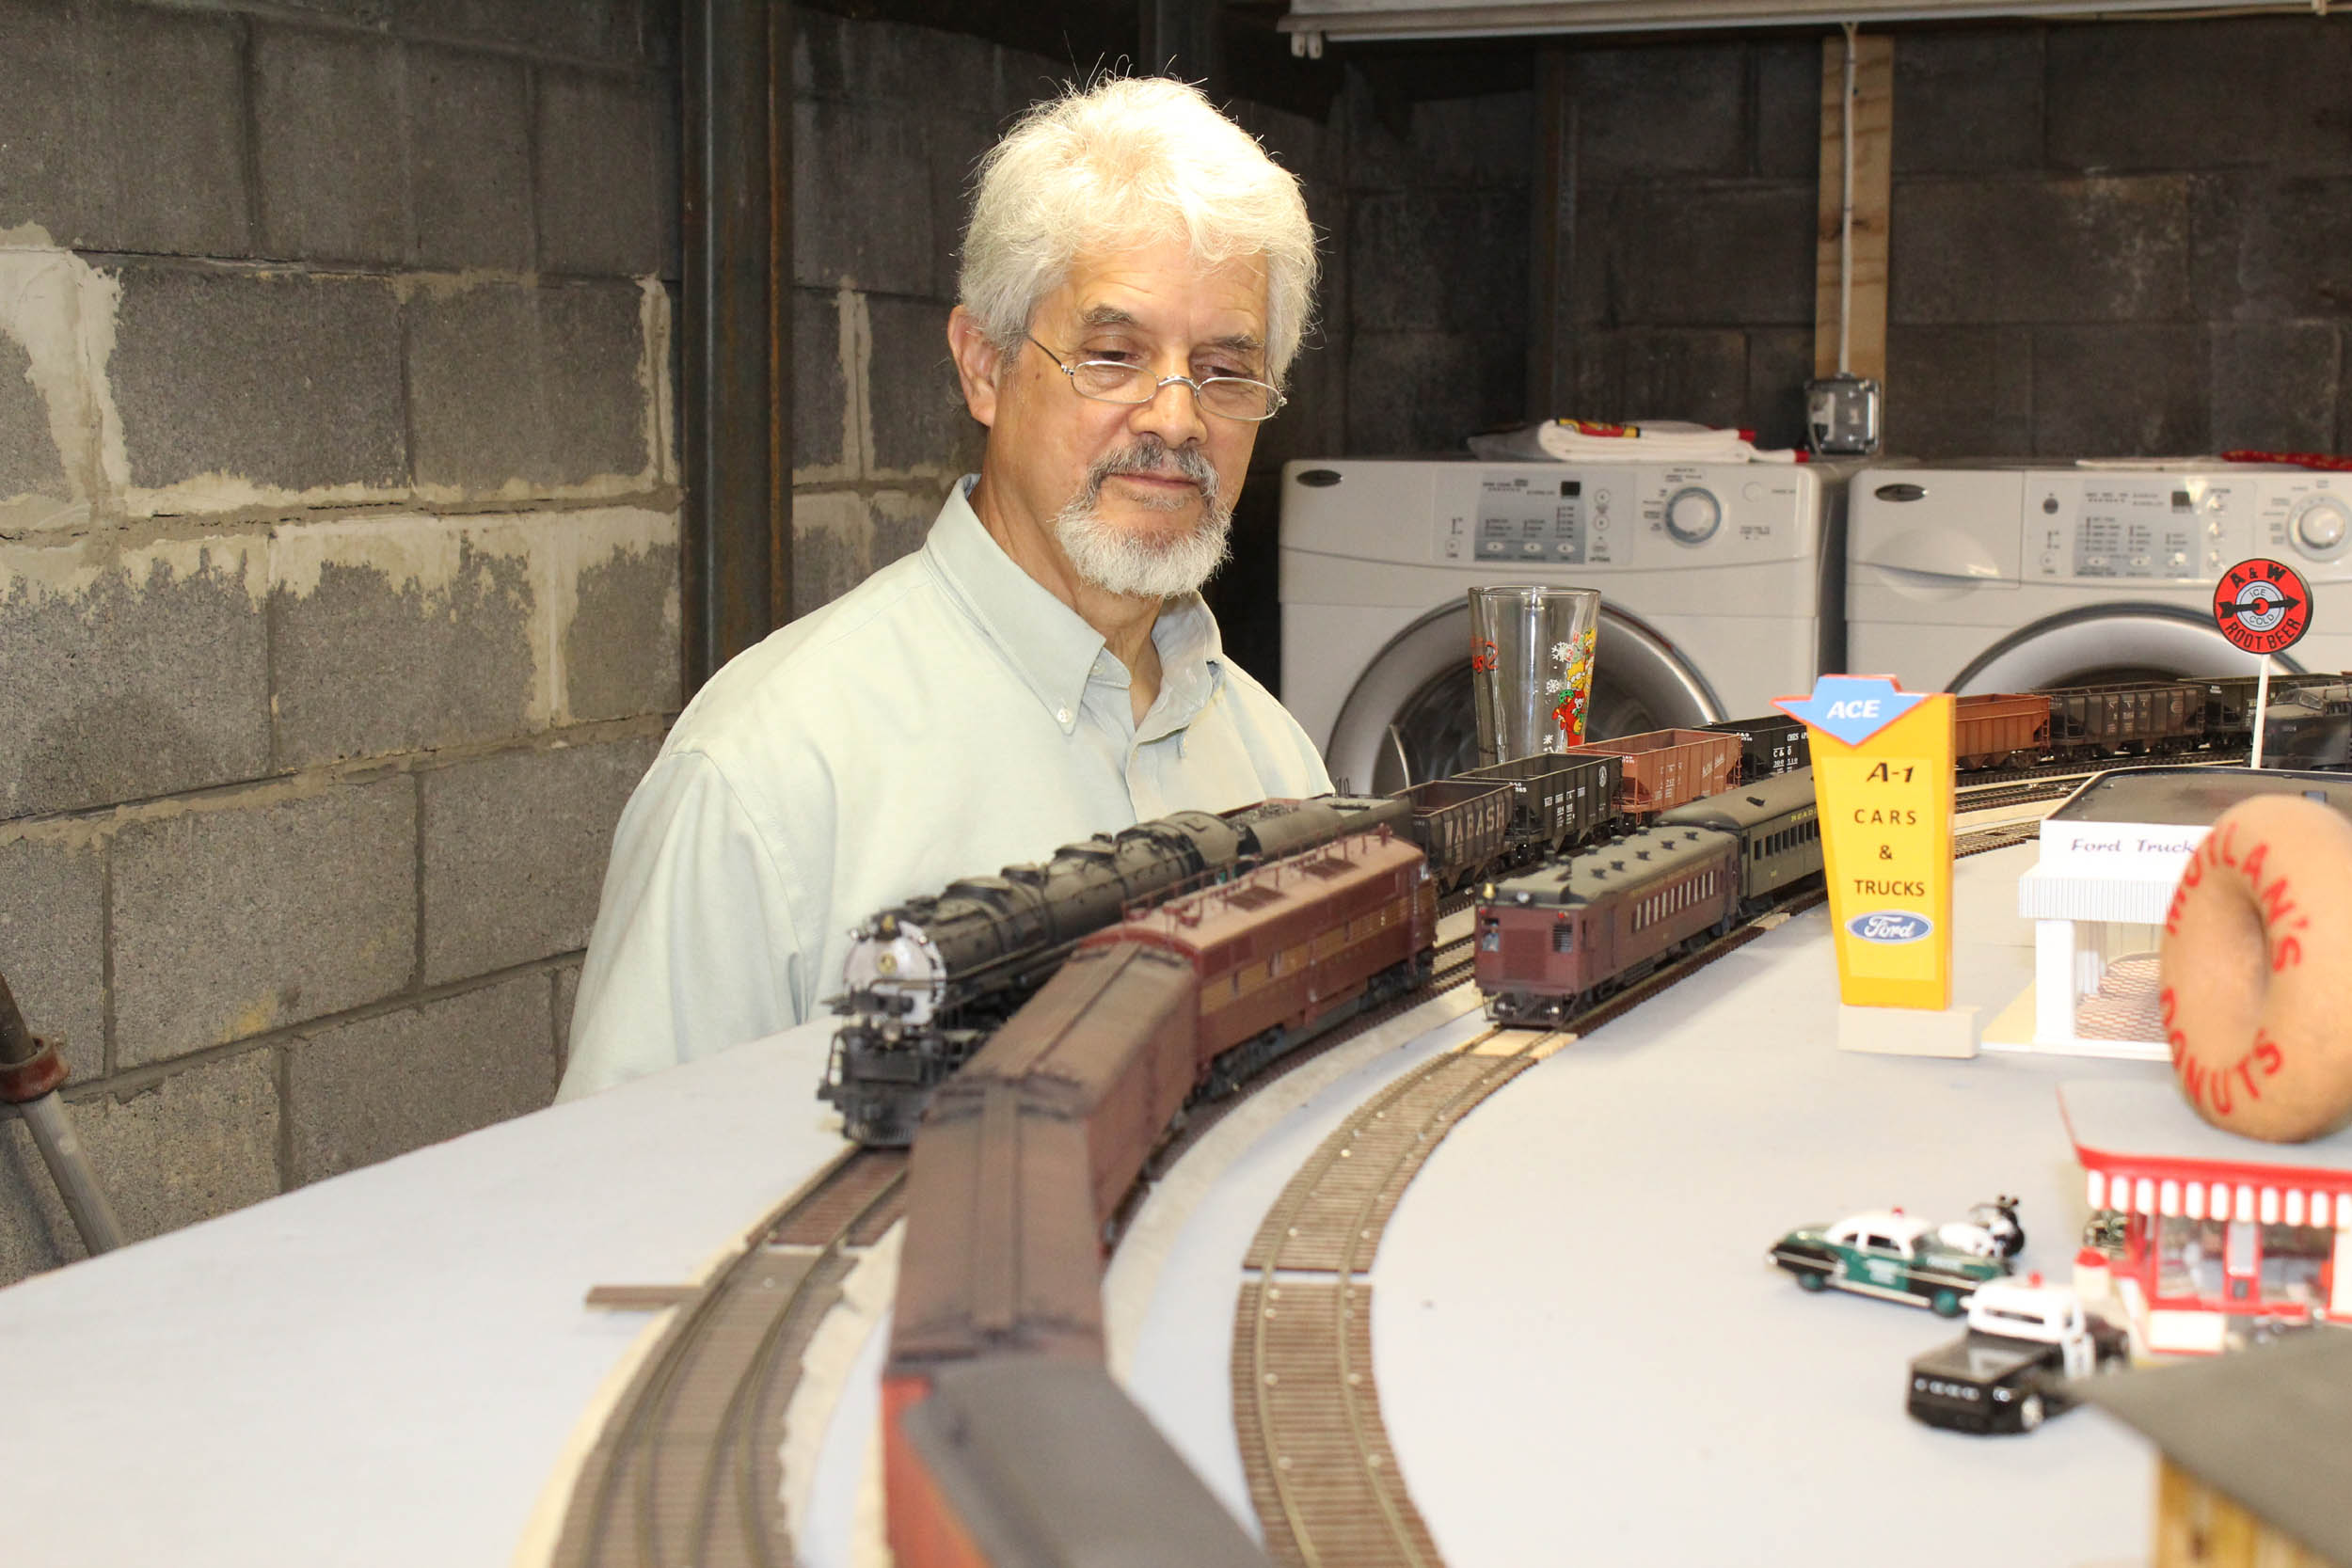
The Late Sam Powell
At My House 7-21-14
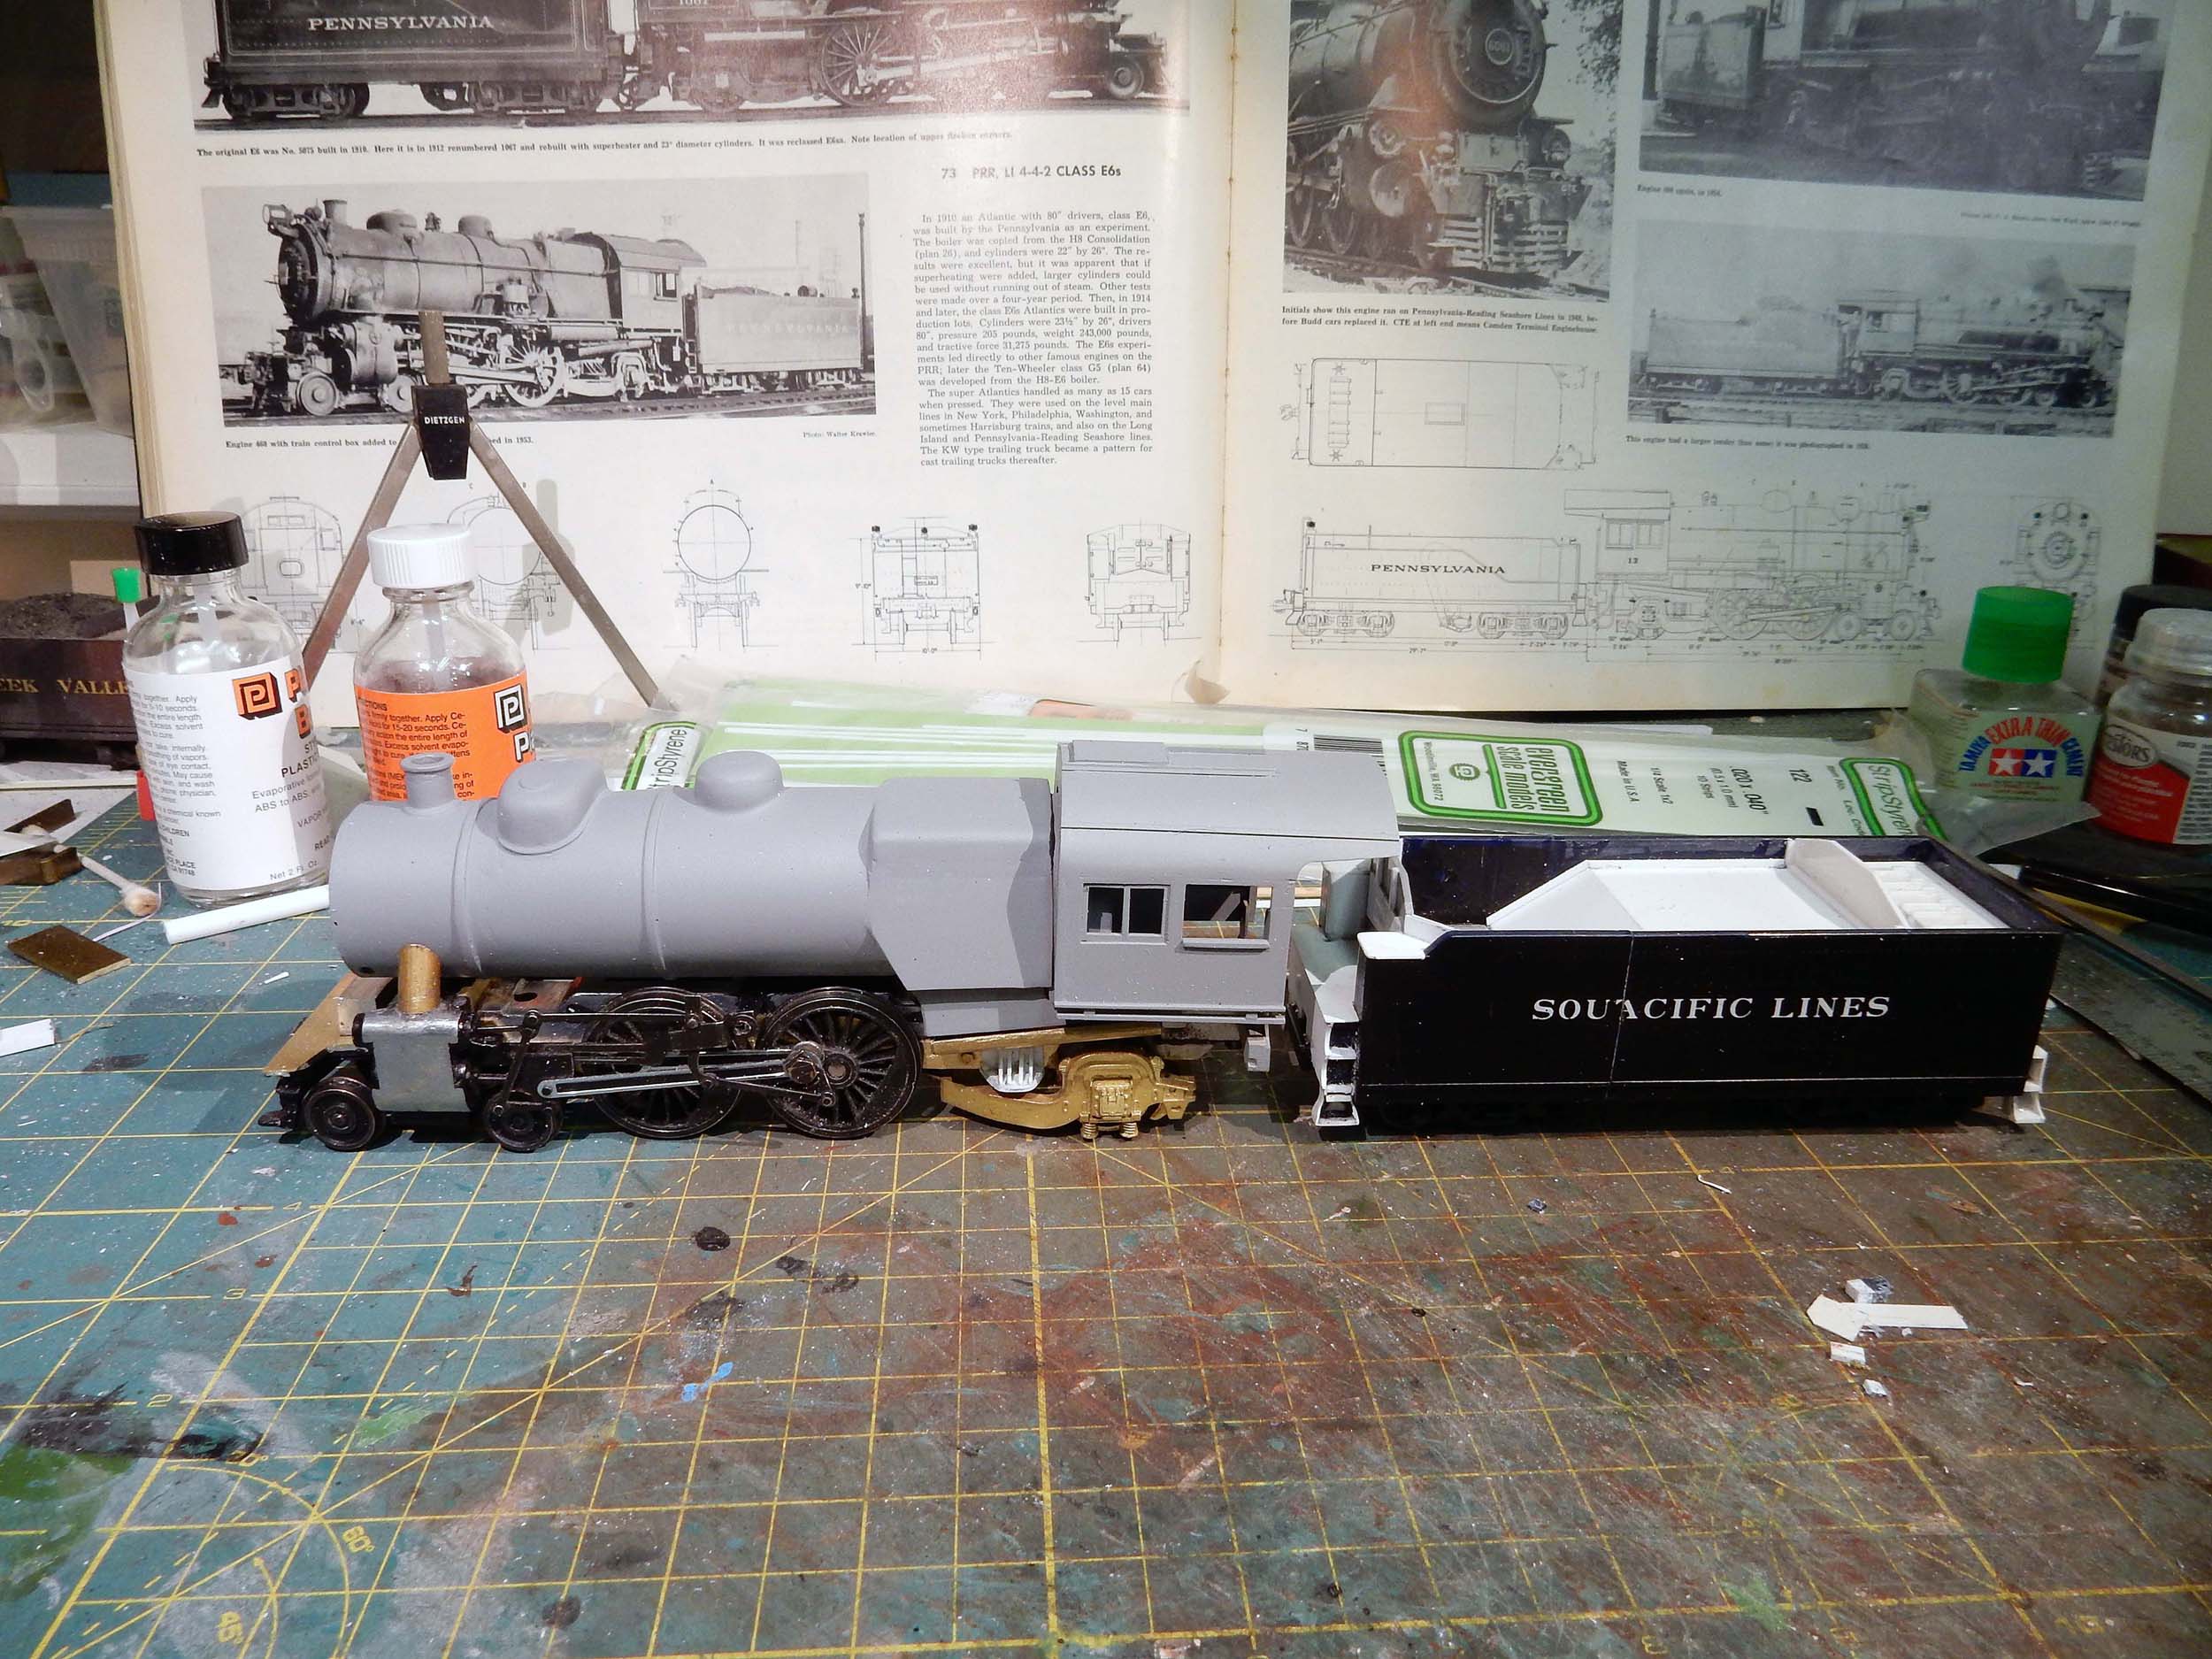
The goal here is not rivet by rivet perfection. Just get the
taste of the model and get it done with a reasonable effort.
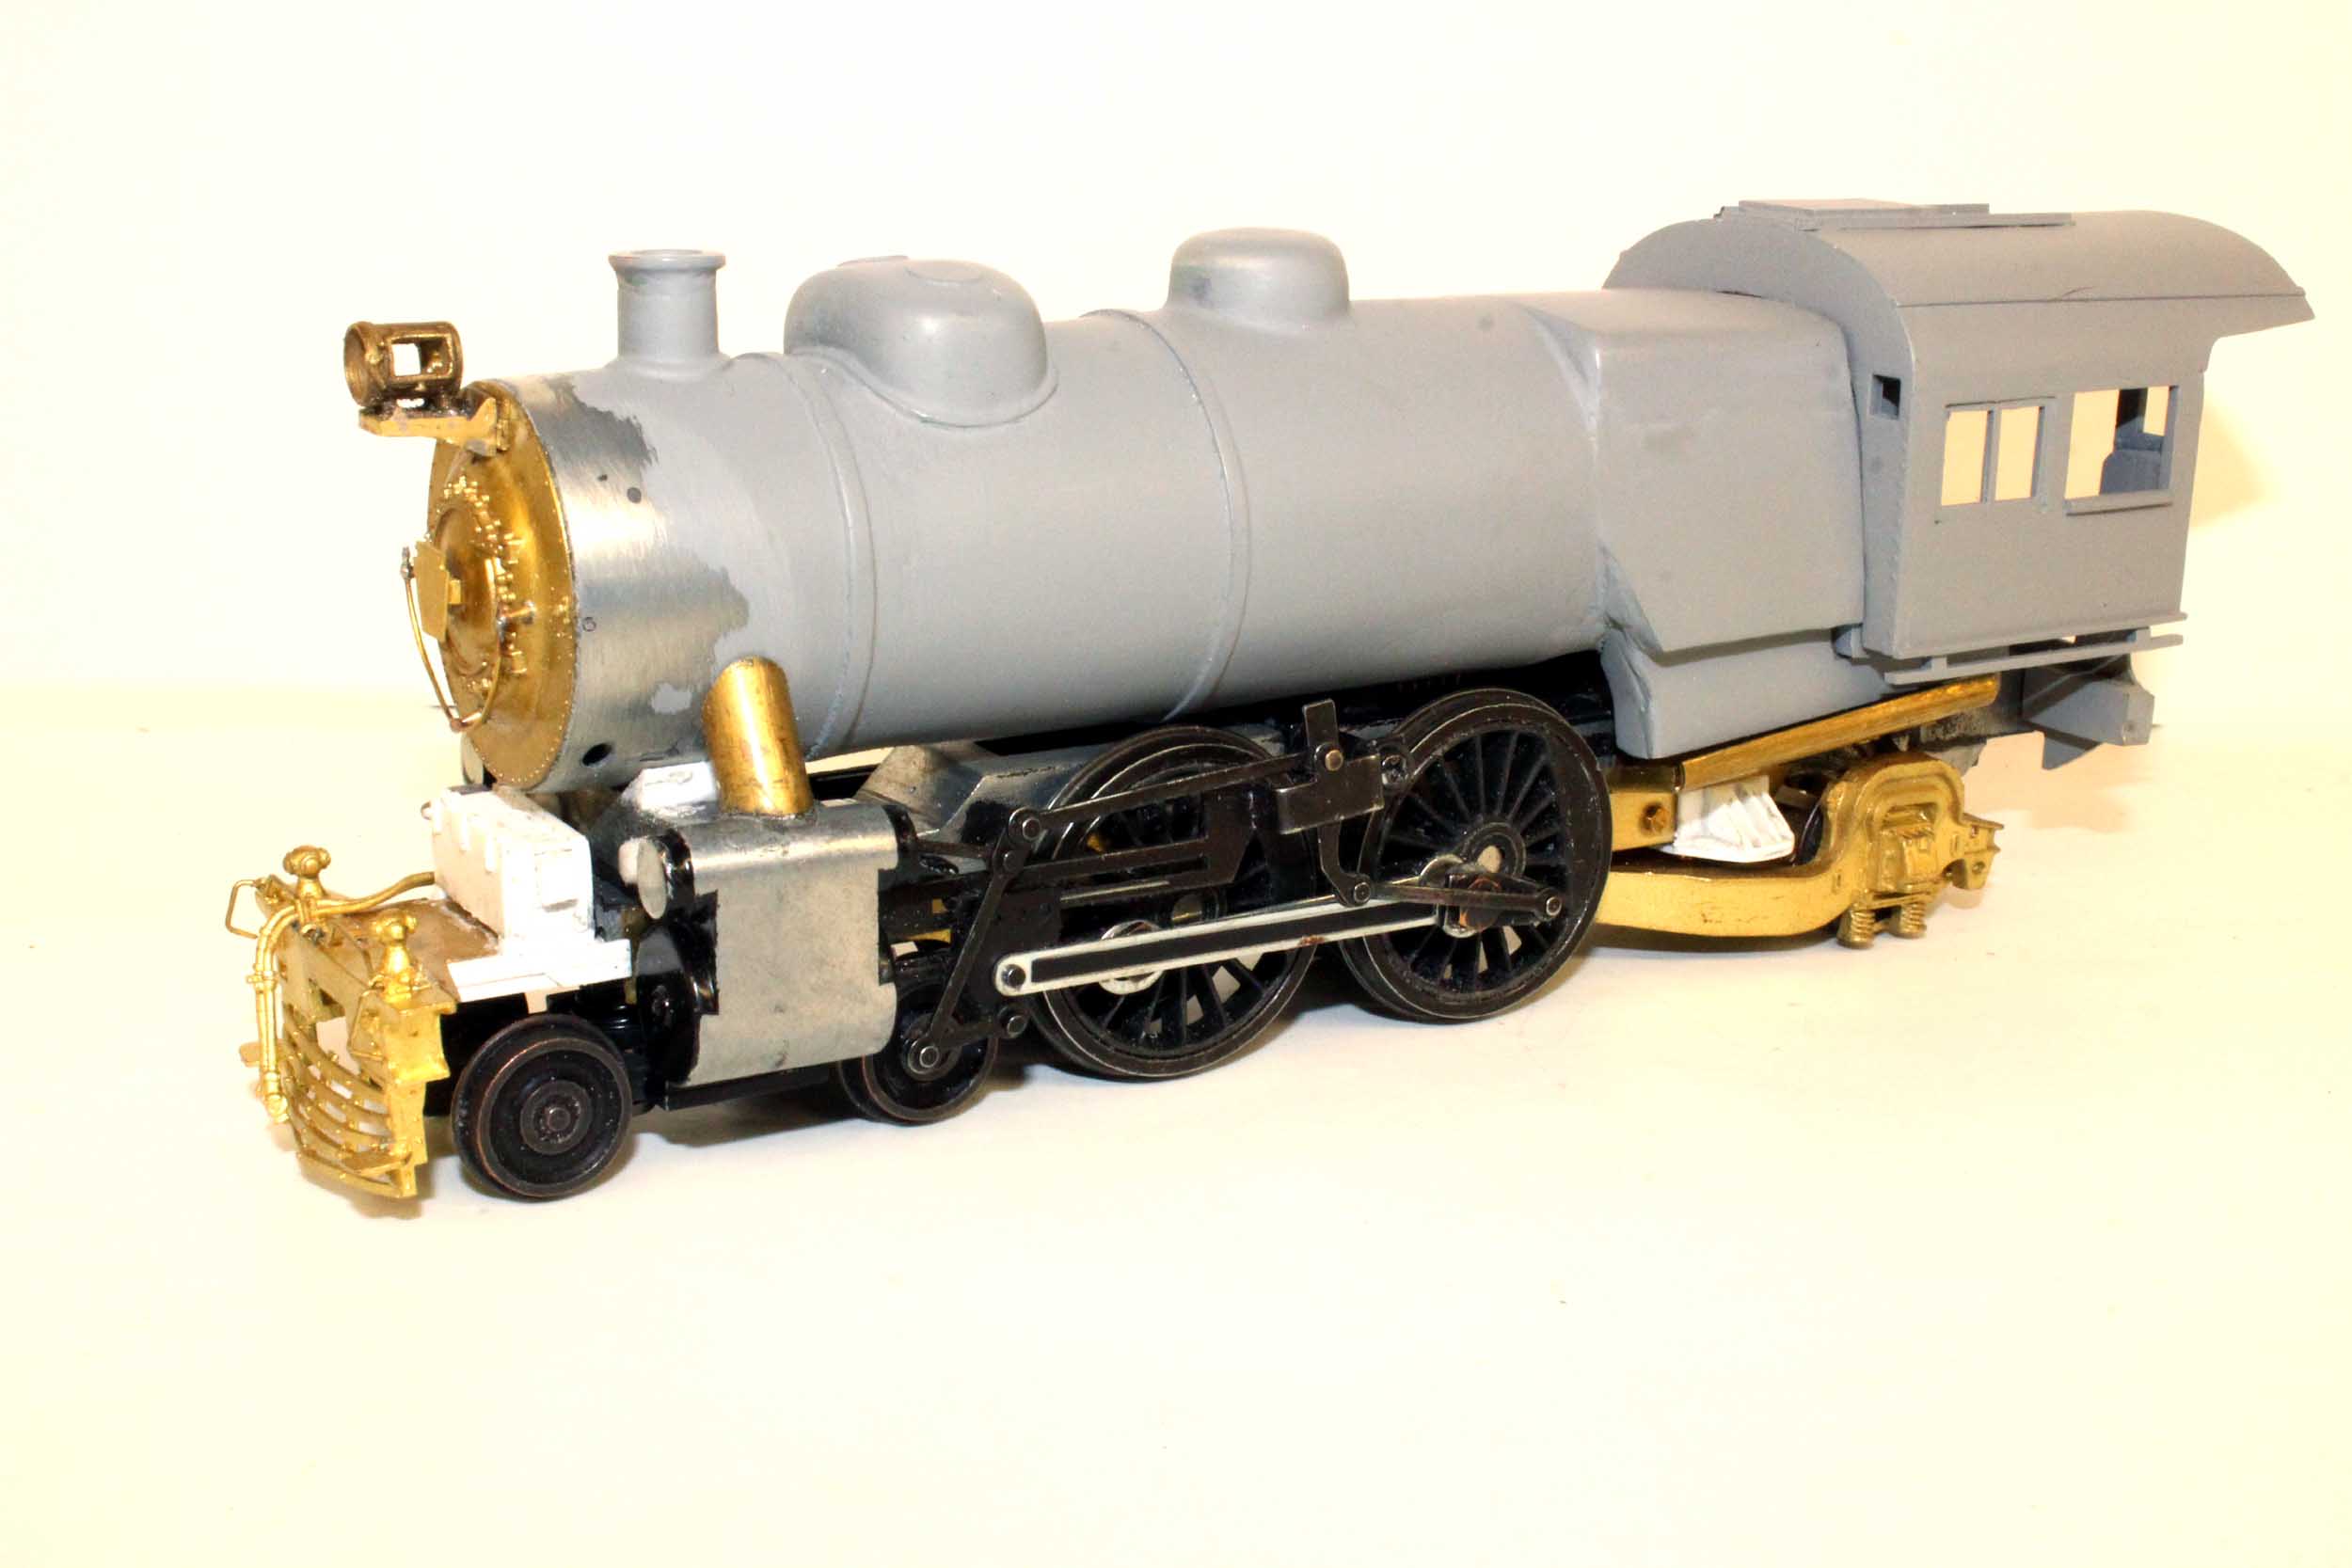
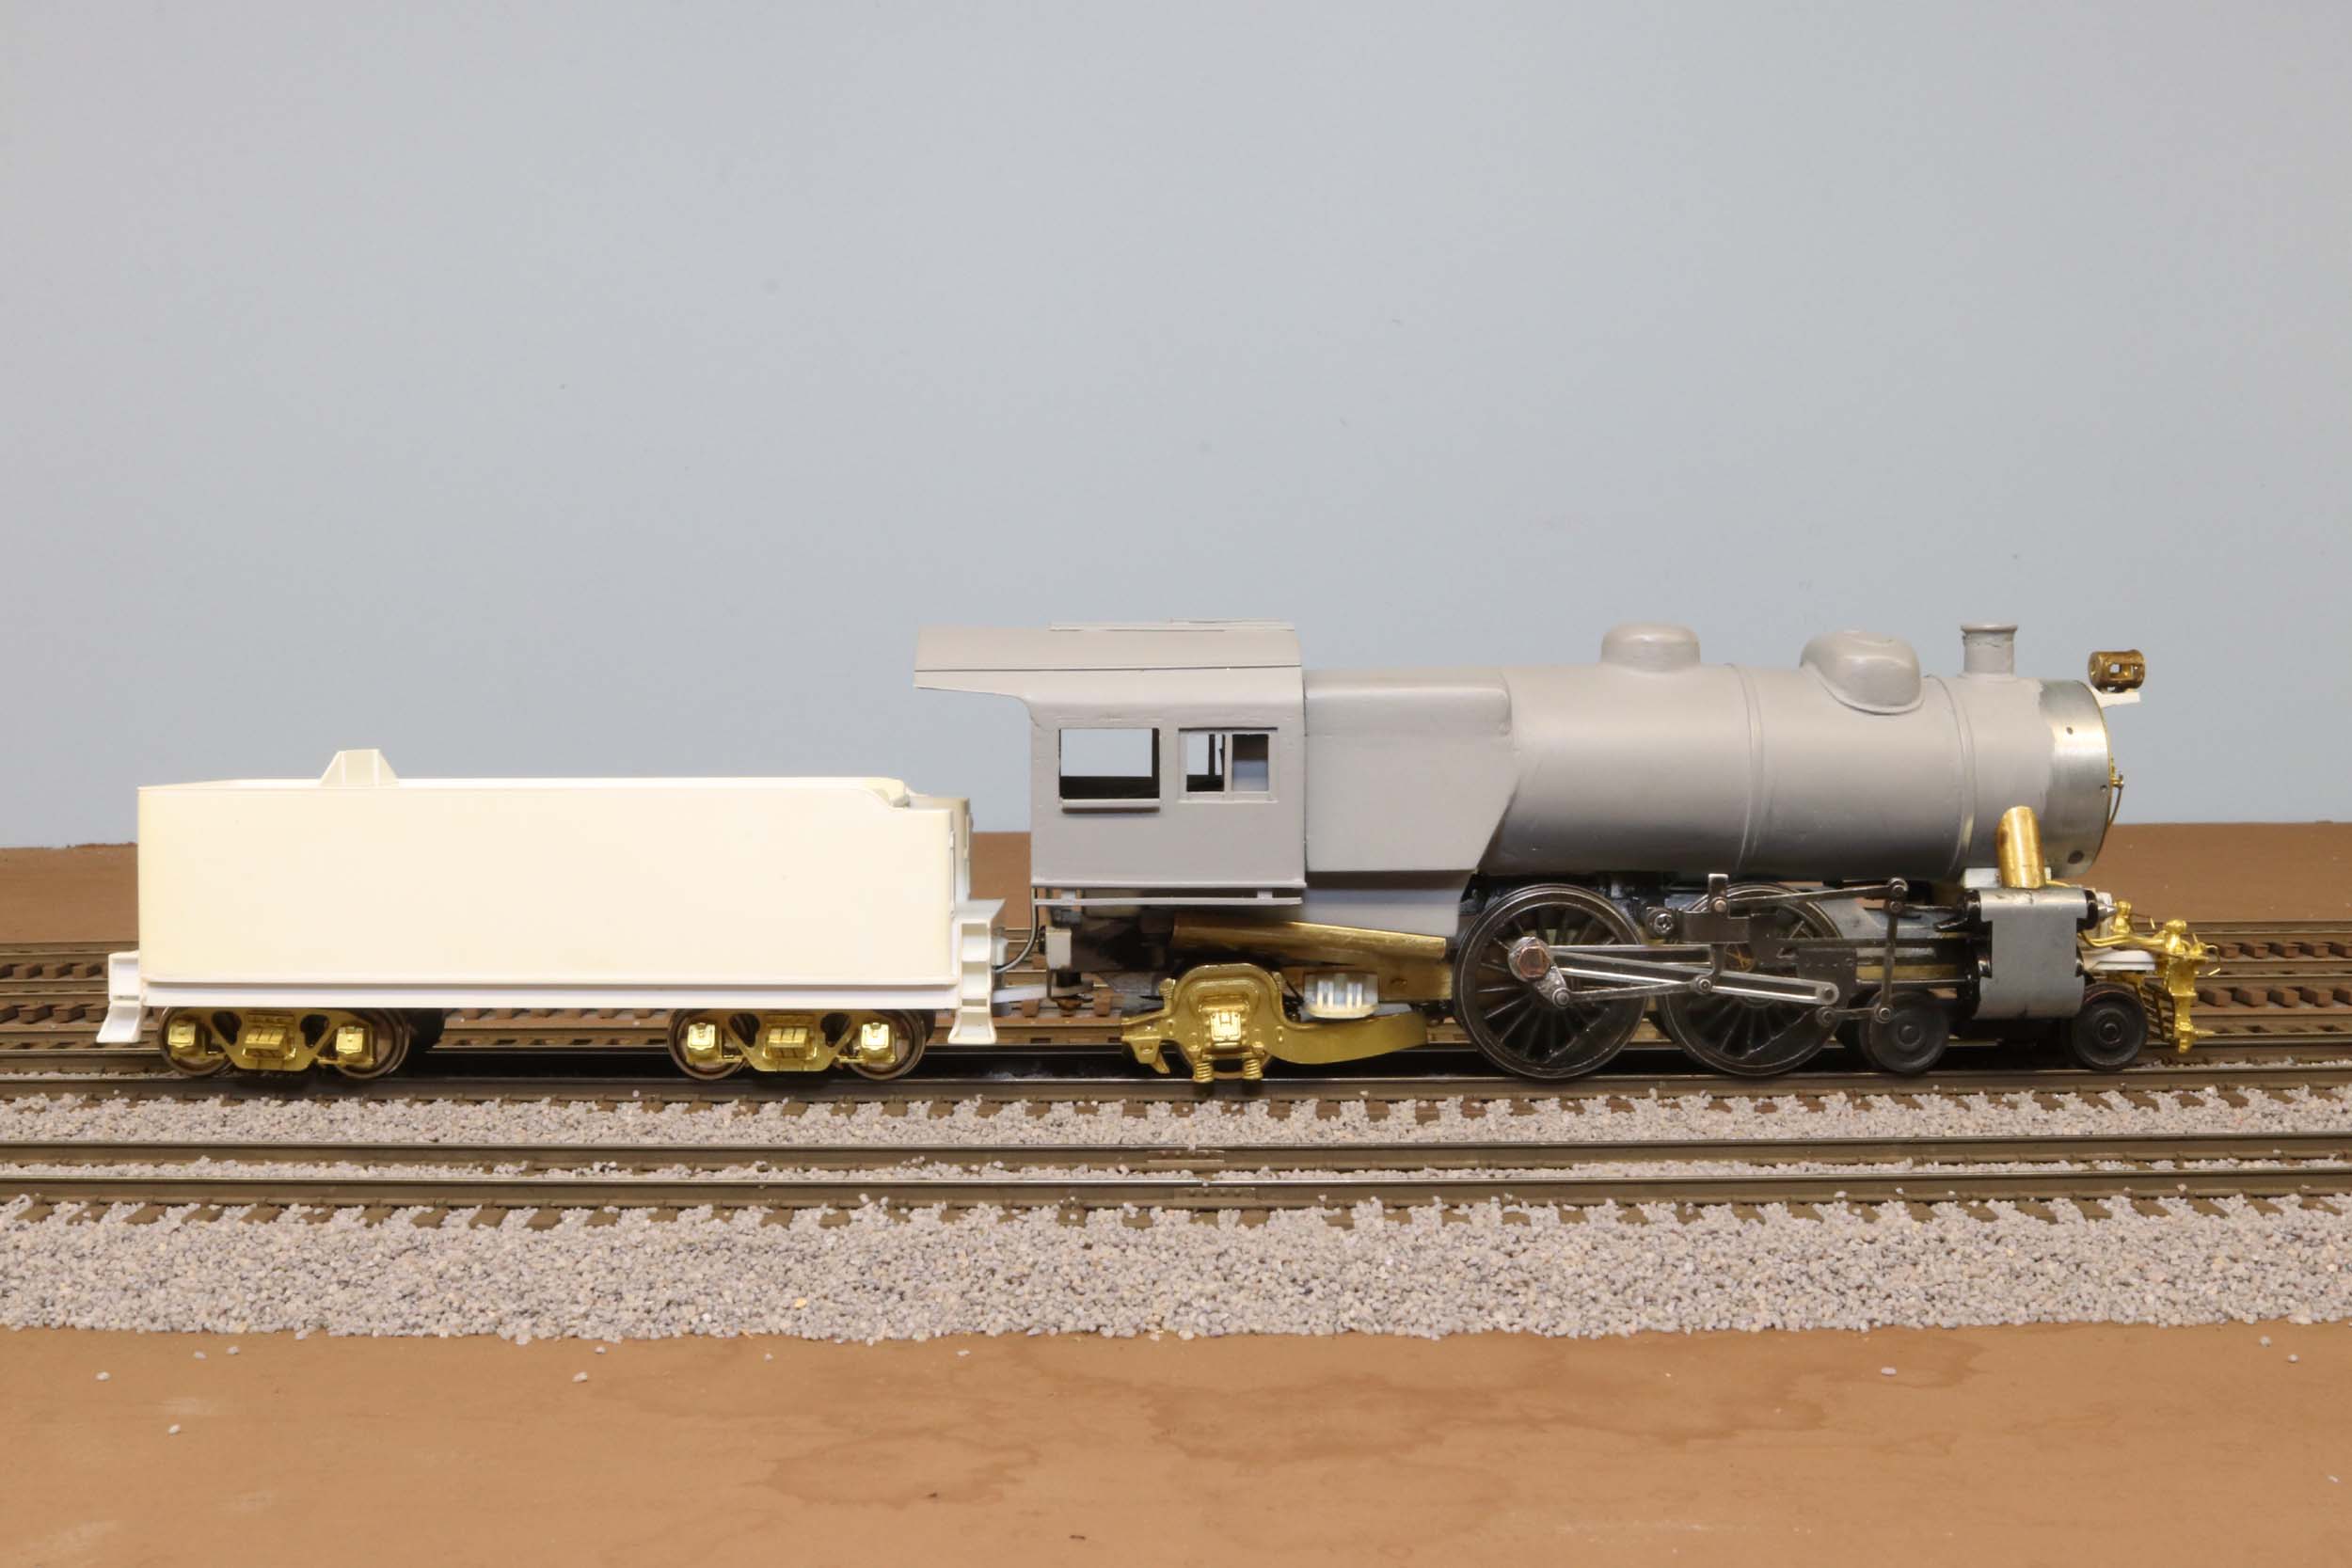
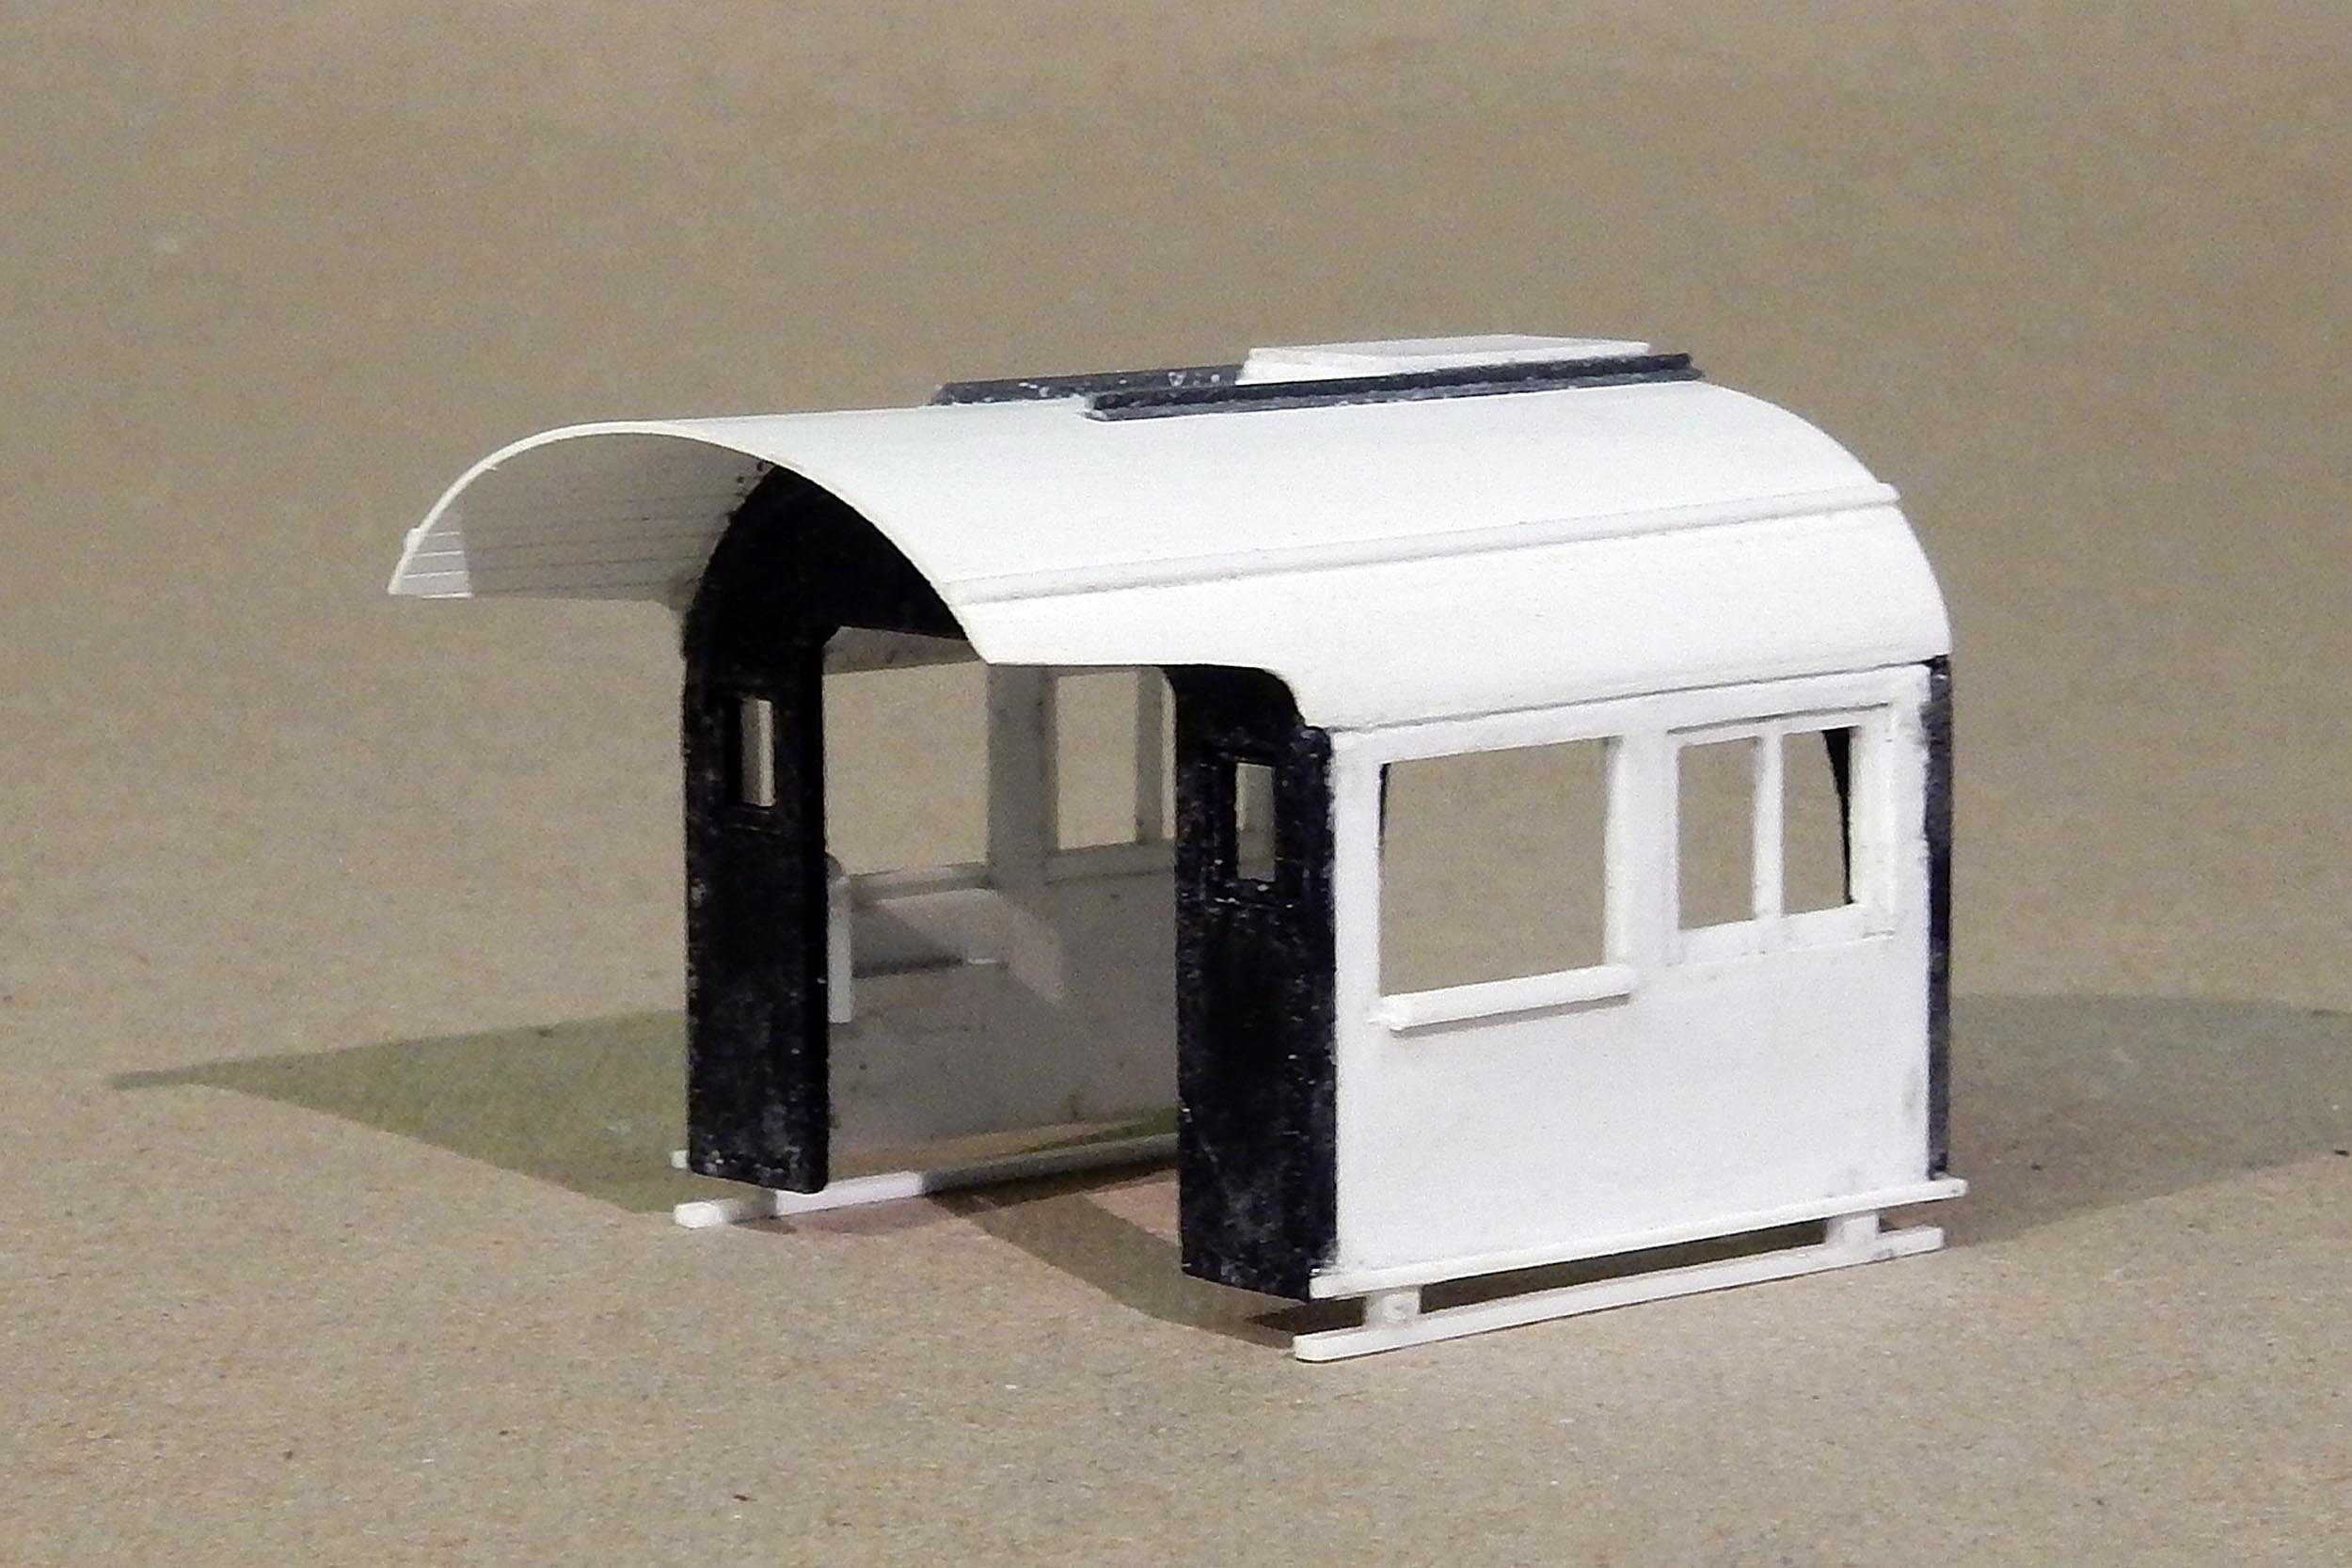
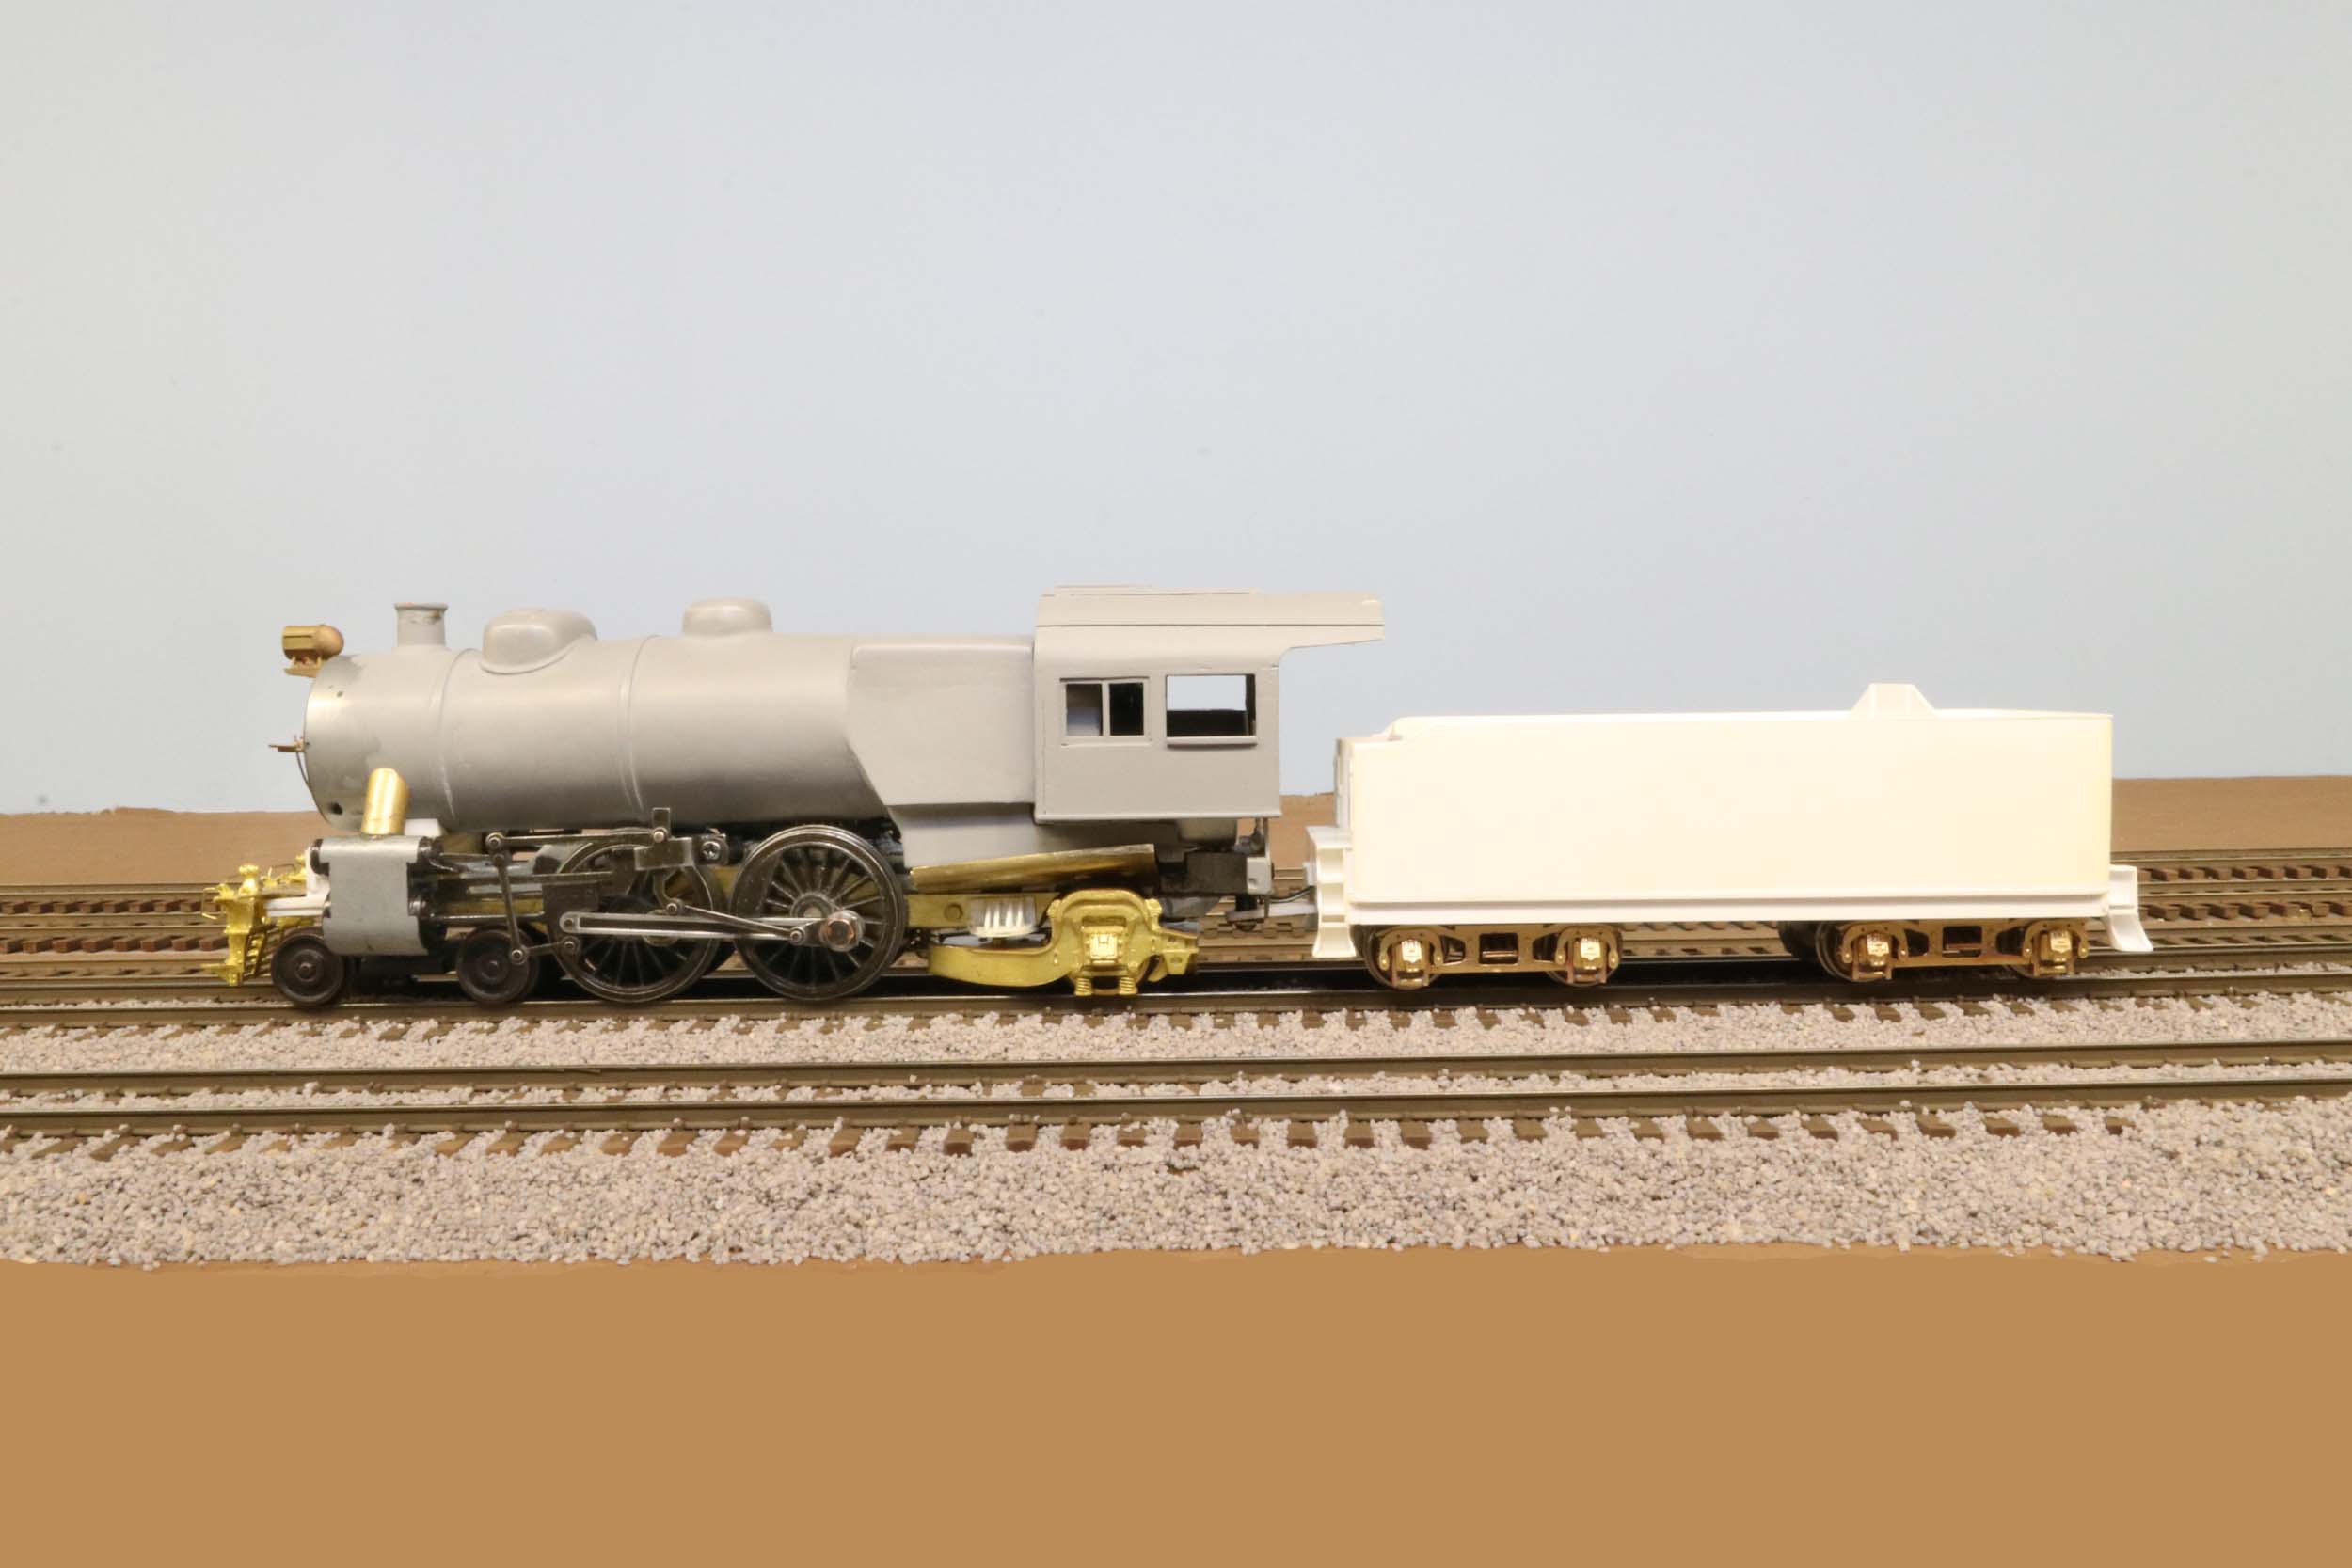
Sam’s Locomotive
This
is how I got the locomotive on 7-23-16, from Sam’s hands to mine. Sam scratchbuilt the cab. I don’t know much else about how
Sam got it to this point. Still this is some significant work completed in the
transformation from a USRA Pacific to what I have here.
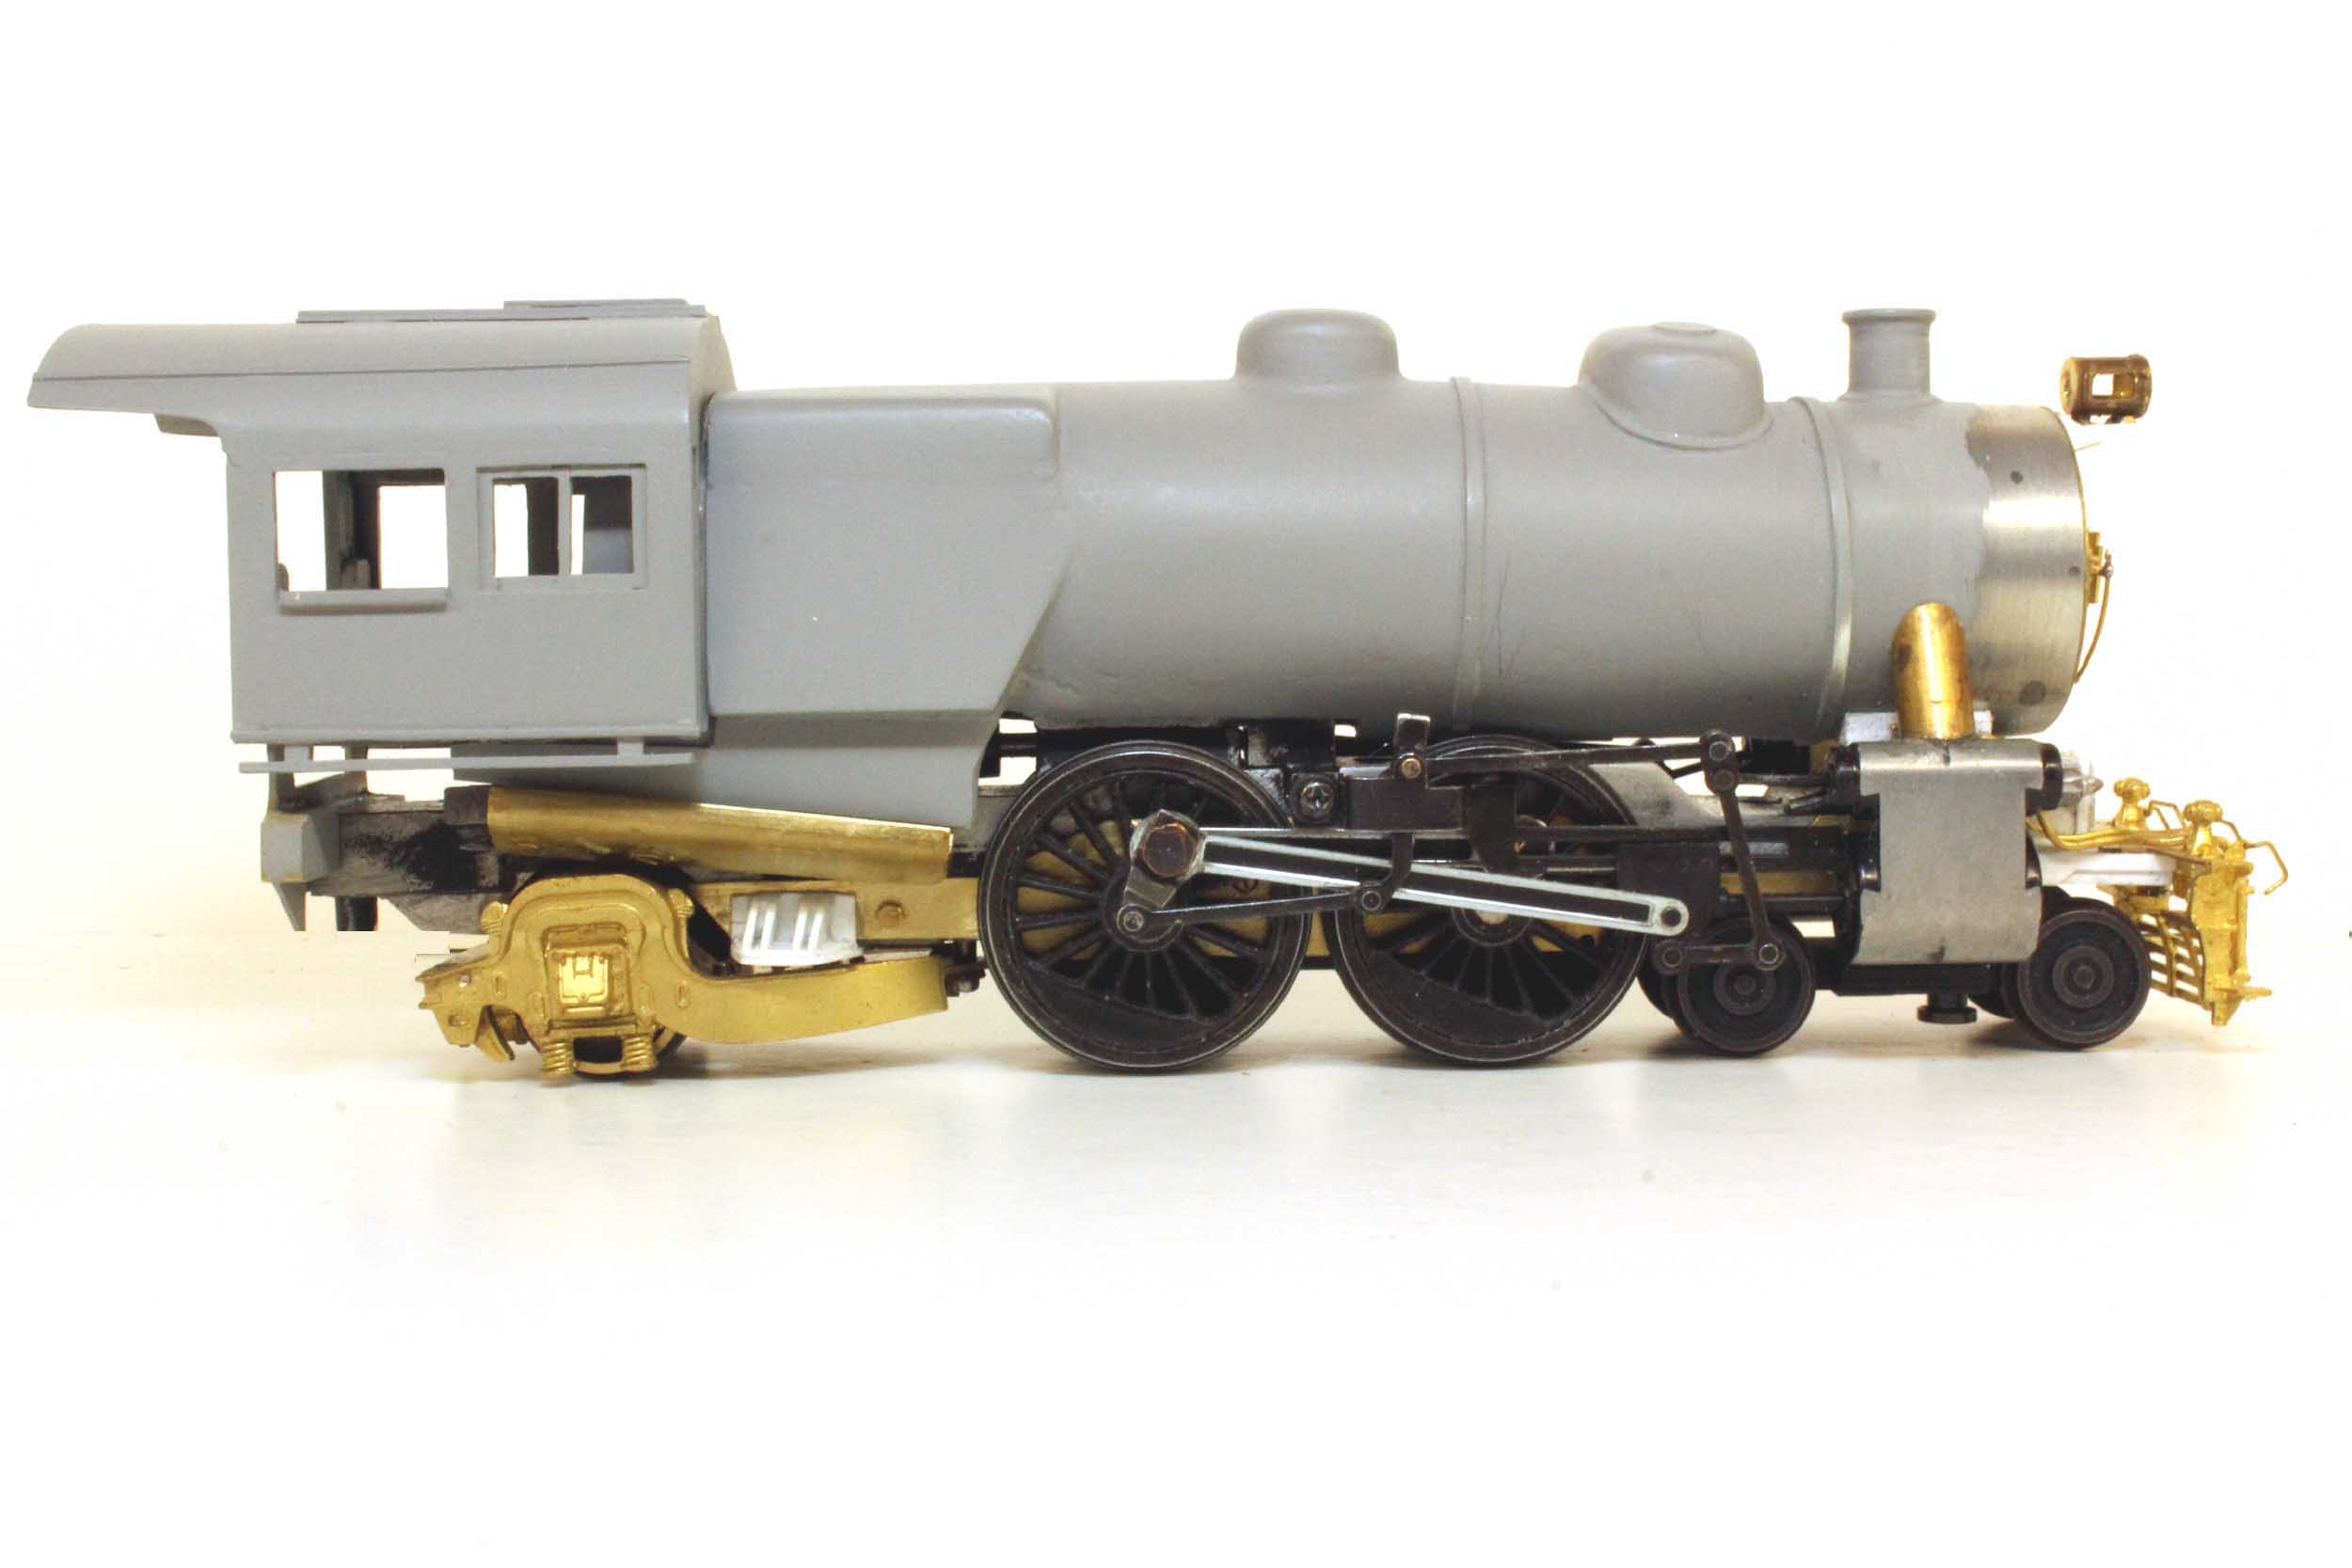

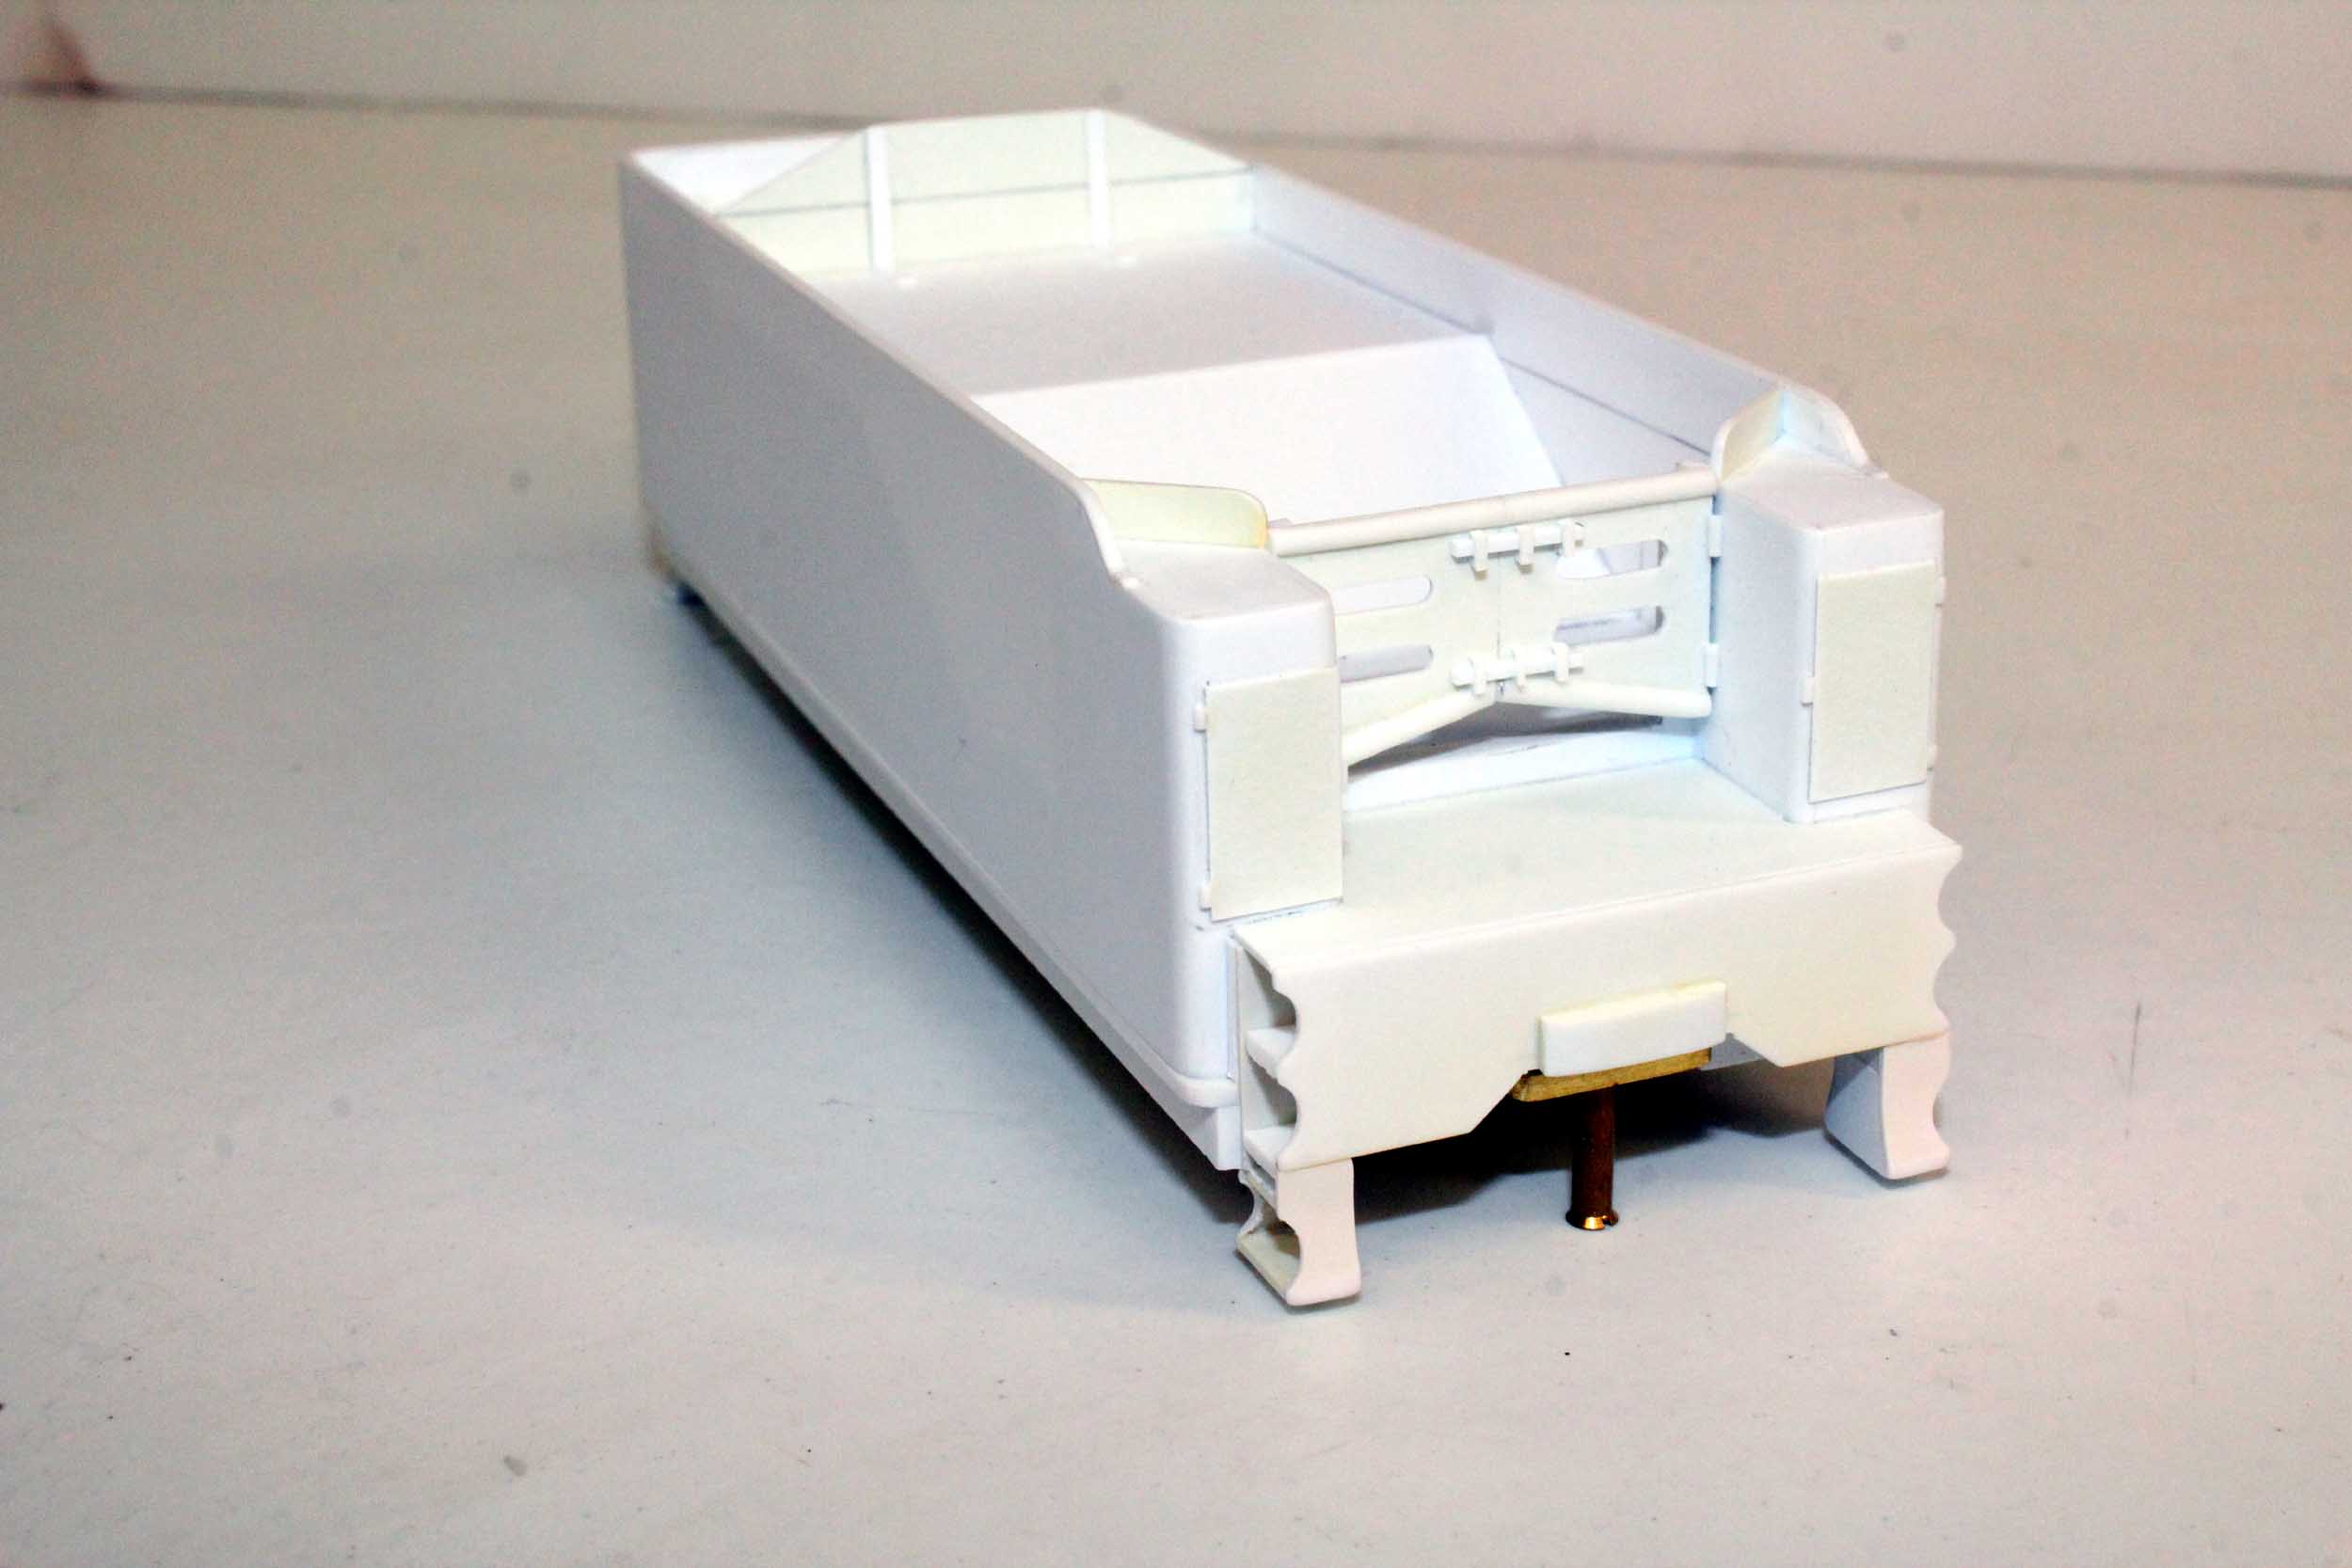
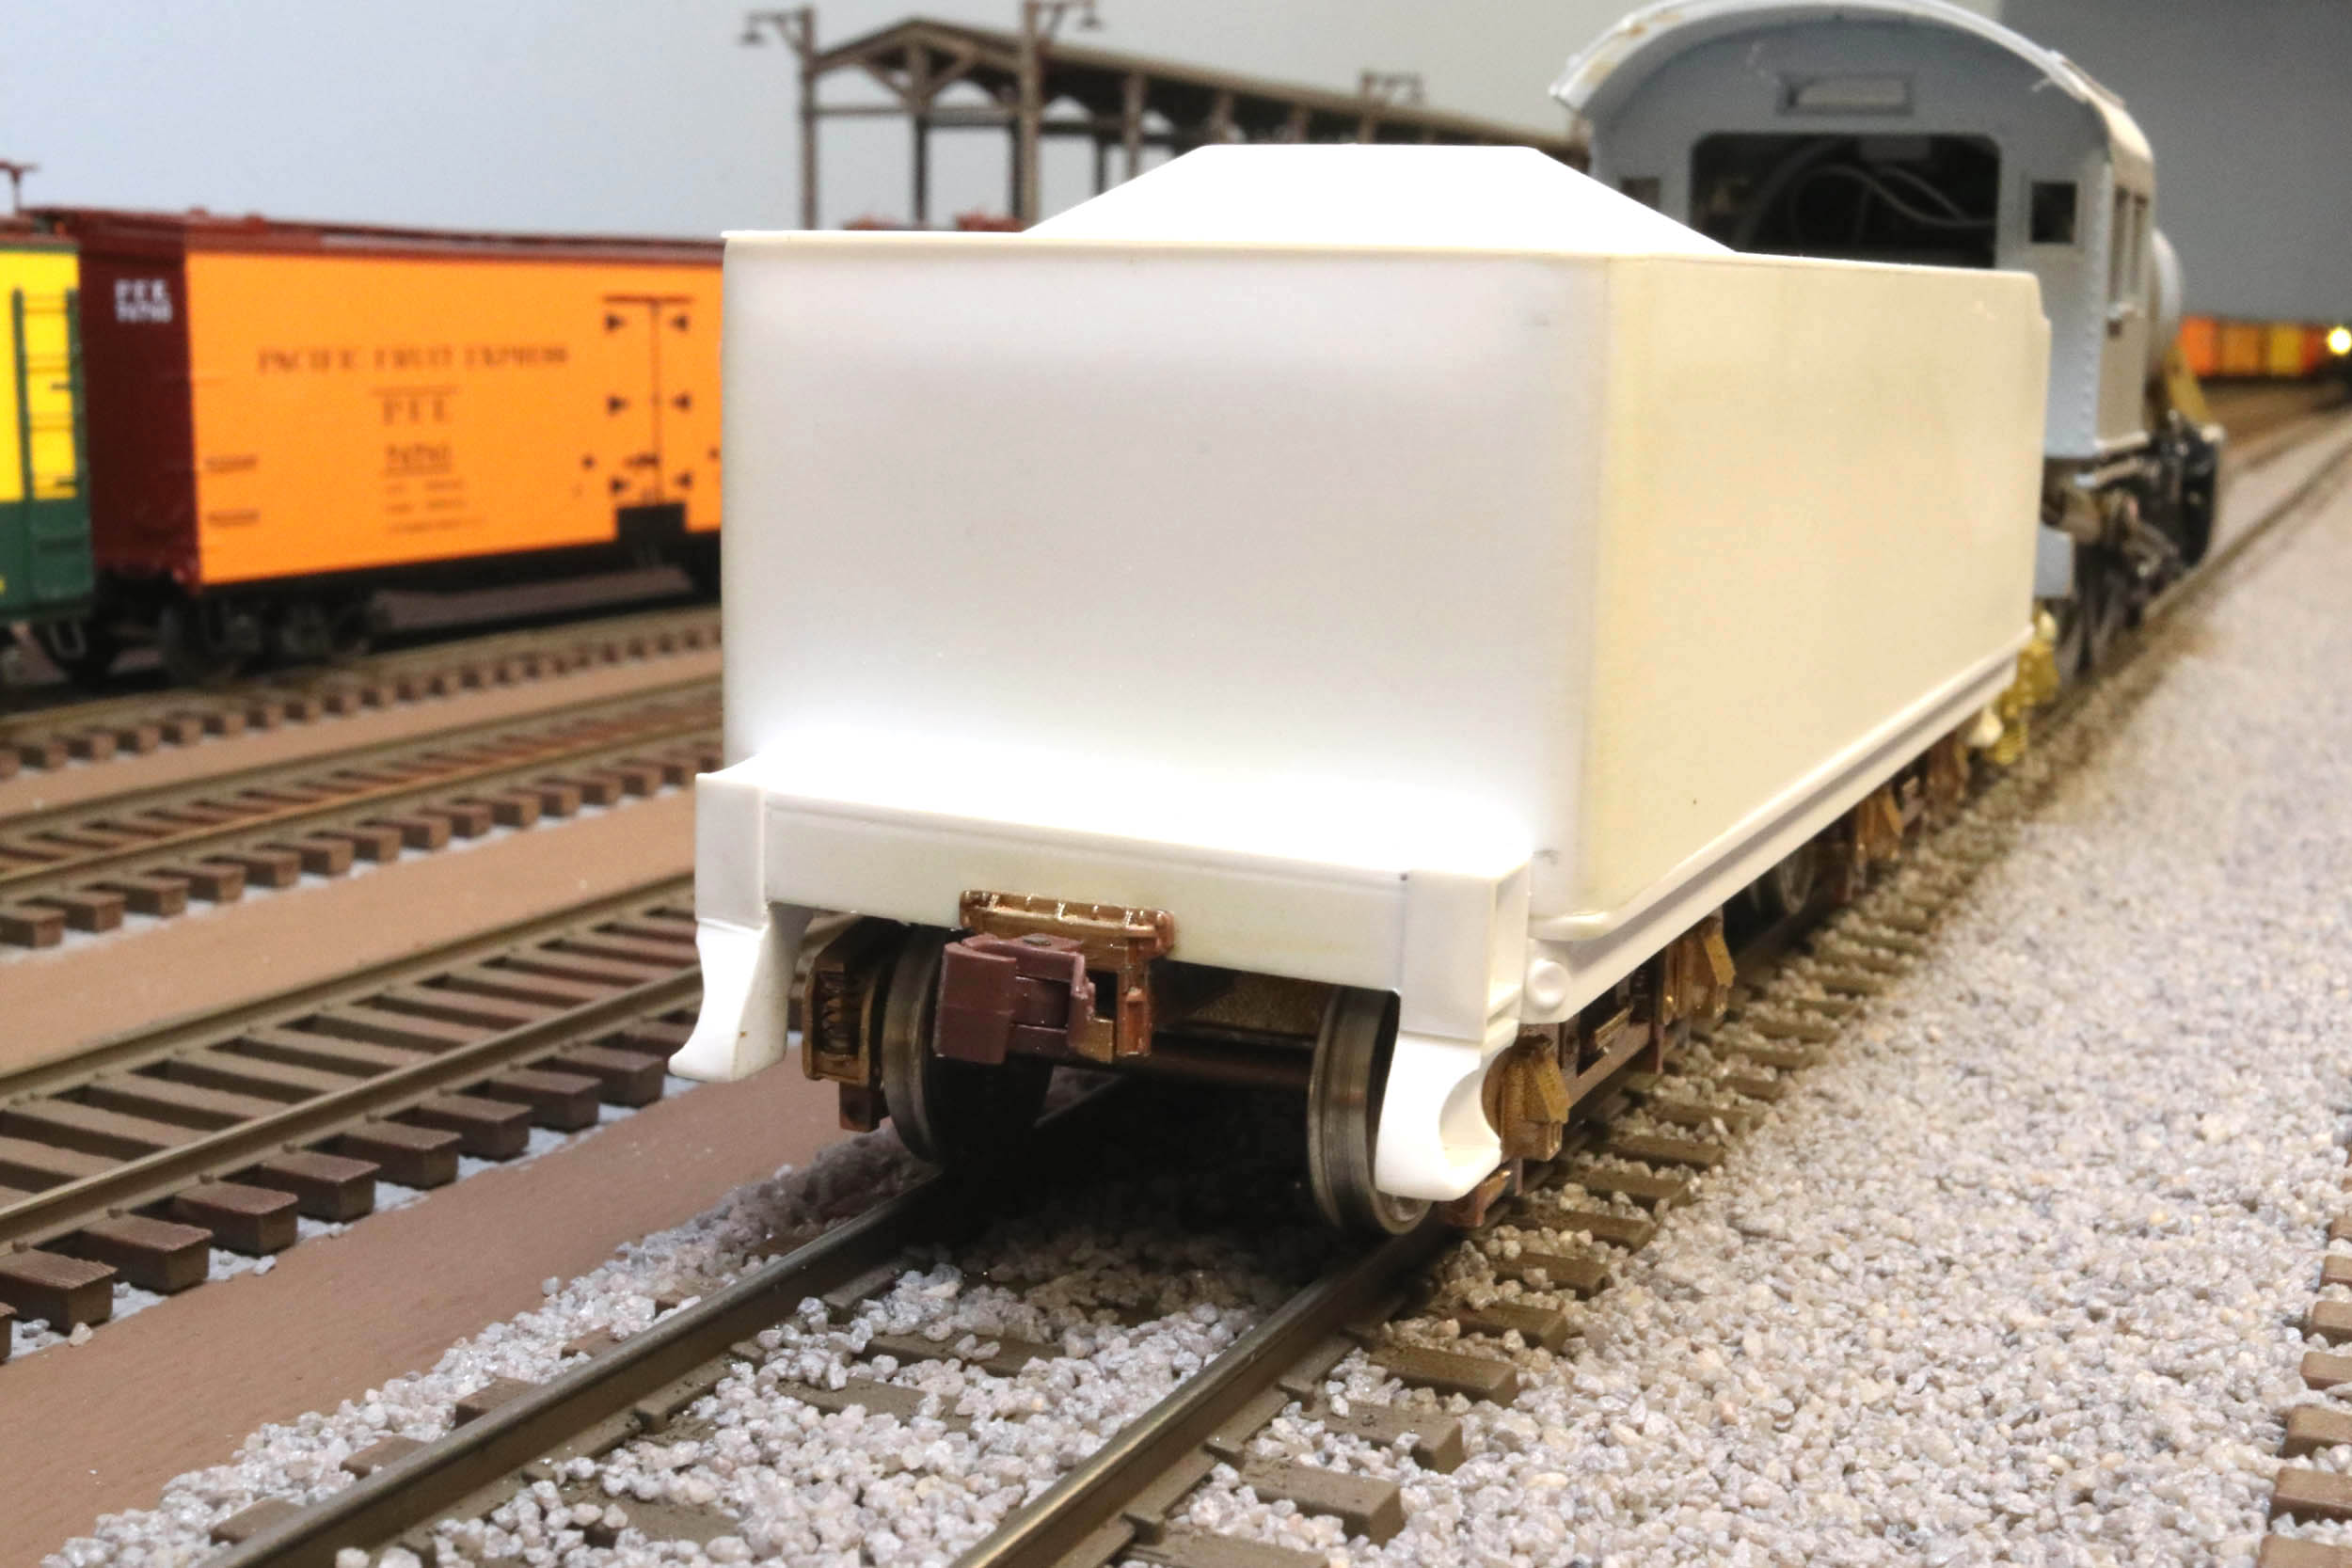
There was no tender started, making me think this would be a very
long time project.
But very good luck intervened once again.
(Maybe from Sam?)
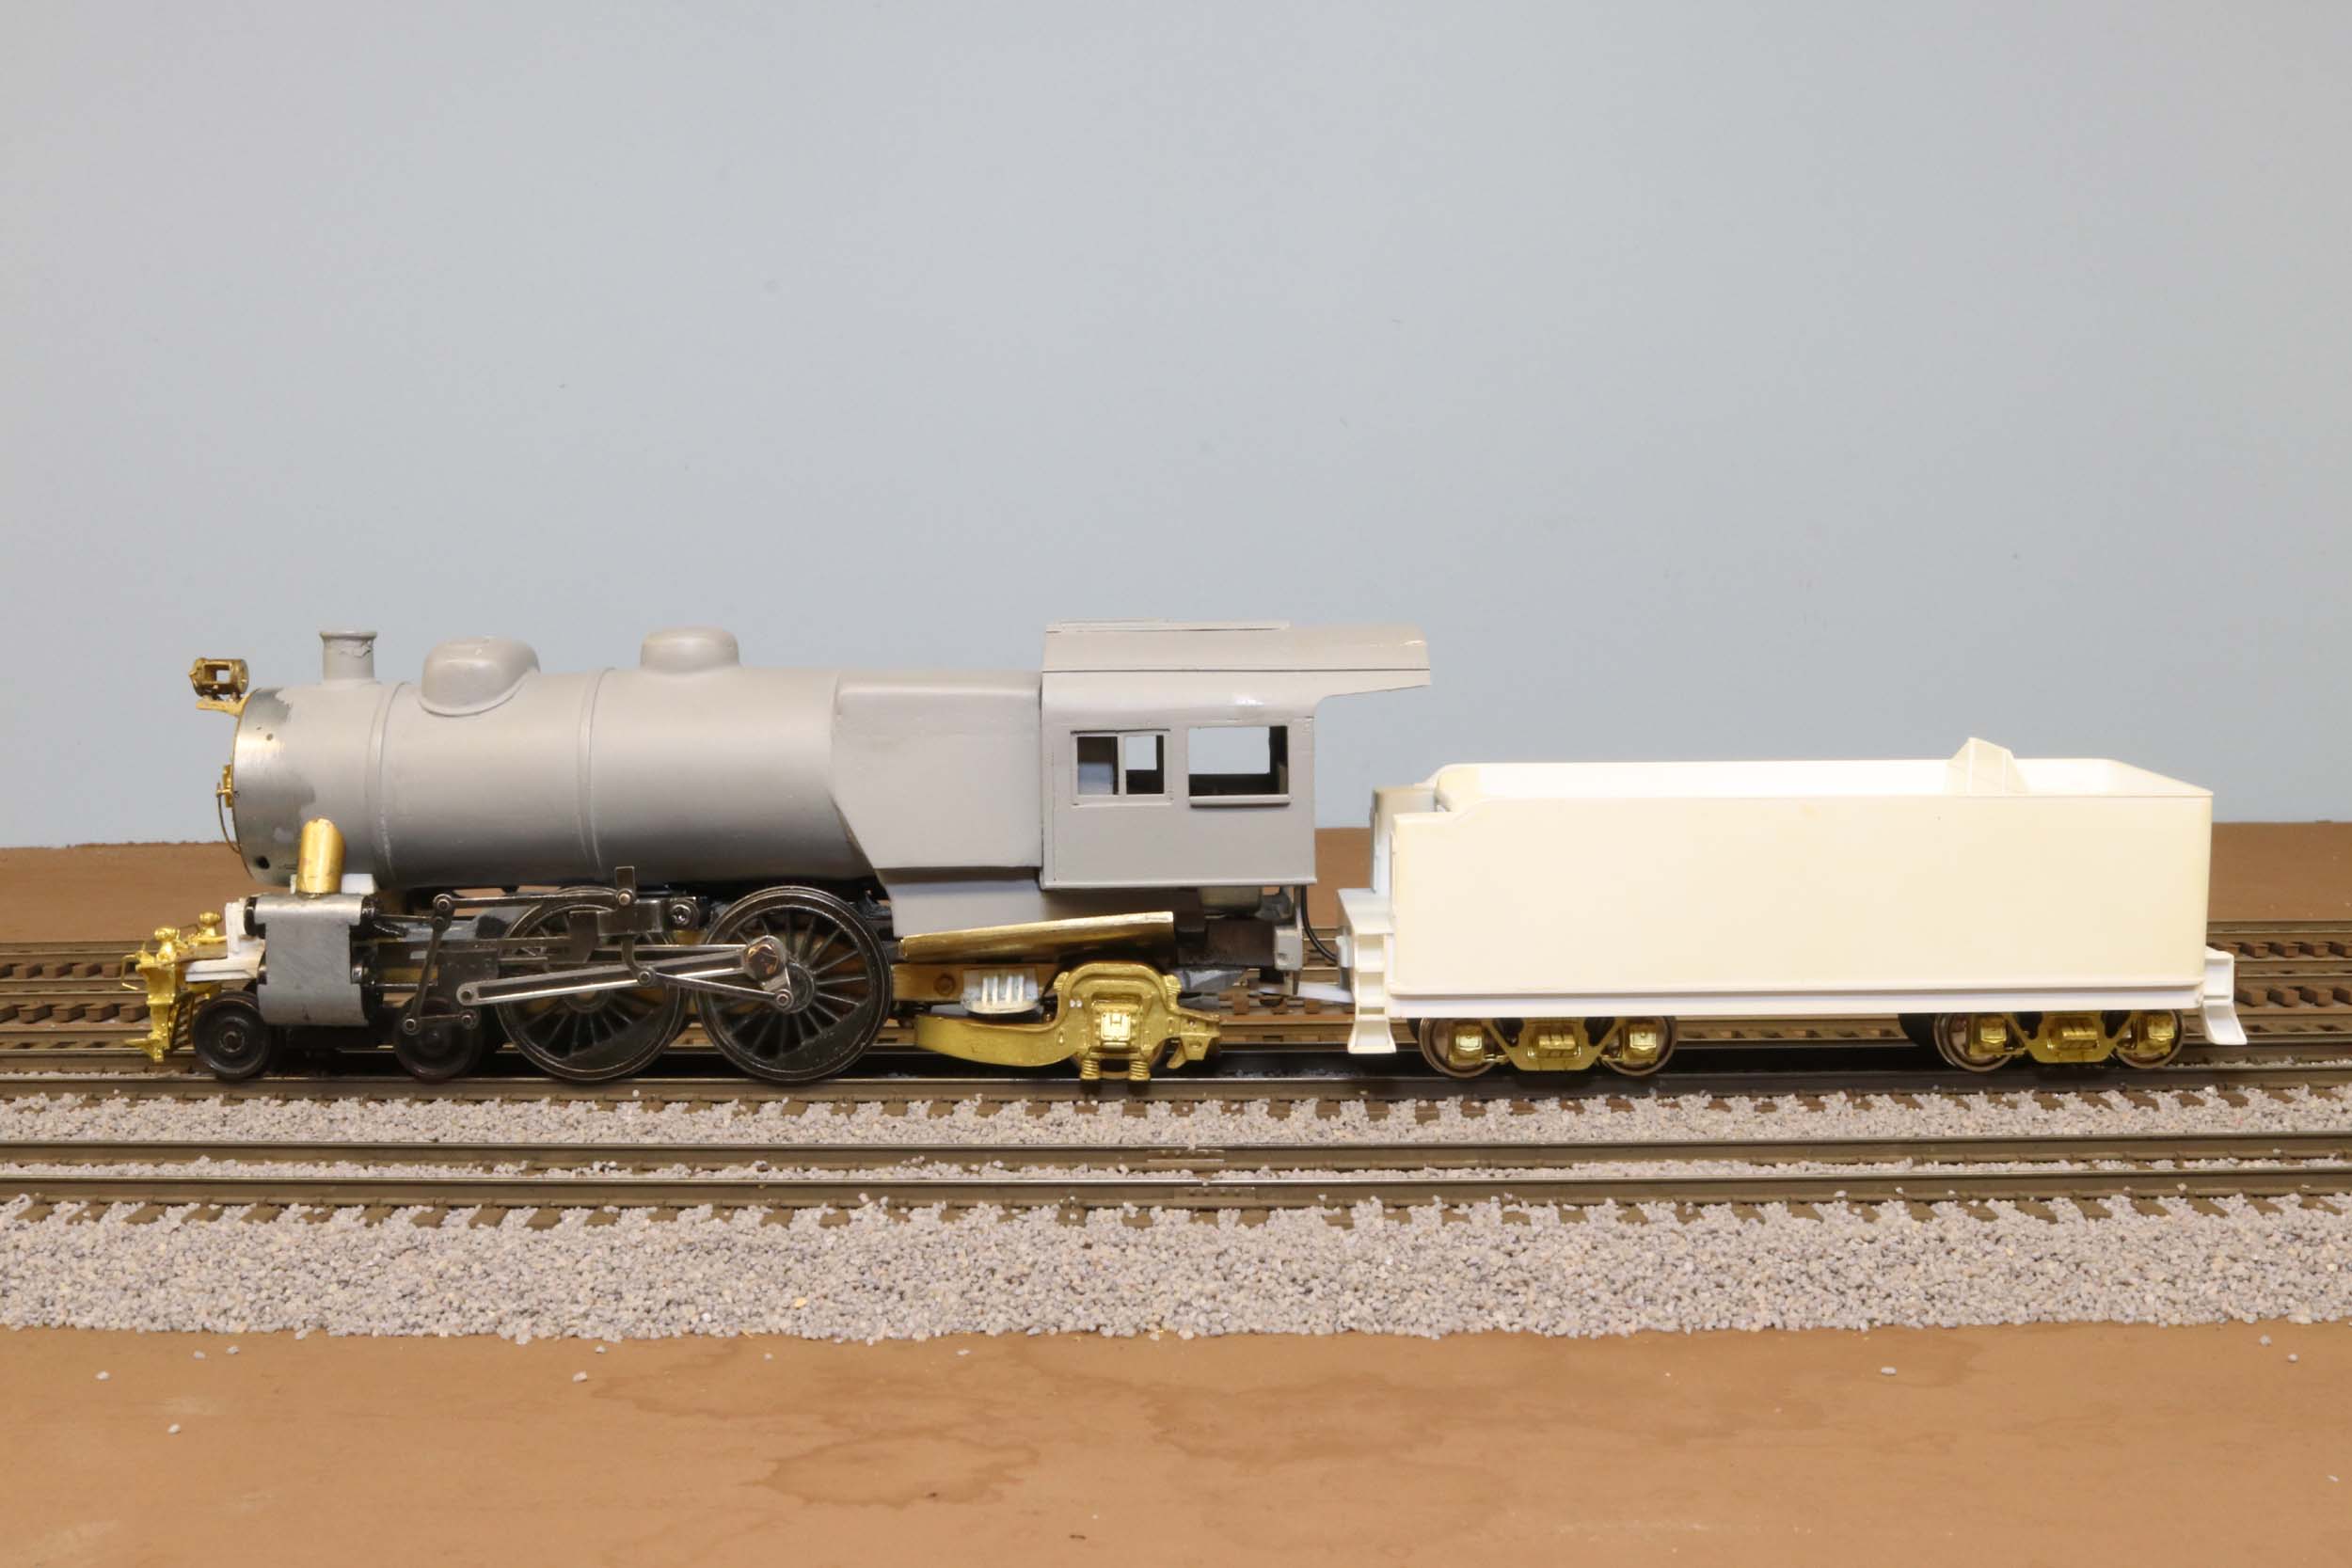
There
was a mention of an S Scaler on the former Yahoo S Scale group that made an
amazing tender from plastic. It was just really awesome work. I contacted him,
and most amazingly of all, I had this tender shell in my hands in about 3
weeks. My E6 just got the next biggest missing piece keeping me from
proceeding. It is a work of art in plastic. The wrapping of the plastic is just
wonderful. This locomotive was meant to be completed.


Added 1-1-19
Just
for a goof I got this out of the box for the first time in about 2 years. The
lack of correct tender trucks has kept it off the to do
list. I hope to have that resolved soon. But I took it from a various parts
status to quick n dirty running in 1 day. It even surprised me how much I got
done.
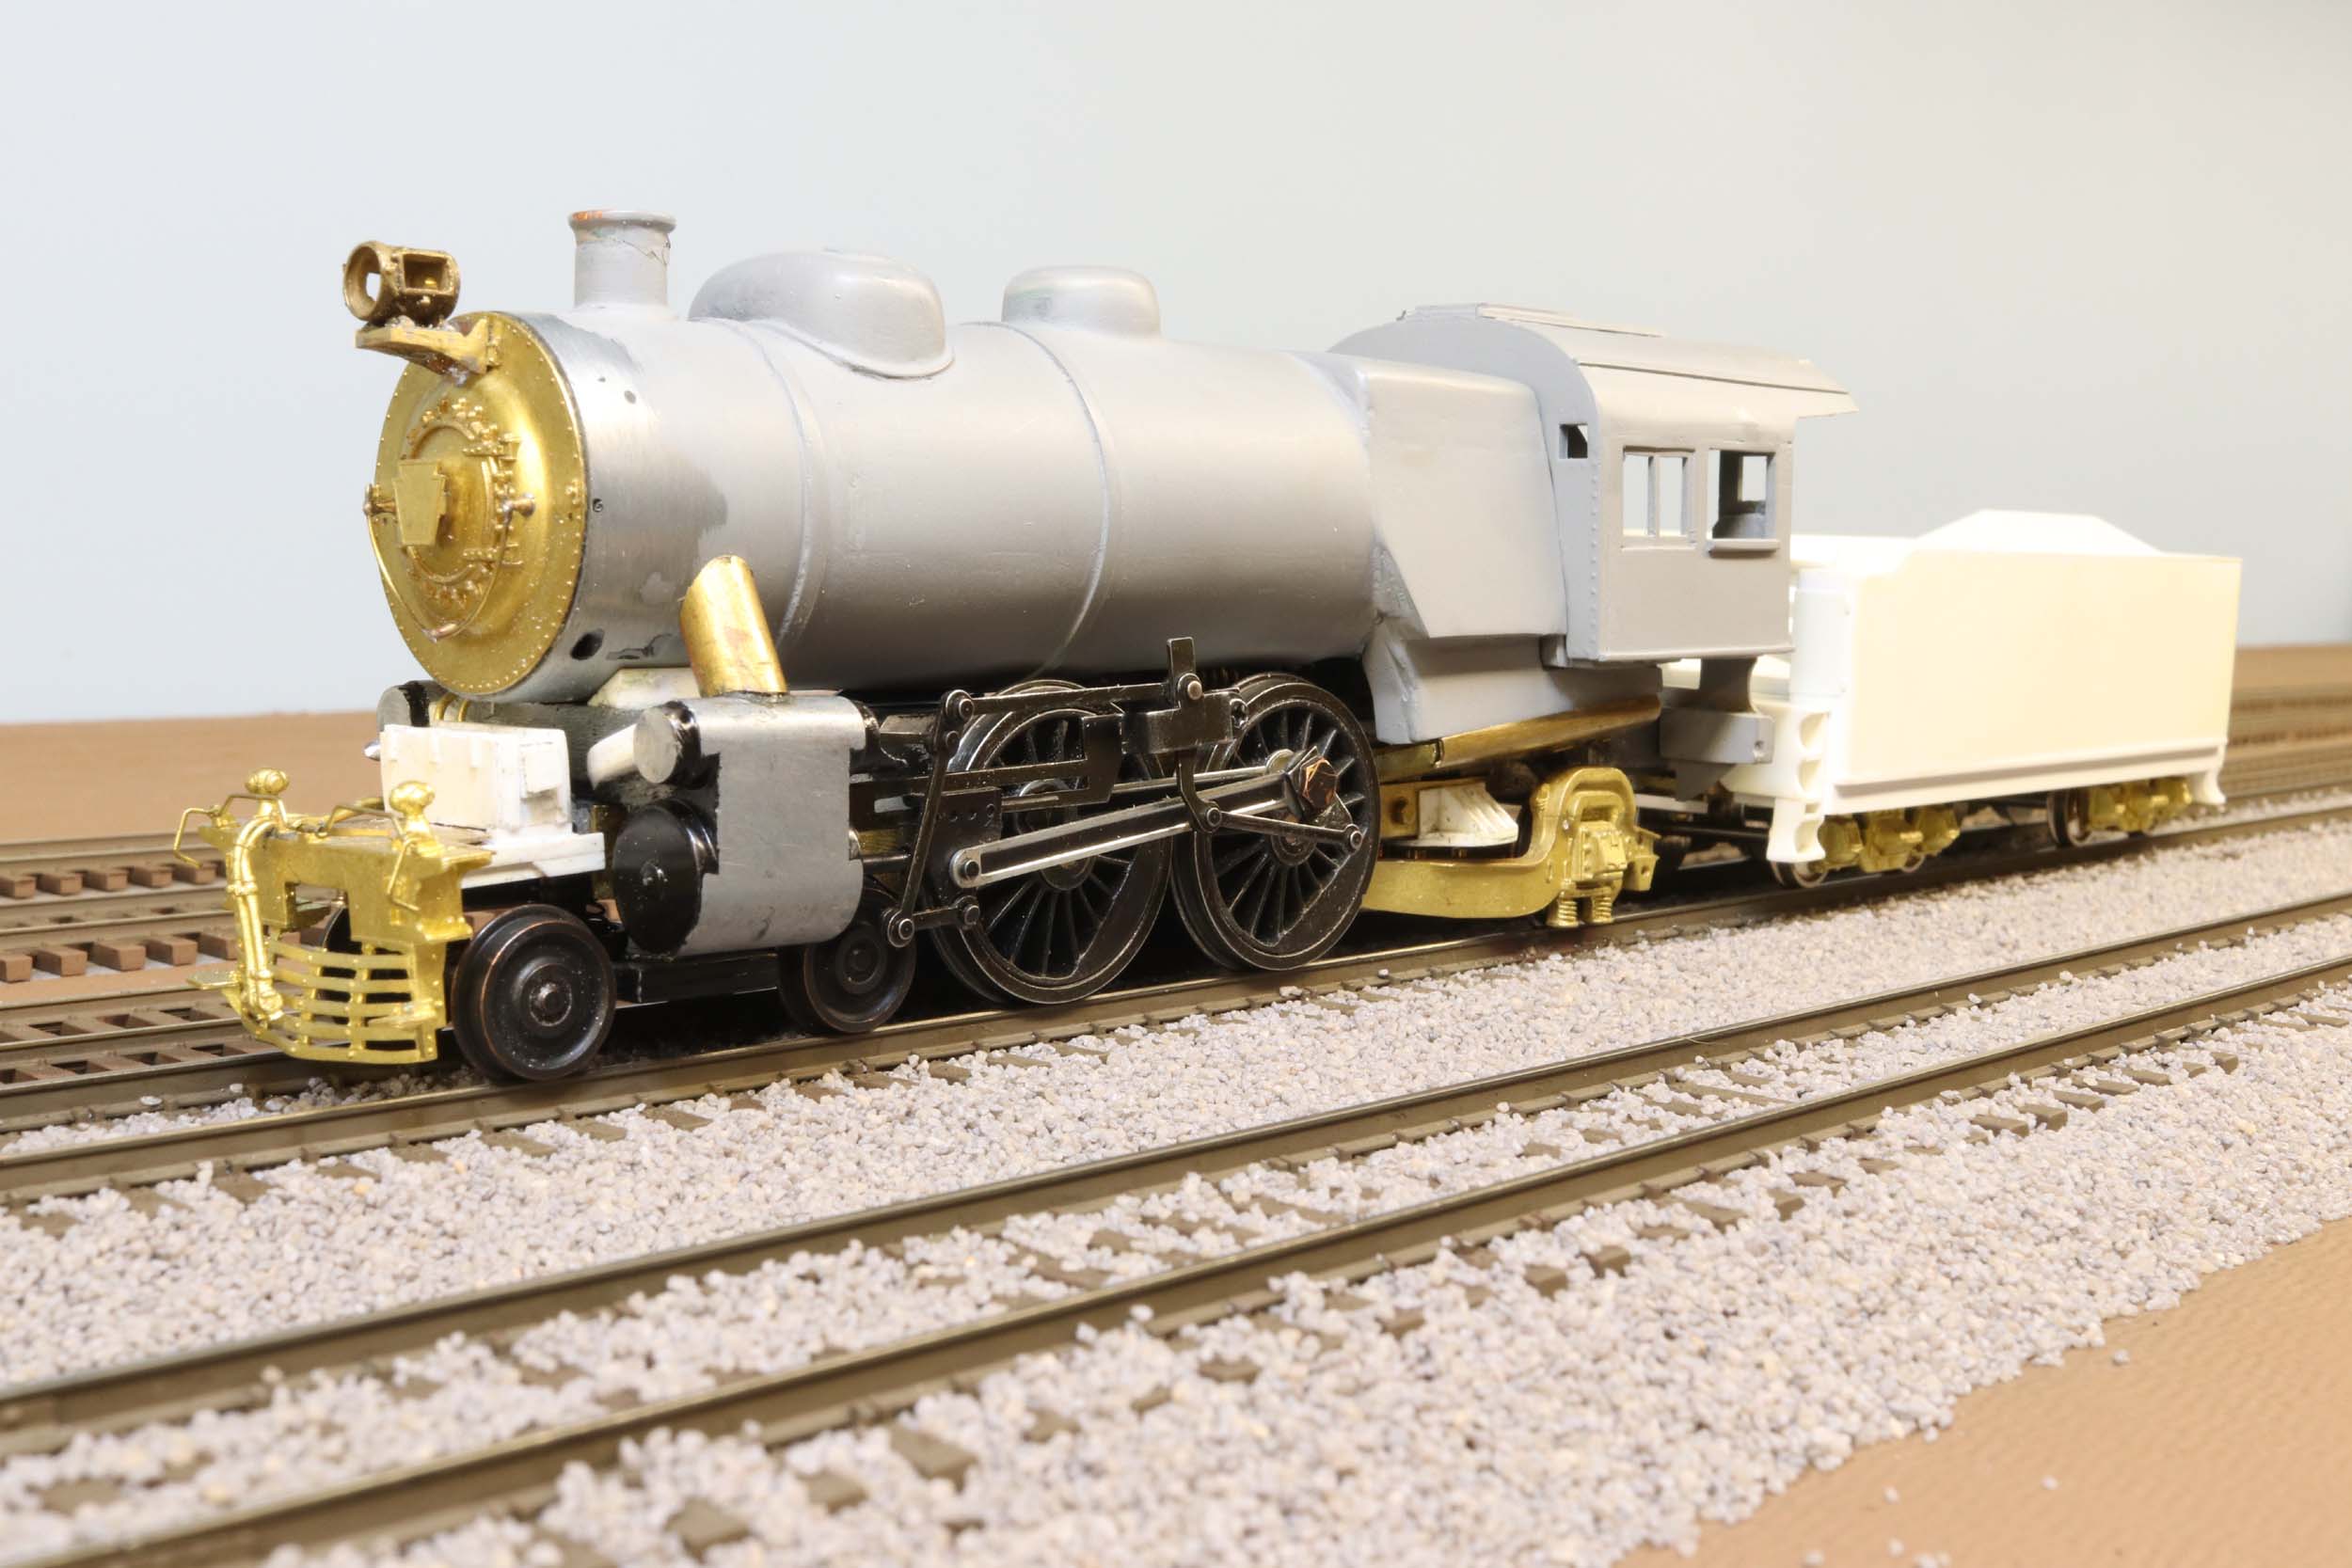
This
is the only known PRR E6 in S Scale besides possibly some Industrial Rail O-27
locos fitted on American Flyer drives. As far as for Scale operation this may
be the only one. I have taken over other steam locos started by friends like my
Reading G1-sb but it was more
complete when I got it. I have a lot of detailing to do! It should be fun.
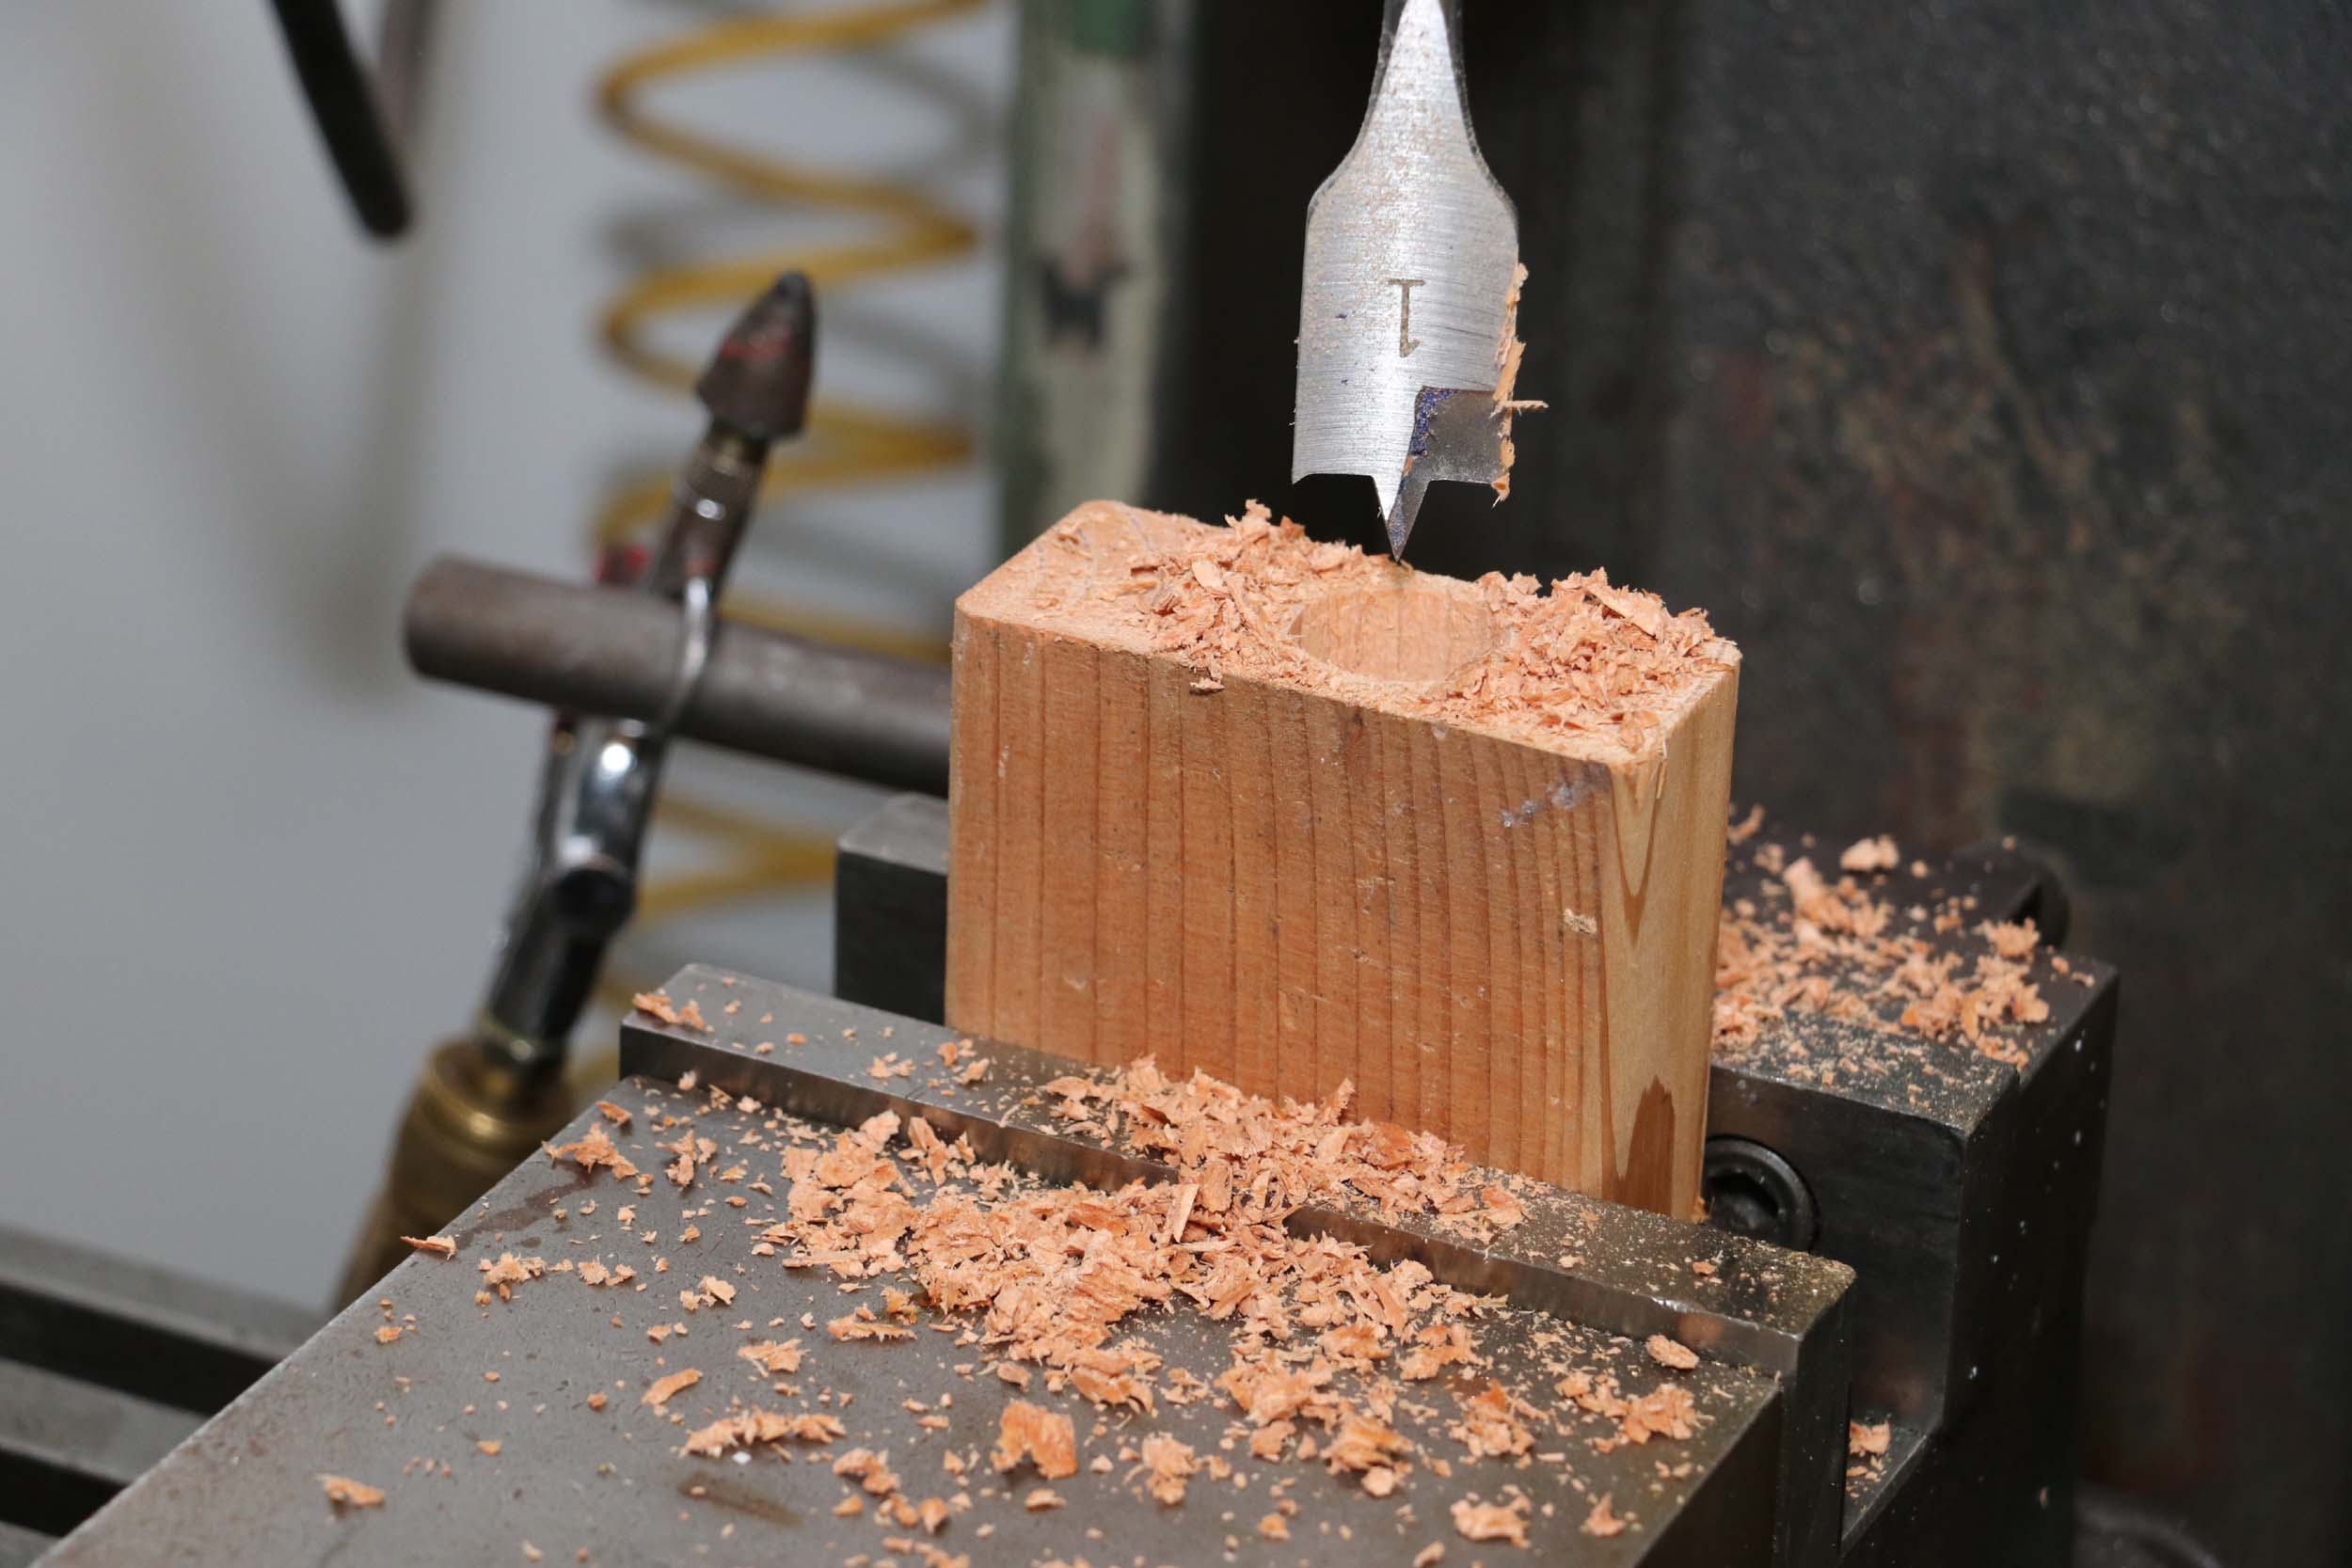
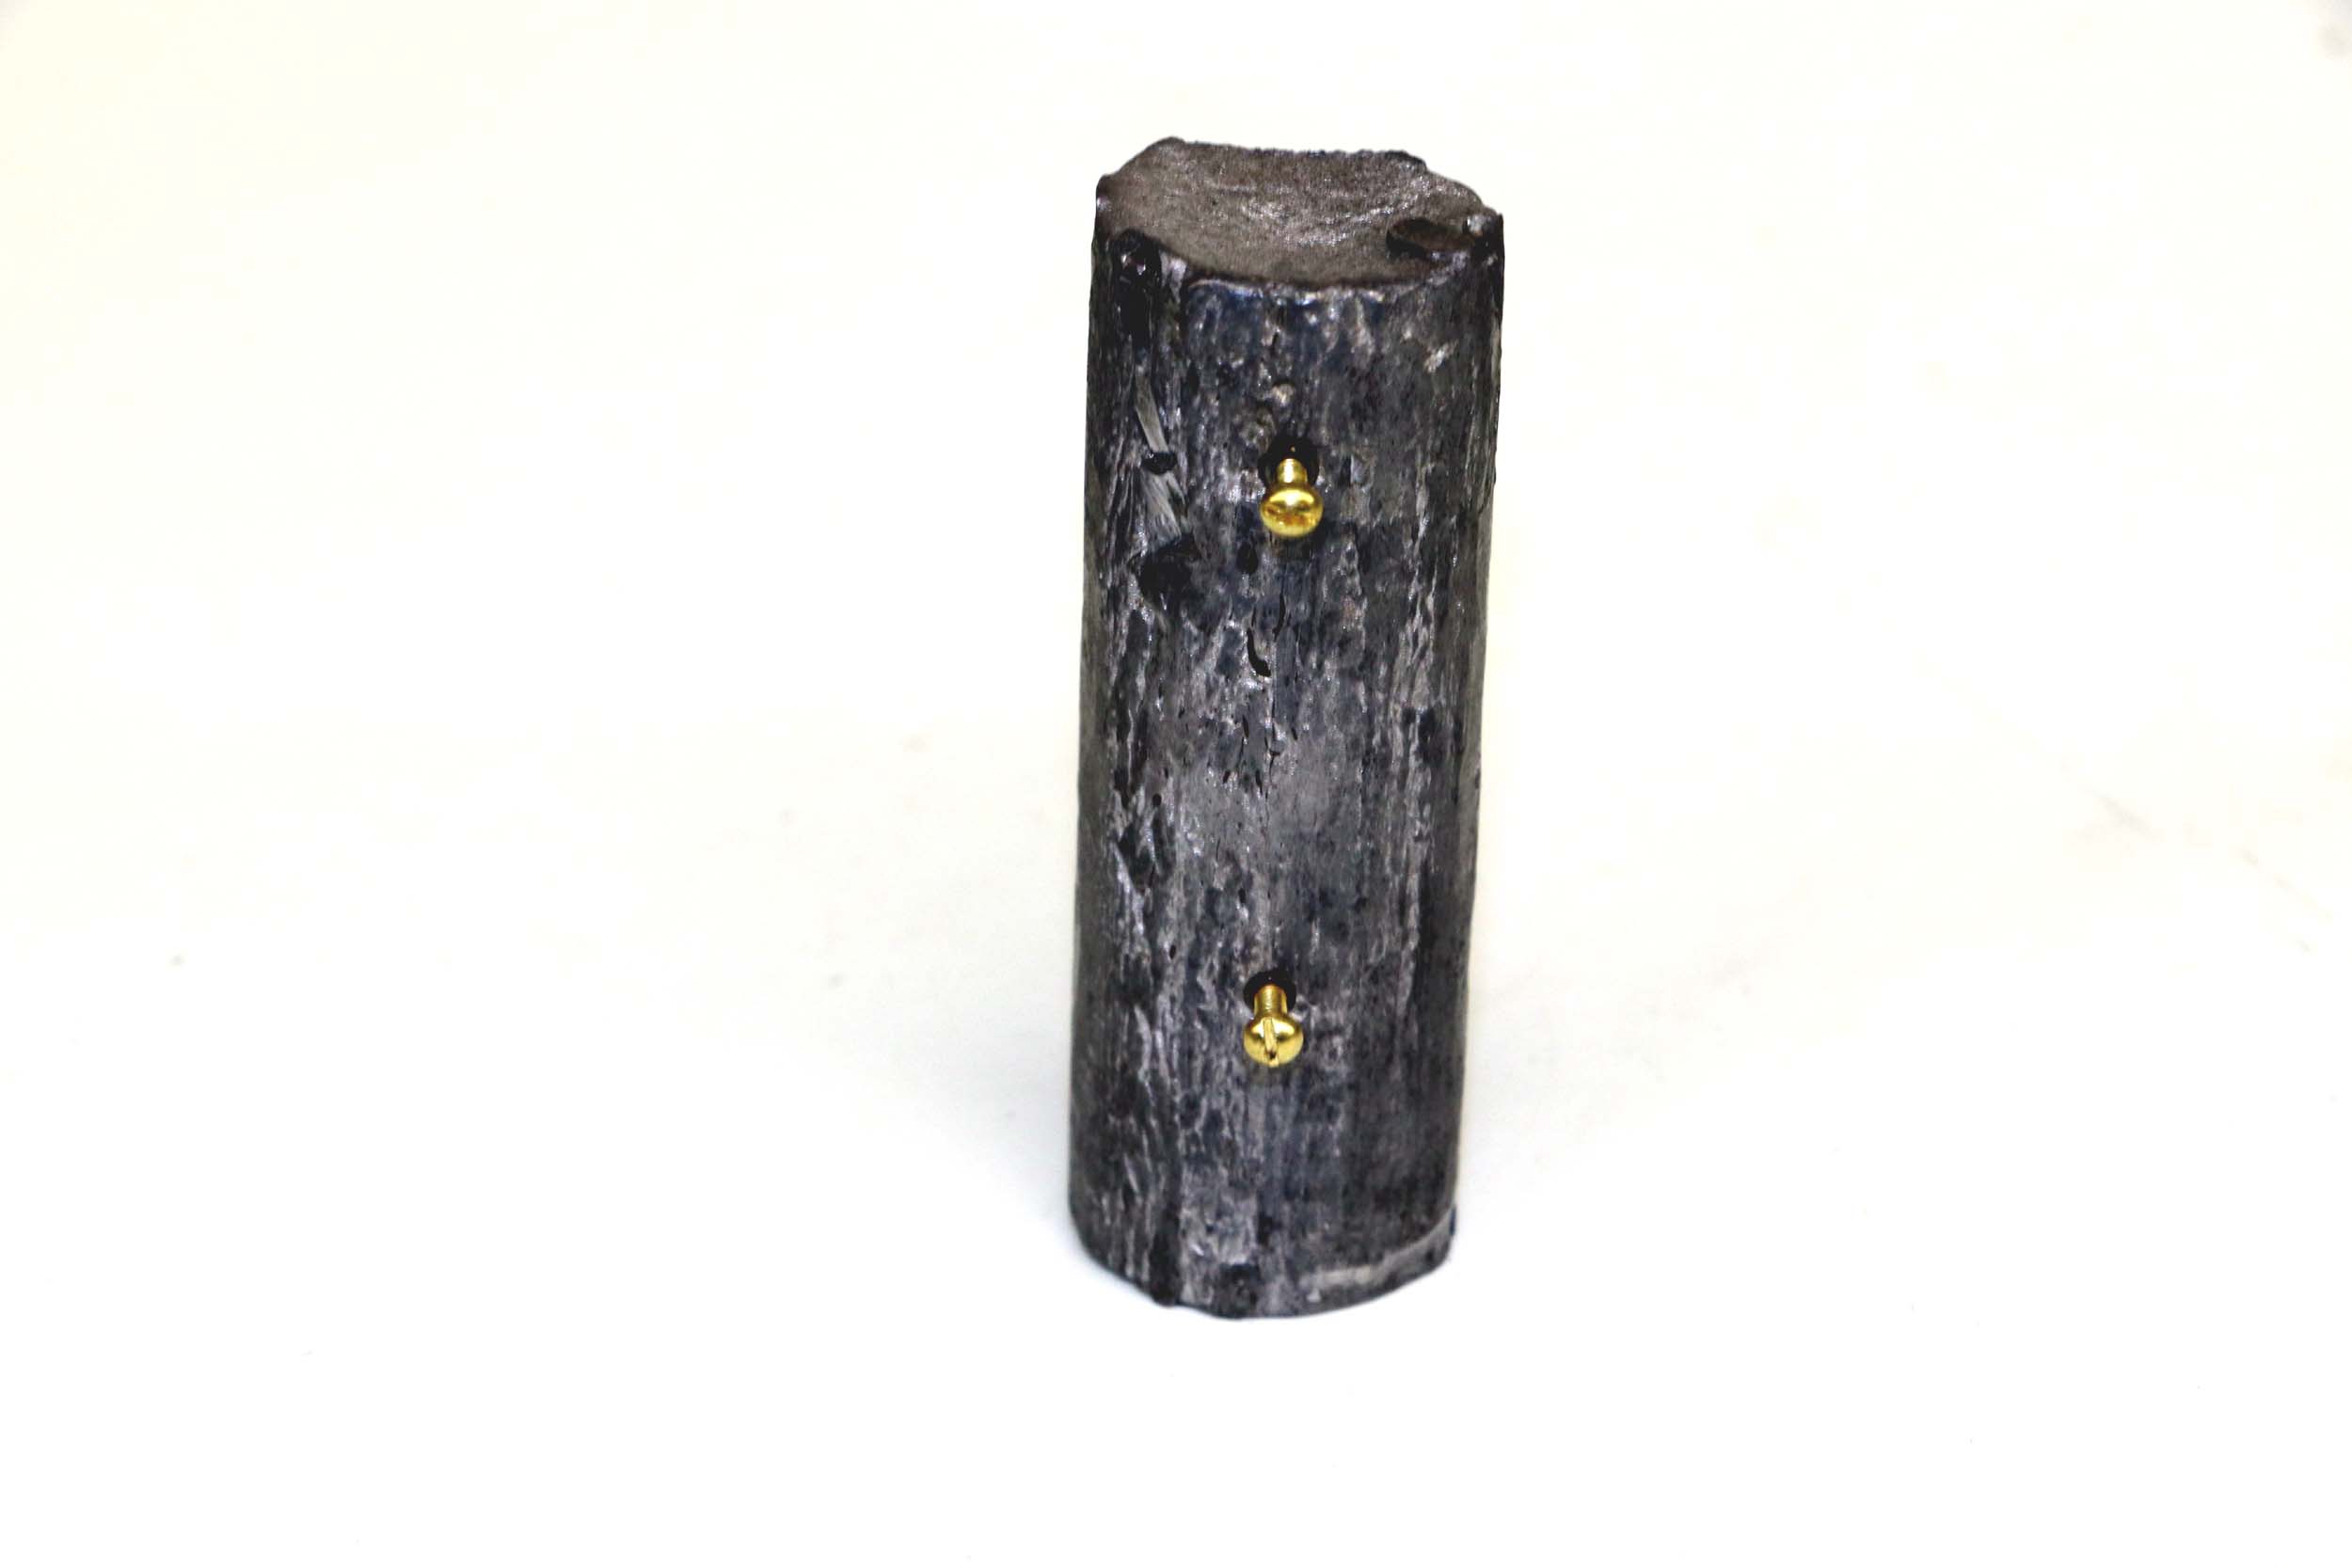
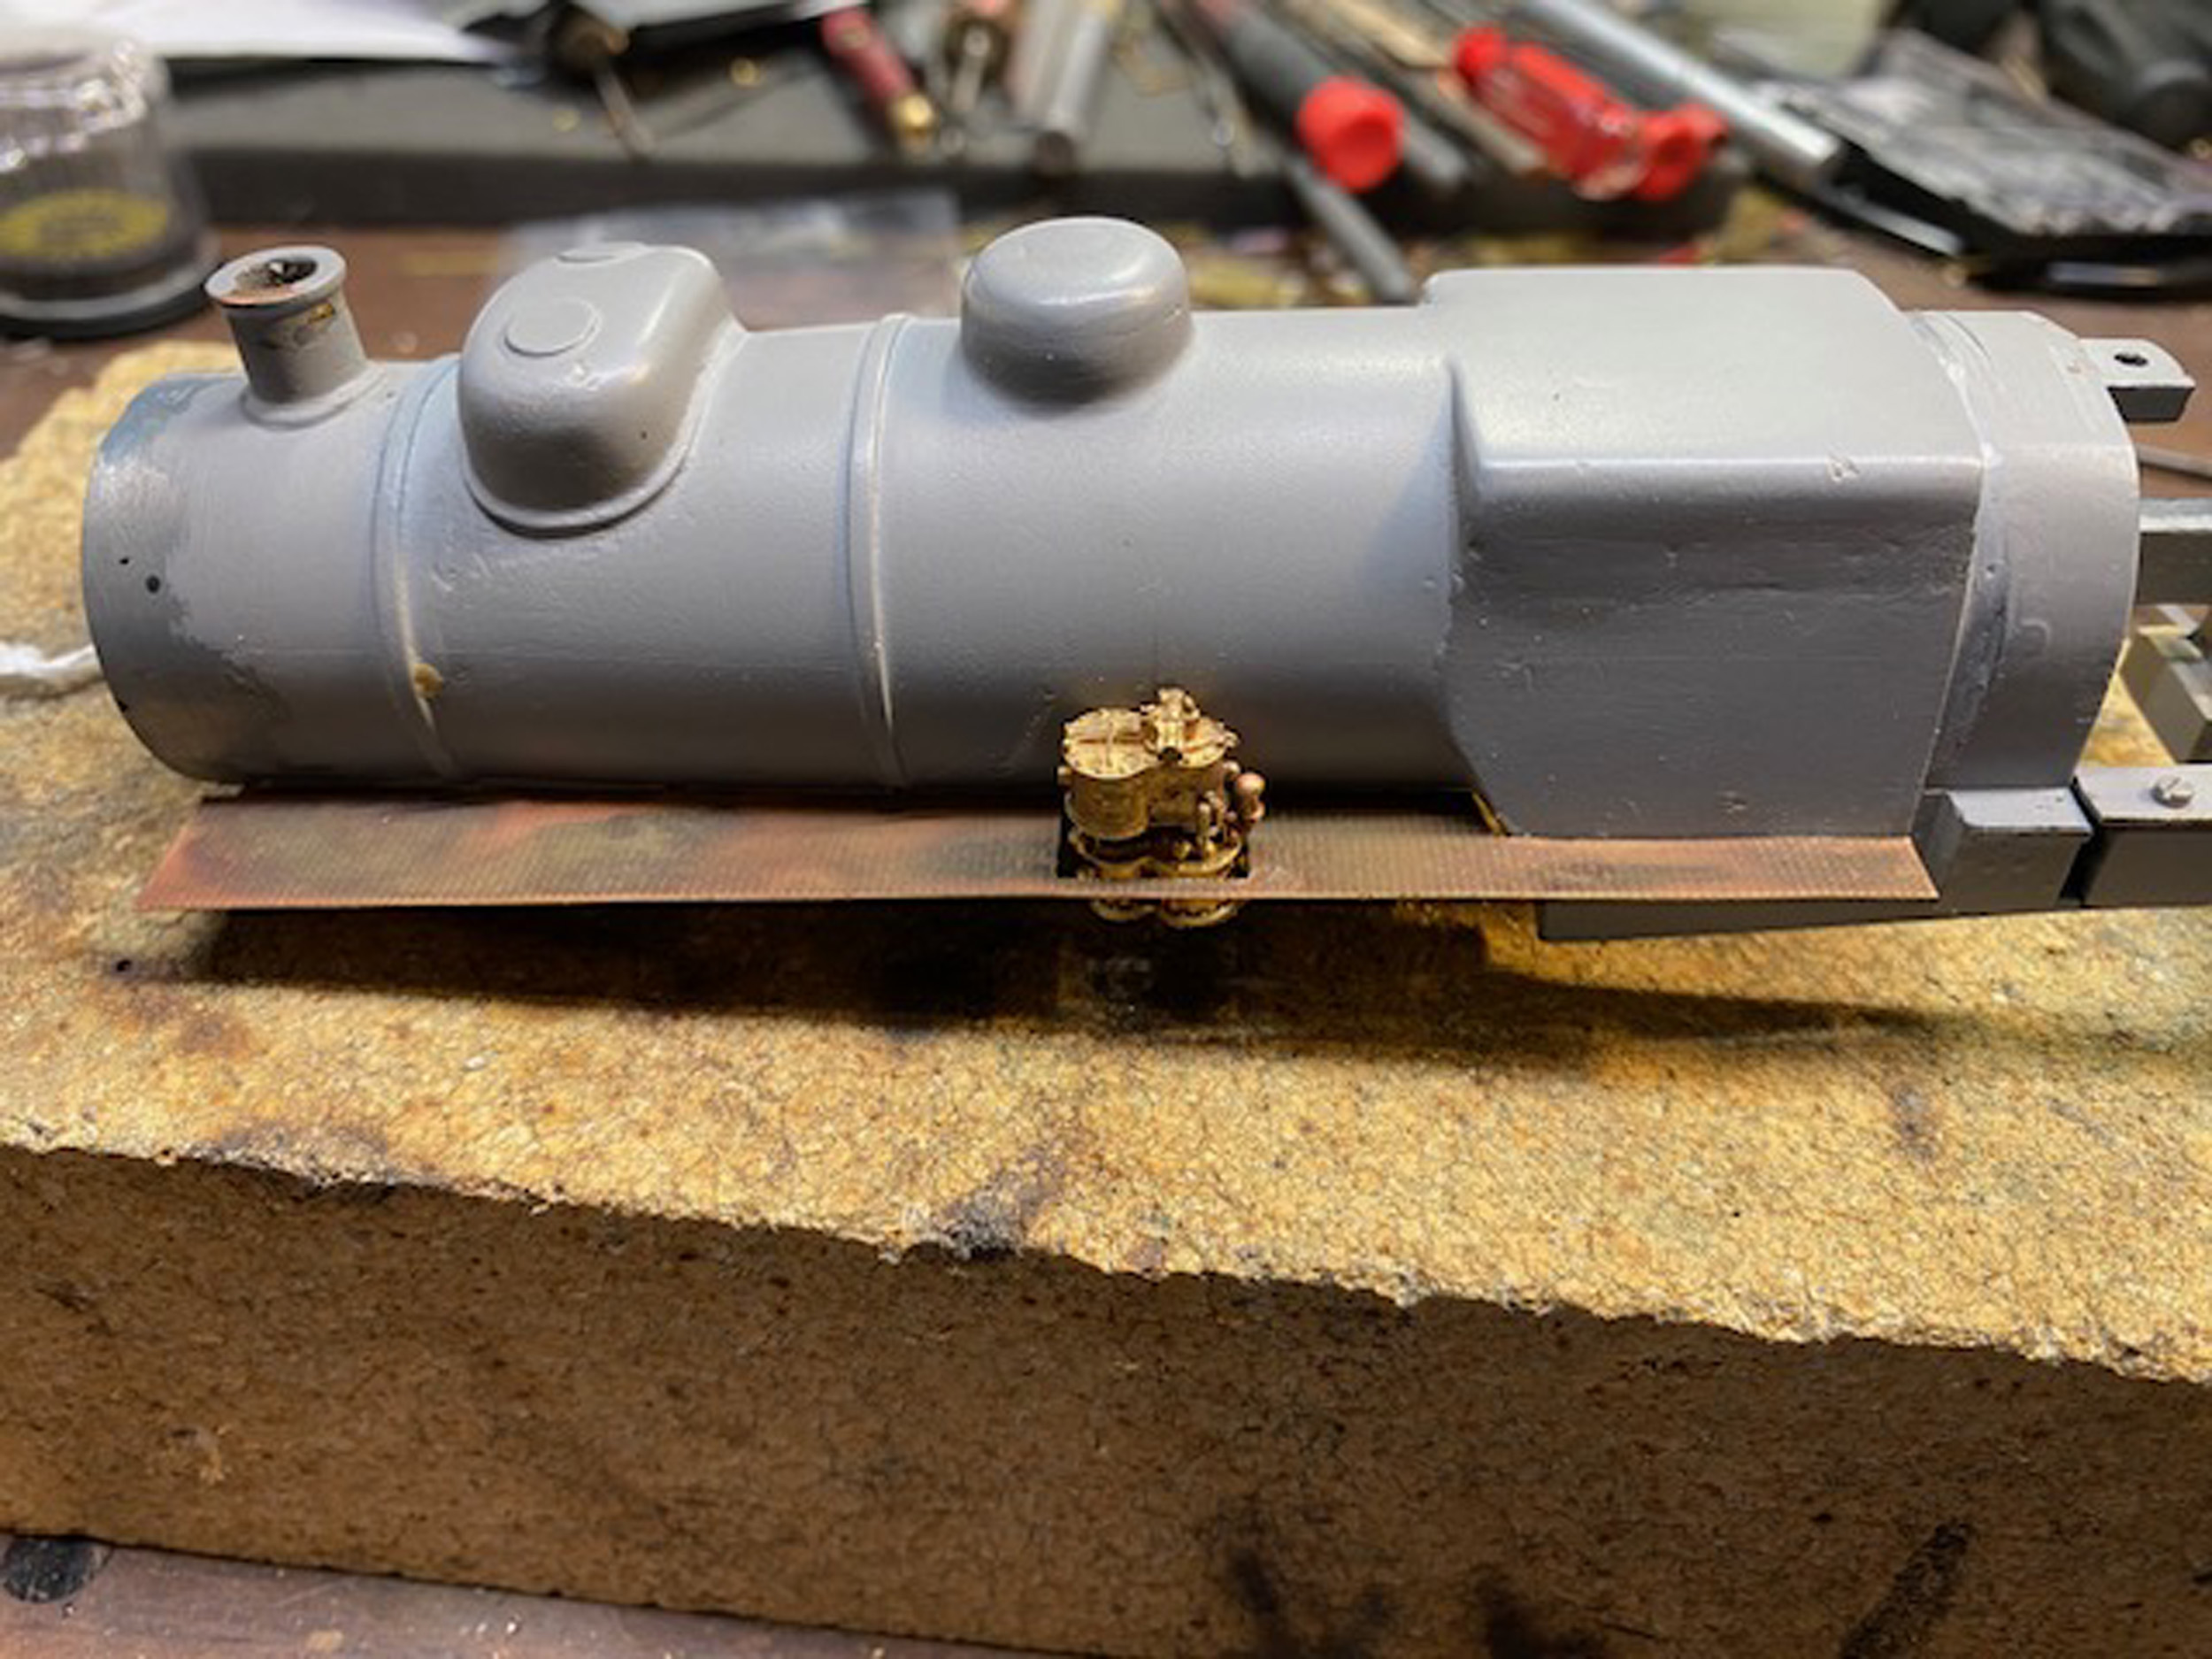
Boiler Weight
Added 1-5-19
I
am NOT encouraging anyone else to melt and pour molten lead. It is dangerous to
do it and should be done at your own risk. But I don’t follow my own warnings!
I
needed a boiler weight. I have recycled tire weights for years. I have an all
steel boiler weight mold that has been used in many of my steam locos. This is
the first time I made a wood mold for a steam loco. I cut a 3” long piece of 2 x 4, and drilled a 1” hole clear through. The drill was
actually spinning when I took the photo and did stop action on the drill bit. I
added 2-56 threaded bushes that get suspended in the pour and locked in place.
I screwed a bottom on the 2 x 4 and poured the lead. The weight eventually slid
out but if not chop the wood up and get the weight out. I picked up 13 ounces. The loco alone now weighs 3 pounds.
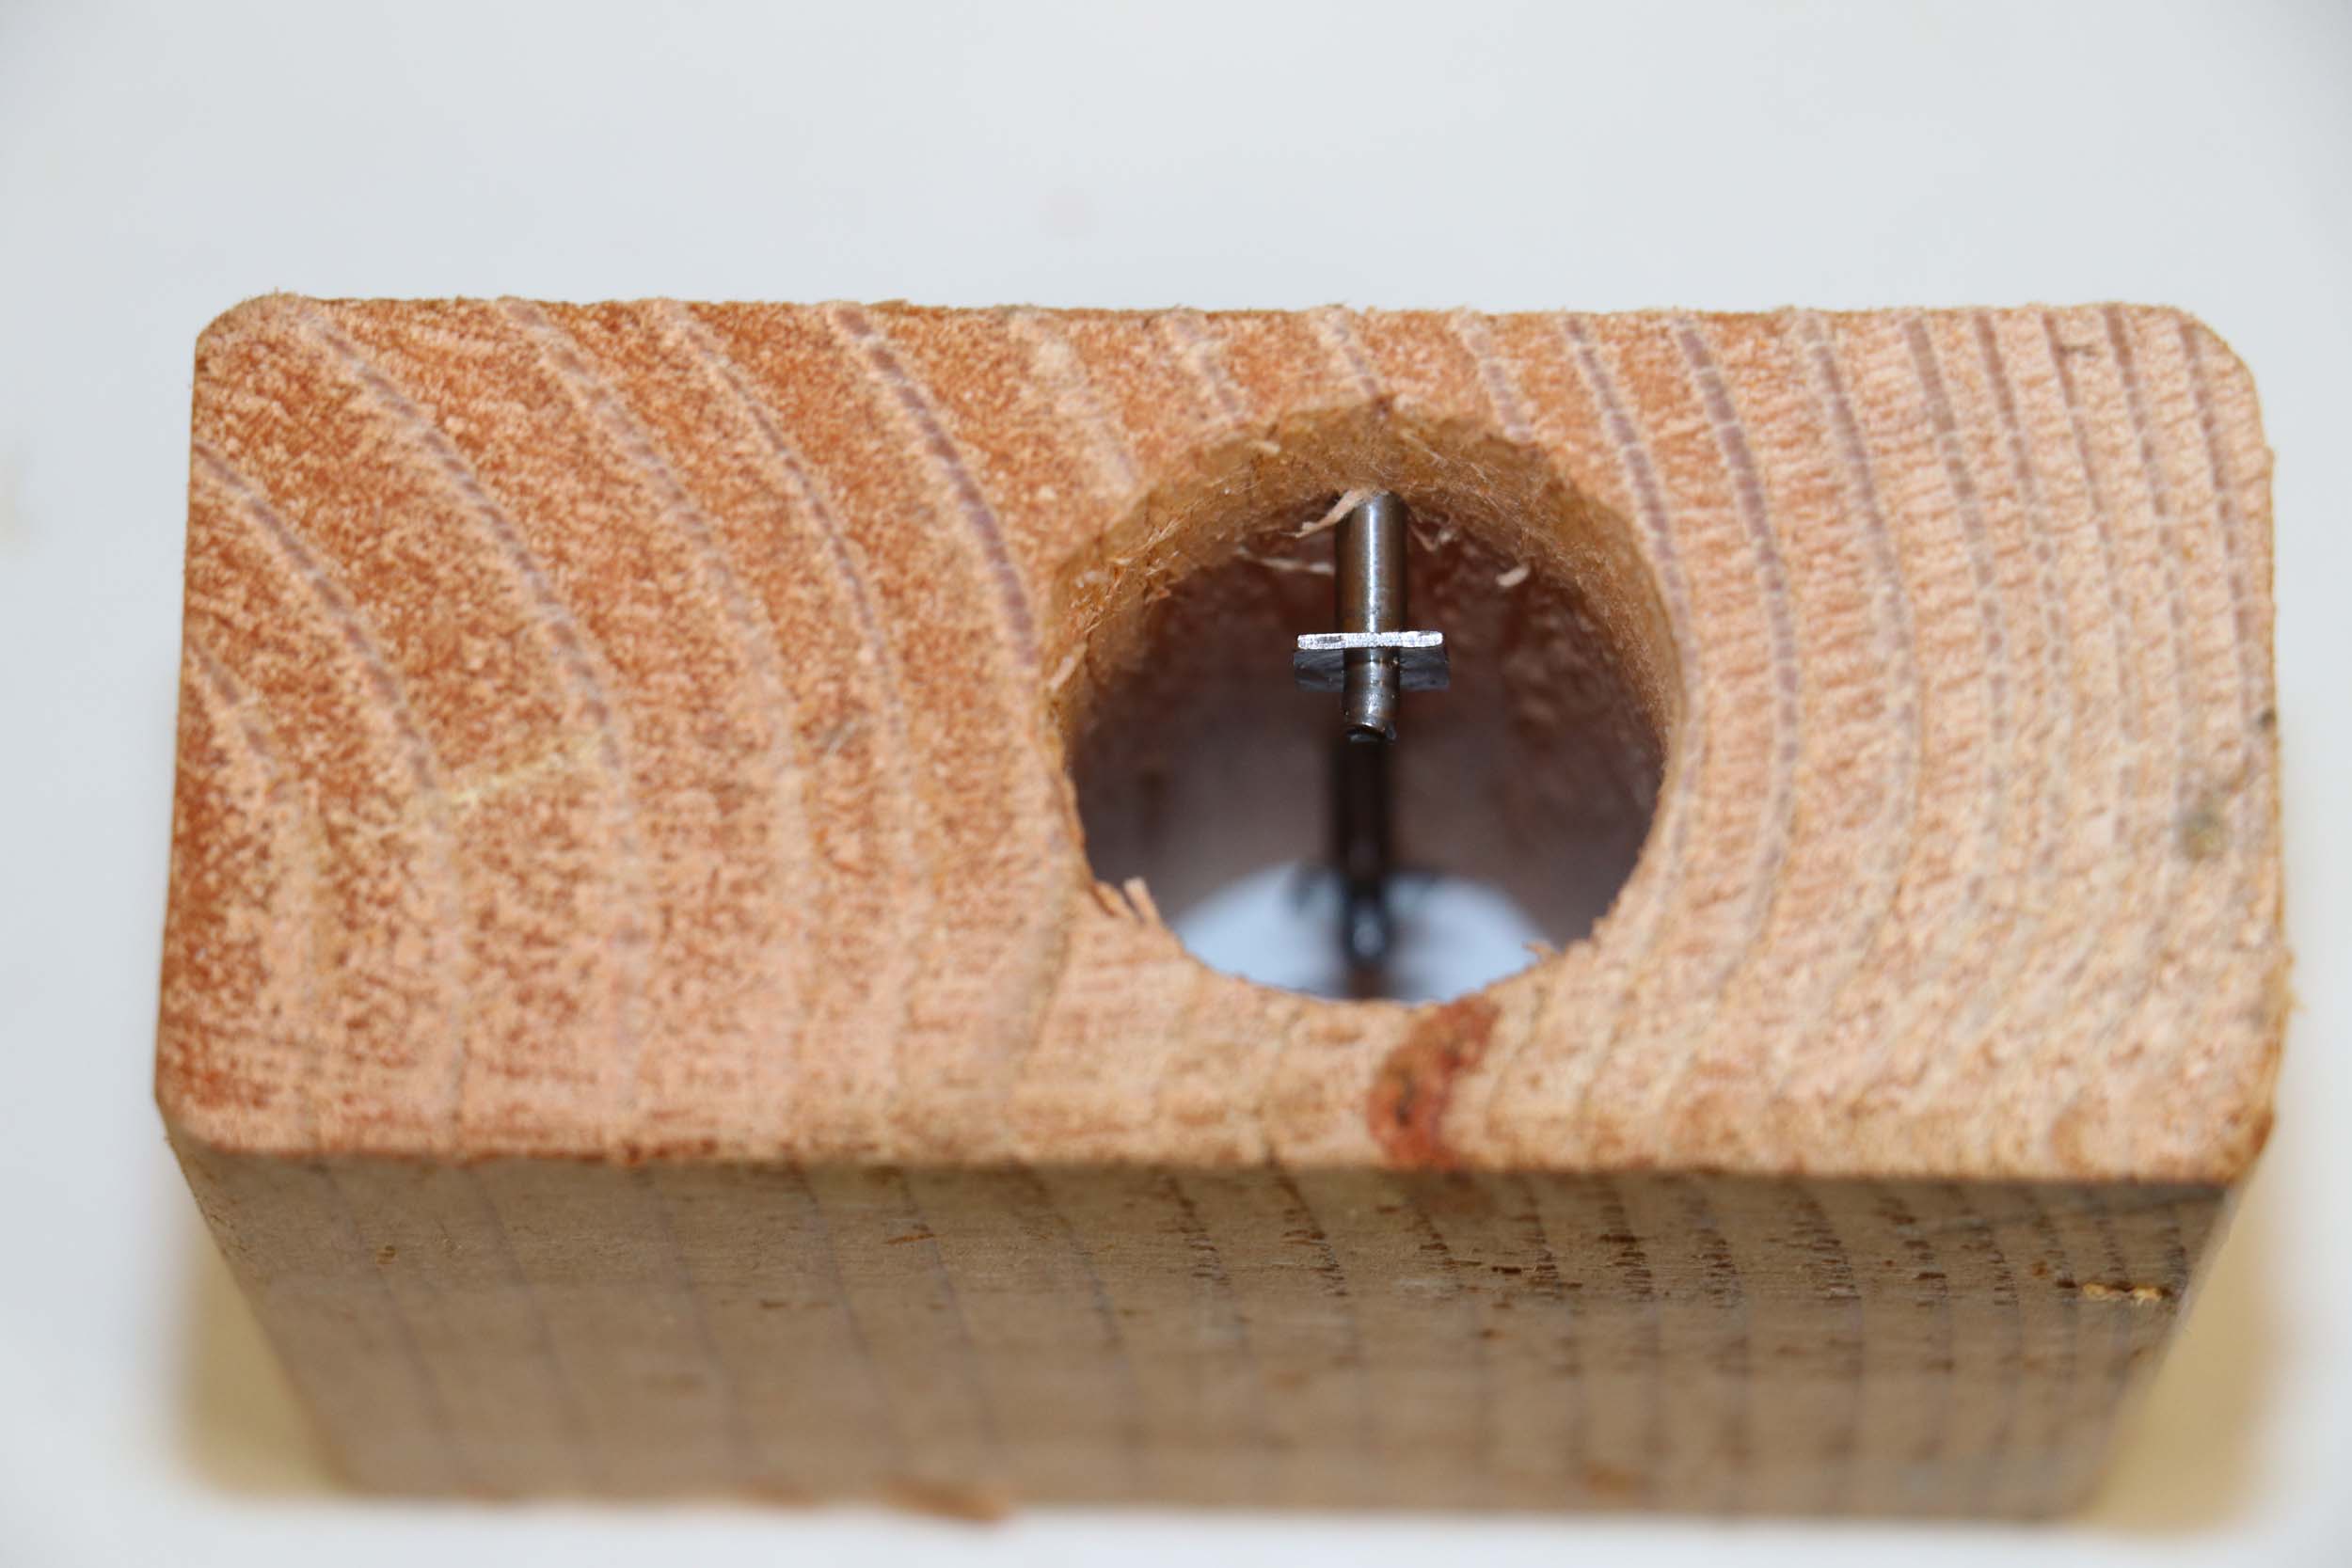
Placement
of these threaded bushings is pretty important for placing the weight on the
drivers and loco balance. Without the weight the front drivers were almost getting
picked up off the rails. Most of the weight is on and forward of the drivers.
It just digs in now. The test run pulled 10 brass cars.
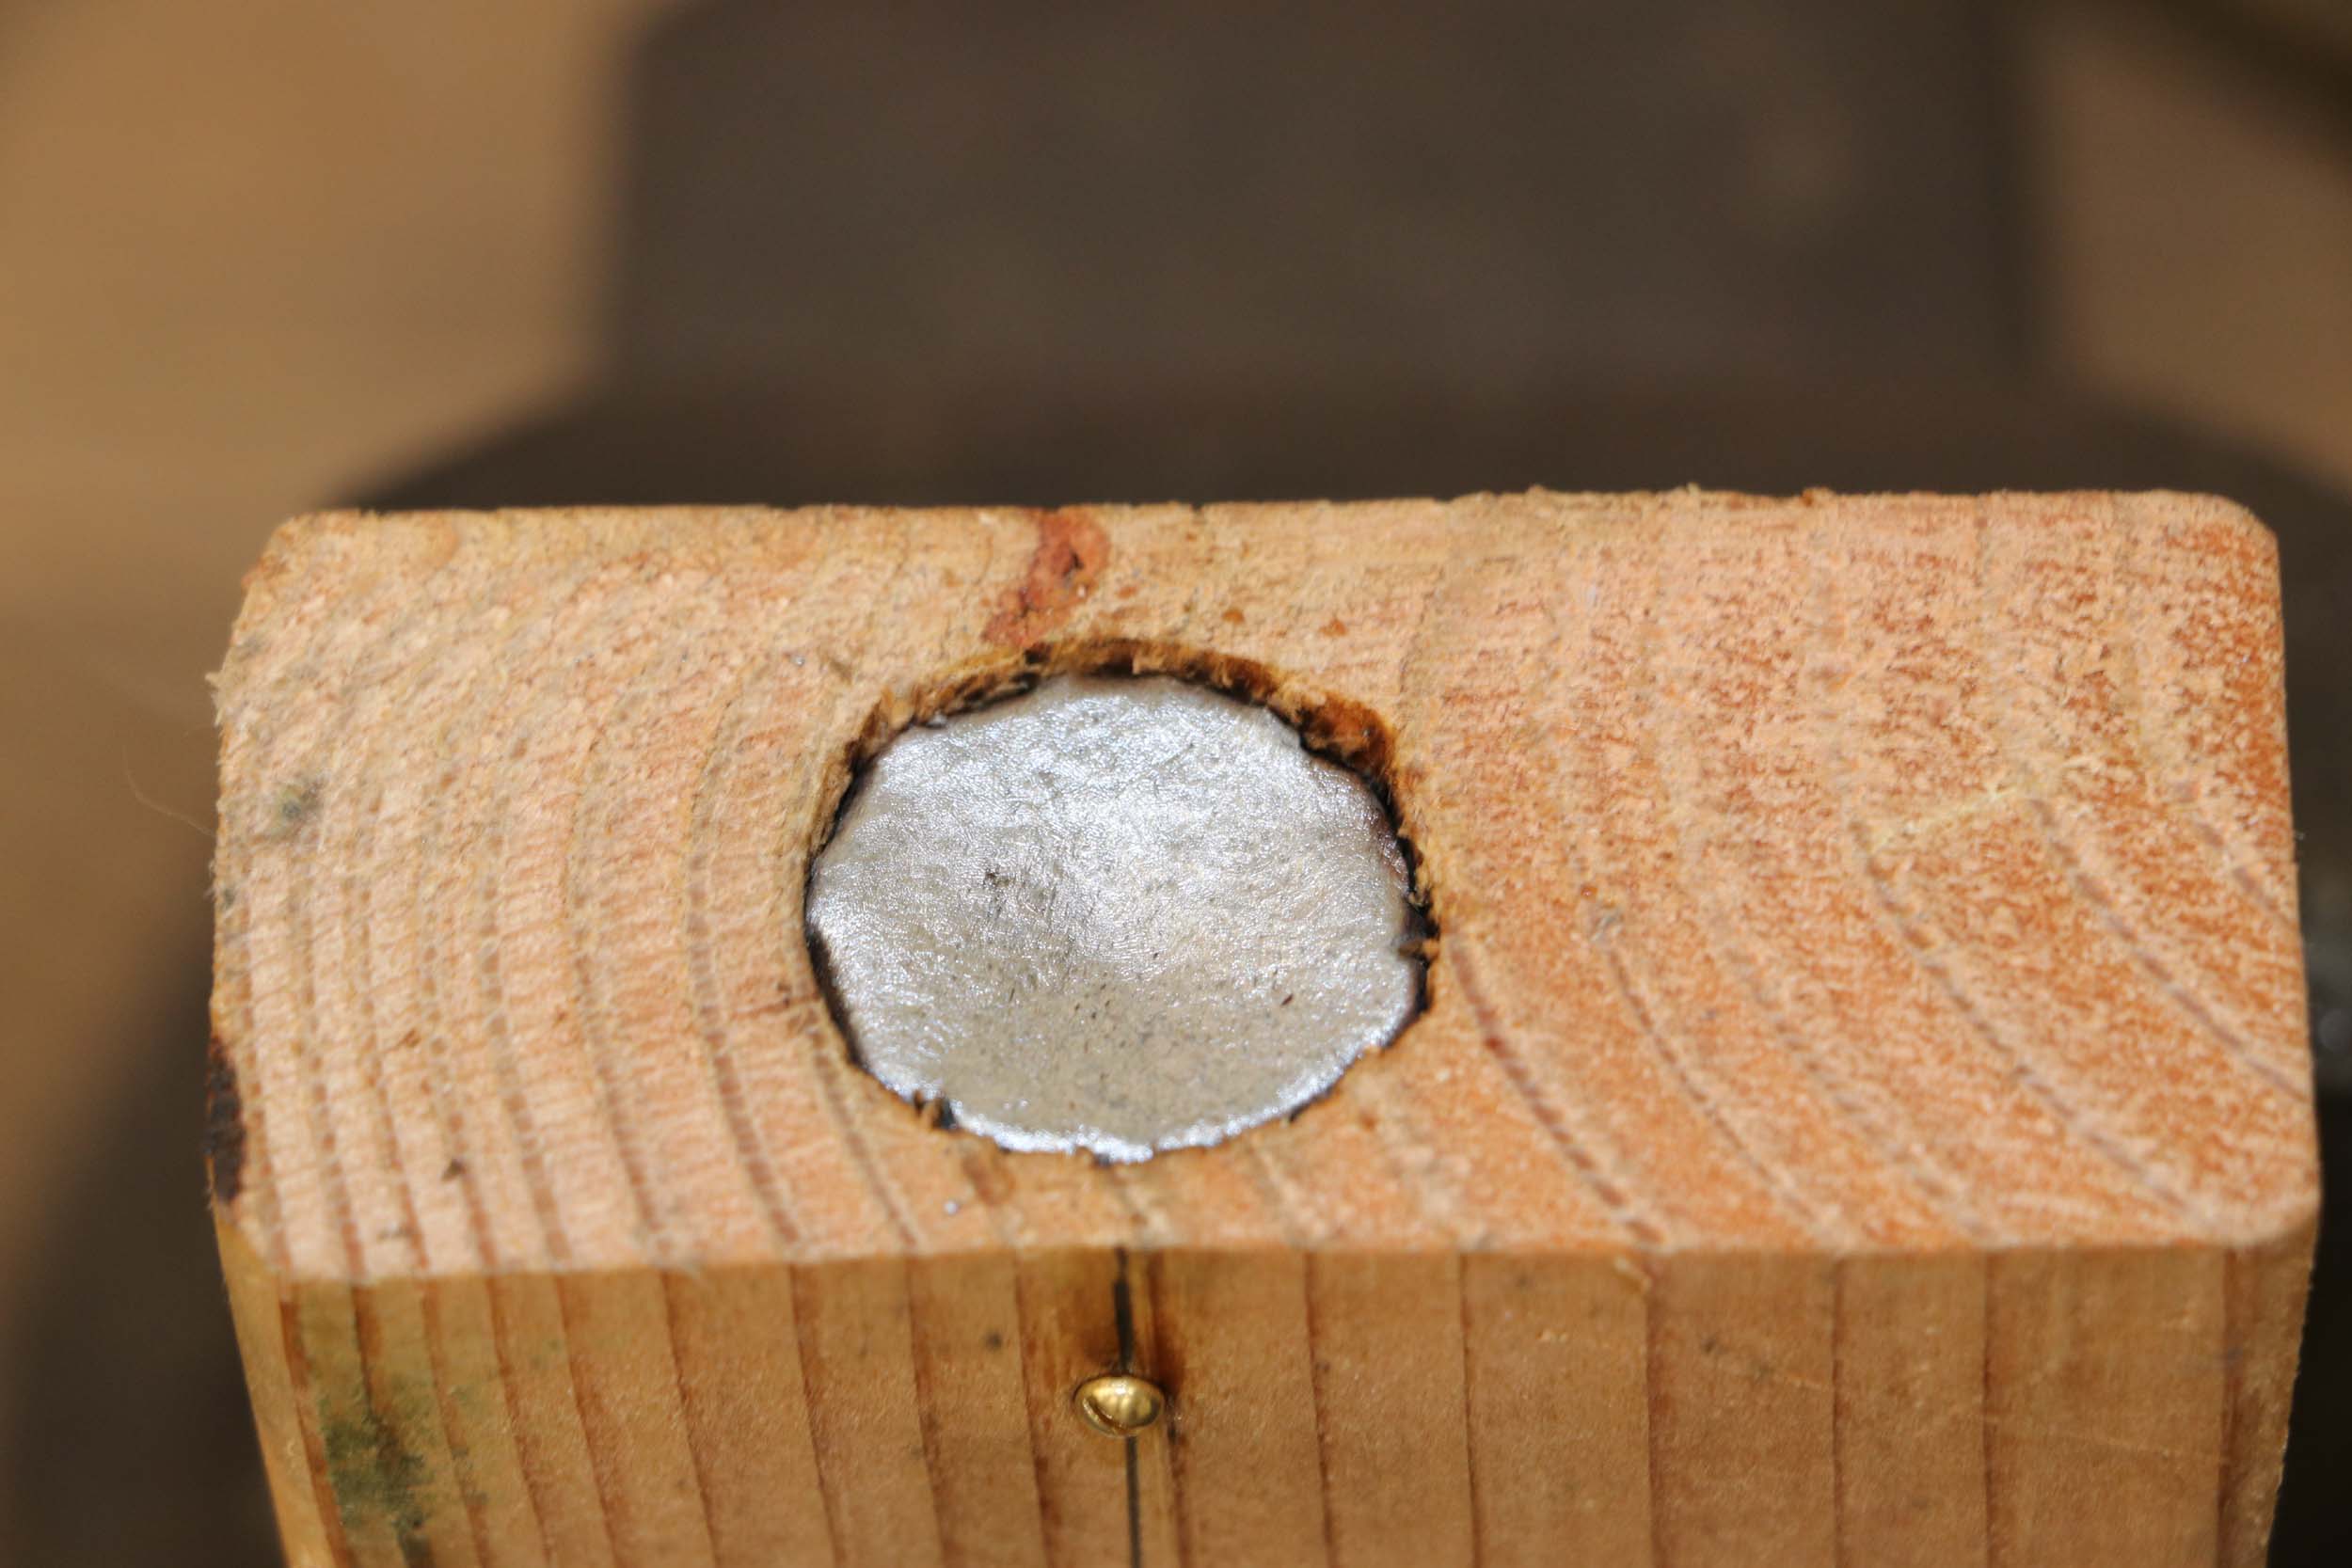
My
big Green Milling Machine is great at removing lead in places it should not be.
At 1” diameter the weight was very close fitting. There was no room for the
headlight wire so I milled a small flat on top for clearance. There is still
room for the decoder, a large speaker and the capacitors in the boiler.
New Photos Of Sam’s Construction
Added 1-10-19
These
photos are new to me, but were sent by Sam to Roger Nulton in January 2017. I
never saw them before as Sam never shared them with me. Roger just sent them to
me on 1-6-19. They are invaluable in many ways. I discovered at least parts of
the boiler were copper pipe. Now I know just WHERE the copper pipe ends. I
would have NOT primed this loco at this point in the build. There are too many
things still to be added. Drilling small holes in copper pipe and die cast will
break a LOT of drill bits.
Sam
likely had a previously built E6 from seeing the Penn Creek tender. I would
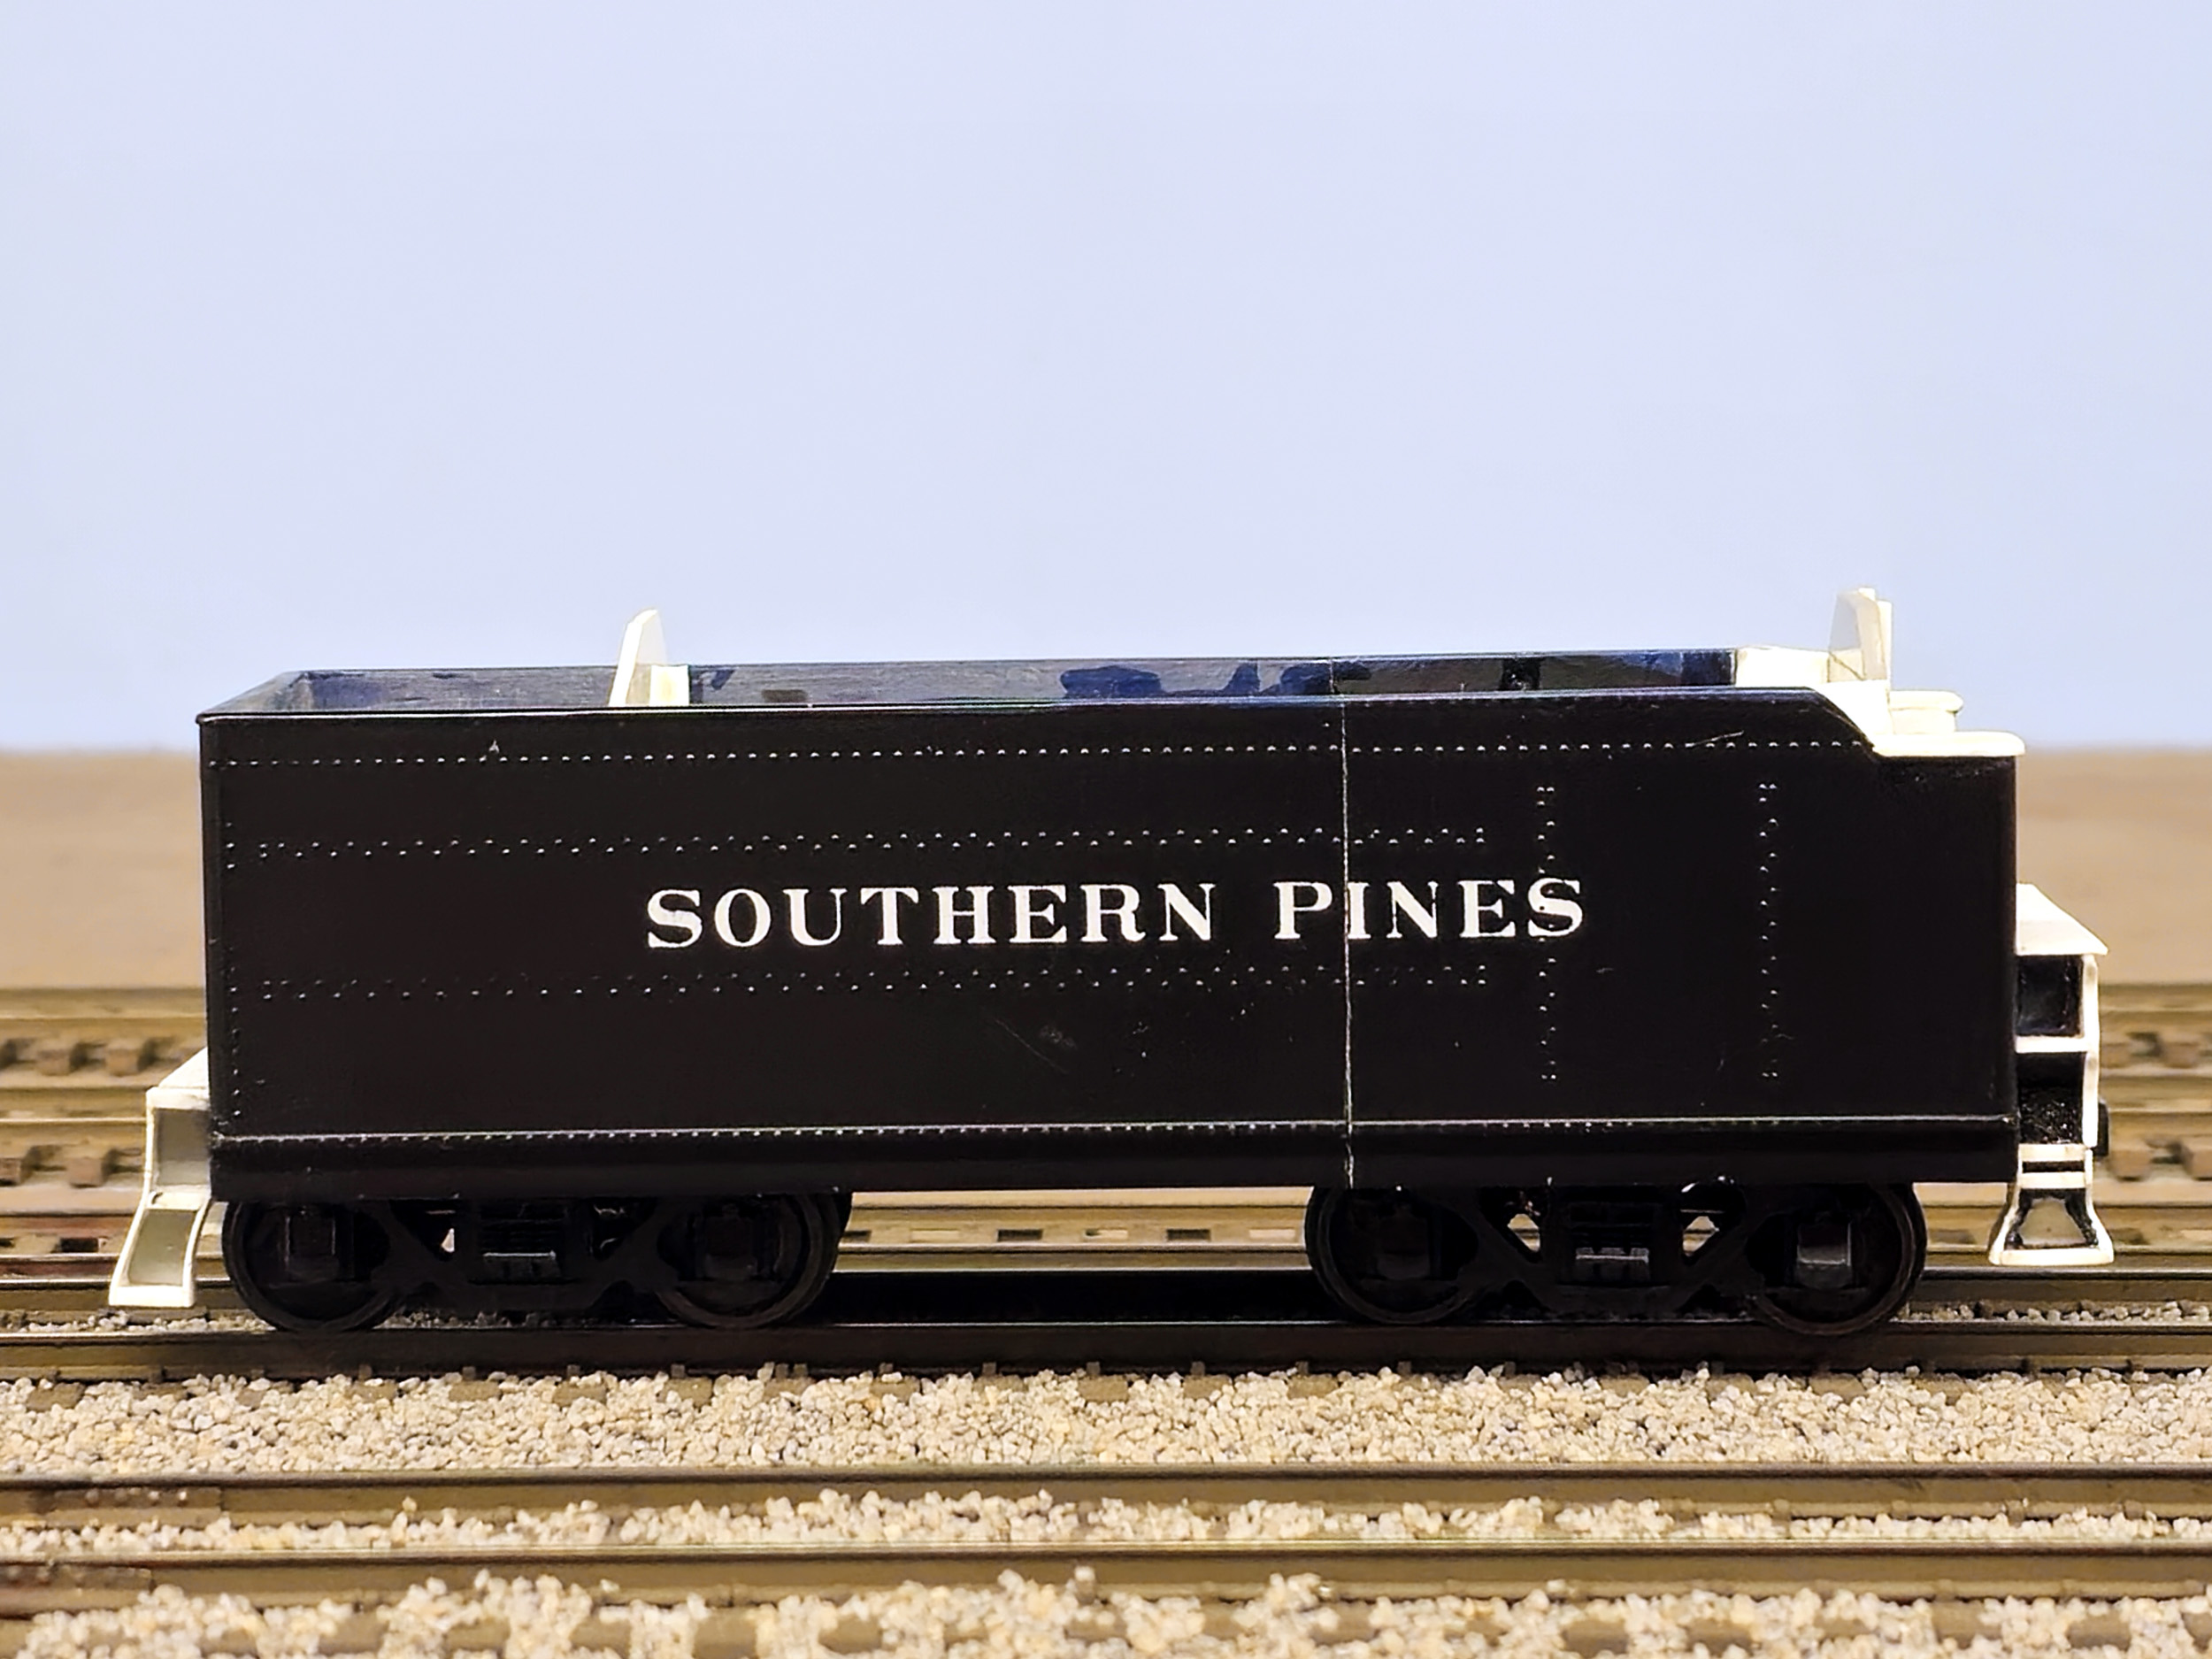
like to know where that loco is! Penn Creek was his private name railroad. Also
Sam had a tender started for this loco, judging from what was painted Southern
Pacific. It likely started with the Atlas Industrial Rail 0-27 Atlantic.
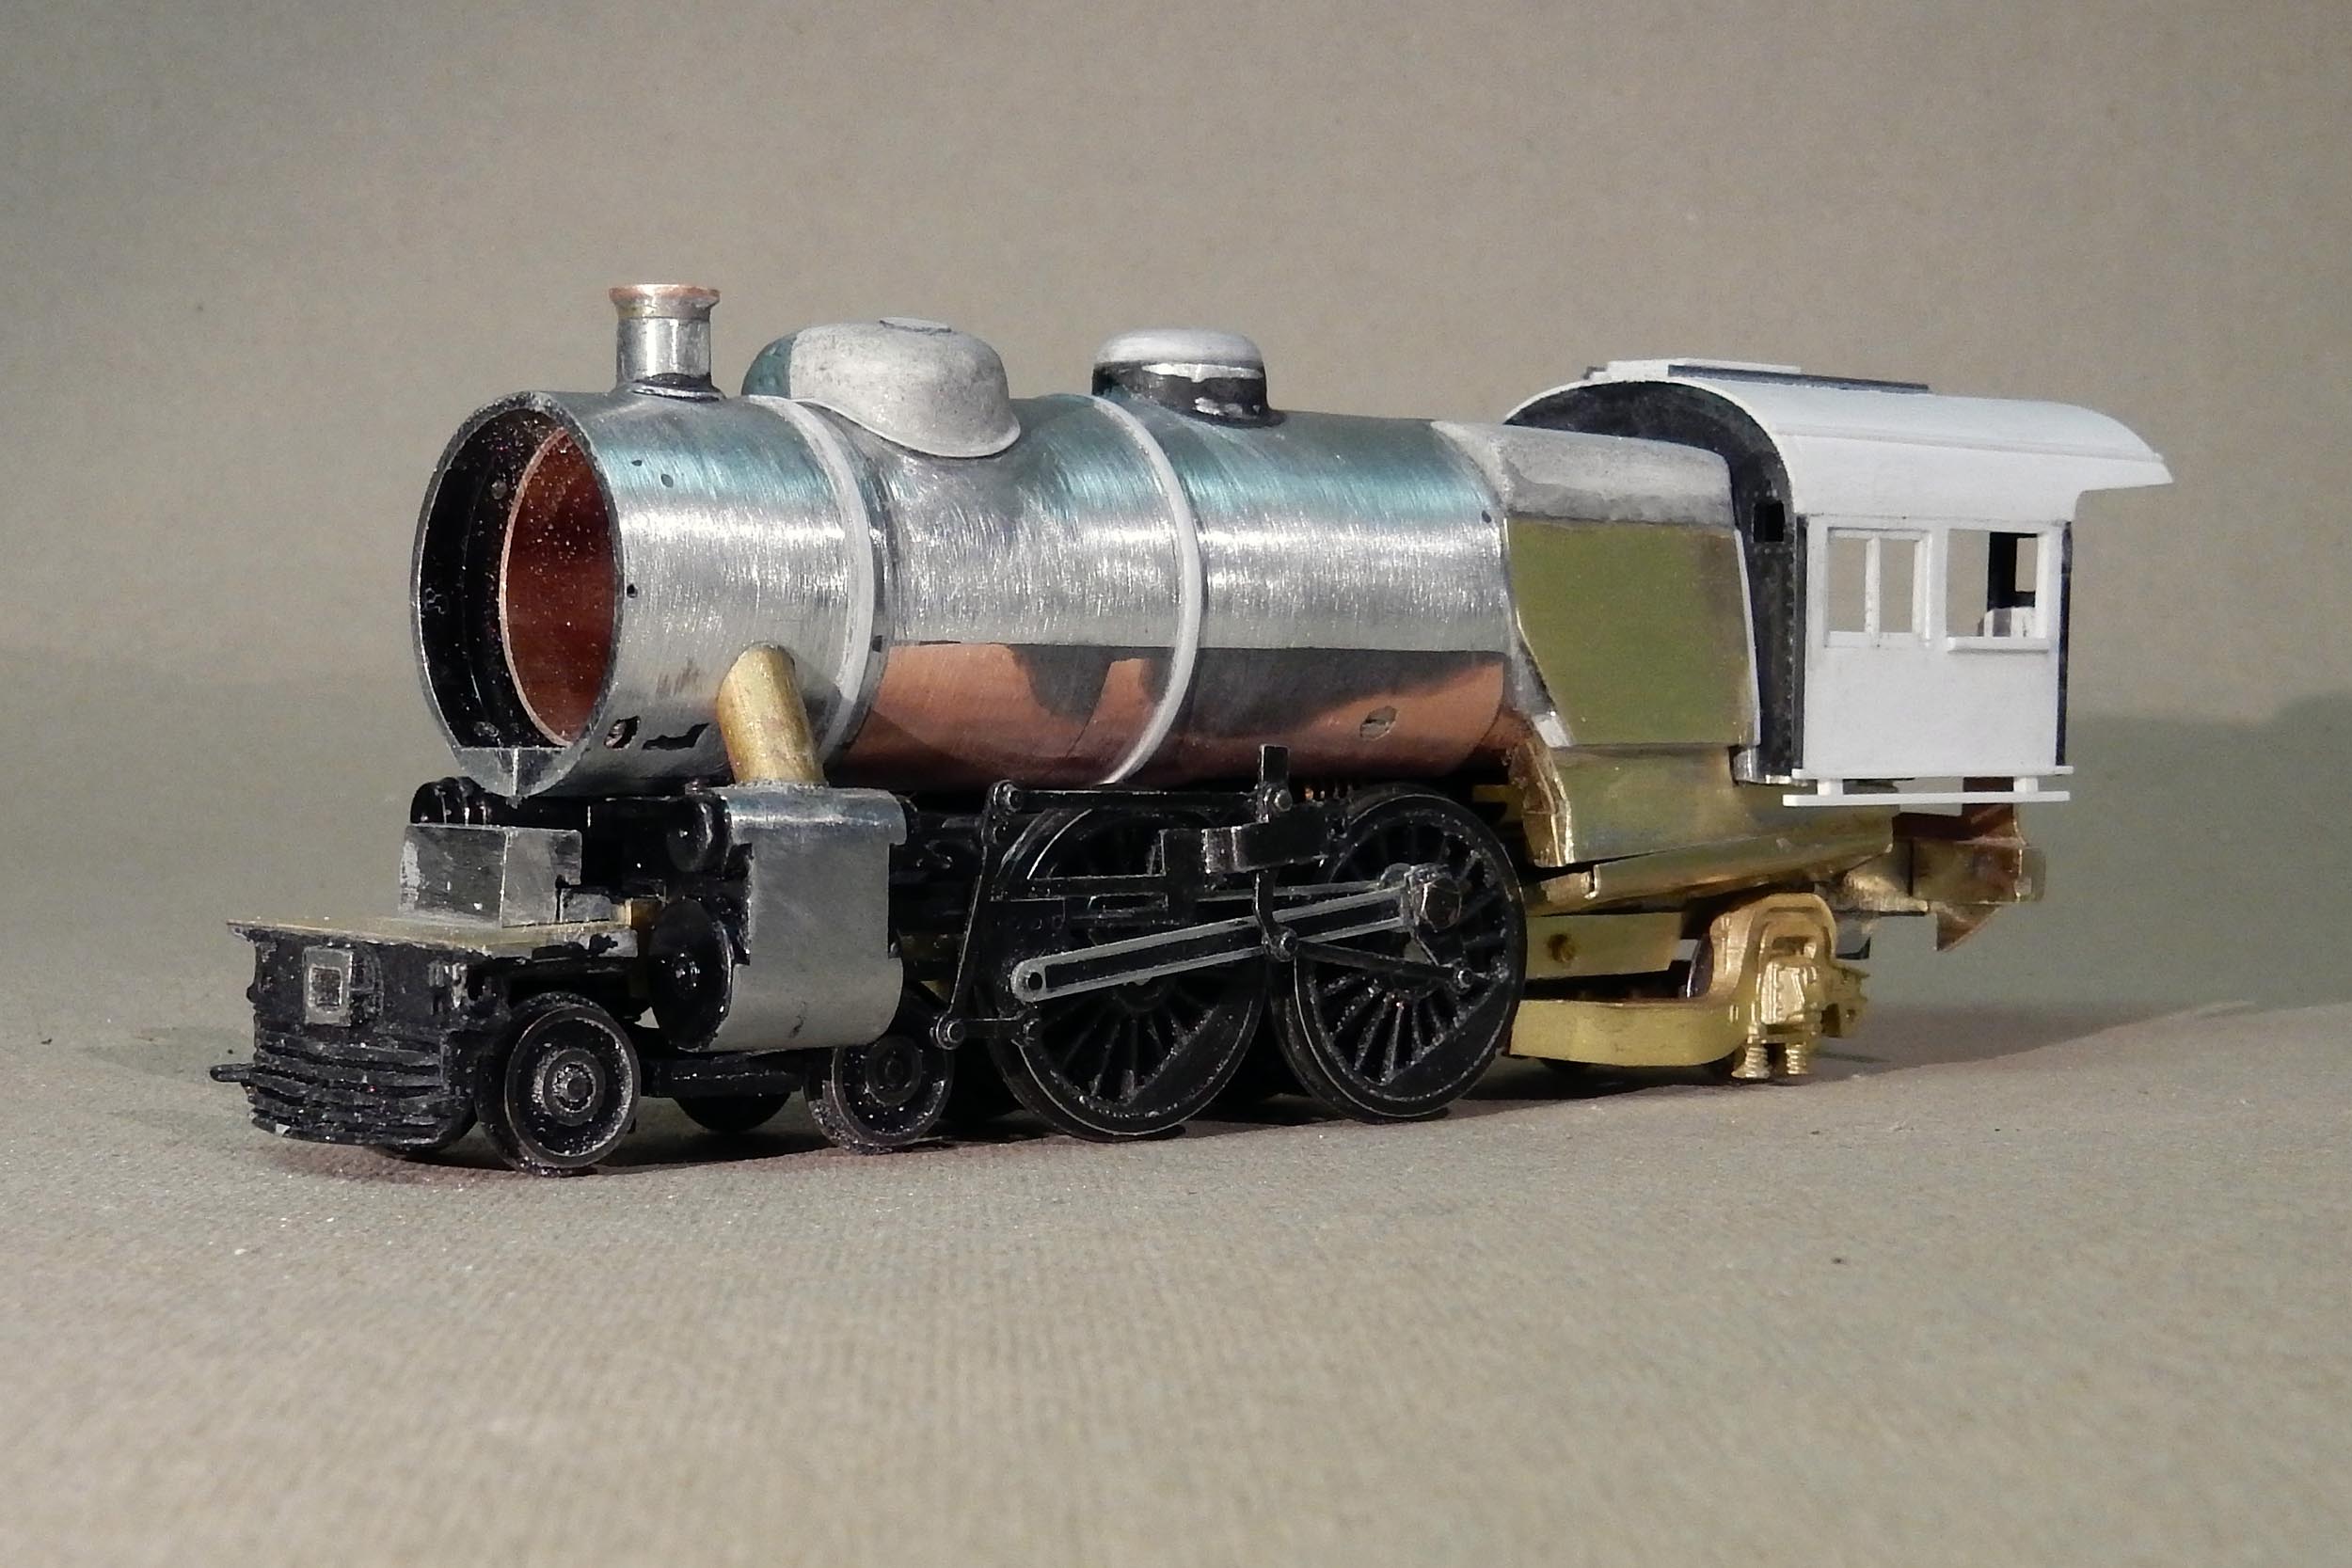
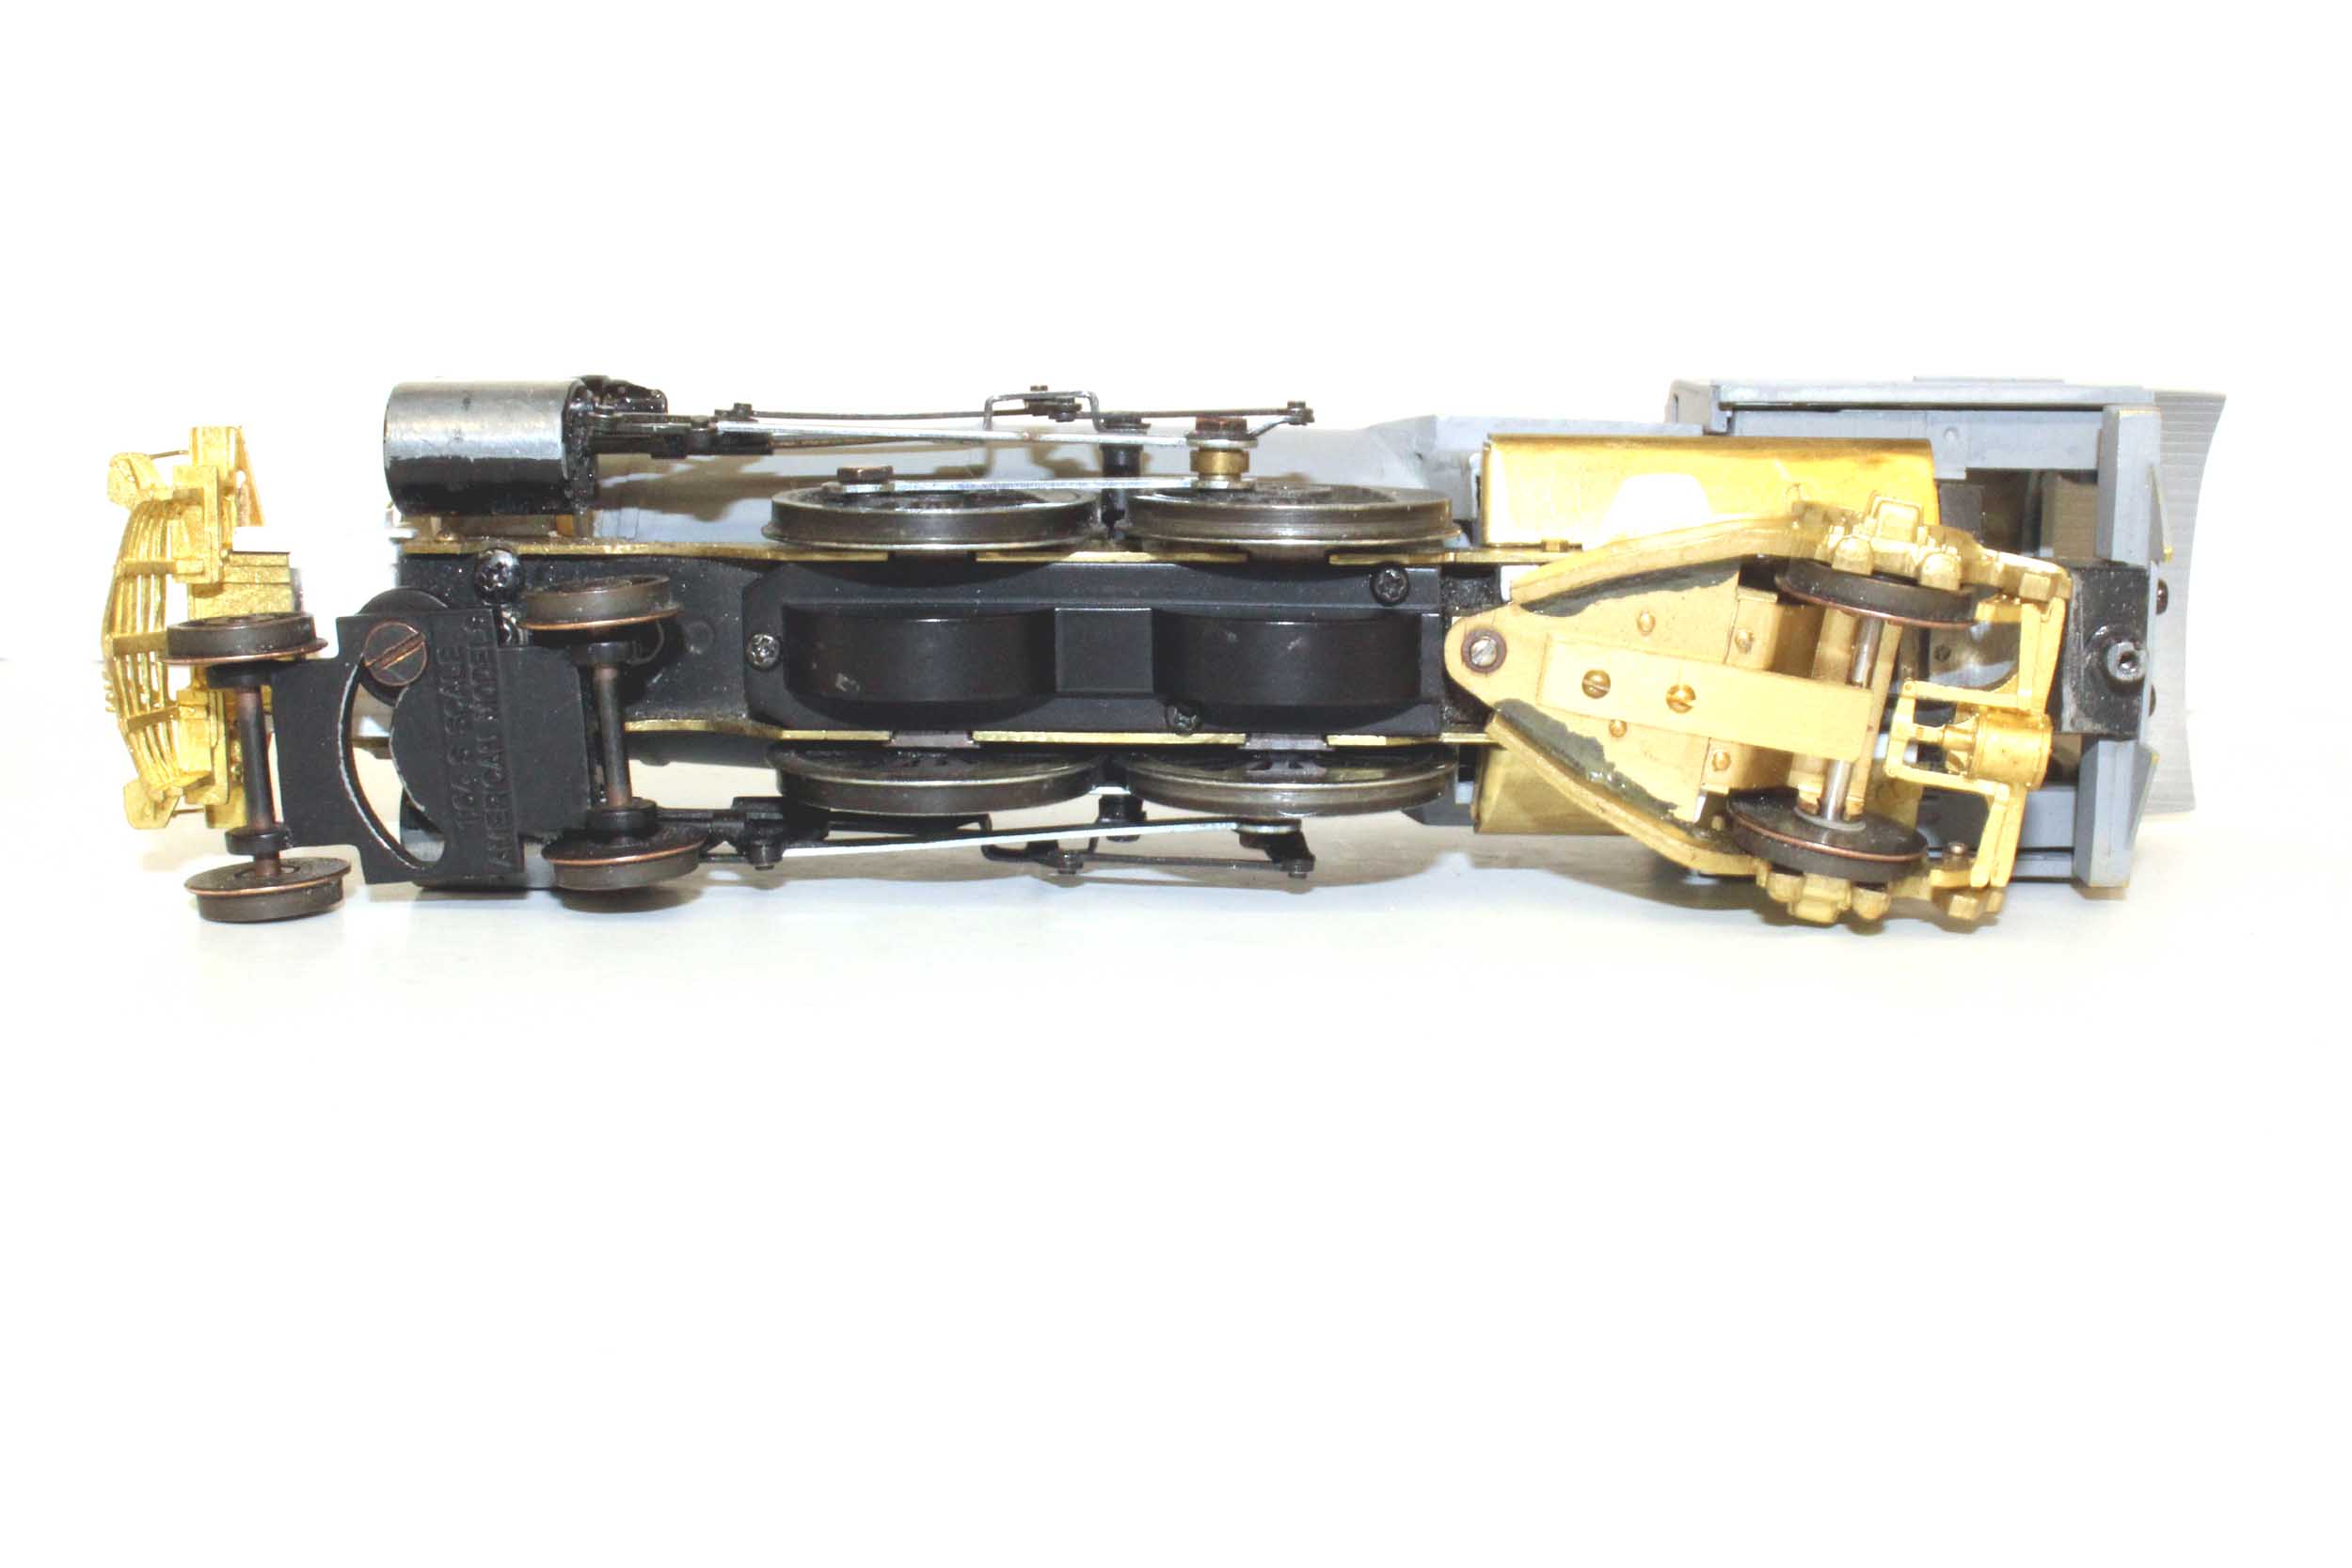
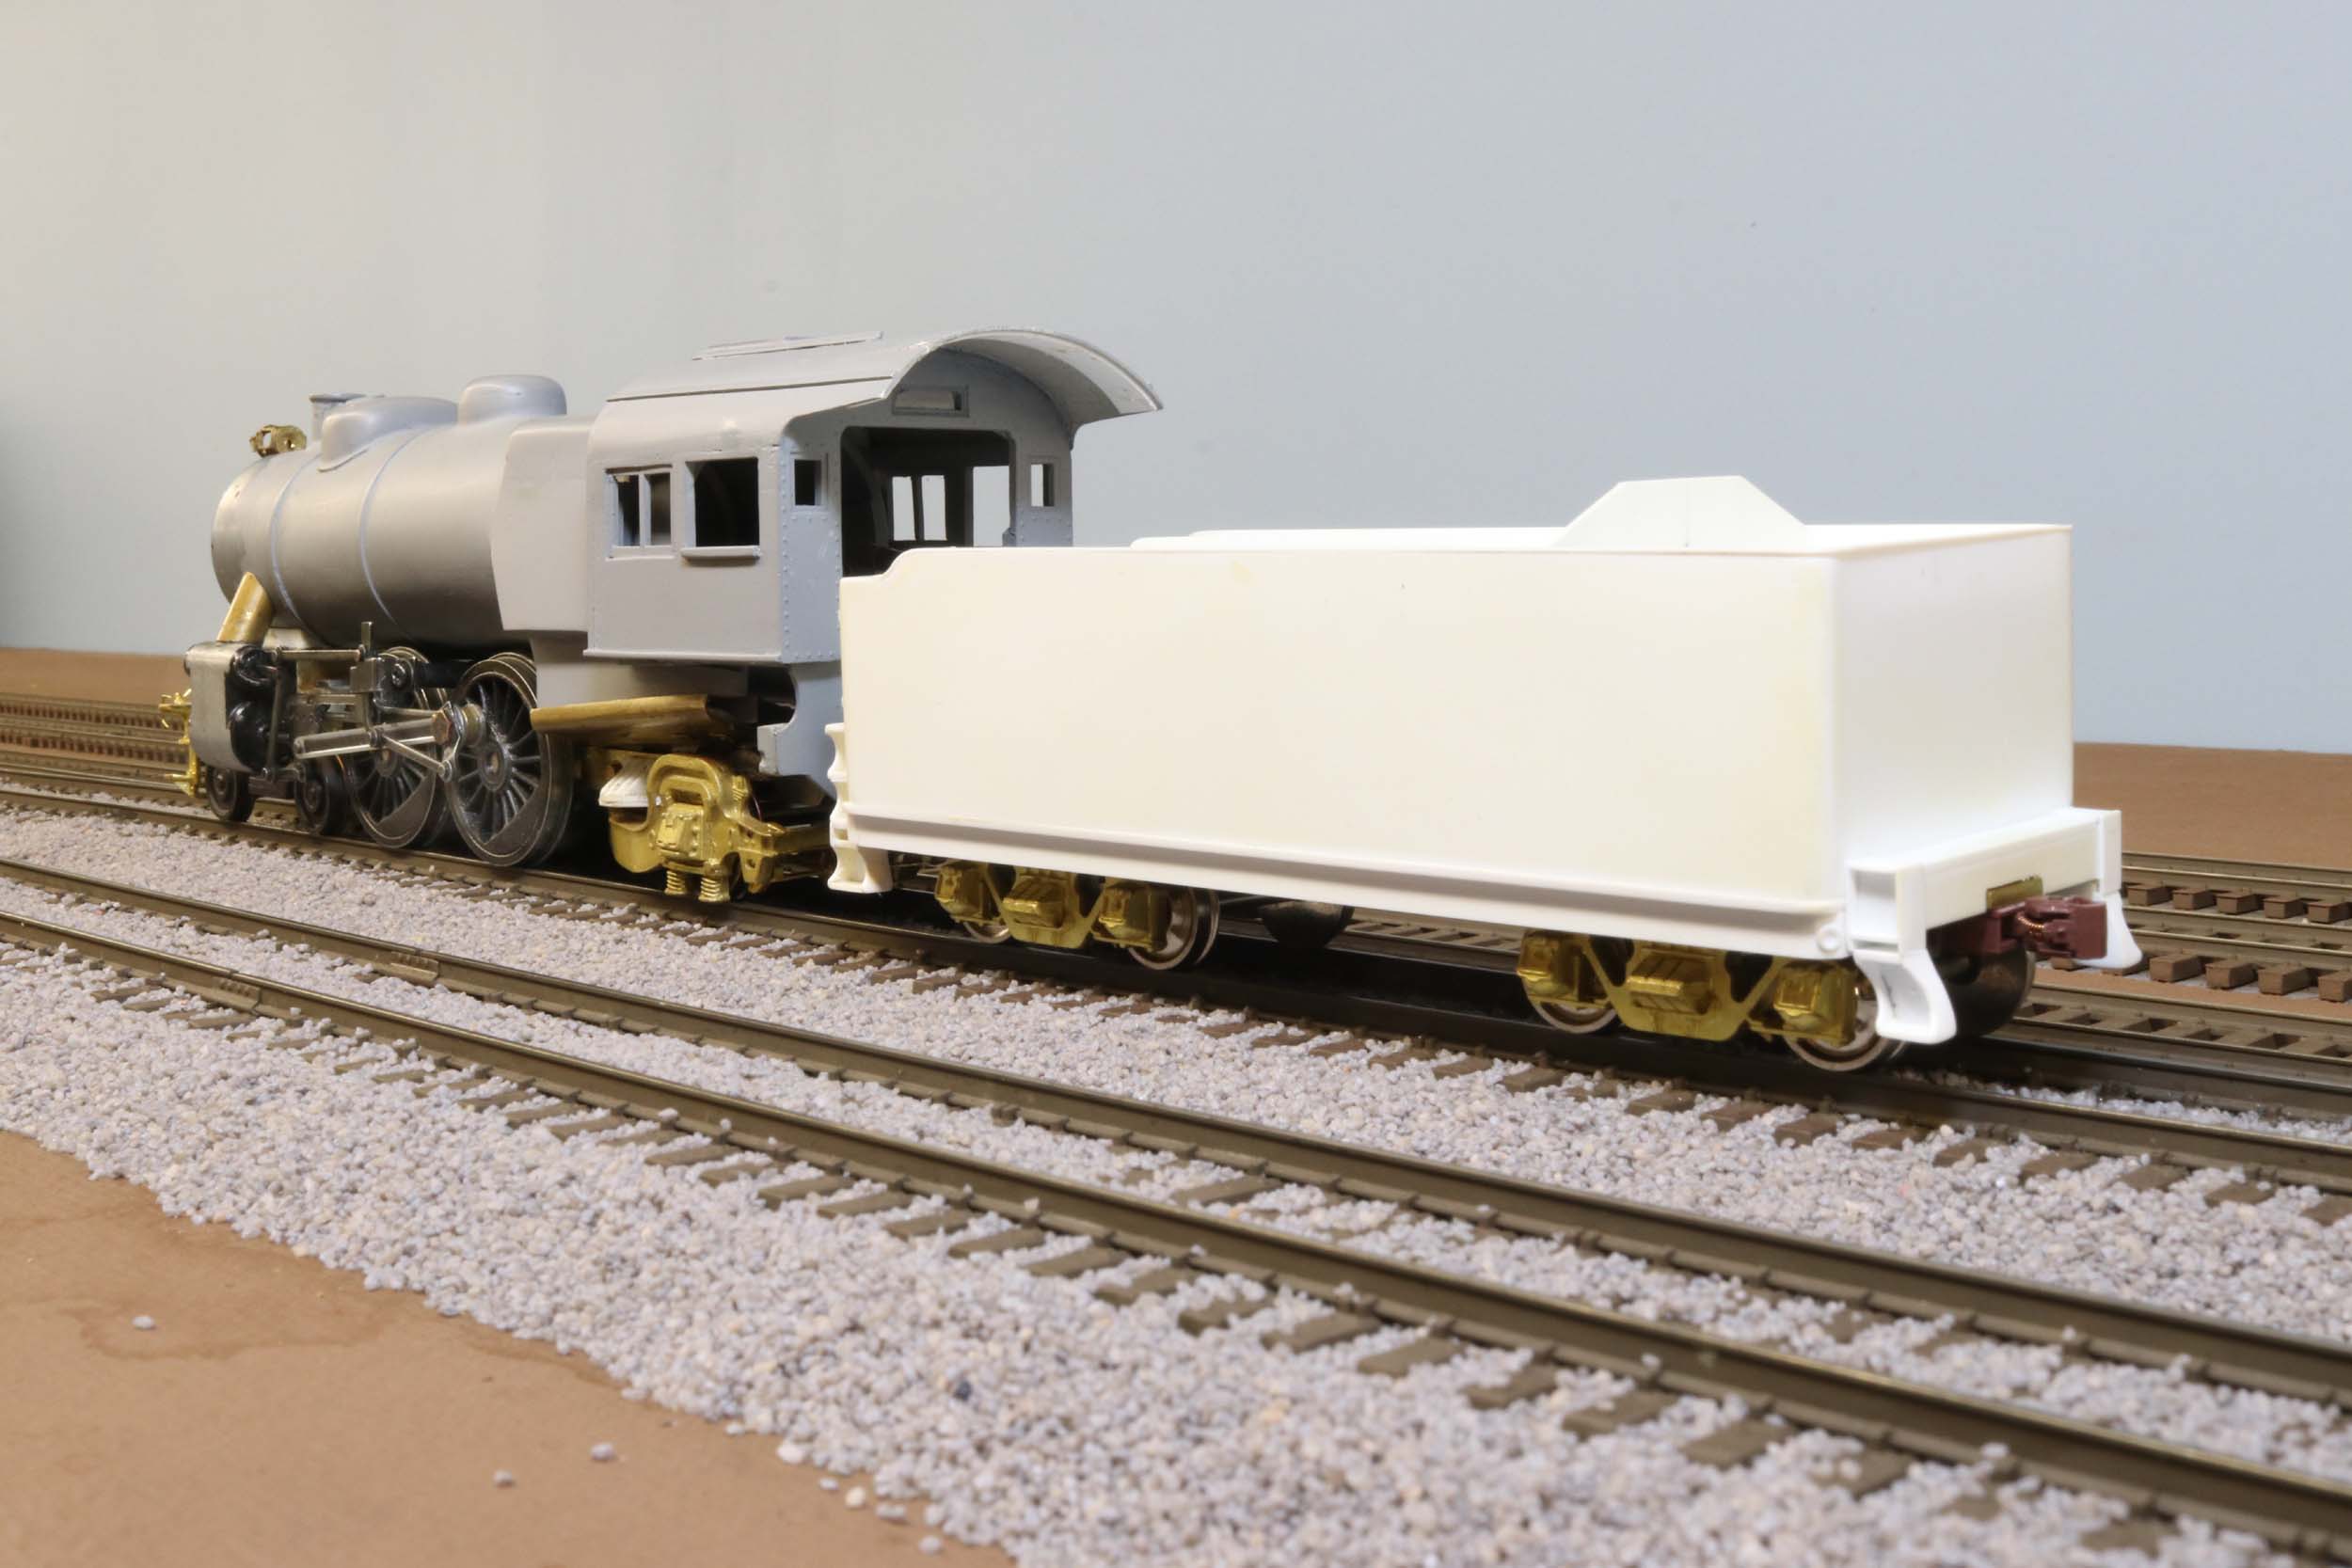
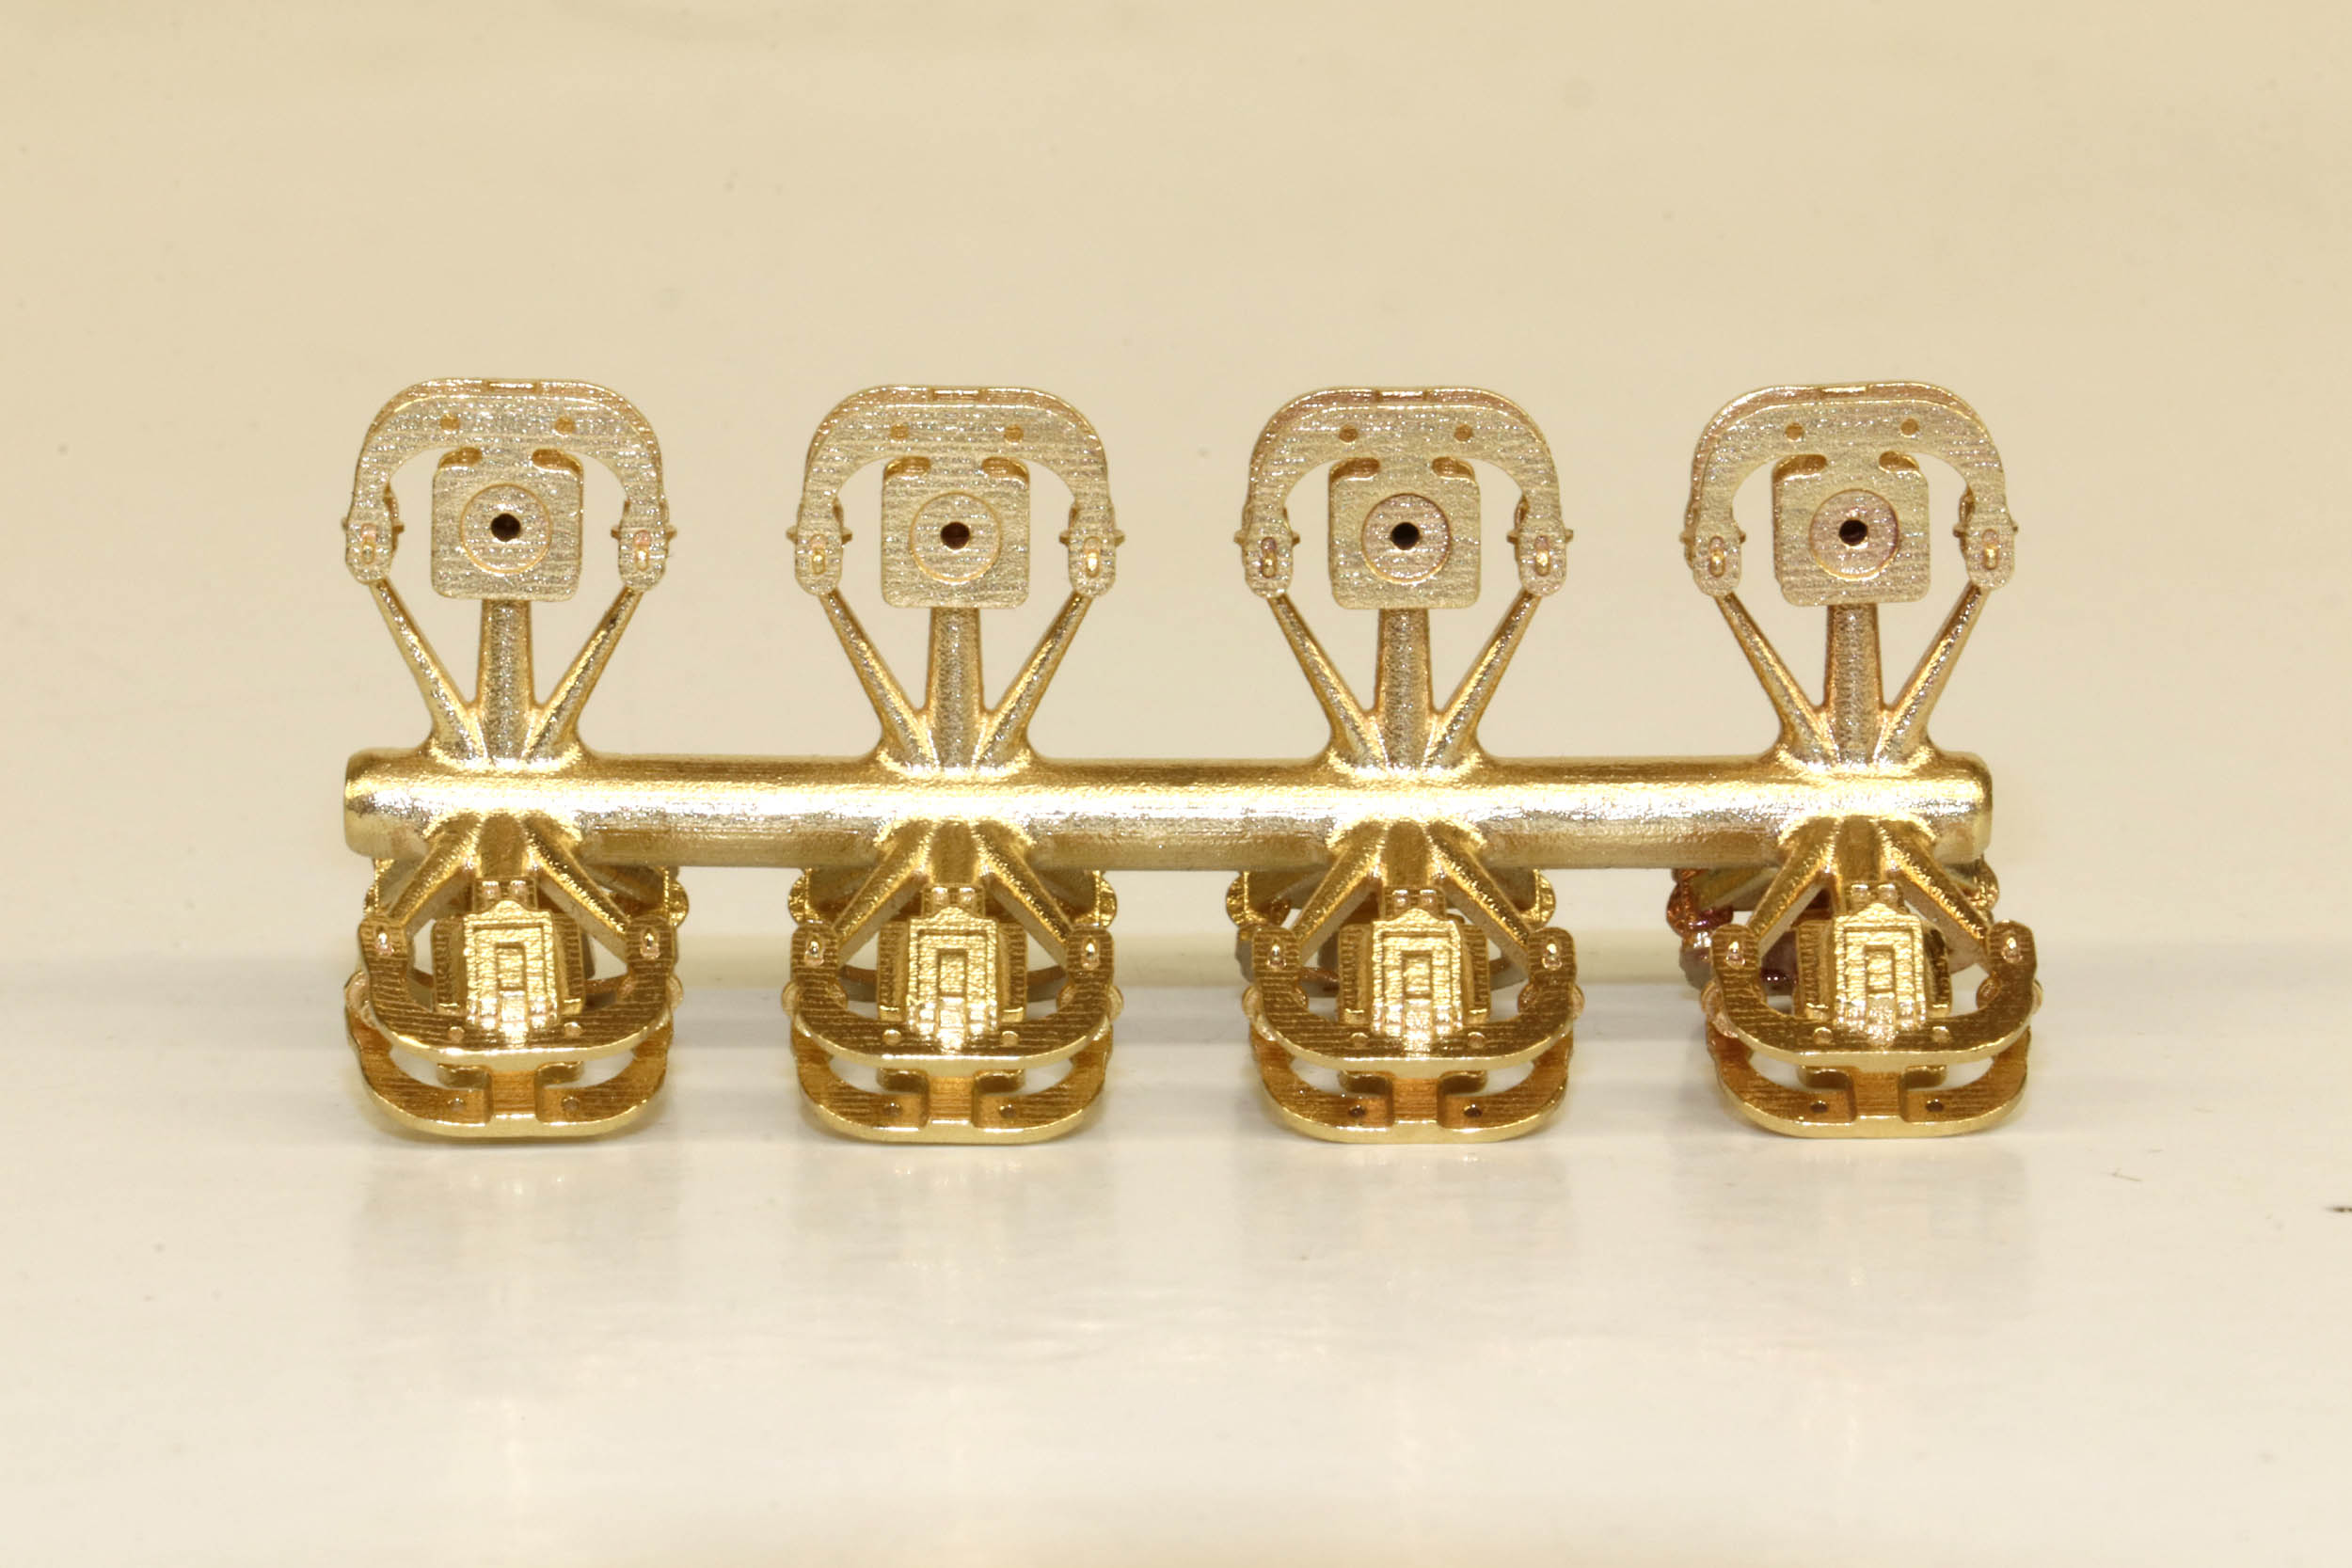
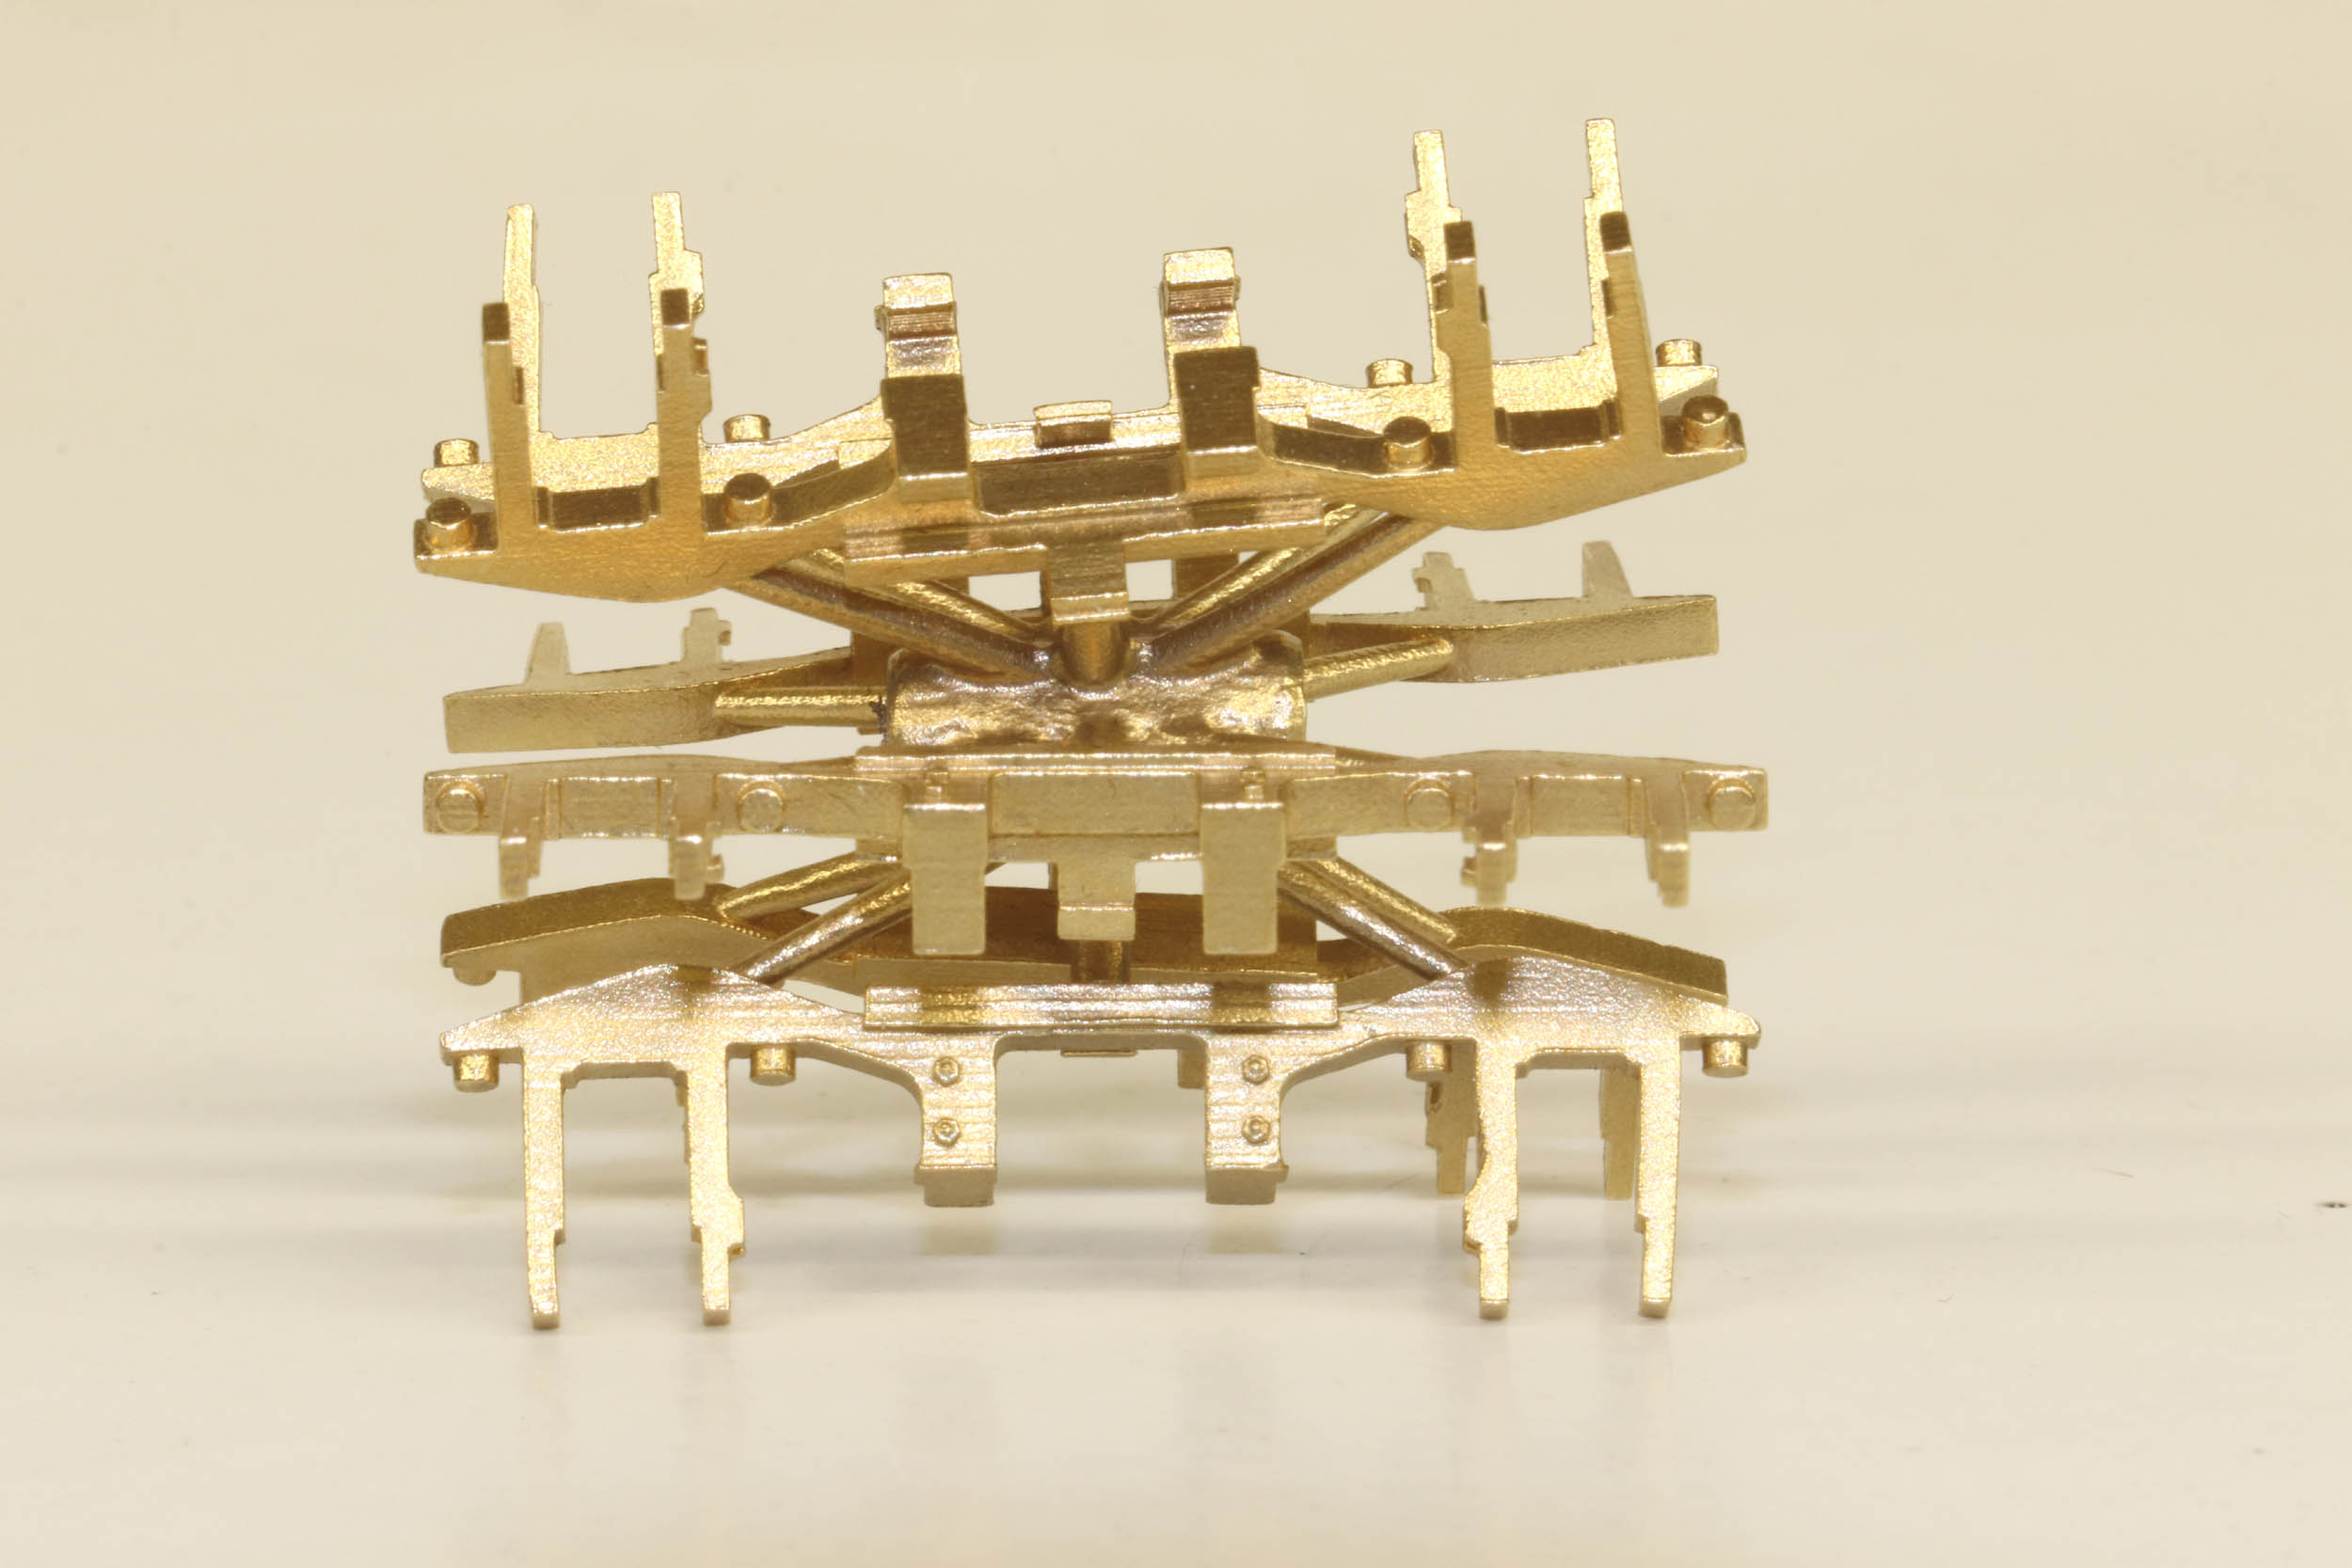
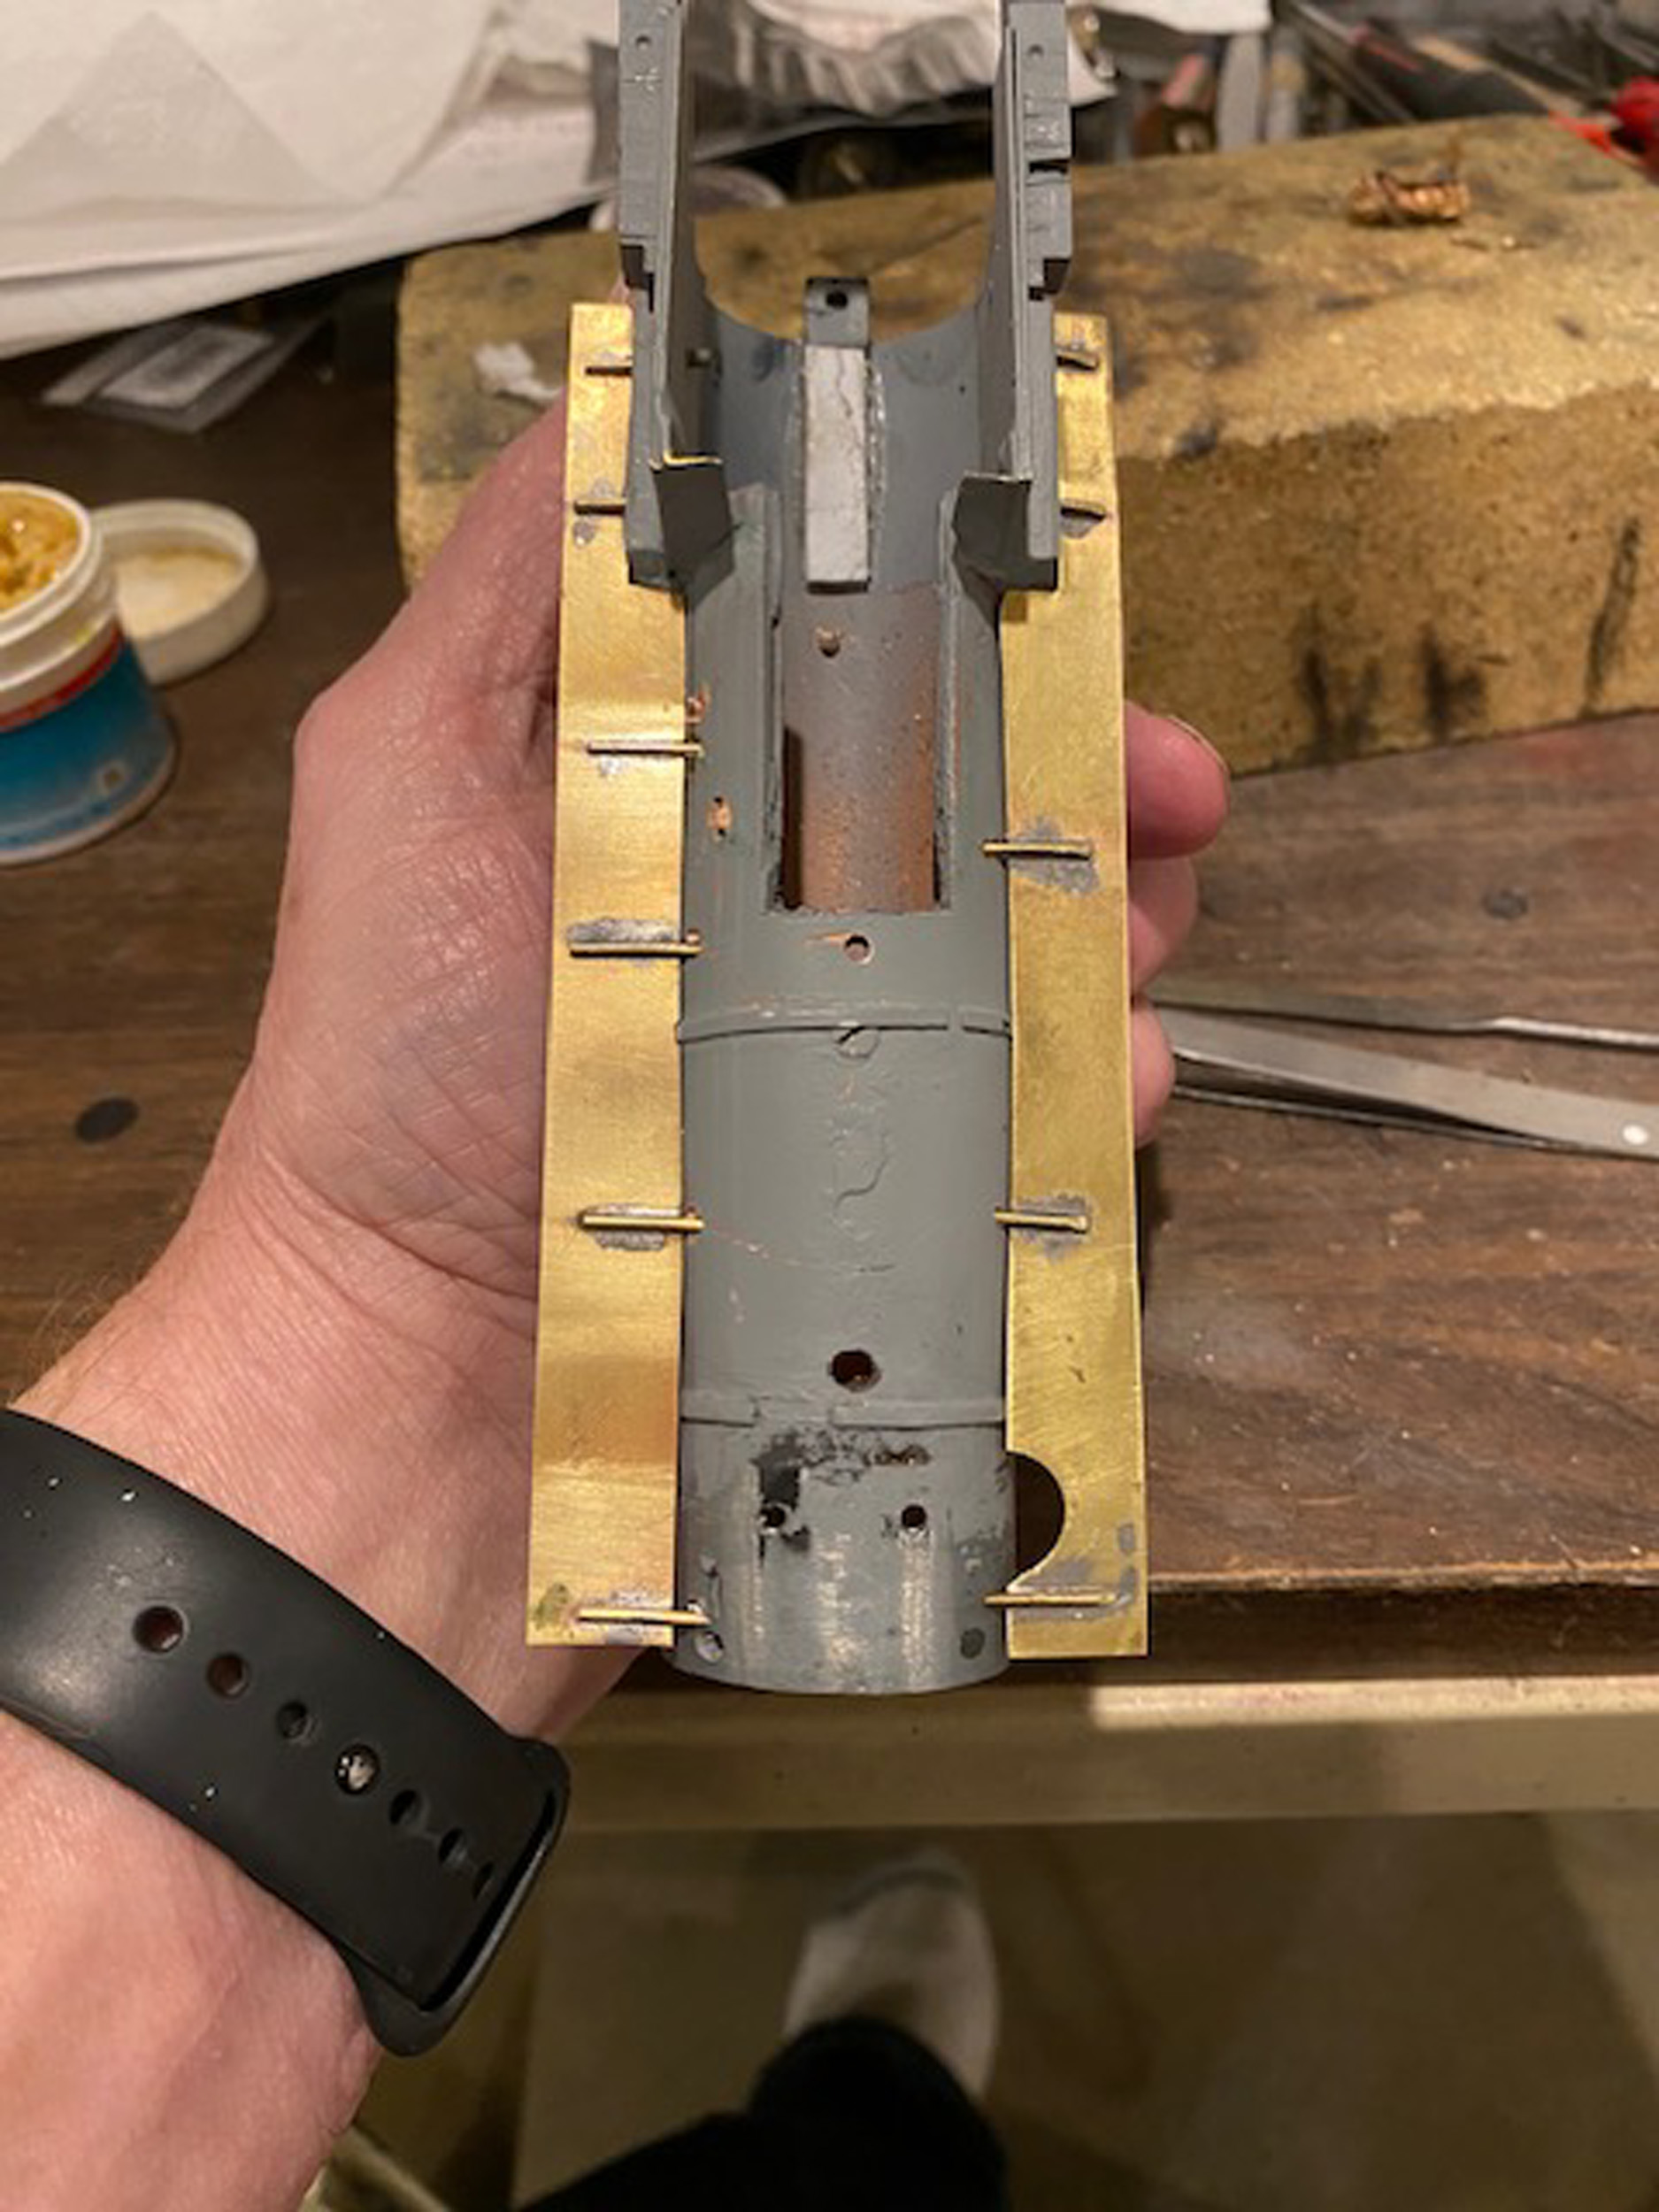
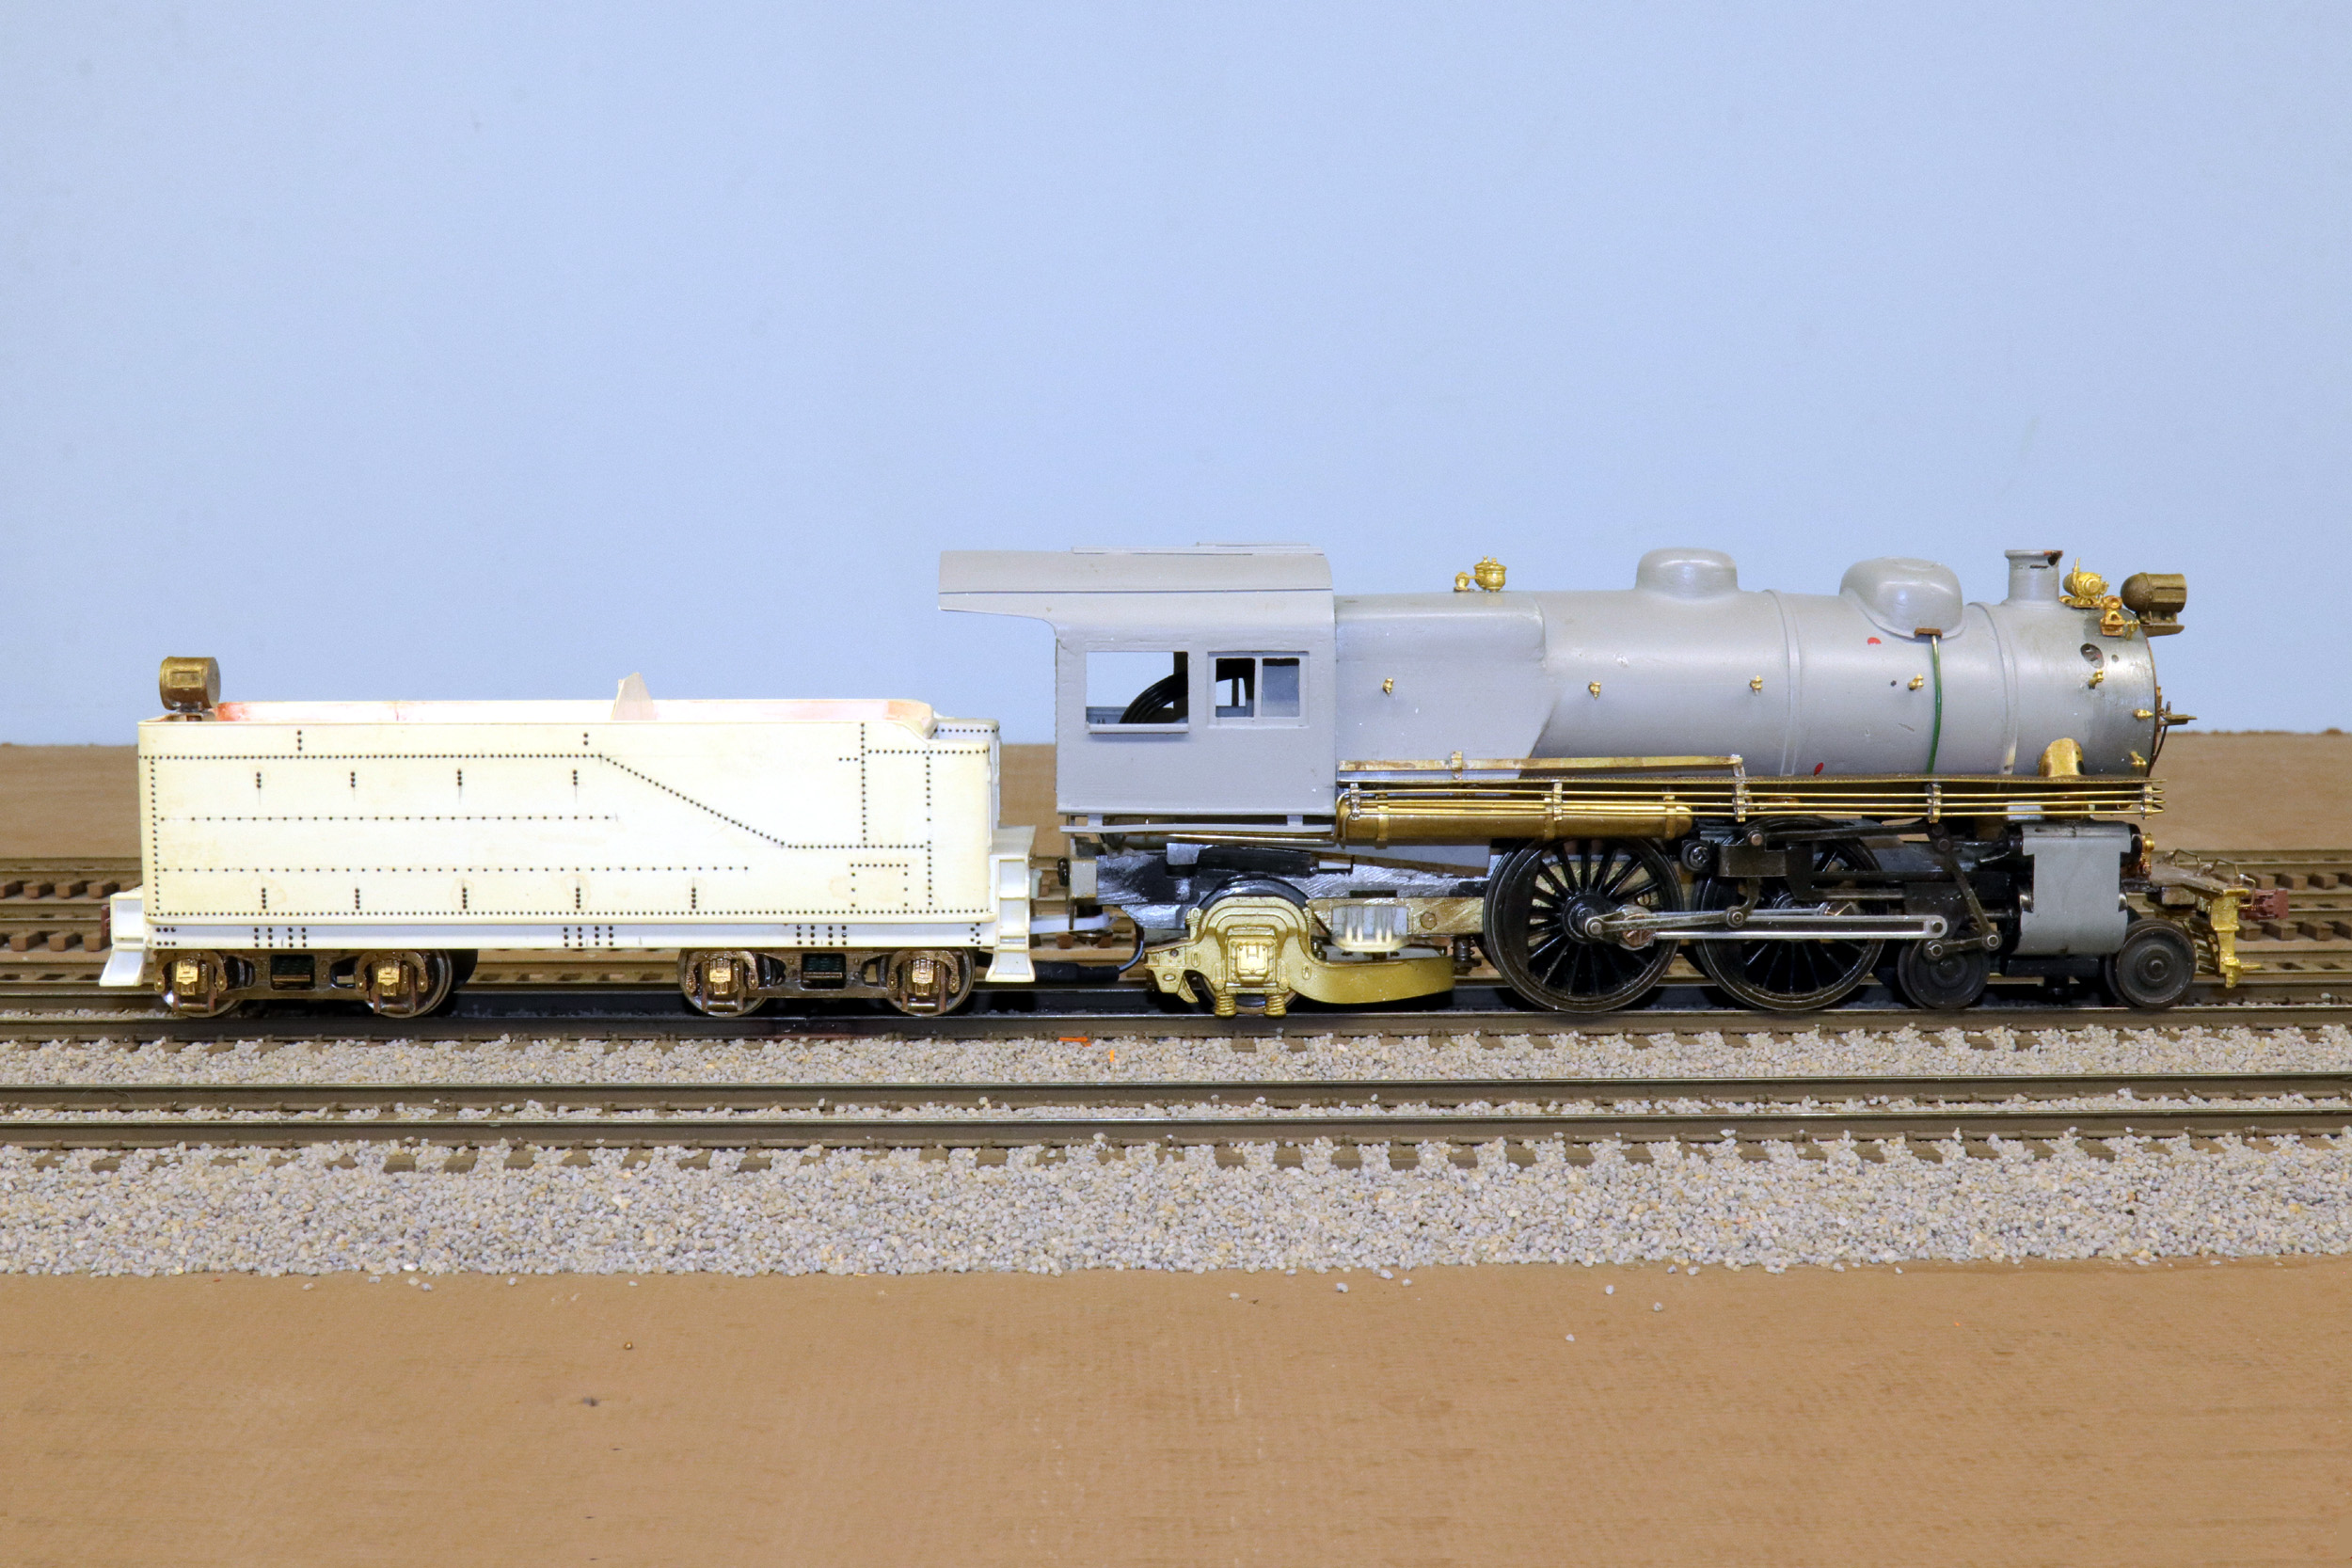
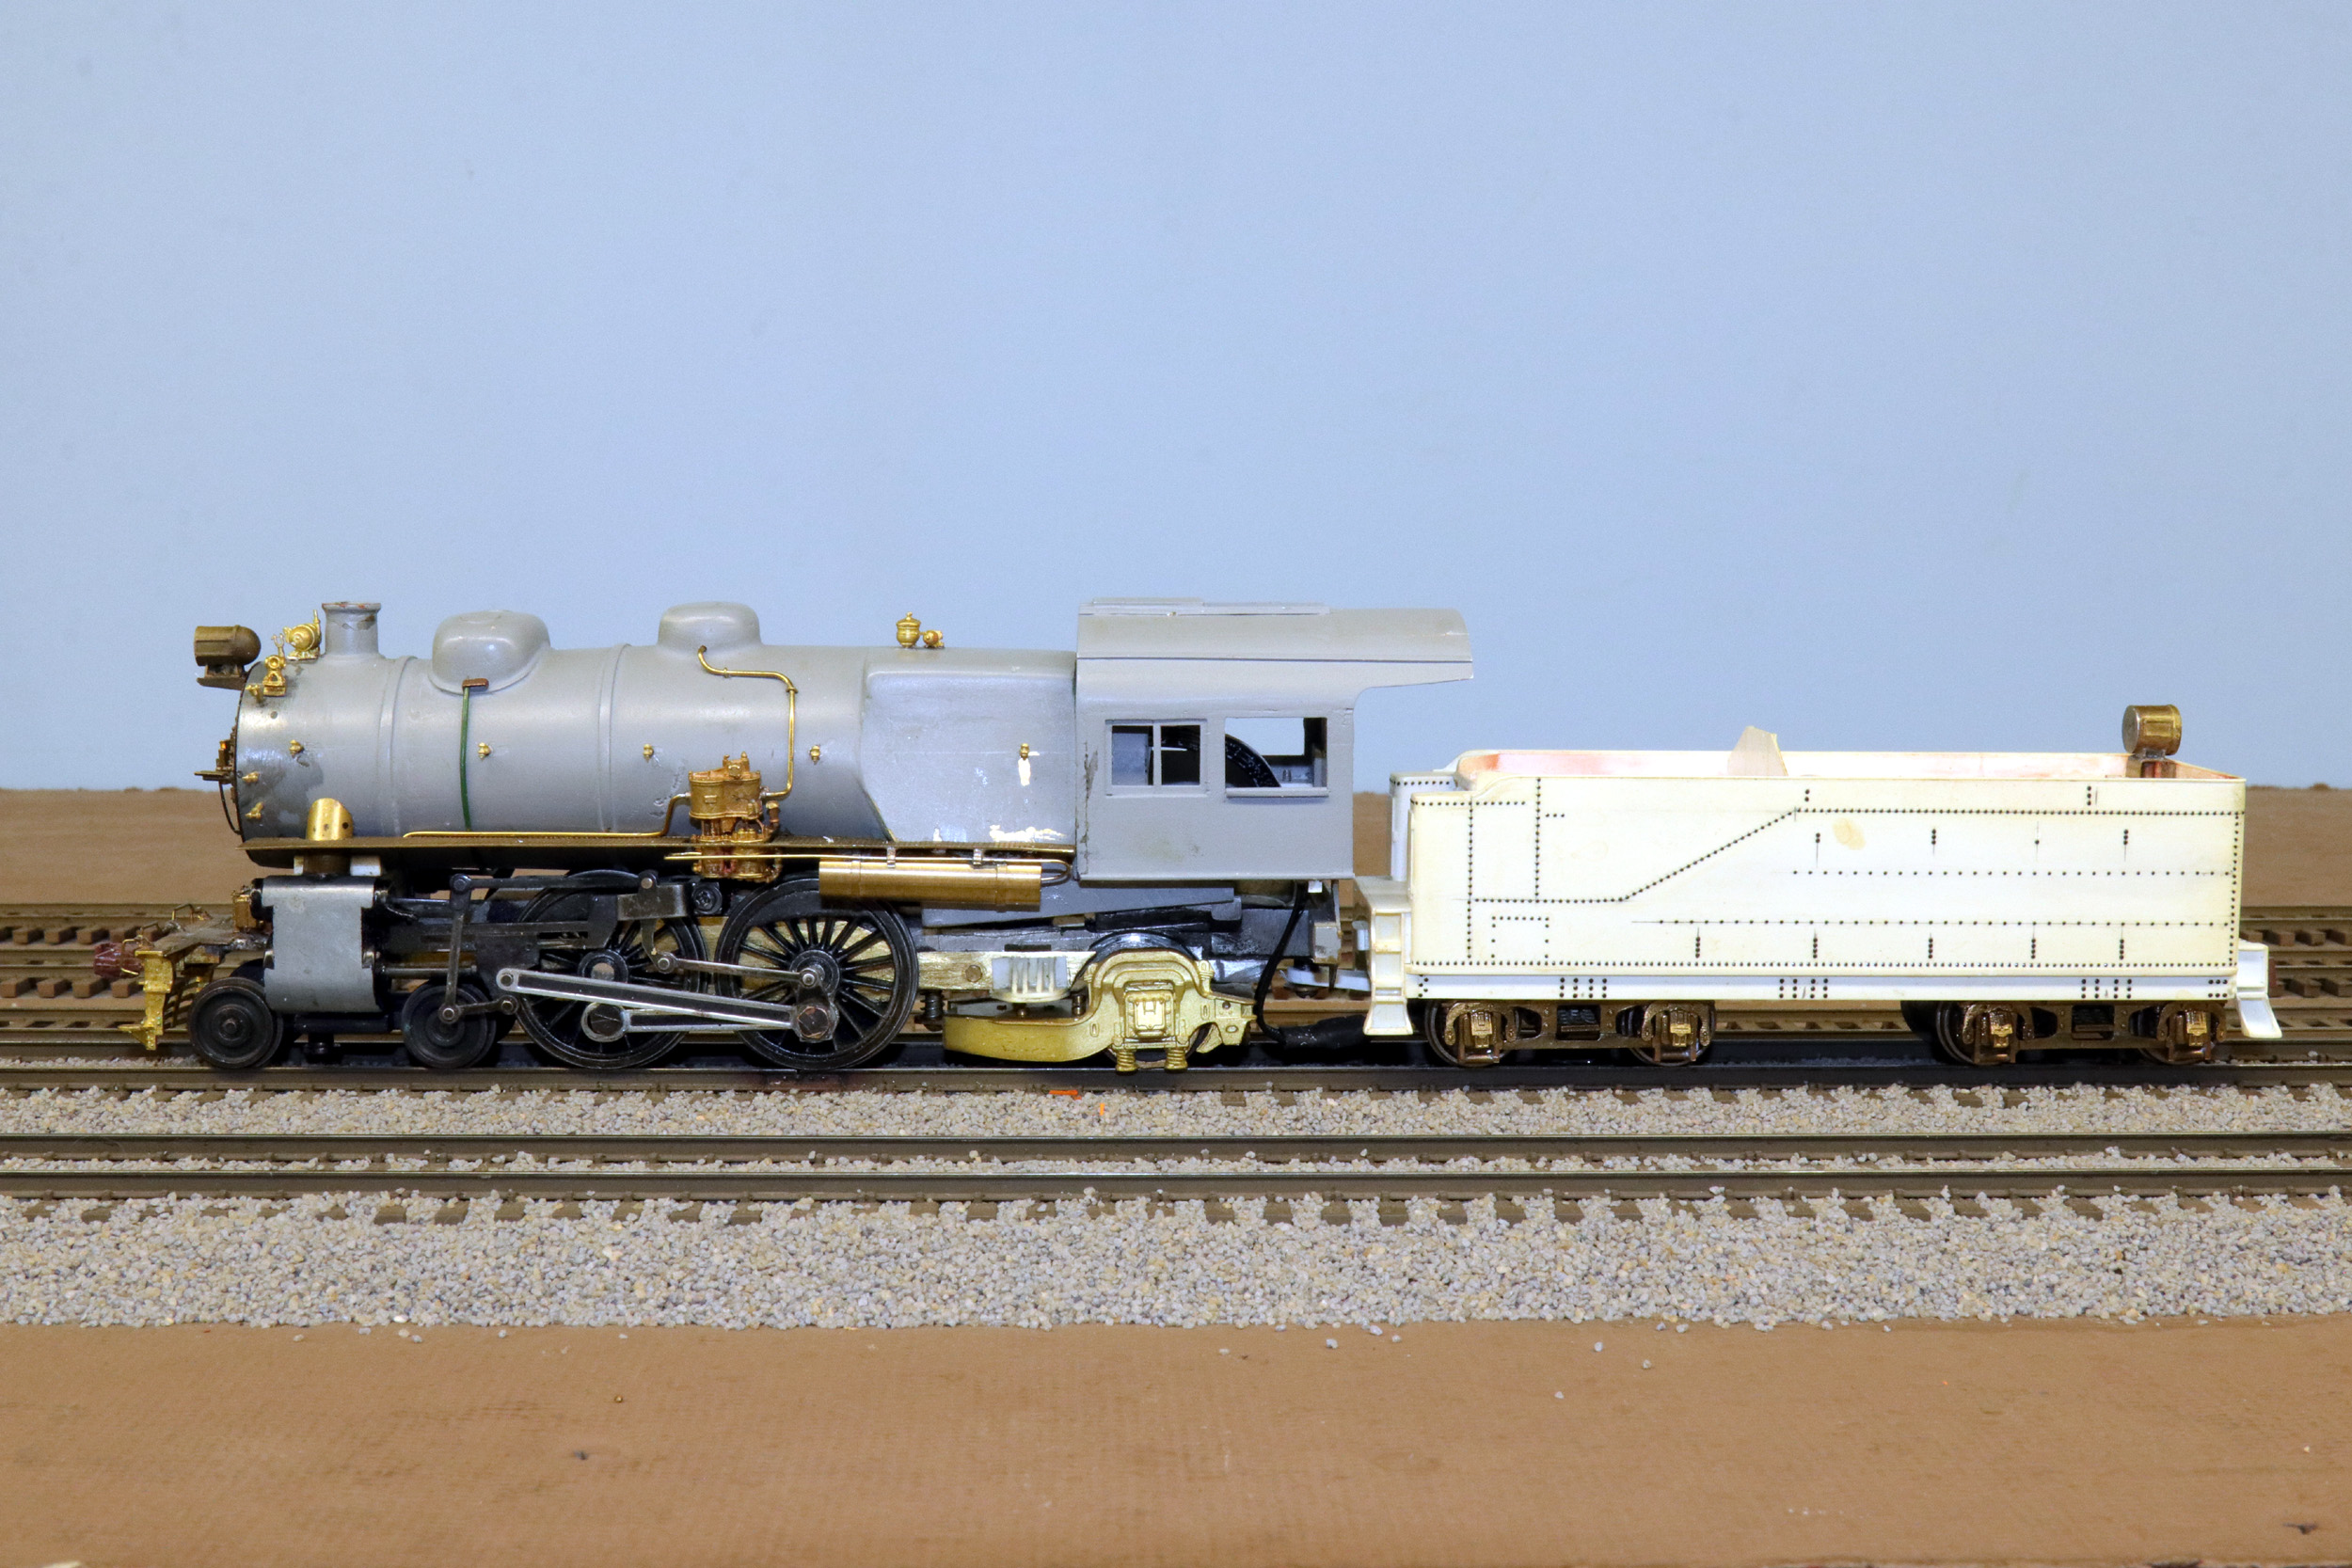
Unique Drive
The
American Models pacific is really a “diesel” in respect that all the axles are
geared to each other. The side rods are purely ornamental. It runs VERY well.
Sam removed the rear axle from the pacific.

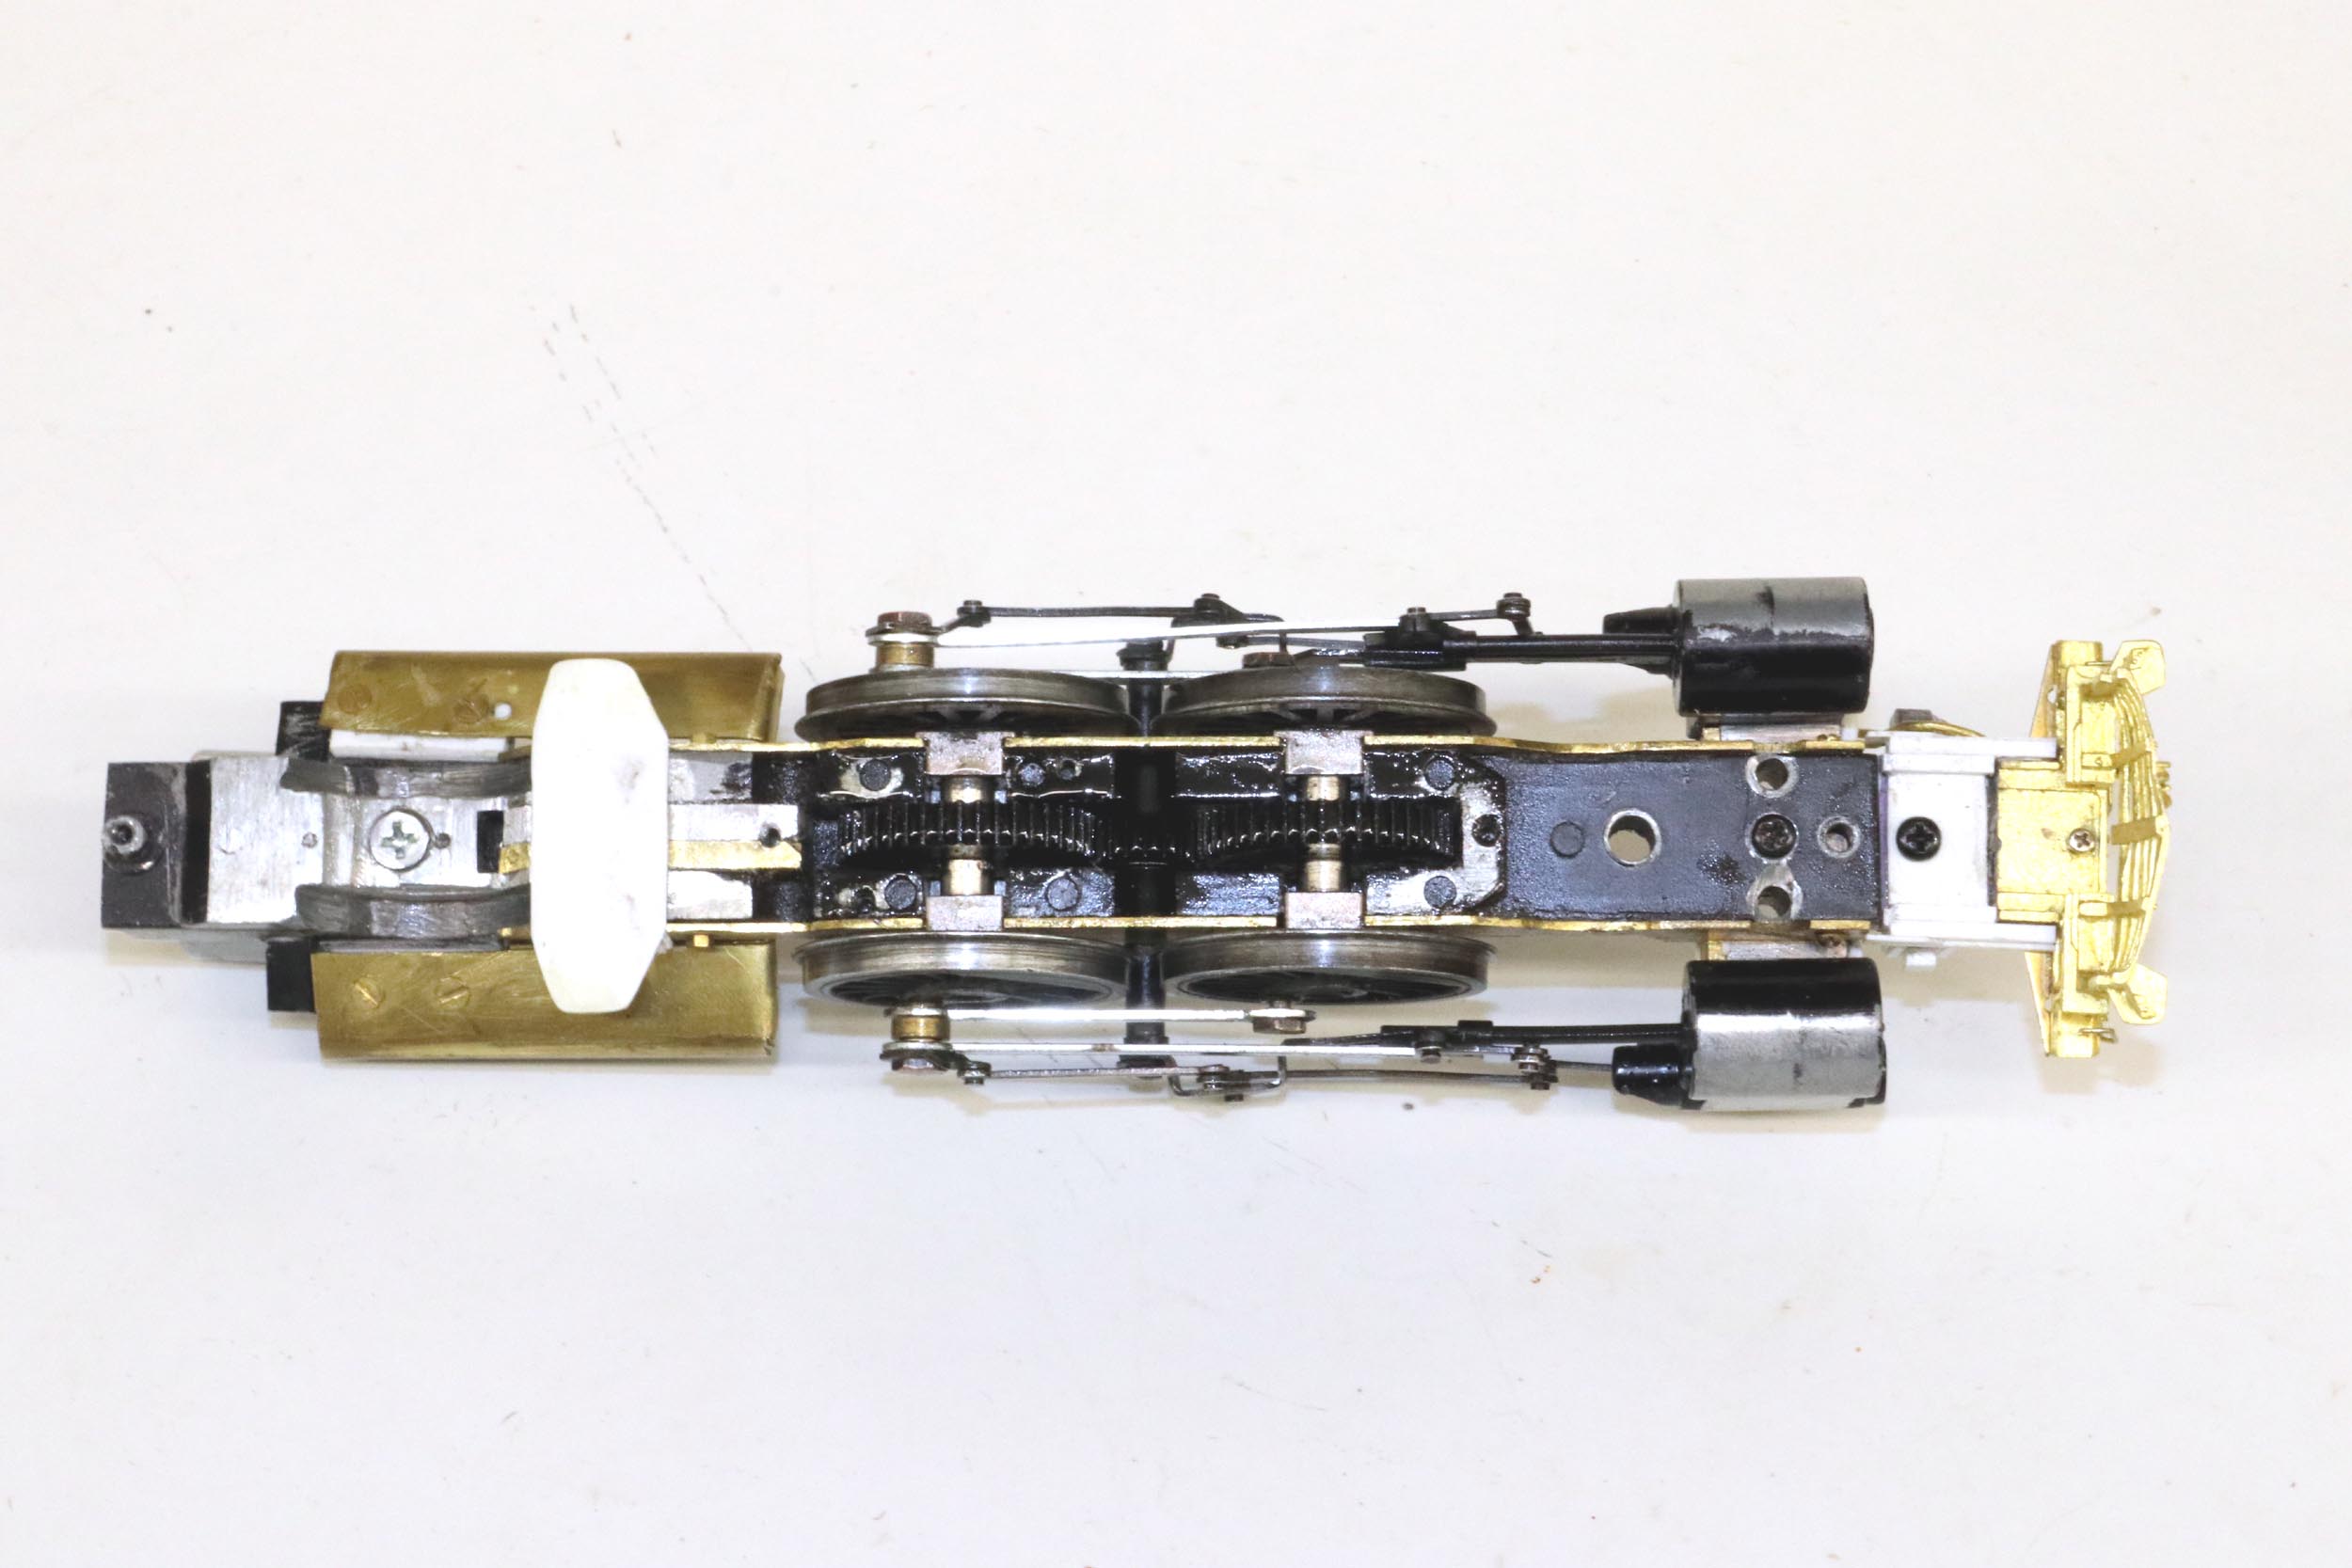
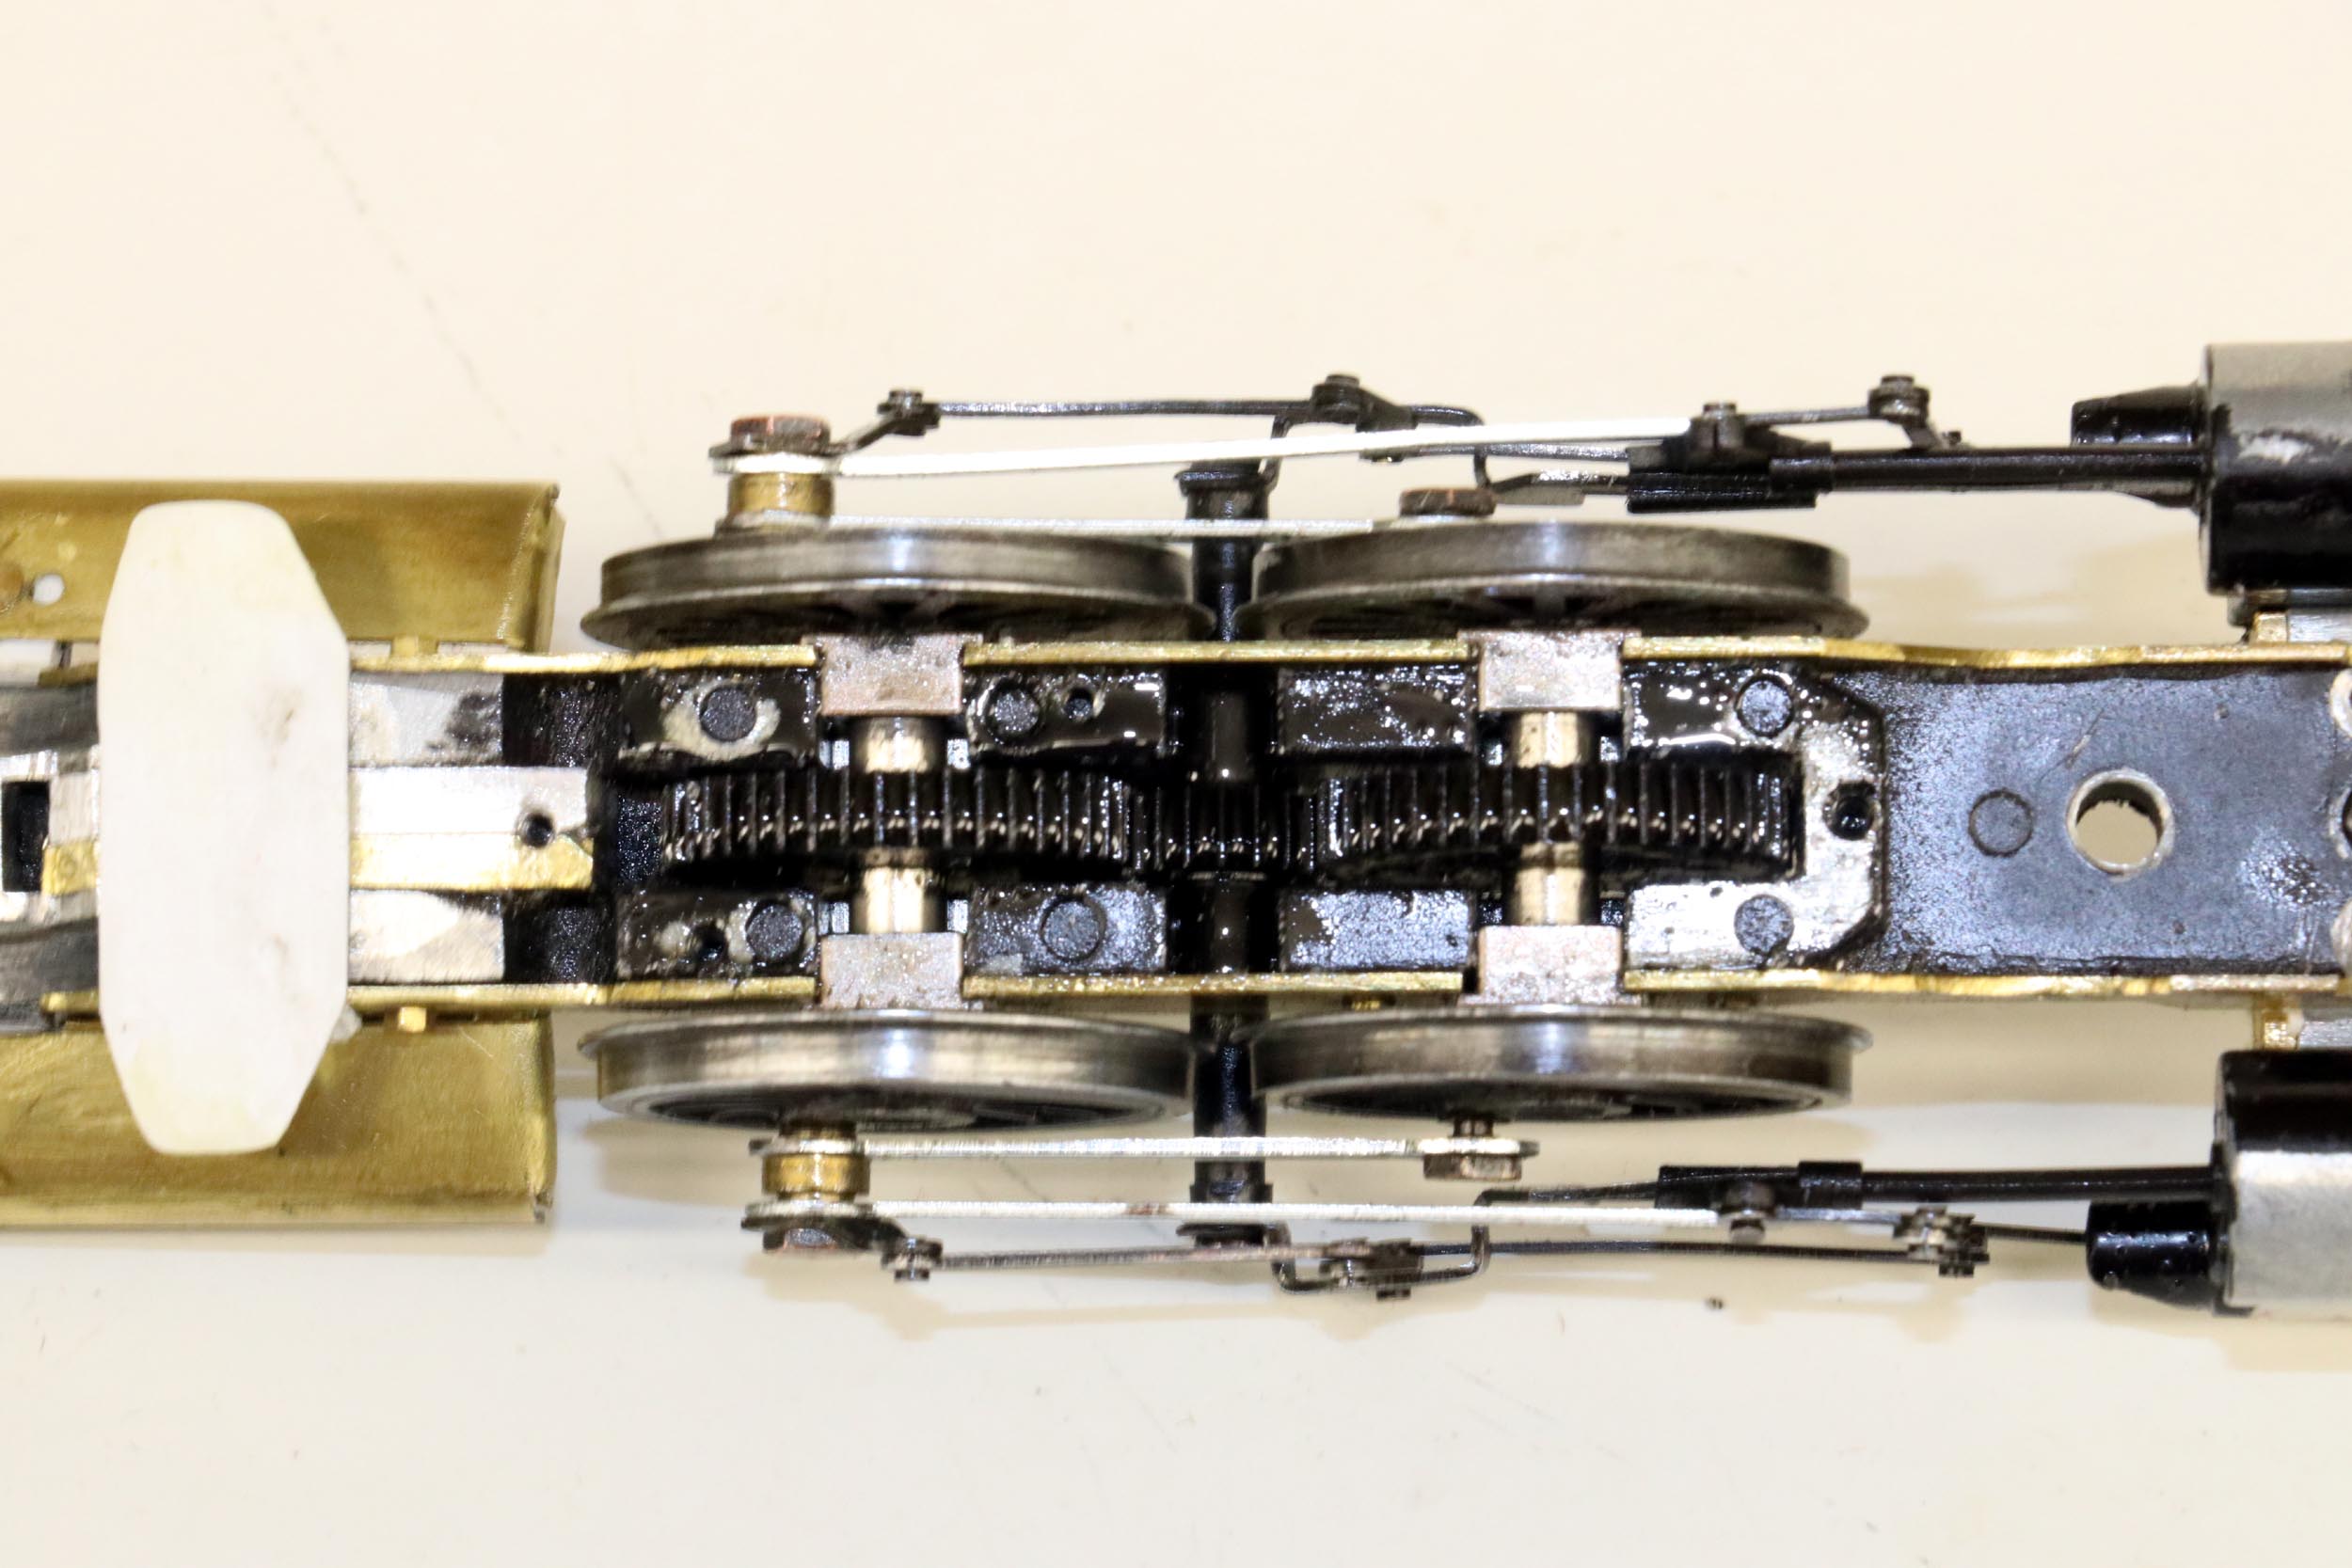
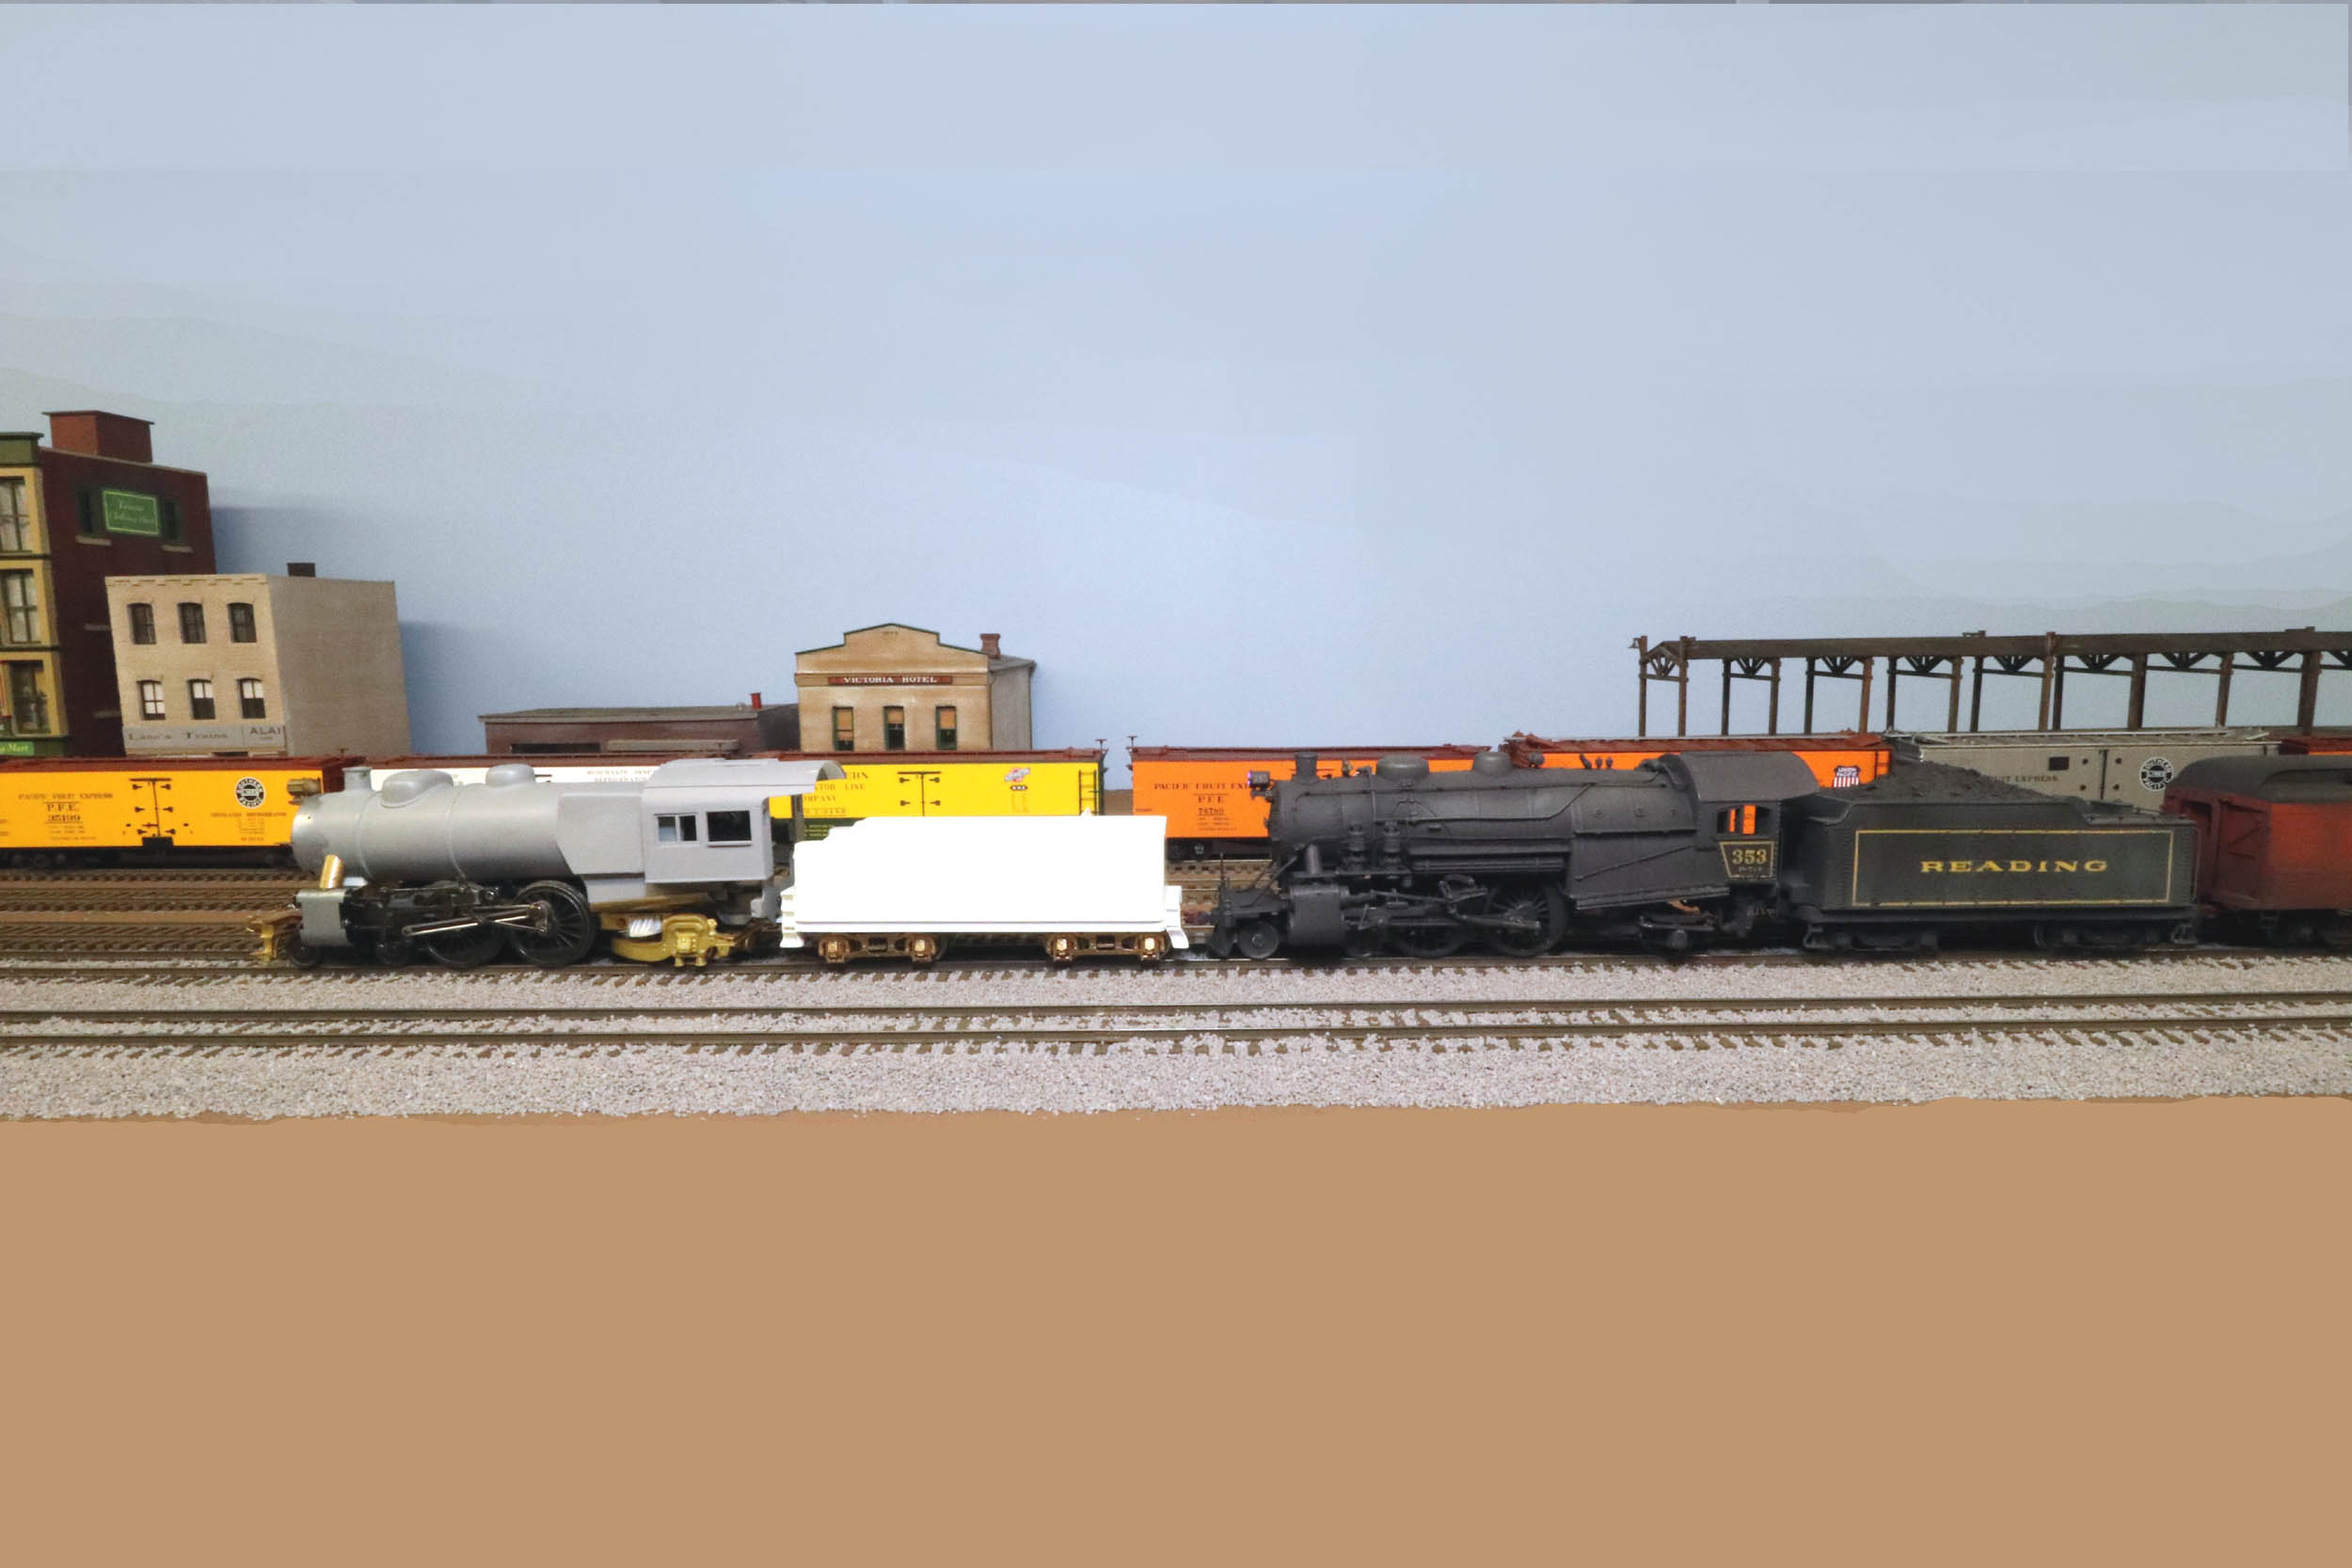
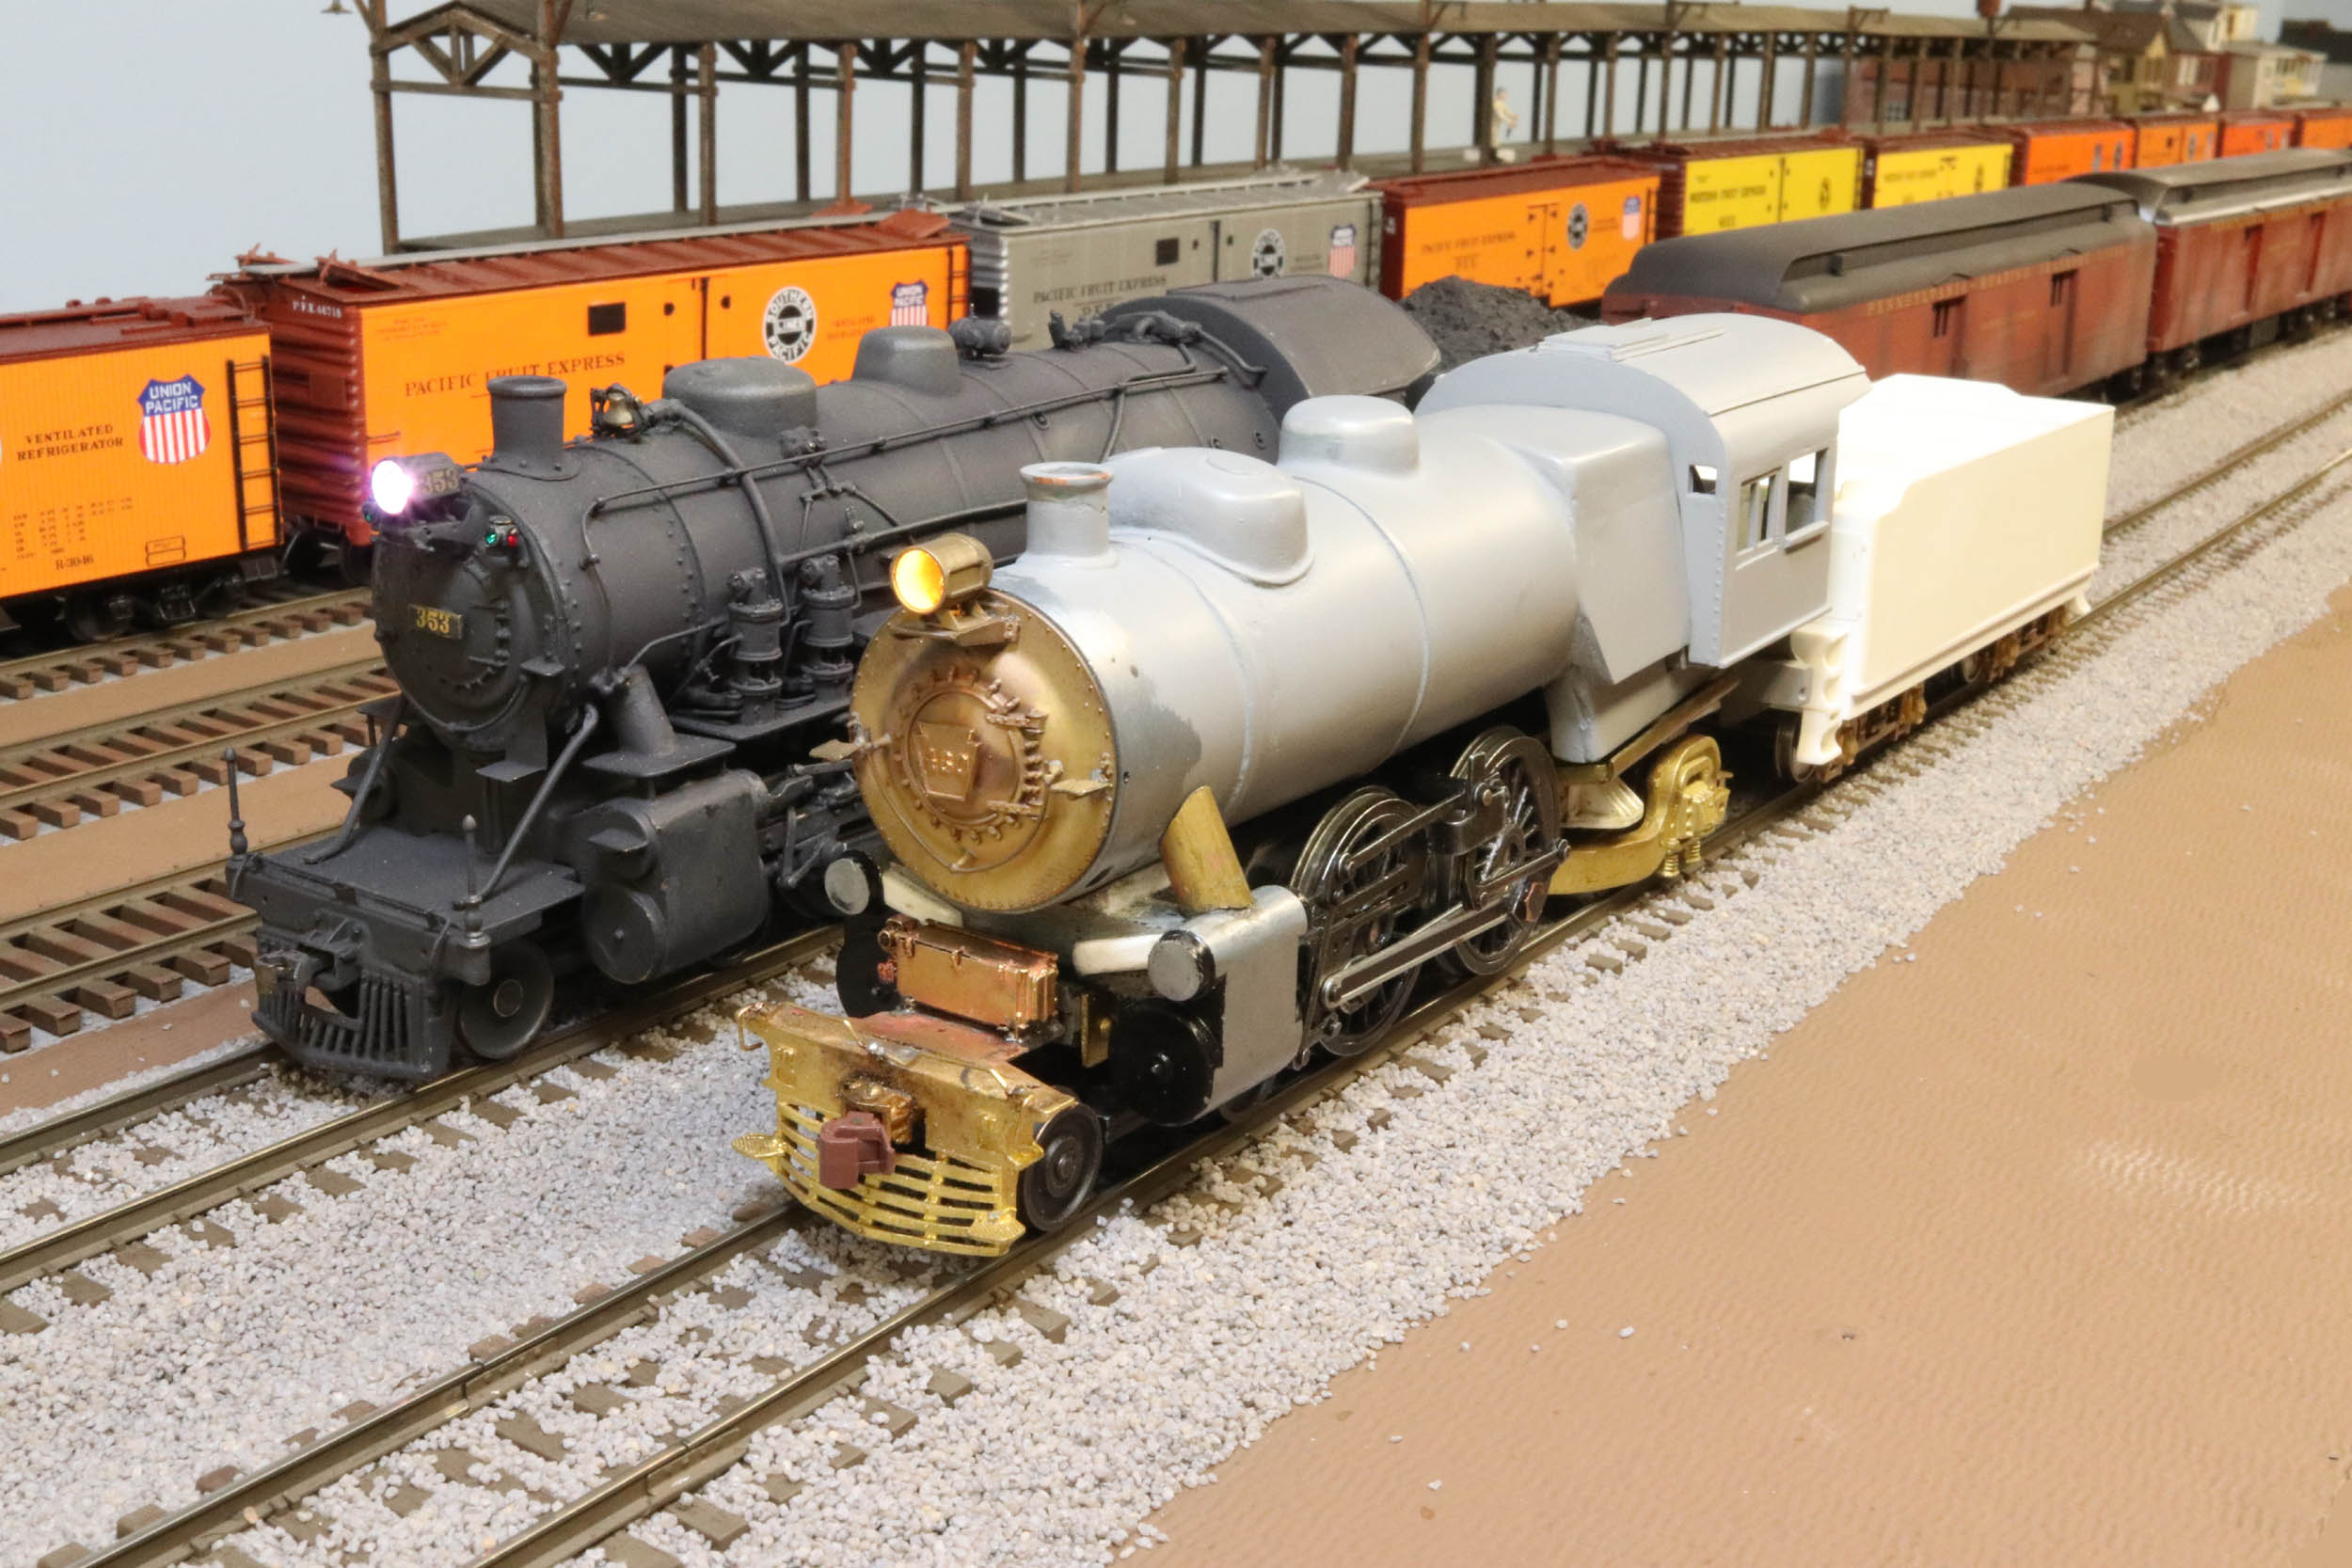
It
now has a TCS WOW4 decoder. I changed to the modern PRR headlight. It is
running great. Let the detailing begin! The photo at bottom right is pulling 11
brass cars with some slip. I will be happy with pulling 8 cars.
Now
that it is running I will have to get parts I do not have and photograph the
real 460. That will start soon.

Added
3-23-19
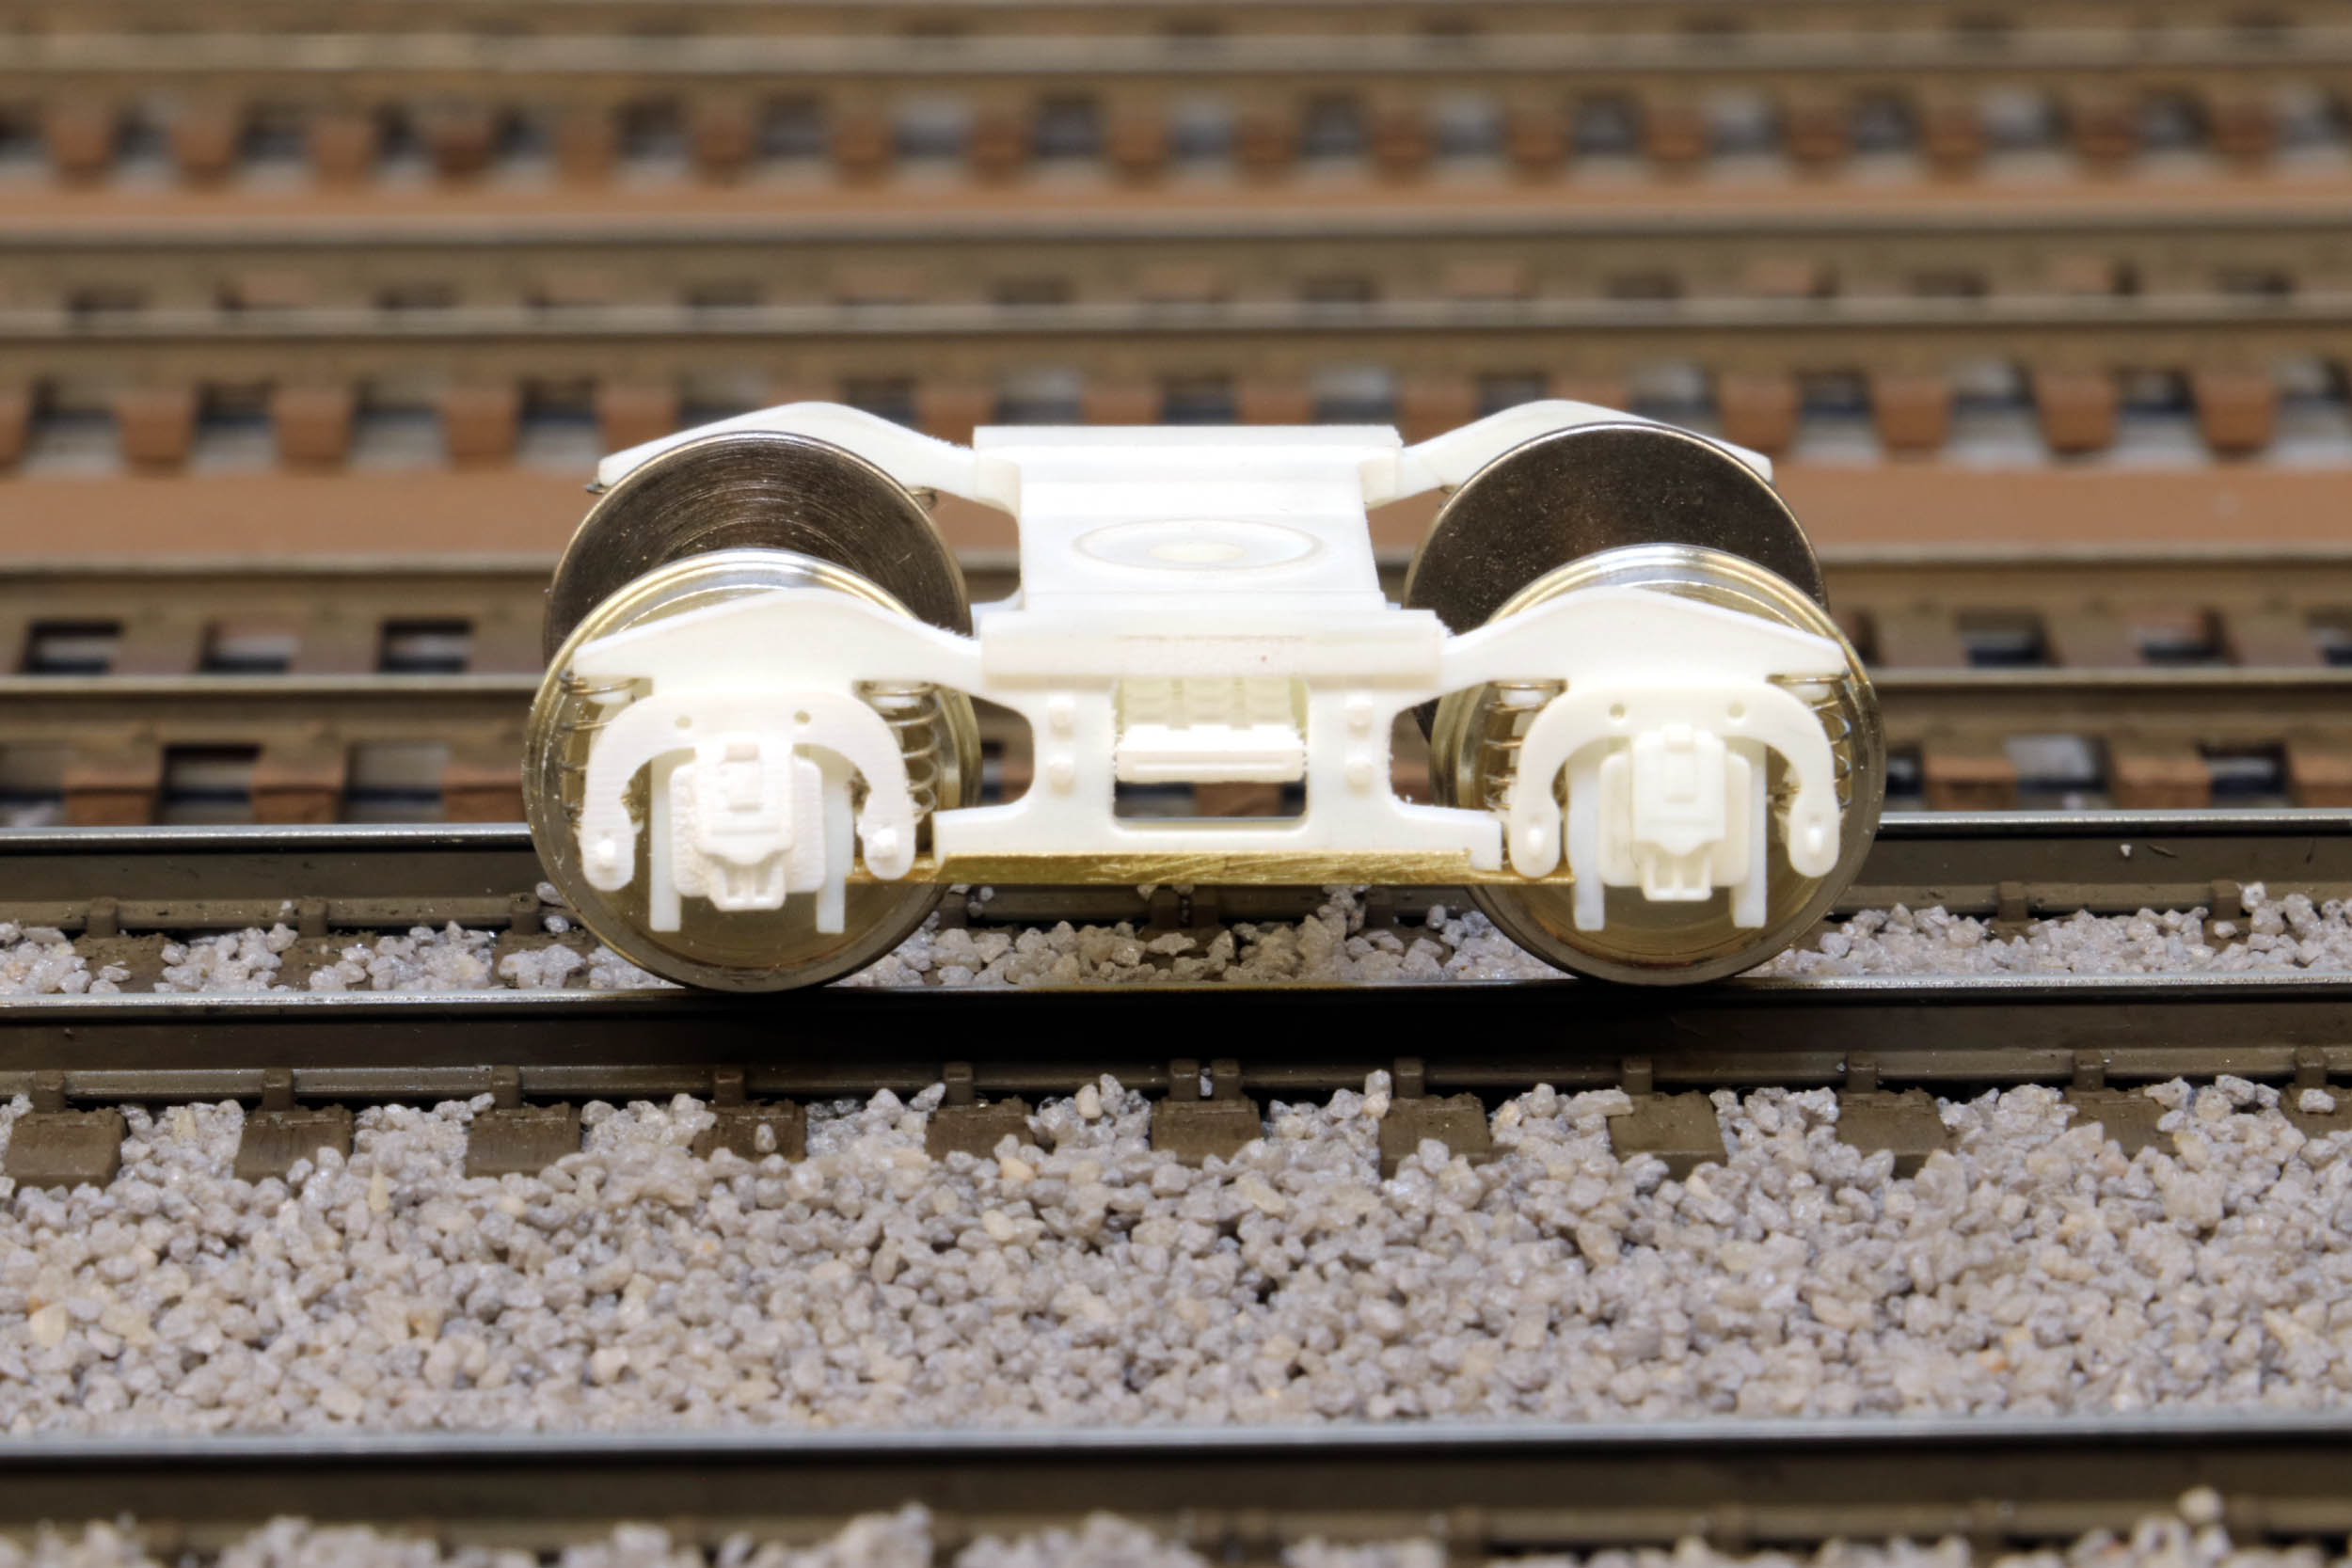
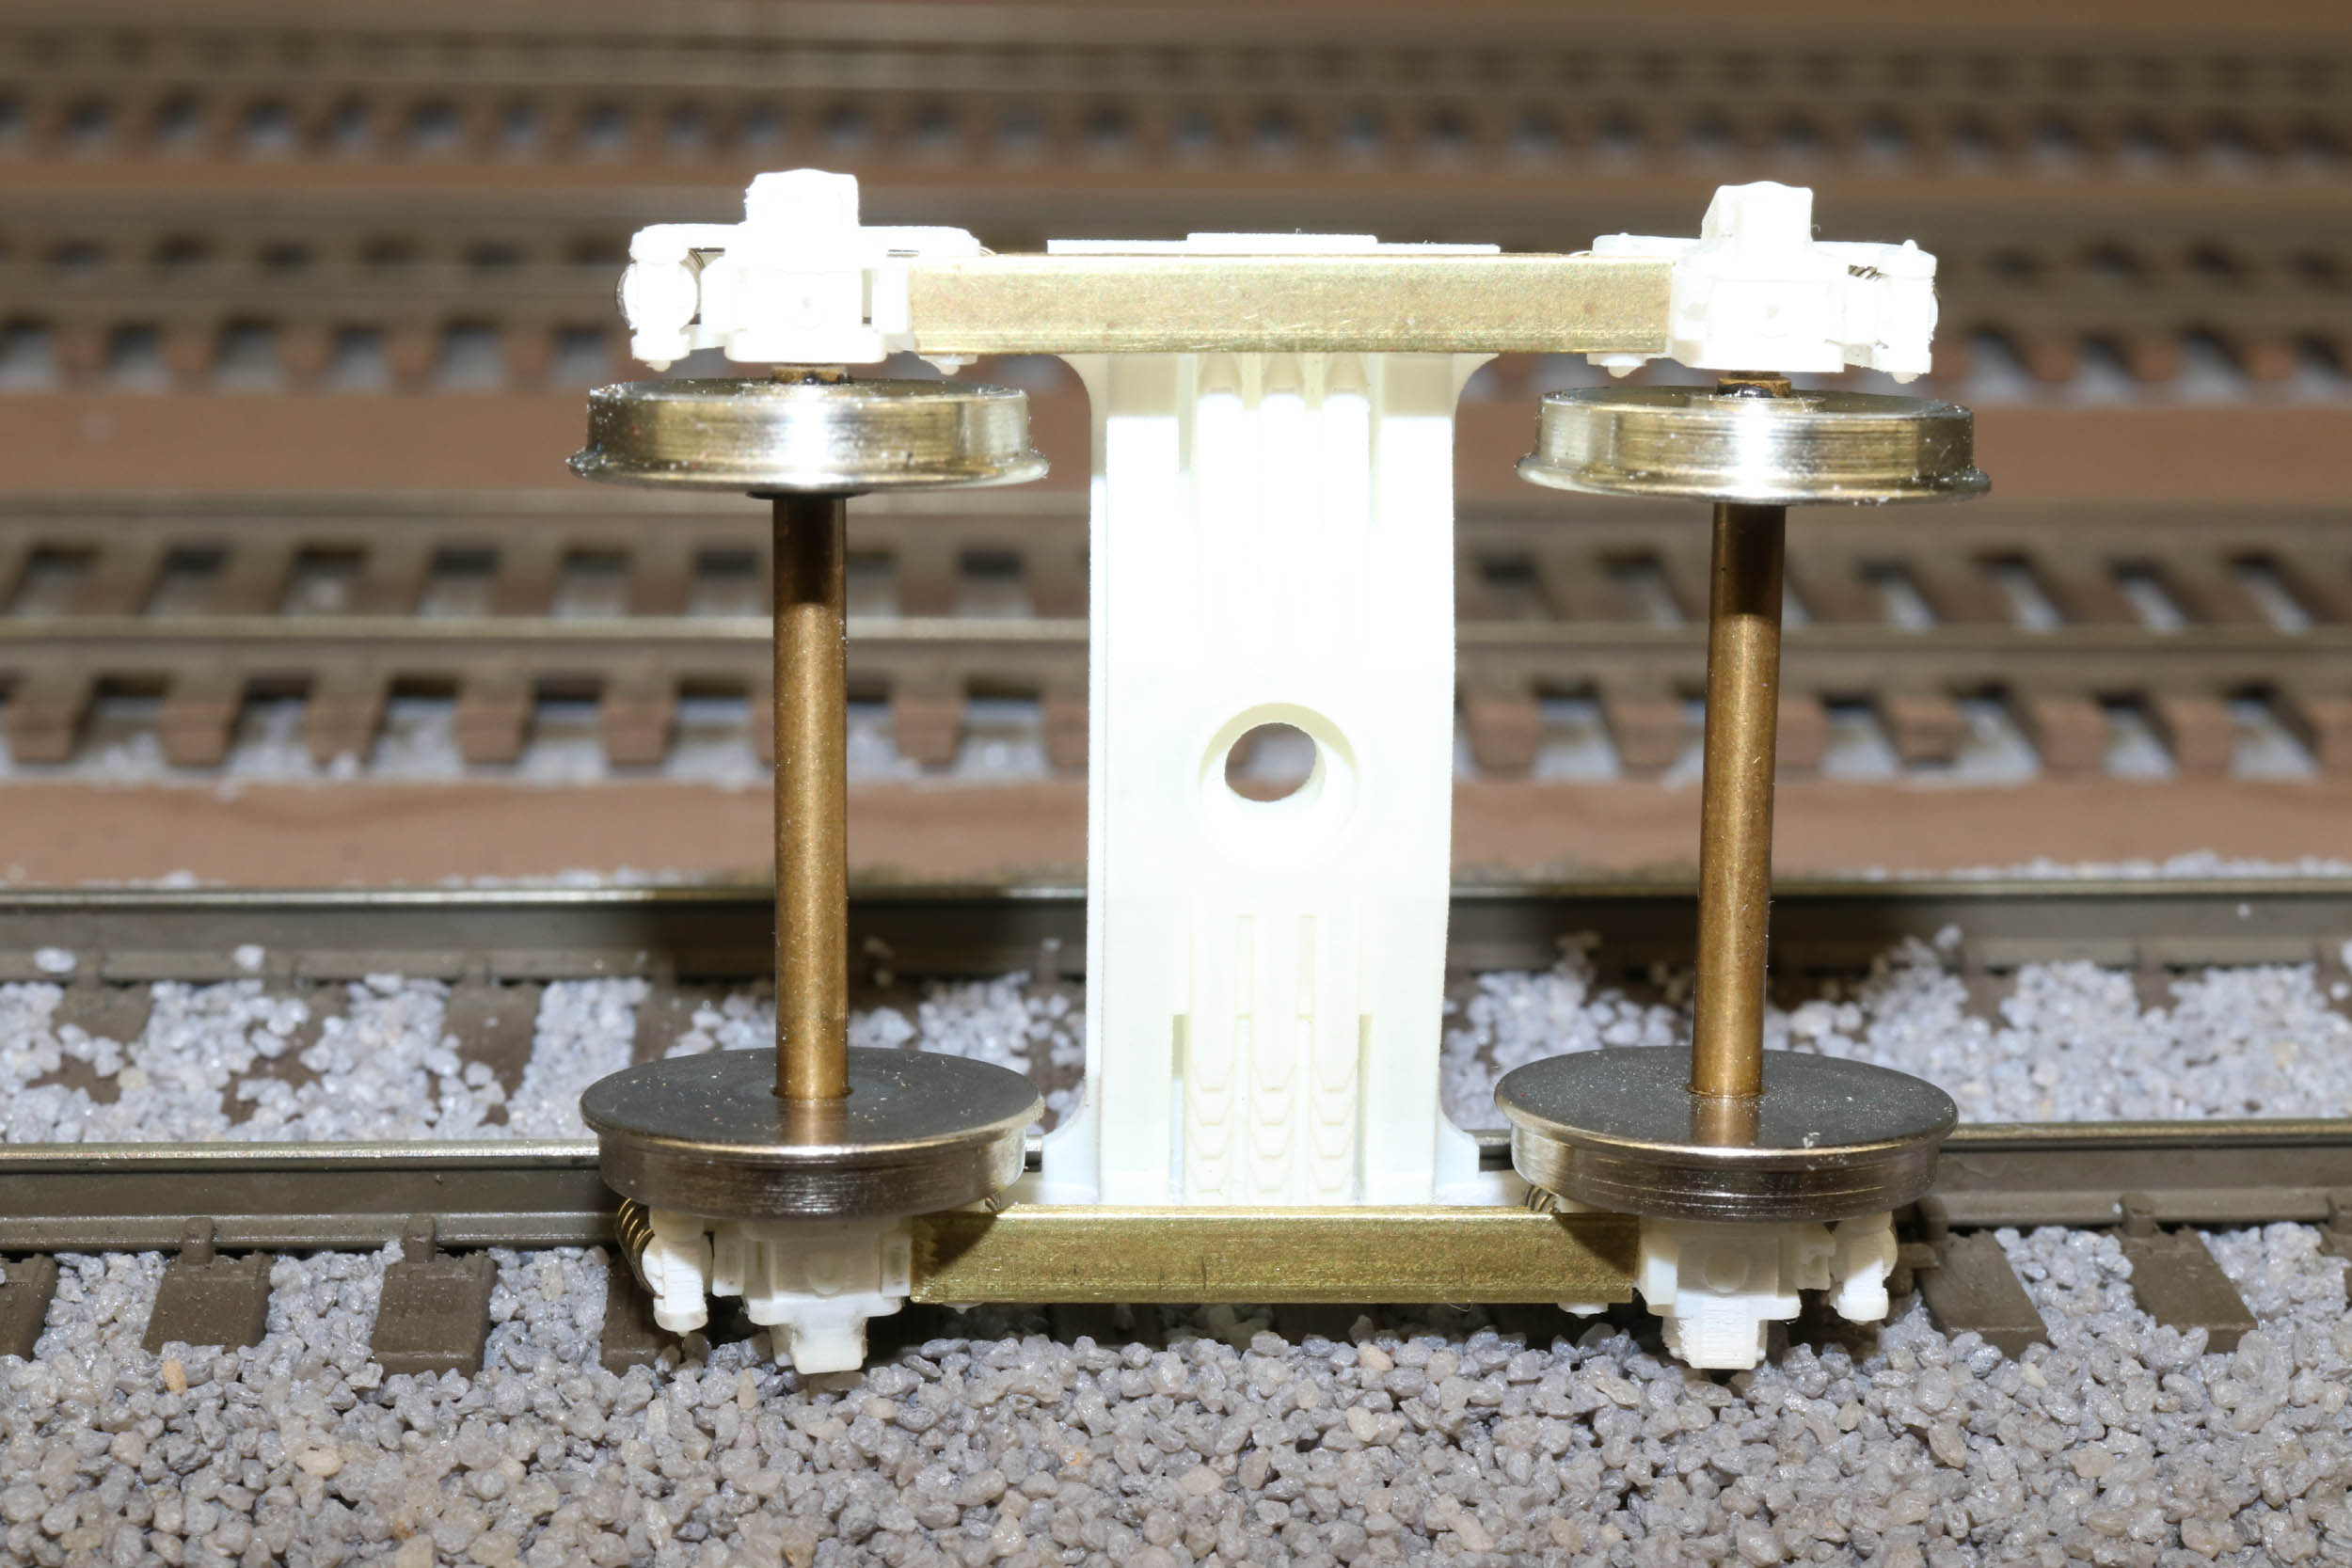
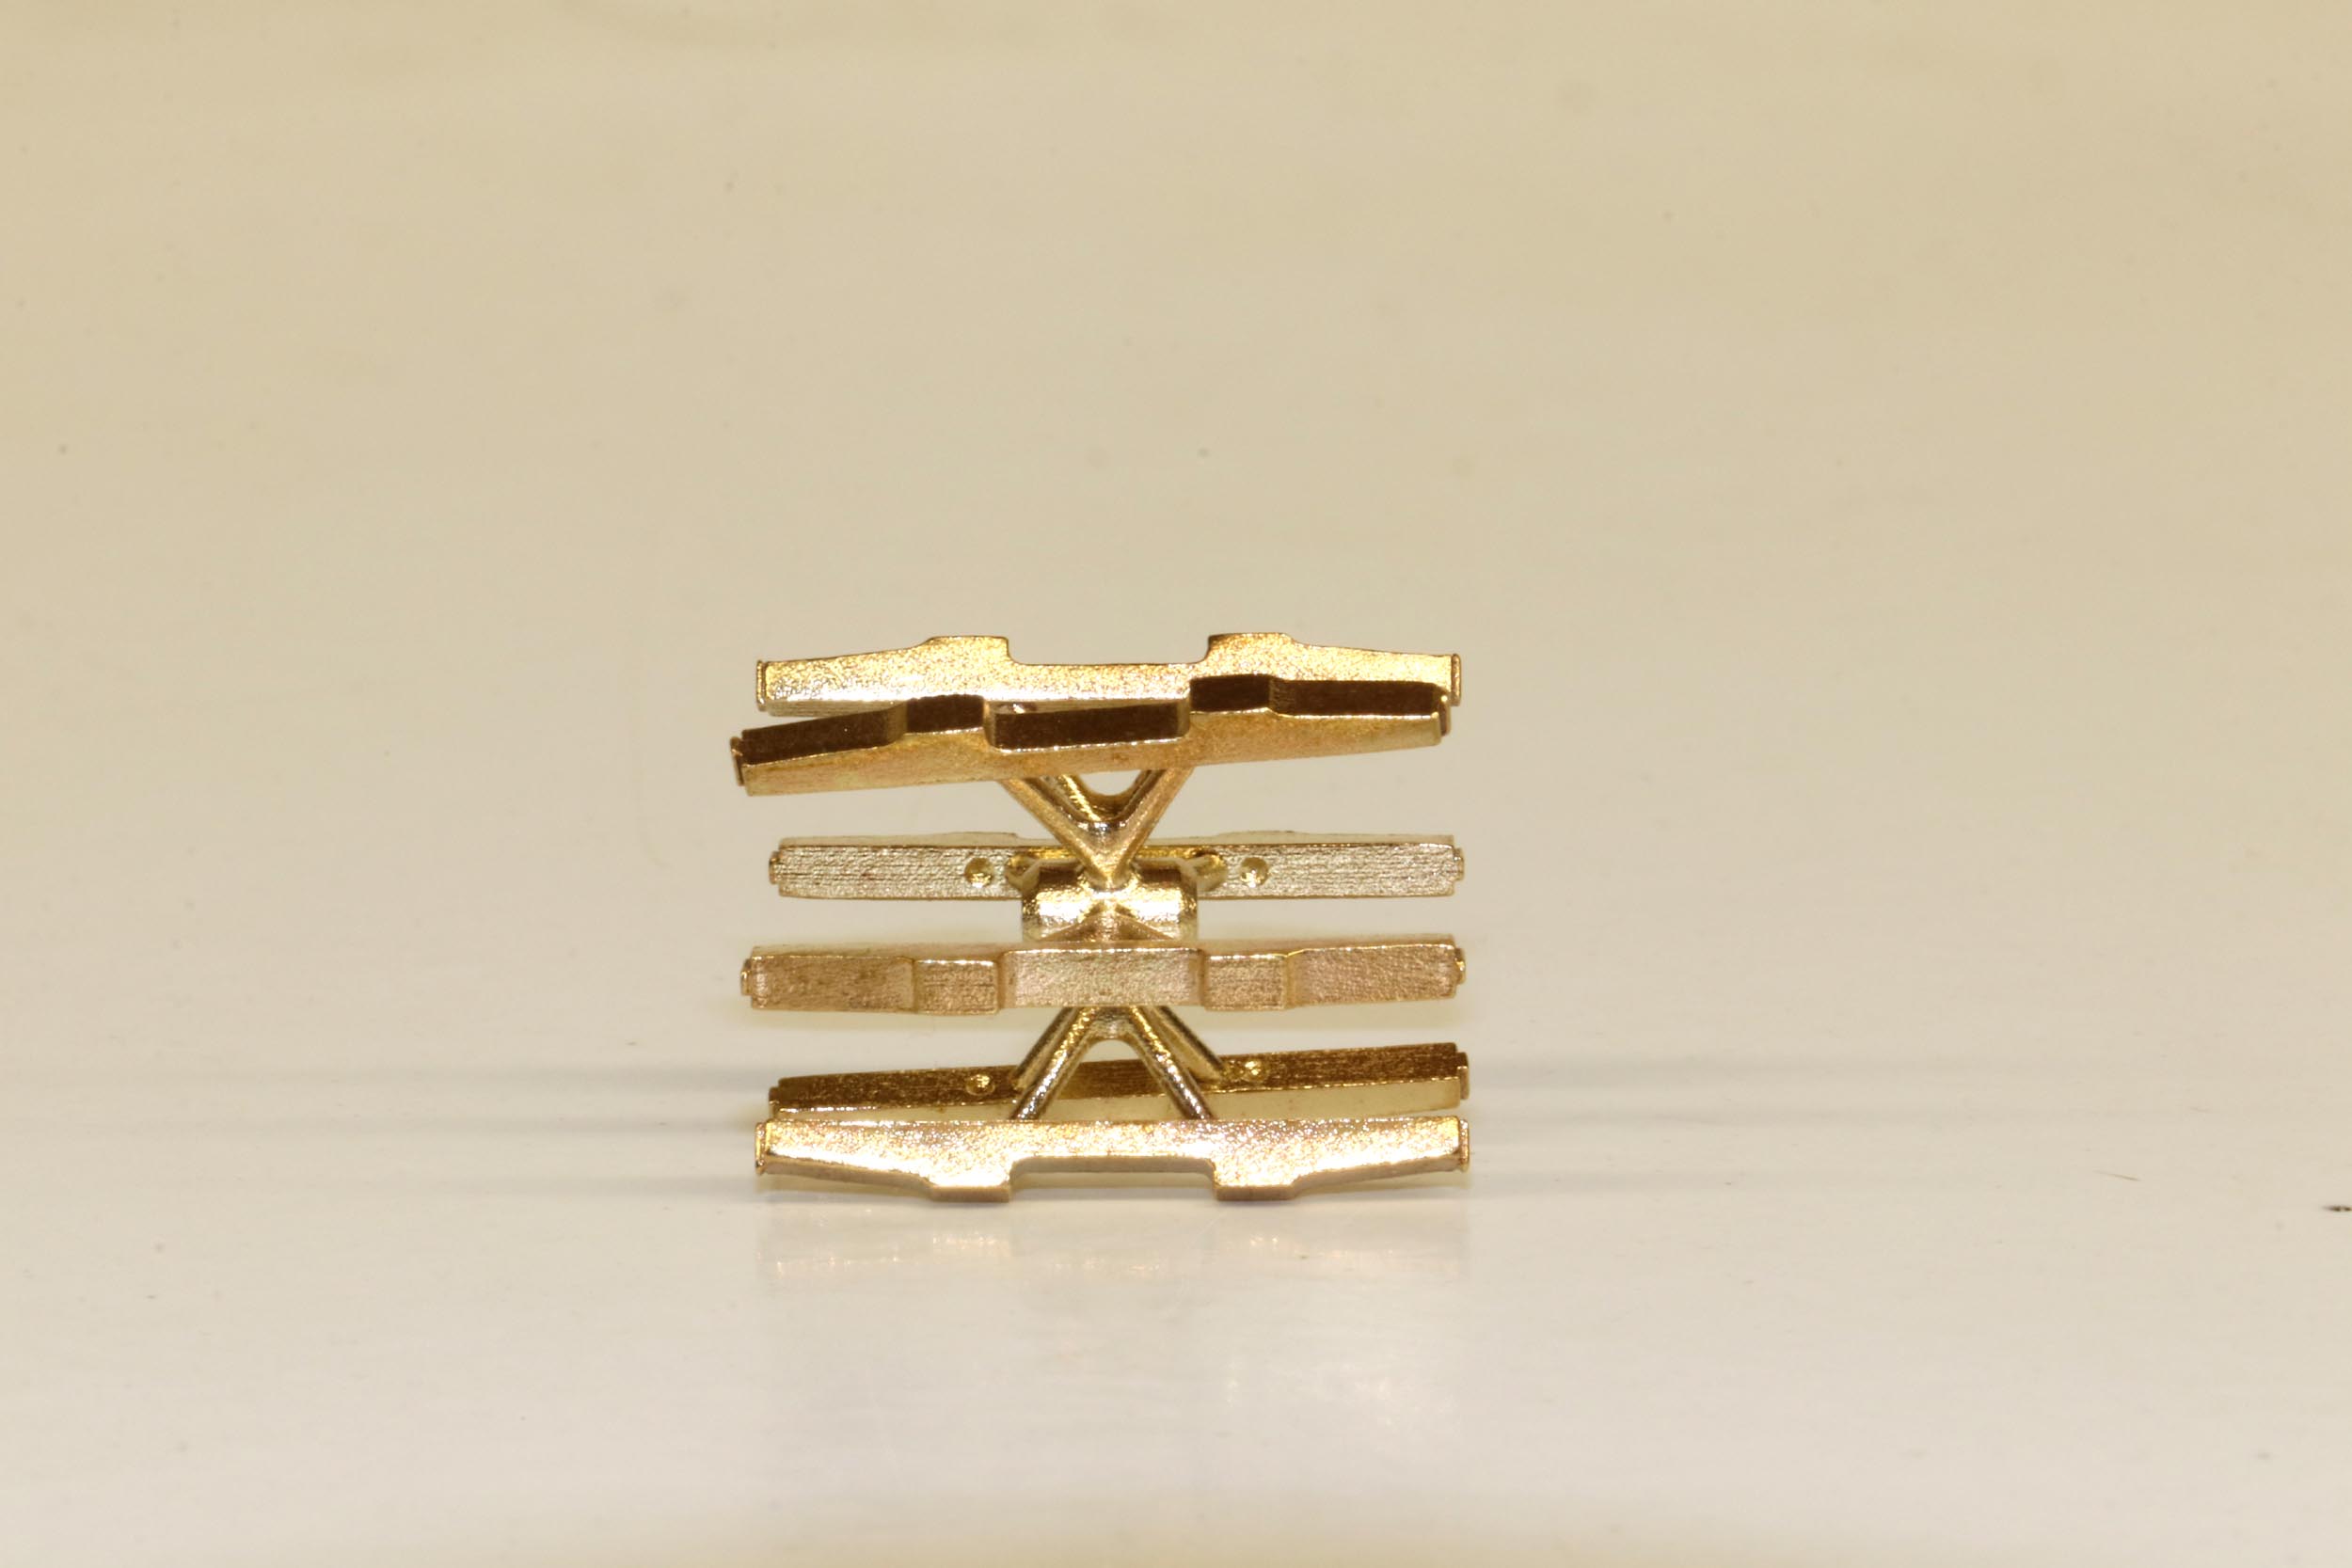
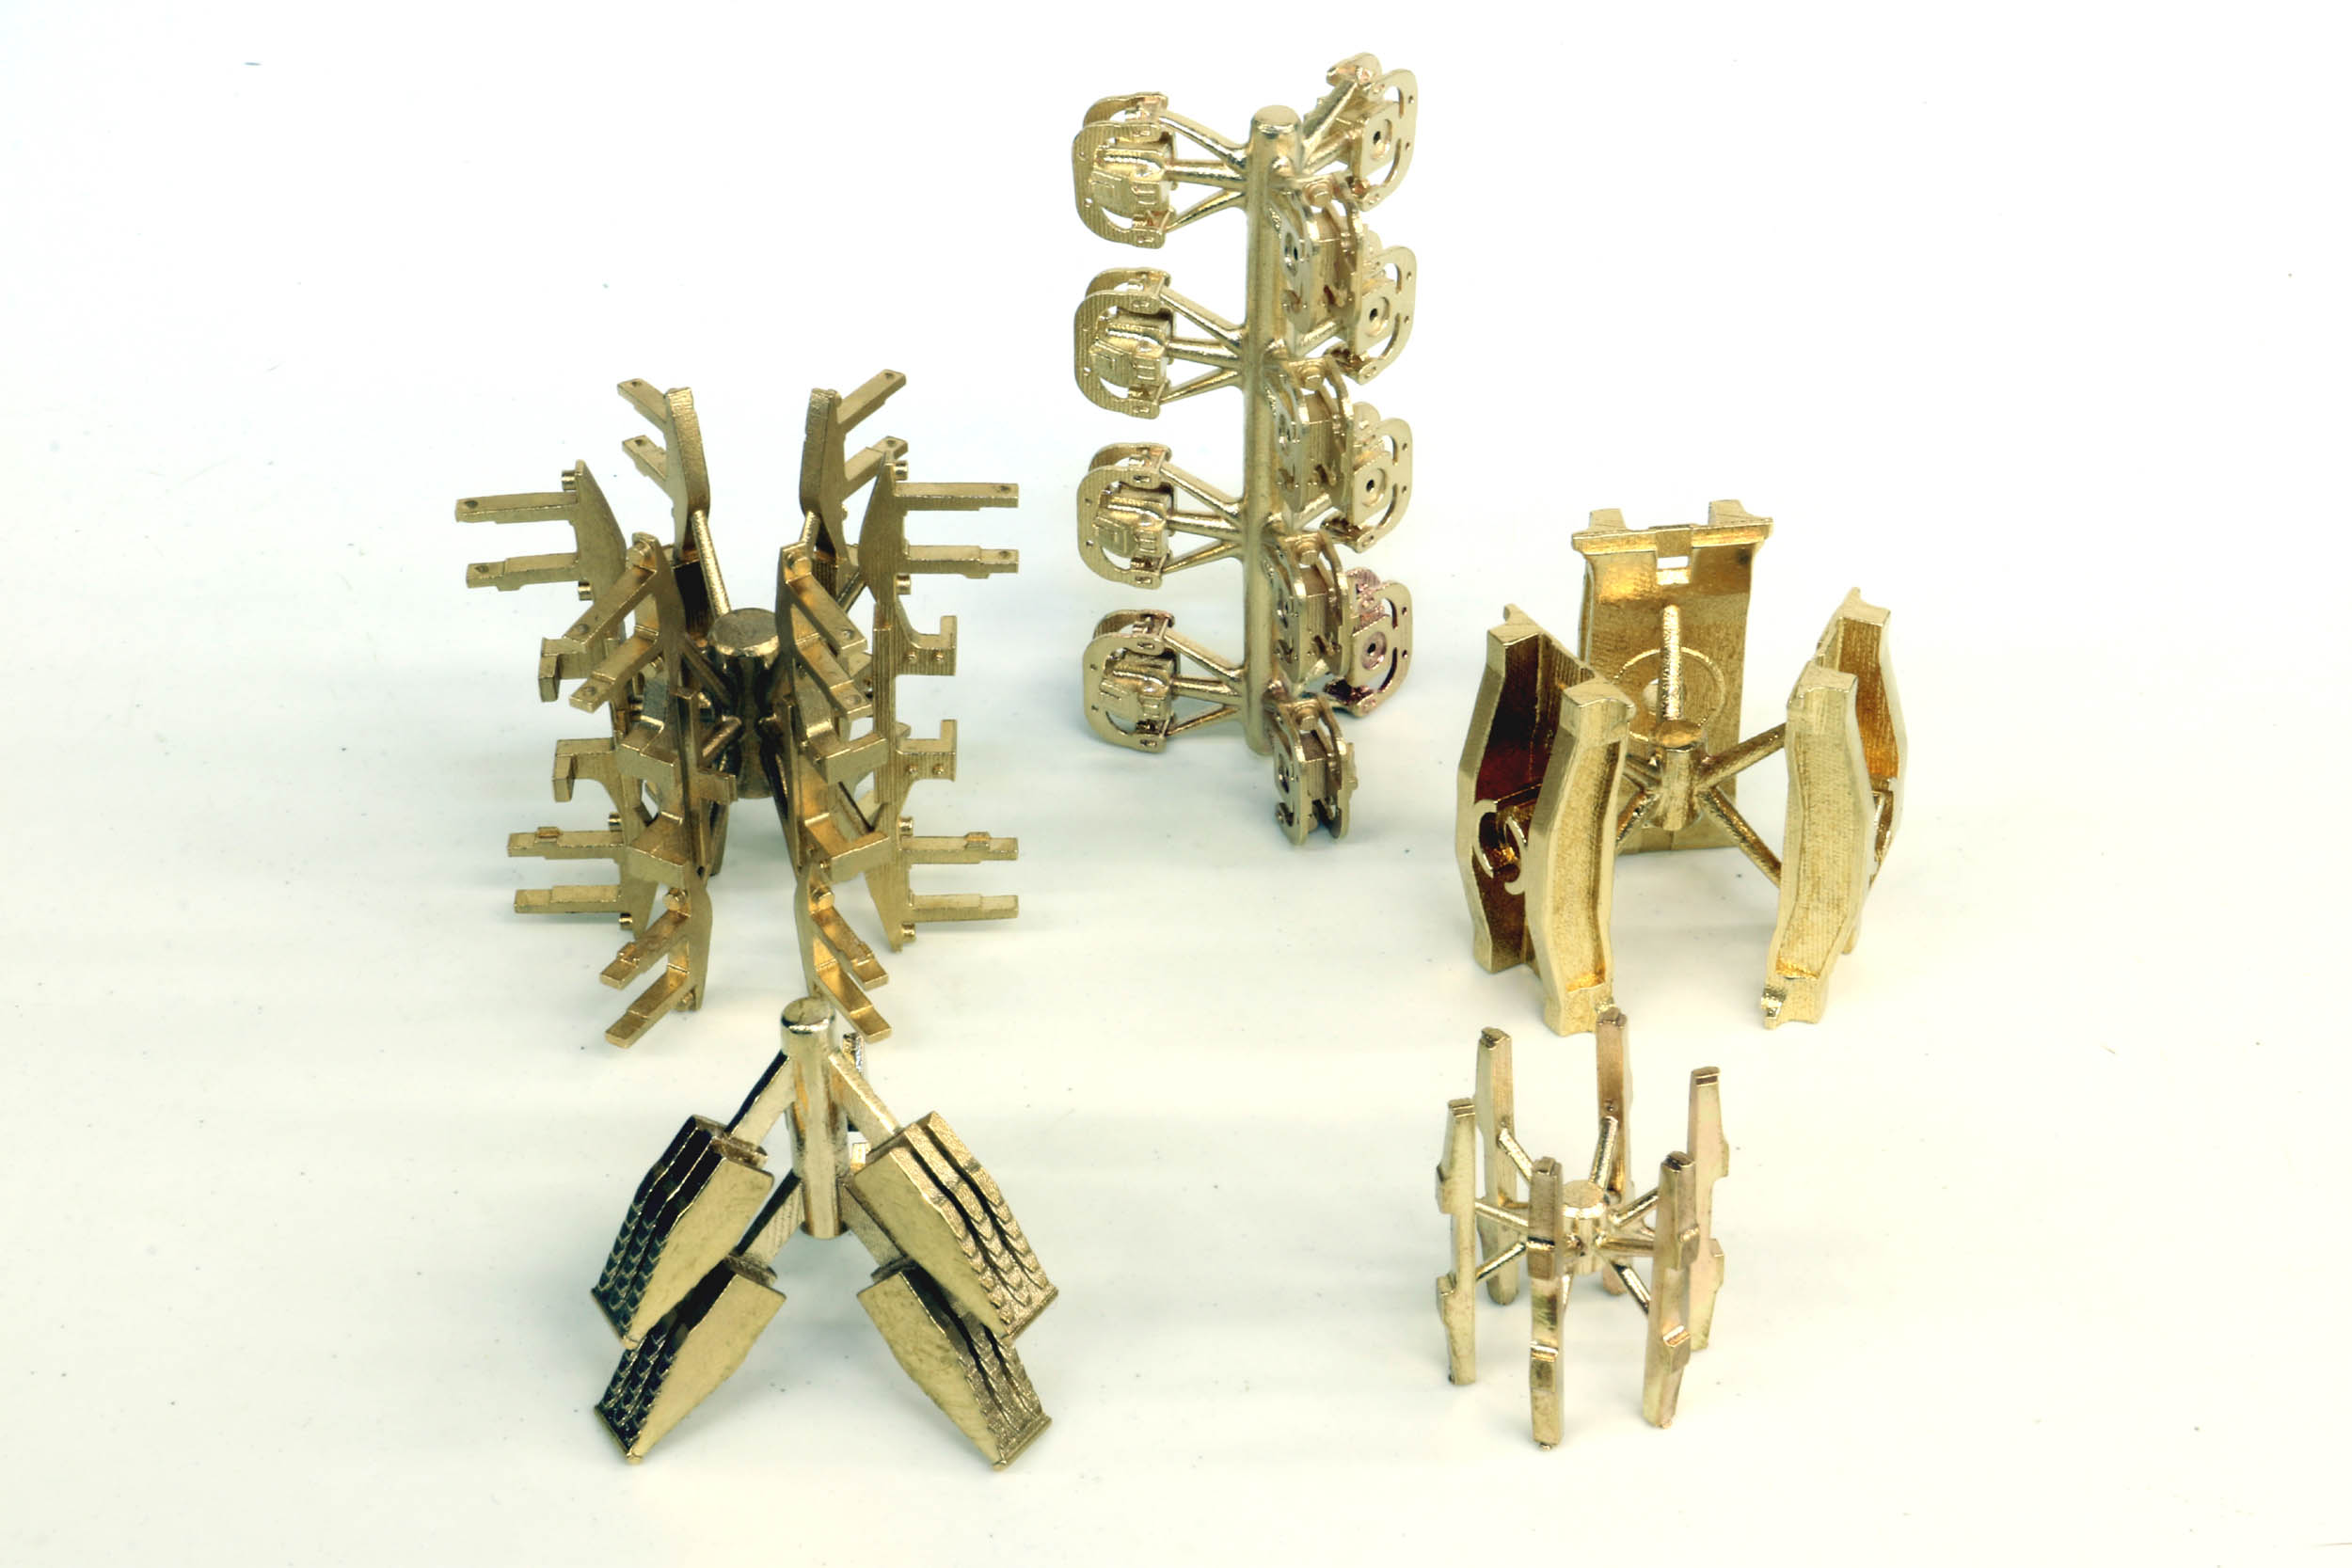
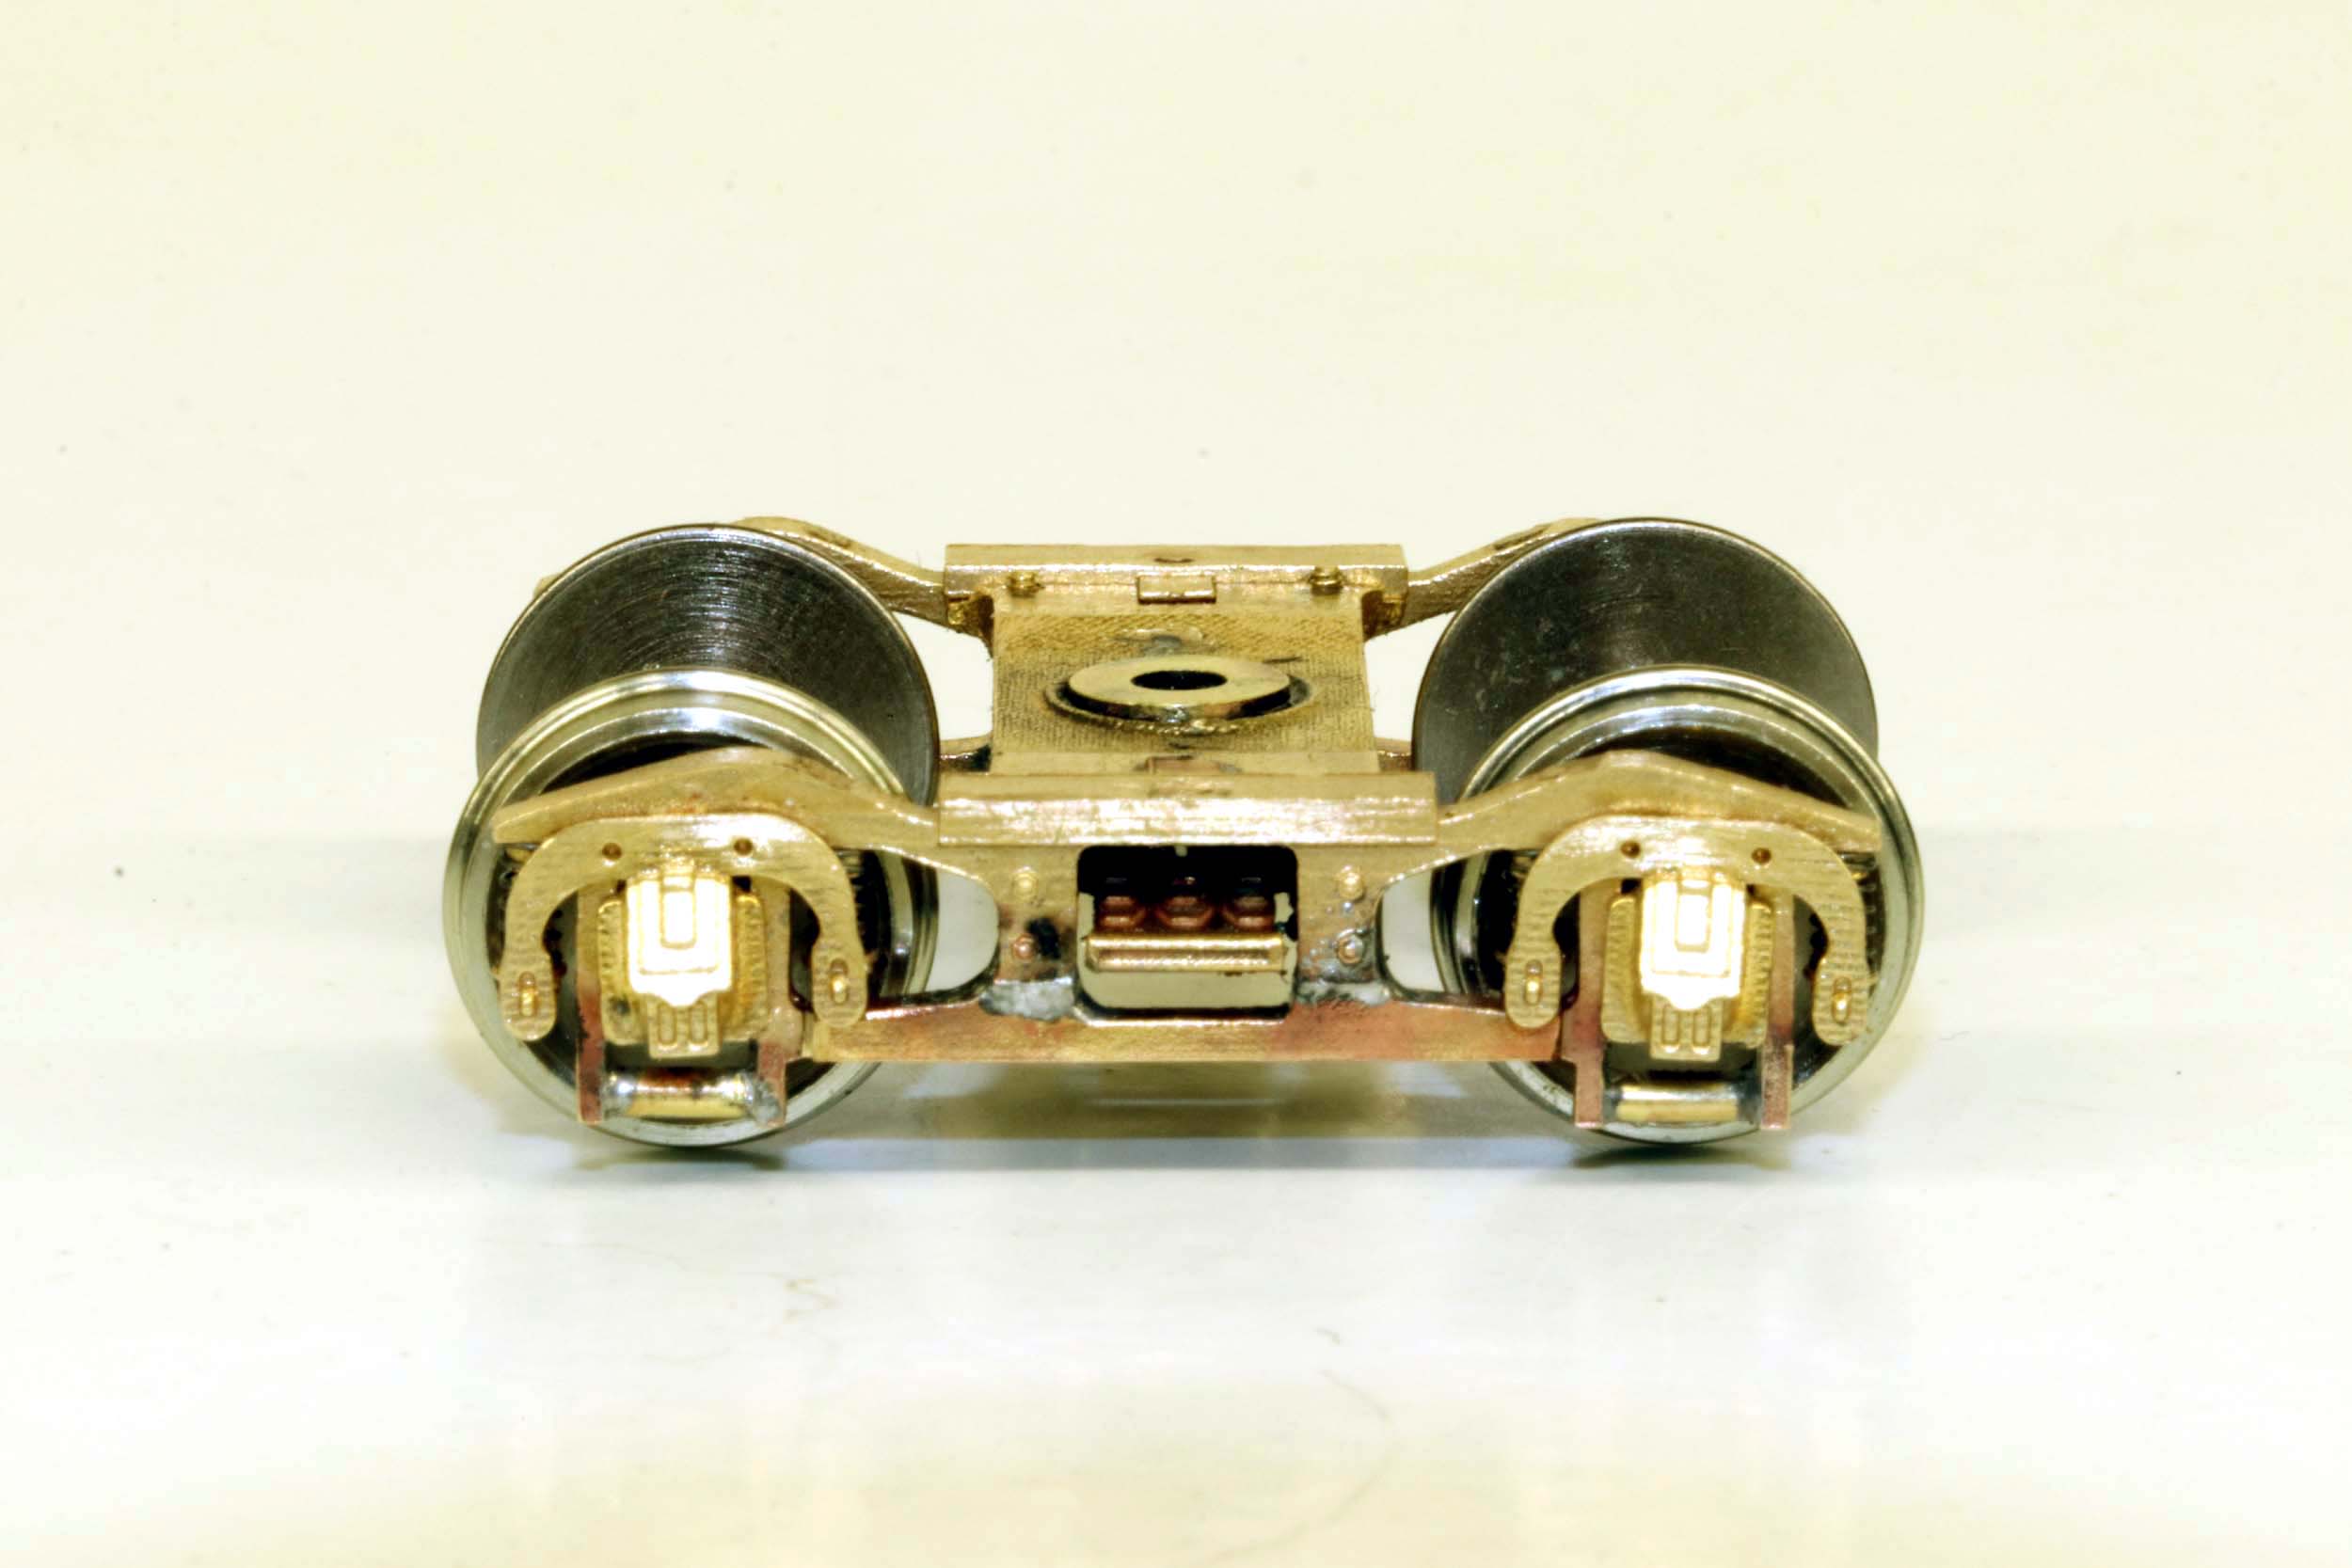
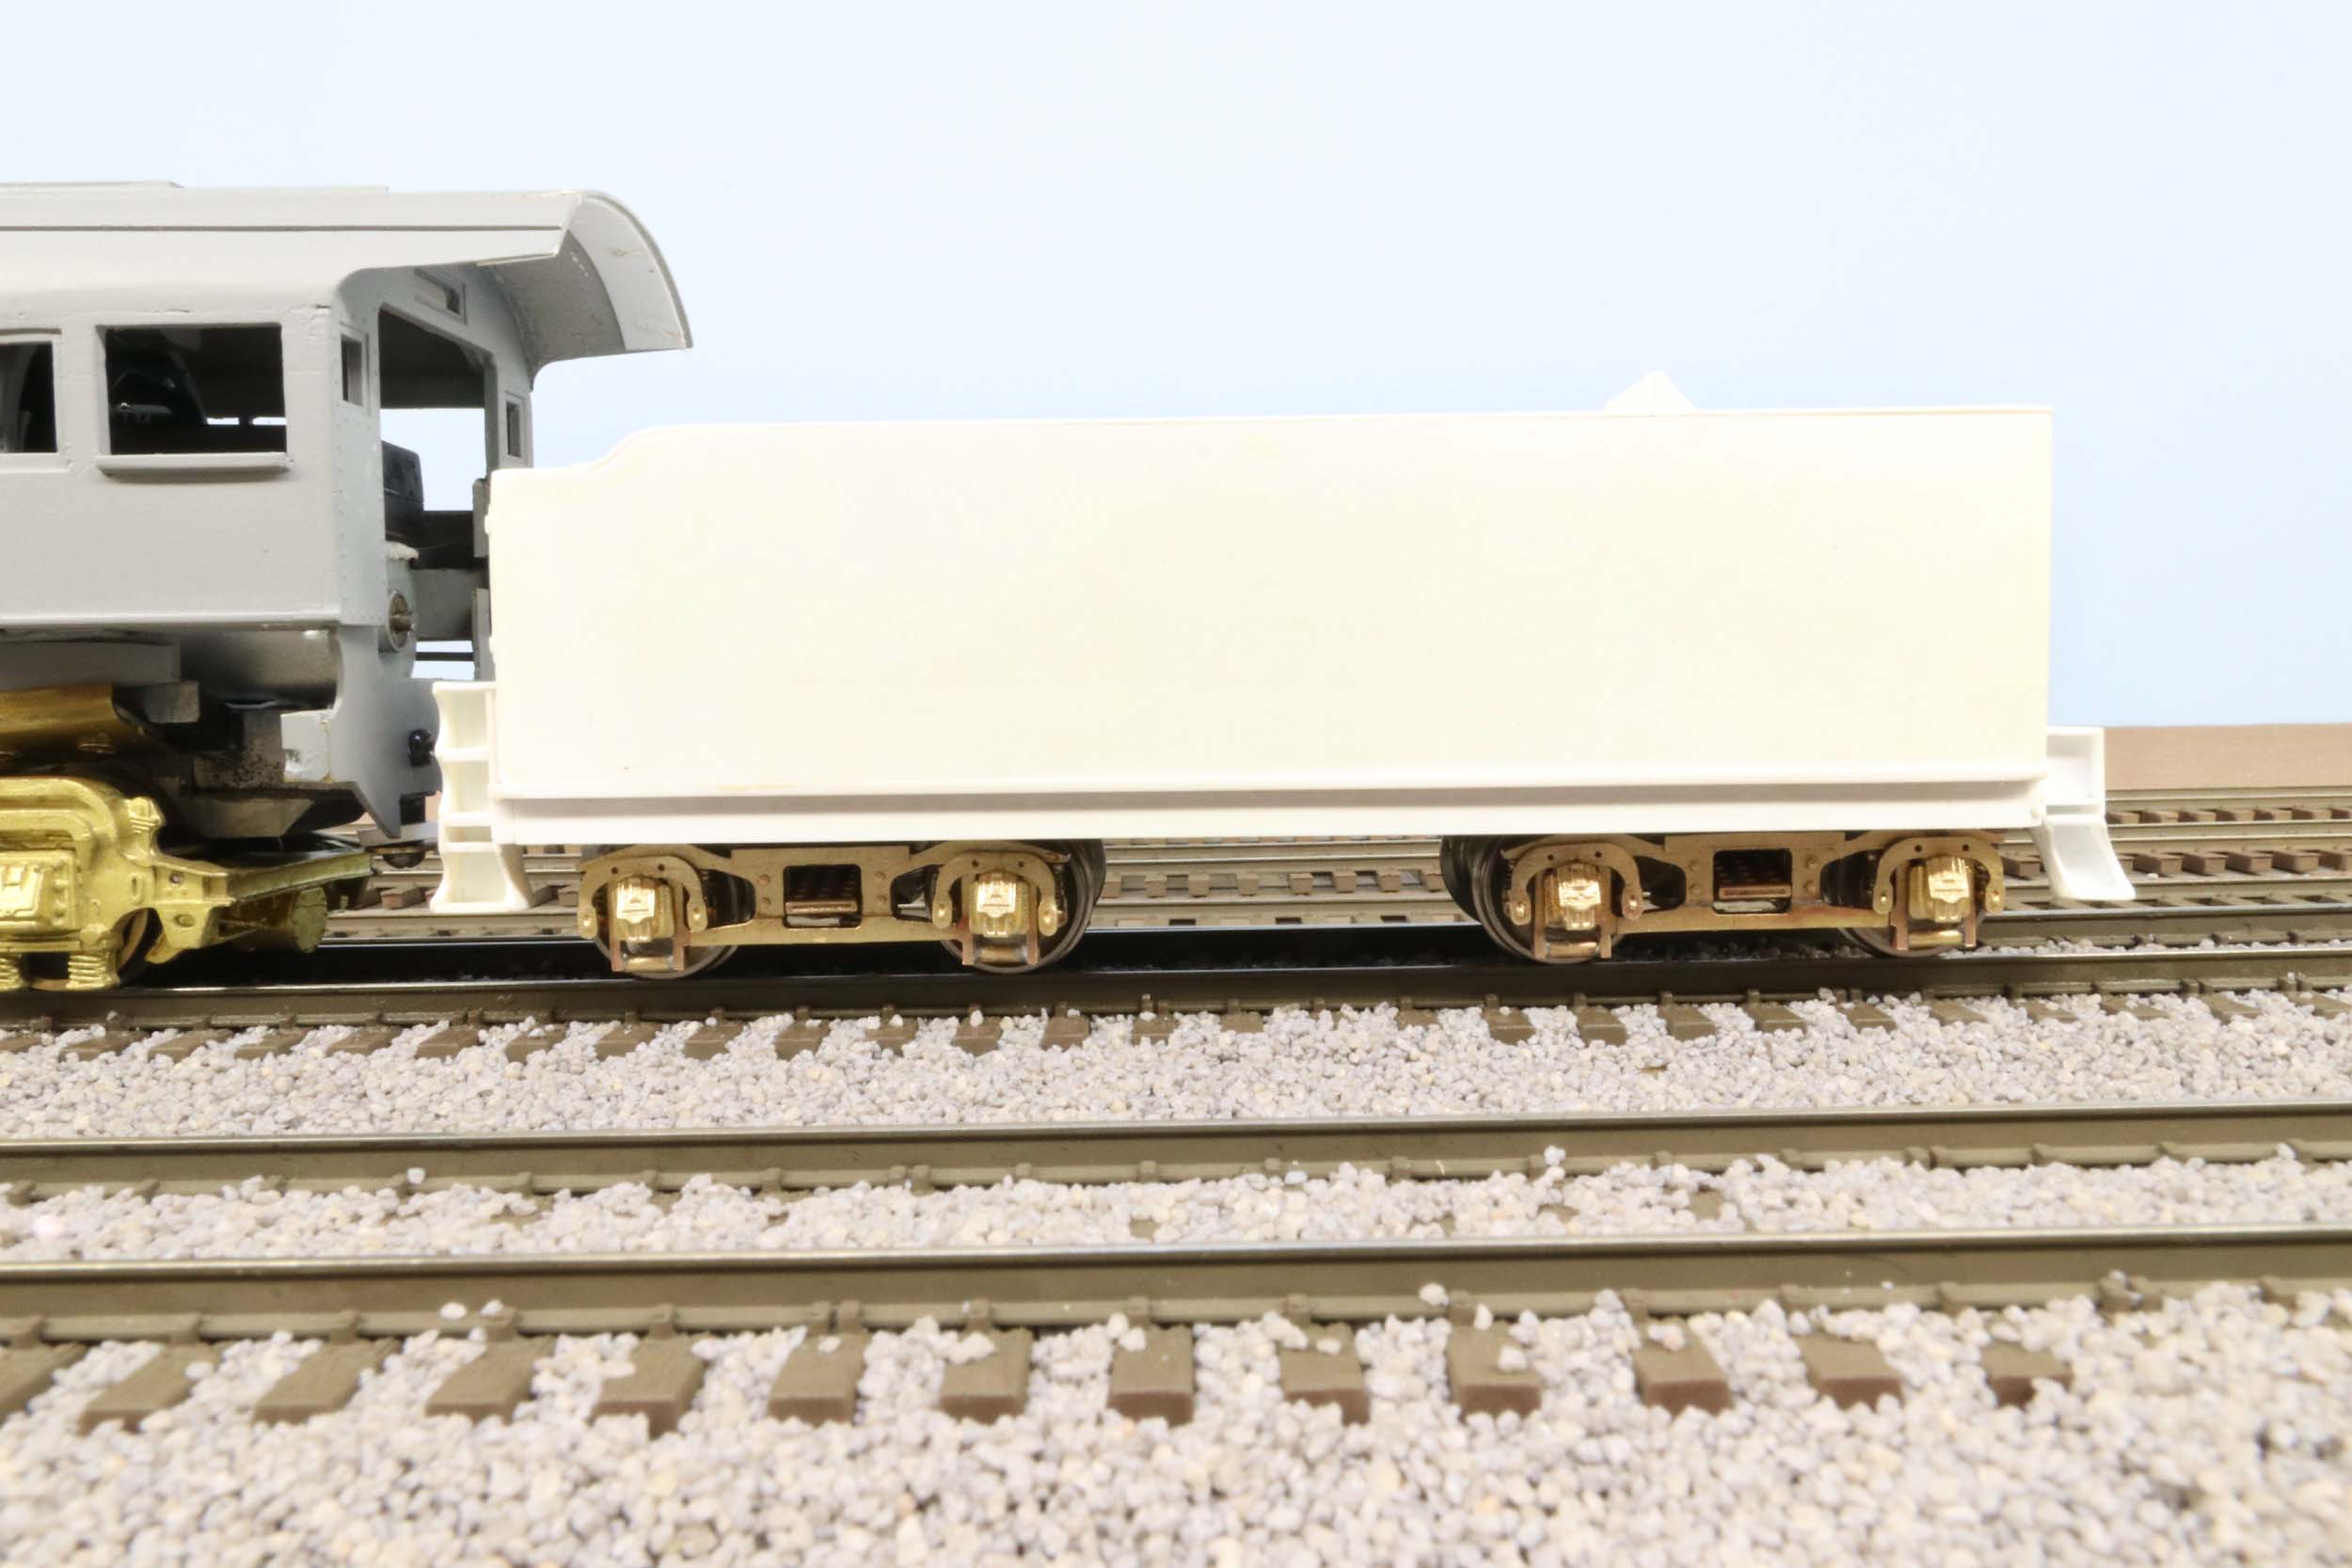
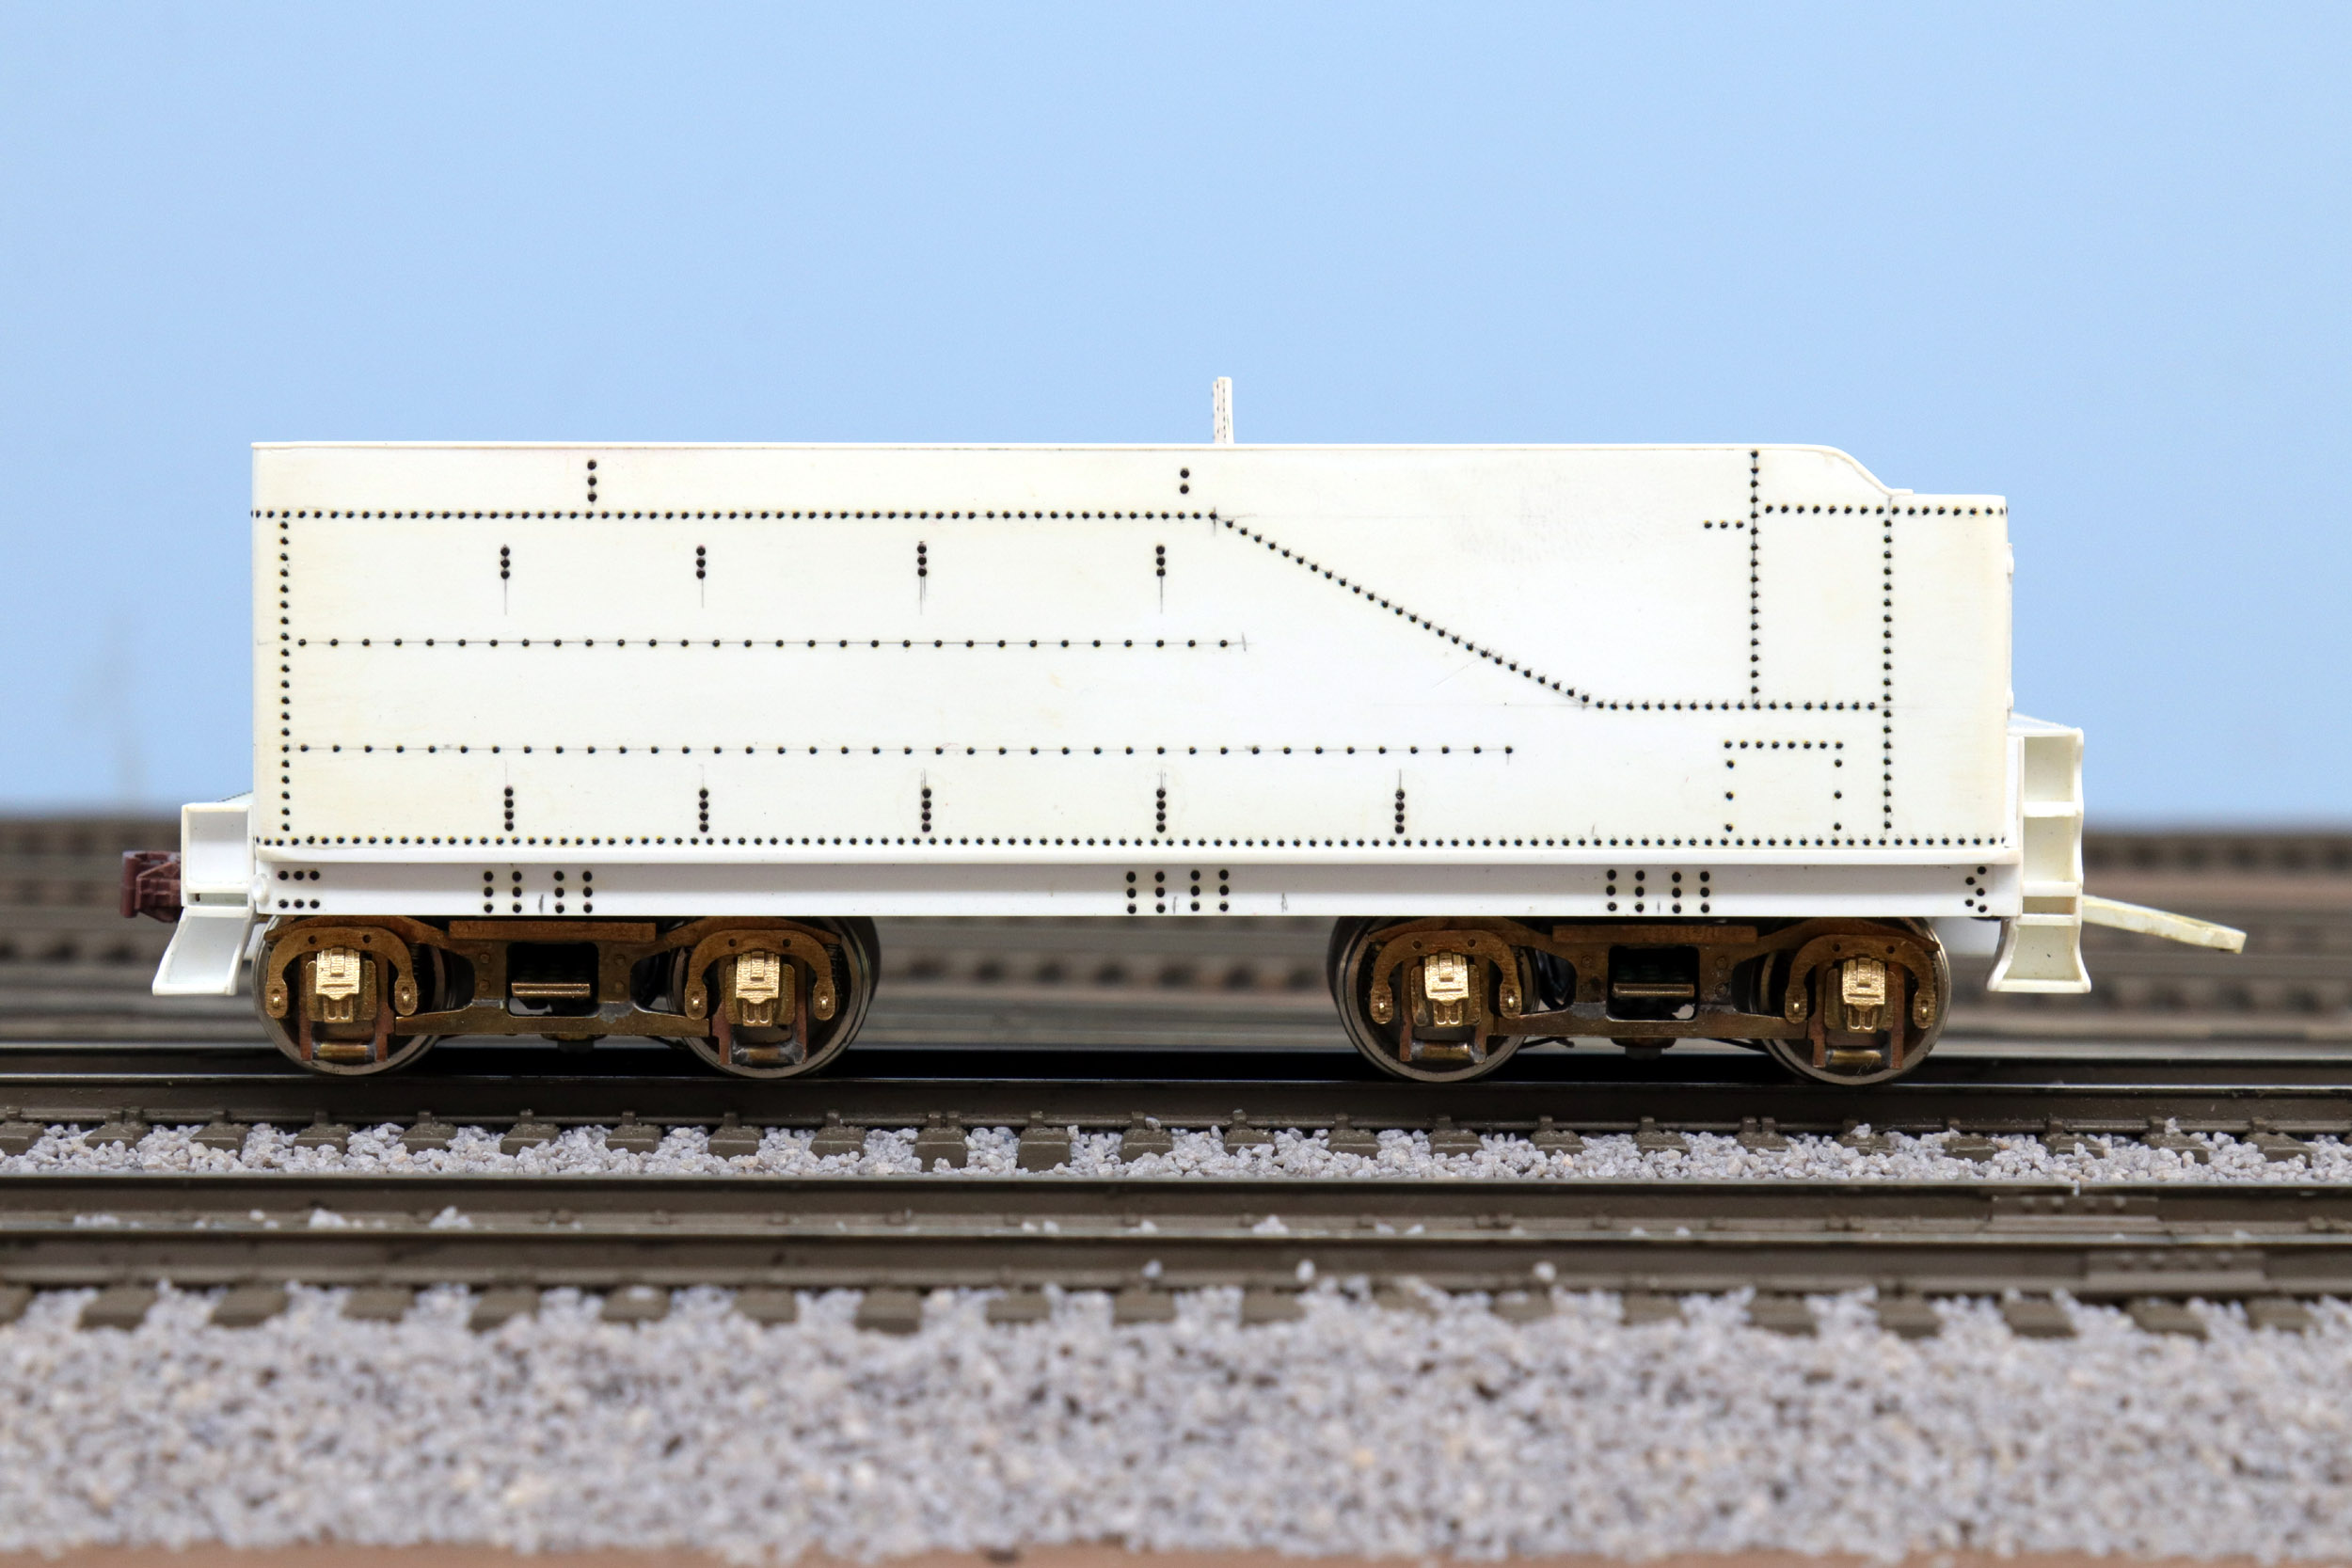
Dolphin Tender Trucks
Progress
has been a bit slow but a major part is now done. The very unique Dolphin
tender trucks are mandatory for this loco. The L1 tender trucks I have been
temporarily using just will not do for the completed loco. I found HO Dolphin
tender trucks for sale in a Shapeways store for http://www.keystonedetails.com We eventually came
together and made it happen. John did beyond an amazing job in doing the
designing, making them for S Scale. Just upscaling a HO truck is easy but not
the best way to go. My brass caster of 25+ years did not want to do anything
with burnout patterns anymore, so we used Shapeways brass casting service.
While the casting aspect was EXTREMELY expensive the quality was excellent.
The fit of all the parts was well within reason. Given there really was no plan
B available to me now it still all worked out really well. The first photos are
a proof of concept mock up truck John supplied before getting the brass trucks
made.
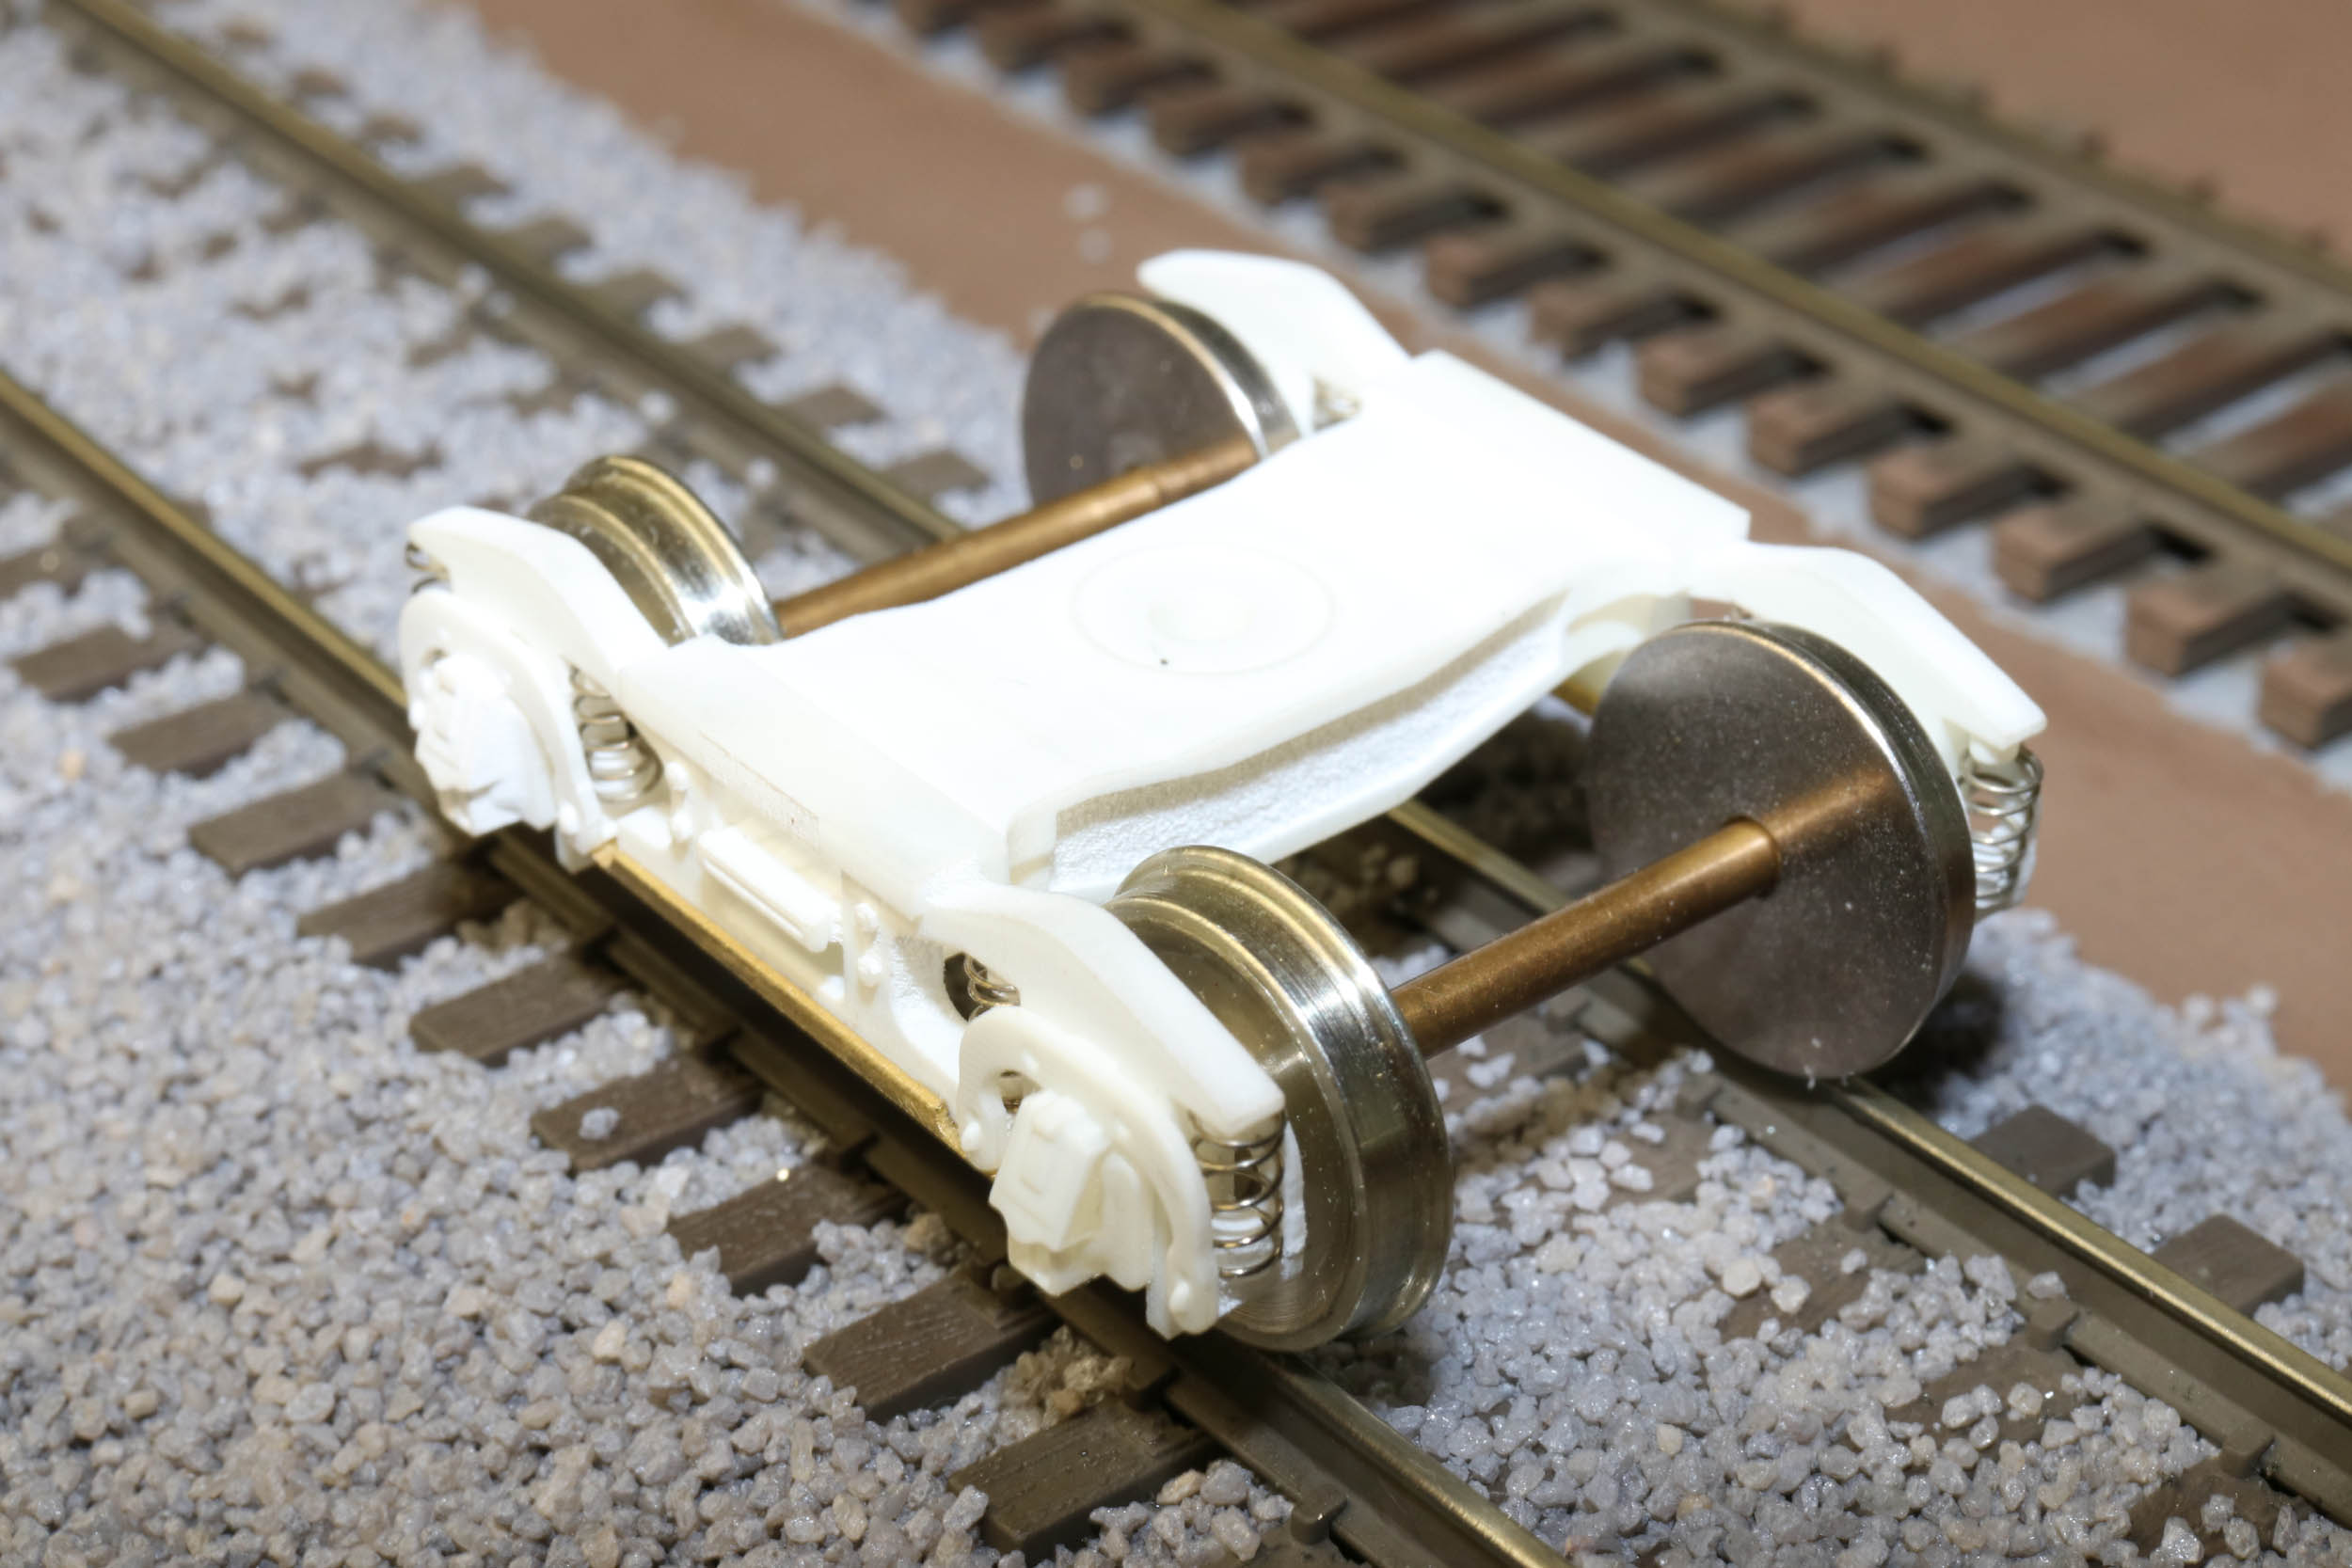
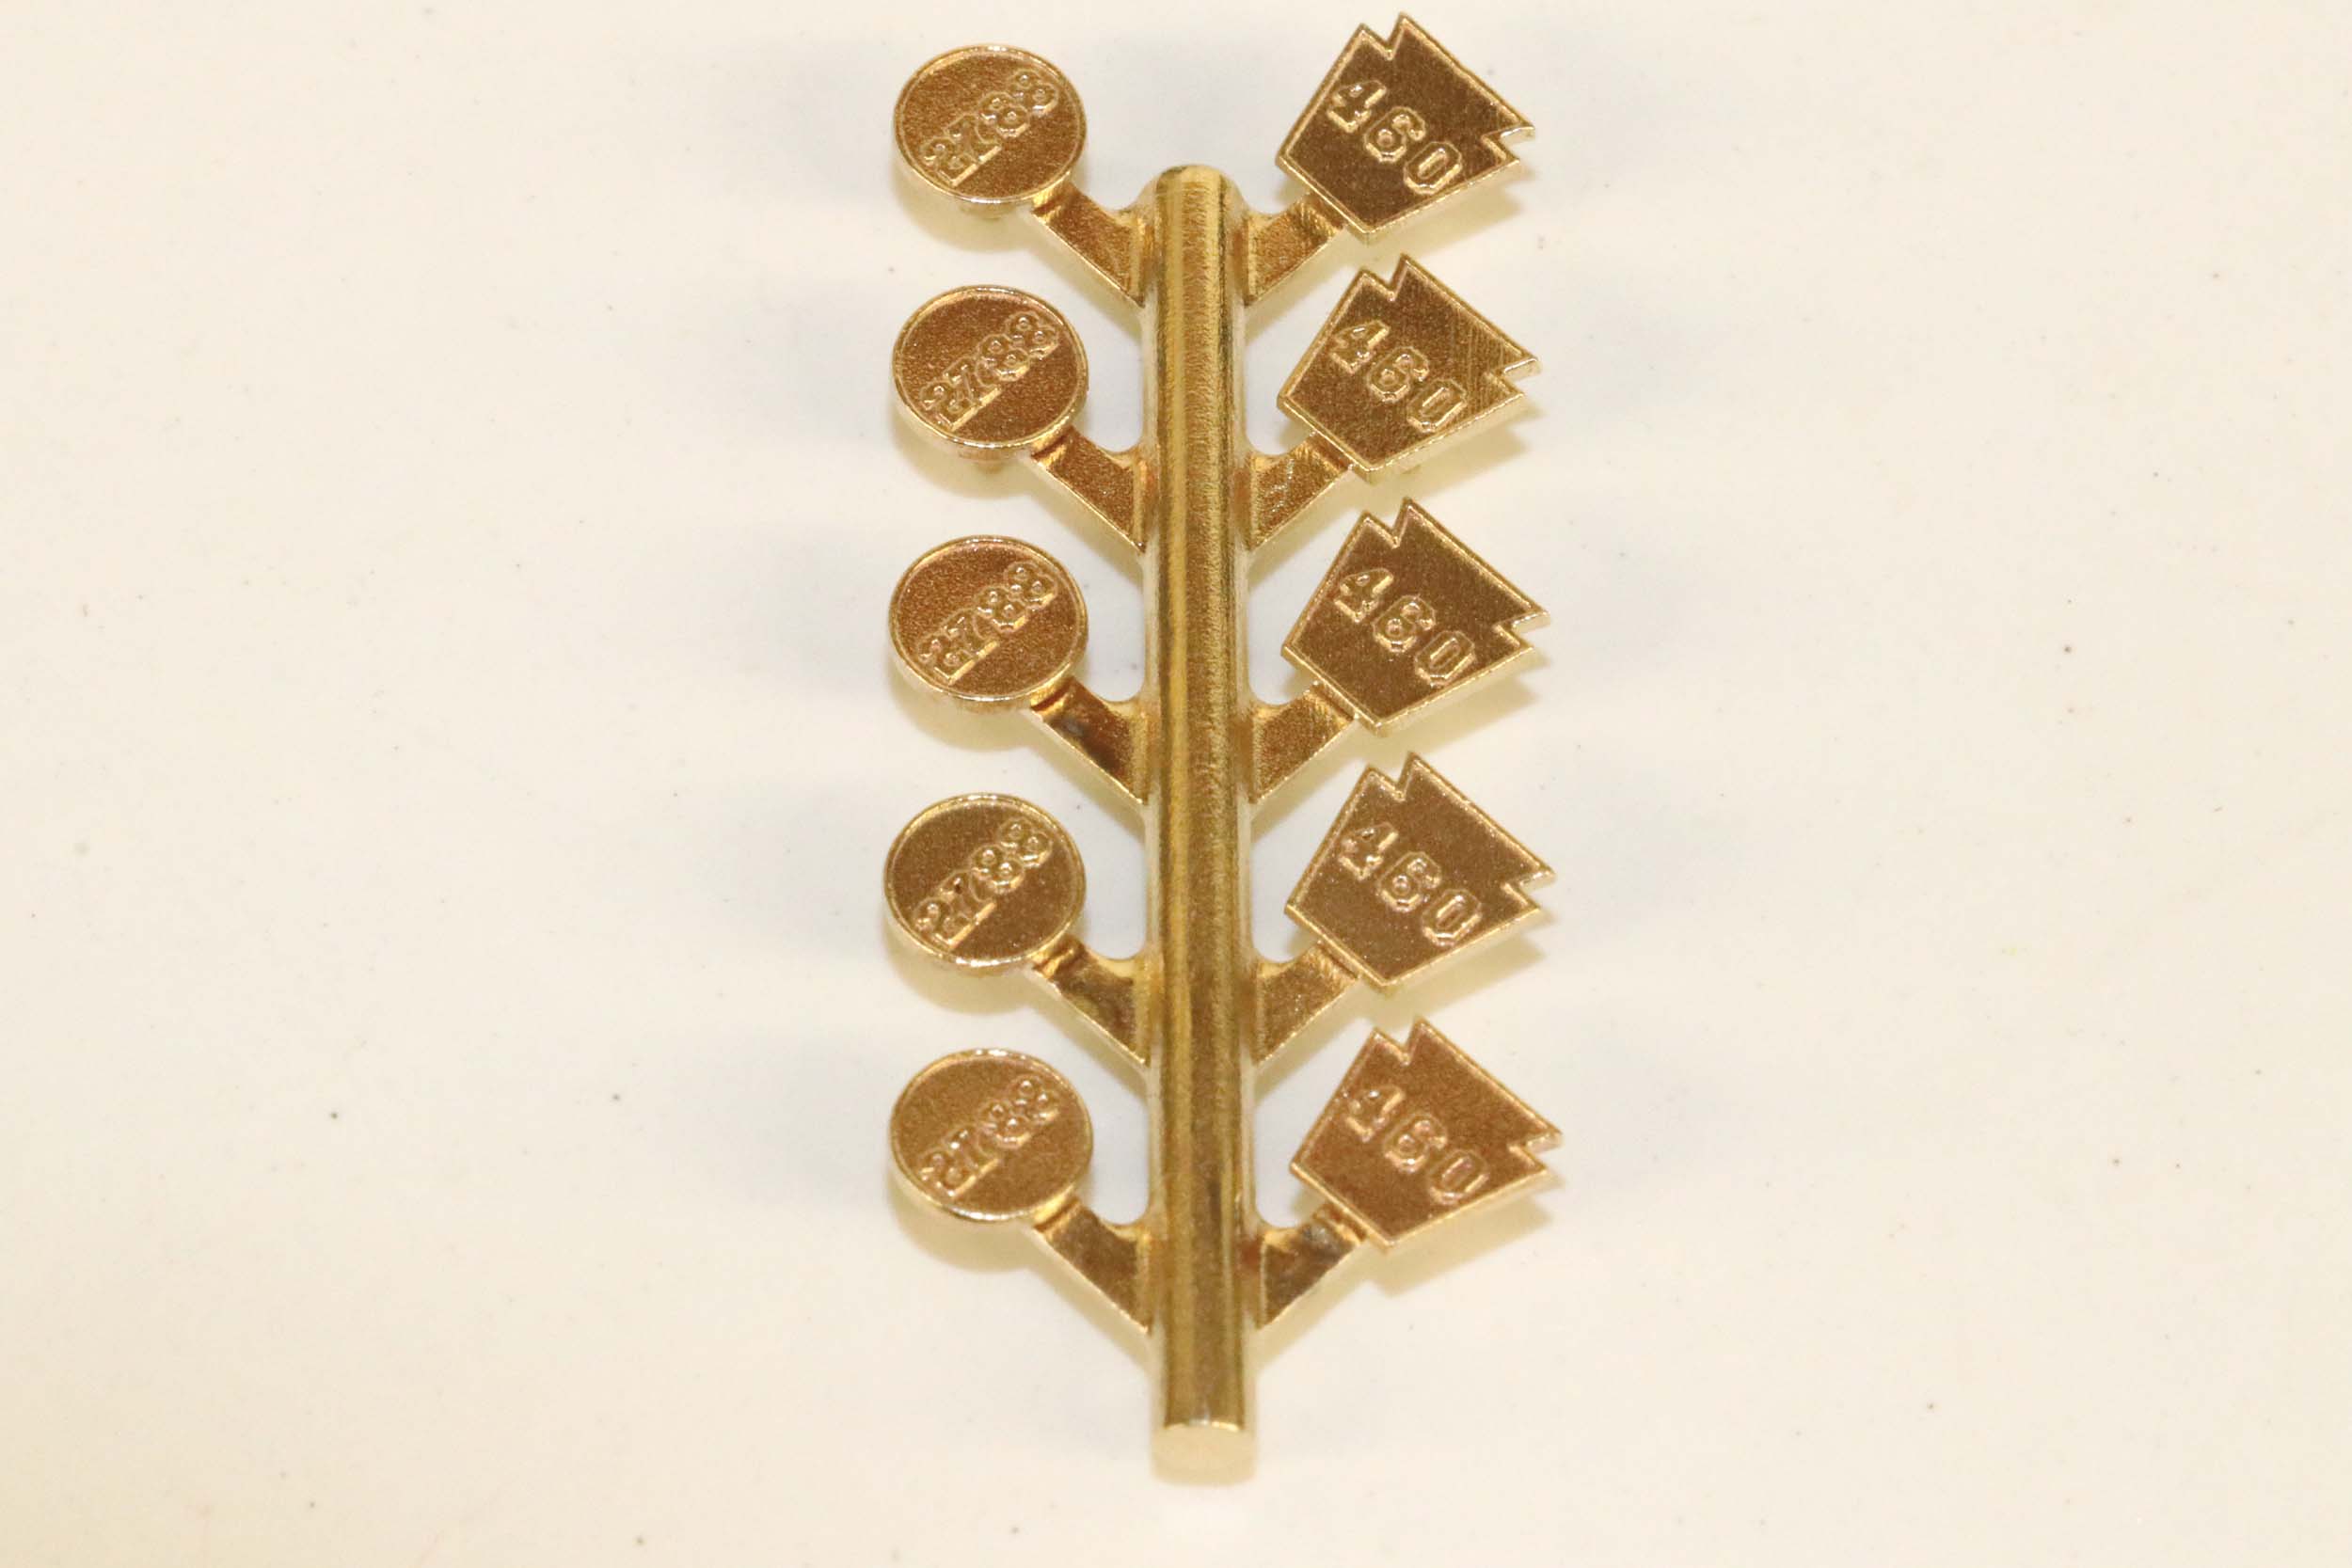
5 parts trees were needed to make the trucks. They yielded enough
parts for 3 trucks total in case I needed spare parts. I still have no idea how
Shapeways cast these trees. The screen shots of the files look EXACTLY like the
castings. There is no longer feeder that was cut off.
Photographing
bare brass is always a problem.
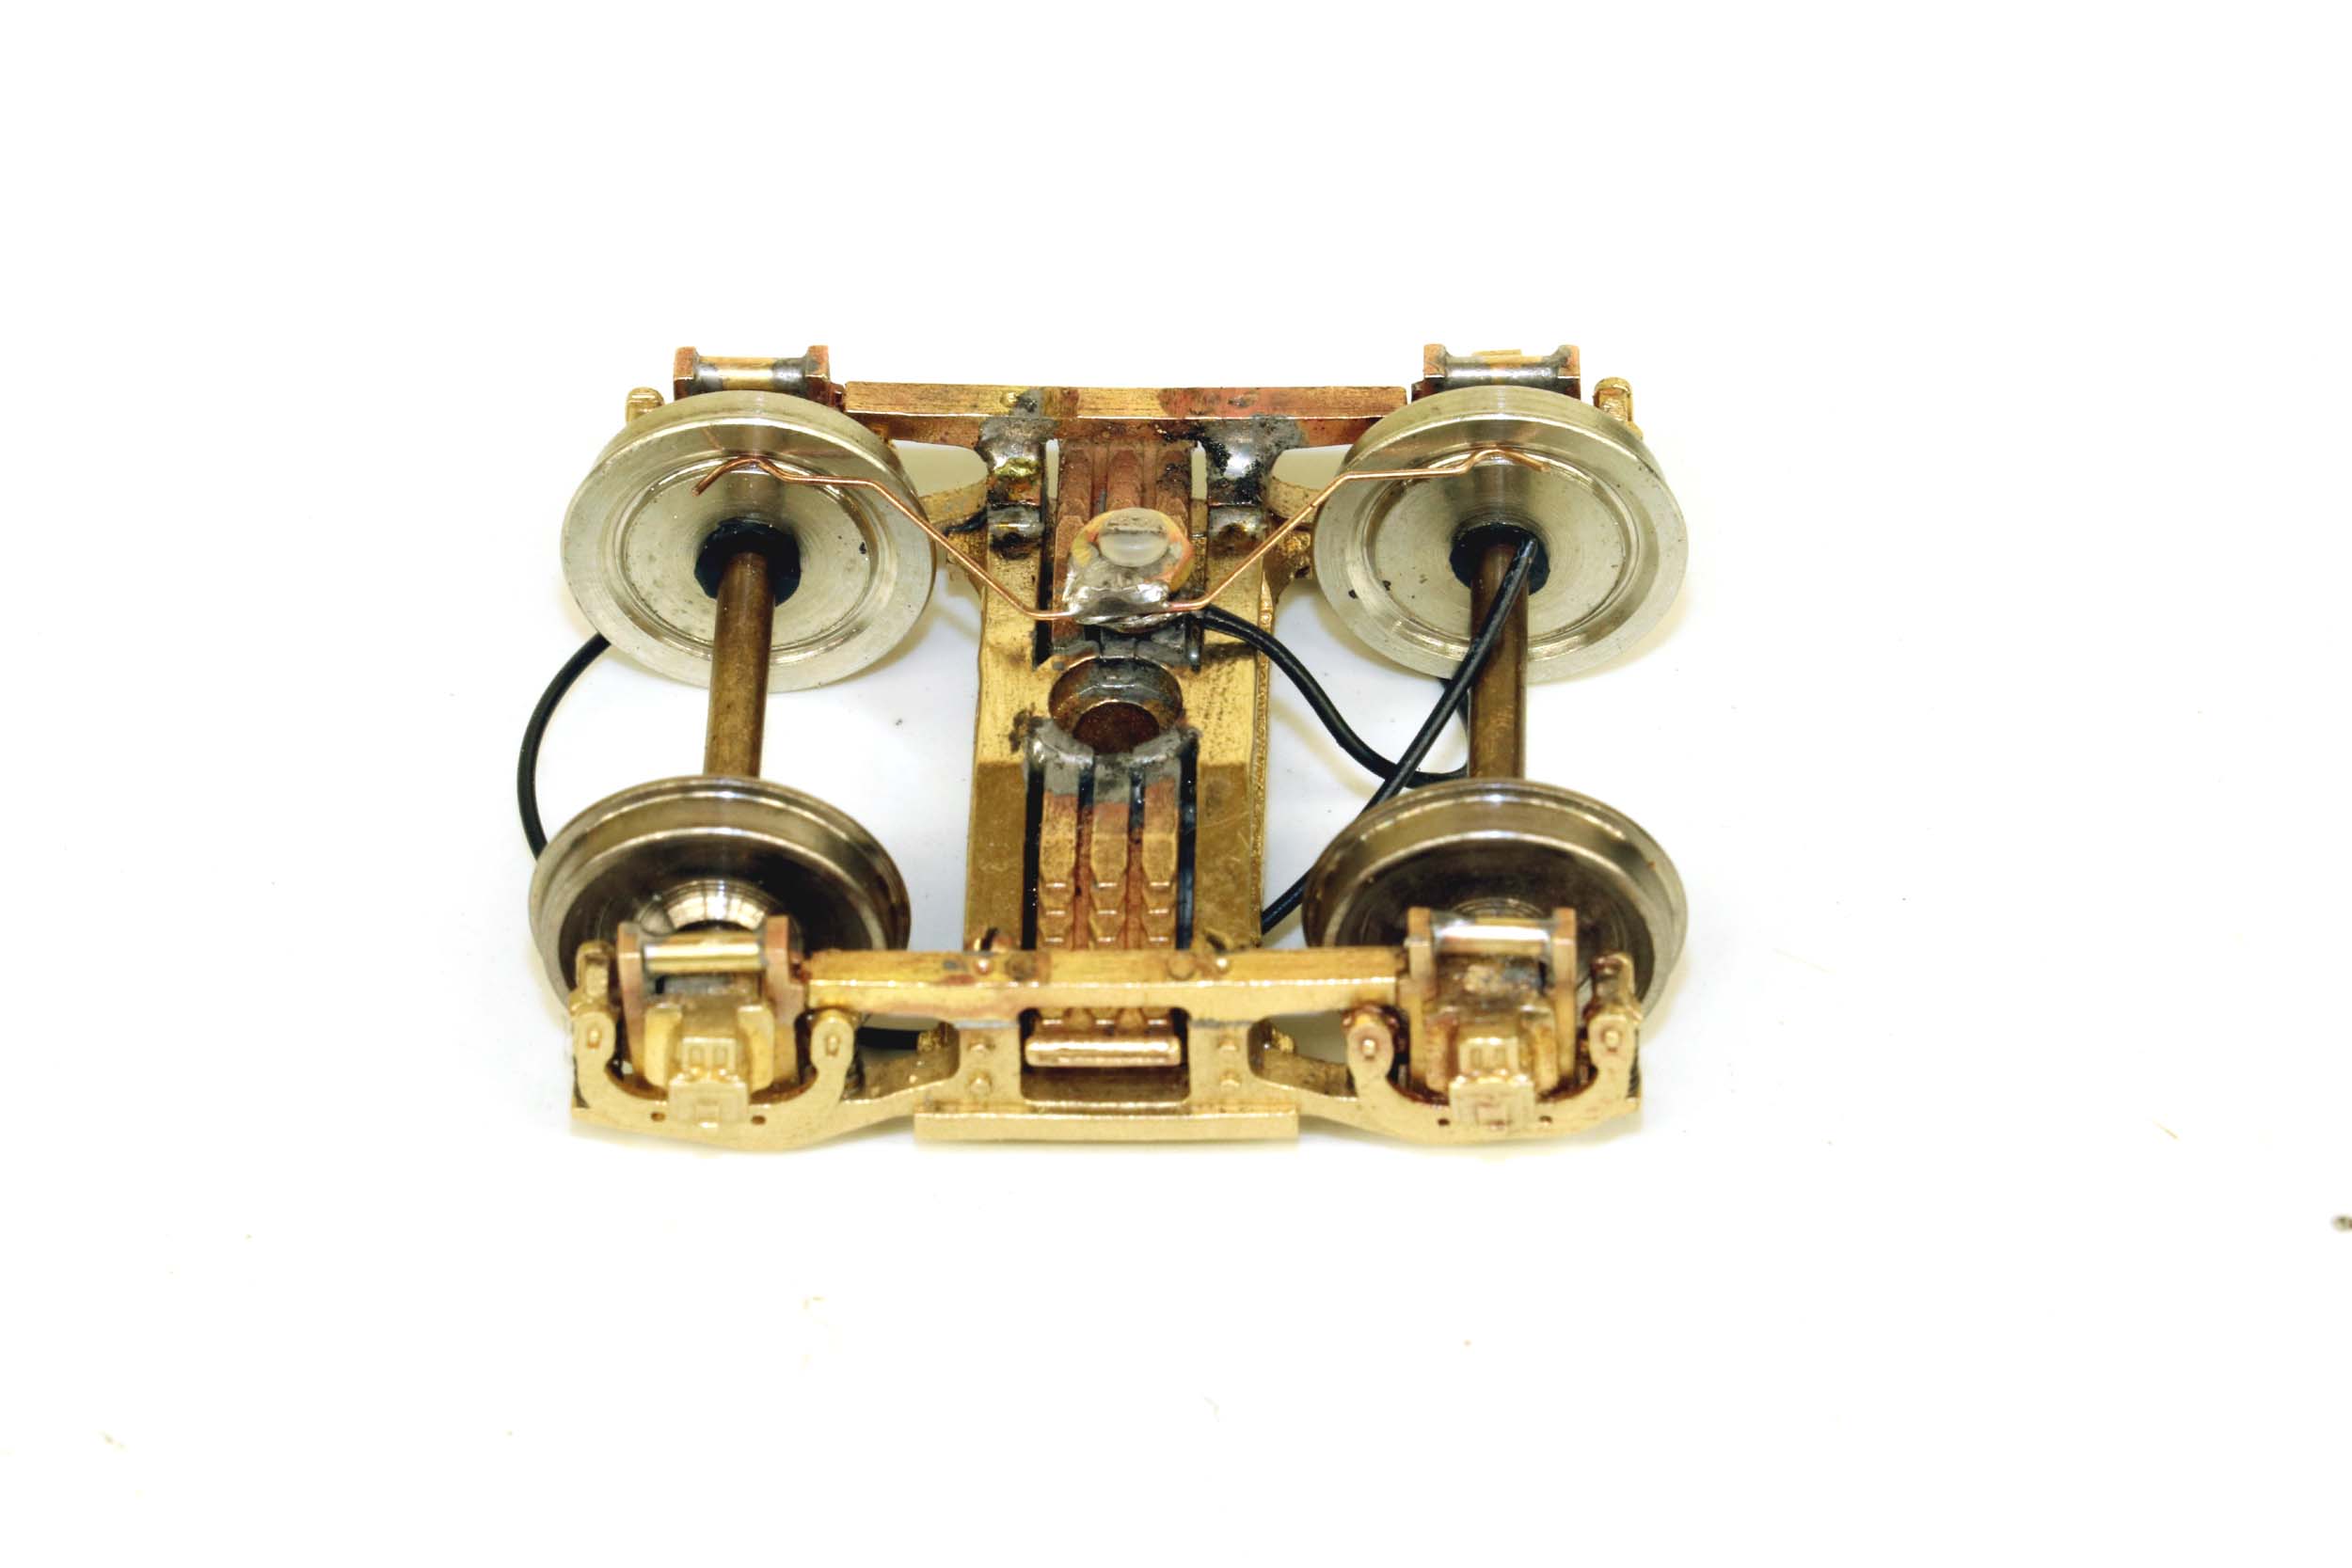
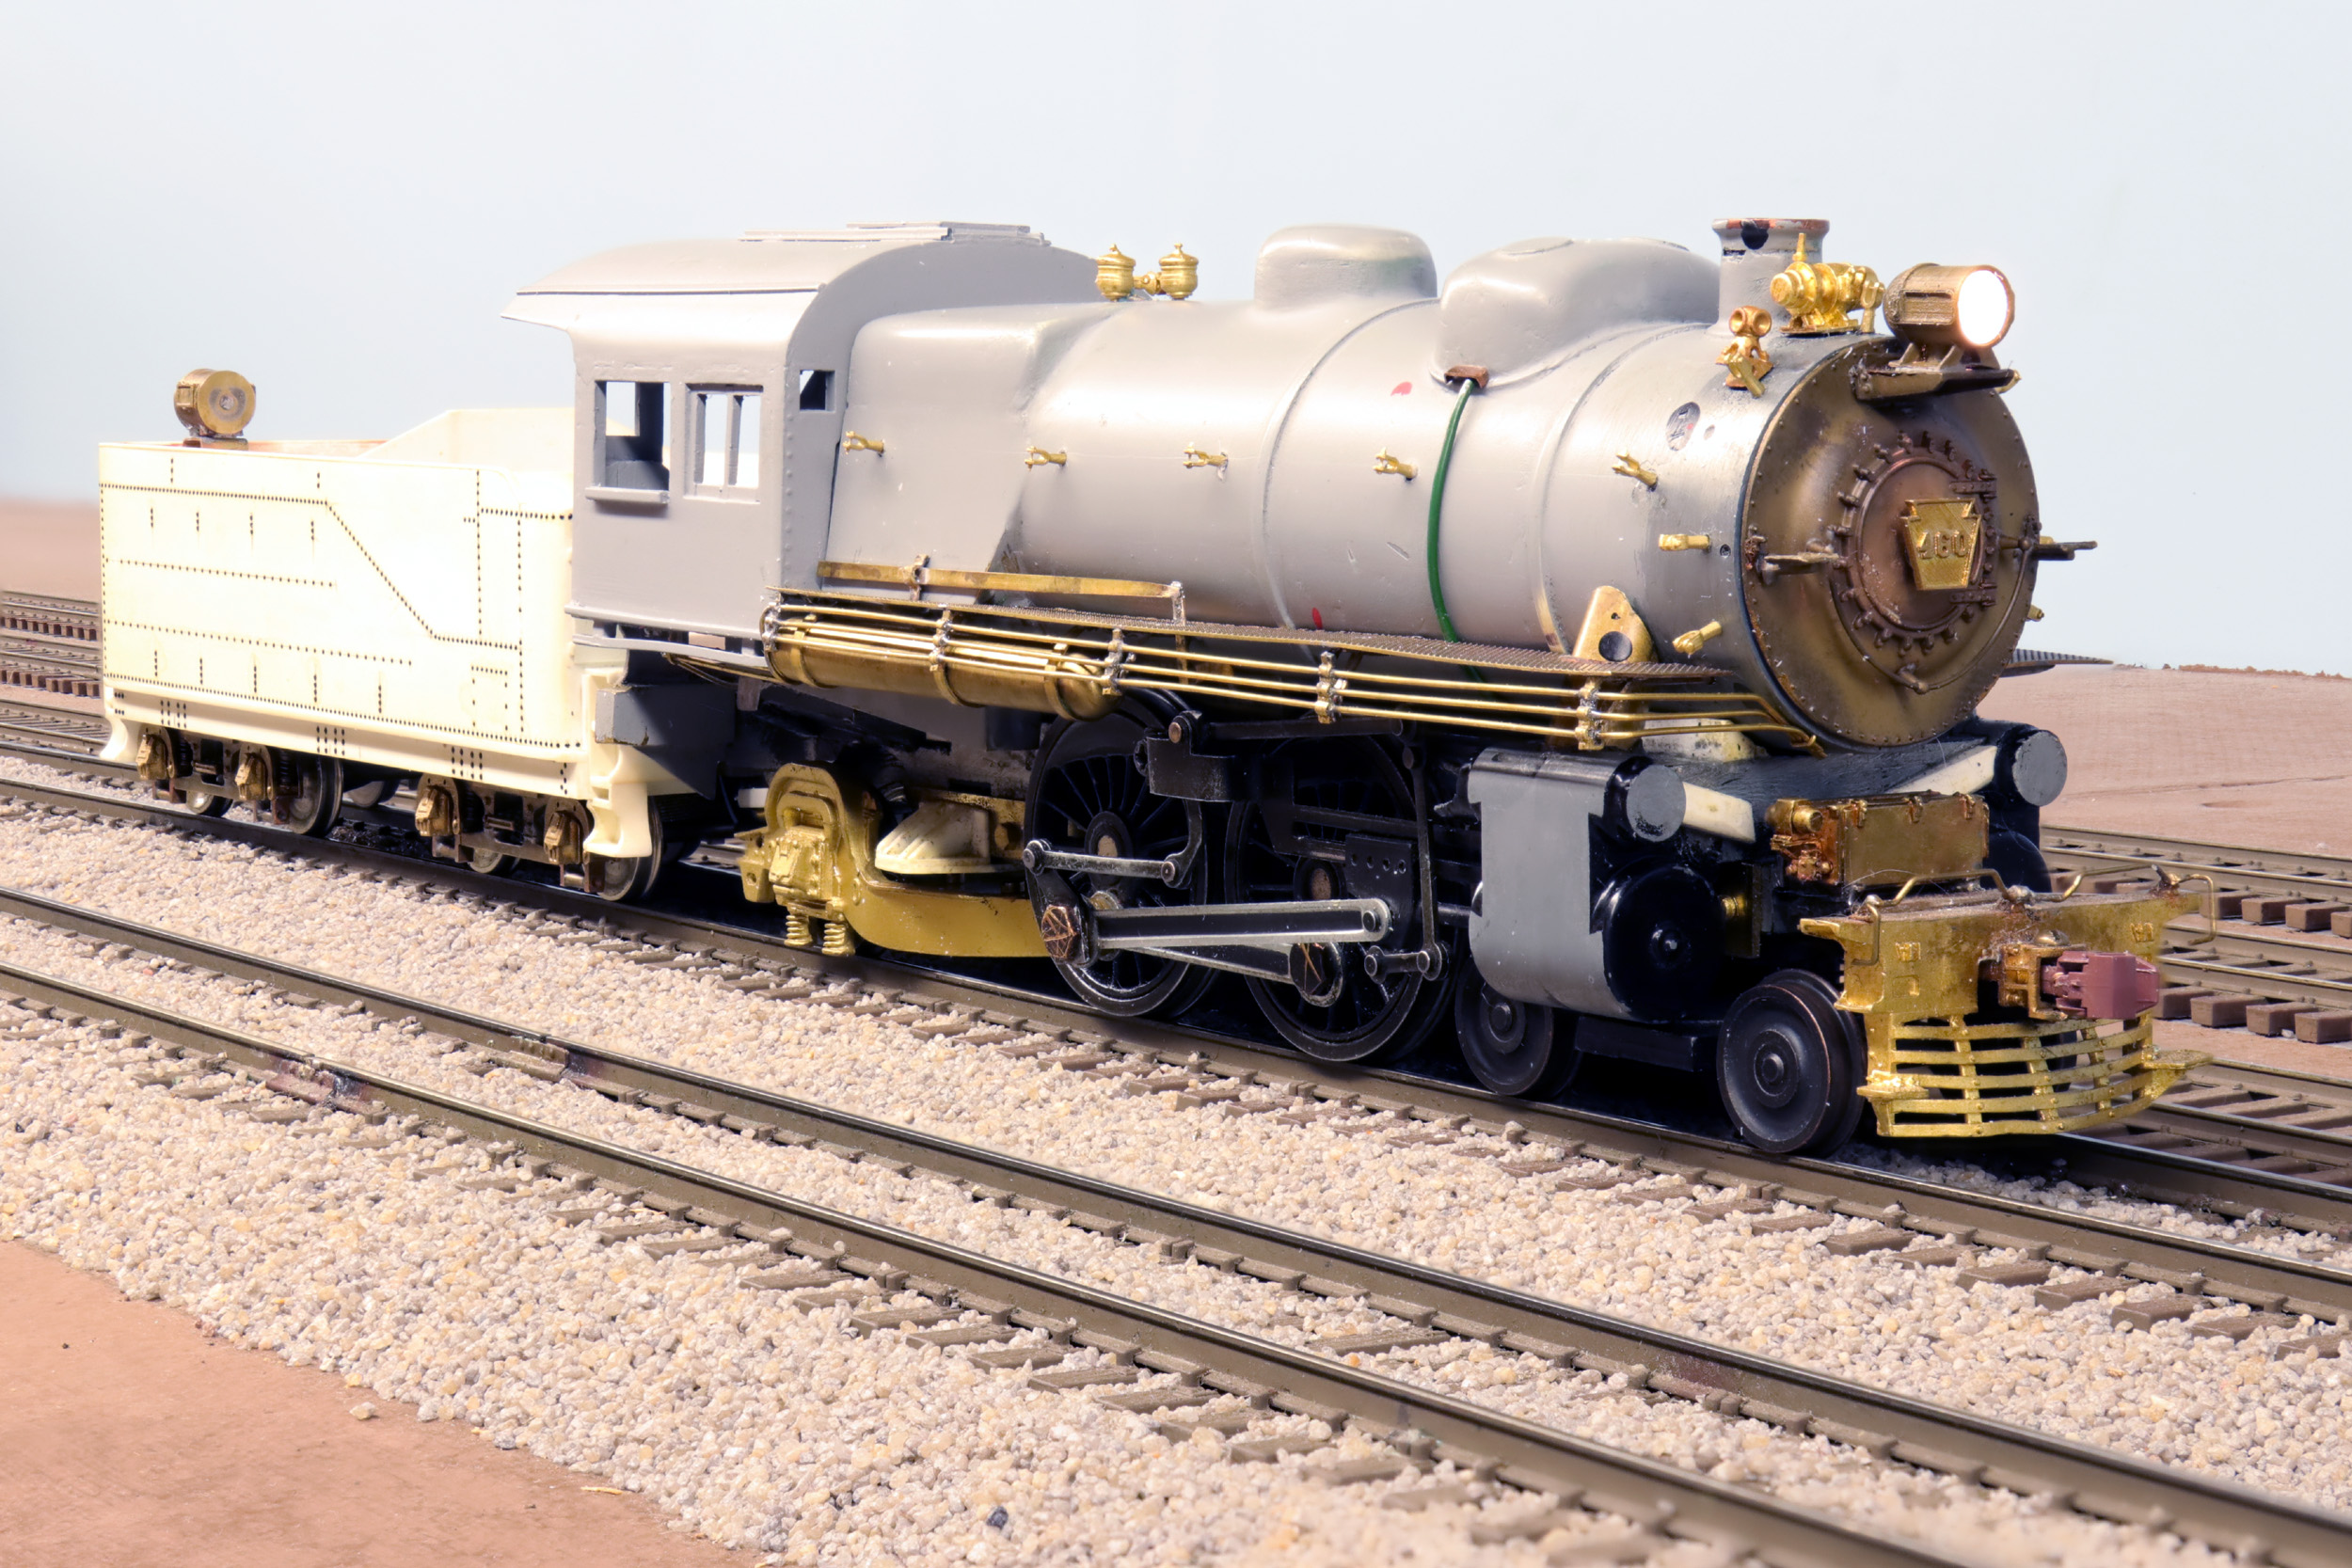
The
real Dolphin truck on the real 460
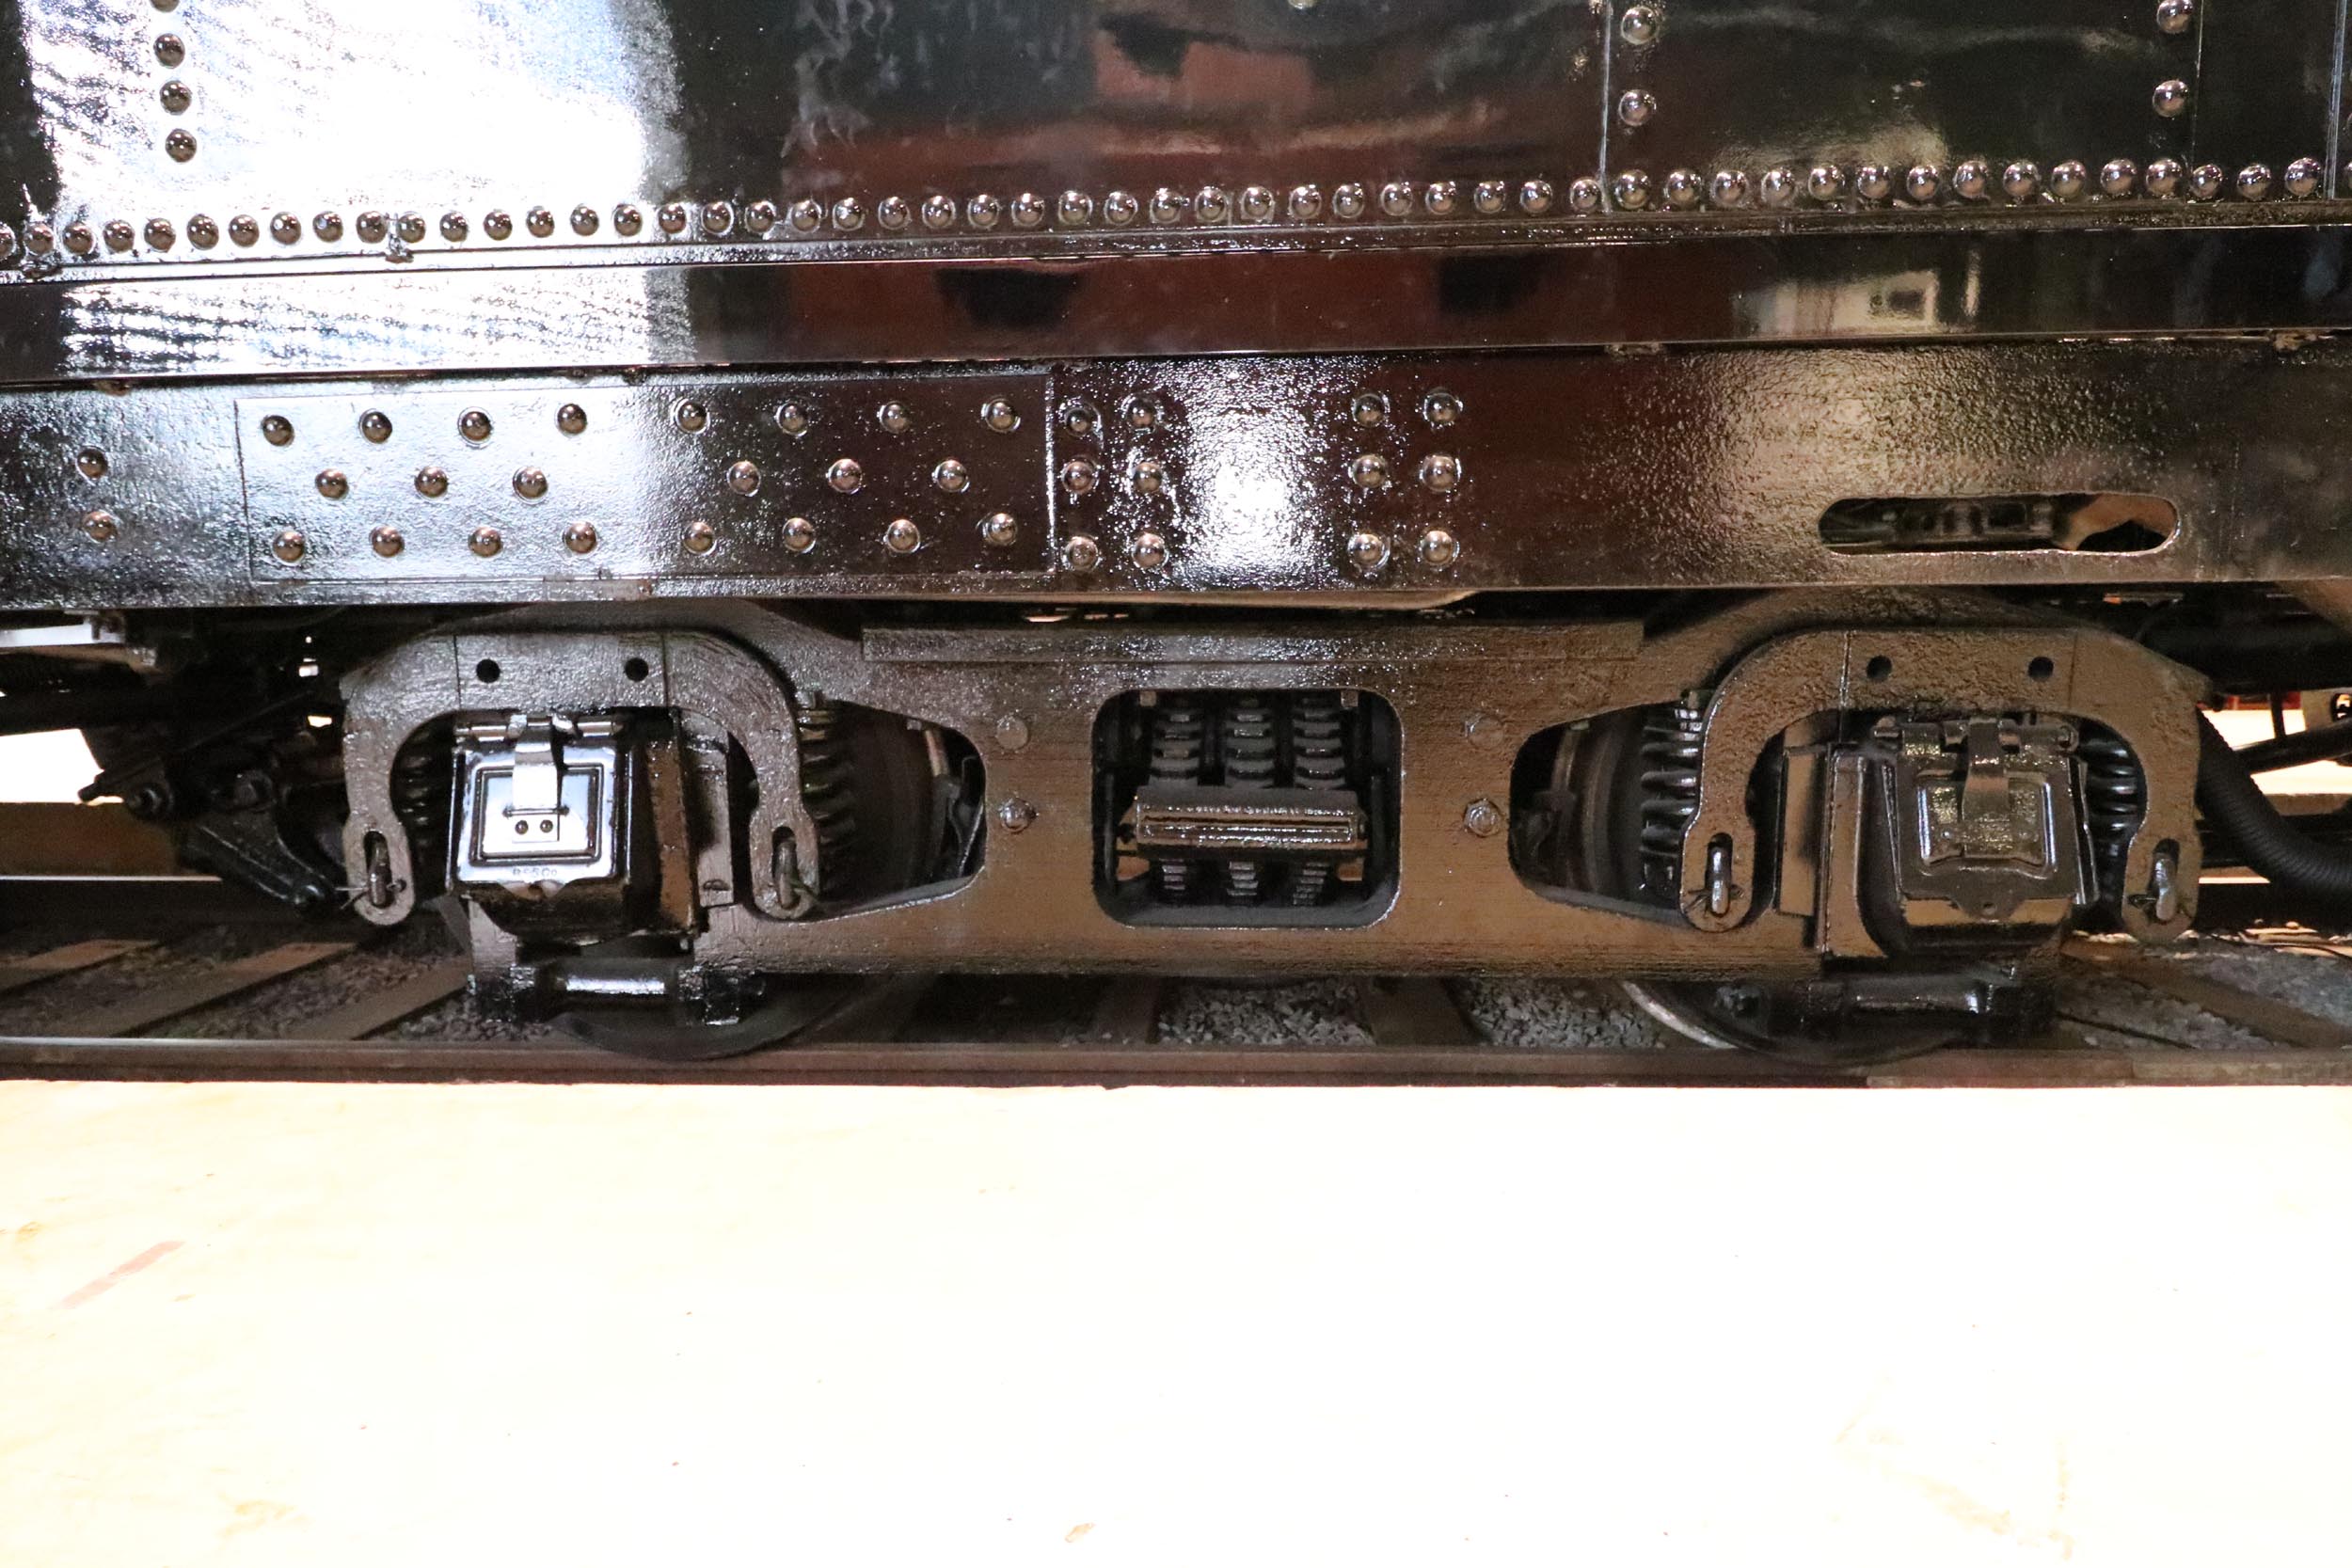
Done
and running
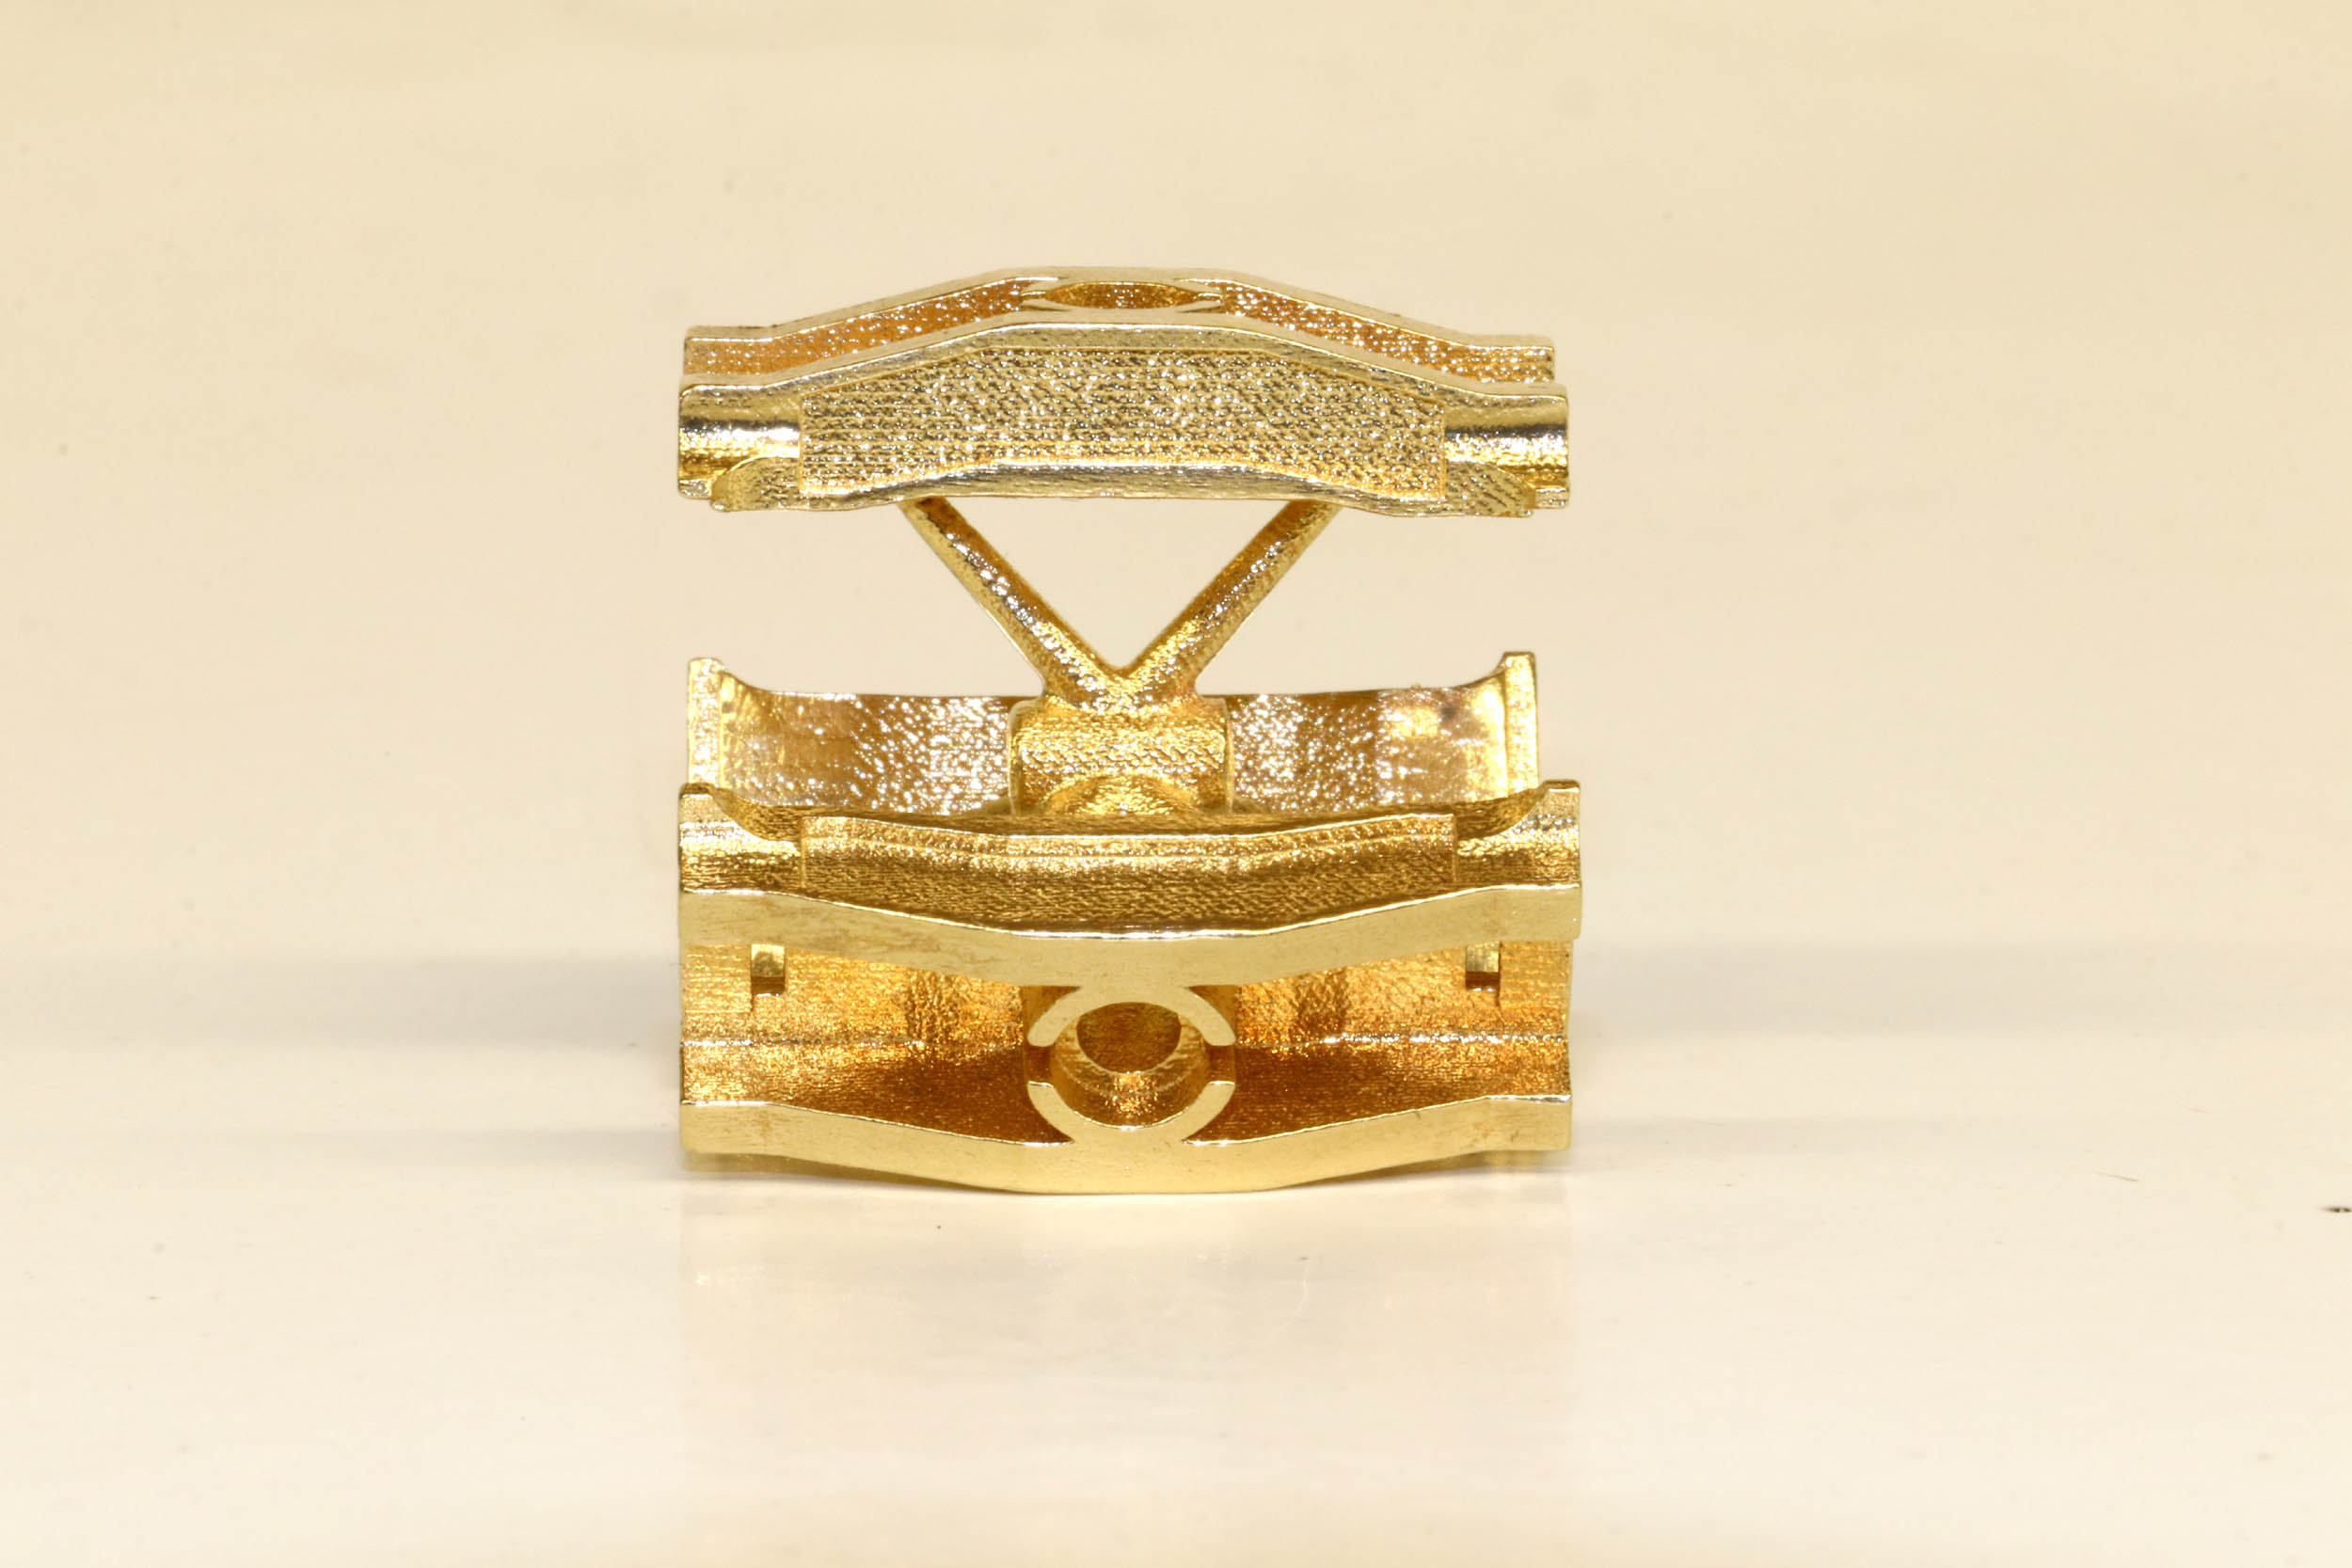
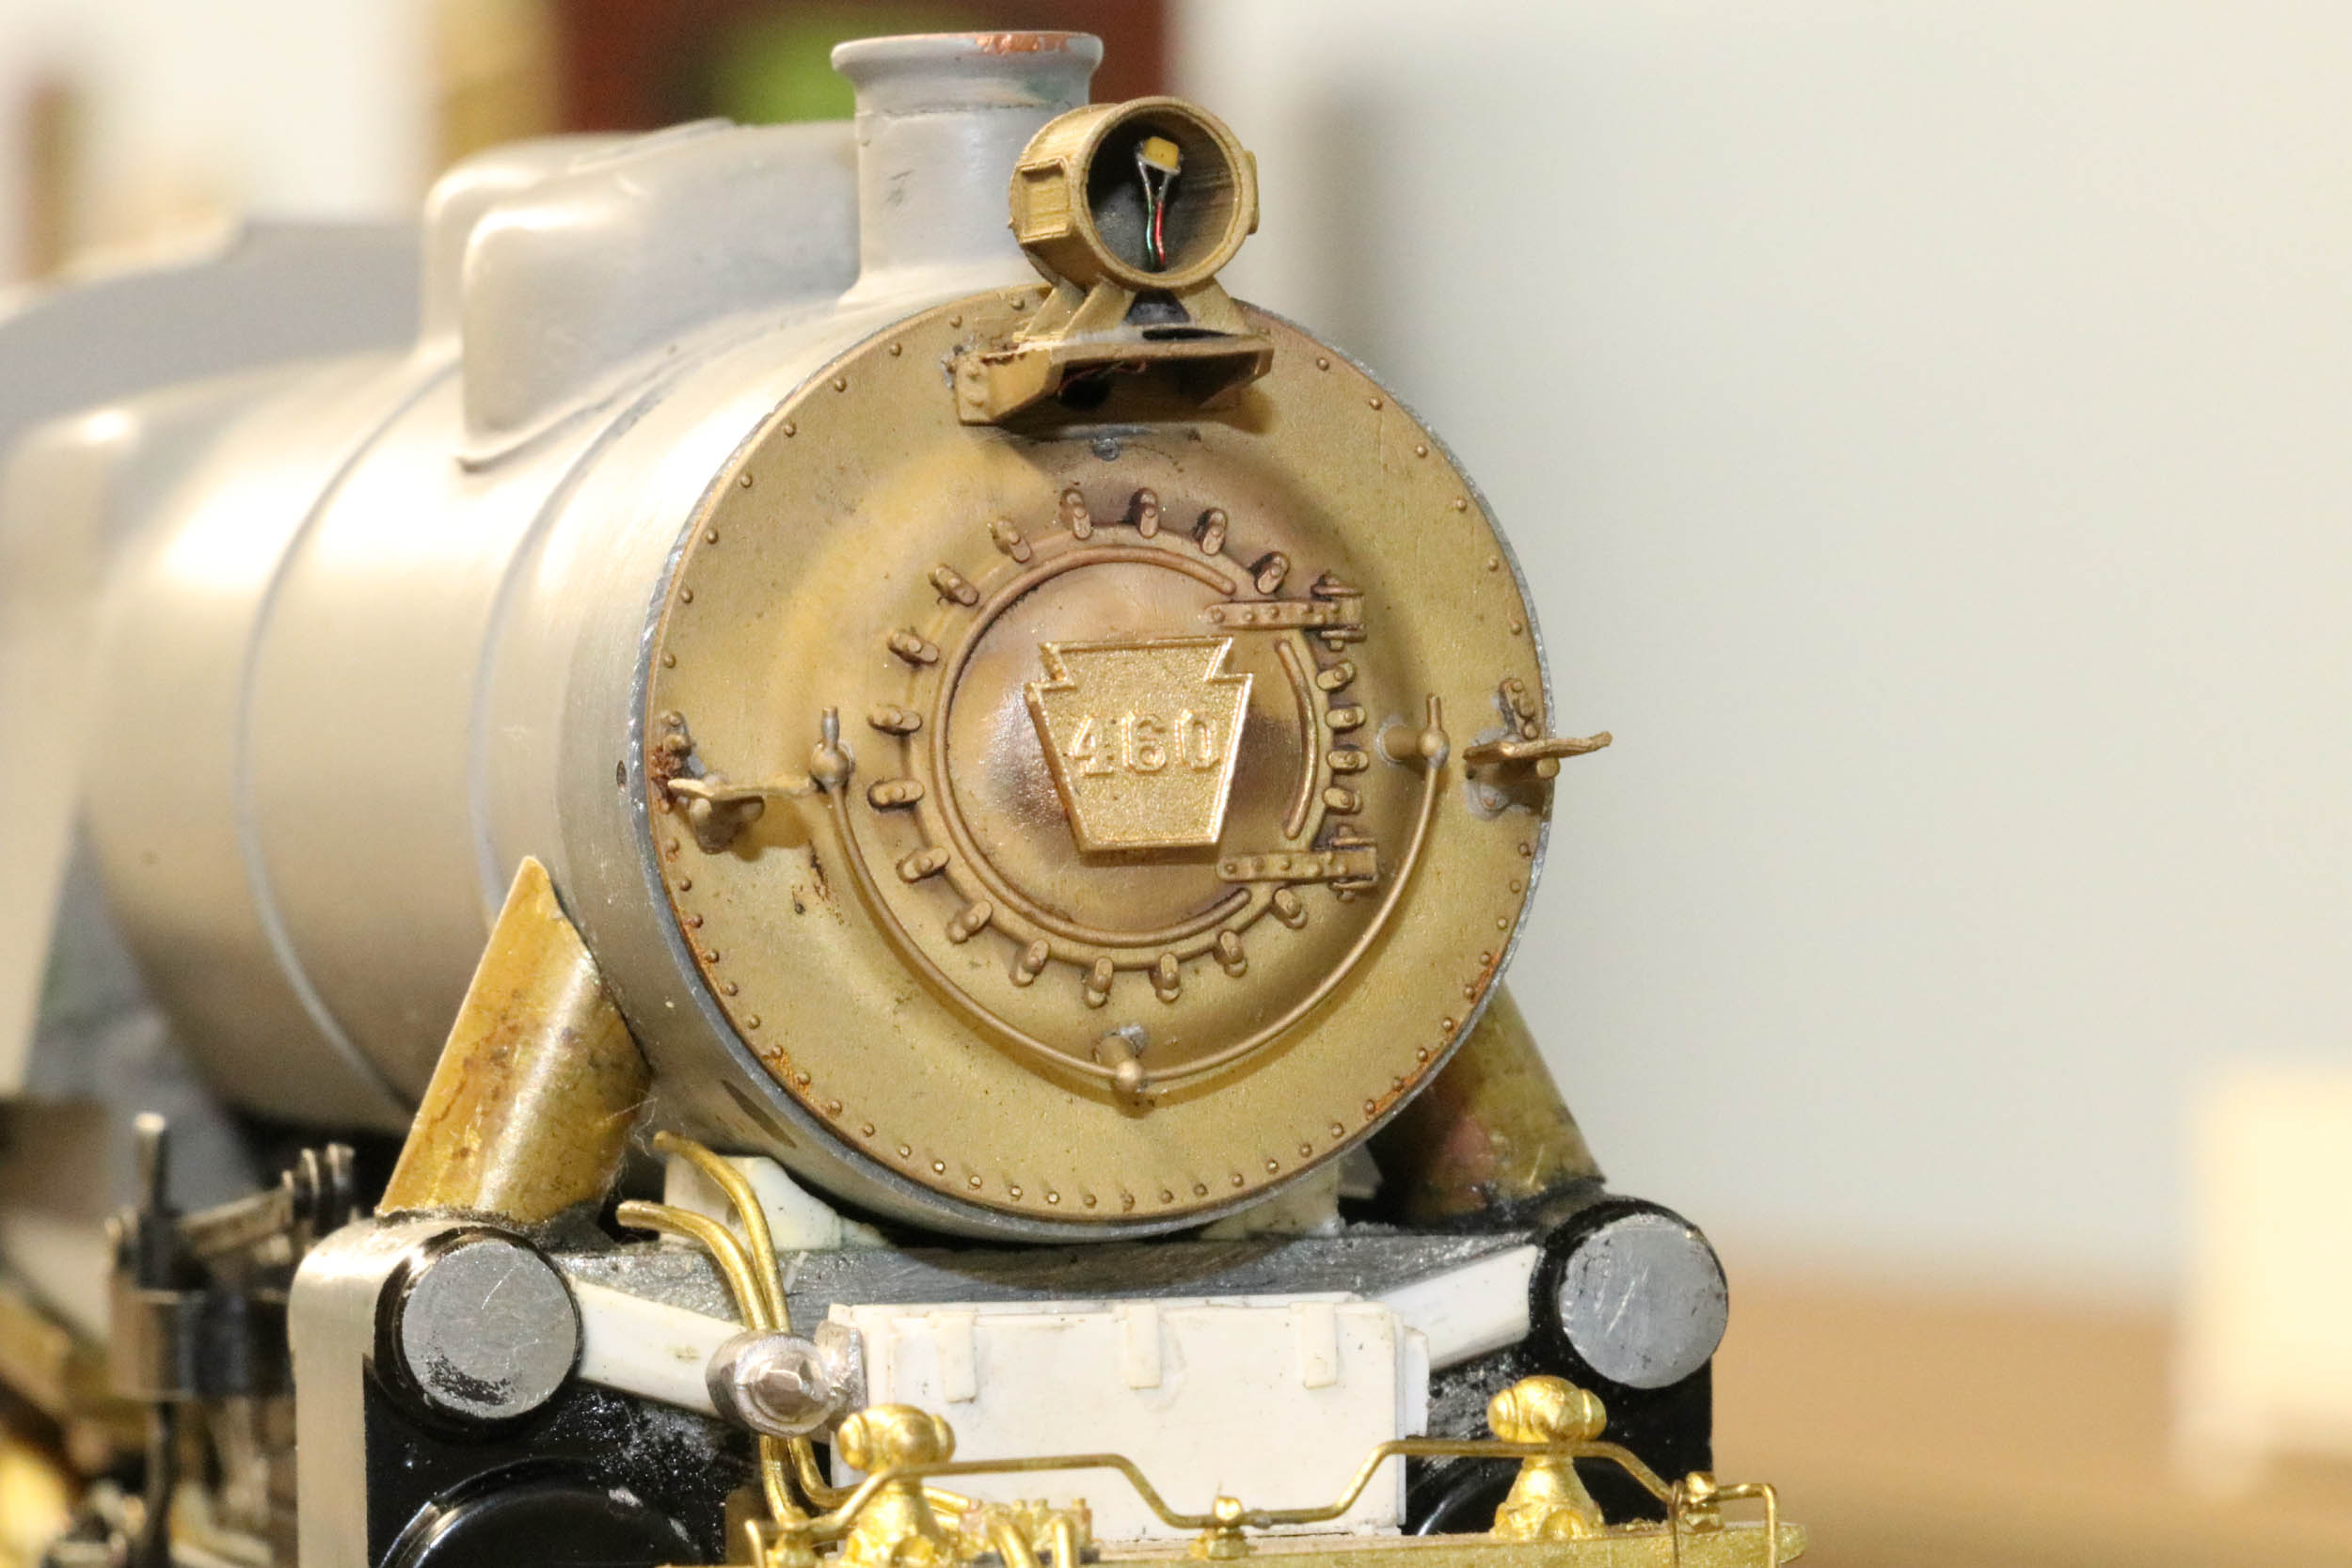
Numberplate
The last thing I had made at Shapeways was the numberplate. The other numberplate is for a PRR B8a I hope
to build.
Added
5-4-19
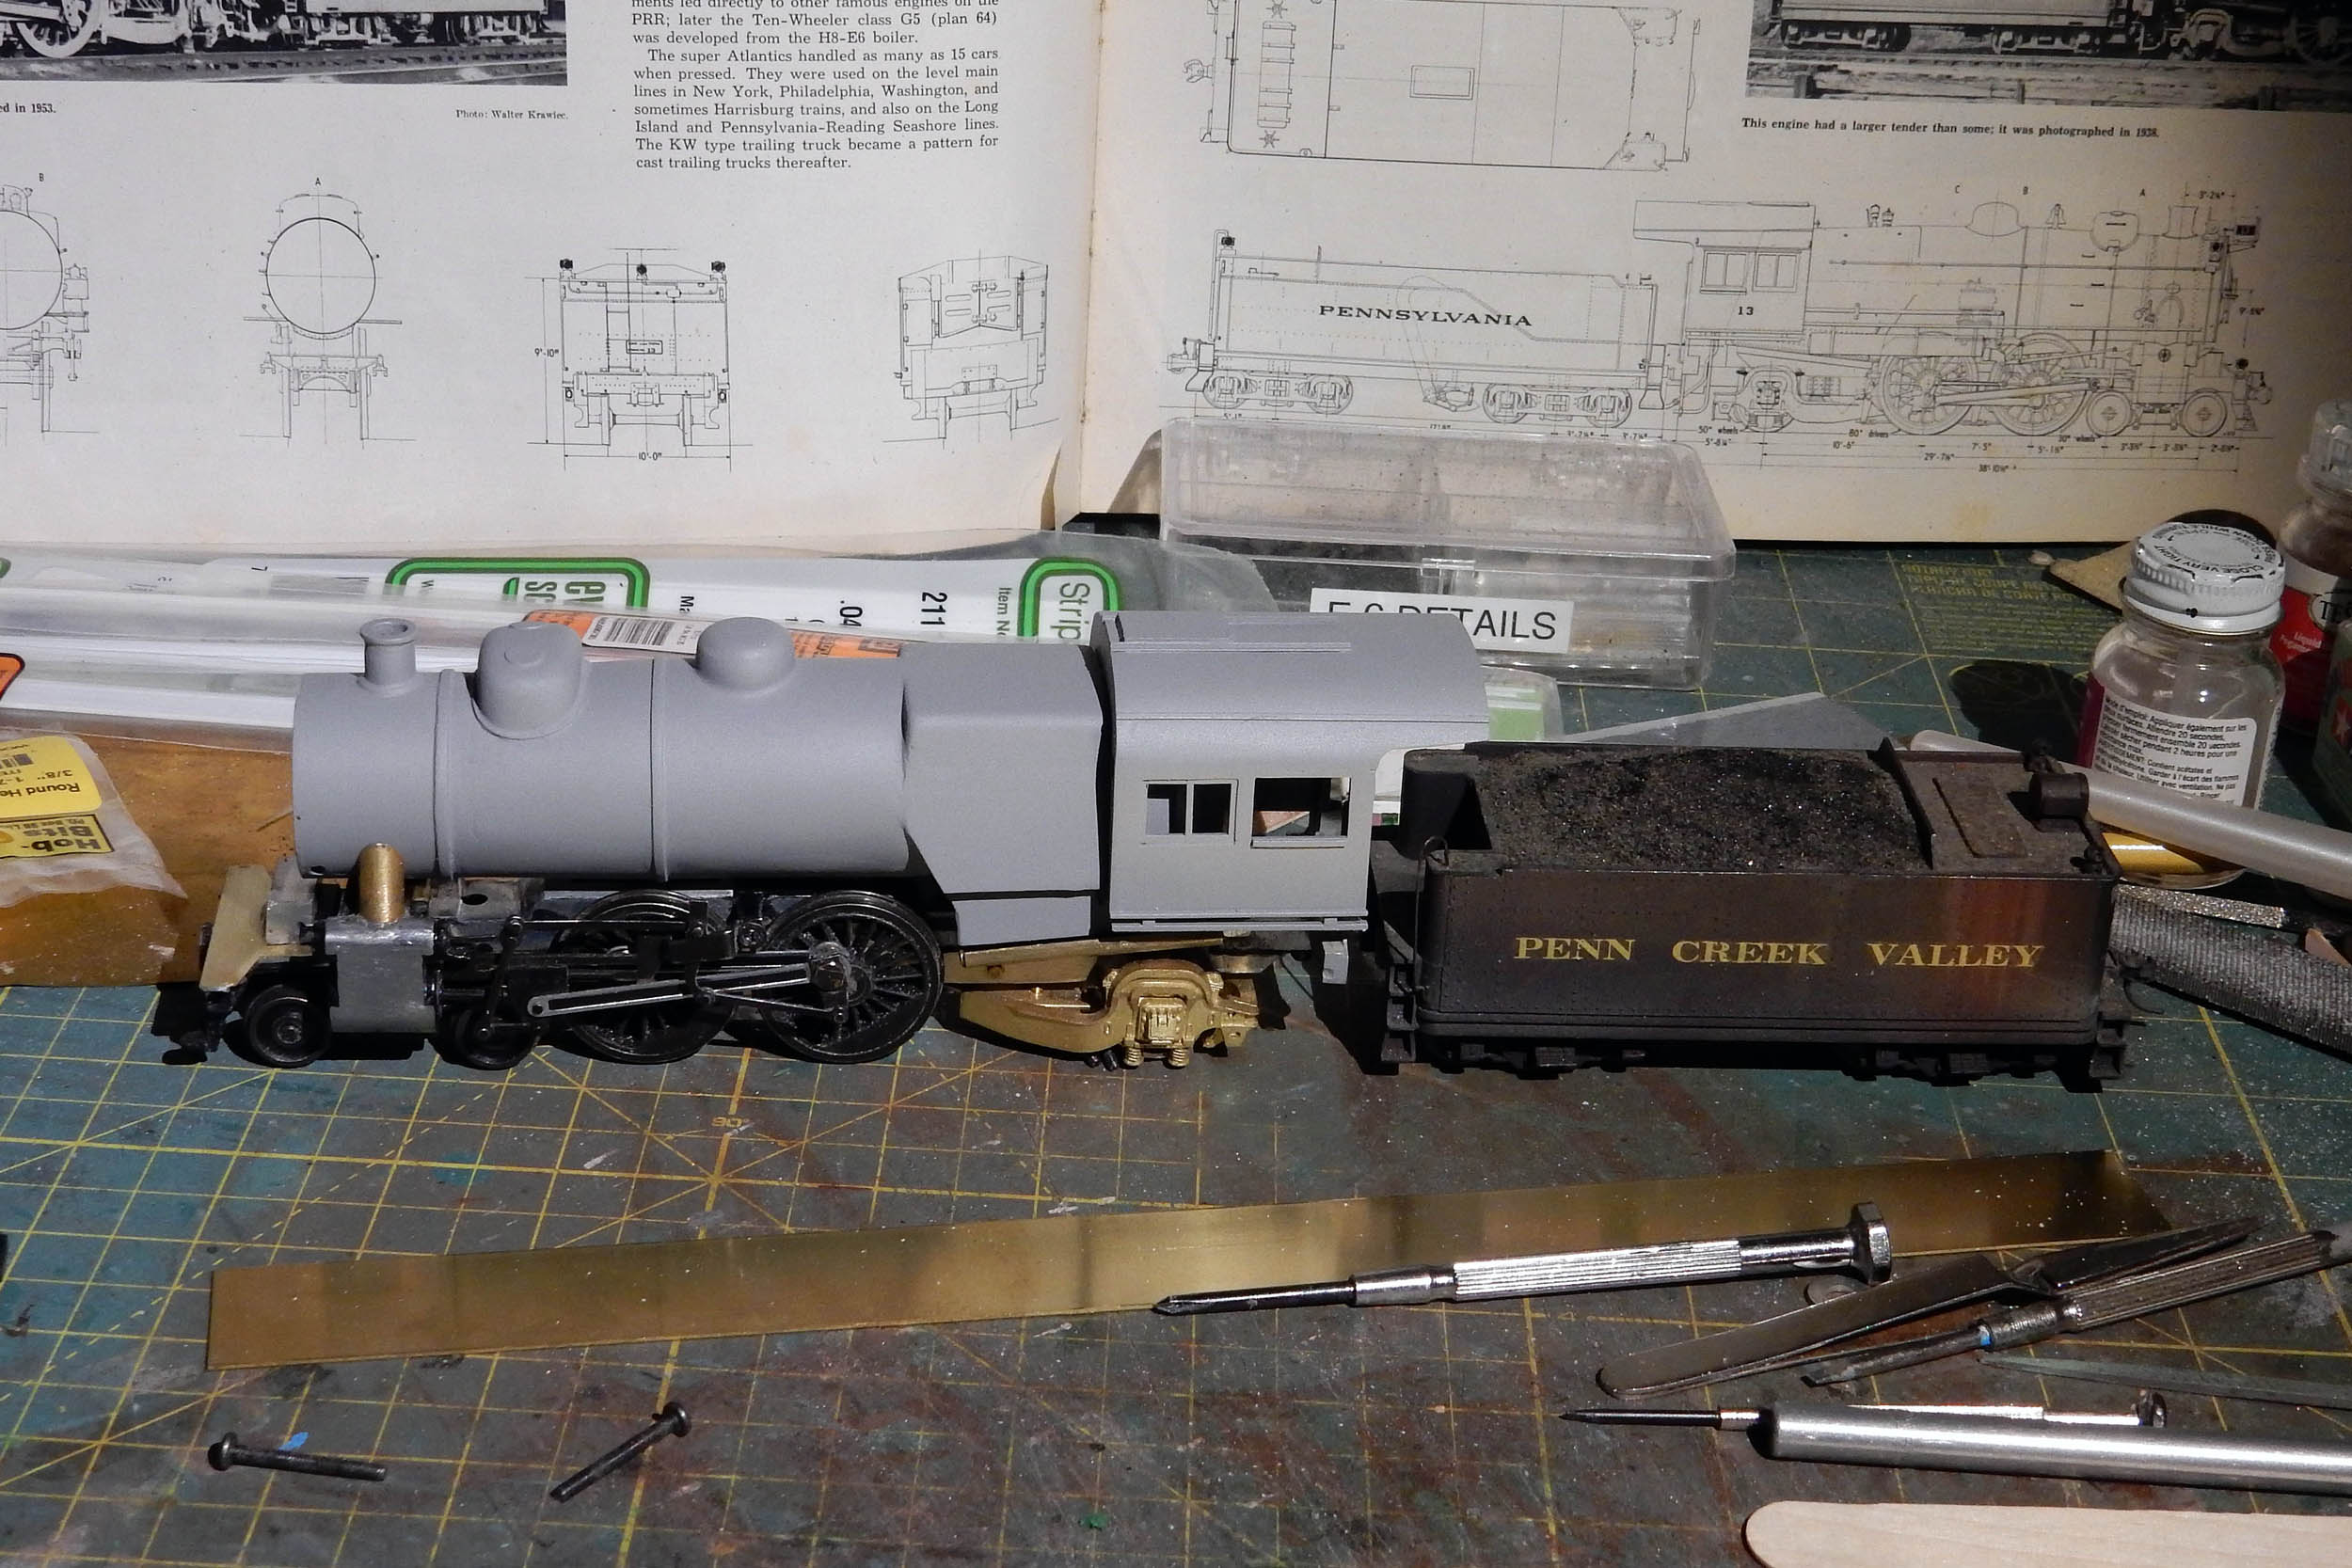
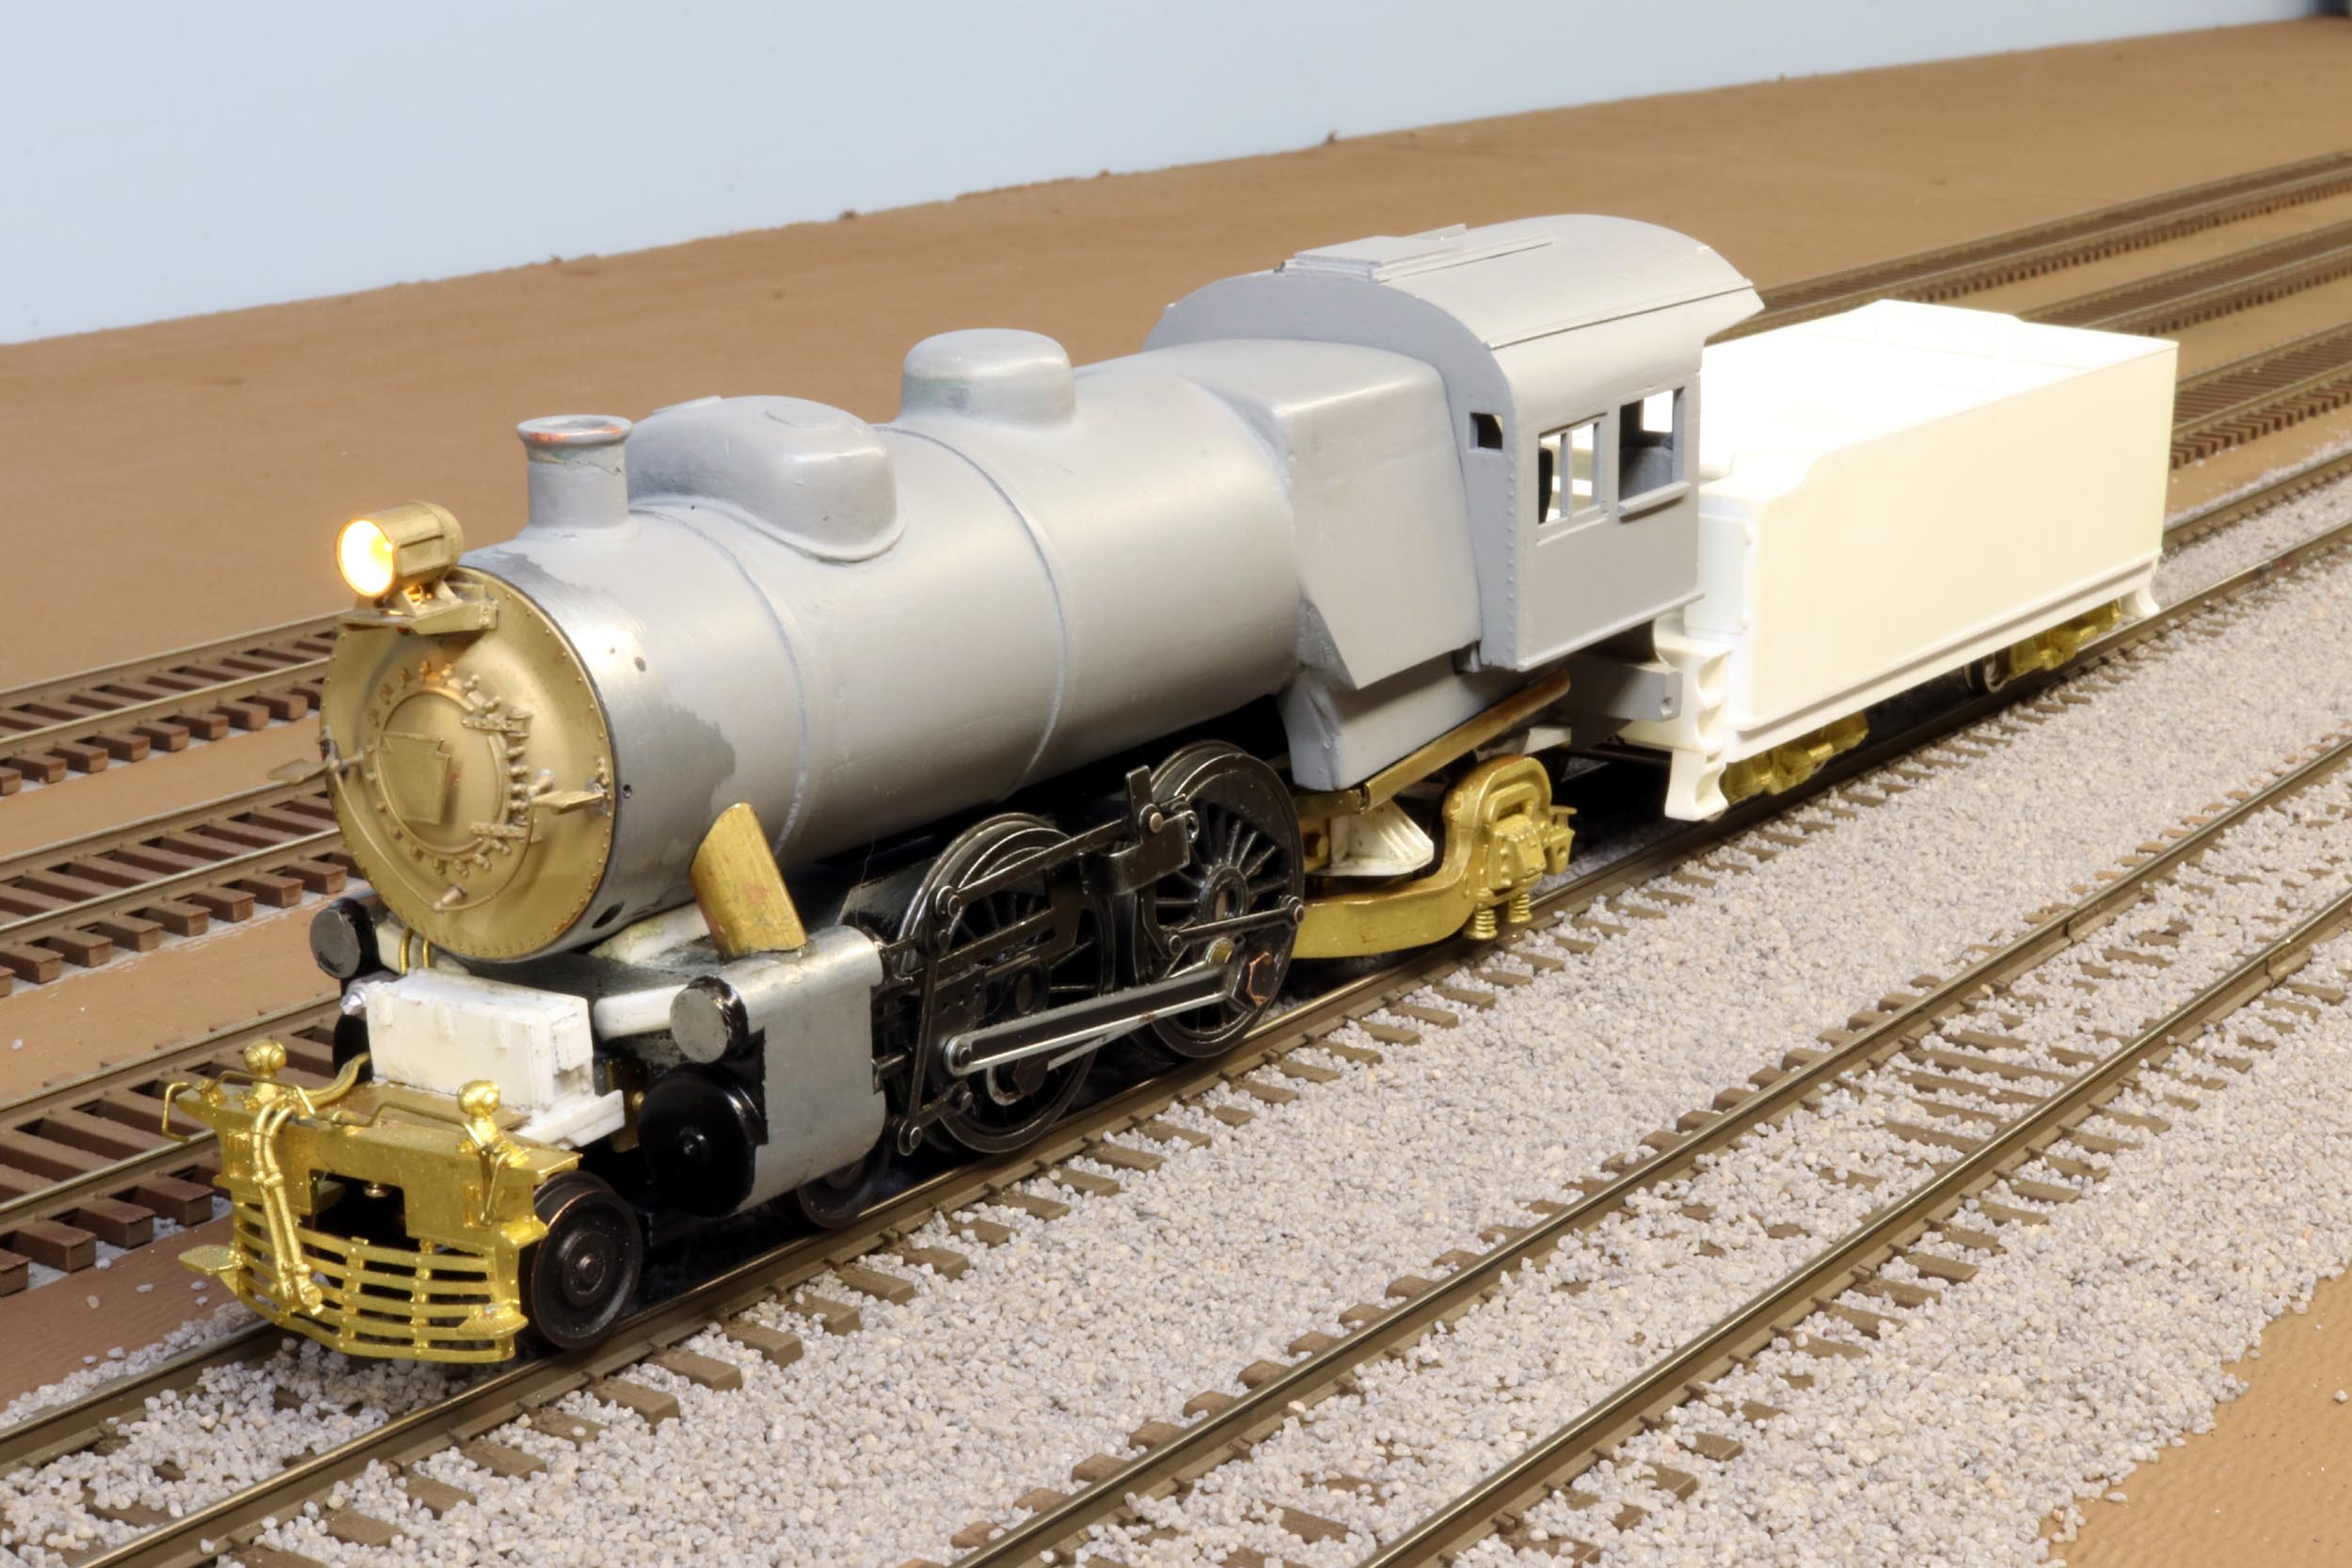
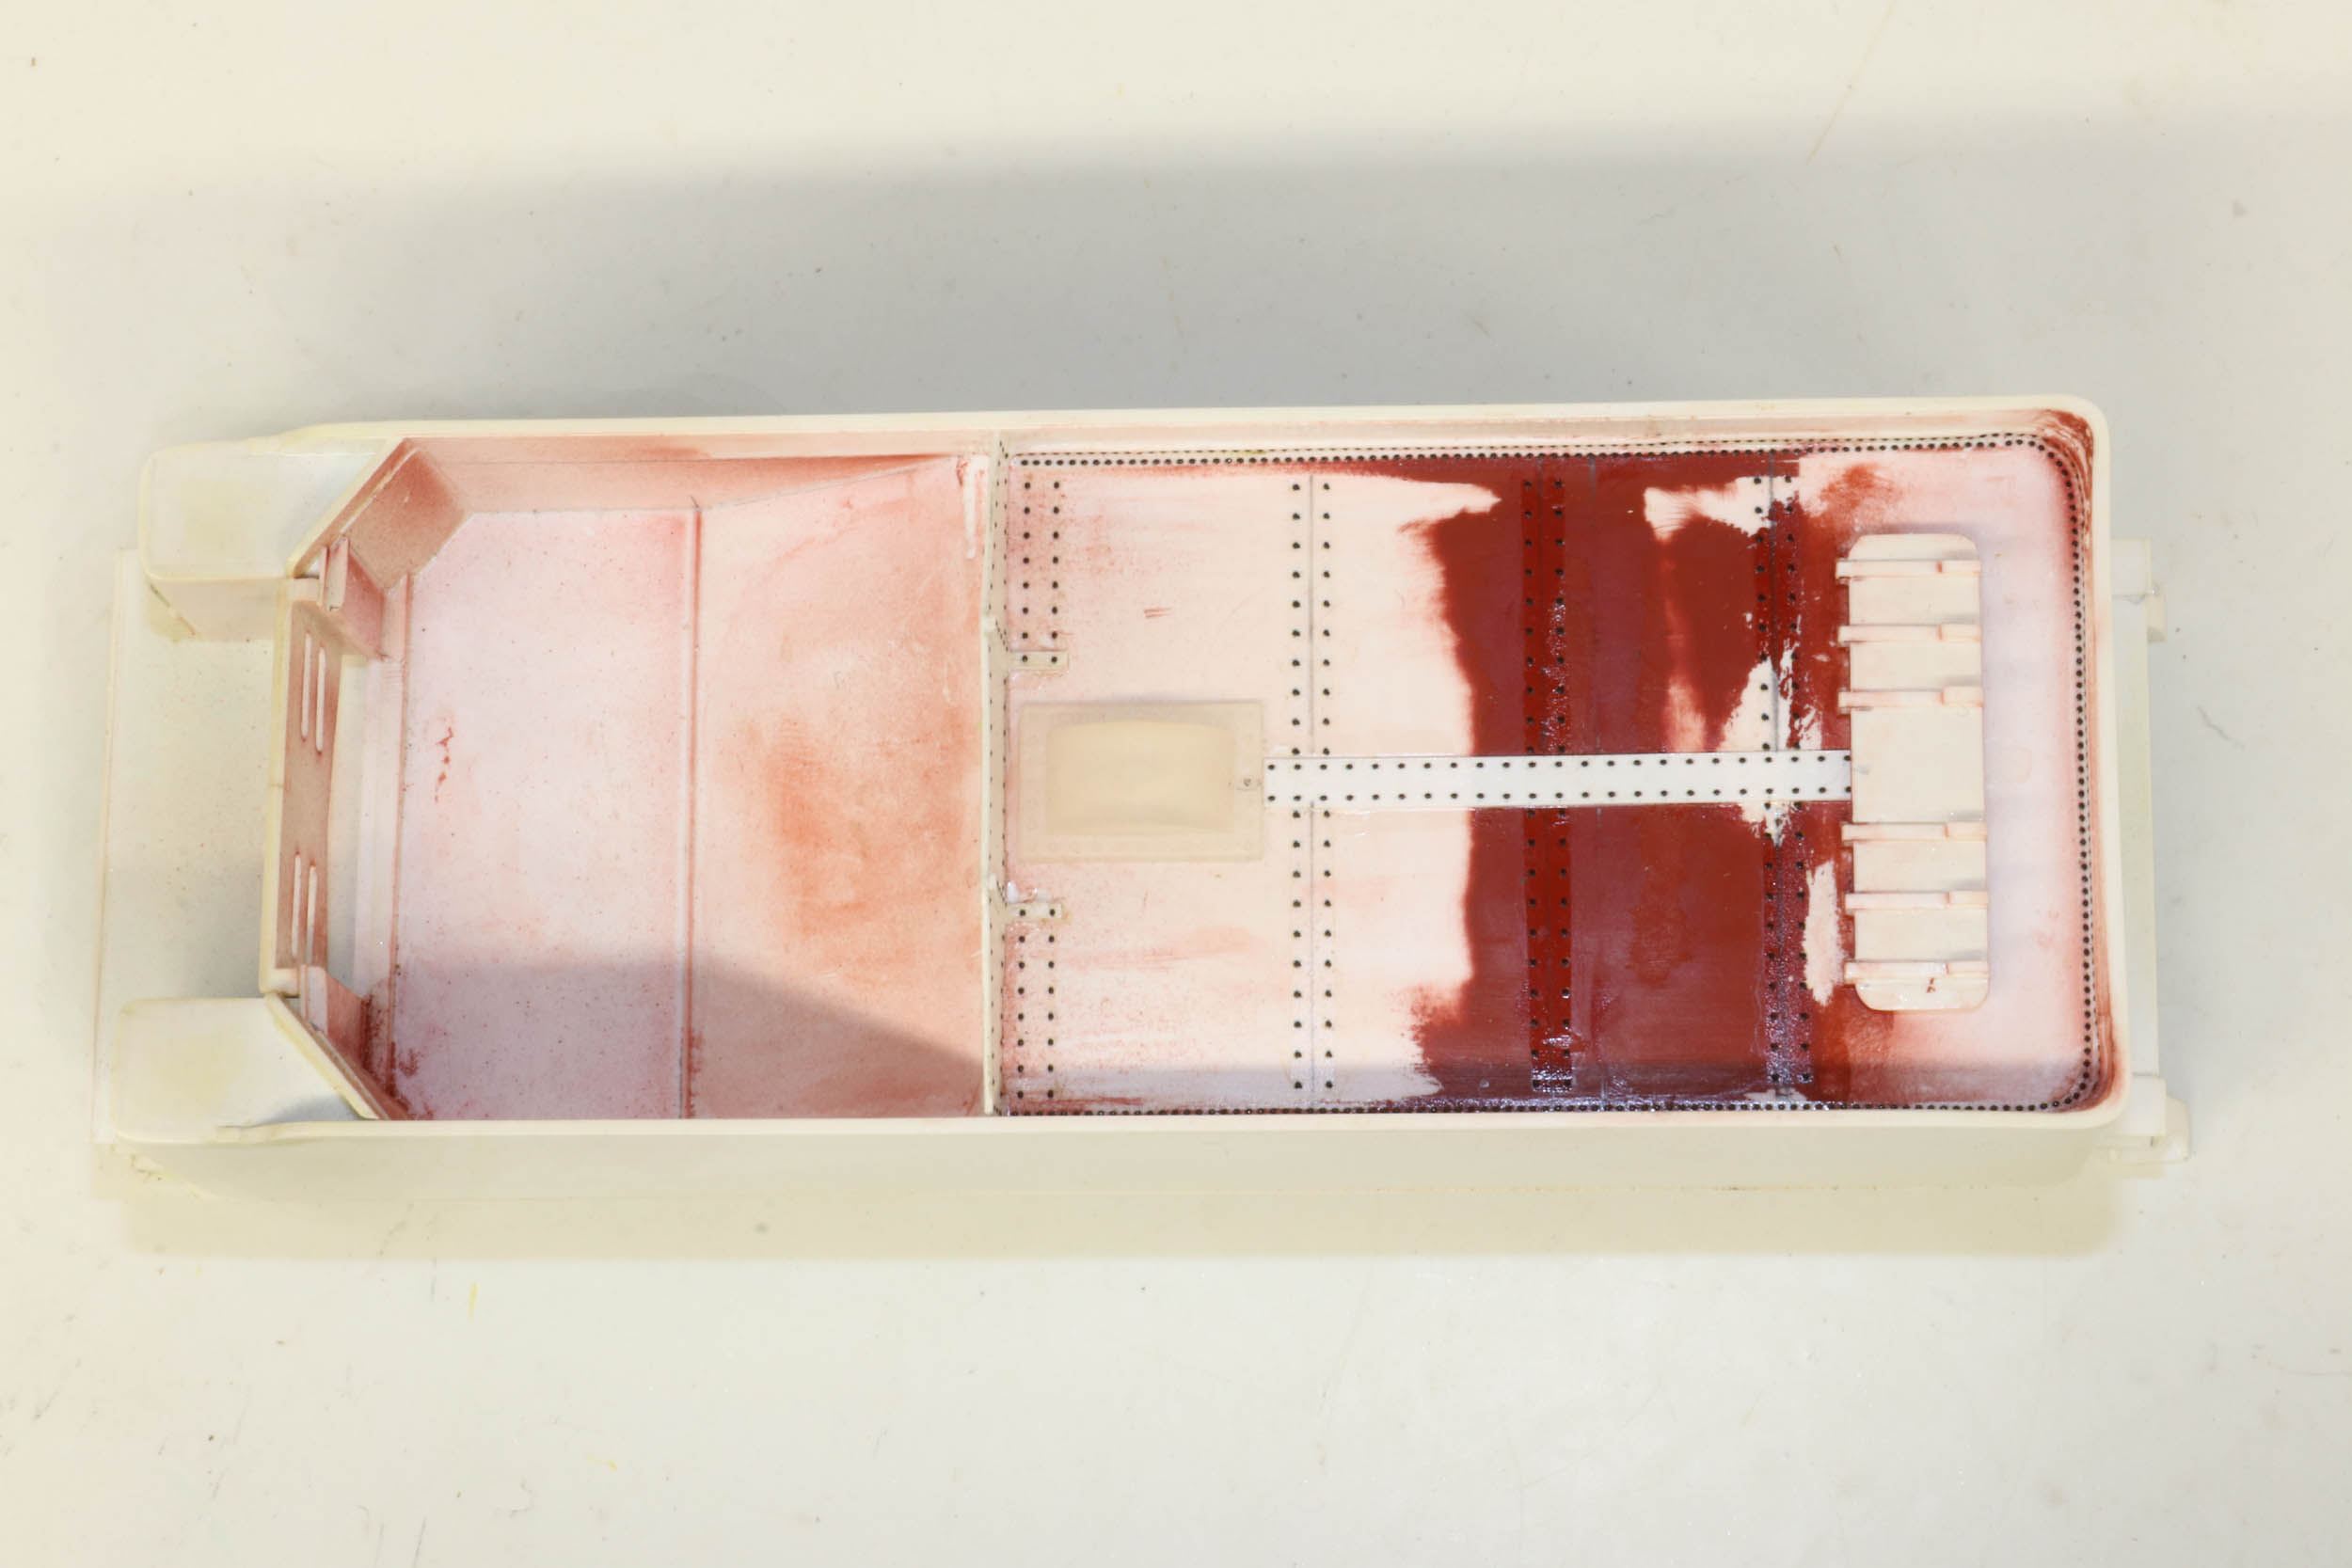
Let The Detailing Begin
Now the real heavy lifting begins detailing the tender and
boiler…. this is new territory for me starting with such a blank boiler. I
visited the Railroad Museum of Pennsylvania on 3-31-19 to measure and
extensively photograph the real 460. I now have enough info to get started.
I added draft gear to the pilot and tender. Sam attached the
pilot with a piece of plastic, and used a scratchbuilt plastic signal control
box. I made a sturdier pilot mount and brass casting for the control box.

Archer
Rivets
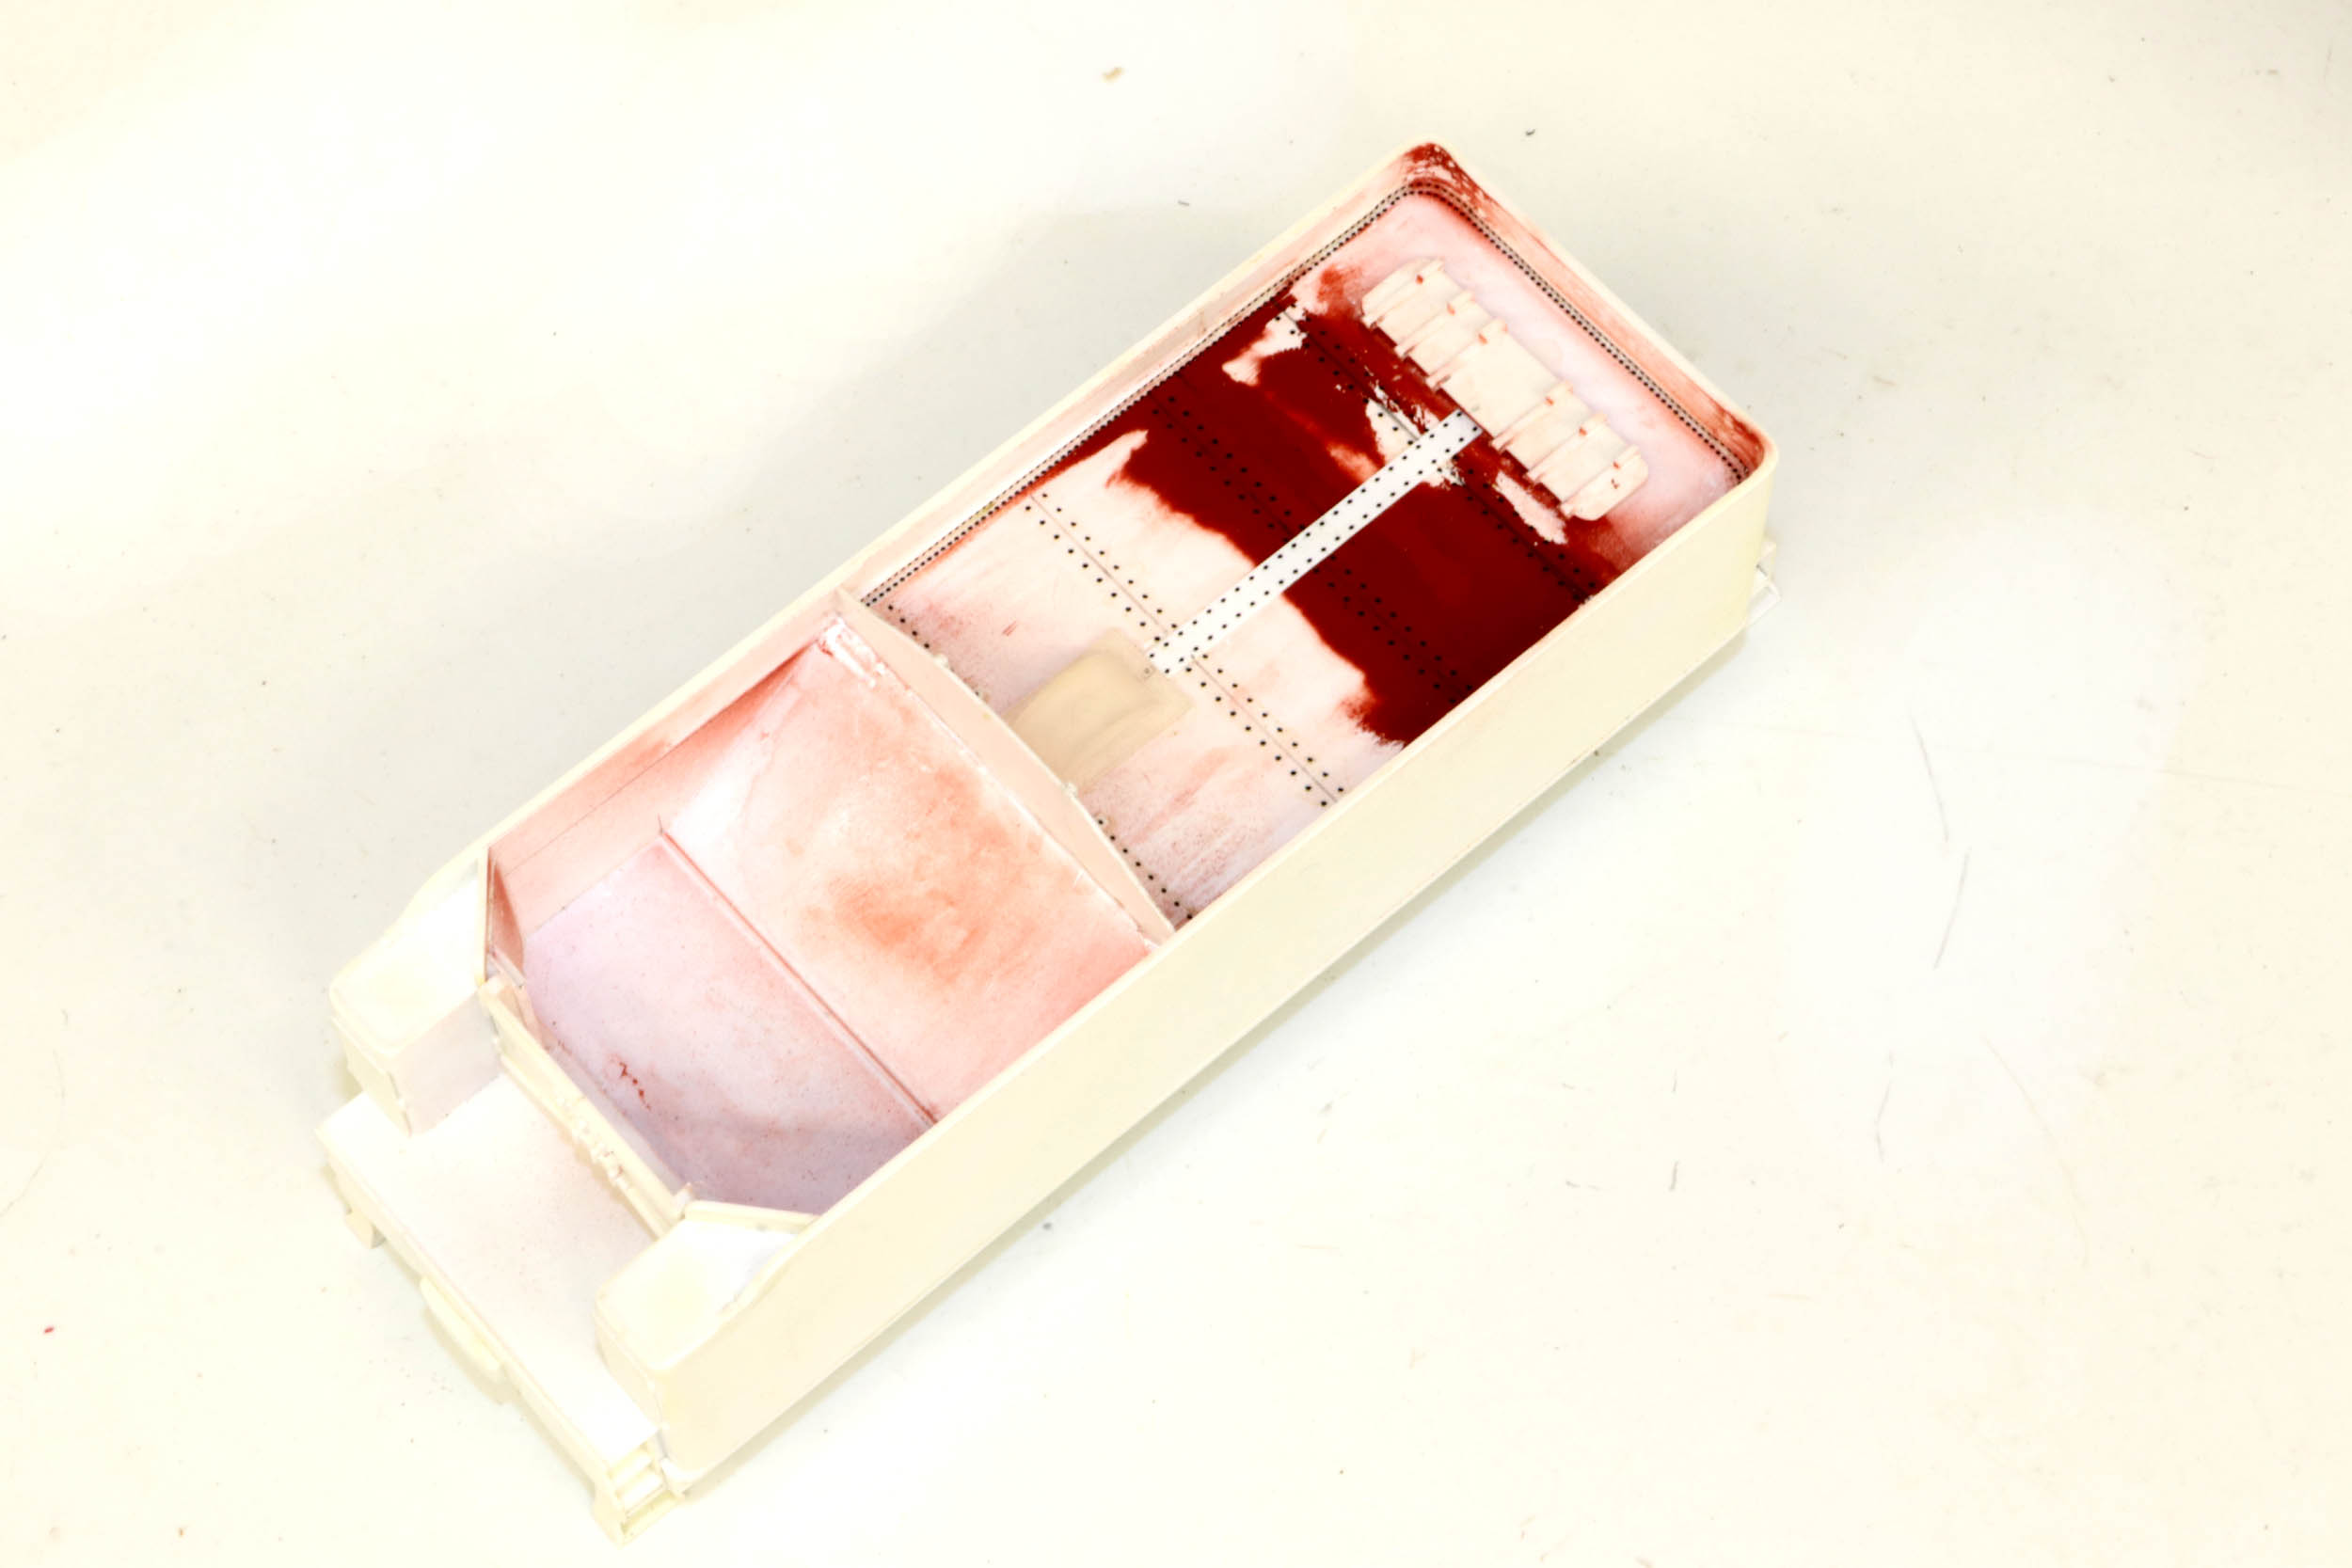
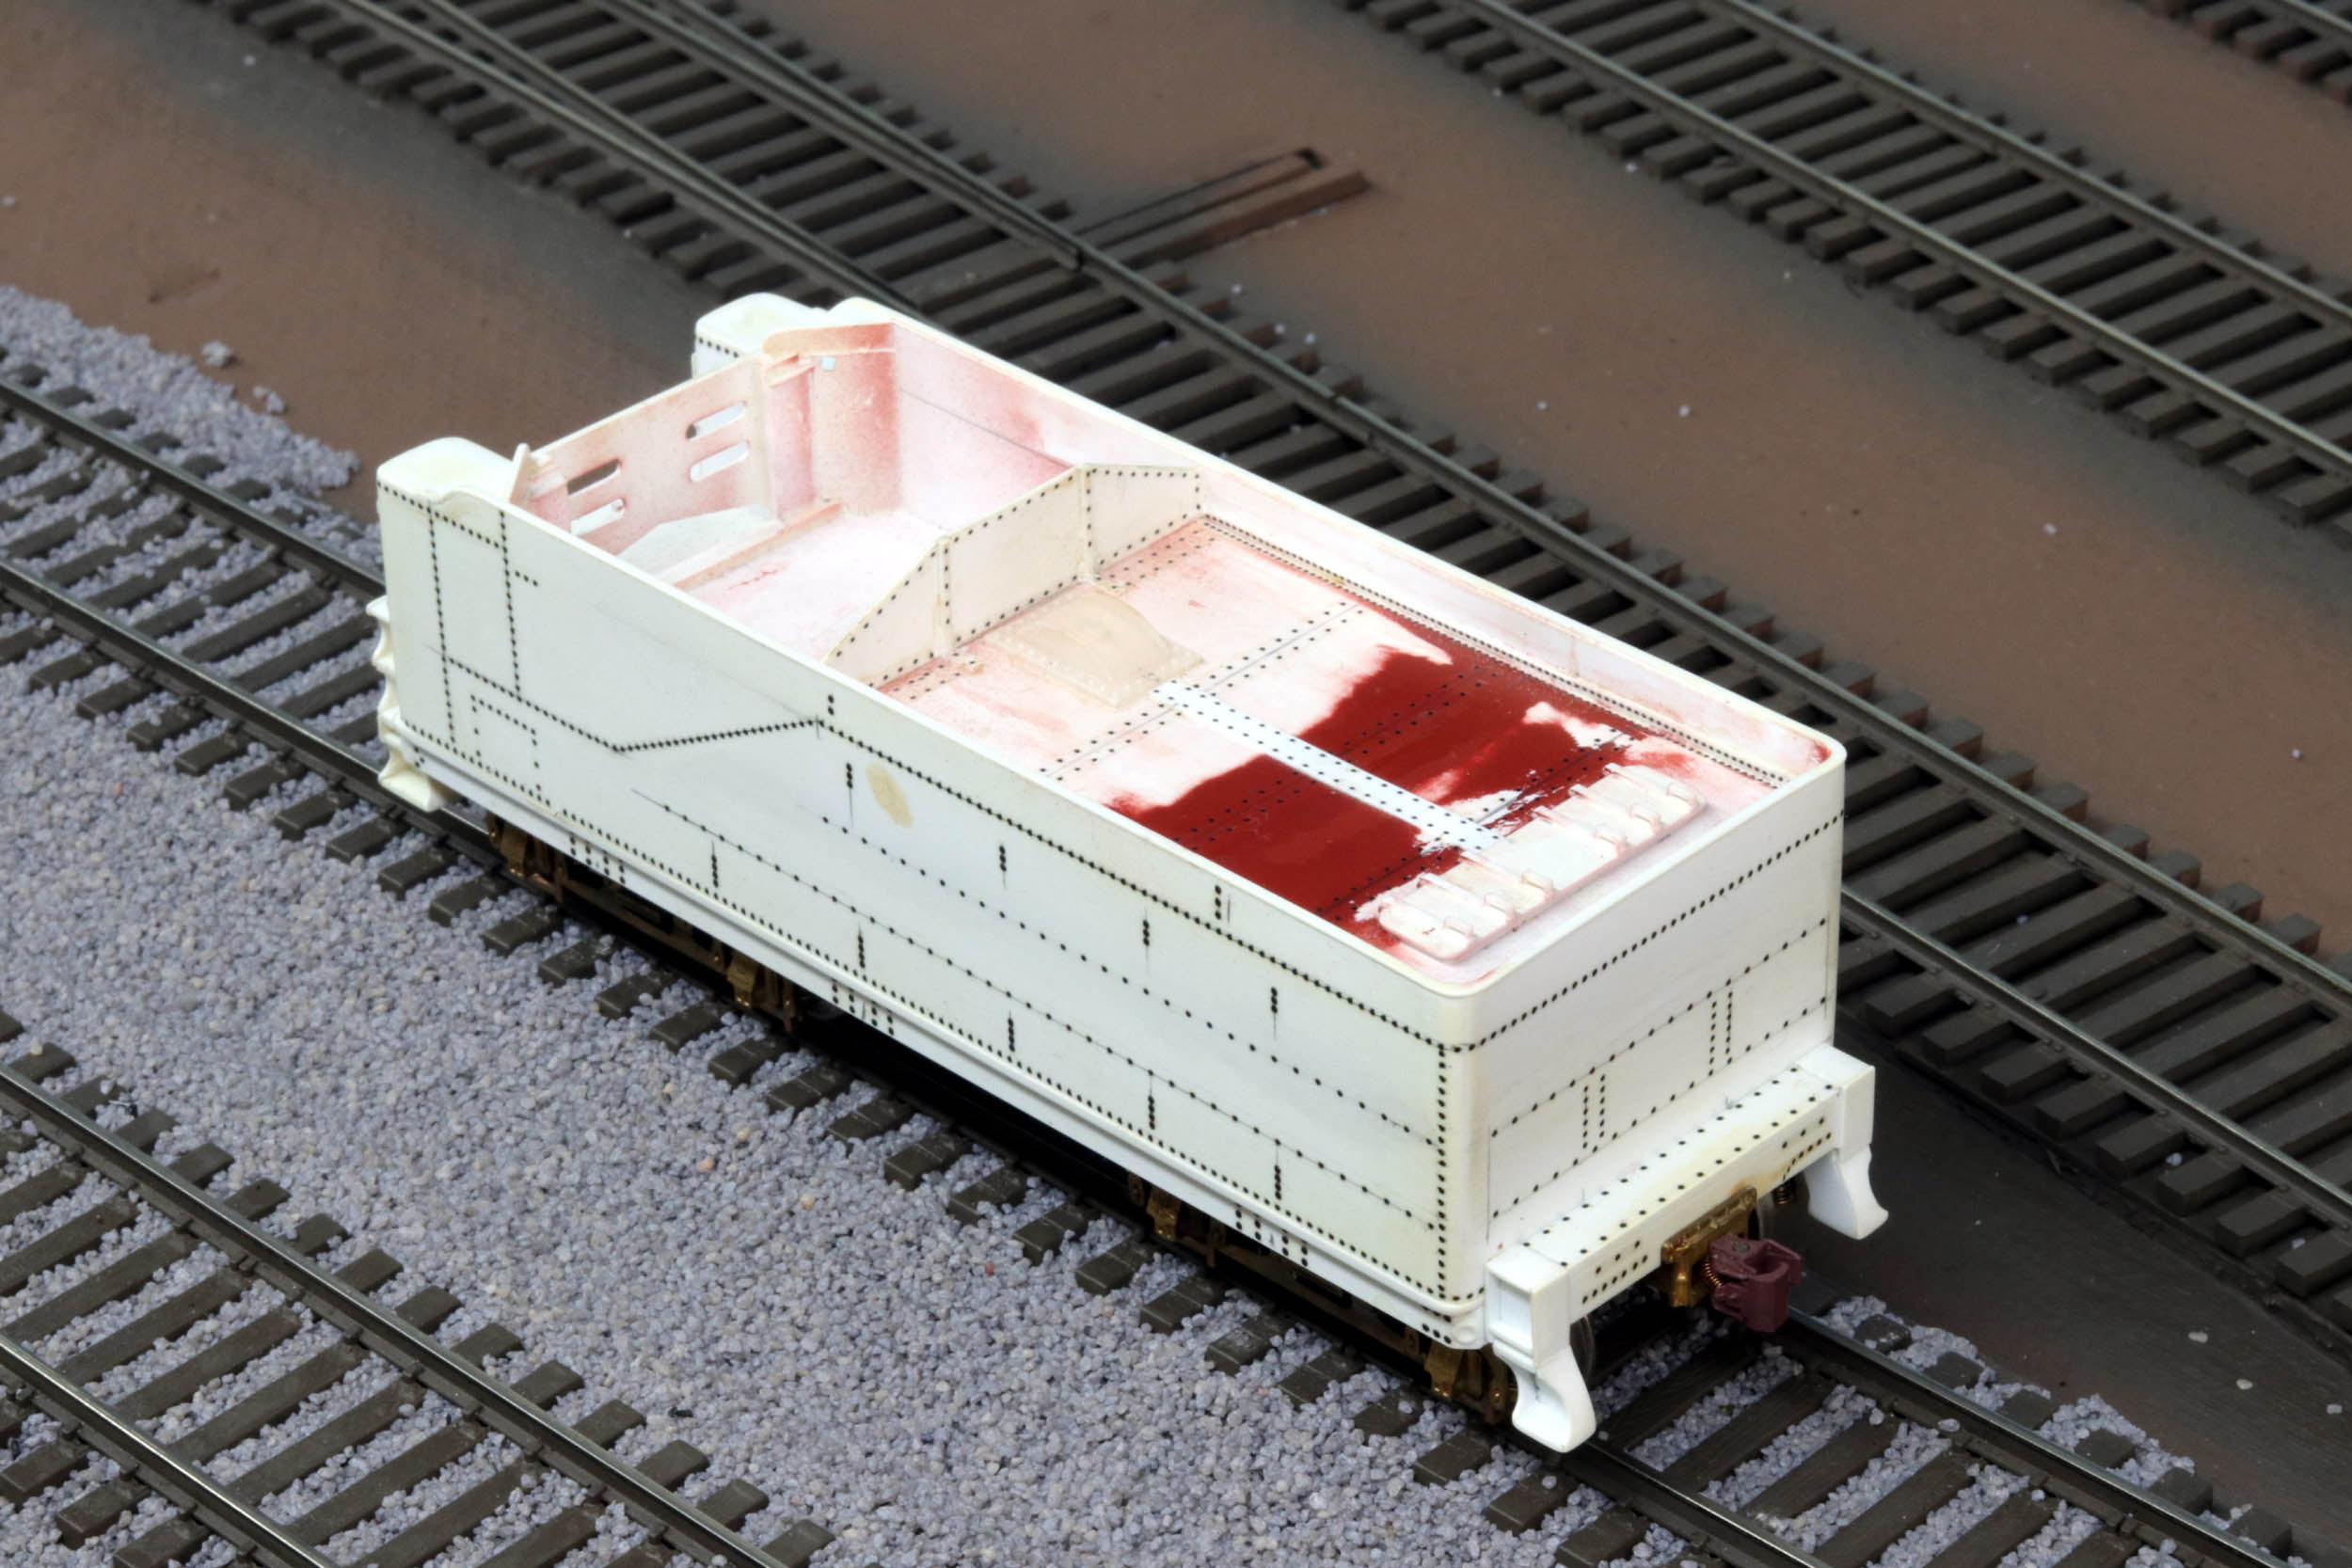
I moved the coal bulkhead wall to the slope sheet. This left some
small indentations in the tender deck at the original site. I filled with 2
heavy coats of paint and wet sanded.
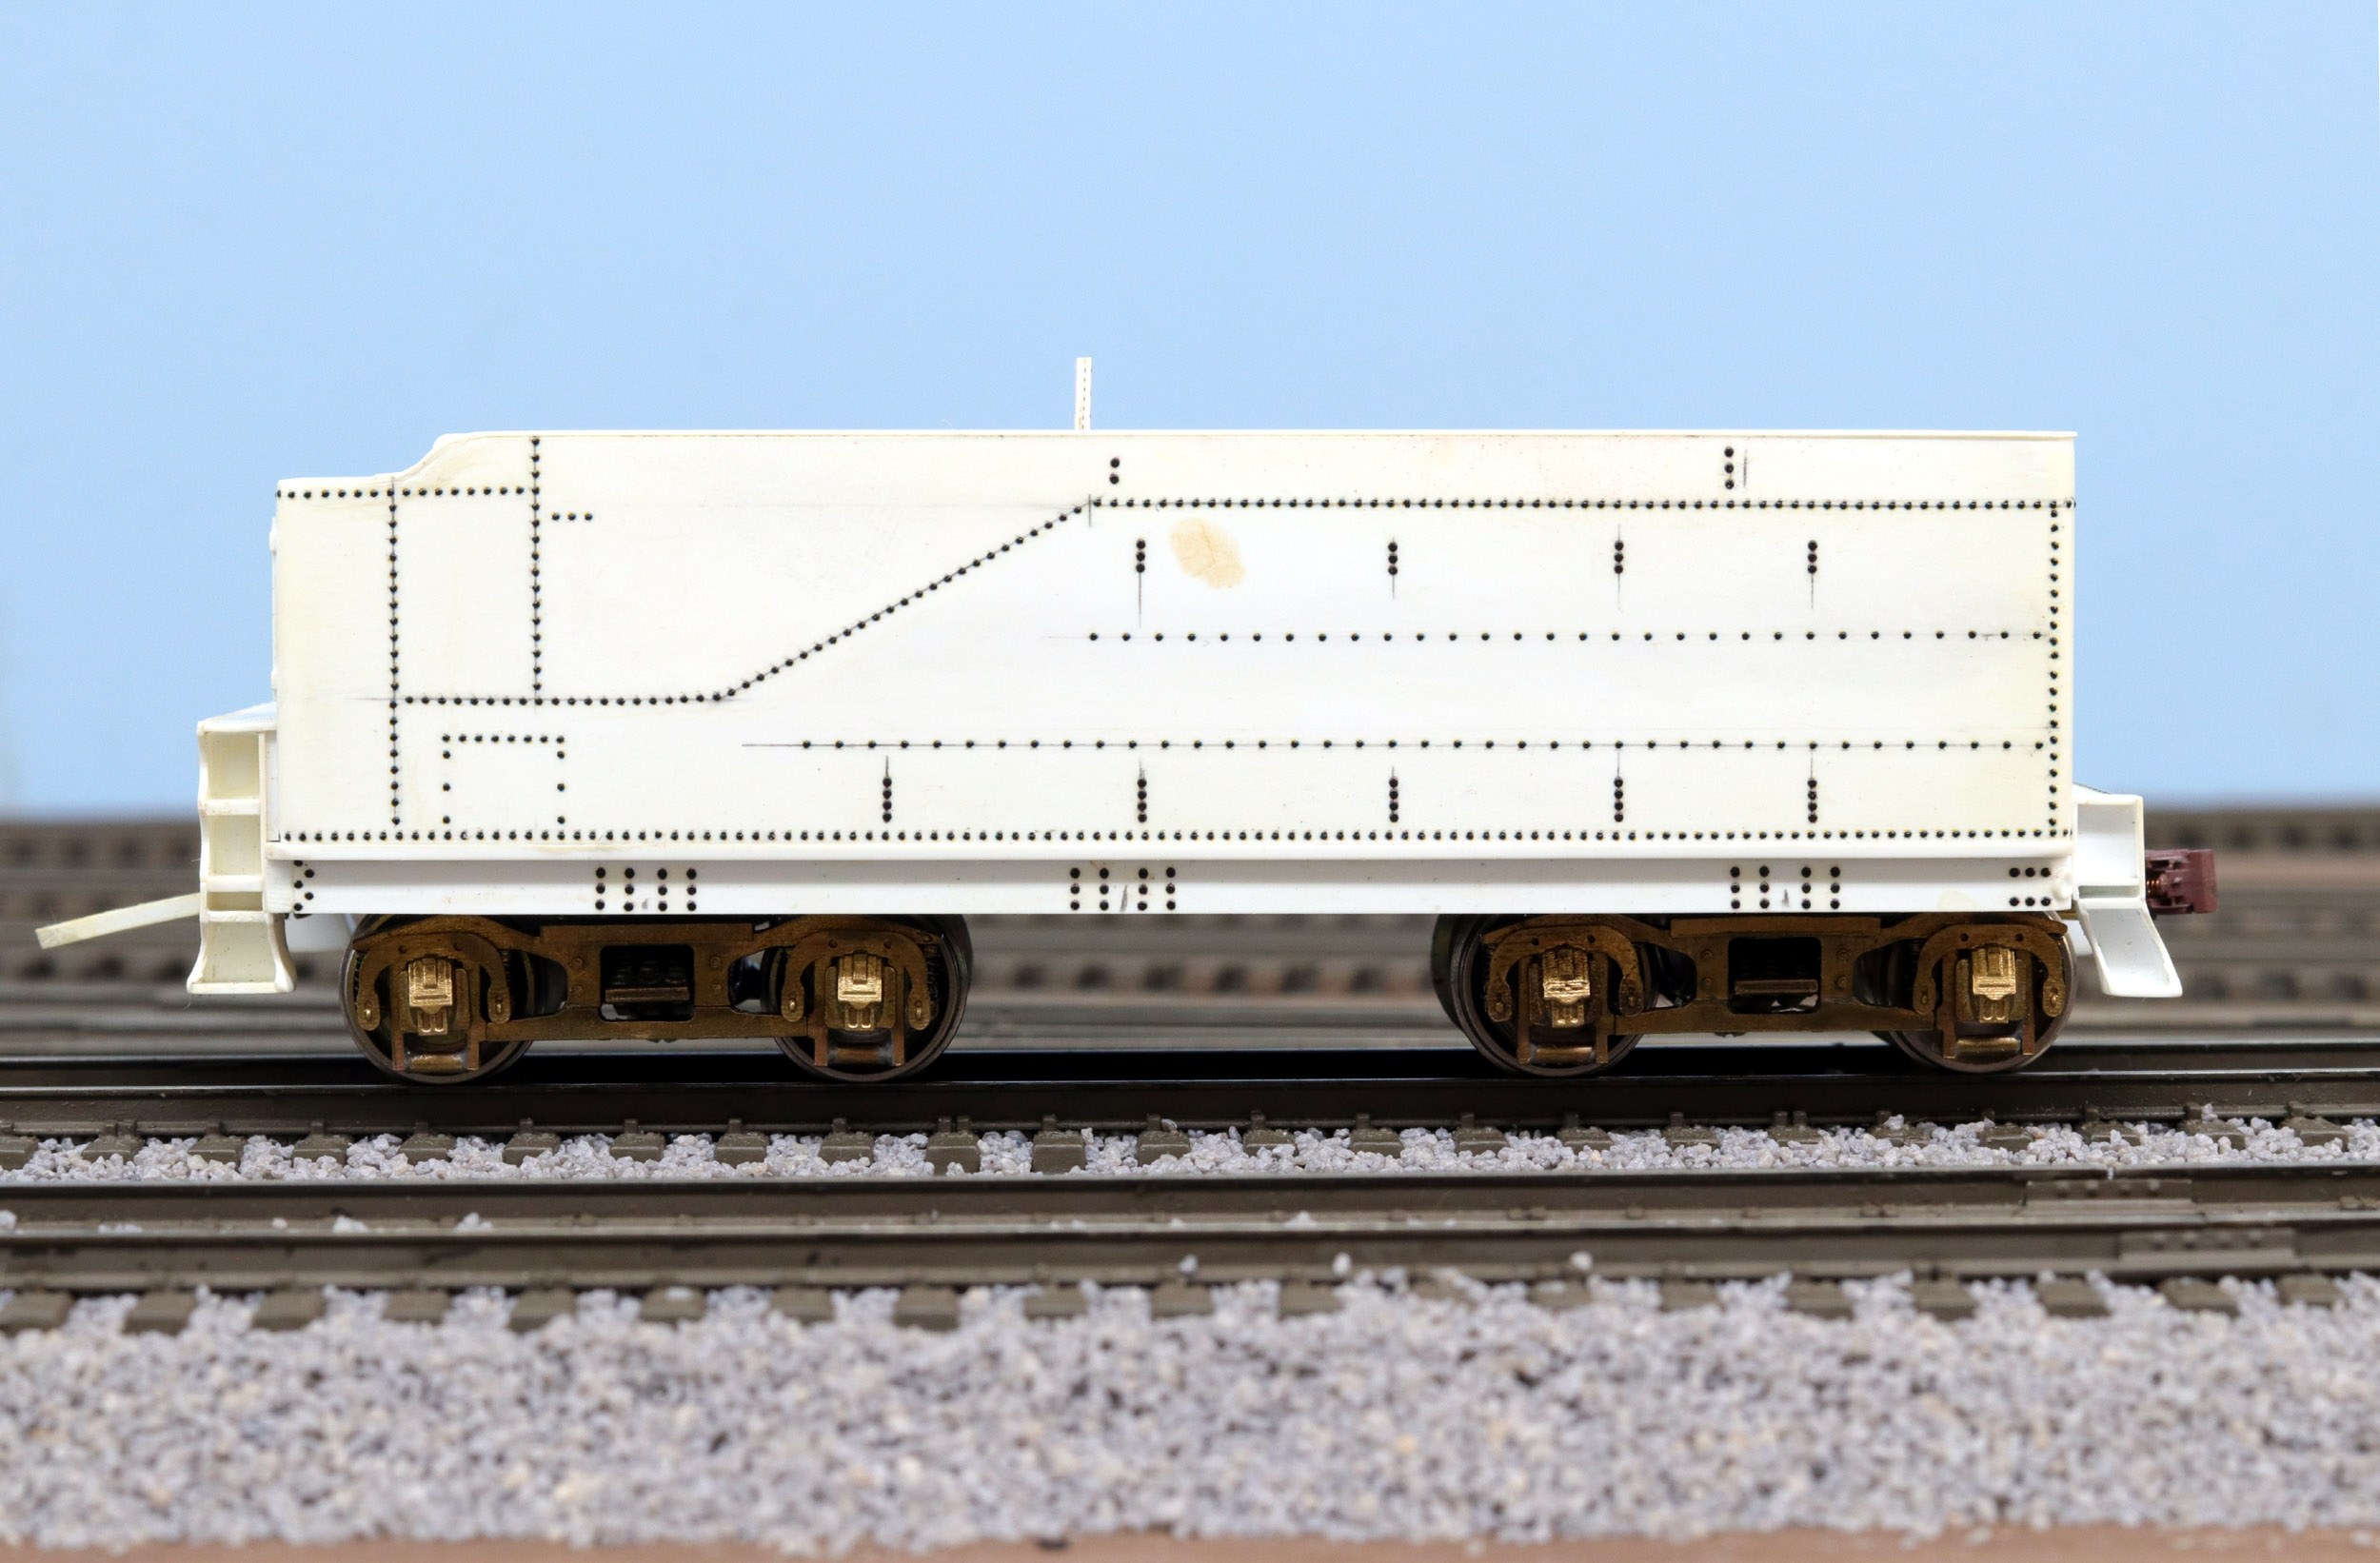
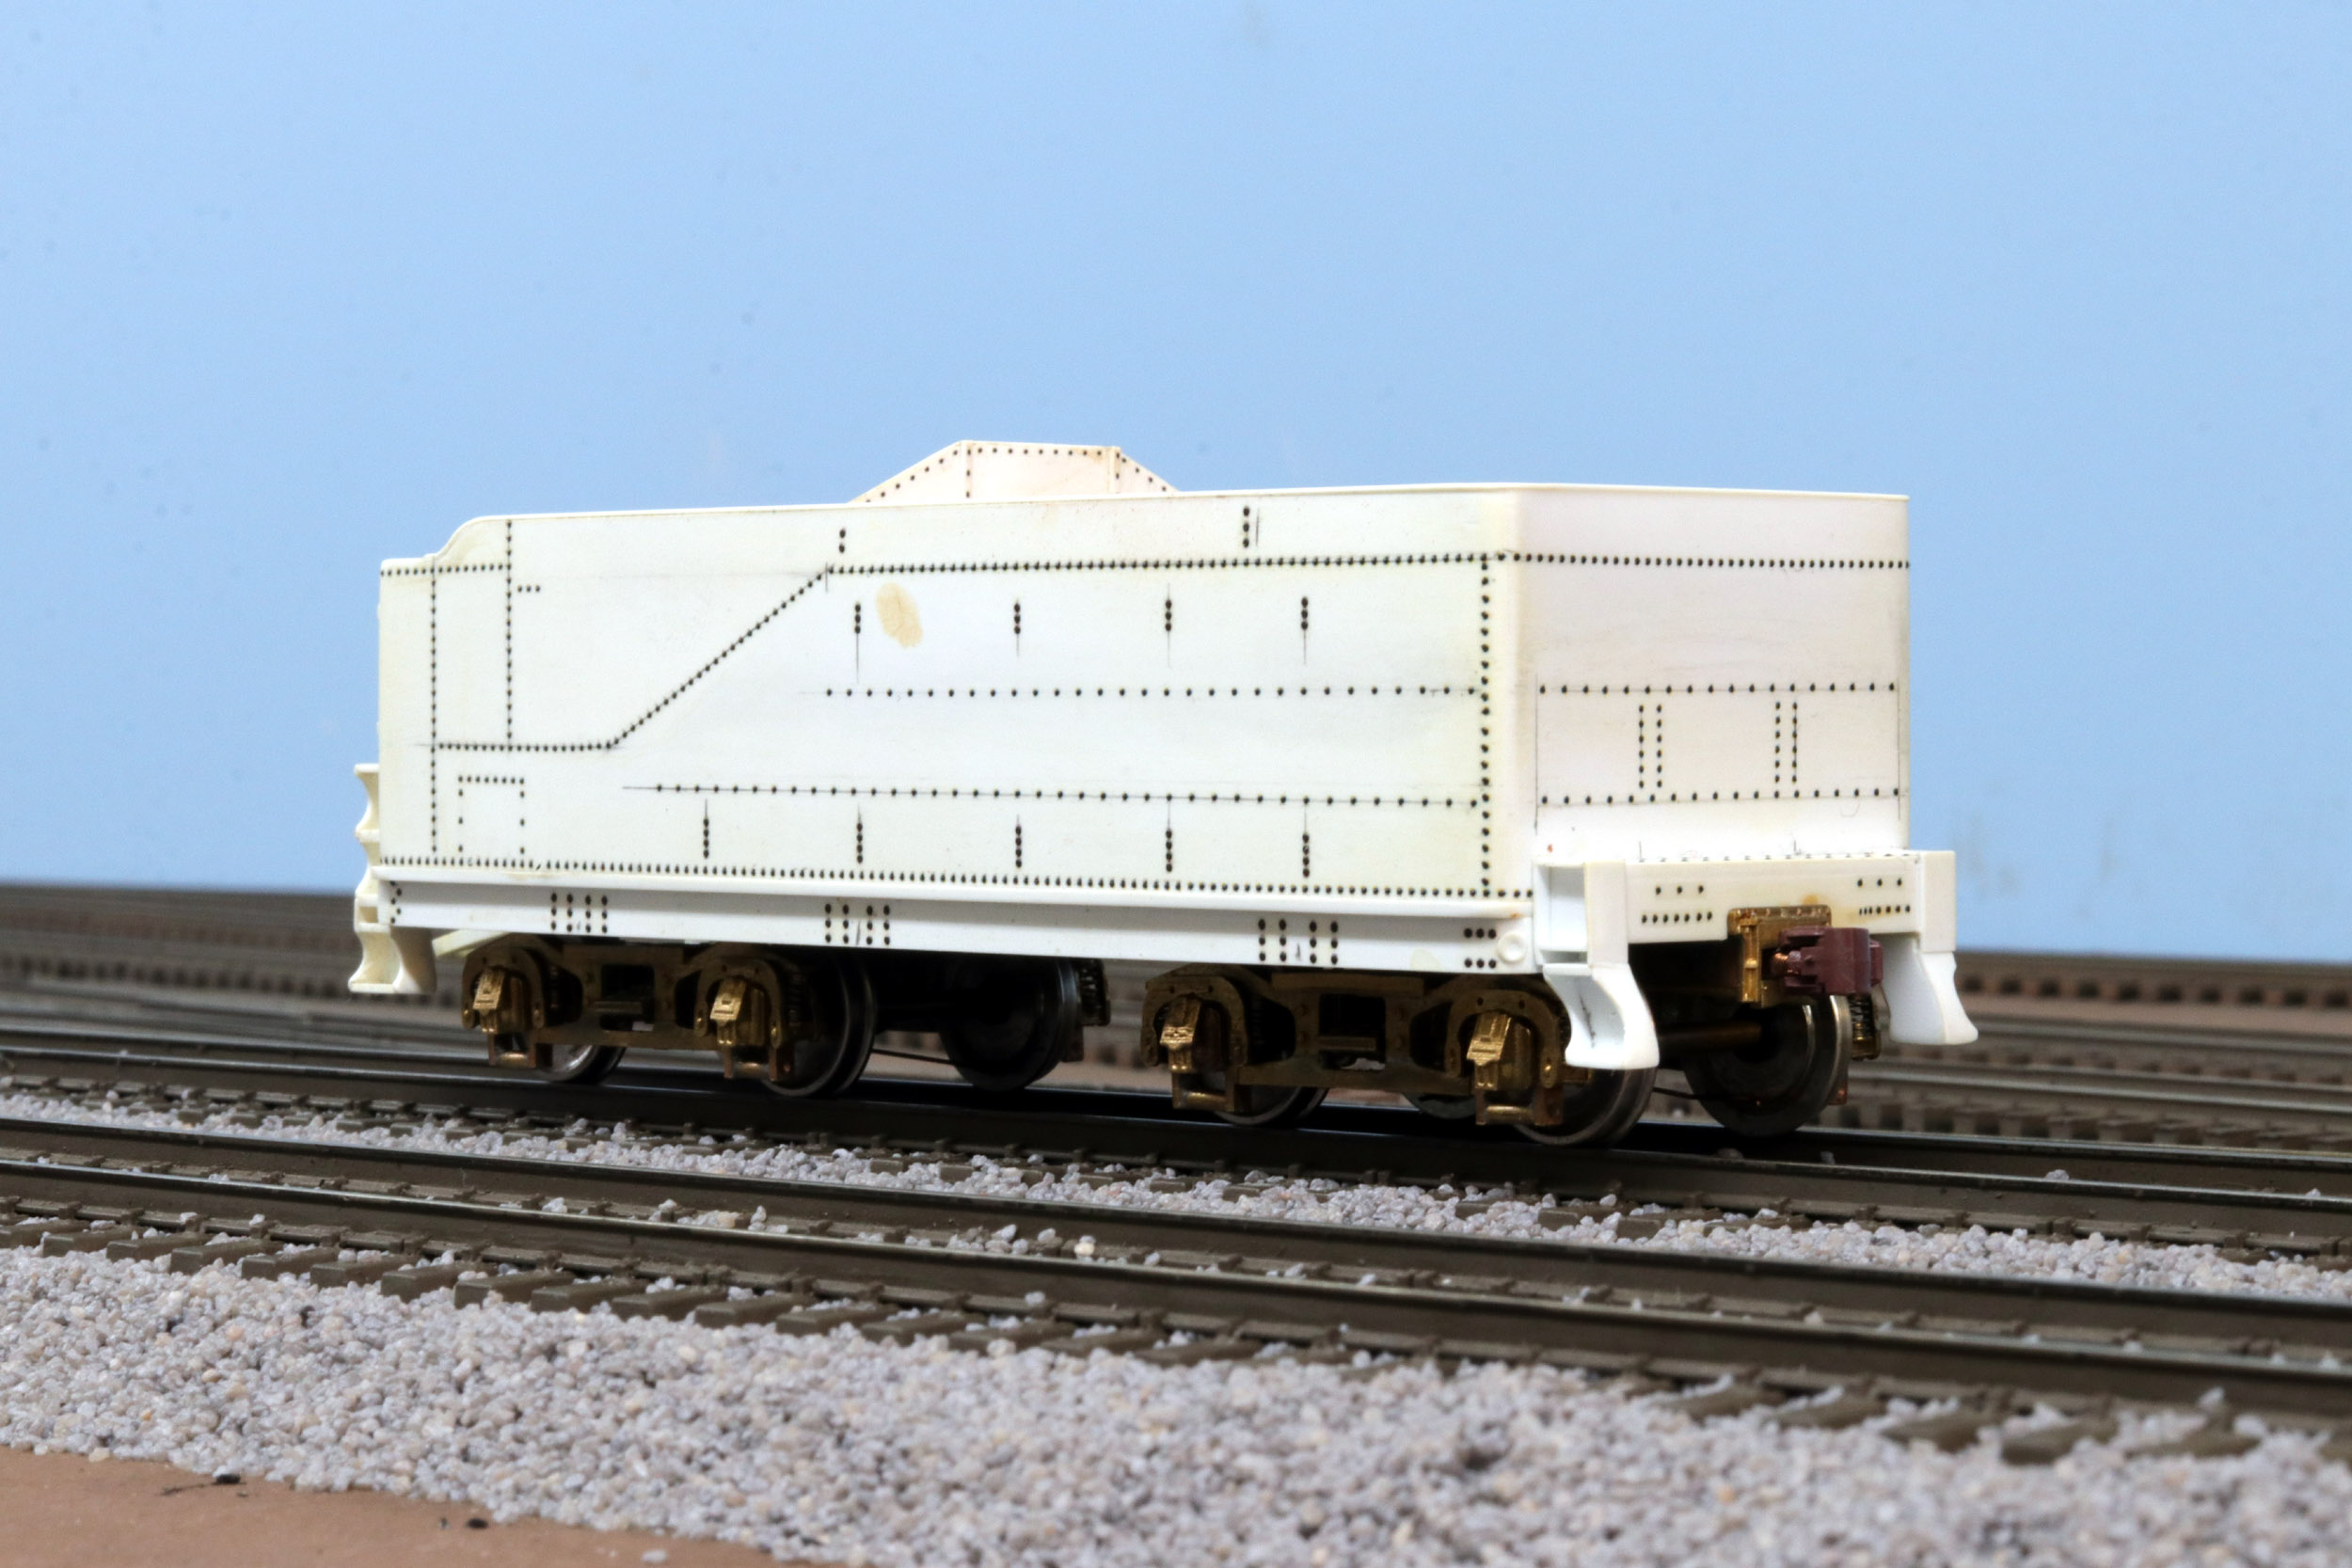
This is my first time ever using Archer rivet decals. I had some
apprehension about it but was unfounded. They are really pretty easy to use. I
will be using a LOT of them especially on the tender. The sides are covered in
rivets I still have to lay out and apply.
I lucked out that the E6 runs perfectly with my Reading P-7sb.
They are also almost the same size. I am sure they will be running together
once the E6 is completed.
Added
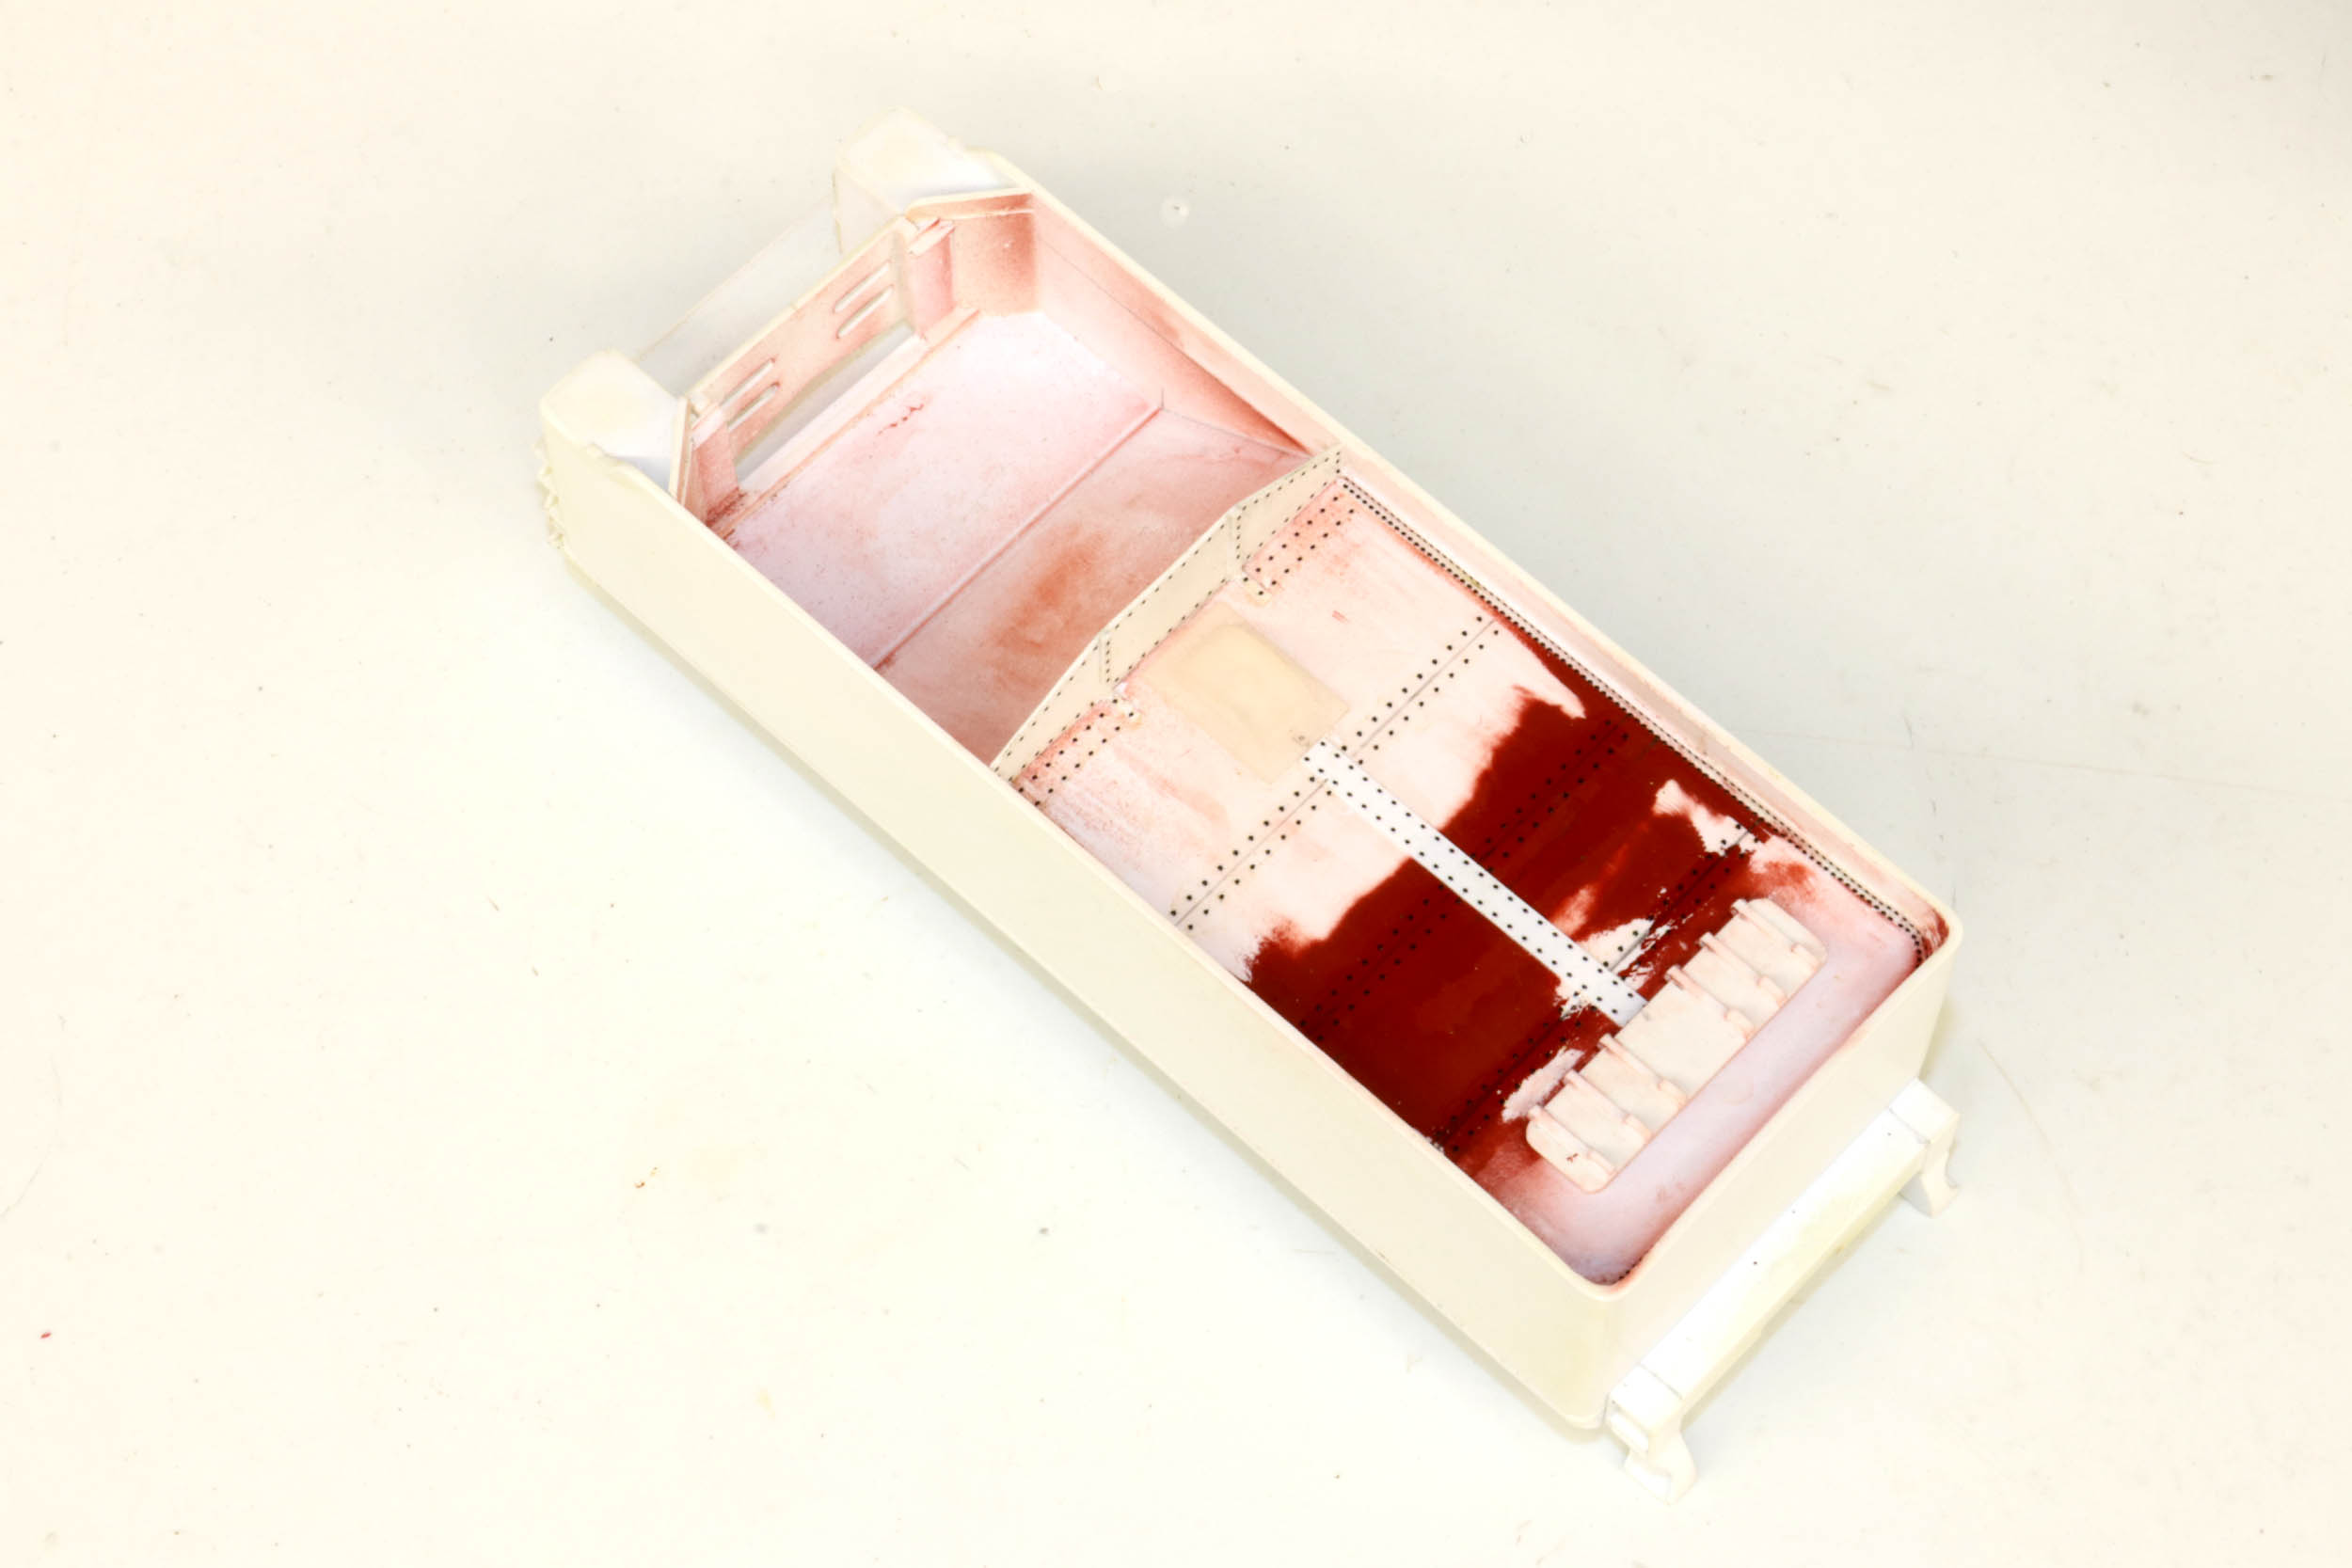
5-22-21
Many projects have been started and completed since I last worked
on this loco. A huge goal was the completion of all of my brass PRR steam locos. I have
had a friend’s O Scale brass tender here for about 2 years with the same rivet
pattern as needed on my E6 tender. With the likelihood of it getting returned
soon I spent some time doing more rivet decaling. It was massively time
consuming. In many cases I truly WAS rivet counting but the Archer decal sets I
had did not always have the correct spacing needed. This is my first big rivet
decaling project. I probably used bigger decals than I should have but I want
them to be SEEN when I am done. I hope paint does not cover everything. There
are some areas with rivets I did not do. I just had enough and quit – good
enough. The decals are fragile. I spent enough time repairing as I added more.
There is a lot more other detailing needed. I gloss coated everything hoping to
lock the rivets in place. I did not want to do the actual painting yet. I want
to wait until I paint the loco at the same time whenever that is going to be.
Added
9-10-23
I have been off in diesel and “modern” projects for about a year
with no end in sight. There are lots of new to me SD40-2 and GP38-2 I want to
complete. I decided that the E6 was sitting for too long. Making the walkways
just gave me anxiety and back into the box it went. I figured it is best to
stick to what I do best and am most productive with my limited weekend free
time. So on 9-9-23 I sent it off to master S Scale Steam
Doctor Mike Swederska to help it along by adding the boiler walkways,
compressor, and other needed details.
Added
11-14-23
This was a S Scale community project
from the beginning but I just realized it - with all the hands that have already
been involved. Mike is another chapter in this loco’s history. Here Mike has
the walkways and compressor installed. This is a major step towards completion.


Major
Progress!
Added
5-28-24
I was by far not in a hurry
to get the loco back from Mike. I have been firmly in modeling “modern” for
well over a year with Chessie, Conrail and Norfolk Southern. About once a month
I would get an update email on the work done. Mike worked on it when he wanted
to and let it sit to do other things. That is just how I wanted it to happen.
And a major thanks to Mike
for his expert efforts here. It is sincerely appreciated.
Now that is it back I can absolutely
take it from here to get it finished. I usually work on steam loco projects in
the winter. That is likely to happen here too. I have about 6 diesels I want to
get completed. For the loco there is not much to be done. I have to finish the
handrails. The tender needs much more work. I have to complete the corner
markers, add the rear ladder and water scoop. Some of the archer rivets have
come off again. That is really annoying. Archer is now out of business. I hope I
don’t regret using them if they come off after painting. If they come off it will
be a white dot in dark green.
But it can run as is, and
it does run pretty well, until I get back to it and really finally finish the
loco tribute to Sam.
As received
4-15-24

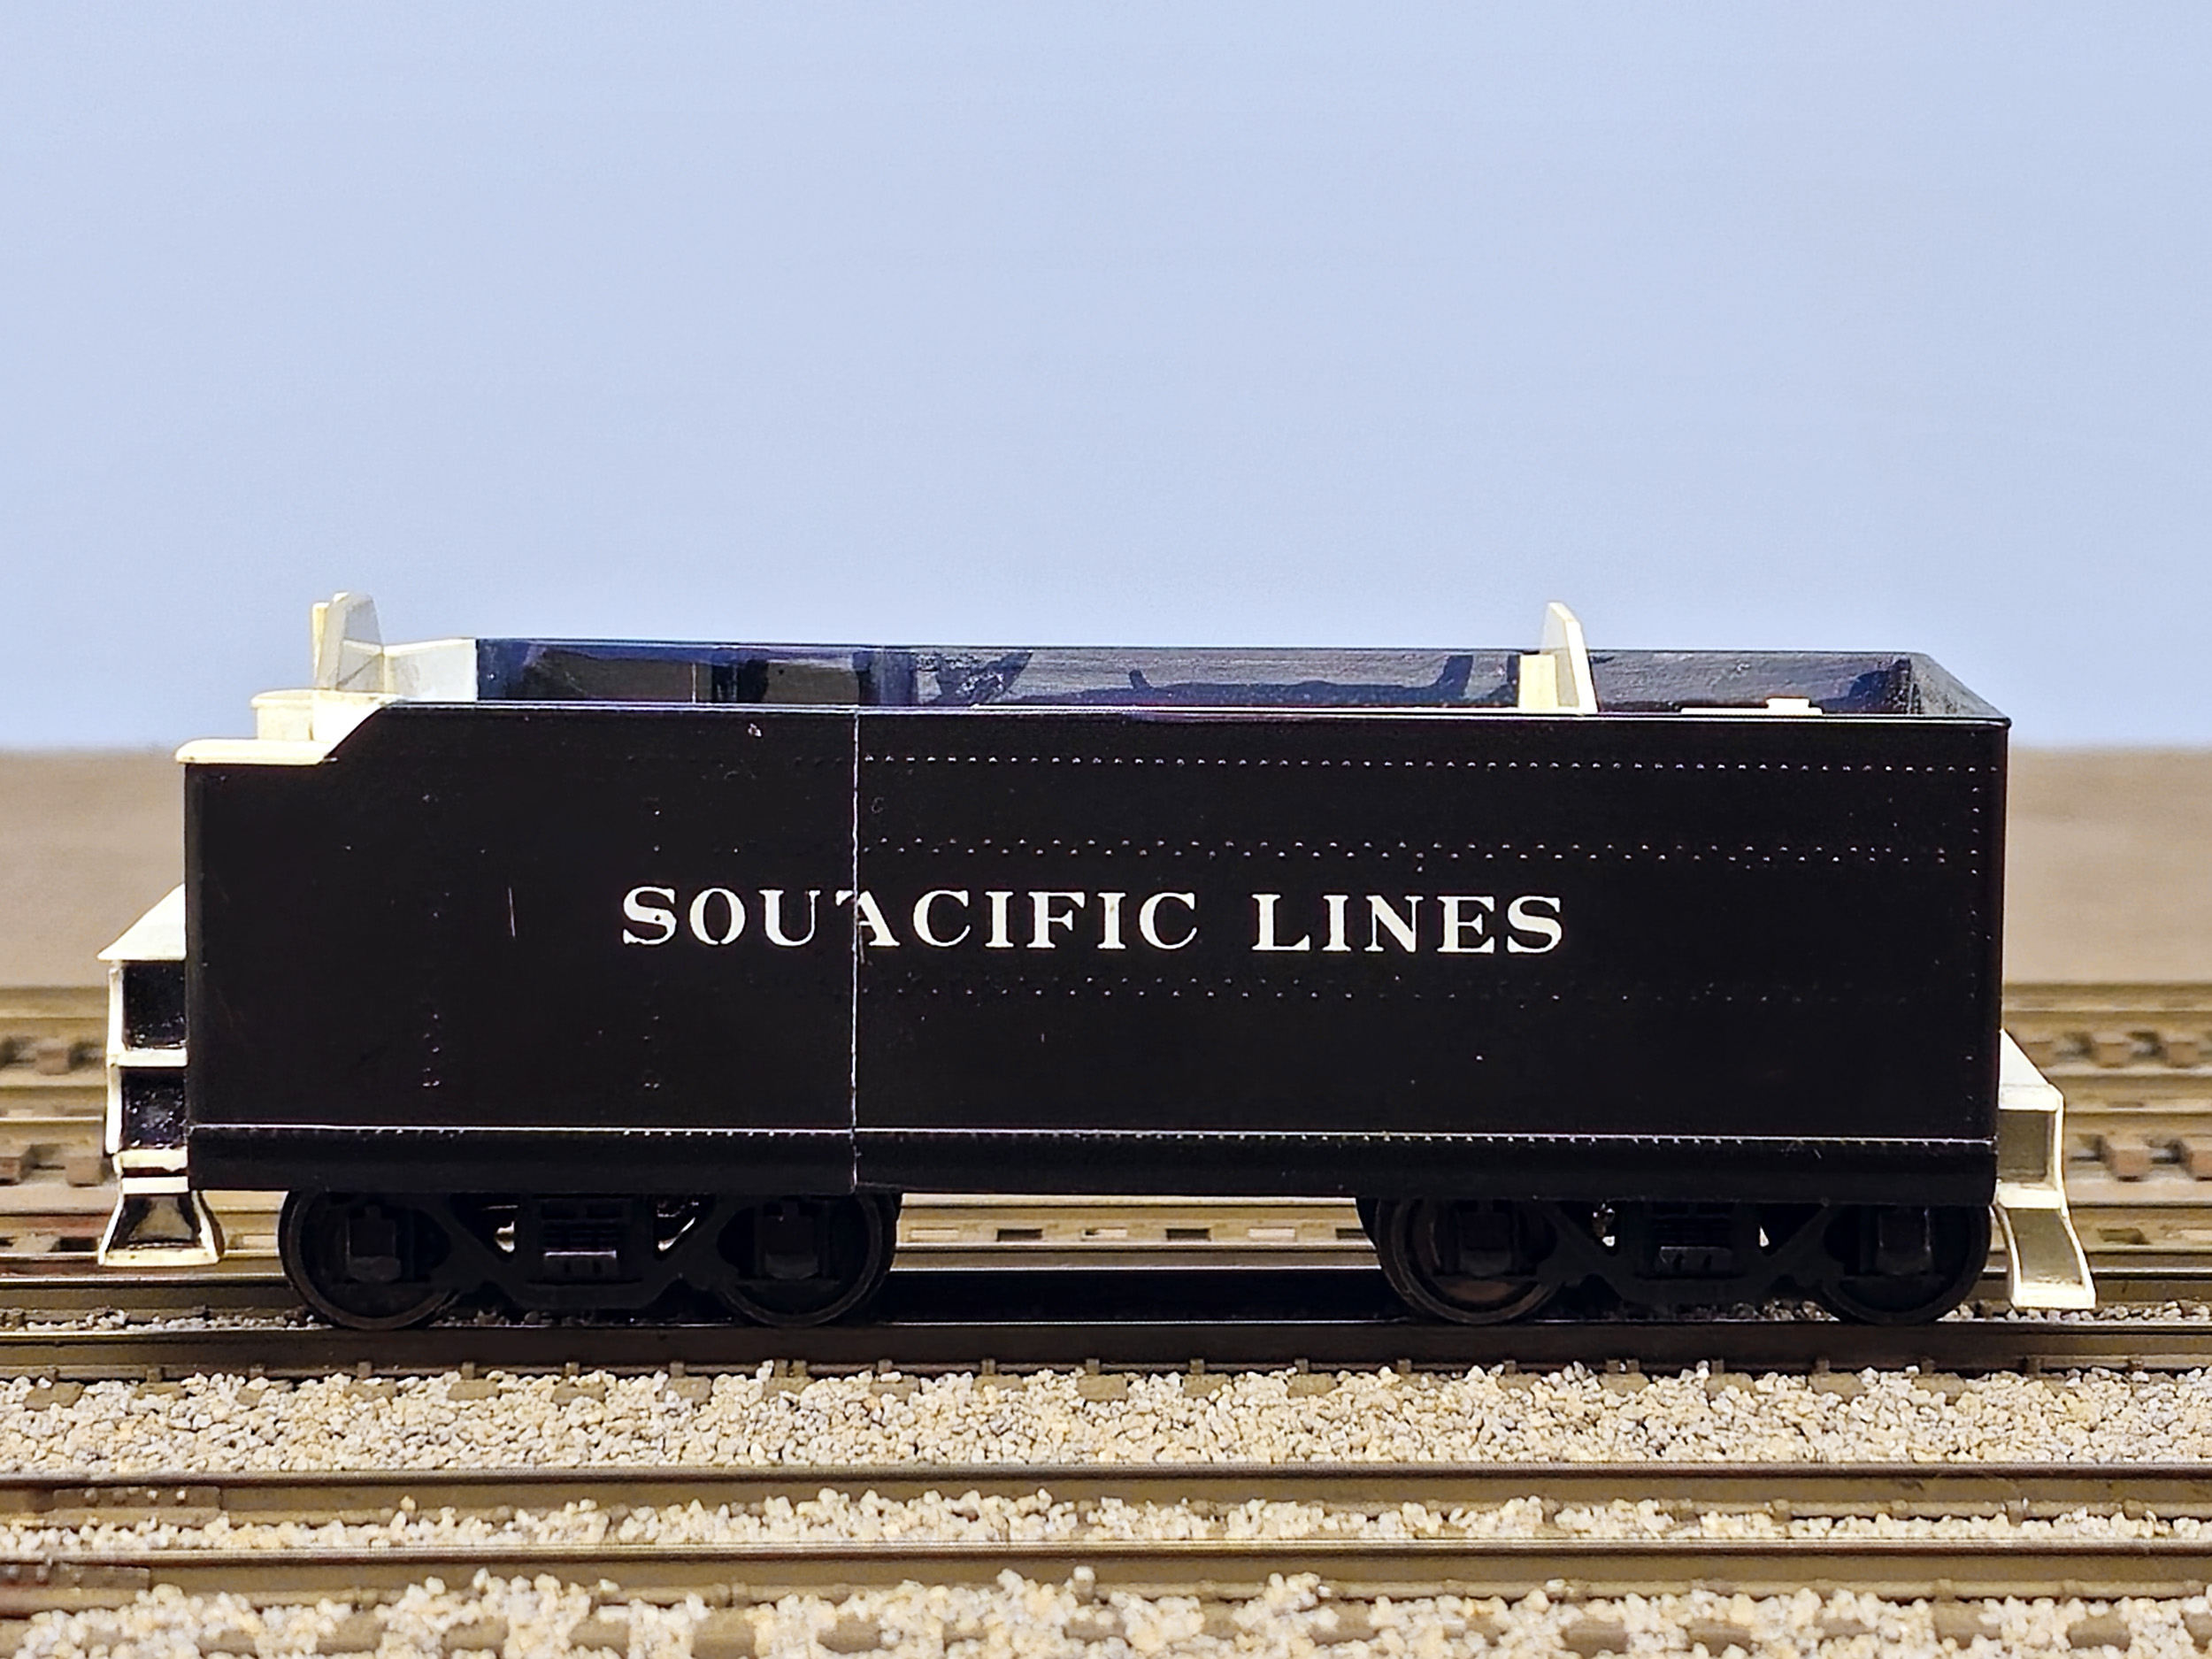
The S Scale serendipity is truly never ending here. Sam’s layout
and most of his trains are now in a museum near Pittsburgh PA. One of the people
involved in the that project found out about this loco project made the
connection to the tender that Sam made for 460 that I did not know about and
sent it to me. I am not going to use it on 460 at least for now. It is a few
chopped up Industrial Rail O-27 tenders.
Sam’s
Bashed 460 Tender
Updated
5-28-24
All photos and content © Lanes Trains 2005-2024